navigation system Lexus IS300h 2013 Navigation manual
[x] Cancel search | Manufacturer: LEXUS, Model Year: 2013, Model line: IS300h, Model: Lexus IS300h 2013Pages: 415, PDF Size: 42.75 MB
Page 47 of 415
47
1. BASIC INFORMATION BEFORE OPERATION
2
BASIC FUNCTION
IS300h/250_Navi_EE
6. LINKING MULTI-INFORMATION DISPLAY AND NAVIGATION SYSTEM
The following functions of the navigation system are linked with the multi-in-
formation display in the instrument cluster:
• Navigation
•Audio
etc.
These functions can be operated using multi-information display control
switches on the steering wheel. For details, refer to “Owner’s Manual”.
Page 66 of 415
66
2. NETWORK SETTINGS
IS300h/250_Navi_EE
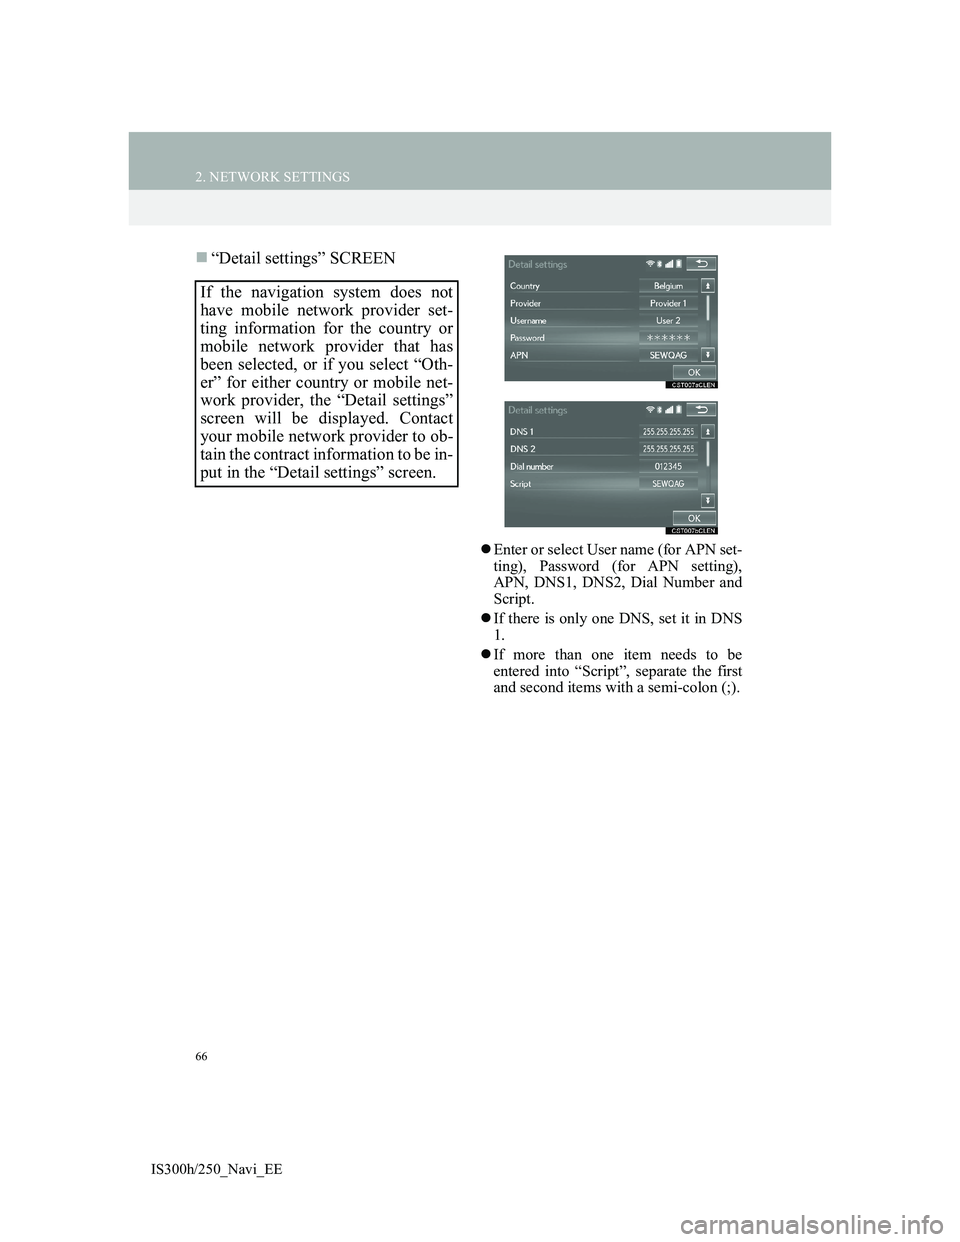
“Detail settings” SCREEN
Enter or select User name (for APN set-
ting), Password (for APN setting),
APN, DNS1, DNS2, Dial Number and
Script.
If there is only one DNS, set it in DNS
1.
If more than one item needs to be
entered into “Script”, separate the first
and second items with a semi-colon (;).
If the navigation system does not
have mobile network provider set-
ting information for the country or
mobile network provider that has
been selected, or if you select “Oth-
er” for either country or mobile net-
work provider, the “Detail settings”
screen will be displayed. Contact
your mobile network provider to ob-
tain the contract information to be in-
put in the “Detail settings” screen.
Page 78 of 415
78
3. OTHER SETTINGS
IS300h/250_Navi_EE
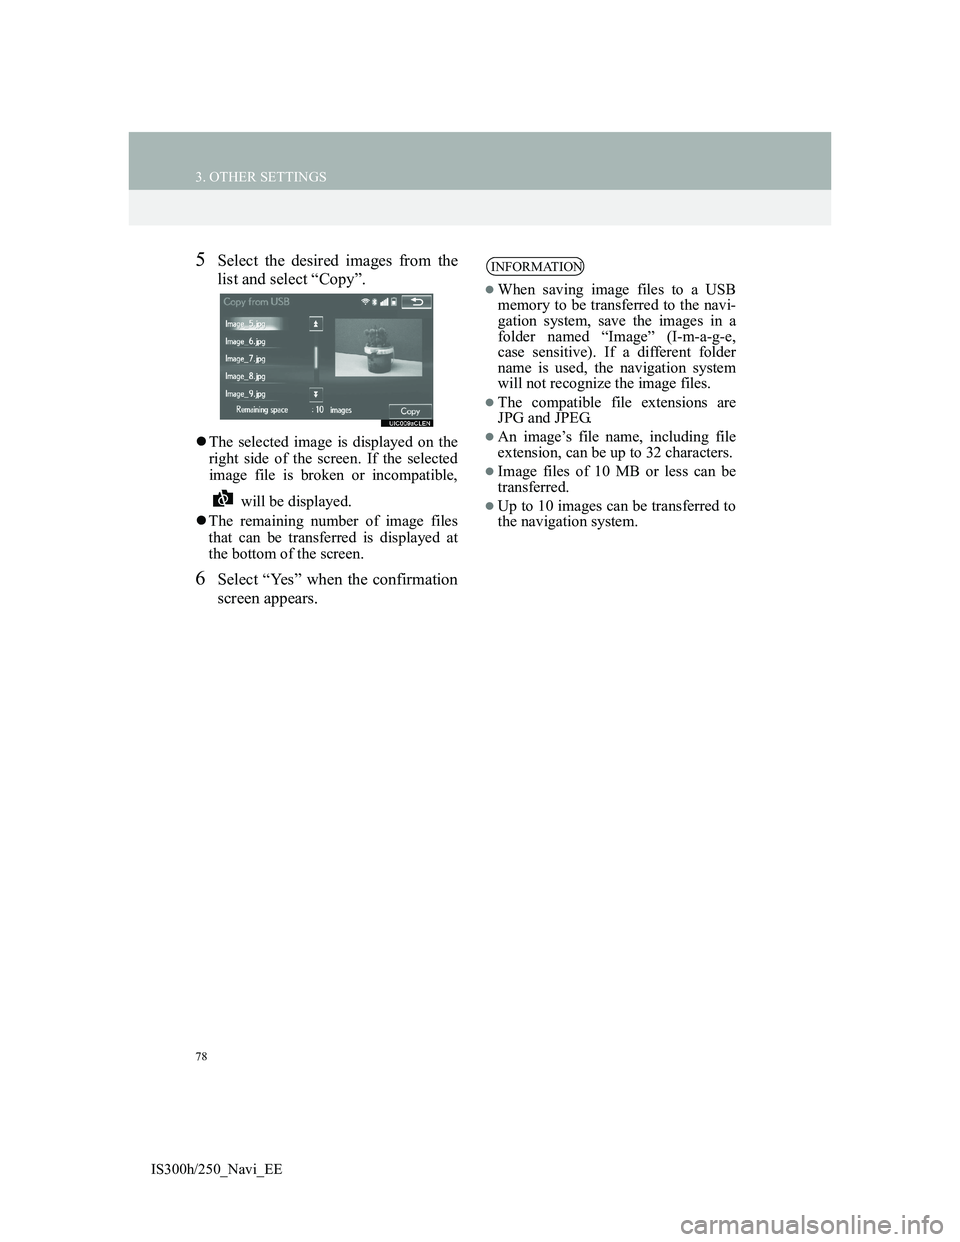
5Select the desired images from the
list and select “Copy”.
The selected image is displayed on the
right side of the screen. If the selected
image file is broken or incompatible,
will be displayed.
The remaining number of image files
that can be transferred is displayed at
the bottom of the screen.
6Select “Yes” when the confirmation
screen appears.
INFORMATION
When saving image files to a USB
memory to be transferred to the navi-
gation system, save the images in a
folder named “Image” (I-m-a-g-e,
case sensitive). If a different folder
name is used, the navigation system
will not recognize the image files.
The compatible file extensions are
JPG and JPEG.
An image’s file name, including file
extension, can be up to 32 characters.
Image files of 10 MB or less can be
transferred.
Up to 10 images can be transferred to
the navigation system.
Page 84 of 415
84
3. OTHER SETTINGS
IS300h/250_Navi_EE
1Display the “Vehicle settings”
screen. (P.83)
2Select “Maintenance”.
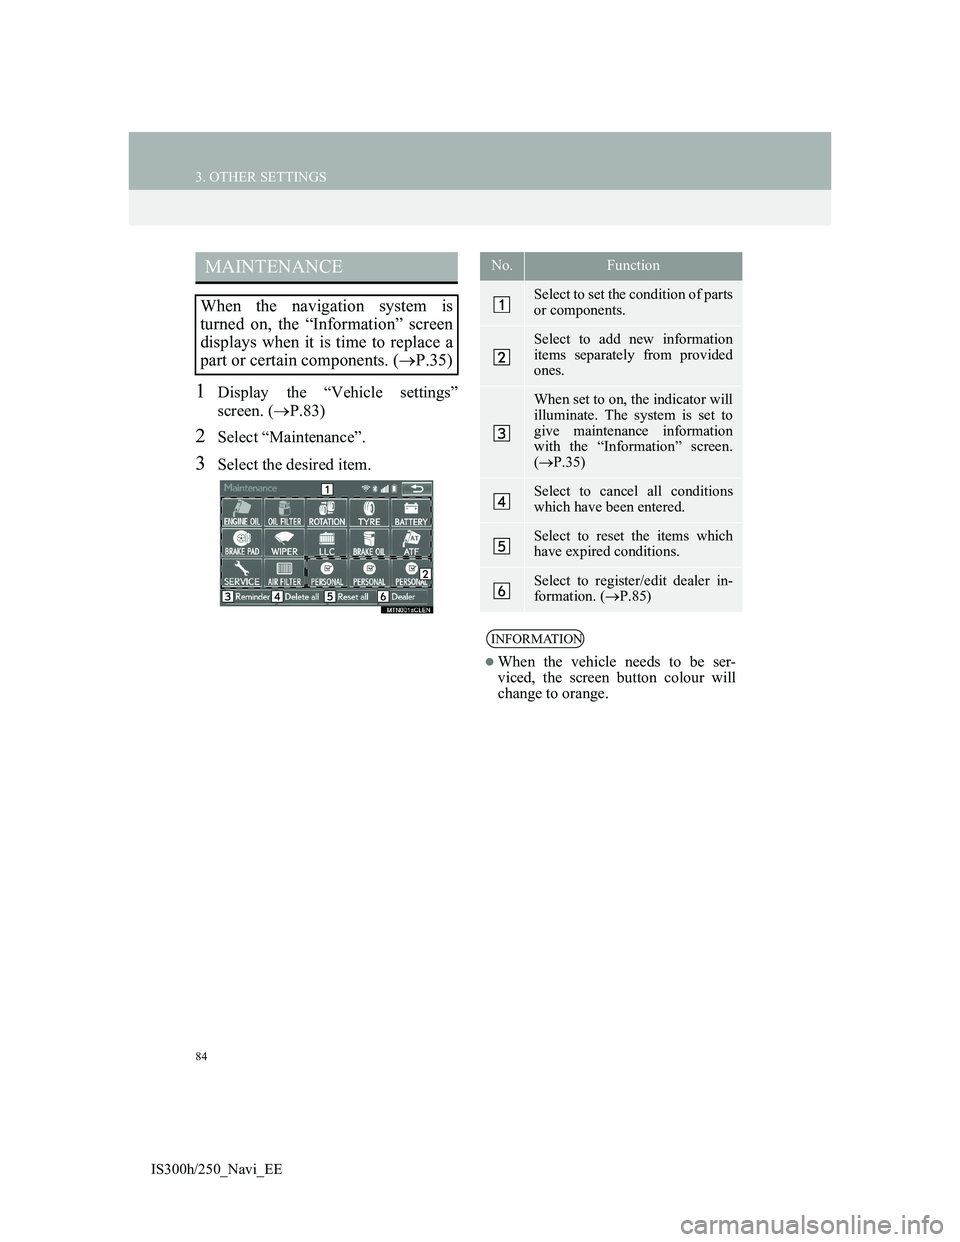
3Select the desired item.
MAINTENANCE
When the navigation system is
turned on, the “Information” screen
displays when it is time to replace a
part or certain components. (P.35)
No.Function
Select to set the condition of parts
or components.
Select to add new information
items separately from provided
ones.
When set to on, the indicator will
illuminate. The system is set to
give maintenance information
with the “Information” screen.
(P.35)
Select to cancel all conditions
which have been entered.
Select to reset the items which
have expired conditions.
Select to register/edit dealer in-
formation. (P.85)
INFORMATION
When the vehicle needs to be ser-
viced, the screen button colour will
change to orange.
Page 89 of 415
3
89
1
2
3
4
5
6
7
8
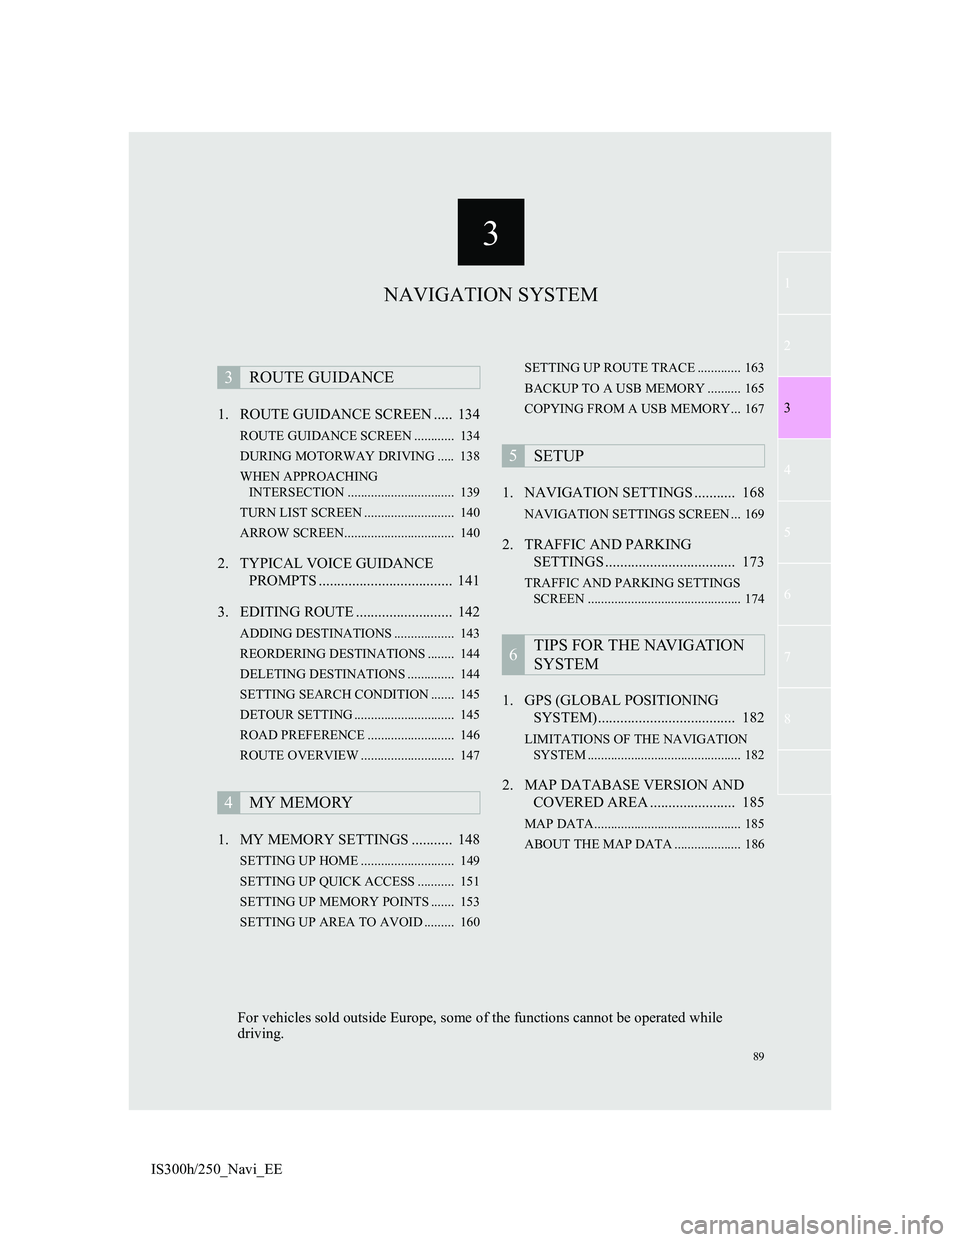
IS300h/250_Navi_EE1. ROUTE GUIDANCE SCREEN ..... 134
ROUTE GUIDANCE SCREEN ............ 134
DURING MOTORWAY DRIVING ..... 138
WHEN APPROACHING
INTERSECTION ................................ 139
TURN LIST SCREEN ........................... 140
ARROW SCREEN................................. 140
2. TYPICAL VOICE GUIDANCE
PROMPTS .................................... 141
3. EDITING ROUTE .......................... 142
ADDING DESTINATIONS .................. 143
REORDERING DESTINATIONS ........ 144
DELETING DESTINATIONS .............. 144
SETTING SEARCH CONDITION ....... 145
DETOUR SETTING .............................. 145
ROAD PREFERENCE .......................... 146
ROUTE OVERVIEW ............................ 147
1. MY MEMORY SETTINGS ........... 148
SETTING UP HOME ............................ 149
SETTING UP QUICK ACCESS ........... 151
SETTING UP MEMORY POINTS ....... 153
SETTING UP AREA TO AVOID ......... 160SETTING UP ROUTE TRACE ............. 163
BACKUP TO A USB MEMORY .......... 165
COPYING FROM A USB MEMORY... 167
1. NAVIGATION SETTINGS ........... 168
NAVIGATION SETTINGS SCREEN ... 169
2. TRAFFIC AND PARKING
SETTINGS ................................... 173
TRAFFIC AND PARKING SETTINGS
SCREEN .............................................. 174
1. GPS (GLOBAL POSITIONING
SYSTEM)..................................... 182
LIMITATIONS OF THE NAVIGATION
SYSTEM .............................................. 182
2. MAP DATABASE VERSION AND
COVERED AREA ....................... 185
MAP DATA............................................ 185
ABOUT THE MAP DATA .................... 186
3ROUTE GUIDANCE
4MY MEMORY
5SETUP
6TIPS FOR THE NAVIGATION
SYSTEM
NAVIGATION SYSTEM
For vehicles sold outside Europe, some of the functions cannot be operated while
driving.
Page 90 of 415
90
IS300h/250_Navi_EE
1. BASIC OPERATION
1. QUICK REFERENCE
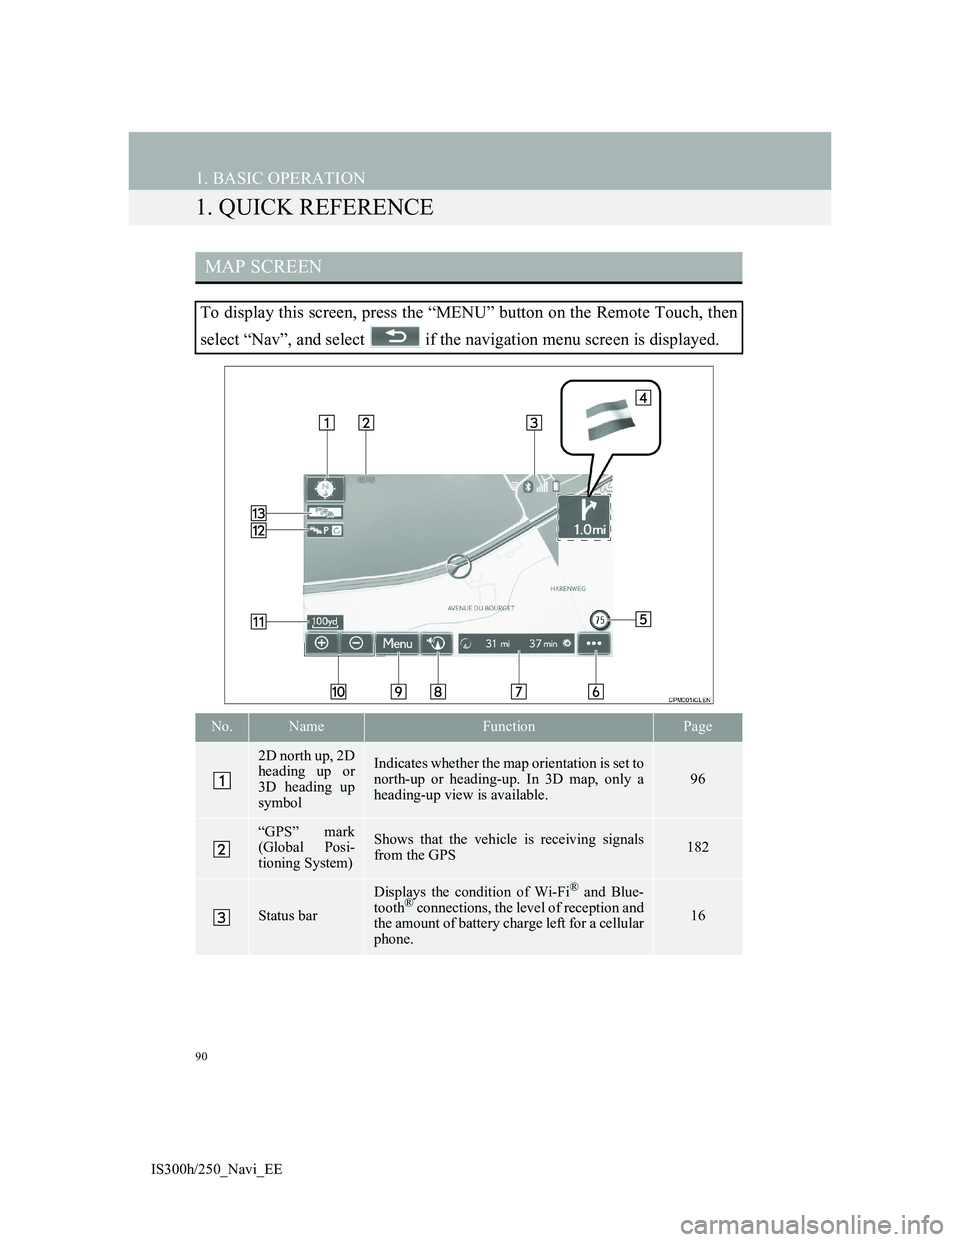
MAP SCREEN
To display this screen, press the “MENU” button on the Remote Touch, then
select “Nav”, and select if the navigation menu screen is displayed.
No.NameFunctionPage
2D north up, 2D
heading up or
3D heading up
symbolIndicates whether the map orientation is set to
north-up or heading-up. In 3D map, only a
heading-up view is available.
96
“GPS” mark
(Global Posi-
tioning System)Shows that the vehicle is receiving signals
from the GPS182
Status bar
Displays the condition of Wi-Fi® and Blue-
tooth® connections, the level of reception and
the amount of battery charge left for a cellular
phone.16
Page 91 of 415
91
1. BASIC OPERATION
IS300h/250_Navi_EE
3
NAVIGATION SYSTEM
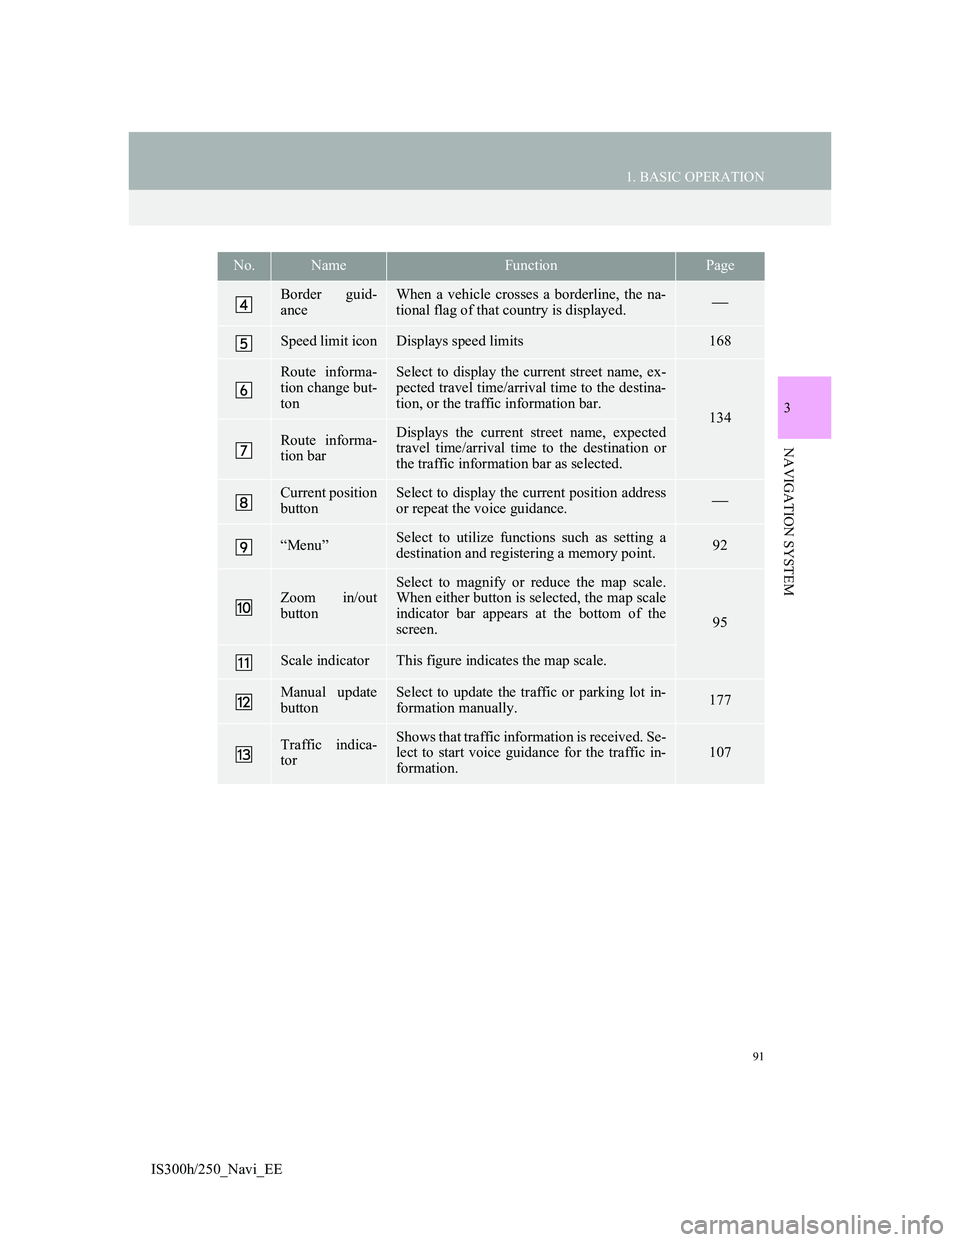
Border guid-
anceWhen a vehicle crosses a borderline, the na-
tional flag of that country is displayed.
Speed limit iconDisplays speed limits168
Route informa-
tion change but-
tonSelect to display the current street name, ex-
pected travel time/arrival time to the destina-
tion, or the traffic information bar.
134
Route informa-
tion barDisplays the current street name, expected
travel time/arrival time to the destination or
the traffic information bar as selected.
Current position
buttonSelect to display the current position address
or repeat the voice guidance.
“Menu”Select to utilize functions such as setting a
destination and registering a memory point.92
Zoom in/out
button
Select to magnify or reduce the map scale.
When either button is selected, the map scale
indicator bar appears at the bottom of the
screen.
95
Scale indicatorThis figure indicates the map scale.
Manual update
buttonSelect to update the traffic or parking lot in-
formation manually. 177
Traffic indica-
torShows that traffic information is received. Se-
lect to start voice guidance for the traffic in-
formation.107
No.NameFunctionPage
Page 93 of 415
93
1. BASIC OPERATION
IS300h/250_Navi_EE
3
NAVIGATION SYSTEM
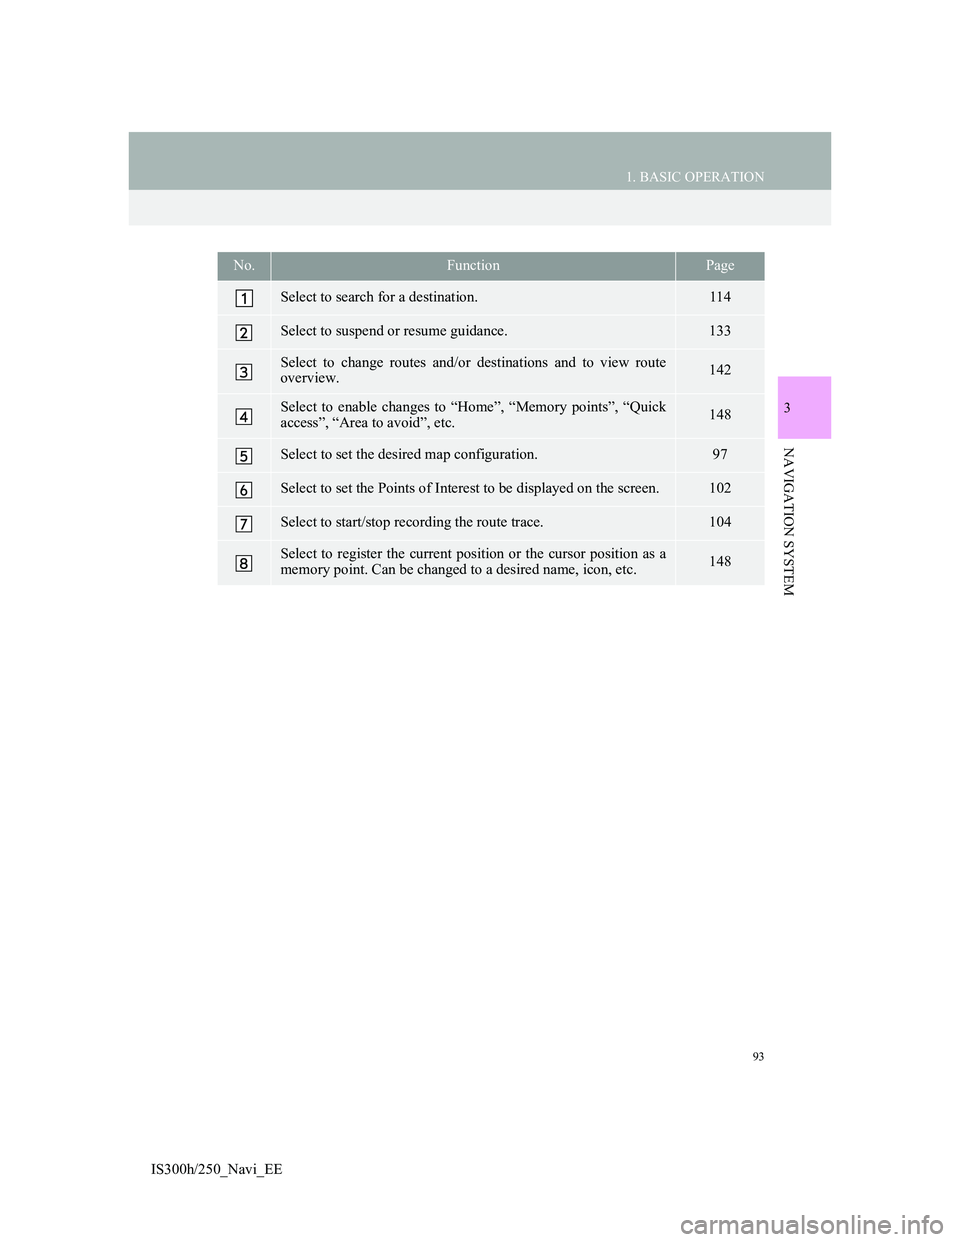
No.FunctionPage
Select to search for a destination.114
Select to suspend or resume guidance.133
Select to change routes and/or destinations and to view route
overview.142
Select to enable changes to “Home”, “Memory points”, “Quick
access”, “Area to avoid”, etc.148
Select to set the desired map configuration.97
Select to set the Points of Interest to be displayed on the screen.102
Select to start/stop recording the route trace.104
Select to register the current position or the cursor position as a
memory point. Can be changed to a desired name, icon, etc.148
Page 94 of 415
94
1. BASIC OPERATION
IS300h/250_Navi_EE
2. MAP SCREEN OPERATION
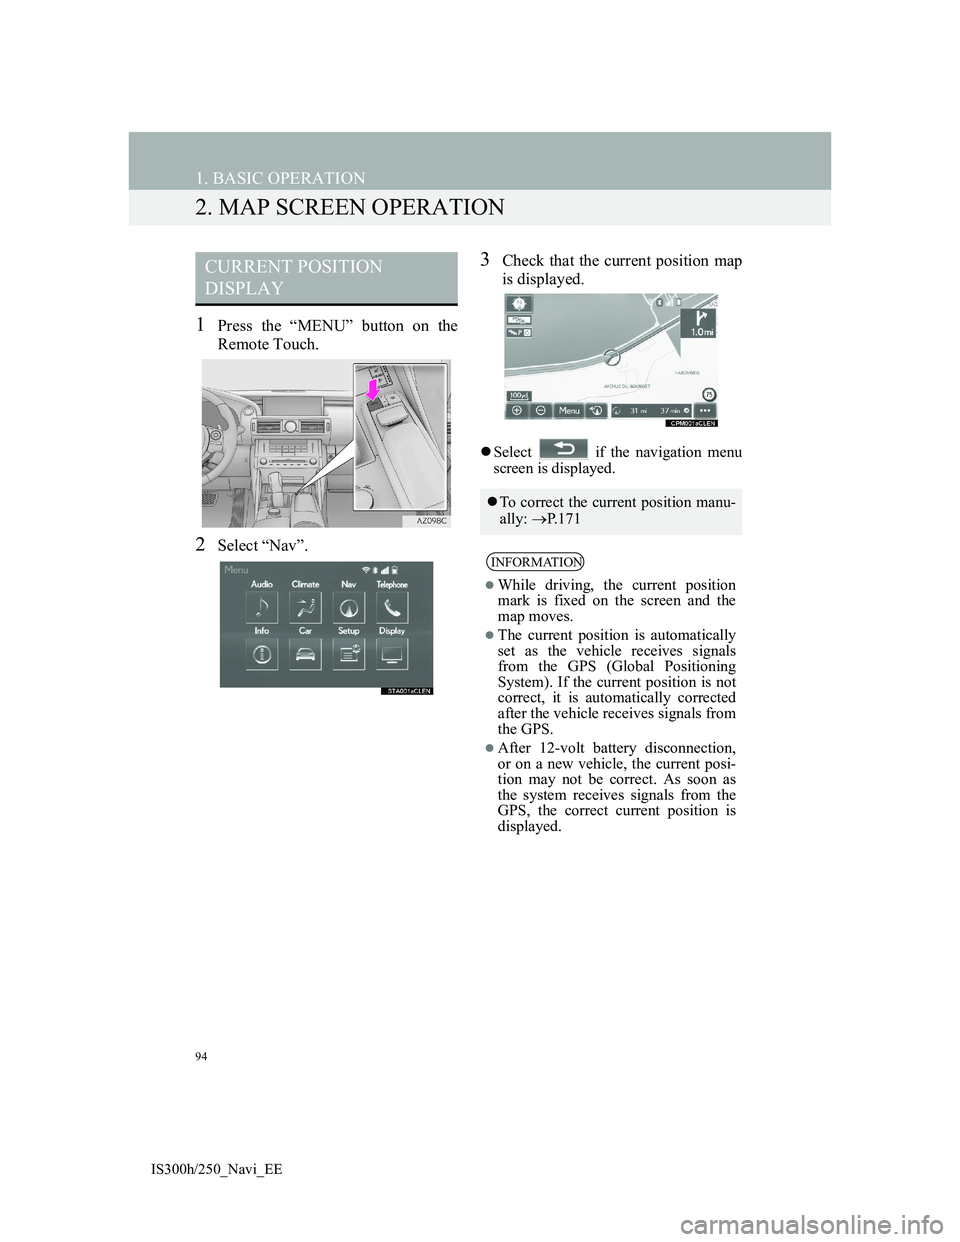
1Press the “MENU” button on the
Remote Touch.
2Select “Nav”.
3Check that the current position map
is displayed.
Select if the navigation menu
screen is displayed.
CURRENT POSITION
DISPLAY
To correct the current position manu-
ally: P. 1 7 1
INFORMATION
While driving, the current position
mark is fixed on the screen and the
map moves.
The current position is automatically
set as the vehicle receives signals
from the GPS (Global Positioning
System). If the current position is not
correct, it is automatically corrected
after the vehicle receives signals from
the GPS.
After 12-volt battery disconnection,
or on a new vehicle, the current posi-
tion may not be correct. As soon as
the system receives signals from the
GPS, the correct current position is
displayed.
Page 95 of 415
95
1. BASIC OPERATION
IS300h/250_Navi_EE
3
NAVIGATION SYSTEM
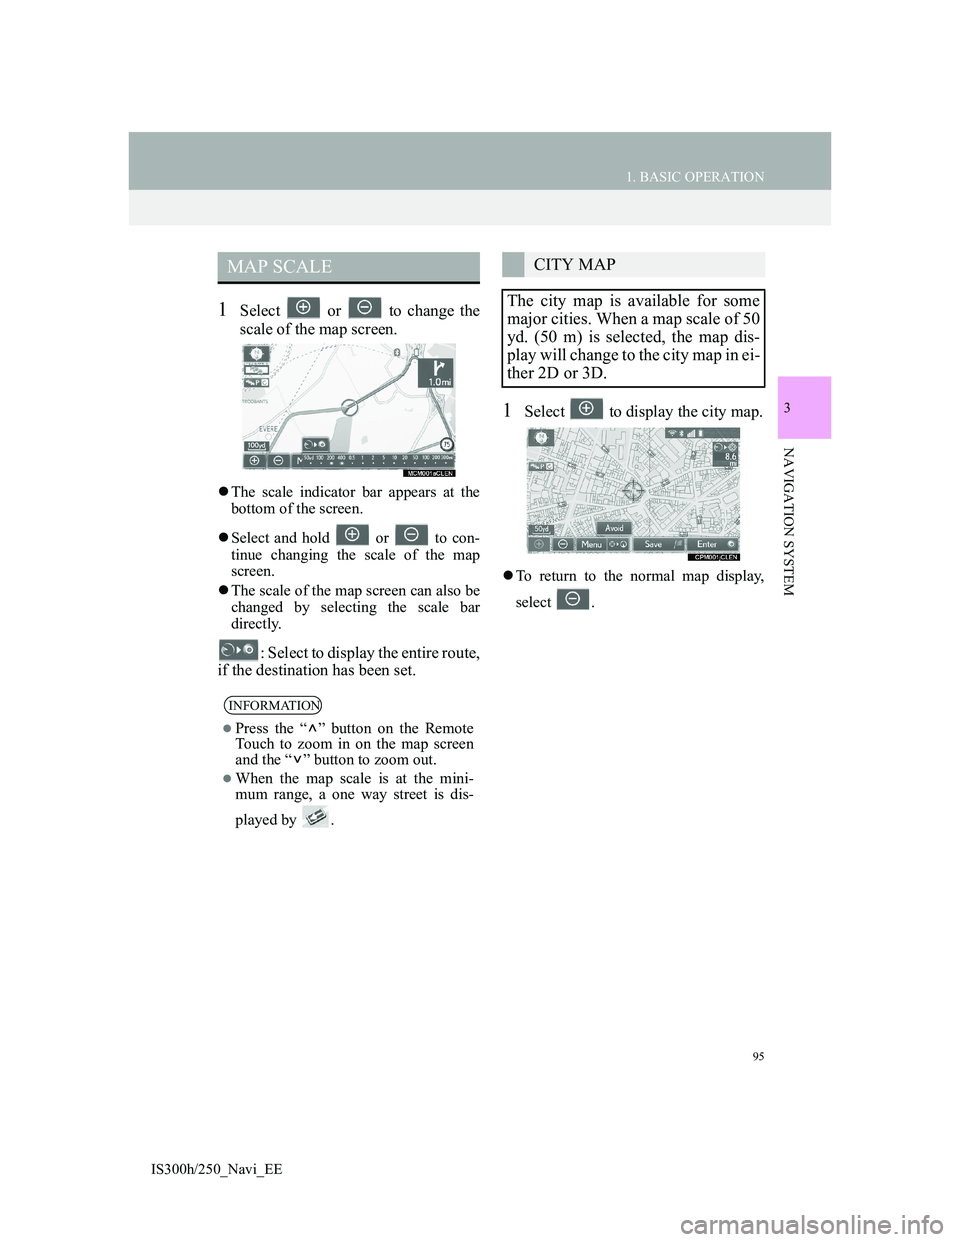
1Select or to change the
scale of the map screen.
The scale indicator bar appears at the
bottom of the screen.
Select and hold or to con-
tinue changing the scale of the map
screen.
The scale of the map screen can also be
changed by selecting the scale bar
directly.
: Select to display the entire route,
if the destination has been set.
1Select to display the city map.
To return to the normal map display,
select .
MAP SCALE
INFORMATION
Press the “ ” button on the Remote
Touch to zoom in on the map screen
and the “ ” button to zoom out.
When the map scale is at the mini-
mum range, a one way street is dis-
played by .
CITY MAP
The city map is available for some
major cities. When a map scale of 50
yd. (50 m) is selected, the map dis-
play will change to the city map in ei-
ther 2D or 3D.