remote Lexus IS300h 2013 Navigation manual
[x] Cancel search | Manufacturer: LEXUS, Model Year: 2013, Model line: IS300h, Model: Lexus IS300h 2013Pages: 415, PDF Size: 42.75 MB
Page 324 of 415
322
IS300h/250_Navi_EE
1. TELEPHONE OPERATION (HANDS-FREE SYSTEM FOR CELLULAR
PHONES)
1. QUICK REFERENCE
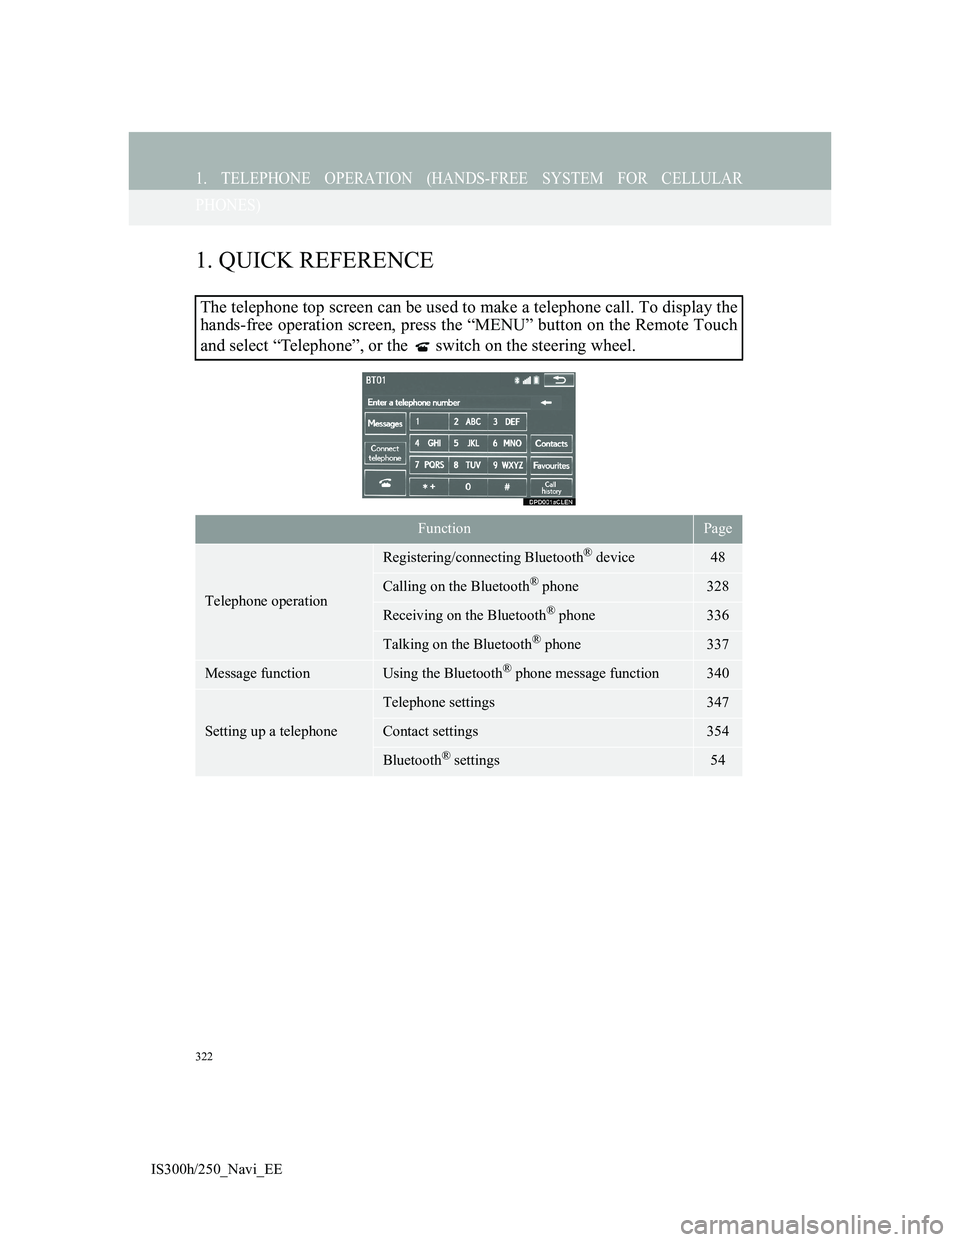
The telephone top screen can be used to make a telephone call. To display the
hands-free operation screen, press the “MENU” button on the Remote Touch
and select “Telephone”, or the switch on the steering wheel.
FunctionPage
Telephone operation
Registering/connecting Bluetooth® device48
Calling on the Bluetooth® phone328
Receiving on the Bluetooth® phone336
Talking on the Bluetooth® phone337
Message functionUsing the Bluetooth® phone message function340
Setting up a telephone
Telephone settings347
Contact settings354
Bluetooth® settings54
Page 330 of 415
328
1. TELEPHONE OPERATION (HANDS-FREE SYSTEM FOR CELLULAR
IS300h/250_Navi_EE
3. CALLING ON THE Bluetooth® PHONE
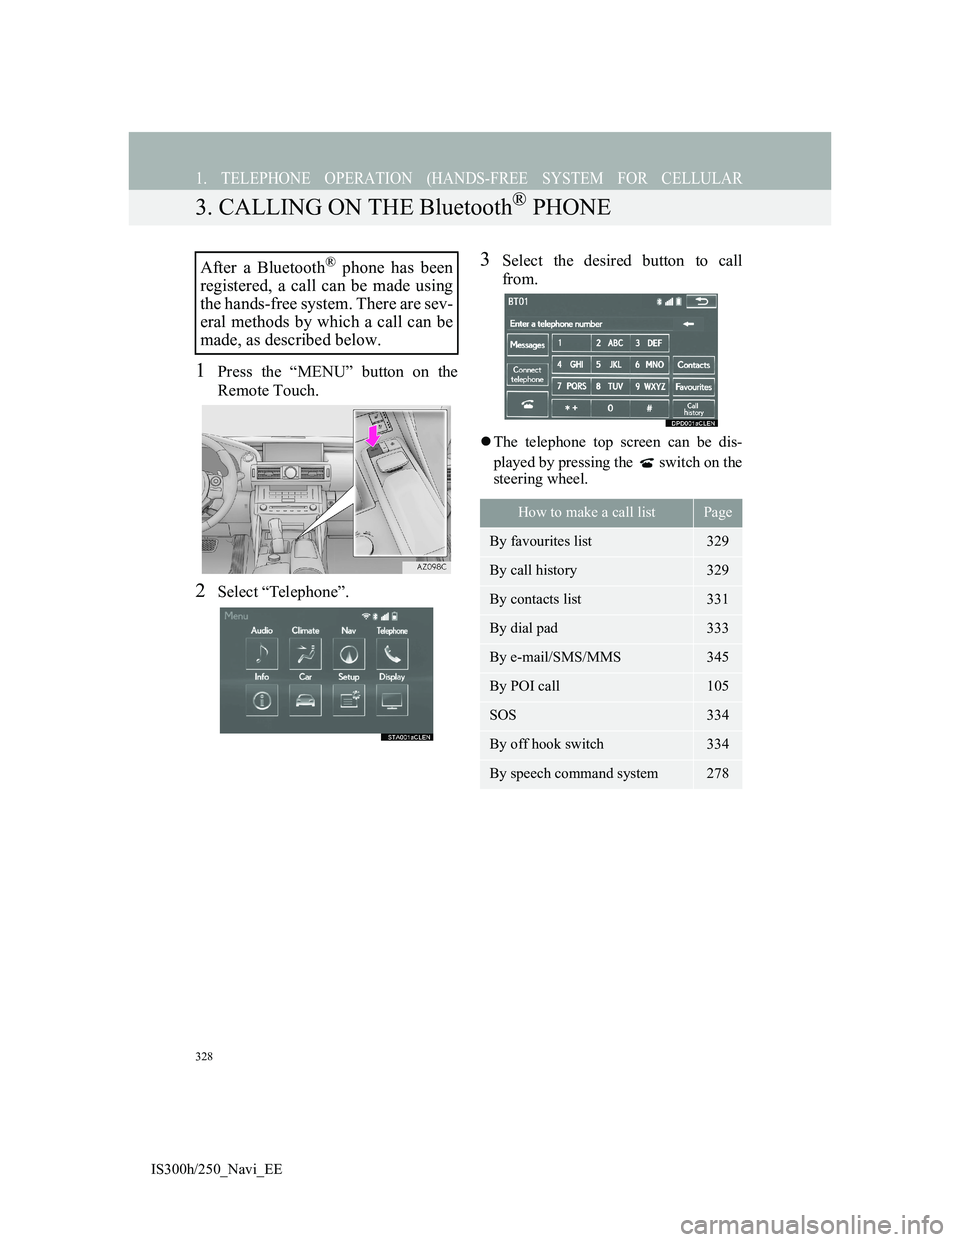
1Press the “MENU” button on the
Remote Touch.
2Select “Telephone”.
3Select the desired button to call
from.
The telephone top screen can be dis-
played by pressing the switch on the
steering wheel.
After a Bluetooth® phone has been
registered, a call can be made using
the hands-free system. There are sev-
eral methods by which a call can be
made, as described below.
How to make a call listPage
By favourites list329
By call history329
By contacts list331
By dial pad333
By e-mail/SMS/MMS345
By POI call105
SOS334
By off hook switch334
By speech command system278
Page 342 of 415
340
1. TELEPHONE OPERATION (HANDS-FREE SYSTEM FOR CELLULAR
IS300h/250_Navi_EE
6. Bluetooth® PHONE MESSAGE FUNCTION
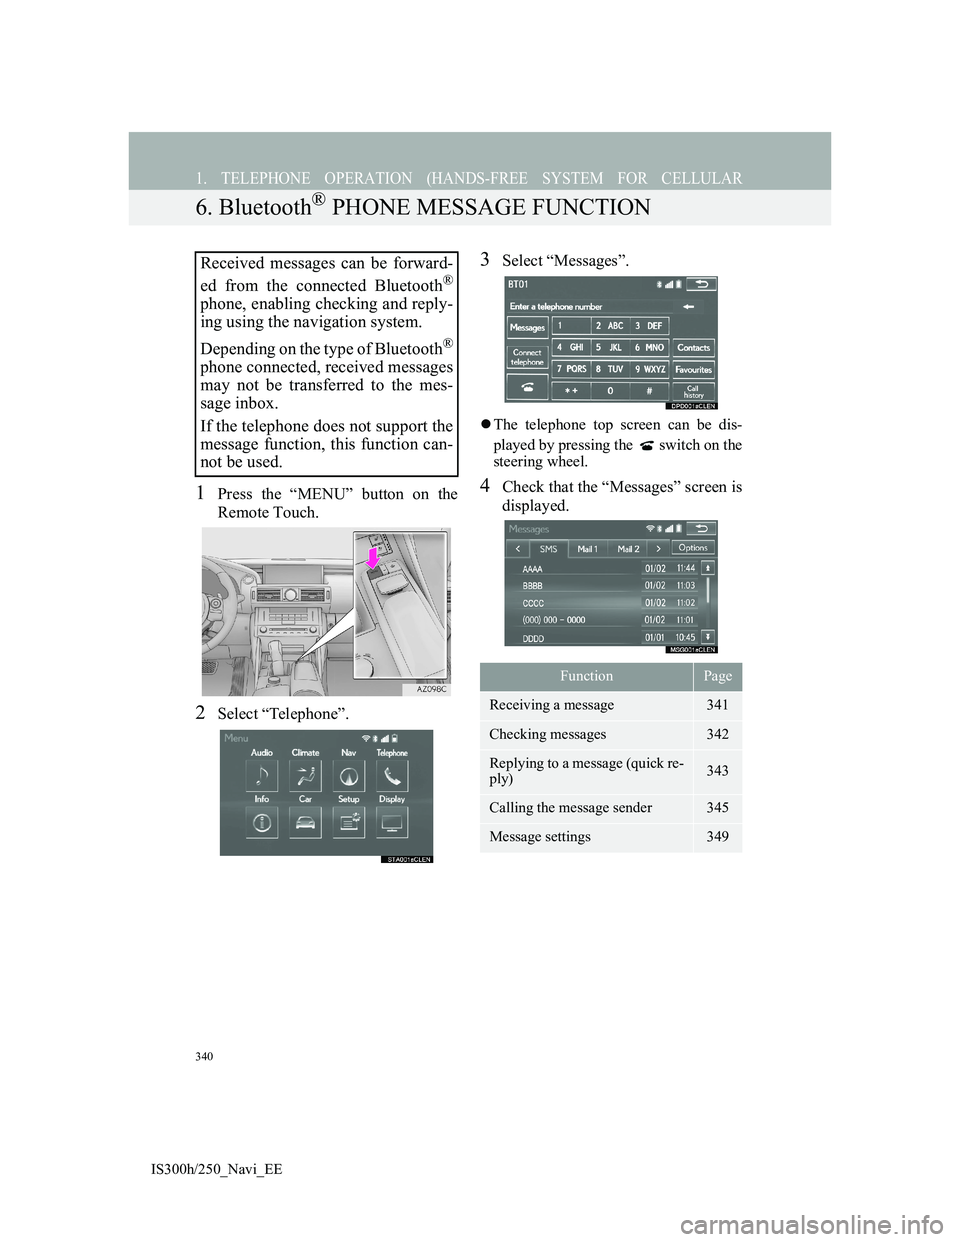
1Press the “MENU” button on the
Remote Touch.
2Select “Telephone”.
3Select “Messages”.
The telephone top screen can be dis-
played by pressing the switch on the
steering wheel.
4Check that the “Messages” screen is
displayed.
Received messages can be forward-
ed from the connected Bluetooth
®
phone, enabling checking and reply-
ing using the navigation system.
Depending on the type of Bluetooth
®
phone connected, received messages
may not be transferred to the mes-
sage inbox.
If the telephone does not support the
message function, this function can-
not be used.
FunctionPage
Receiving a message341
Checking messages 342
Replying to a message (quick re-
ply)343
Calling the message sender345
Message settings349
Page 349 of 415
347
IS300h/250_Navi_EE
7
TELEPHONE
2. SETUP
1. TELEPHONE SETTINGS
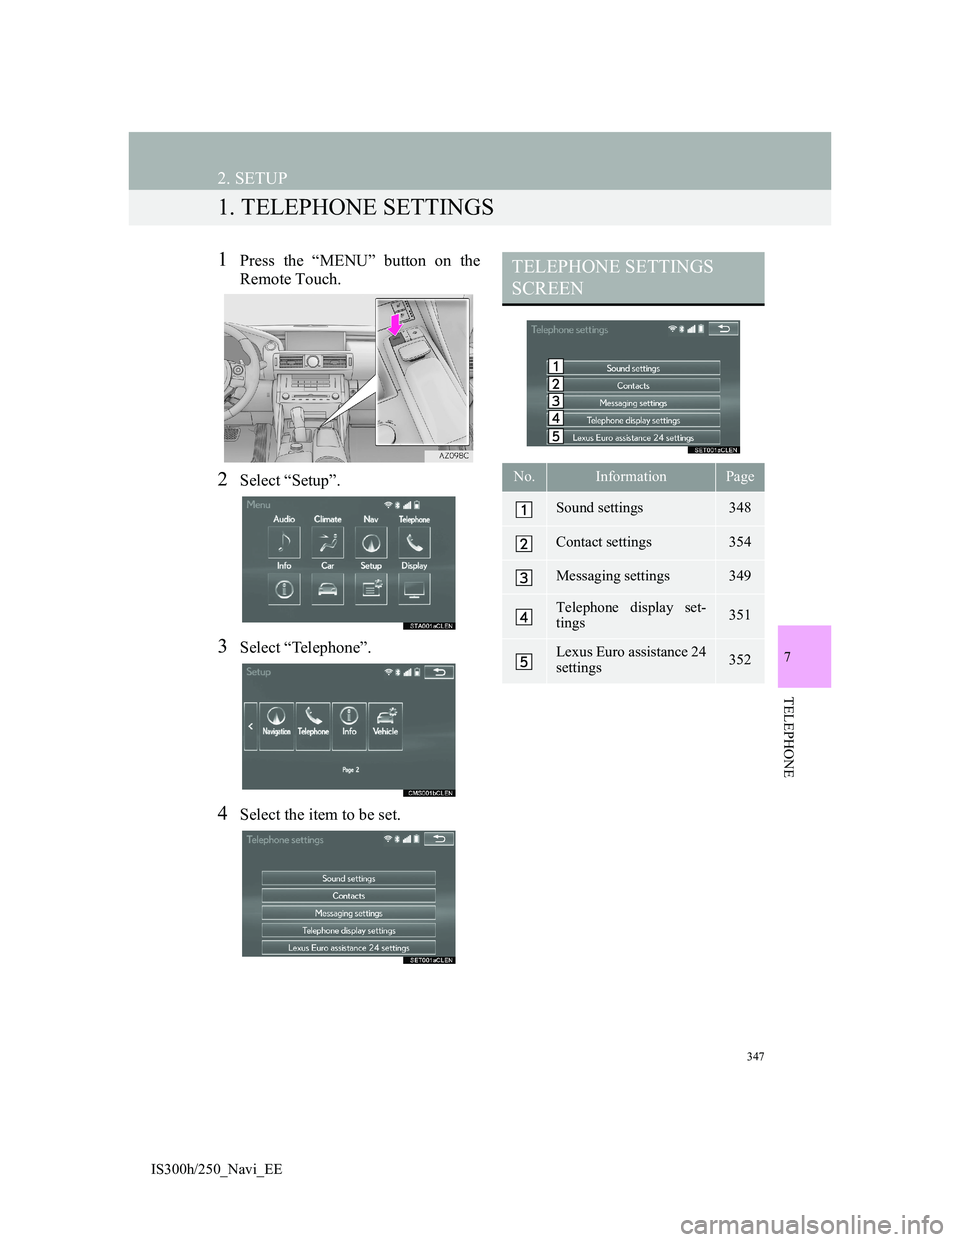
1Press the “MENU” button on the
Remote Touch.
2Select “Setup”.
3Select “Telephone”.
4Select the item to be set.
TELEPHONE SETTINGS
SCREEN
No.InformationPage
Sound settings348
Contact settings354
Messaging settings349
Telephone display set-
tings351
Lexus Euro assistance 24
settings352
Page 356 of 415
354
2. SETUP
IS300h/250_Navi_EE
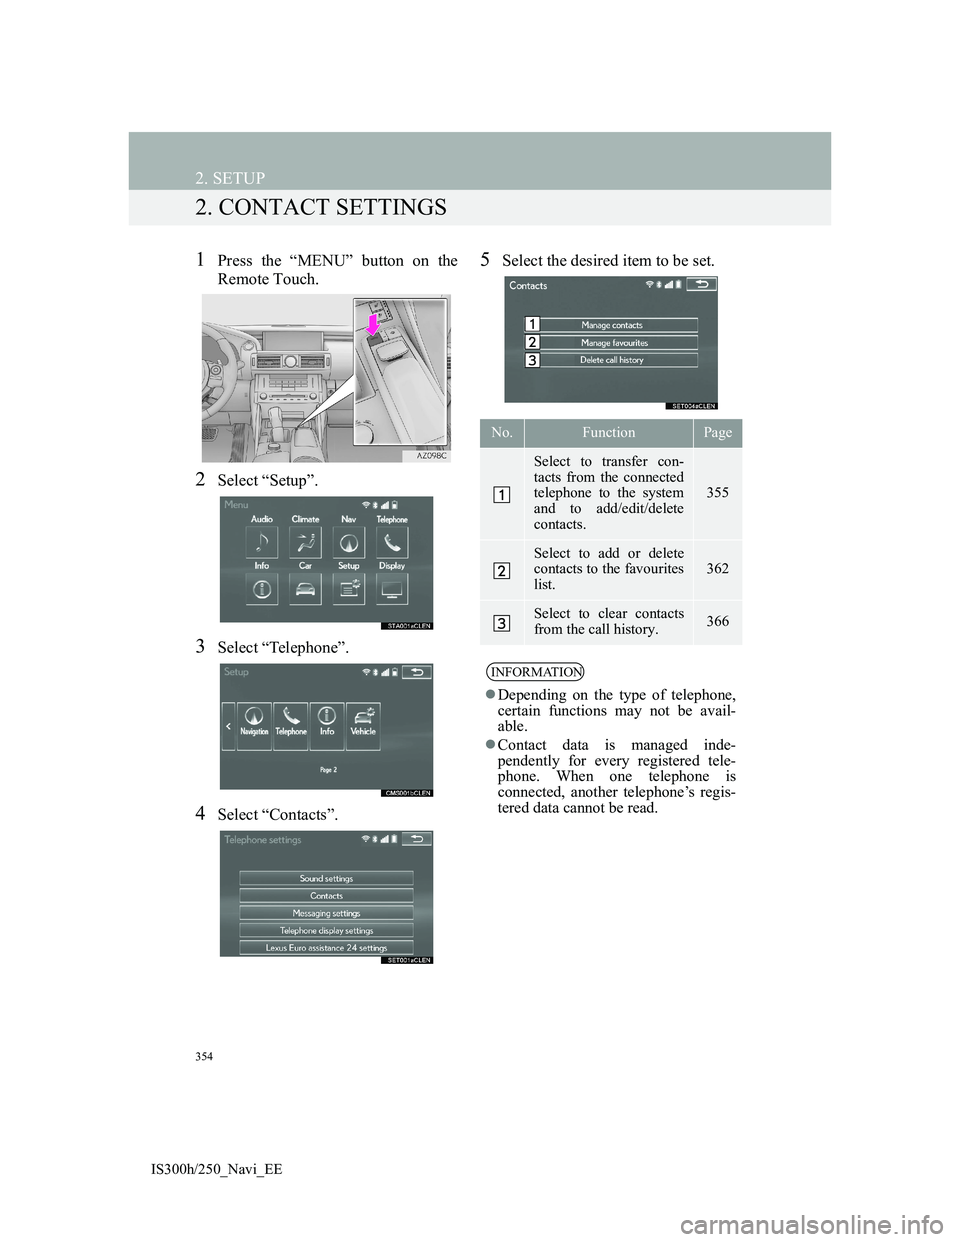
2. CONTACT SETTINGS
1Press the “MENU” button on the
Remote Touch.
2Select “Setup”.
3Select “Telephone”.
4Select “Contacts”.
5Select the desired item to be set.
No.FunctionPage
Select to transfer con-
tacts from the connected
telephone to the system
and to add/edit/delete
contacts.
355
Select to add or delete
contacts to the favourites
list. 362
Select to clear contacts
from the call history. 366
INFORMATION
Depending on the type of telephone,
certain functions may not be avail-
able.
Contact data is managed inde-
pendently for every registered tele-
phone. When one telephone is
connected, another telephone’s regis-
tered data cannot be read.
Page 380 of 415
377
1. CONNECTED SERVICES
IS300h/250_Navi_EE
8
CONNECTED SERVICES
2. SETTINGS REQUIRED FOR USING THE SERVICE
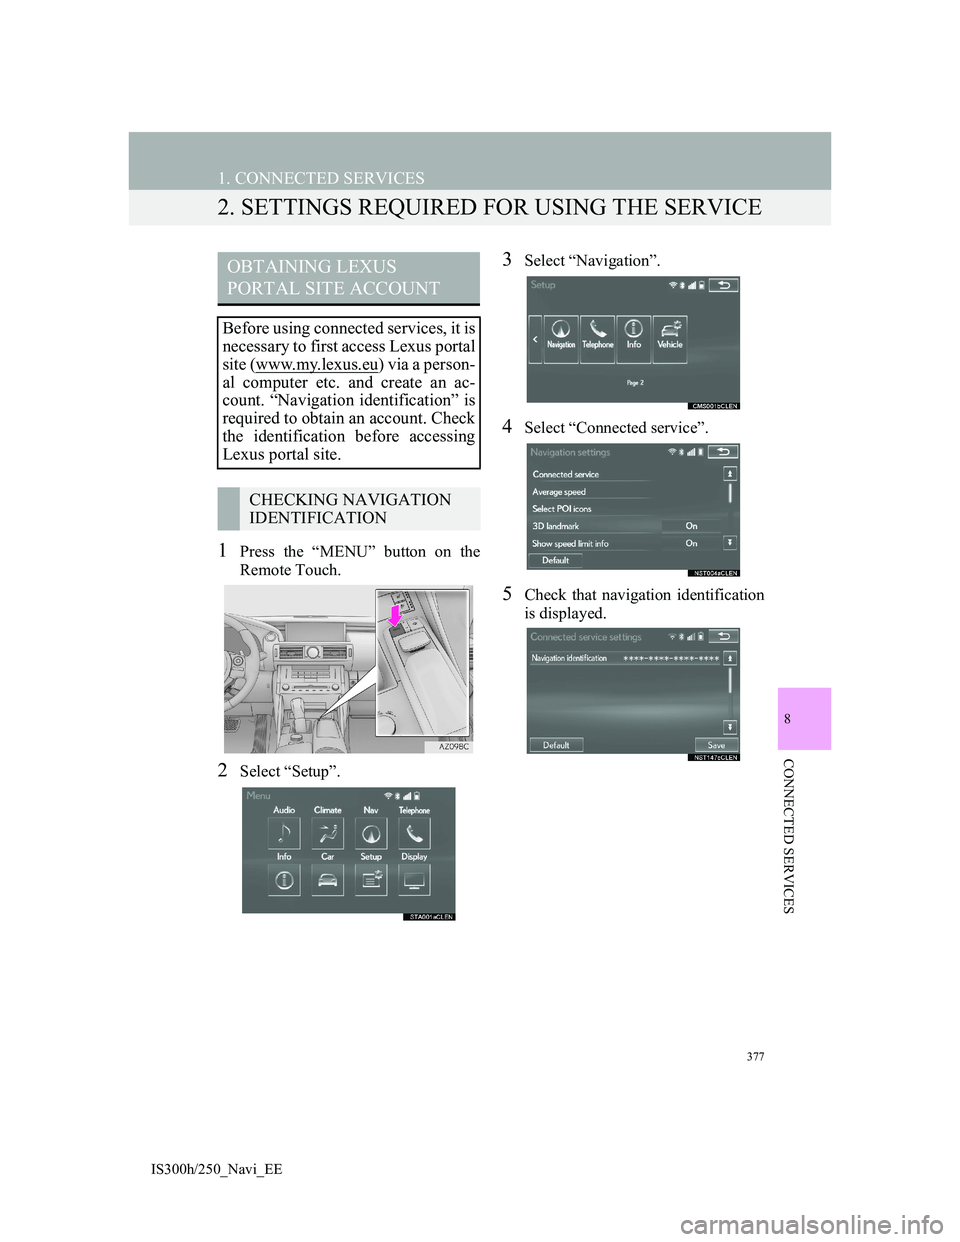
1Press the “MENU” button on the
Remote Touch.
2Select “Setup”.
3Select “Navigation”.
4Select “Connected service”.
5Check that navigation identification
is displayed.
OBTAINING LEXUS
PORTAL SITE ACCOUNT
Before using connected services, it is
necessary to first access Lexus portal
site (www.my.lexus.eu
) via a person-
al computer etc. and create an ac-
count. “Navigation identification” is
required to obtain an account. Check
the identification before accessing
Lexus portal site.
CHECKING NAVIGATION
IDENTIFICATION
Page 382 of 415
379
1. CONNECTED SERVICES
IS300h/250_Navi_EE
8
CONNECTED SERVICES
3. ONLINE SEARCH
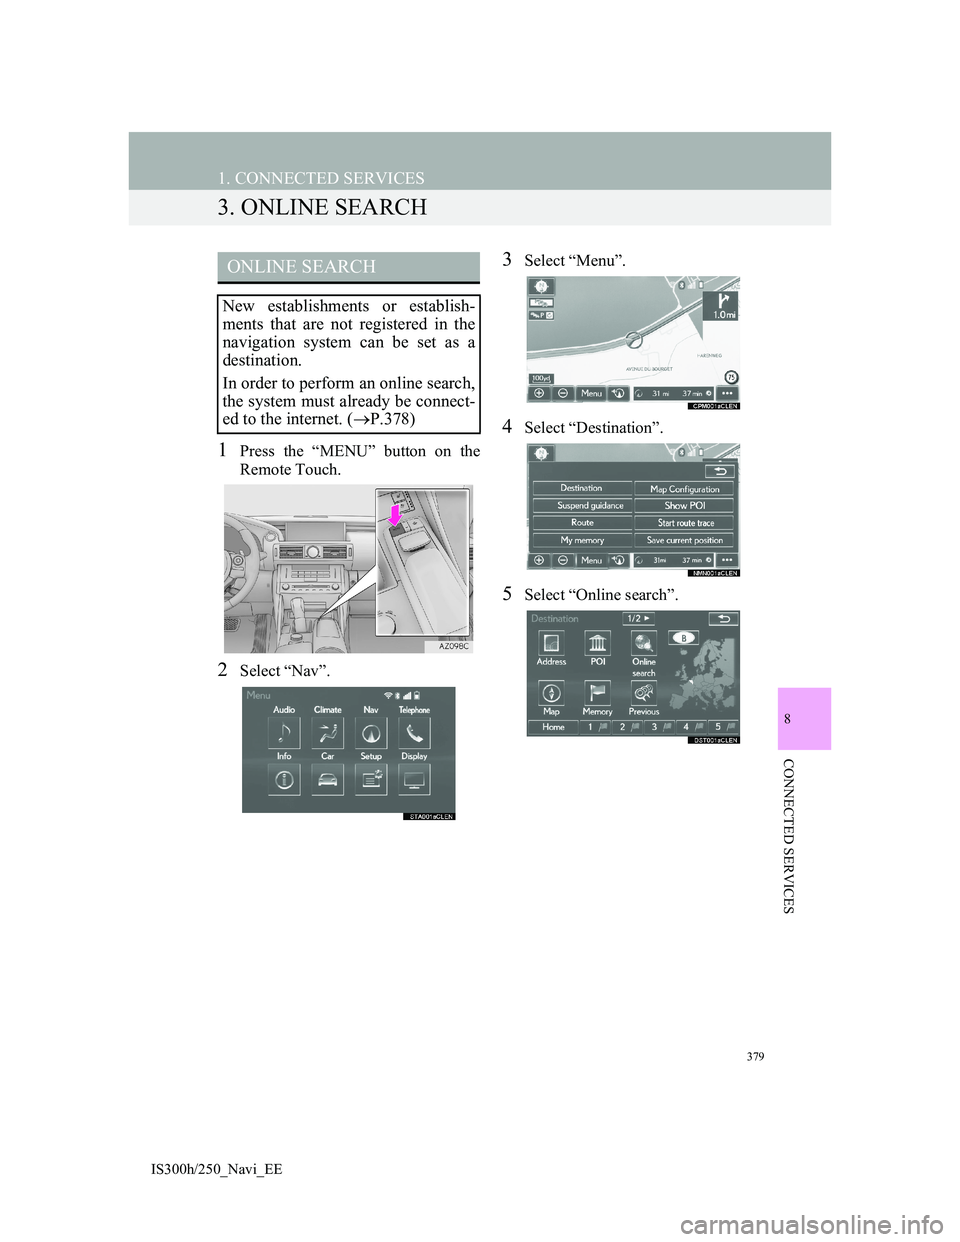
1Press the “MENU” button on the
Remote Touch.
2Select “Nav”.
3Select “Menu”.
4Select “Destination”.
5Select “Online search”.
ONLINE SEARCH
New establishments or establish-
ments that are not registered in the
navigation system can be set as a
destination.
In order to perform an online search,
the system must already be connect-
ed to the internet. (P.378)
Page 392 of 415

389
1. CONNECTED SERVICES
IS300h/250_Navi_EE
8
CONNECTED SERVICES
5. Street View
1Press the “MENU” button on the
Remote Touch.
2Select “Info”.
3Select “Street View”.
4Select the desired item to search for
a point.The Street View of the desired loca-
tion can be viewed. In order to per-
form Street View, the system must
already be connected to the internet.
(P.378)
No.Function
Select to set a Street View loca-
tion by address or location.
Select to set a Street View loca-
tion by a previously selected des-
tination. (P.123)
Select to set a Street View loca-
tion by using the current position.
Select to set a Street View loca-
tion by using the last displayed
map.
Select to set a Street View loca-
tion by using a current destina-
tion.
Select to change pages.
Page 394 of 415

391
1. CONNECTED SERVICES
IS300h/250_Navi_EE
8
CONNECTED SERVICES
6. Panoramio
1Press the “MENU” button on the
Remote Touch.
2Select “Info”.
3Select “Panoramio”.
4Select the desired item to search for
a point.
5Scroll the map to the desired point
(P.101) and select .
Users’ pictures on a map, comments
and other information can be viewed.
In order to perform Panoramio, the
system must already be connected to
the internet. (P.378)
No.Function
Select to set a location by ad-
dress. (P.118)
Select to set a location by using
the current position.
Select to set a location by using
the last displayed map.
Select to set a location by using a
current destination.
Select to change pages.
Page 396 of 415
393
IS300h/250_Navi_EE
8
CONNECTED SERVICES
2. SETUP
1. CONNECTED SERVICE SETTINGS
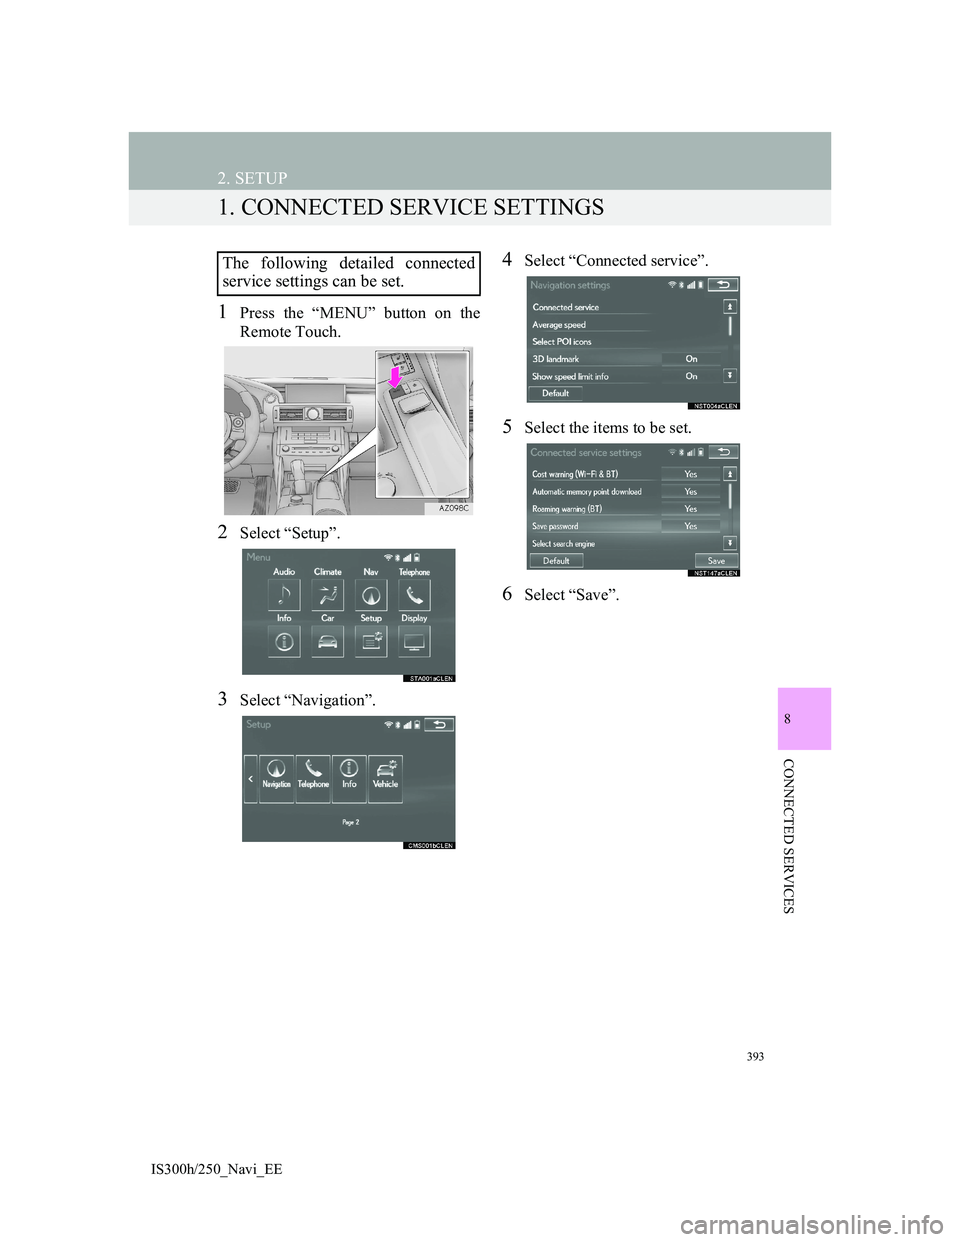
1Press the “MENU” button on the
Remote Touch.
2Select “Setup”.
3Select “Navigation”.
4Select “Connected service”.
5Select the items to be set.
6Select “Save”.
The following detailed connected
service settings can be set.