display lexus LC500C 2021 Owner's Manual / LEXUS 2021 LC500 CONVERTIBLE OWNER'S MANUAL (OM11498U)
[x] Cancel search | Manufacturer: LEXUS, Model Year: 2021, Model line: LC500C, Model: Lexus LC500C 2021Pages: 410, PDF Size: 8.71 MB
Page 244 of 410
2425-3. Using the air conditioning system
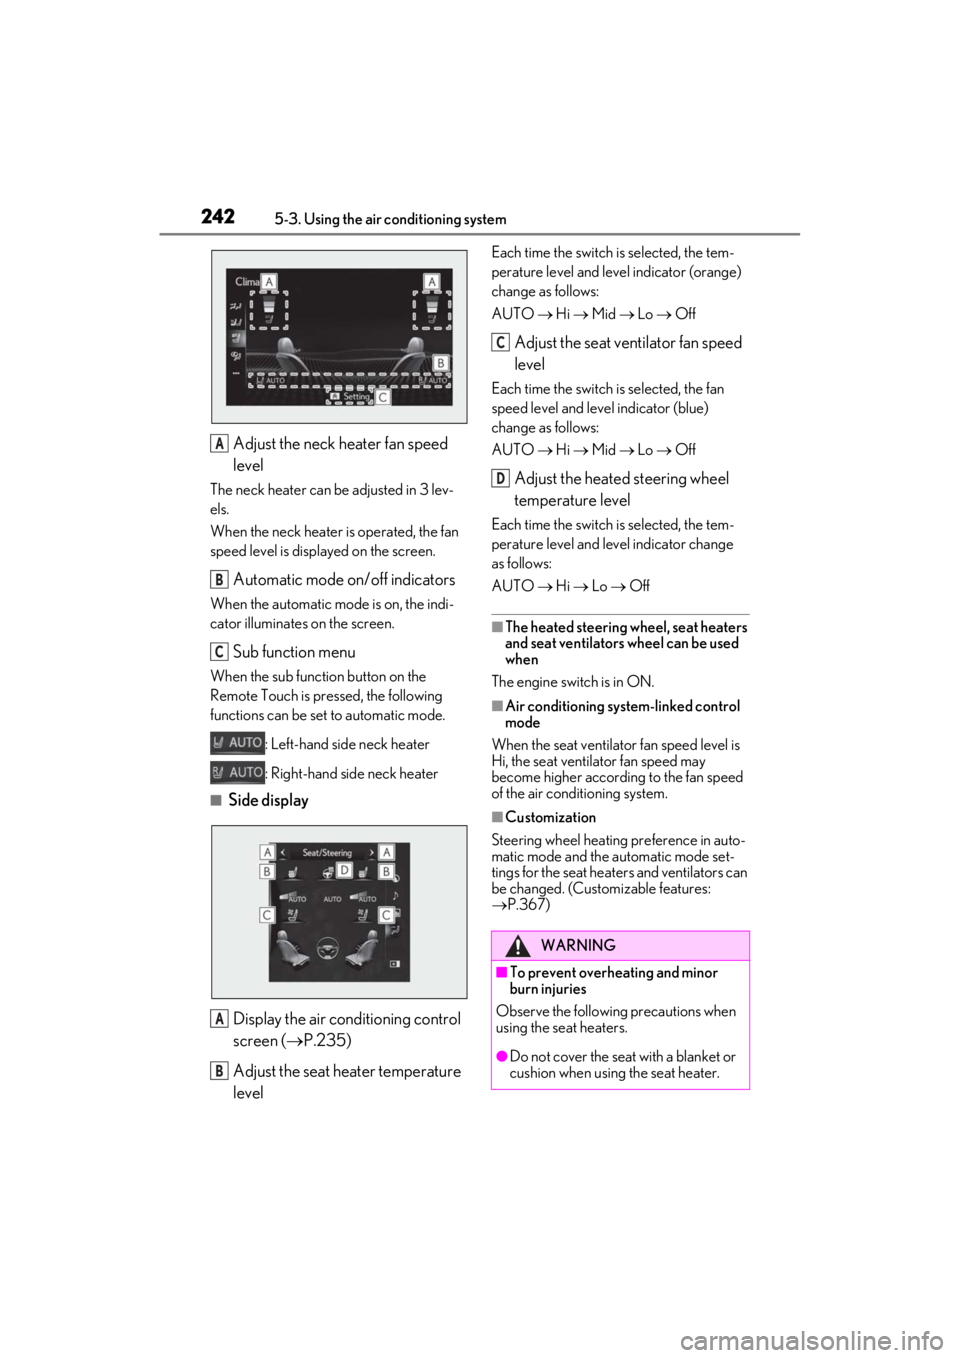
Adjust the neck heater fan speed
level
The neck heater can be adjusted in 3 lev-
els.
When the neck heater is operated, the fan
speed level is displayed on the screen.
Automatic mode on/off indicators
When the automatic mode is on, the indi-
cator illuminates on the screen.
Sub function menu
When the sub function button on the
Remote Touch is pressed, the following
functions can be set to automatic mode.
: Left-hand side neck heater
: Right-hand side neck heater
■Side display
Display the air conditioning control
screen ( P.235)
Adjust the seat heater temperature
level
Each time the switch is selected, the tem-
perature level and level indicator (orange)
change as follows:
AUTO Hi Mid Lo Off
Adjust the seat ventilator fan speed
level
Each time the switch is selected, the fan
speed level and level indicator (blue)
change as follows:
AUTO Hi Mid Lo Off
Adjust the heated steering wheel
temperature level
Each time the switch is selected, the tem-
perature level and le vel indicator change
as follows:
AUTO Hi Lo Off
■The heated steering wheel, seat heaters
and seat ventilators wheel can be used
when
The engine switch is in ON.
■Air conditioning system-linked control
mode
When the seat ventilator fan speed level is
Hi, the seat ventilator fan speed may
become higher according to the fan speed
of the air conditioning system.
■Customization
Steering wheel heating preference in auto-
matic mode and the automatic mode set-
tings for the seat heaters and ventilators can
be changed. (Customizable features:
P.367)
A
B
C
A
B
WARNING
■To prevent overheating and minor
burn injuries
Observe the following precautions when
using the seat heaters.
●Do not cover the seat with a blanket or
cushion when using the seat heater.
C
D
Page 257 of 410
2555-6. Using the other interior features
5
Interior features
Press the appropriate HomeLink®
button. The HomeLink
® indicator light
should turn on.
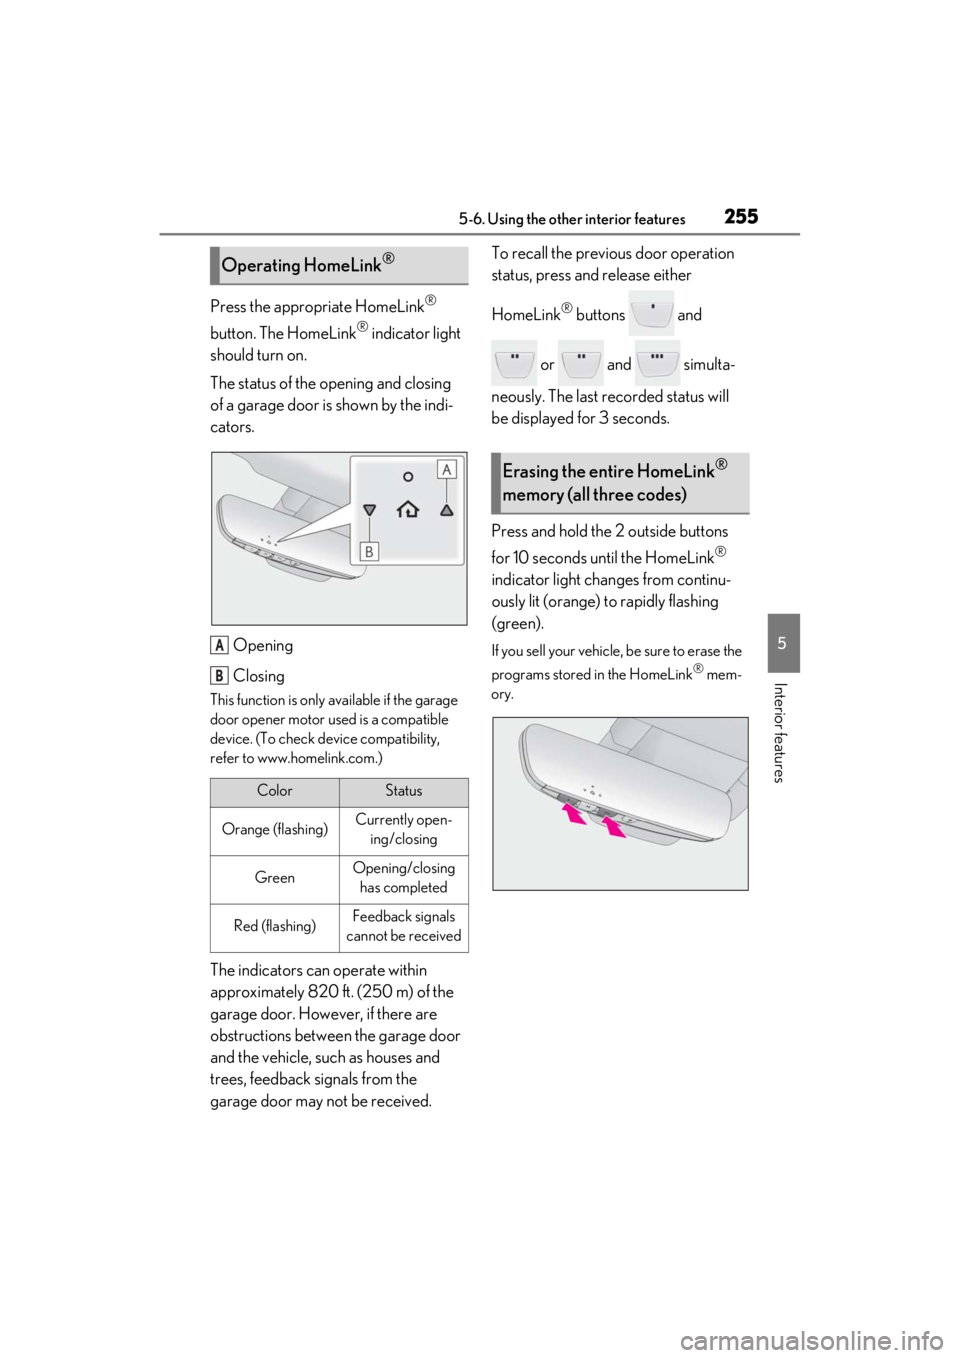
The status of the opening and closing
of a garage door is shown by the indi-
cators.
Opening
Closing
This function is only available if the garage
door opener motor used is a compatible
device. (To check device compatibility,
refer to www.homelink.com.)
The indicators can operate within
approximately 820 ft. (250 m) of the
garage door. However, if there are
obstructions between the garage door
and the vehicle, such as houses and
trees, feedback signals from the
garage door may not be received. To recall the previous door operation
status, press and release either
HomeLink
® buttons and
or and simulta-
neously. The last recorded status will
be displayed for 3 seconds.
Press and hold the 2 outside buttons
for 10 seconds until the HomeLink
®
indicator light changes from continu-
ously lit (orange) to rapidly flashing
(green).
If you sell your vehicle, be sure to erase the
programs stored in the HomeLink
® mem-
ory.
Operating HomeLink®
ColorStatus
Orange (flashing)Currently open- ing/closing
GreenOpening/closing has completed
Red (flashing)Feedback signals
cannot be received
A
B
Erasing the entire HomeLink®
memory (all three codes)
Page 280 of 410
2786-3. Do-it-yourself maintenance
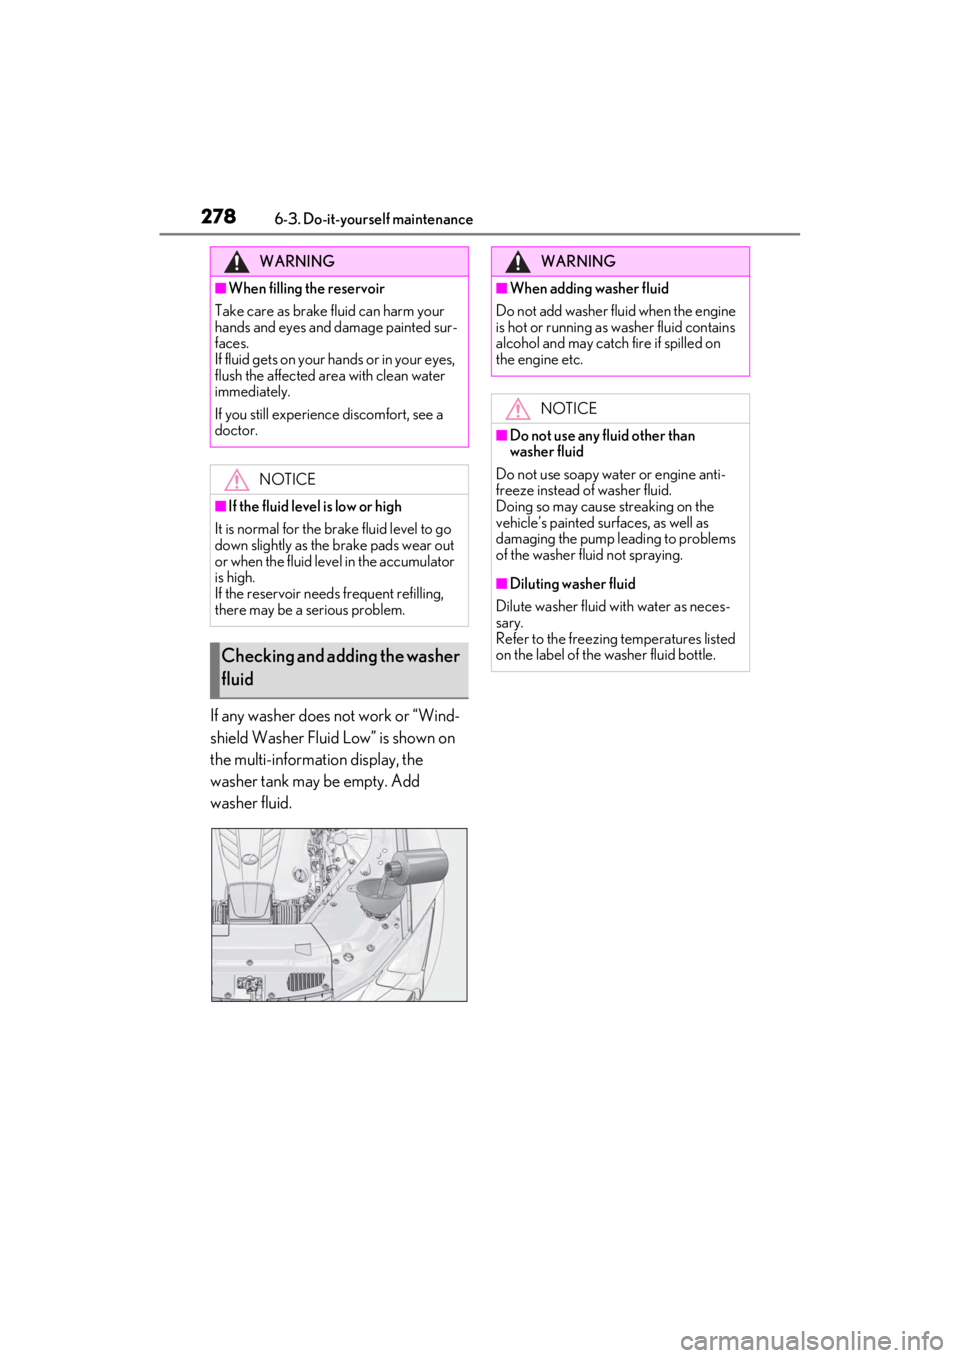
If any washer does not work or “Wind-
shield Washer Fluid Low” is shown on
the multi-information display, the
washer tank may be empty. Add
washer fluid.
WARNING
■When filling the reservoir
Take care as brake fluid can harm your
hands and eyes and damage painted sur-
faces.
If fluid gets on your hands or in your eyes,
flush the affected area with clean water
immediately.
If you still experience discomfort, see a
doctor.
NOTICE
■If the fluid level is low or high
It is normal for the brake fluid level to go
down slightly as the brake pads wear out
or when the fluid level in the accumulator
is high.
If the reservoir need s frequent refilling,
there may be a serious problem.
Checking and adding the washer
fluid
WARNING
■When adding washer fluid
Do not add washer fluid when the engine
is hot or running as washer fluid contains
alcohol and may catch fire if spilled on
the engine etc.
NOTICE
■Do not use any fluid other than
washer fluid
Do not use soapy water or engine anti-
freeze instead of washer fluid.
Doing so may cause streaking on the
vehicle’s painted surfaces, as well as
damaging the pump leading to problems
of the washer fluid not spraying.
■Diluting washer fluid
Dilute washer fluid with water as neces-
sary.
Refer to the freezing temperatures listed
on the label of the washer fluid bottle.
Page 285 of 410
2836-3. Do-it-yourself maintenance
6
Maintenance and care
Tires cannot be rotated.
When run-flat tires are installed, the
vehicle can be driven for a maximum of
100 miles (160 km) at a speed below
50 mph (80 km/h) after any tire goes
flat. (However, the vehicle speed may
not increase to near 50 mph [80
km/h] depending on weather or driv-
ing conditions.)
A run-flat tire has a mark on
the sidewall.
Make sure to replace the flat tire before
the vehicle has been driven for near 100
miles (160 km). Also, do not use a repaired
tire.
■Run-flat tires
●The run-flat tires are for only this vehicle.
Do not use the tires on other vehicles.
●Do not mix run-flat tires and normal tires.
●If non-genuine Lexus wheels are used, it
may be impossible to sufficiently demon-
strate the performanc e of run-flat tires.
Your vehicle is equipped with a tire
pressure warning system that uses tire
pressure warning valves and transmit-
ters to detect low tire inflation pressure
before serious problems arise.
If the tire pressure drops below a
predetermined level, the driver is
warned by a screen display and a
warning light. ( P.319)
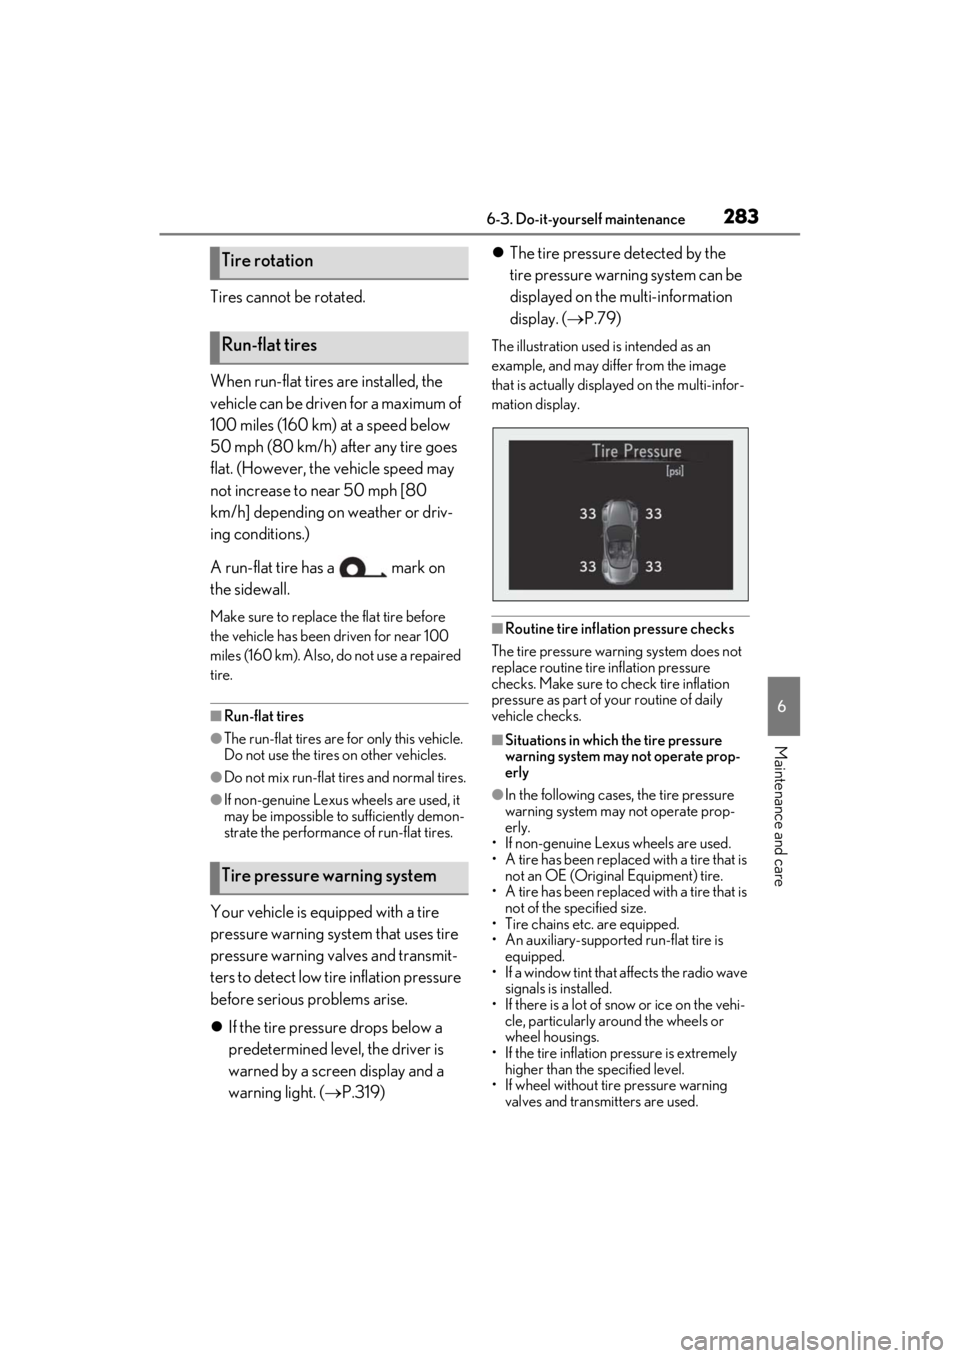
The tire pressure detected by the
tire pressure warning system can be
displayed on the multi-information
display. ( P.79)
The illustration used is intended as an
example, and may differ from the image
that is actually displayed on the multi-infor-
mation display.
■Routine tire inflation pressure checks
The tire pressure warning system does not
replace routine tire inflation pressure
checks. Make sure to check tire inflation
pressure as part of your routine of daily
vehicle checks.
■Situations in which the tire pressure
warning system may not operate prop-
erly
●In the following cases, the tire pressure
warning system may not operate prop-
erly.
• If non-genuine Lexus wheels are used.
• A tire has been replaced with a tire that is not an OE (Original Equipment) tire.
• A tire has been replaced with a tire that is not of the specified size.
• Tire chains etc. are equipped.
• An auxiliary-supported run-flat tire is equipped.
• If a window tint that affects the radio wave signals is installed.
• If there is a lot of snow or ice on the vehi- cle, particularly around the wheels or
wheel housings.
• If the tire inflation pressure is extremely higher than the specified level.
• If wheel without tire pressure warning valves and transmitters are used.
Tire rotation
Run-flat tires
Tire pressure warning system
Page 286 of 410
2846-3. Do-it-yourself maintenance
• If the ID code on the tire pressure warn-ing valves and transmitters is not regis-
tered in the tire pressure warning
computer.
●Performance may be affected in the fol-
lowing situations.
• Near a TV tower, electric power plant, gas station, radio stat ion, large display,
airport or other faci lity that generates
strong radio waves or electrical noise
• When carrying a portable radio, cellular
phone, cordless phone or other wireless
communication device If tire position information is not correctly
displayed due to the radio wave conditions,
the display may be corrected by driving and
changing the radio
wave conditions.●When the vehicle is parked, the time
taken for the warning to start or go off
could be extended.
●When tire inflation pr essure declines rap-
idly for example when a tire has burst, the
warning may not function.
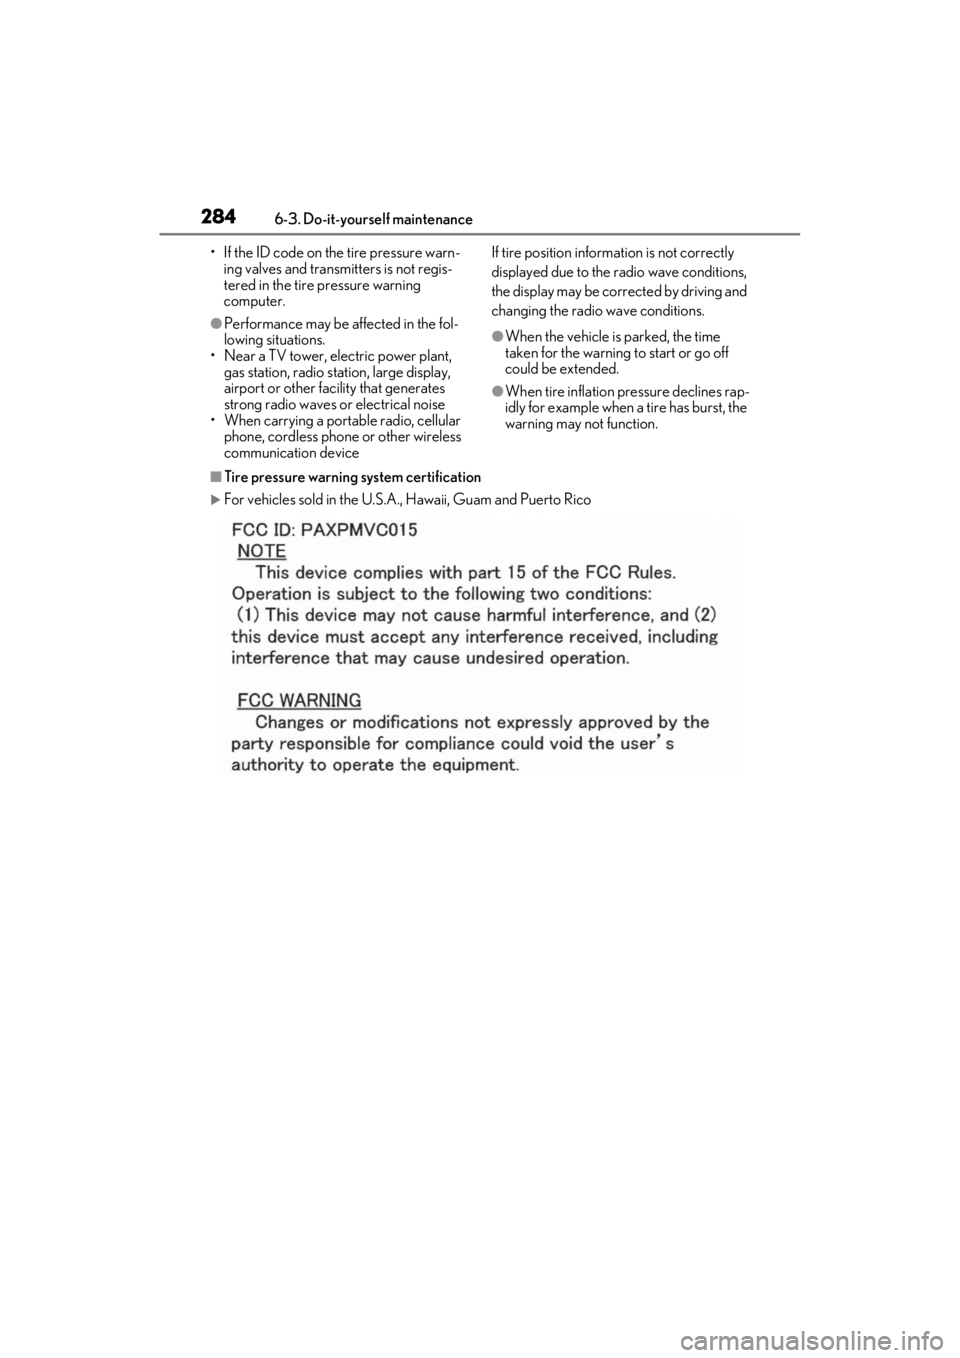
■Tire pressure warning system certification
For vehicles sold in the U.S.A. , Hawaii, Guam and Puerto Rico
Page 288 of 410
2866-3. Do-it-yourself maintenance
■The tire pressure warning system
must be initialized in the following
circumstances:
When rotating the tires.
When the tire inflation pressure is
changed when changing traveling
speed.
When the tire inflation pressure is
changed such as when changing tire
size. (When there are multiple spec-
ified pressures)
After registering the ID codes.
( P.287)
When the tire pressure warning sys-
tem is initialized, the current tire infla-
tion pressure is set as the benchmark
pressure.
■How to initialize the tire pressure
warning system
1 Park the vehicle in a safe place and
turn the engine switch off.
Initialization cannot be performed while
the vehicle is moving.
2 Adjust the tire inflation pressure to
the specified cold tire inflation
pressure level.
Make sure to adjust th e tire pressure to the
specified cold tire infl ation pressure level.
The tire pressure warning system will oper-
ate based on this pressure level.
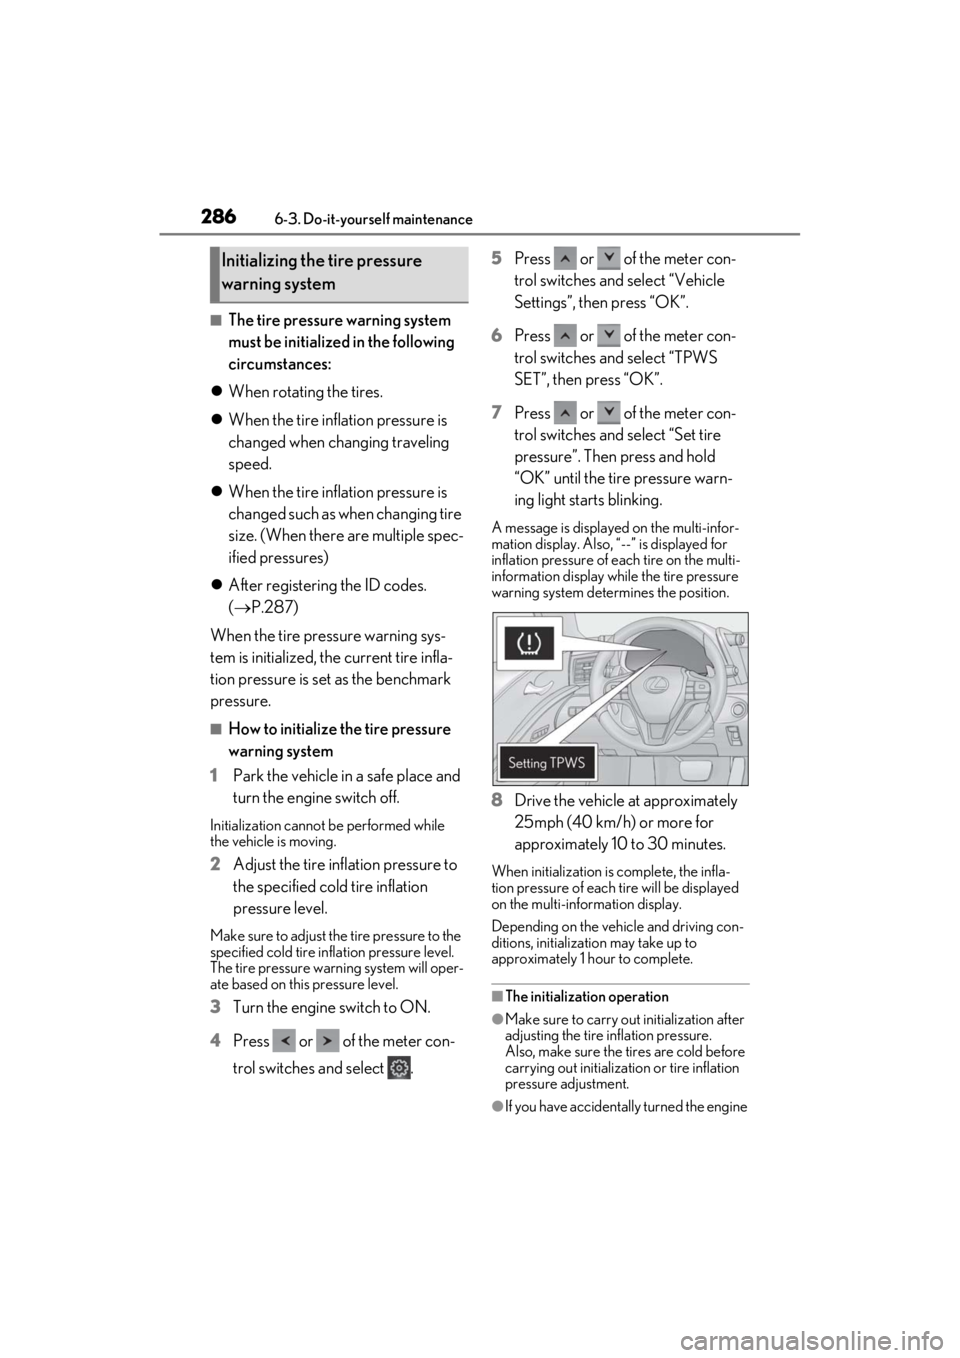
3 Turn the engine switch to ON.
4 Press or of the meter con-
trol switches and select . 5
Press or of the meter con-
trol switches and select “Vehicle
Settings”, then press “OK”.
6 Press or of the meter con-
trol switches and select “TPWS
SET”, then press “OK”.
7 Press or of the meter con-
trol switches and select “Set tire
pressure”. Then press and hold
“OK” until the tire pressure warn-
ing light starts blinking.
A message is displayed on the multi-infor-
mation display. Also, “--” is displayed for
inflation pressure of each tire on the multi-
information display while the tire pressure
warning system determines the position.
8Drive the vehicle at approximately
25mph (40 km/h) or more for
approximately 10 to 30 minutes.
When initialization is complete, the infla-
tion pressure of each tire will be displayed
on the multi-information display.
Depending on the vehicle and driving con-
ditions, initialization may take up to
approximately 1 hour to complete.
■The initialization operation
●Make sure to carry out initialization after
adjusting the tire inflation pressure.
Also, make sure the tires are cold before
carrying out initialization or tire inflation
pressure adjustment.
●If you have accidentally turned the engine
Initializing the tire pressure
warning system
Page 289 of 410

2876-3. Do-it-yourself maintenance
6
Maintenance and care
switch off during initialization, it is not
necessary to manually restart the initial-
ization again, as initialization will restart
automatically the next time the engine
switch is turned to ON.
●If you accidentally perform initialization
when initialization is not necessary, adjust
the tire inflation pres sure to the specified
level when the tires are cold, and conduct
initialization again.
●While the position of each tire is being
determined and the inflation pressures
are not being displayed on the multi-
information display, if the inflation pres-
sure of a tire drops, the tire pressure
warning light will come on.
■When initialization of the tire pressure
warning system has failed
Initialization may take lo nger to complete if
the vehicle is driven on an unpaved road.
When performing initialization, drive on a
paved road if possible. Depending on the
driving environment and condition of the
tires, initialization will be completed in
approximately 10 to 30 minutes. If initializa-
tion is not complete after driving approxi-
mately 10 to 30 minutes, continue driving
for a while. If the inflation of each tire is not
displayed after driving for approximately 1
hour, perform the following procedure.
●Park the vehicle in a safe place for
approximately 20 minutes. Then drive
straight (with occasi onal left and right
turns) at approximately 25 mph (40
km/h) or more for approximately 10 to
30 minutes.
However, in the following situations, the tire
inflation pressure will not be recorded and
the system will not operate properly. Per-
form initialization again.
●When performing init ialization, the tire
pressure warning light does not blink 3
times. (Initialization will not occur while
driving)
●After performing initialization, the tire
pressure warning light blinks for 1 minute
then stays on after driving for about 20
minutes.
If the inflation pressure of each tire is still not displayed, have the vehicle inspected by
your Lexus dealer.
■When registering ID codes
●Initialize the tire pressure warning system
after ID code registration. Initialization is
disabled if the system was initialized
before registration.
●After ID code registration, the tires are
hot by driving. Initia
lize the tire pressure
warning system after the tires become
cold.
The tire pressure warning valve and
transmitter is equipped with a unique
ID code. When replacing a tire pres-
sure warning valve and transmitter, it is
necessary to register the ID code.
When registering the ID codes, per-
form the following procedure.
1
Turn the engine switch to ON.
2
Press or of the meter con-
trol switches and select .
3
Press or of the meter con-
trol switches and select “Vehicle
Settings”, then press “OK”.
WARNING
■When initializing the tire pressure
warning system
Do not initialize tire inflation pressure
without first adjusting the tire inflation
pressure to the spec ified level. Other-
wise, the tire pressure warning light may
not come on even if the tire inflation
pressure is low, or it may come on when
the tire inflation pressure is actually nor-
mal.
Registering ID codes
Page 290 of 410
2886-3. Do-it-yourself maintenance
4Press or of the meter con-
trol switches and select “TPWS
SET”, then press “OK”.
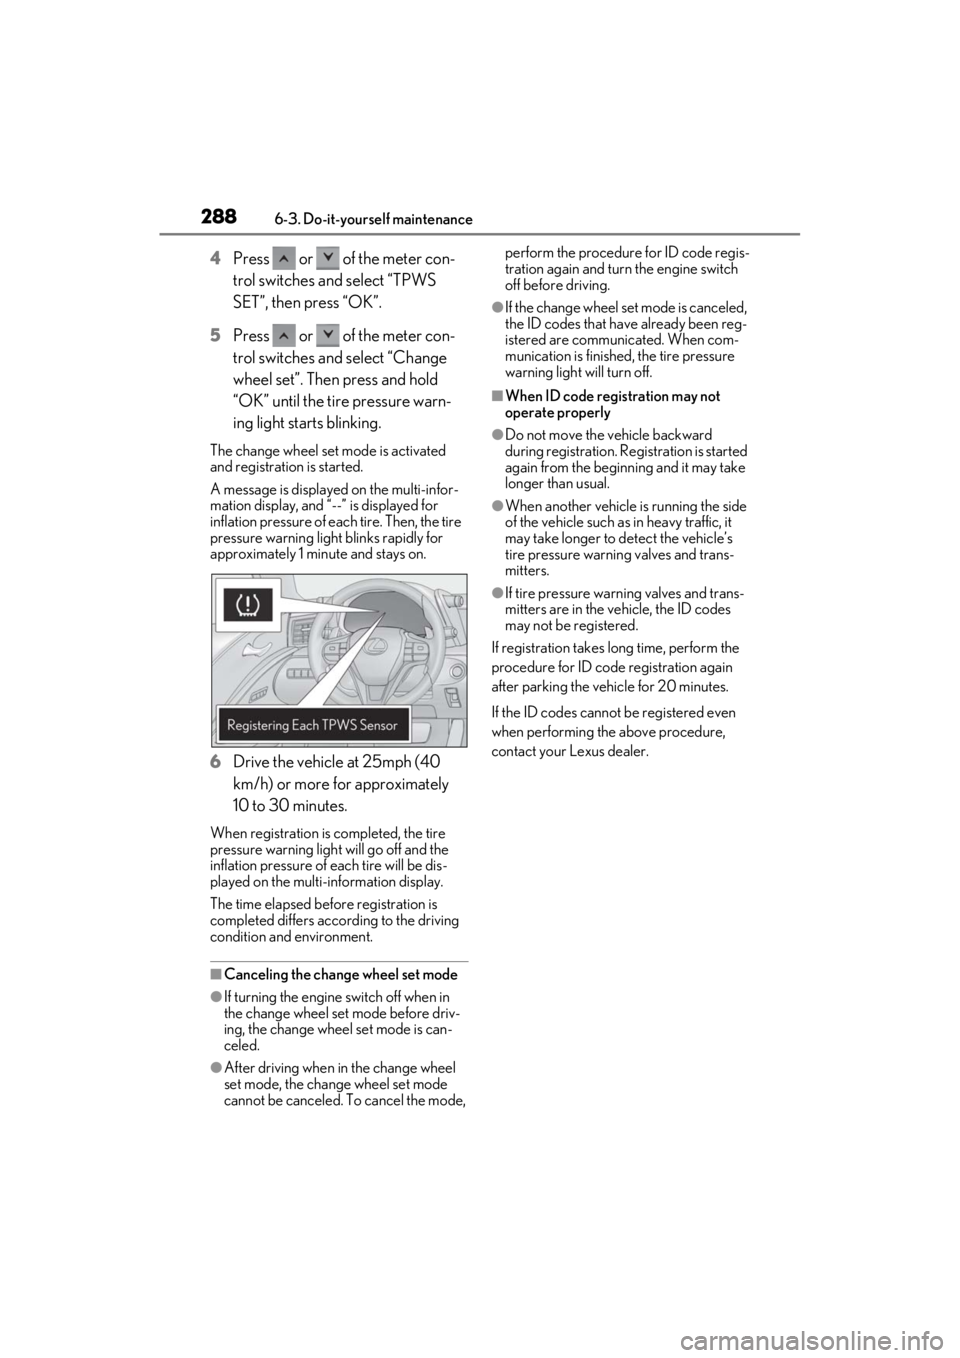
5 Press or of the meter con-
trol switches and select “Change
wheel set”. Then press and hold
“OK” until the tire pressure warn-
ing light starts blinking.
The change wheel set mode is activated
and registration is started.
A message is displaye d on the multi-infor-
mation display, and “--” is displayed for
inflation pressure of e ach tire. Then, the tire
pressure warning light blinks rapidly for
approximately 1 minute and stays on.
6 Drive the vehicle at 25mph (40
km/h) or more for approximately
10 to 30 minutes.
When registration is completed, the tire
pressure warning light will go off and the
inflation pressure of e ach tire will be dis-
played on the multi-information display.
The time elapsed before registration is
completed differs according to the driving
condition and environment.
■Canceling the change wheel set mode
●If turning the engine switch off when in
the change wheel set mode before driv-
ing, the change wheel set mode is can-
celed.
●After driving when in the change wheel
set mode, the change wheel set mode
cannot be canceled. To cancel the mode, perform the procedure for ID code regis-
tration again and turn the engine switch
off before driving.
●If the change wheel set mode is canceled,
the ID codes that have already been reg-
istered are communicated. When com-
munication is finished, the tire pressure
warning light will turn off.
■When ID code registration may not
operate properly
●Do not move the vehicle backward
during registration. Re
gistration is started
again from the beginning and it may take
longer than usual.
●When another vehicle is running the side
of the vehicle such as in heavy traffic, it
may take longer to detect the vehicle’s
tire pressure warnin g valves and trans-
mitters.
●If tire pressure warning valves and trans-
mitters are in the vehicle, the ID codes
may not be registered.
If registration takes long time, perform the
procedure for ID code registration again
after parking the vehicle for 20 minutes.
If the ID codes cannot be registered even
when performing the above procedure,
contact your Lexus dealer.
Page 295 of 410
2936-3. Do-it-yourself maintenance
6
Maintenance and care
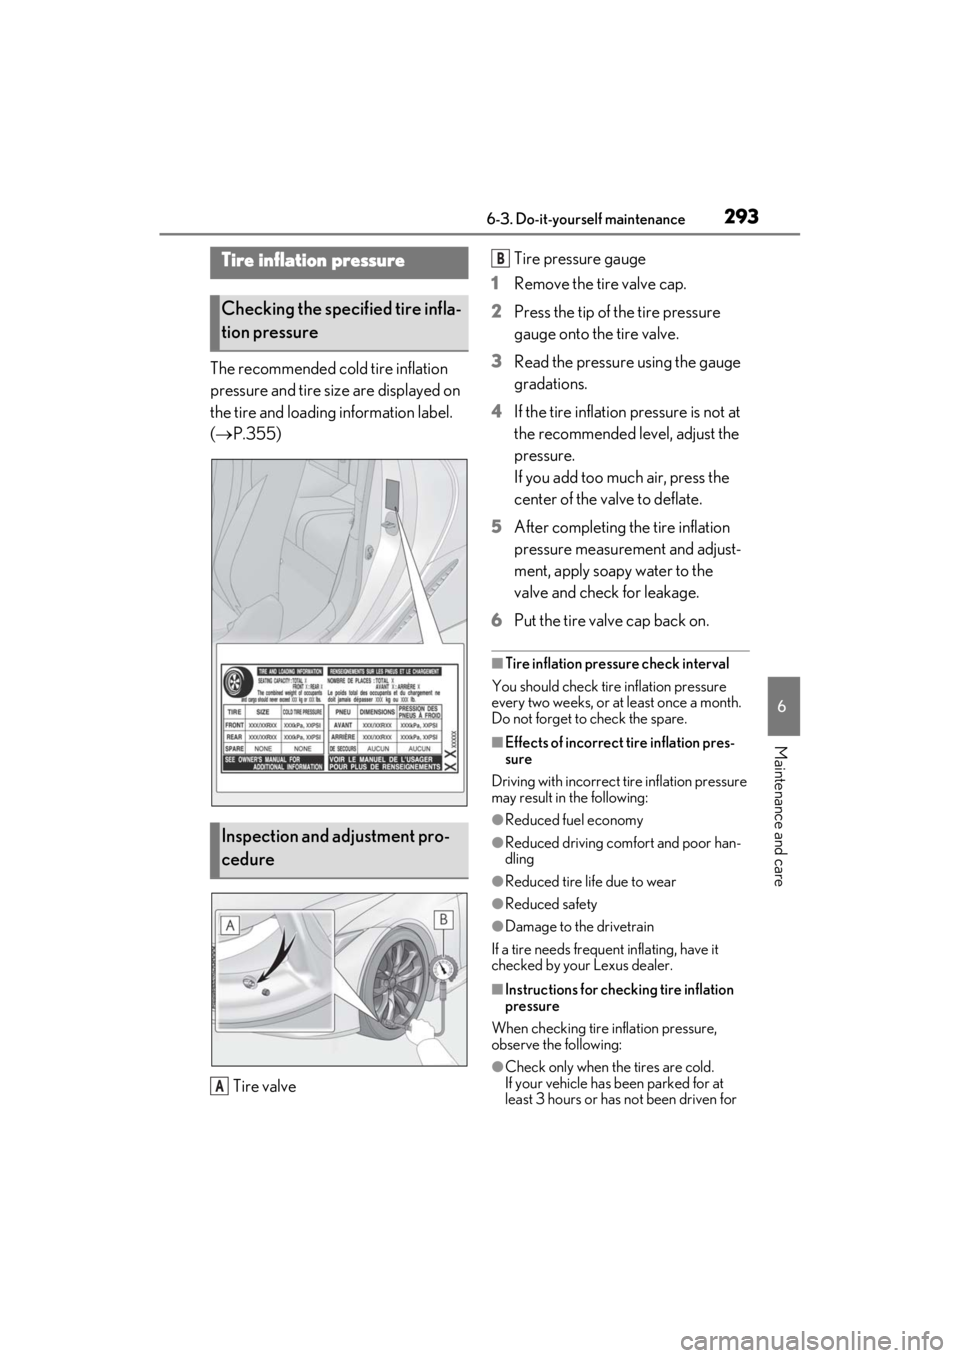
The recommended cold tire inflation
pressure and tire size are displayed on
the tire and loading information label.
( P.355)
Tire valve Tire pressure gauge
1 Remove the tire valve cap.
2 Press the tip of the tire pressure
gauge onto the tire valve.
3 Read the pressure using the gauge
gradations.
4 If the tire inflation pressure is not at
the recommended level, adjust the
pressure.
If you add too much air, press the
center of the valve to deflate.
5 After completing the tire inflation
pressure measurement and adjust-
ment, apply soapy water to the
valve and check for leakage.
6 Put the tire valve cap back on.
■Tire inflation pressure check interval
You should check tire inflation pressure
every two weeks, or at least once a month.
Do not forget to check the spare.
■Effects of incorrect tire inflation pres-
sure
Driving with incorrect ti re inflation pressure
may result in the following:
●Reduced fuel economy
●Reduced driving comfort and poor han-
dling
●Reduced tire life due to wear
●Reduced safety
●Damage to the drivetrain
If a tire needs frequent inflating, have it
checked by your Lexus dealer.
■Instructions for checking tire inflation
pressure
When checking tire inflation pressure,
observe the following:
●Check only when the tires are cold.
If your vehicle has been parked for at
least 3 hours or has not been driven for
Tire inflation pressure
Checking the specified tire infla-
tion pressure
Inspection and adjustment pro-
cedure
A
B
Page 307 of 410

305
7
7
When trouble arises
When trouble arises
7-1. Essential informationEmergency flashers.................. 306
If your vehicle has to be stopped in an emergency ..................... 306
If the vehicle is trapped in rising water............................................ 307
7-2. Steps to take in an emergency If your vehicle needs to be towed........................................................ 309
If you think something is wrong ......................................................... 312
Fuel pump shut off system ...... 313
If a warning light turns on or a warning buzzer sounds ........ 314
If a warning message is displayed ........................................................ 323
If you have a flat tire.................. 327
If the engine wi ll not start .......328
If you lose your keys ................. 329
If the fuel filler door cannot be opened........................................ 330
If the electronic key does not operate properly .................... 330
If the battery is discharged .... 332
If the soft top roof cannot be closed .......................................... 338
If your vehicle overheats ........ 345
If the vehicle becomes stuck 347