lexus LFA 2012 Owner's Manual / LEXUS 2012 LFA OWNERS MANUAL (OM77006U)
Manufacturer: LEXUS, Model Year: 2012,
Model line: LFA,
Model: Lexus LFA 2012
Pages: 420, PDF Size: 5.02 MB
lexus LFA 2012 Owner's Manual / LEXUS 2012 LFA OWNERS MANUAL (OM77006U)
LFA 2012
Lexus
Lexus
https://www.carmanualsonline.info/img/36/30114/w960_30114-0.png
lexus LFA 2012 Owner's Manual / LEXUS 2012 LFA OWNERS MANUAL (OM77006U)
Trending: air filter, language, remove seats, battery replacement, low oil pressure, torque, fuel filter
Page 211 of 420
209
3
Interior features
3-4.Using the storage features
List of storage features
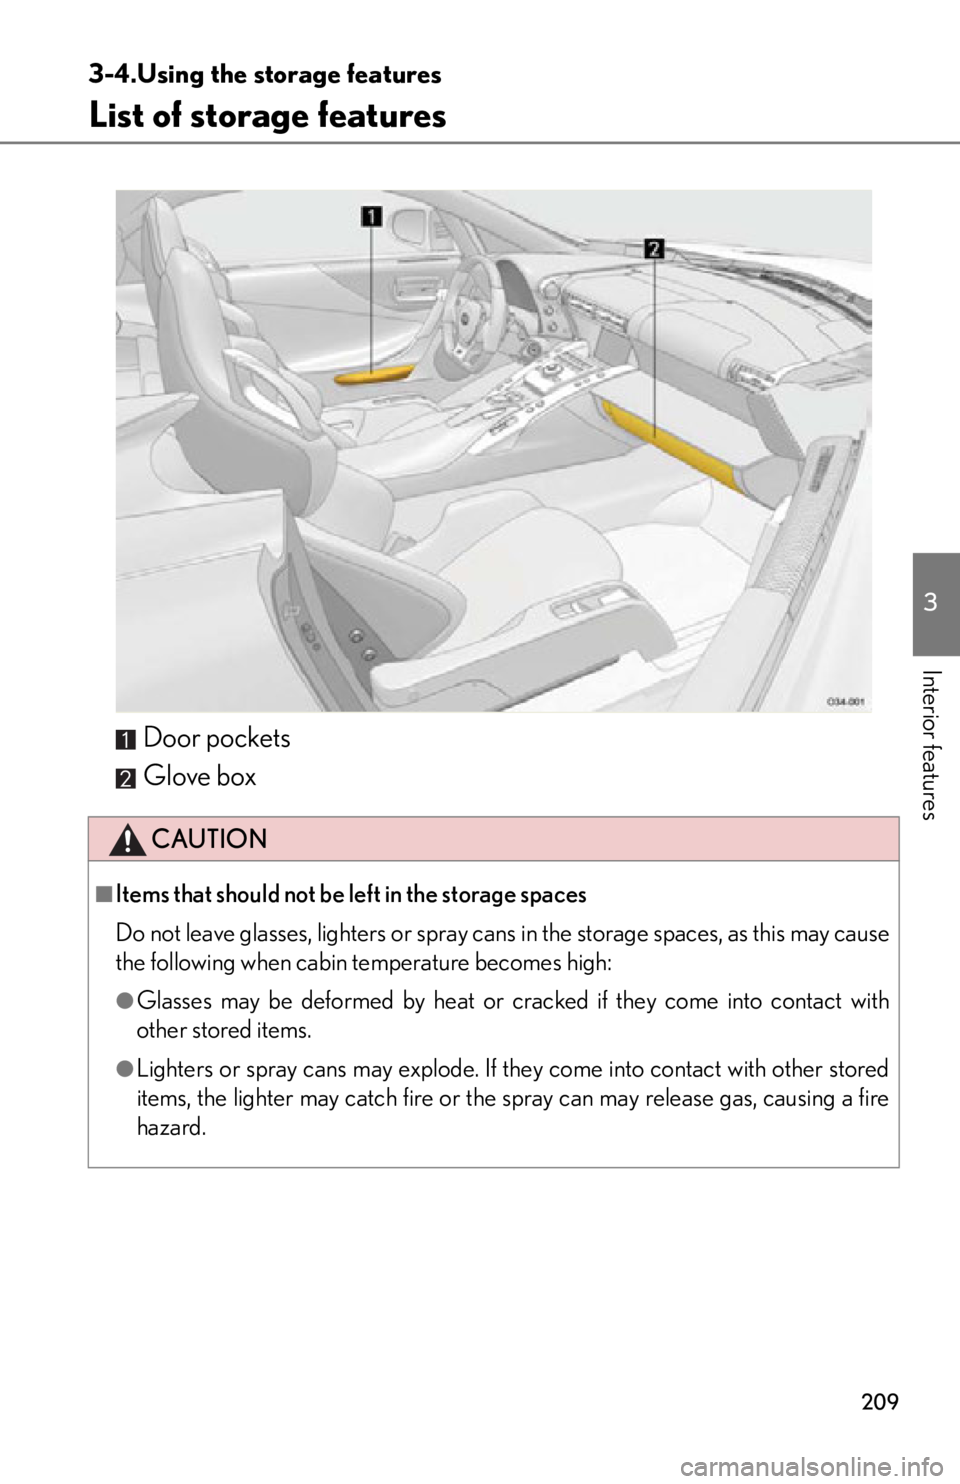
Door pockets
Glove box
CAUTION
■Items that should not be left in the storage spaces
Do not leave glasses, lighters or spray cans in the storage spaces, as this may cause
the following when cabin temperature becomes high:
●Glasses may be deformed by heat or cracked if they come into contact with
other stored items.
●Lighters or spray cans may explode. If they come into contact with other stored
items, the lighter may catch fire or the spray can may release gas, causing a fire
hazard.
Page 212 of 420
210
3-4. Using the storage features
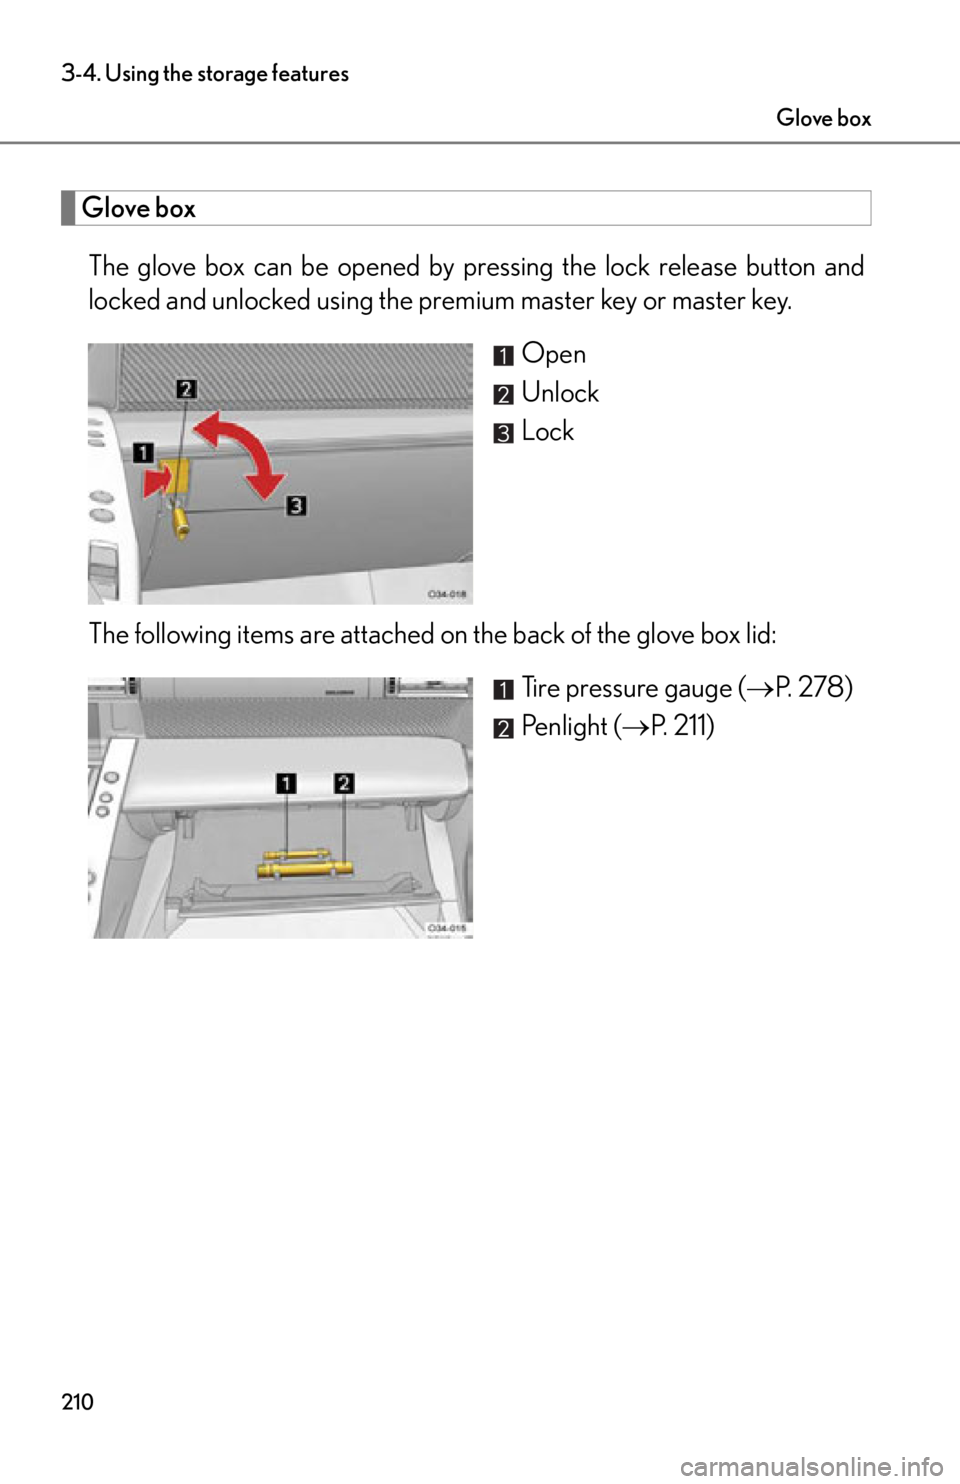
Glove boxThe glove box can be opened by pr essing the lock release button and
locked and unlocked using the premium master key or master key.
Open
Unlock
Lock
The following items are attached on the back of the glove box lid: Tire pressure gauge (P. 2 7 8 )
Penlight ( P. 211)
Glove box
Page 213 of 420
211
3-4. Using the storage features
3
Interior features
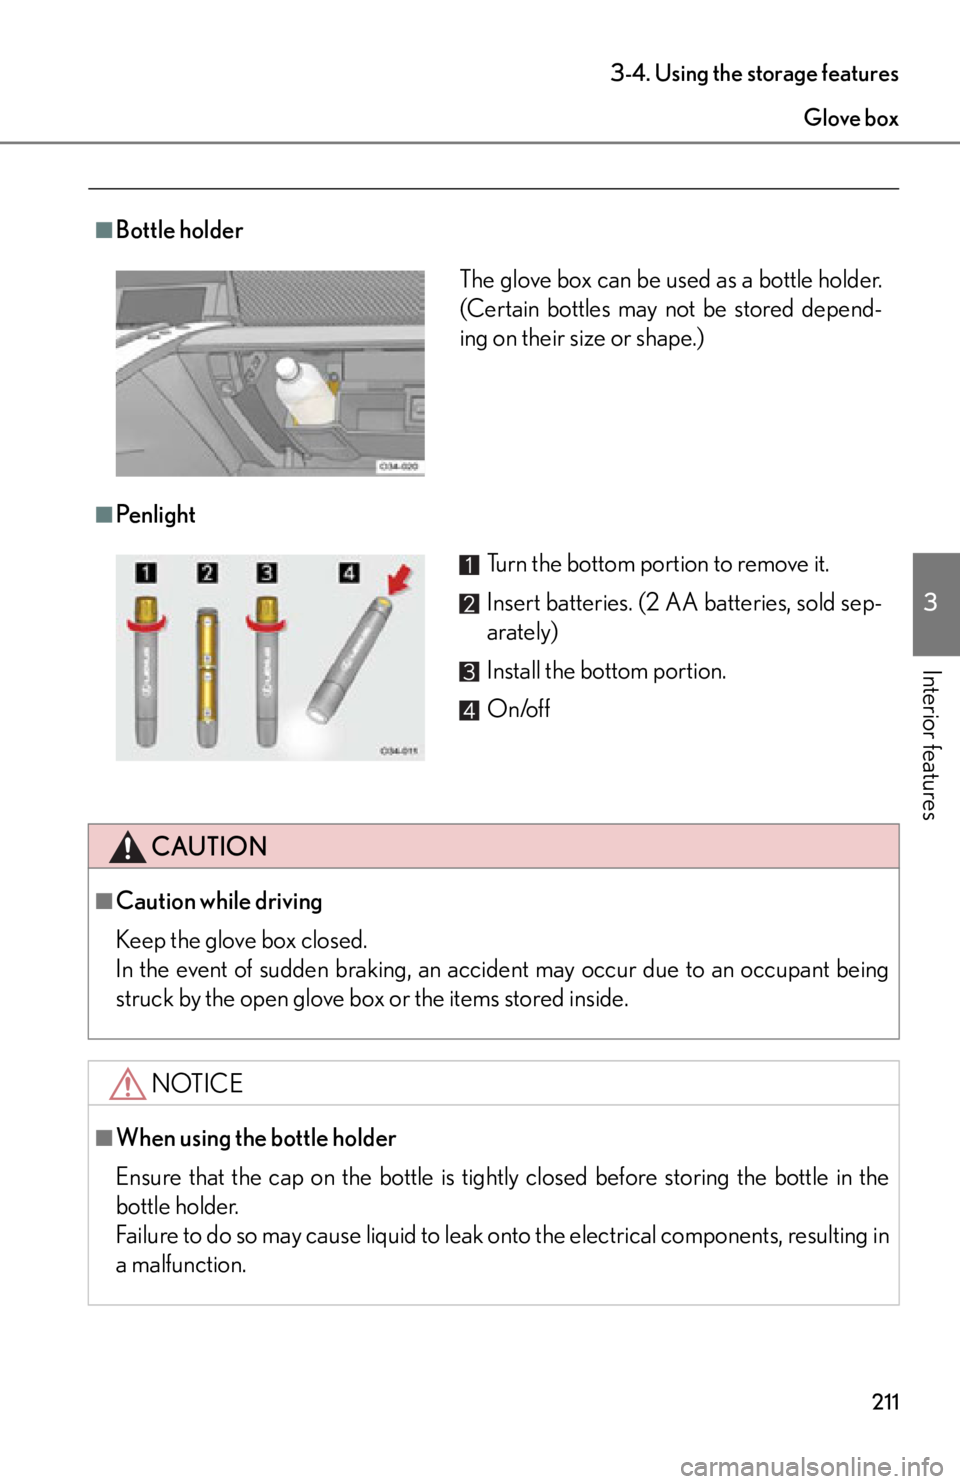
■Bottle holder
■Pe n l i g h t
CAUTION
■Caution while driving
Keep the glove box closed.
In the event of sudden braking, an accident may occur due to an occupant being
struck by the open glove box or the items stored inside.
NOTICE
■When using the bottle holder
Ensure that the cap on the bottle is tightly closed before storing the bottle in the
bottle holder.
Failure to do so may cause liquid to leak onto the electrical components, resulting in
a malfunction.
The glove box can be used as a bottle holder.
(Certain bottles may not be stored depend-
ing on their size or shape.)
Turn the bottom portion to remove it.
Insert batteries. (2 AA batteries, sold sep-
arately)
Install the bottom portion.
On/off
Glove box
Page 214 of 420
212
3-4. Using the storage features
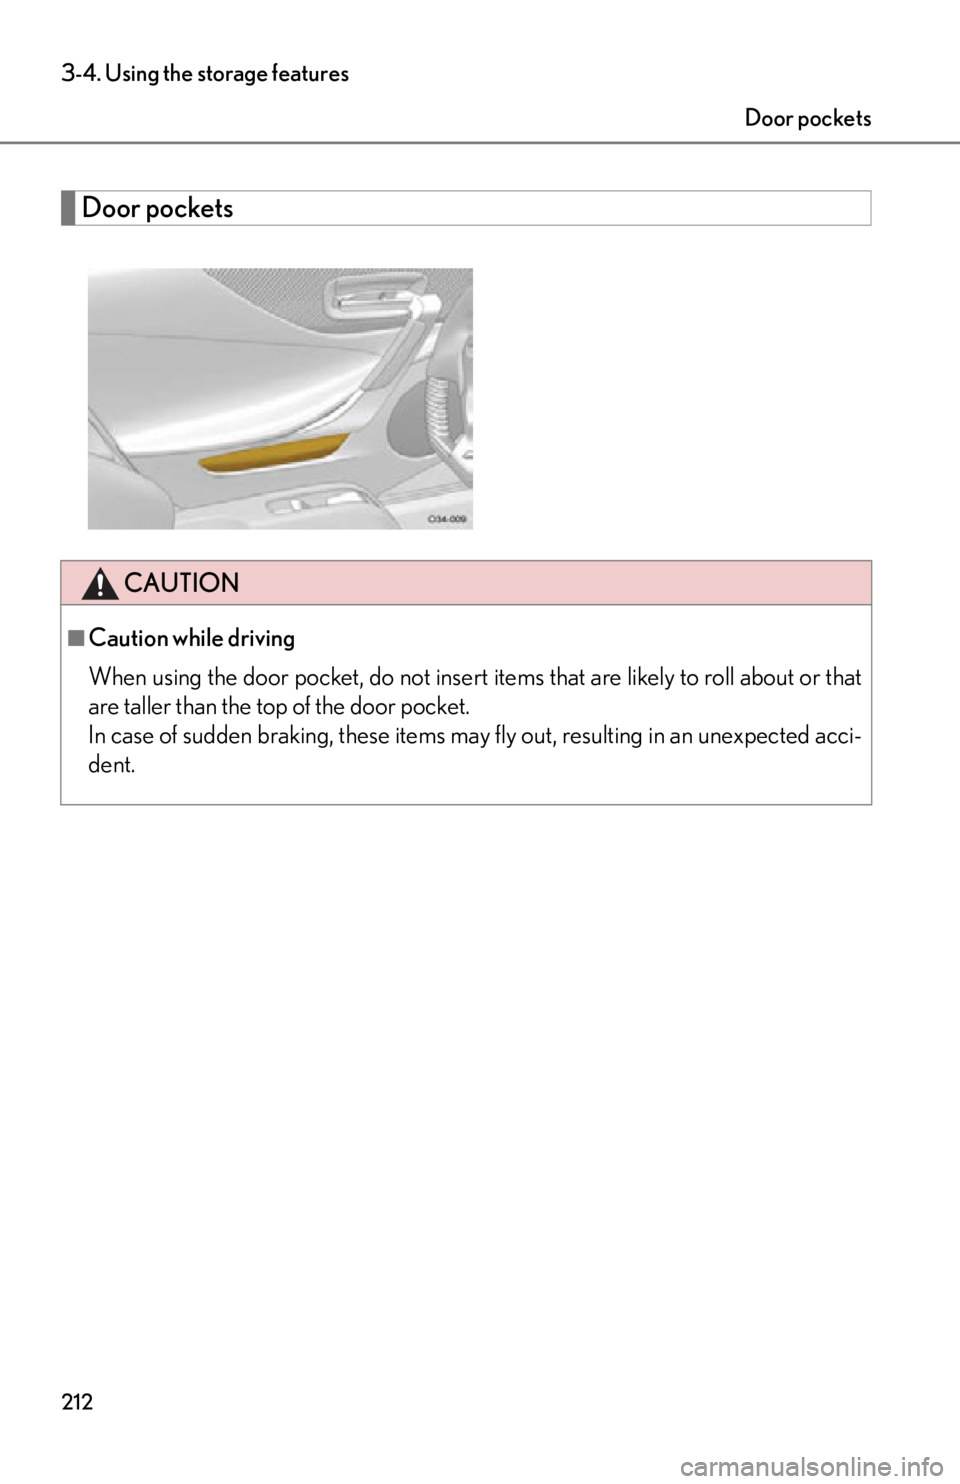
Door pockets
CAUTION
■Caution while driving
When using the door pocket, do not insert items that are likely to roll about or that
are taller than the top of the door pocket.
In case of sudden braking, these items may fly out, resulting in an unexpected acci-
dent.
Door pockets
Page 215 of 420
213
3
Interior features
3-5.Other interior features
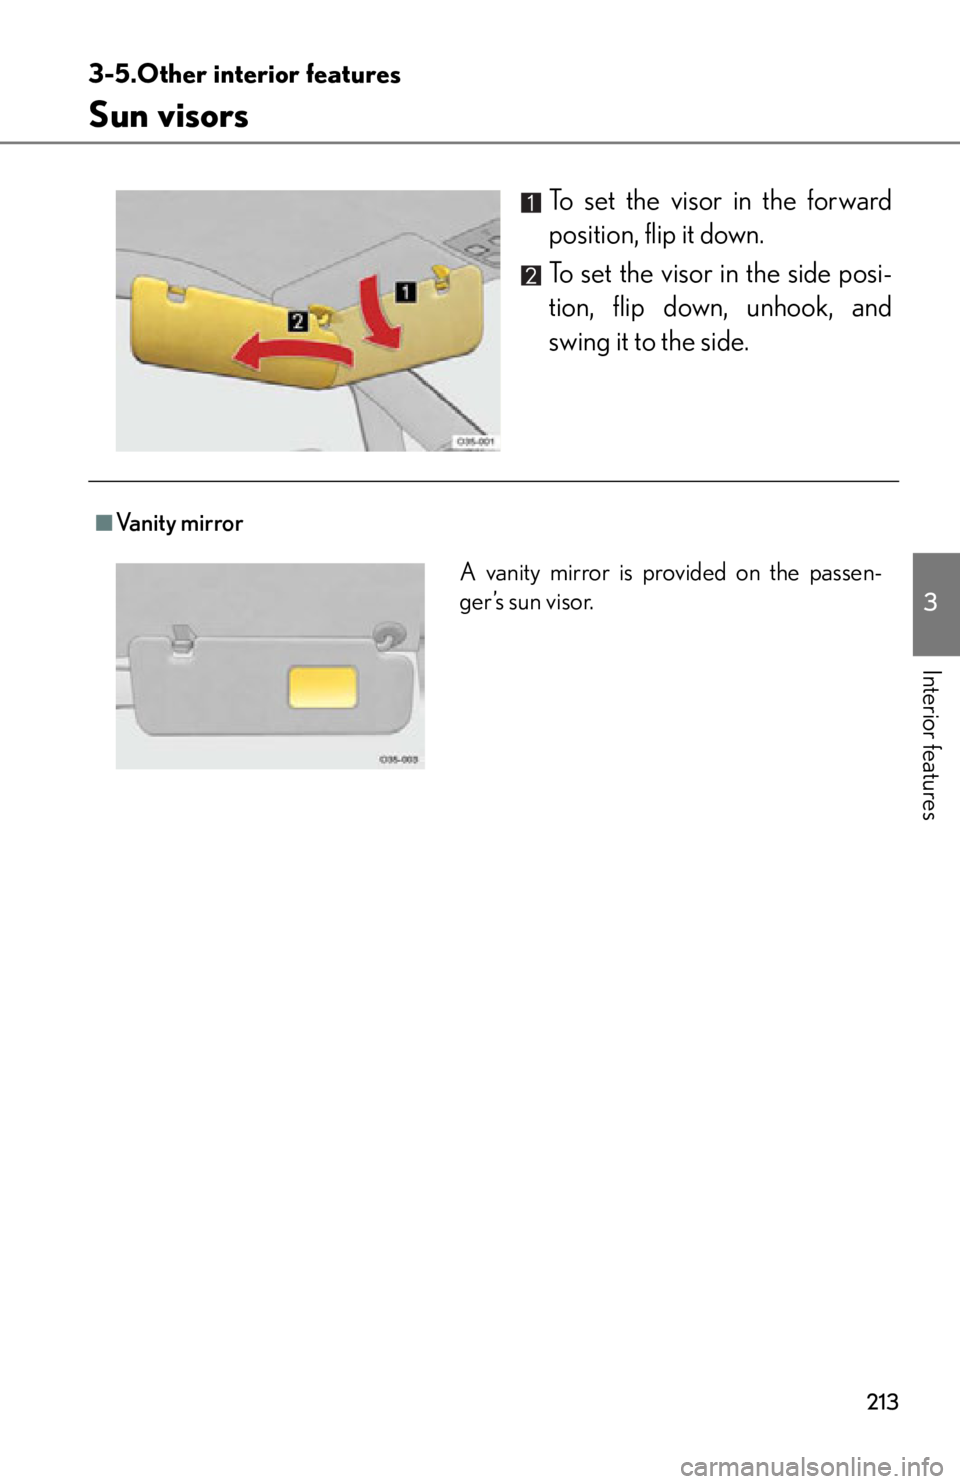
Sun visors
To set the visor in the forward
position, flip it down.
To set the visor in the side posi-
tion, flip down, unhook, and
swing it to the side.
■Va n i t y m i r r o r
A vanity mirror is provided on the passen-
ger’s sun visor.
Page 216 of 420
214
3-5. Other interior features
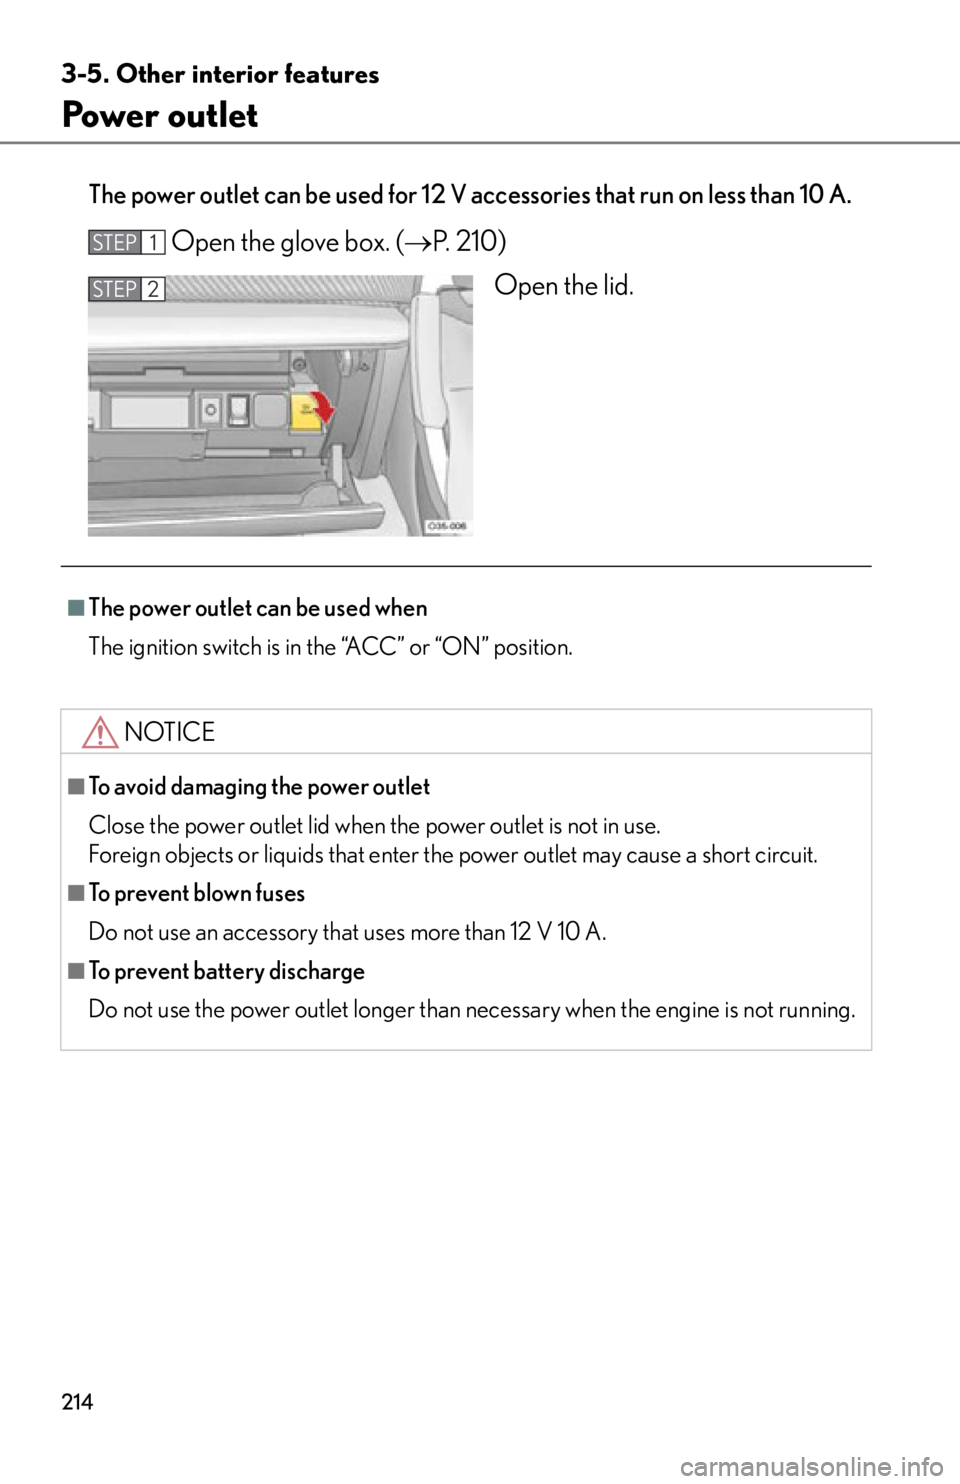
Power outlet
The power outlet can be used for 12 V accessories that run on less than 10 A.
Open the glove box. (P. 210)
Open the lid.STEP1
STEP2
■The power outlet can be used when
The ignition switch is in the “ACC” or “ON” position.
NOTICE
■To avoid damaging the power outlet
Close the power outlet lid when the power outlet is not in use.
Foreign objects or liquids that enter th e power outlet may cause a short circuit.
■To prevent blown fuses
Do not use an accessory that uses more than 12 V 10 A.
■To prevent battery discharge
Do not use the power outlet longer than necessary when the engine is not running.
Page 217 of 420
215
3-5. Other interior features
3
Interior features
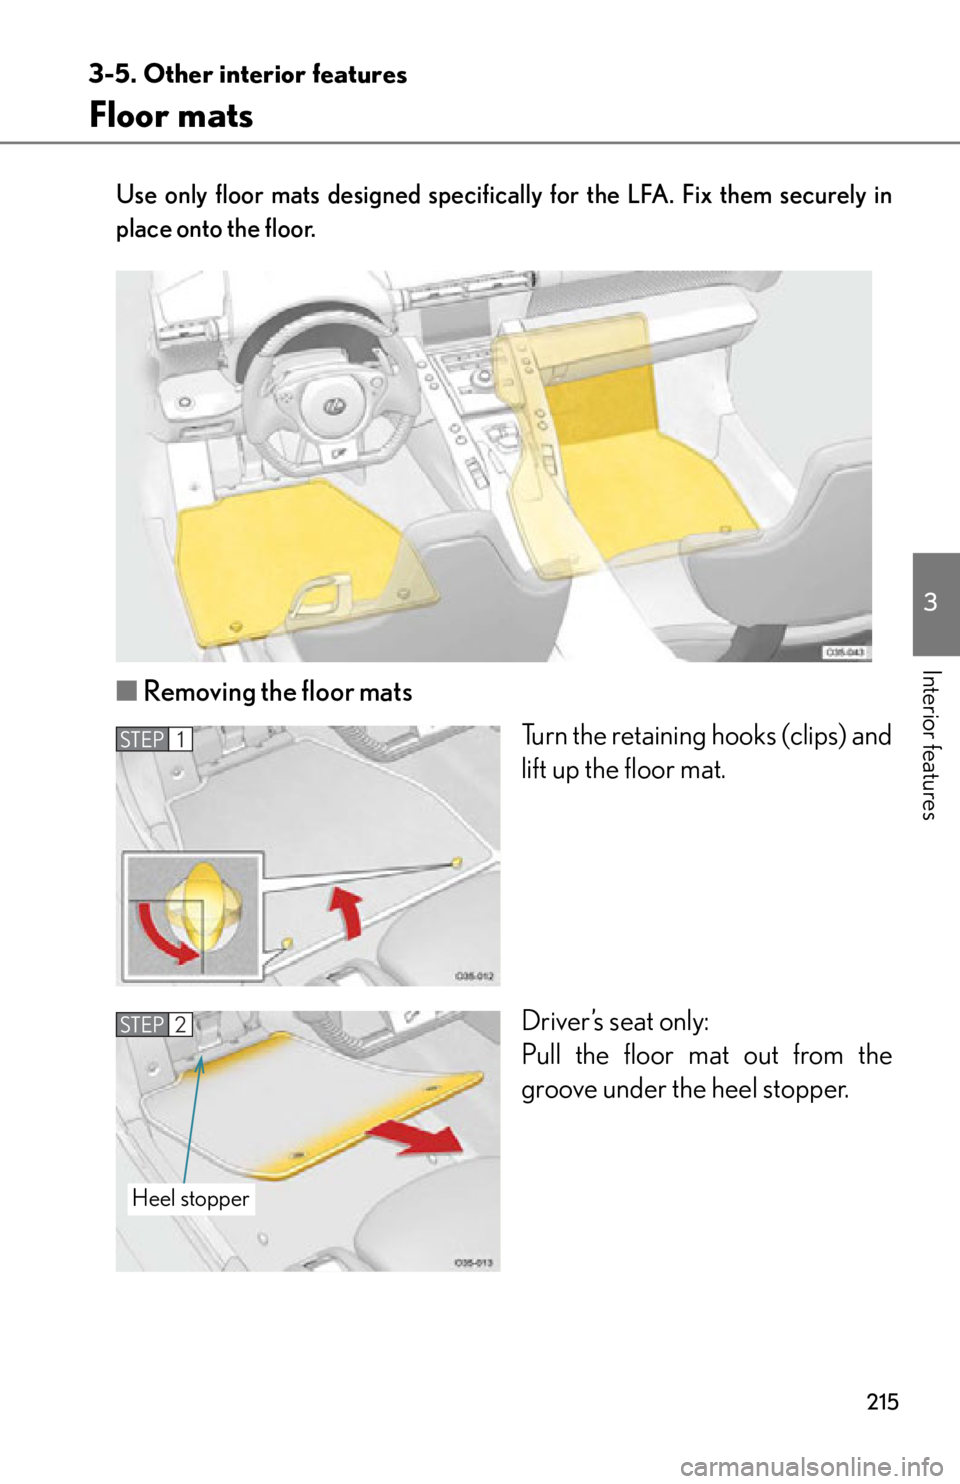
Floor mats
Use only floor mats designed specifically for the LFA. Fix them securely in
place onto the floor.
■Removing the floor mats
Turn the retaining hooks (clips) and
lift up the floor mat.
Driver’s seat only:
Pull the floor mat out from the
groove under the heel stopper.
STEP1
STEP2
Heel stopper
Page 218 of 420
216
3-5. Other interior features
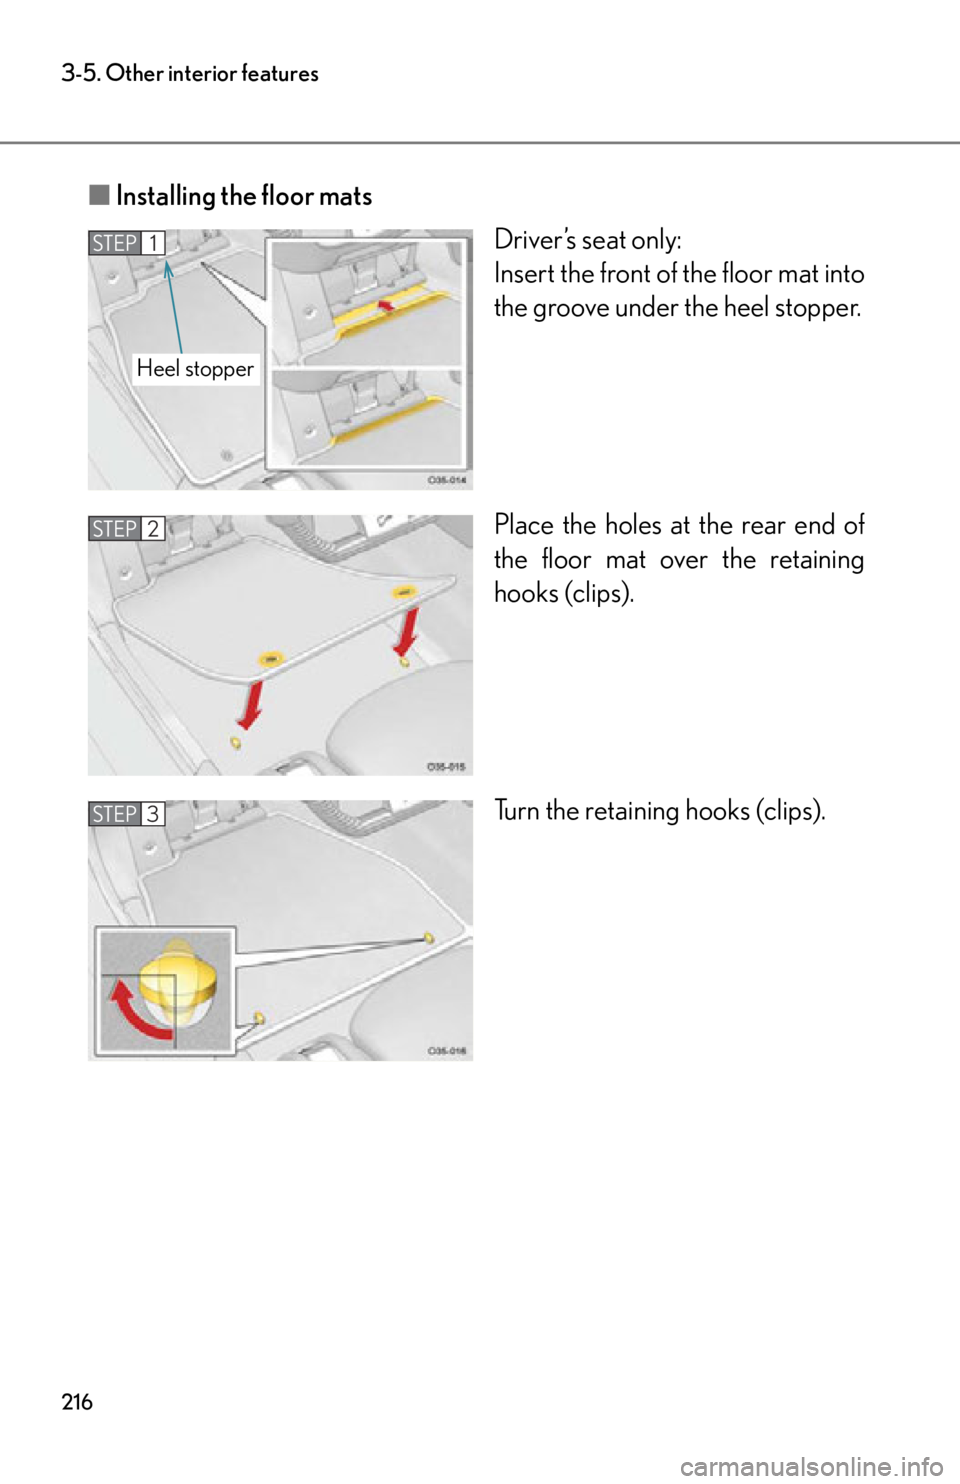
■Installing the floor mats
Driver’s seat only:
Insert the front of the floor mat into
the groove under the heel stopper.
Place the holes at the rear end of
the floor mat over the retaining
hooks (clips).
Turn the retaining hooks (clips).
STEP1
Heel stopper
STEP2
STEP3
Page 219 of 420
217
3-5. Other interior features
3
Interior features
CAUTION
Observe the following precautions.
Failure to do so may cause the driver's floor mat to slip, possibly interfering with the
pedals while driving. An unexpectedly high speed may result or it may become diffi-
cult to stop the vehicle, leading to a serious accident.
■When installing a floor mat on the driver's seat floor
●Only use floor mat designed for the driver's seat.
●Do not use floor mats designed for othe r models even if they are Lexus Genuine
floor mats.
●Insert the floor mat firmly into the groove under the heel stopper.
●Always install the floor mat securely using the retaining hooks (clips).
●Do not use two or more floor mats on top of each other.
●Do not place the floor mat bottom-side up or upside-down.
●Do not install the floor mat designed for the passenger's seat on the driver's seat
floor.
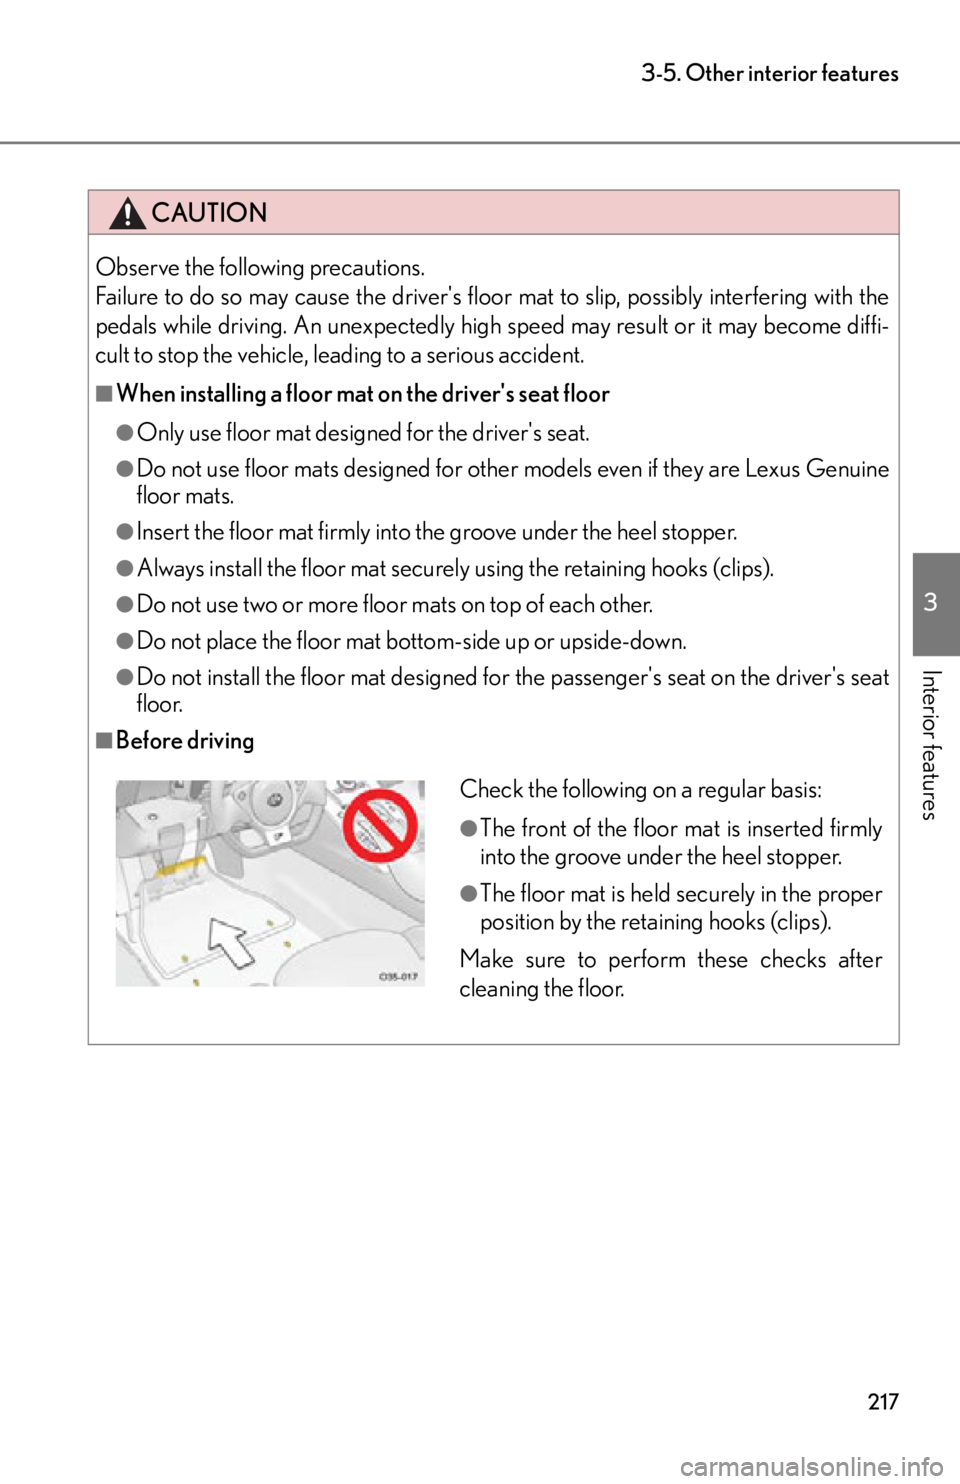
■Before driving
Check the following on a regular basis:
●The front of the floor mat is inserted firmly
into the groove under the heel stopper.
●The floor mat is held securely in the proper
position by the retaining hooks (clips).
Make sure to perform these checks after
cleaning the floor.
Page 220 of 420
218
3-5. Other interior features
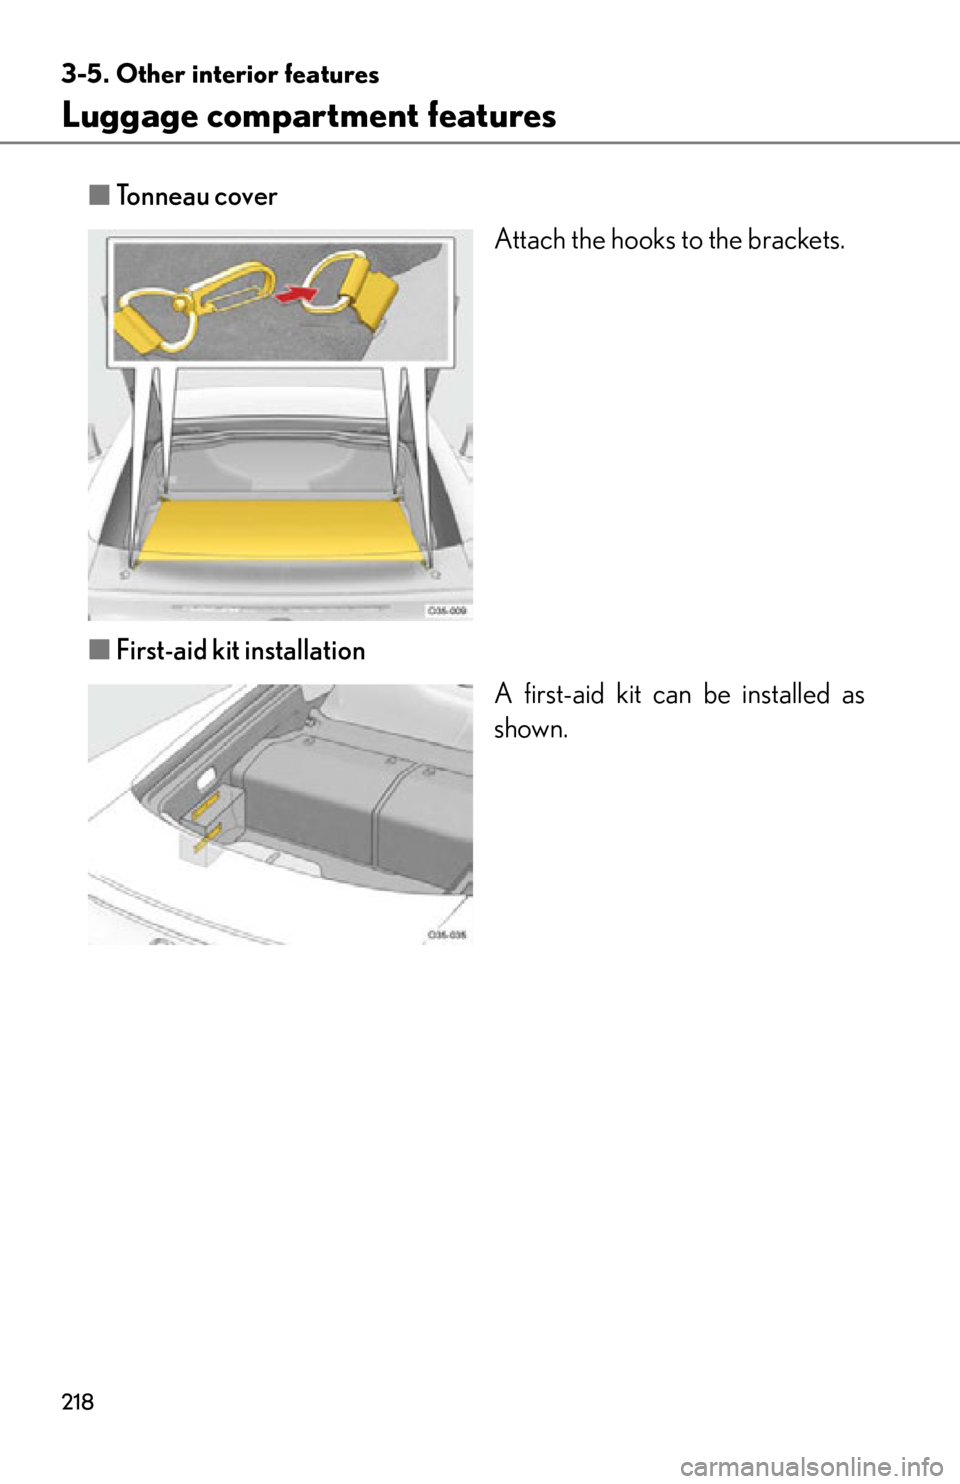
Luggage compartment features
■Tonneau cover
Attach the hooks to the brackets.
■ First-aid kit installation
A first-aid kit can be installed as
shown.
Trending: gearbox, fuel pressure, sport mode, seats, check oil, low beam, clutch
