lexus LFA 2012 Owner's Manual / LEXUS 2012 LFA (OM77006U) Manual Online
Manufacturer: LEXUS, Model Year: 2012,
Model line: LFA,
Model: Lexus LFA 2012
Pages: 420, PDF Size: 5.02 MB
lexus LFA 2012 Owner's Manual / LEXUS 2012 LFA (OM77006U) Manual Online
LFA 2012
Lexus
Lexus
https://www.carmanualsonline.info/img/36/30114/w960_30114-0.png
lexus LFA 2012 Owner's Manual / LEXUS 2012 LFA (OM77006U) Manual Online
Trending: warning, manual radio set, remote control, change wheel, checking oil, interior lights, spare tire
Page 81 of 420
79
1-7. Safety information
1
Before driving
CAUTION
■Child restraint lock function belt precaution
Do not allow children to play with the child restraint lock function belt. If the belt
becomes twisted around a child’s neck, it will not be possible to pull the belt out
leading to choking or other serious in juries that could result in death.
If this occurs and the buckle cannot be un fastened, scissors should be used to cut
the belt behind the seat belt guide.
■When the child restraint system is not in use
●Keep the child restraint system properly secu red on the seat even if it is not in use.
Do not store the restraint unsecured in the passenger compartment.
●If it is necessary to detach the child restraint system, remove it from the vehicle.
This will prevent it from injuring occupa nts in the event of a sudden stop, sudden
swerve or an accident.
Page 82 of 420
80
1-7. Safety information
Installing child restraints
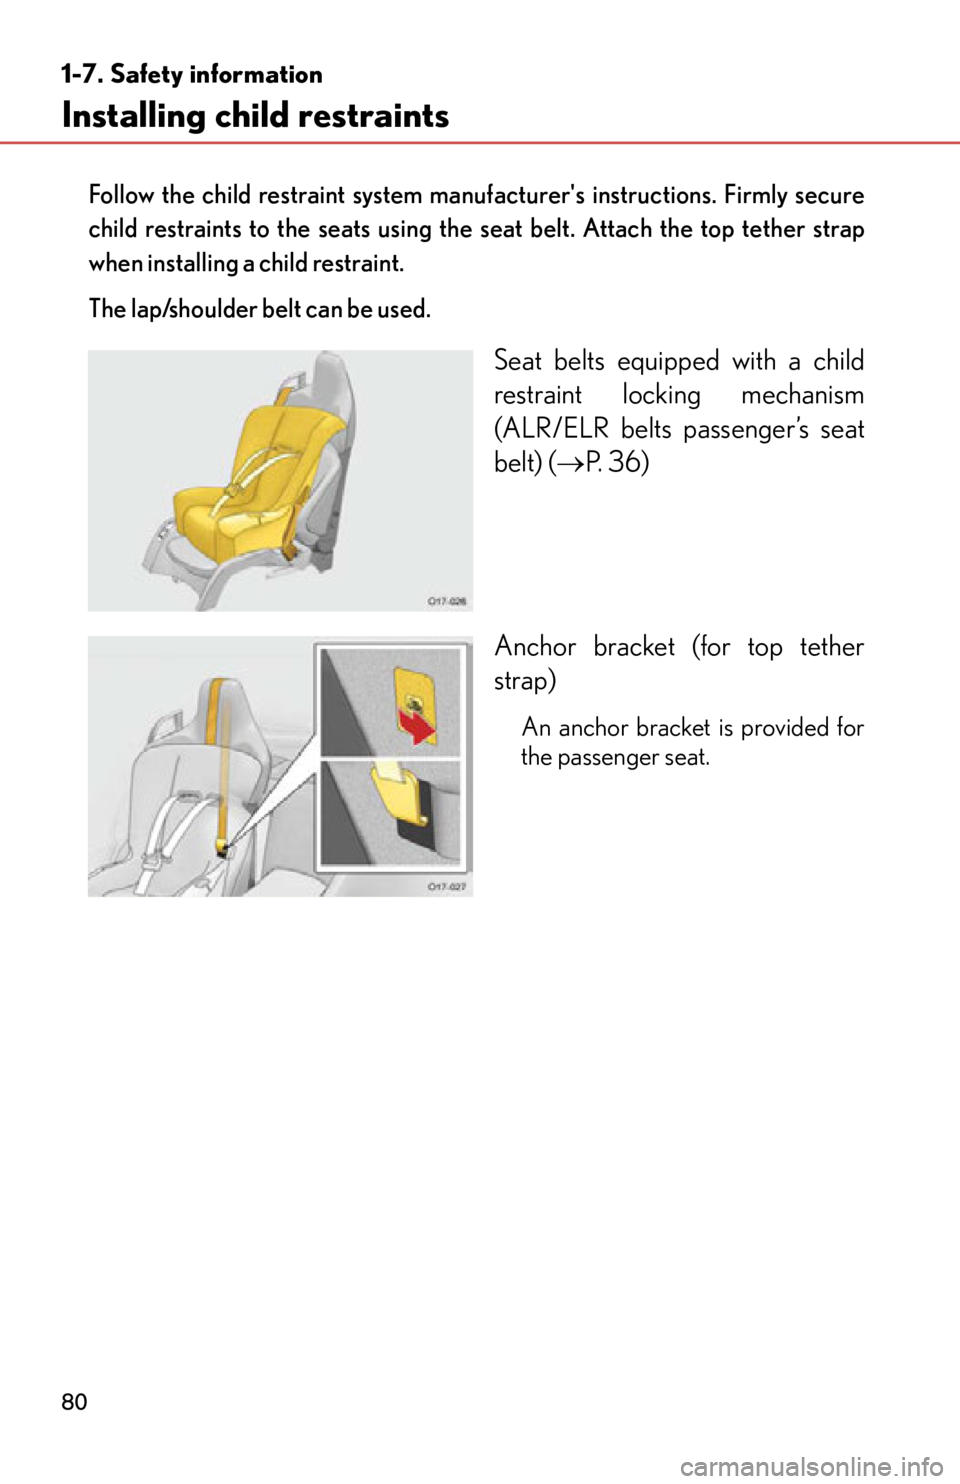
Follow the child restraint system manufacturer's instructions. Firmly secure
child restraints to the seats using the seat belt. Attach the top tether strap
when installing a child restraint.
The lap/shoulder belt can be used.
Seat belts equipped with a child
restraint locking mechanism
(ALR/ELR belts passenger’s seat
belt) ( P. 36)
Anchor bracket (for top tether
strap)
An anchor bracket is provided for
the passenger seat.
Page 83 of 420
81
1-7. Safety information
1
Before driving
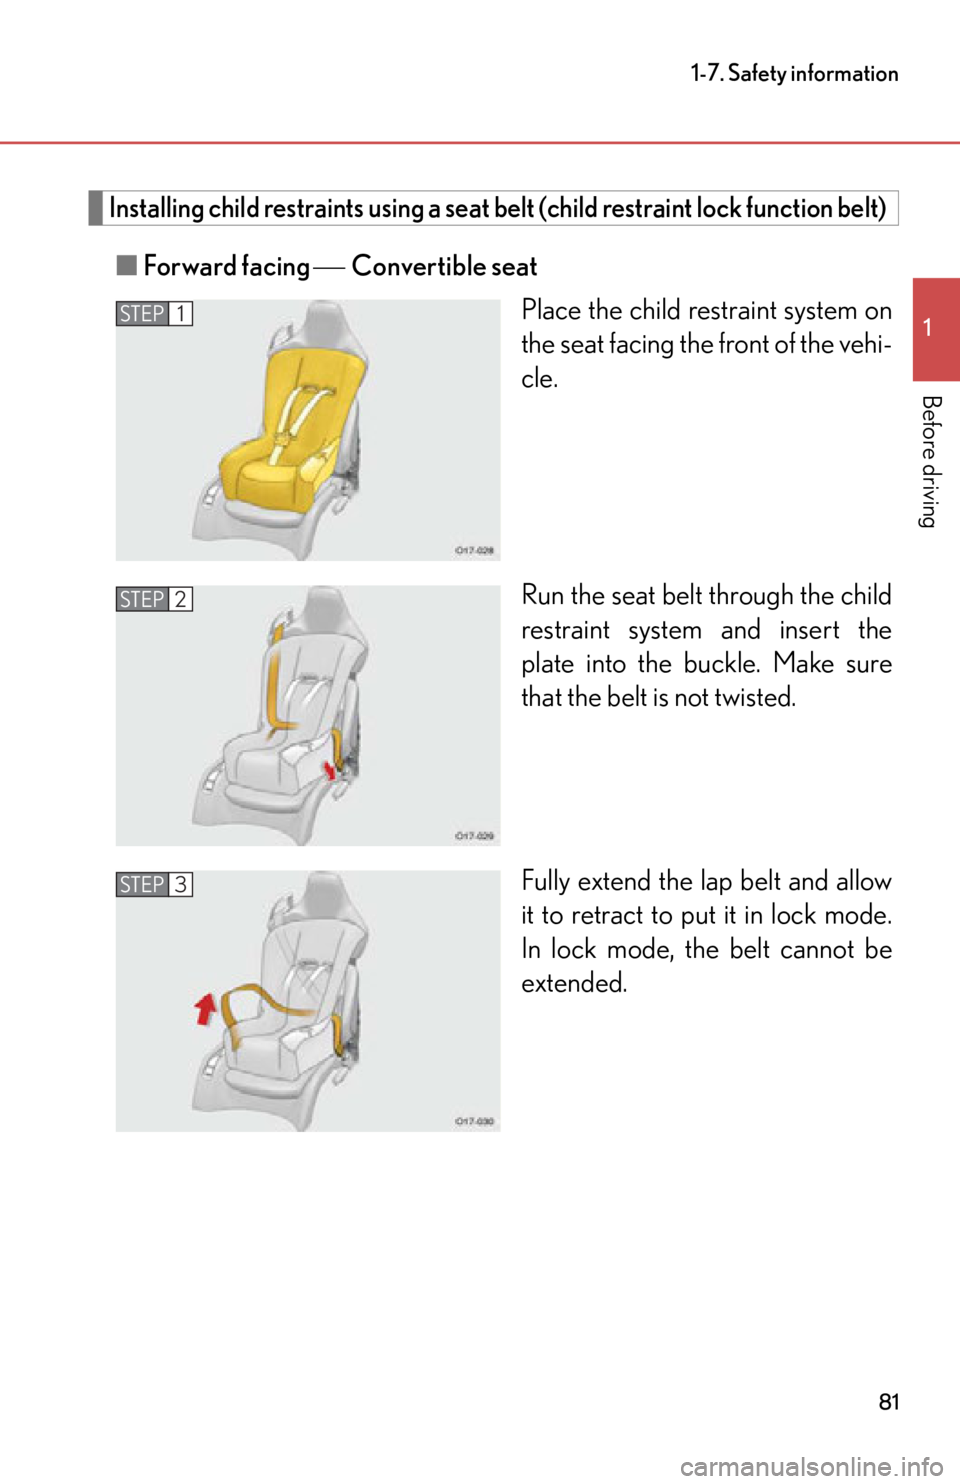
Installing child restraints using a seat belt (child restraint lock function belt)
■Forward facing Convertible seat
Place the child restraint system on
the seat facing the front of the vehi-
cle.
Run the seat belt through the child
restraint system and insert the
plate into the buckle. Make sure
that the belt is not twisted.
Fully extend the lap belt and allow
it to retract to put it in lock mode.
In lock mode, th e belt cannot be
extended.
STEP1
STEP2
STEP3
Page 84 of 420
82
1-7. Safety information
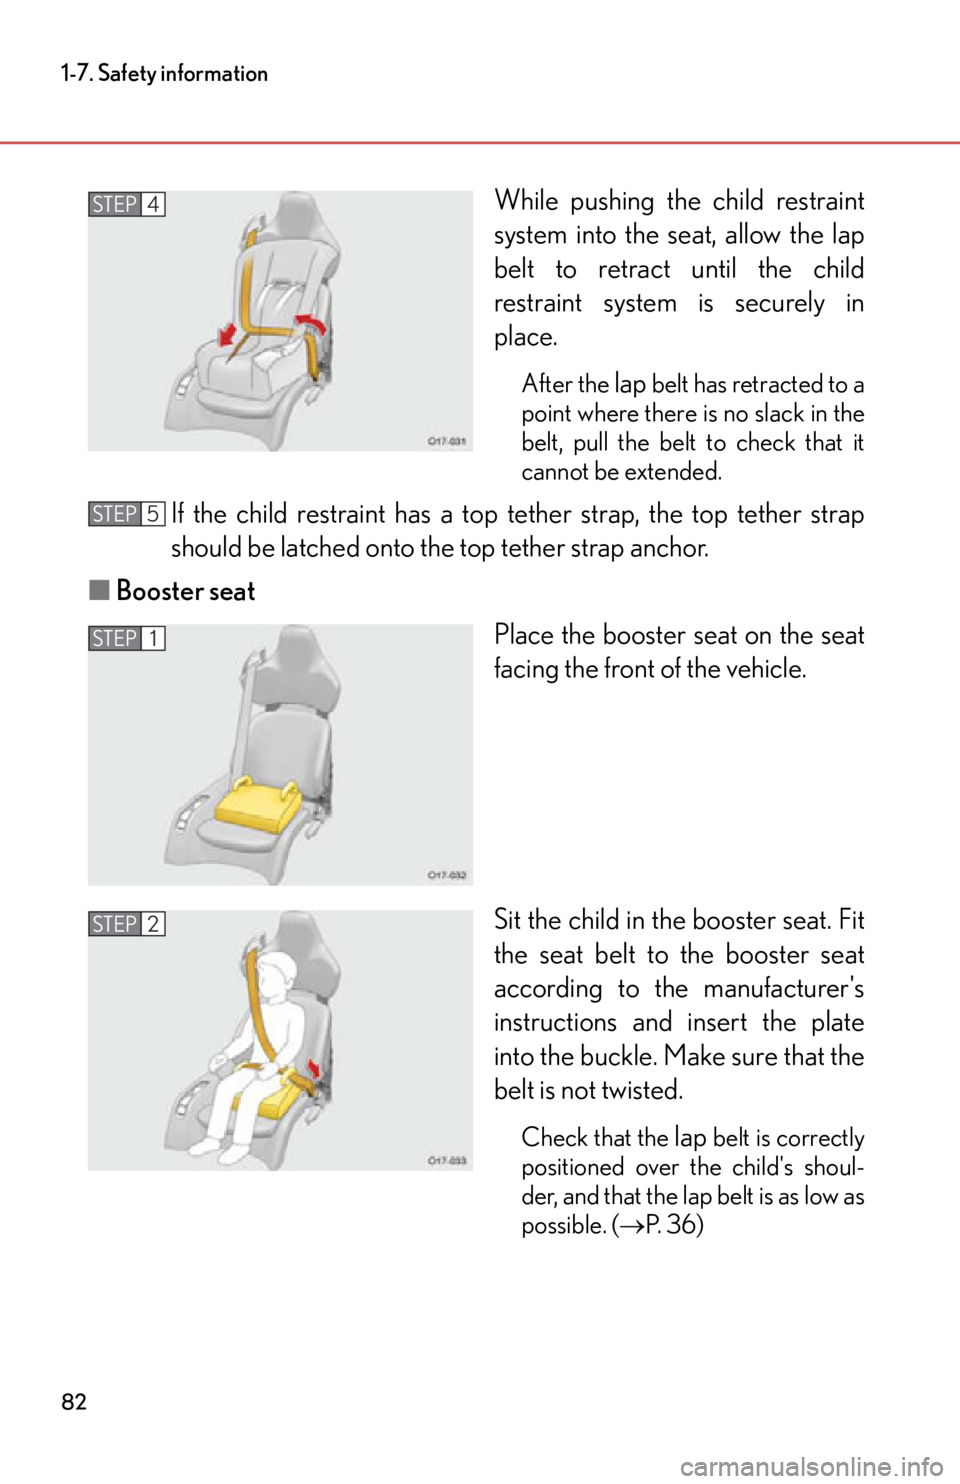
While pushing the child restraint
system into the seat, allow the lap
belt to retract until the child
restraint system is securely in
place.
After the lap belt has retracted to a
point where there is no slack in the
belt, pull the belt to check that it
cannot be extended.
If the child restraint has a top tether strap, the top tether strap
should be latched onto the top tether strap anchor.
■ Booster seat
Place the booster seat on the seat
facing the front of the vehicle.
Sit the child in the booster seat. Fit
the seat belt to the booster seat
according to the manufacturer's
instructions and insert the plate
into the buckle. Make sure that the
belt is not twisted.
Check that the lap belt is correctly
positioned over the child's shoul-
der, and that the lap belt is as low as
possible. ( P. 3 6 )
STEP4
STEP5
STEP1
STEP2
Page 85 of 420
83
1-7. Safety information
1
Before driving
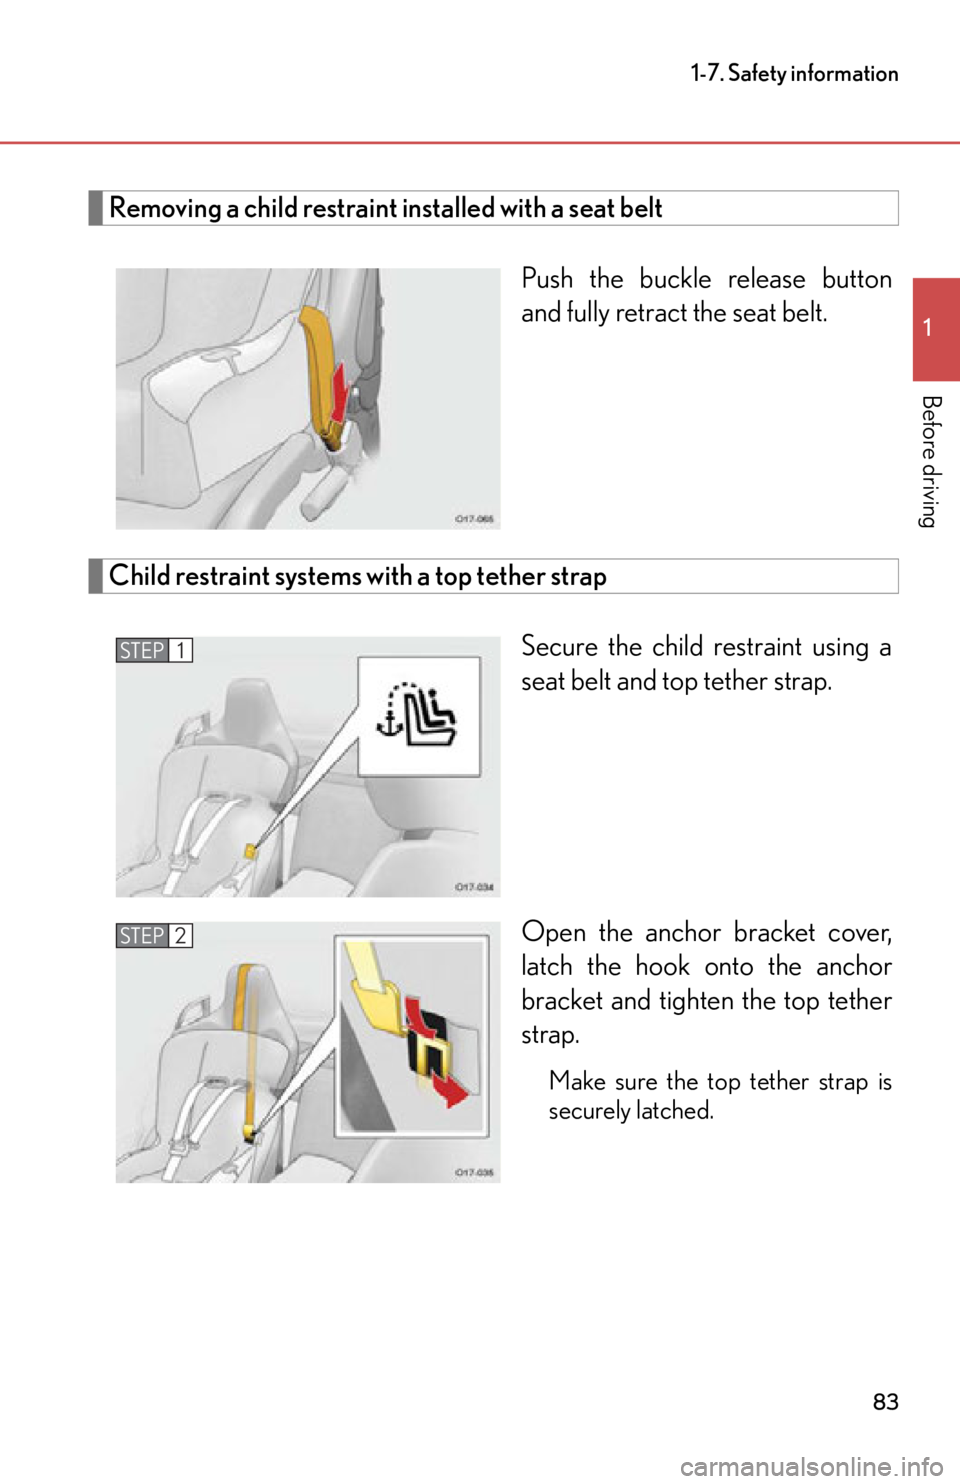
Removing a child restraint installed with a seat beltPush the buckle release button
and fully retract the seat belt.
Child restraint systems with a top tether strapSecure the child restraint using a
seat belt and top tether strap.
Open the anchor bracket cover,
latch the hook onto the anchor
bracket and tighten the top tether
strap.
Make sure the top tether strap is
securely latched.
STEP1
STEP2
Page 86 of 420
84
1-7. Safety information
■Laws and regulations pertaining to anchorages
Child restraint systems conforming to FMVSS213 or CMVSS213 specifications
can be used.
This vehicle is designed to conform to the SAE J1819.
CAUTION
■When installing a booster seat
To prevent the belt from going into ALR lo ck mode, do not fully extend the lap belt.
ALR mode causes the belt to tighten only. This could cause injury or discomfort to
the child. ( P. 3 8 )
■When installing a child restraint system
Follow the directions given in the child restraint system installation manual and fix
the child restraint system securely in place.
If the child restraint system is not correctl y fixed in place, the child or driver may be
seriously injured or even killed in the ev ent of sudden braking, sudden swerving or
an accident.
●When a booster seat is installed, always ensure that the shoulder belt is posi-
tioned across the center of the child's shoulder. The belt should be kept away
from the child's neck, but not so that it could fall off the child's shoulder. Failing to
do so may result in death or serious inju ry in the event of sudden braking, sudden
swerving or an accident.
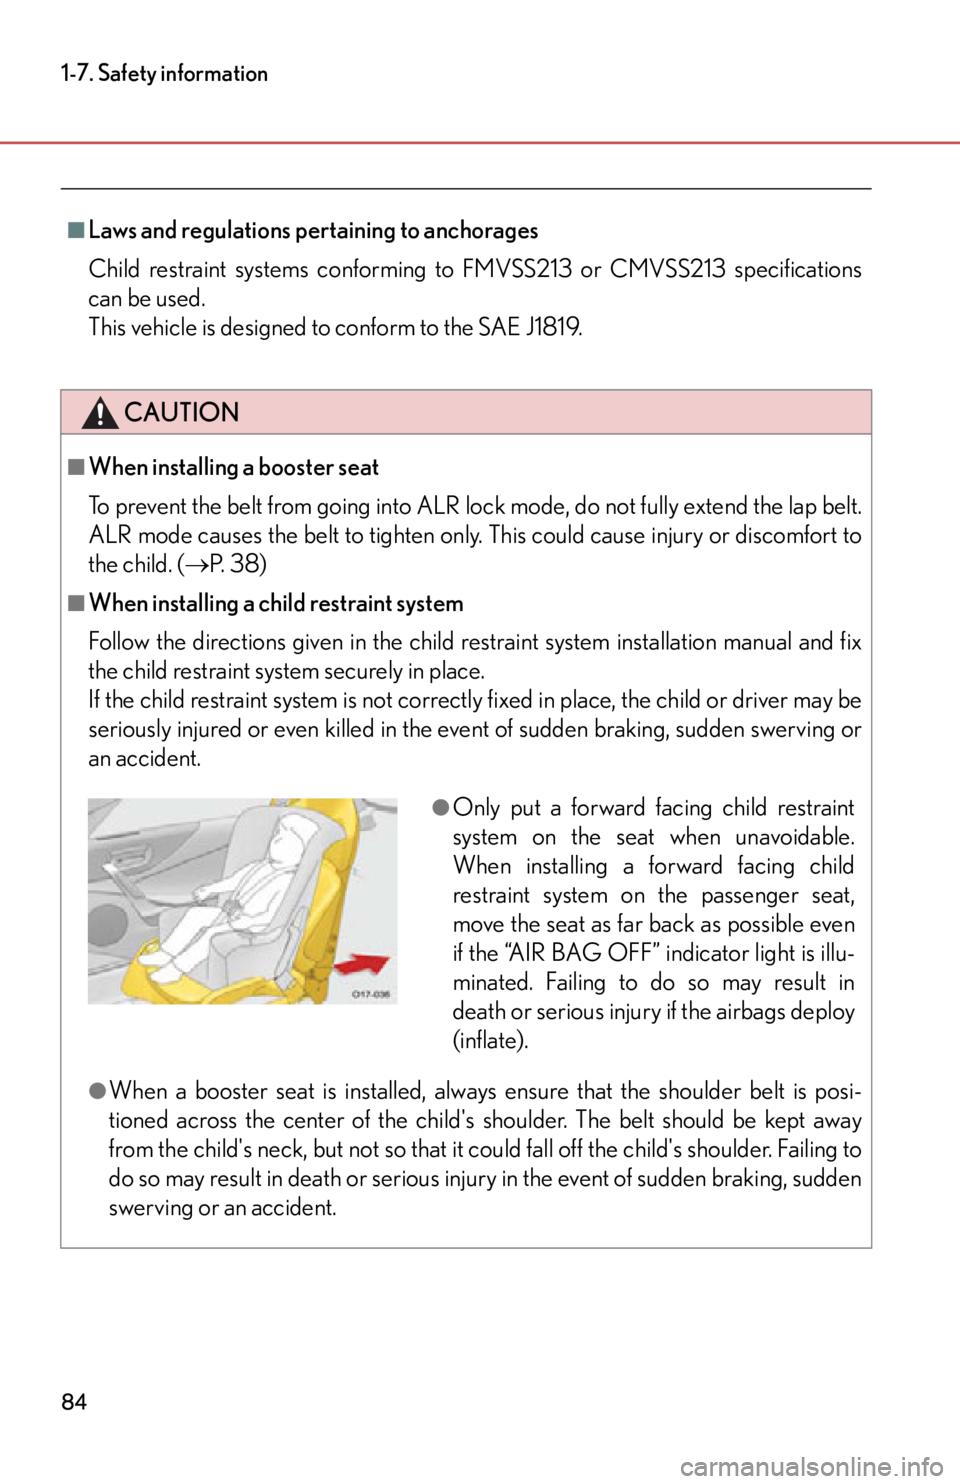
●Only put a forward facing child restraint
system on the seat when unavoidable.
When installing a forward facing child
restraint system on the passenger seat,
move the seat as far back as possible even
if the “AIR BAG OFF” in dicator light is illu-
minated. Failing to do so may result in
death or serious injury if the airbags deploy
(inflate).
Page 87 of 420
85
1-7. Safety information
1
Before driving
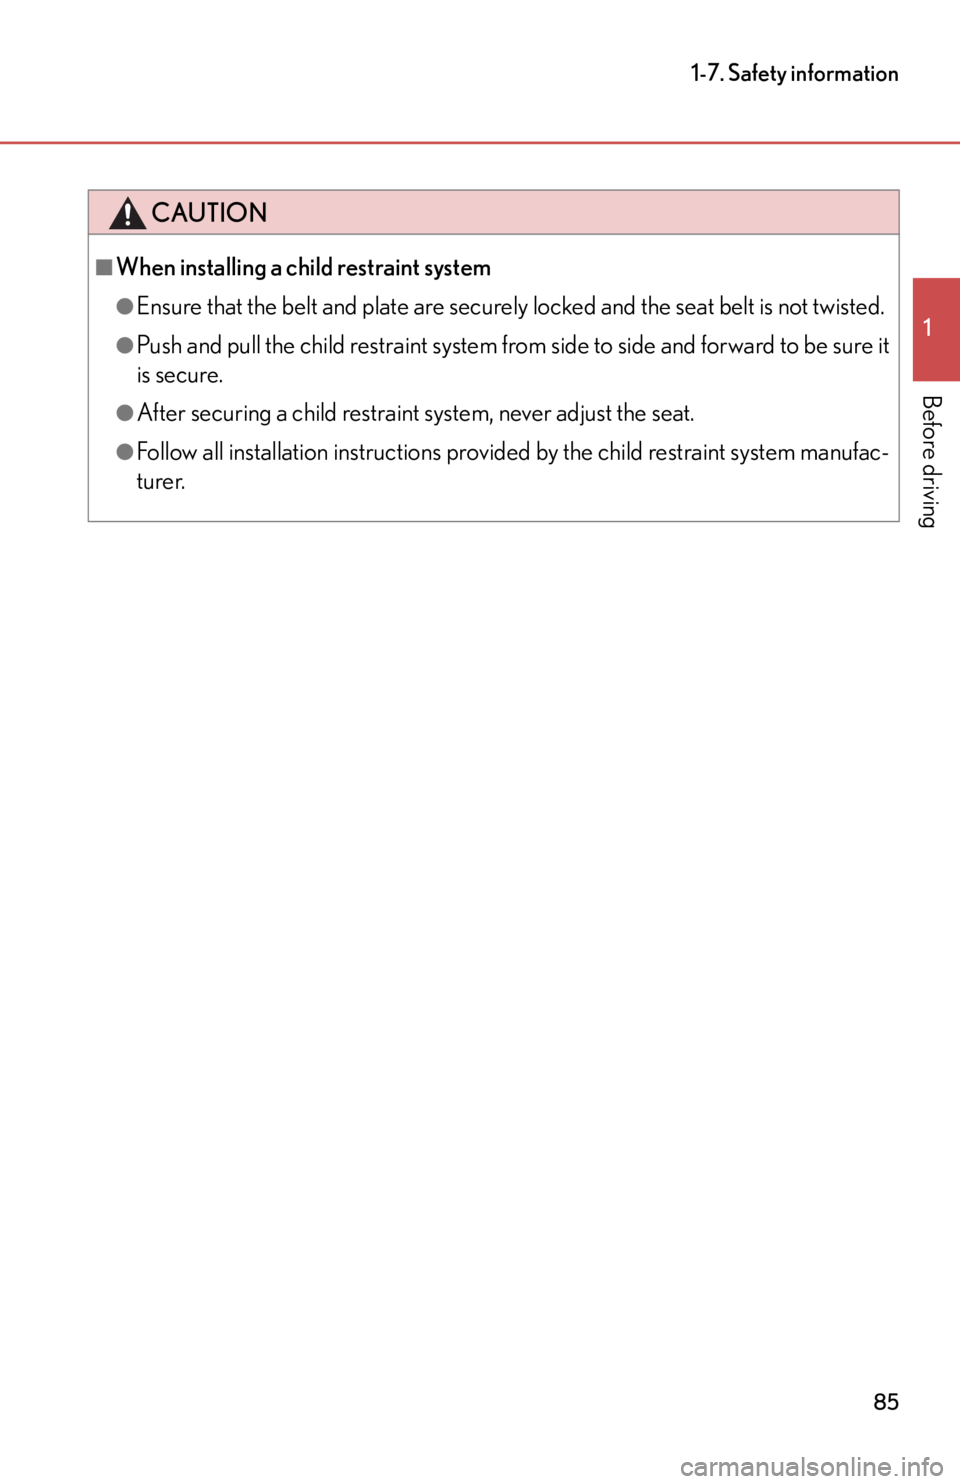
CAUTION
■When installing a child restraint system
●Ensure that the belt and plate are securely locked and the seat belt is not twisted.
●Push and pull the child restraint system from side to side and forward to be sure it
is secure.
●After securing a child restraint system, never adjust the seat.
●Follow all installation instructions provid ed by the child restraint system manufac-
turer.
Page 88 of 420
86
1-7. Safety information
Page 89 of 420

When driving2
87
2-1. Driving proceduresDriving the vehicle................... 88
Ignition switch ........................... 98
ASG (Automated Sequential Gearbox) .......... 102
Turn signal lever ........................ 112
Parking brake ............................ 113
Horn ............................................. 115
2-2. Instrument cluster Gauges and meters ................. 116
Indicators and warning lights .......................................... 121
Using the menu........................ 124
2-3. Operating the lights and windshield wipers
Headlight switch...................... 158
Windshield wipers and washer ..................................... 160 2-4. Using other driving
systems
Rear view monitor system .... 163
Driving assist systems ............ 166
Active rear wing ........................ 171
Launch control.......................... 174
2-5. Driving information Cargo and luggage ................. 176
Vehicle load limits .................... 179
Winter driving tips .................. 180
Trailer towing ........................... 182
Dinghy towing .......................... 183
Page 90 of 420
88
2-1.Driving procedures
Driving the vehicle
The following procedures should be observed to ensure safe driving:
■Starting the engine
P. 9 8
■ Driving
With the brake pedal depressed, select 1st gear. ( P. 1 0 2 )
Check that “D1” or “1” is displayed on the gear indicator.
Release the parking brake. ( P. 113)
Gradually release the brake pedal and gently depress the accel-
erator pedal to accelerate the vehicle.
■ Stopping
Depress the brake pedal.
If necessary, set the parking brake.
If the vehicle is to be stopped for an extended period of time, select
Neutral. ( P. 1 0 3 )
■Parking the vehicle
Depress the brake pedal.
Set the parking brake. ( P. 113)
Select 1st gear or Reverse. ( P. 1 0 2 )
Check that “D1”, “1” or “R” is displayed on the gear indicator.
Turn the ignition switch to the “LOCK” position to stop the
engine.
Check that “D1” or “R” is no long er displayed on the gear indicator.
Lock the door, making sure that you have the key on your person.
STEP1
STEP2
STEP3
STEP1
STEP2
STEP1
STEP2
STEP3
STEP4
STEP5
Trending: four wheel drive, radiator, roof rack, height, spark plugs, window, weight
