LEXUS LS430 2003 Factory User Guide
LS430 2003
LEXUS
LEXUS
https://www.carmanualsonline.info/img/36/57050/w960_57050-0.png
LEXUS LS430 2003 Factory User Guide
Page 3876 of 4500
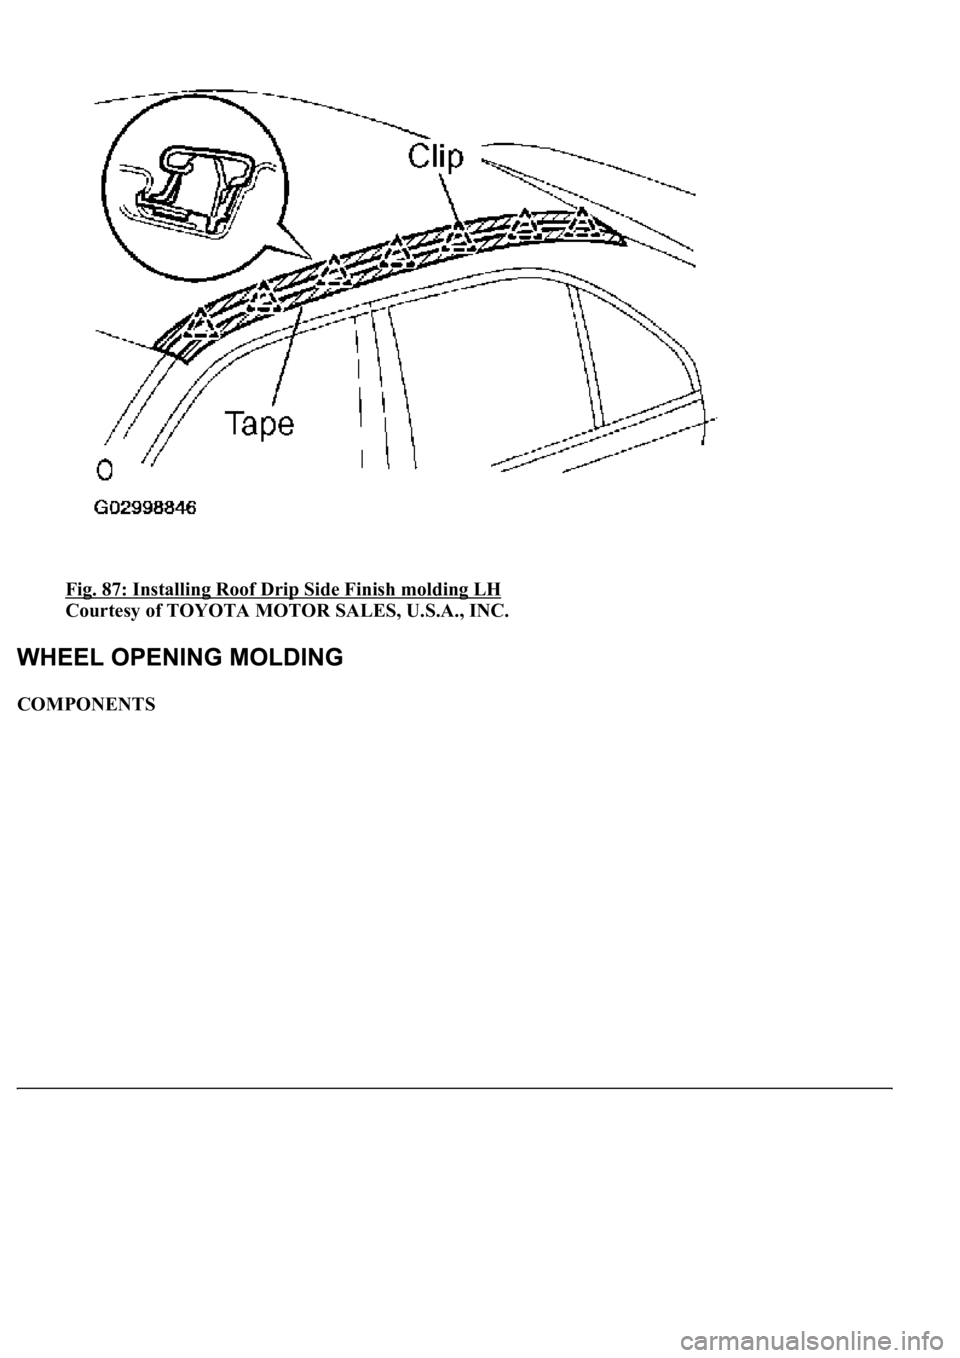
Fig. 87: Installing Roof Drip Side Finish molding LH
Courtesy of TOYOTA MOTOR SALES, U.S.A., INC.
COMPONENTS
Page 3889 of 4500
1.REMOVE PACKAGE TRAY TRIM PANEL ASSY (See REPLACEMENT )
a. Remove the rear door scuff plate LH and RH.
b. Remove the rear door opening trim weatherstrip LH and RH.
c. Remove the rear seat side cover LH and RH.
d. Remove the roof side garnish inner LH and RH.
e. Remove the rear speaker grille.
f. Remove the package tray trim panel.
2.REMOVE PACKAGE TRAY TRIM PANEL ASSY NO. 2 (See REPLACEMENT
)
a. Remove the center stop lamp.
b. Remove the package tray trim panel.
3.REMOVE REAR SUNSHADE
a. Disconnect the connector.
b. Remove the 6 bolts.
c. Remove the sunshade.
Fig. 100: Removing Rear Sunshade
Page 3890 of 4500
Courtesy of TOYOTA MOTOR SALES, U.S.A., INC.
COMPONENTS
Fig. 101: Exploded View Of Roof Headlining Assy
Page 3891 of 4500
Courtesy of TOYOTA MOTOR SALES, U.S.A., INC.
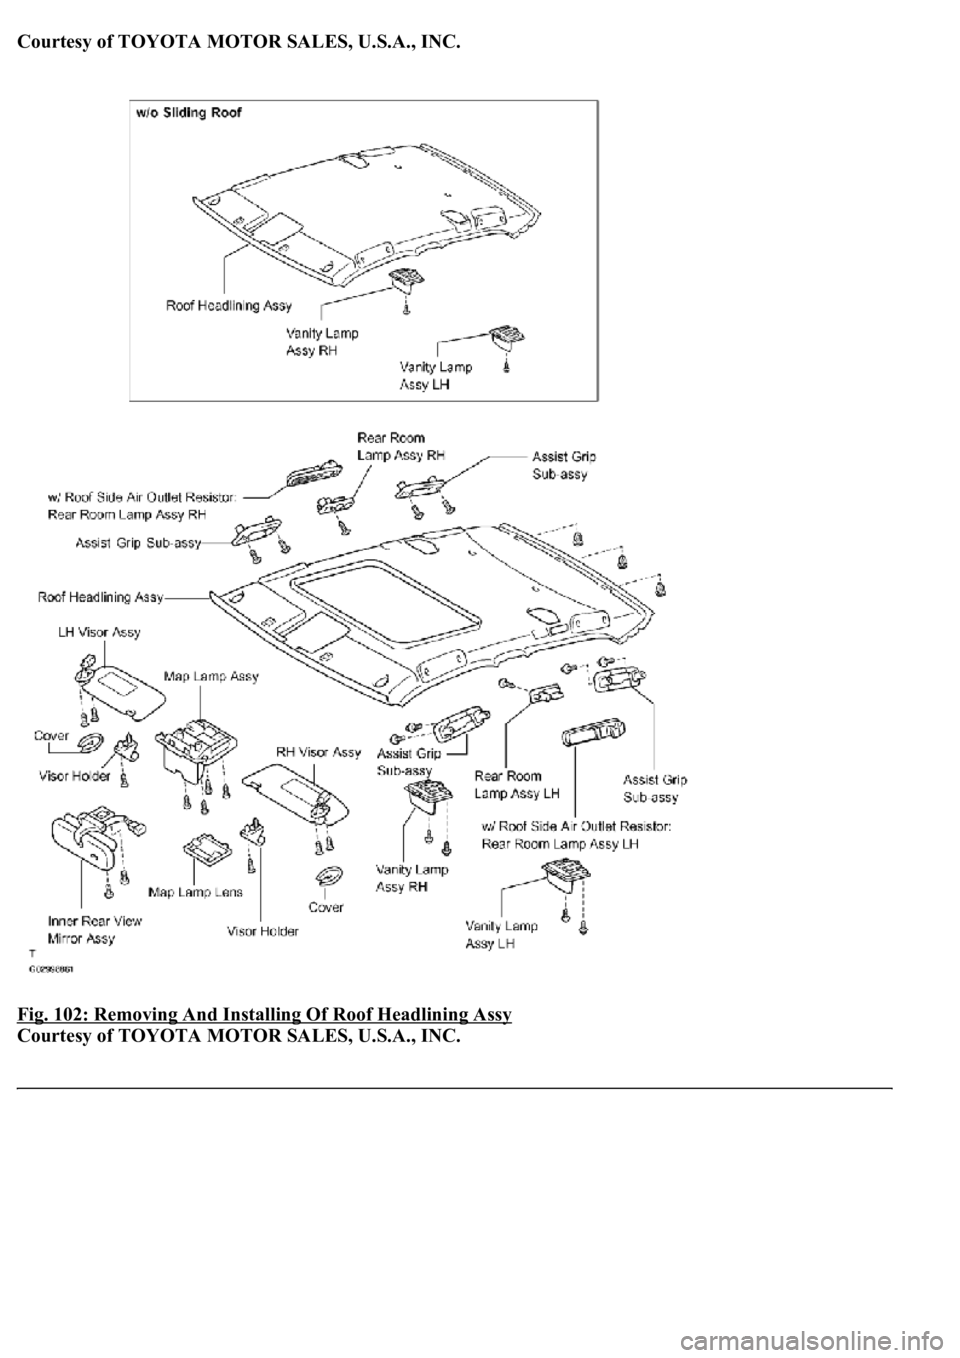
Fig. 102: Removing And Installing Of Roof Headlining Assy
Courtesy of TOYOTA MOTOR SALES, U.S.A., INC.
Page 3896 of 4500
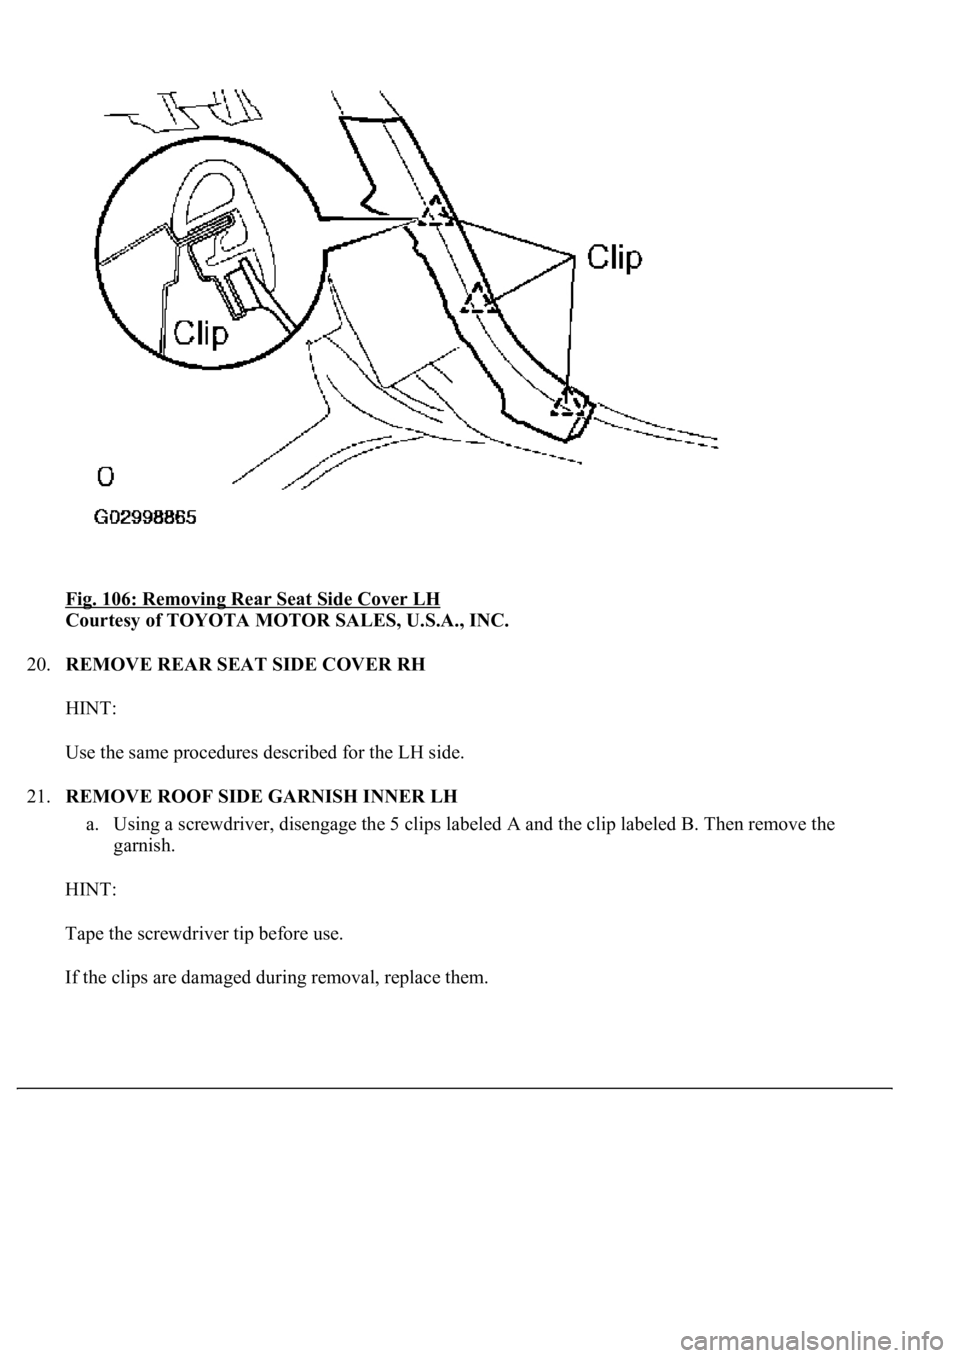
Fig. 106: Removing Rear Seat Side Cover LH
Courtesy of TOYOTA MOTOR SALES, U.S.A., INC.
20.REMOVE REAR SEAT SIDE COVER RH
HINT:
Use the same procedures described for the LH side.
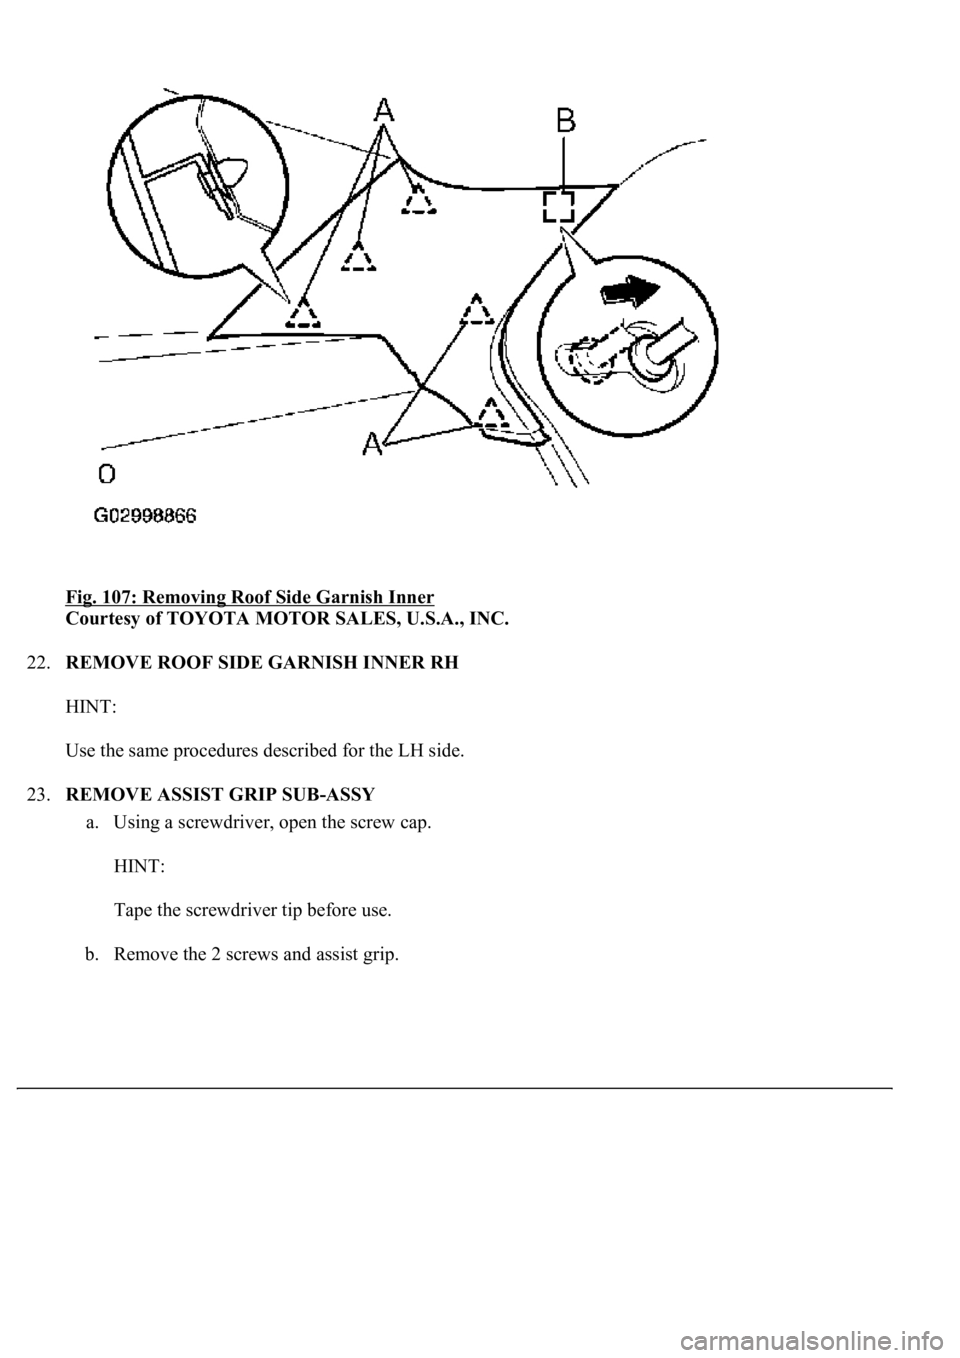
21.REMOVE ROOF SIDE GARNISH INNER LH
a. Using a screwdriver, disengage the 5 clips labeled A and the clip labeled B. Then remove the
garnish.
HINT:
Tape the screwdriver tip before use.
If the clips are dama
ged during removal, replace them.
Page 3897 of 4500
Fig. 107: Removing Roof Side Garnish Inner
Courtesy of TOYOTA MOTOR SALES, U.S.A., INC.
22.REMOVE ROOF SIDE GARNISH INNER RH
HINT:
Use the same procedures described for the LH side.
23.REMOVE ASSIST GRIP SUB-ASSY
a. Using a screwdriver, open the screw cap.
HINT:
Tape the screwdriver tip before use.
b. Remove the 2 screws and assist grip.
Page 3907 of 4500
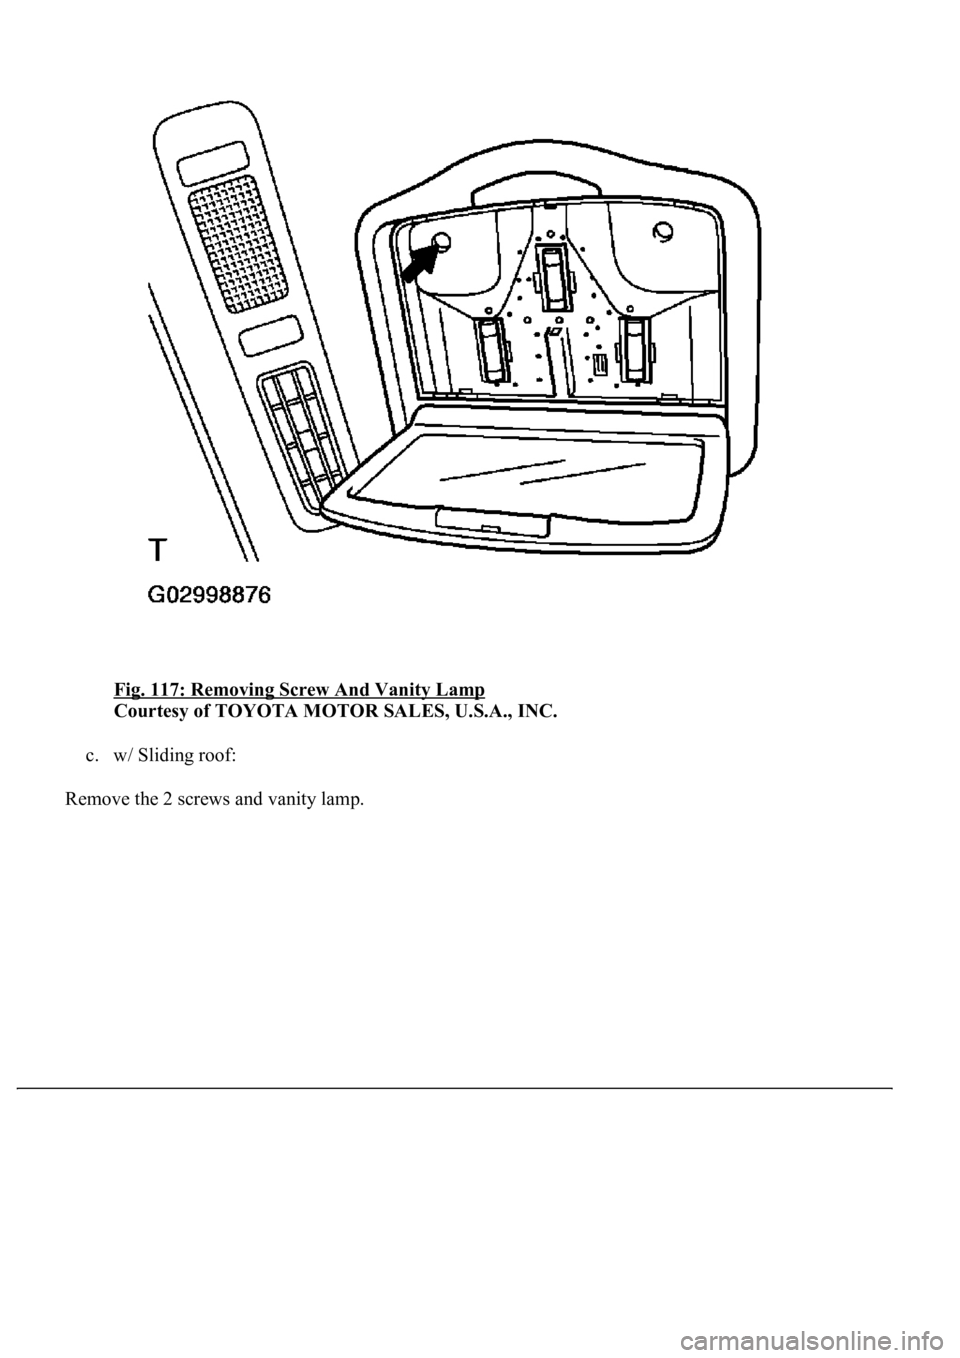
Fig. 117: Removing Screw And Vanity Lamp
Courtesy of TOYOTA MOTOR SALES, U.S.A., INC.
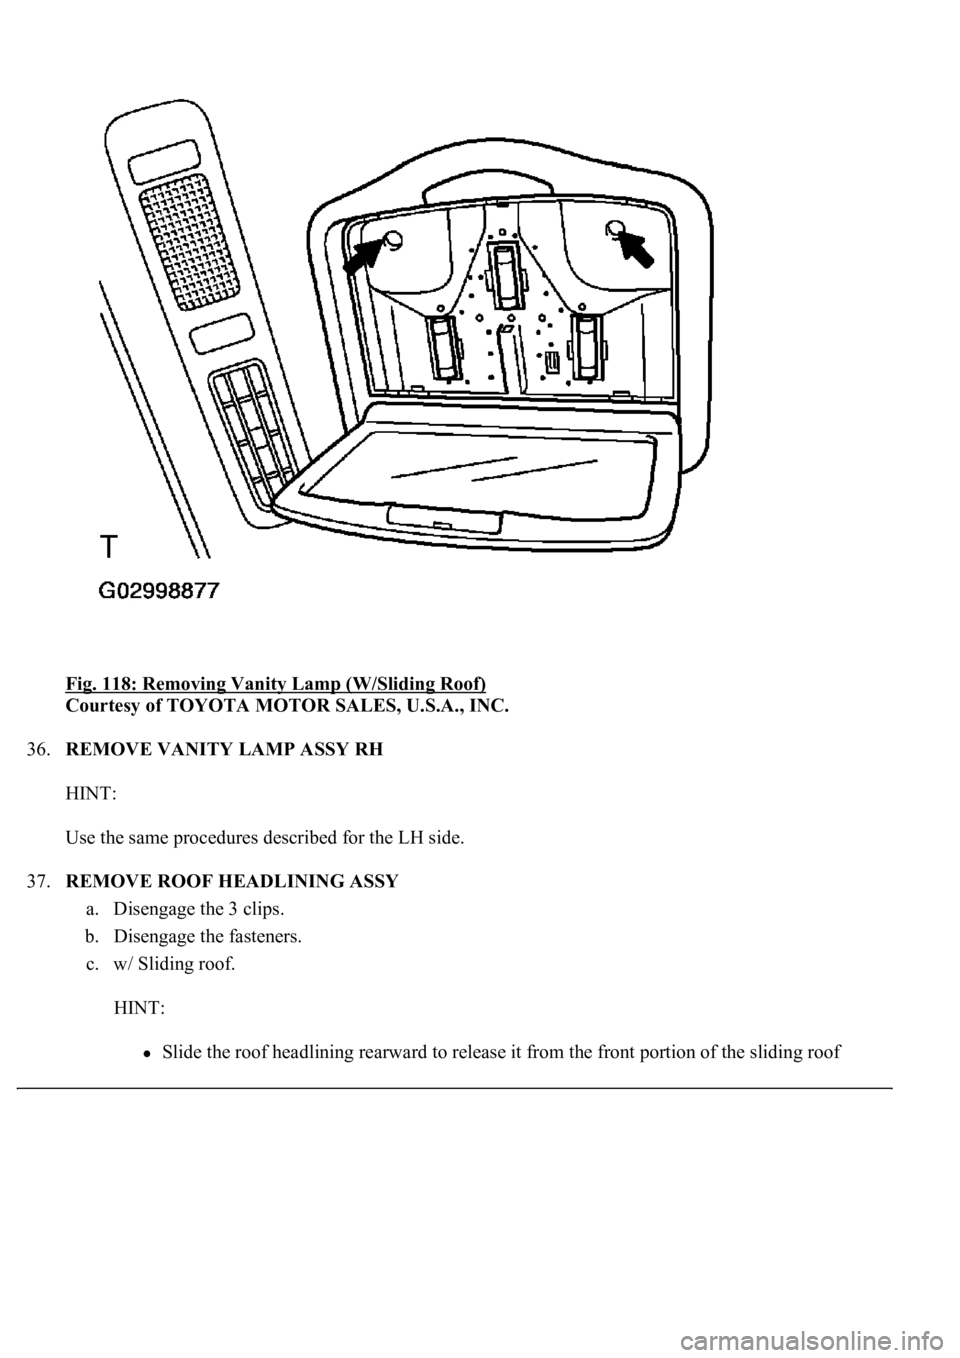
c. w/ Sliding roof:
Remove the 2 screws and vanit
y lamp.
Page 3908 of 4500
Fig. 118: Removing Vanity Lamp (W/Sliding Roof)
Courtesy of TOYOTA MOTOR SALES, U.S.A., INC.
36.REMOVE VANITY LAMP ASSY RH
HINT:
Use the same procedures described for the LH side.
37.REMOVE ROOF HEADLINING ASSY
a. Disengage the 3 clips.
b. Disengage the fasteners.
c. w/ Sliding roof.
HINT:
Slide the roof headlining rearward to release it from the front portion of the sliding roof
Page 3909 of 4500
housing.
Slide the roof headlining forward to release it from the rear portion of the sliding roof
housing.
d. Pull the roof headlinin
g down to remove it.
Page 3910 of 4500
Fig. 119: Removing Roof Headlining Assy
Courtesy of TOYOTA MOTOR SALES, U.S.A., INC.