LEXUS LS430 2003 Factory Repair Manual
LS430 2003
LEXUS
LEXUS
https://www.carmanualsonline.info/img/36/57050/w960_57050-0.png
LEXUS LS430 2003 Factory Repair Manual
Page 1043 of 4500
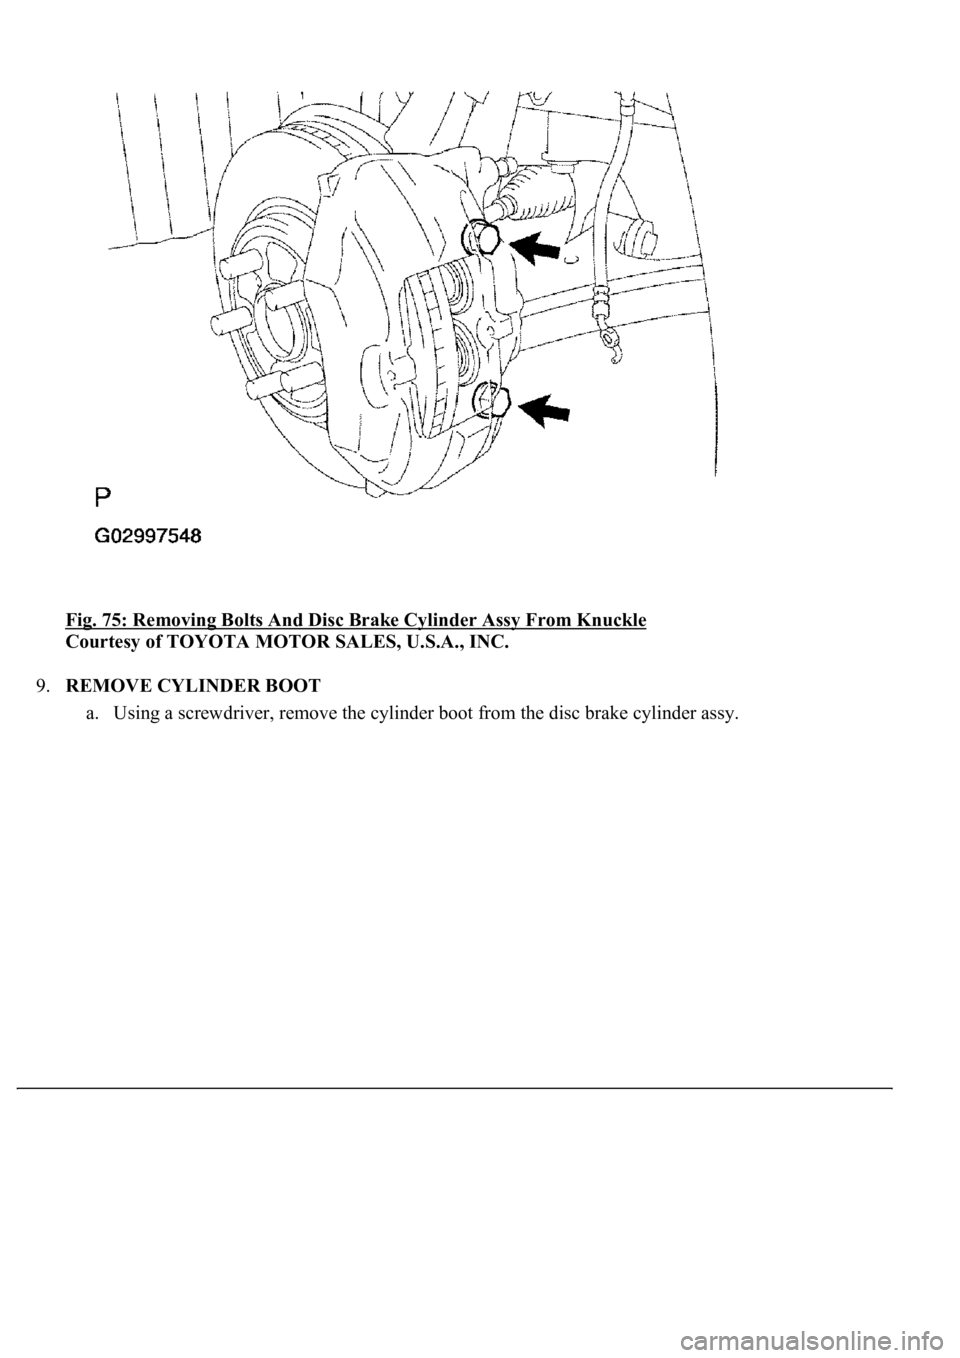
Fig. 75: Removing Bolts And Disc Brake Cylinder Assy From Knuckle
Courtesy of TOYOTA MOTOR SALES, U.S.A., INC.
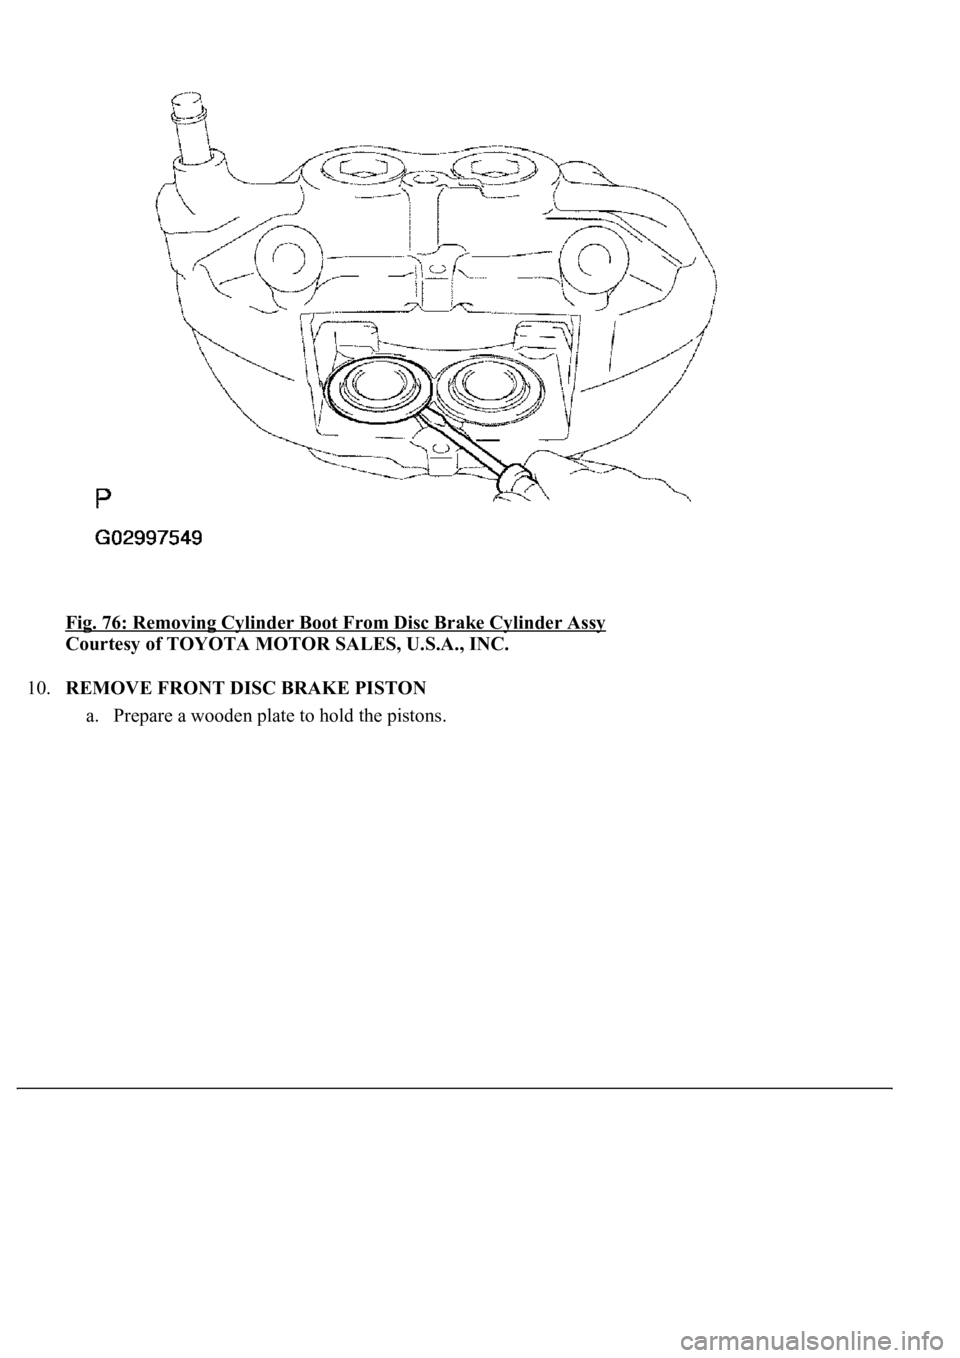
9.REMOVE CYLINDER BOOT
a. Using a screwdriver, remove the cylinder boot from the disc brake cylinder assy.
Page 1044 of 4500
Fig. 76: Removing Cylinder Boot From Disc Brake Cylinder Assy
Courtesy of TOYOTA MOTOR SALES, U.S.A., INC.
10.REMOVE FRONT DISC BRAKE PISTON
a. Prepare a wooden plate to hold the pistons.
Page 1051 of 4500
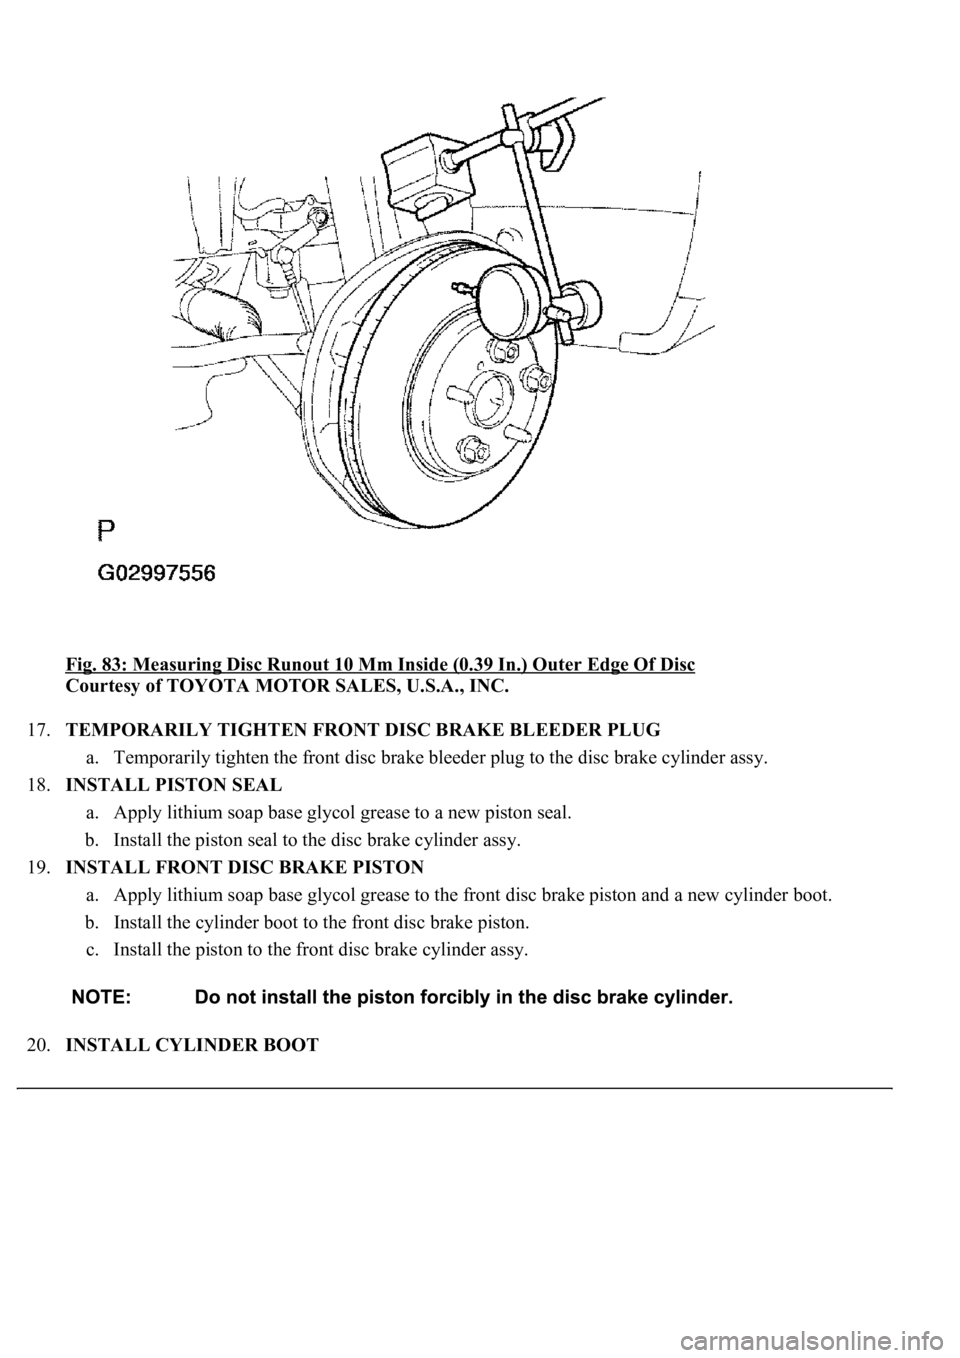
Fig. 83: Measuring Disc Runout 10 Mm Inside (0.39 In.) Outer Edge Of Disc
Courtesy of TOYOTA MOTOR SALES, U.S.A., INC.
17.TEMPORARILY TIGHTEN FRONT DISC BRAKE BLEEDER PLUG
a. Temporarily tighten the front disc brake bleeder plug to the disc brake cylinder assy.
18.INSTALL PISTON SEAL
a. Apply lithium soap base glycol grease to a new piston seal.
b. Install the piston seal to the disc brake cylinder assy.
19.INSTALL FRONT DISC BRAKE PISTON
a. Apply lithium soap base glycol grease to the front disc brake piston and a new cylinder boot.
b. Install the cylinder boot to the front disc brake piston.
c. Install the piston to the front disc brake cylinder assy.
20.INSTALL CYLINDER BOOT
Page 1052 of 4500
a. Install the cylinder boot to the front disc brake cylinder.
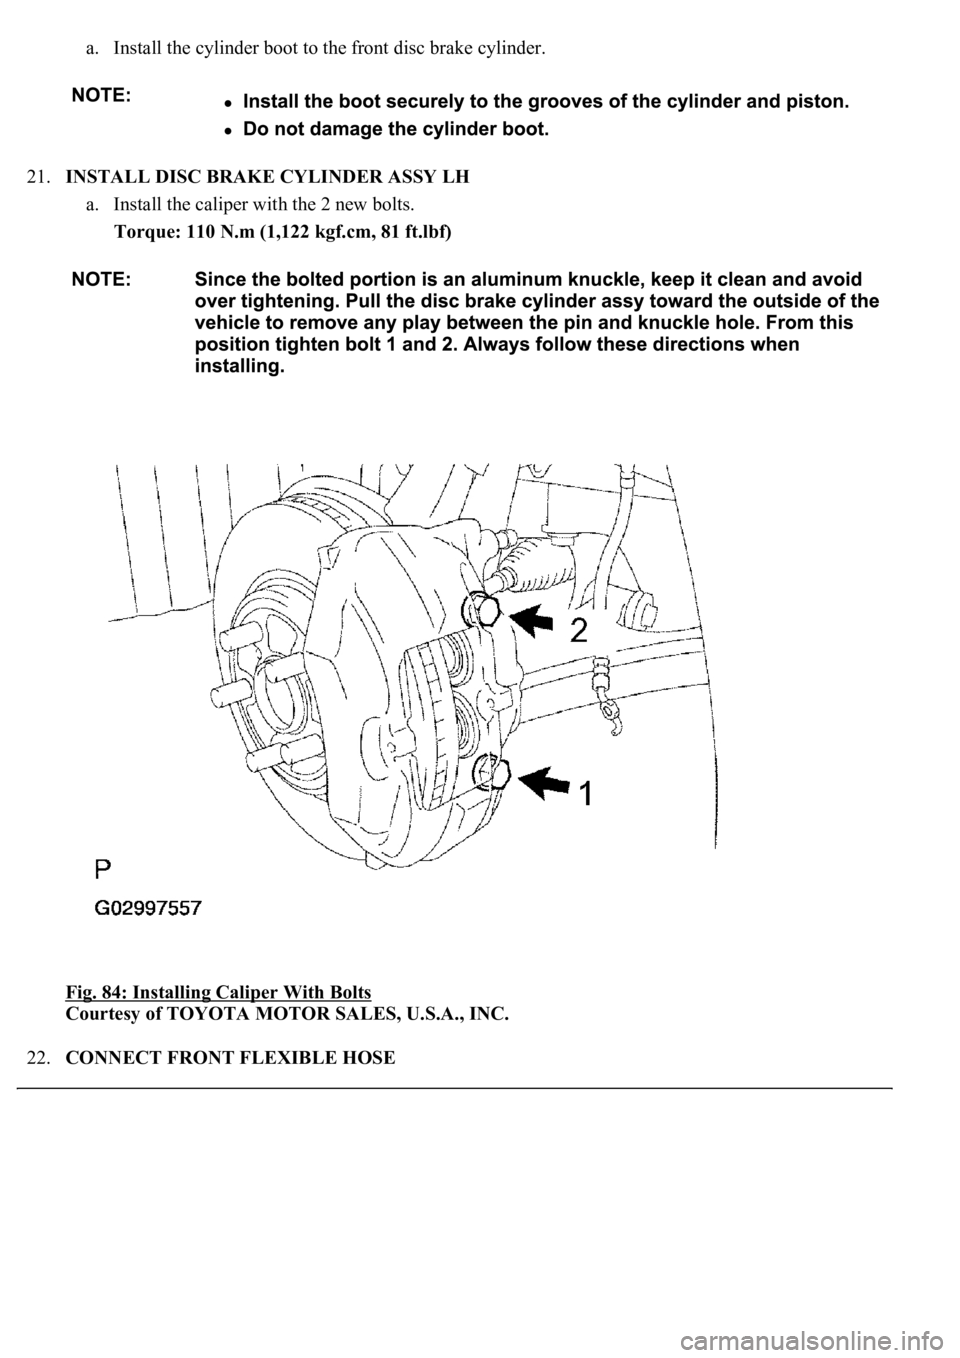
21.INSTALL DISC BRAKE CYLINDER ASSY LH
a. Install the caliper with the 2 new bolts.
Torque: 110 N.m (1,122 kgf.cm, 81 ft.lbf)
Fig. 84: Installing Caliper With Bolts
Courtesy of TOYOTA MOTOR SALES, U.S.A., INC.
22.CONNECT FRONT FLEXIBLE HOSE
Page 1062 of 4500
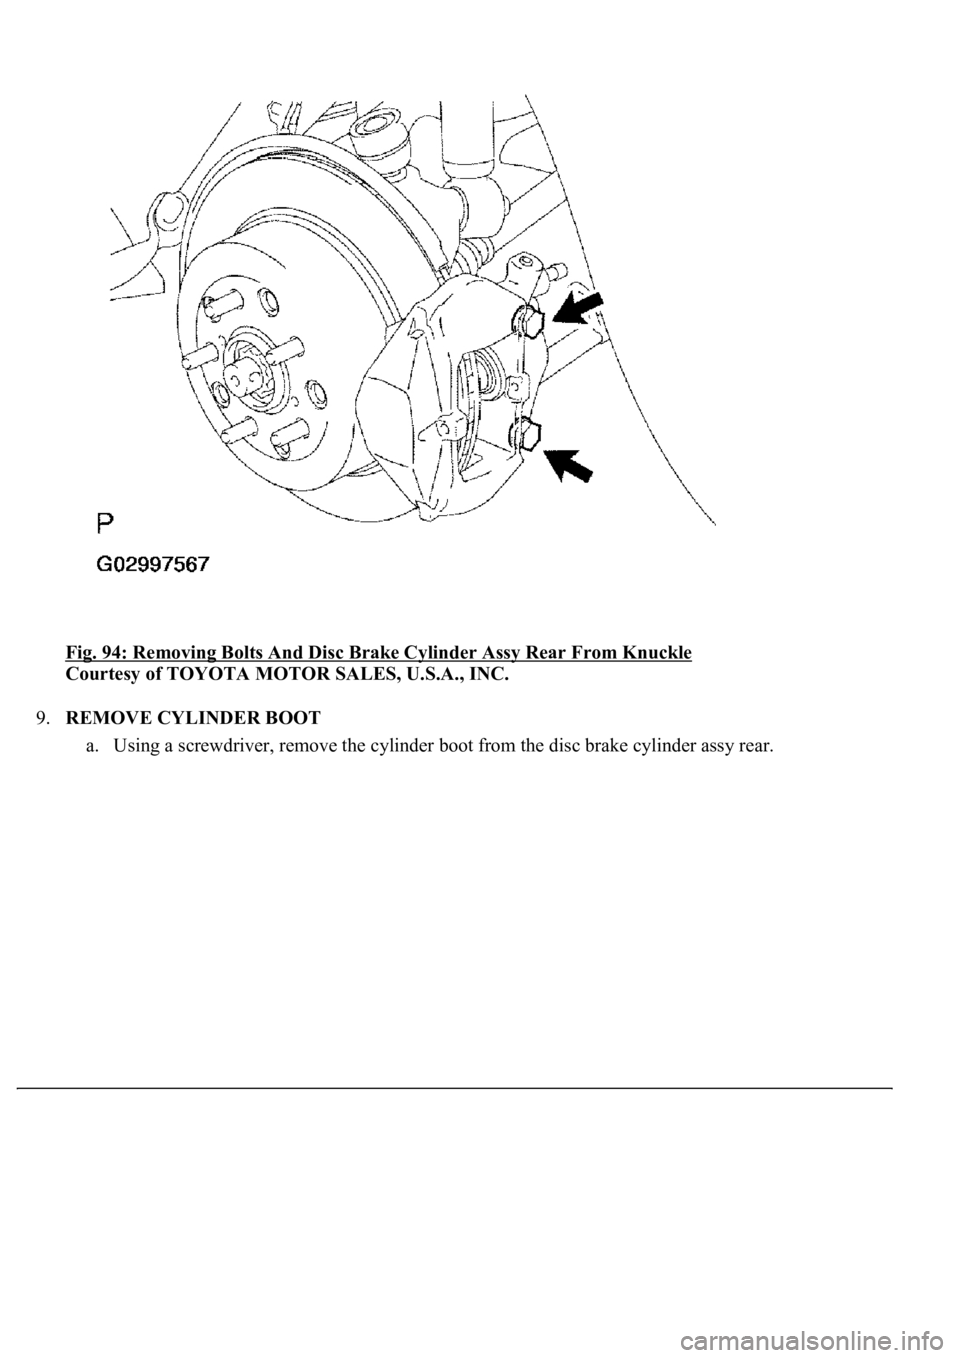
Fig. 94: Removing Bolts And Disc Brake Cylinder Assy Rear From Knuckle
Courtesy of TOYOTA MOTOR SALES, U.S.A., INC.
9.REMOVE CYLINDER BOOT
a. Usin
g a screwdriver, remove the cylinder boot from the disc brake cylinder assy rear.
Page 1063 of 4500
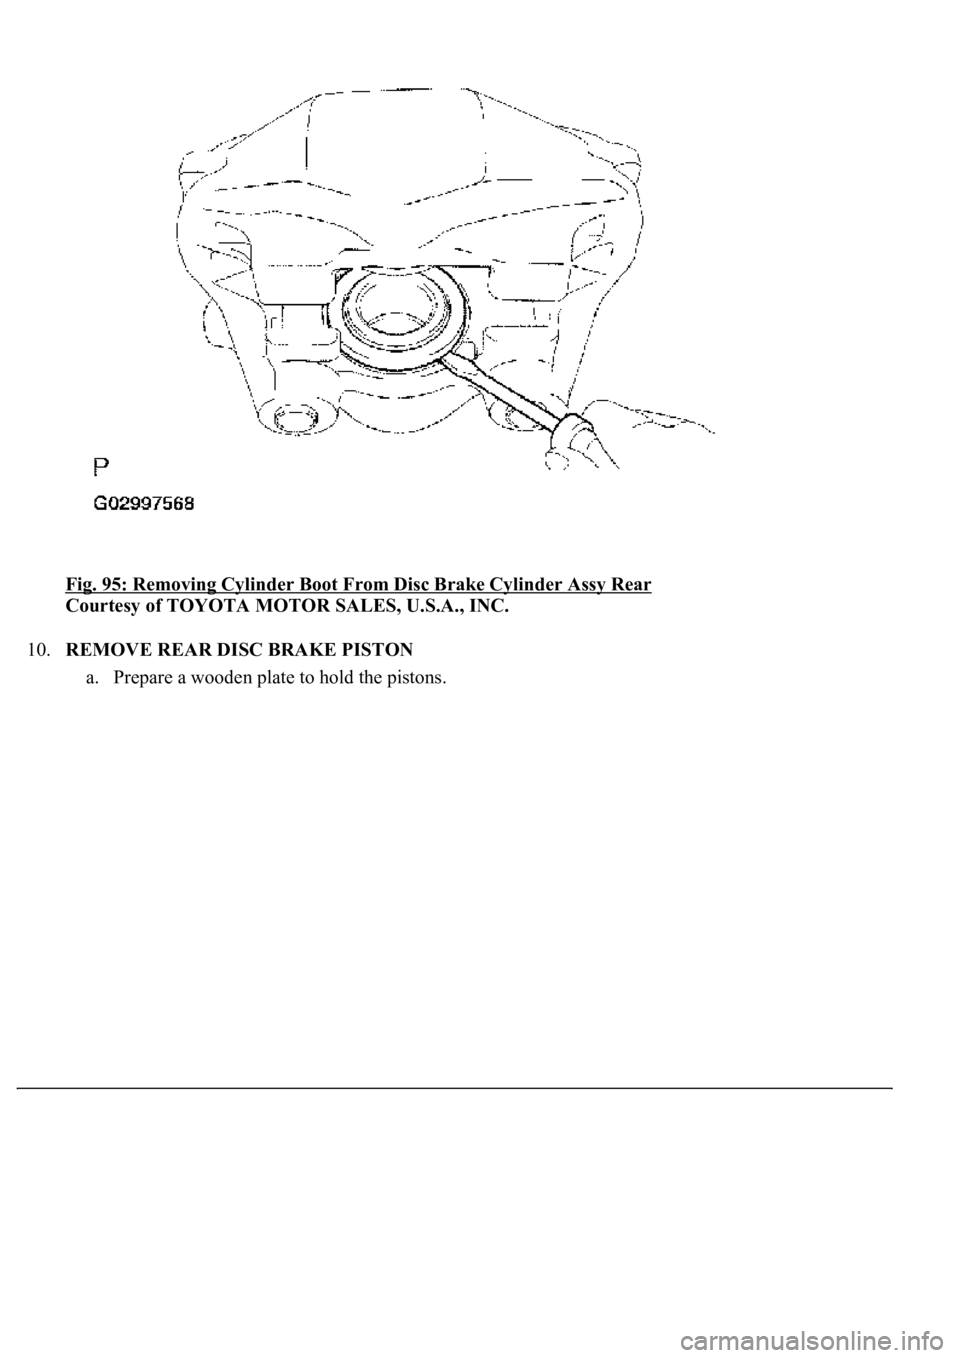
Fig. 95: Removing Cylinder Boot From Disc Brake Cylinder Assy Rear
Courtesy of TOYOTA MOTOR SALES, U.S.A., INC.
10.REMOVE REAR DISC BRAKE PISTON
a. Prepare a wooden plate to hold the pistons.
Page 1071 of 4500
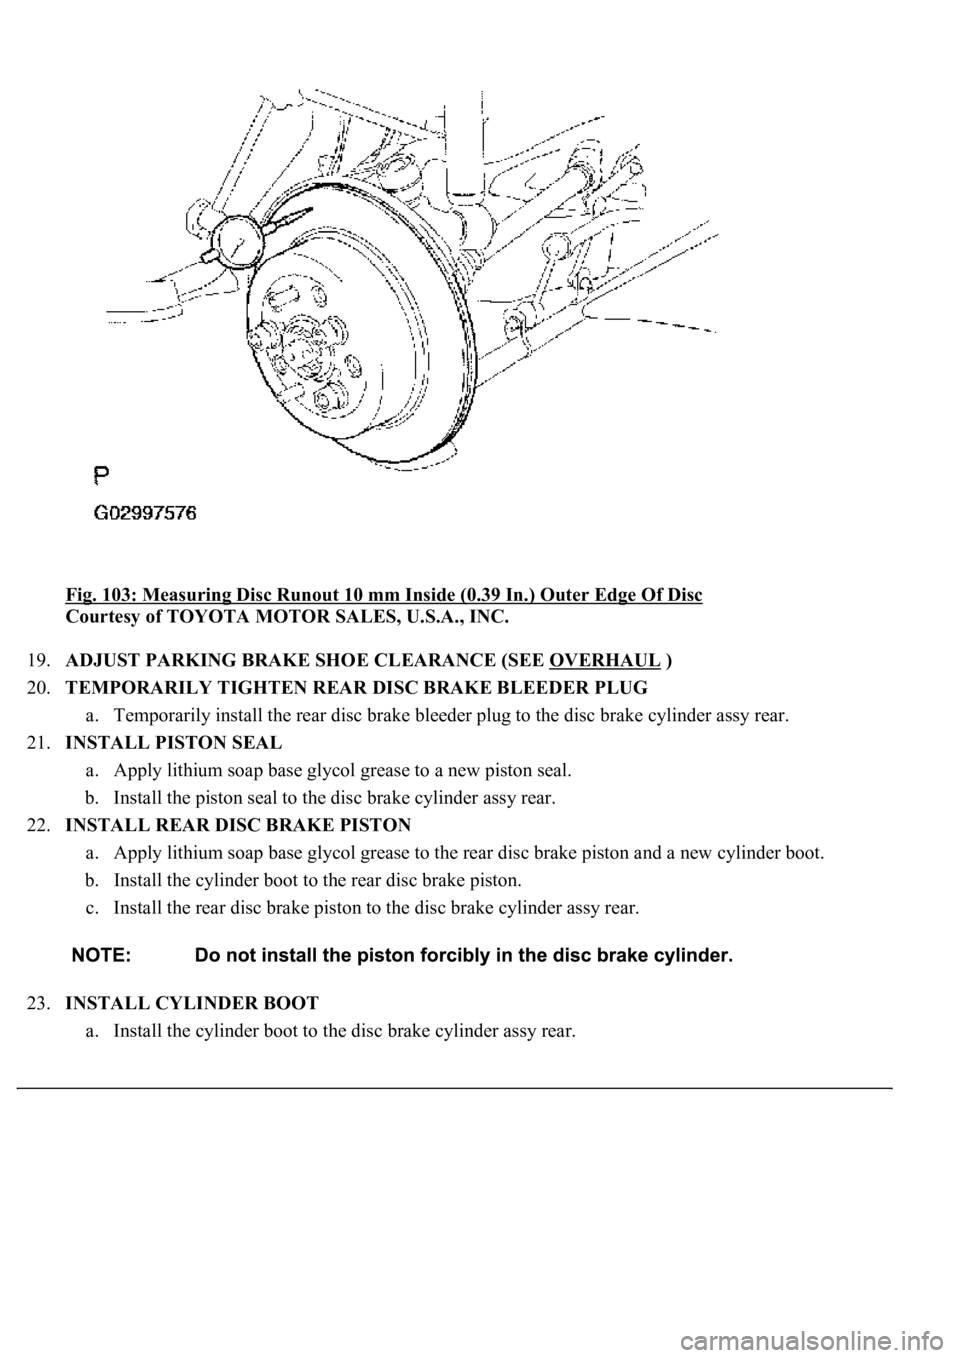
Fig. 103: Measuring Disc Runout 10 mm Inside (0.39 In.) Outer Edge Of Disc
Courtesy of TOYOTA MOTOR SALES, U.S.A., INC.
19.ADJUST PARKING BRAKE SHOE CLEARANCE (SEE OVERHAUL
)
20.TEMPORARILY TIGHTEN REAR DISC BRAKE BLEEDER PLUG
a. Temporarily install the rear disc brake bleeder plug to the disc brake cylinder assy rear.
21.INSTALL PISTON SEAL
a. Apply lithium soap base glycol grease to a new piston seal.
b. Install the piston seal to the disc brake cylinder assy rear.
22.INSTALL REAR DISC BRAKE PISTON
a. Apply lithium soap base glycol grease to the rear disc brake piston and a new cylinder boot.
b. Install the cylinder boot to the rear disc brake piston.
c. Install the rear disc brake piston to the disc brake cylinder assy rear.
23.INSTALL CYLINDER BOOT
a. Install the cylinder boot to the disc brake cylinder assy rear.
Page 2323 of 4500
Fig. 18: Identifying Matchmarks On Intermediate Shaft And Propeller Shaft
Courtesy of TOYOTA MOTOR SALES, U.S.A., INC.
c. Remove the dust boot from the propeller shaft.
HINT:
If the dust boot is reused, remove it after wrappin
g vinyl tape around the spline, so it will not be damaged.
Page 2334 of 4500
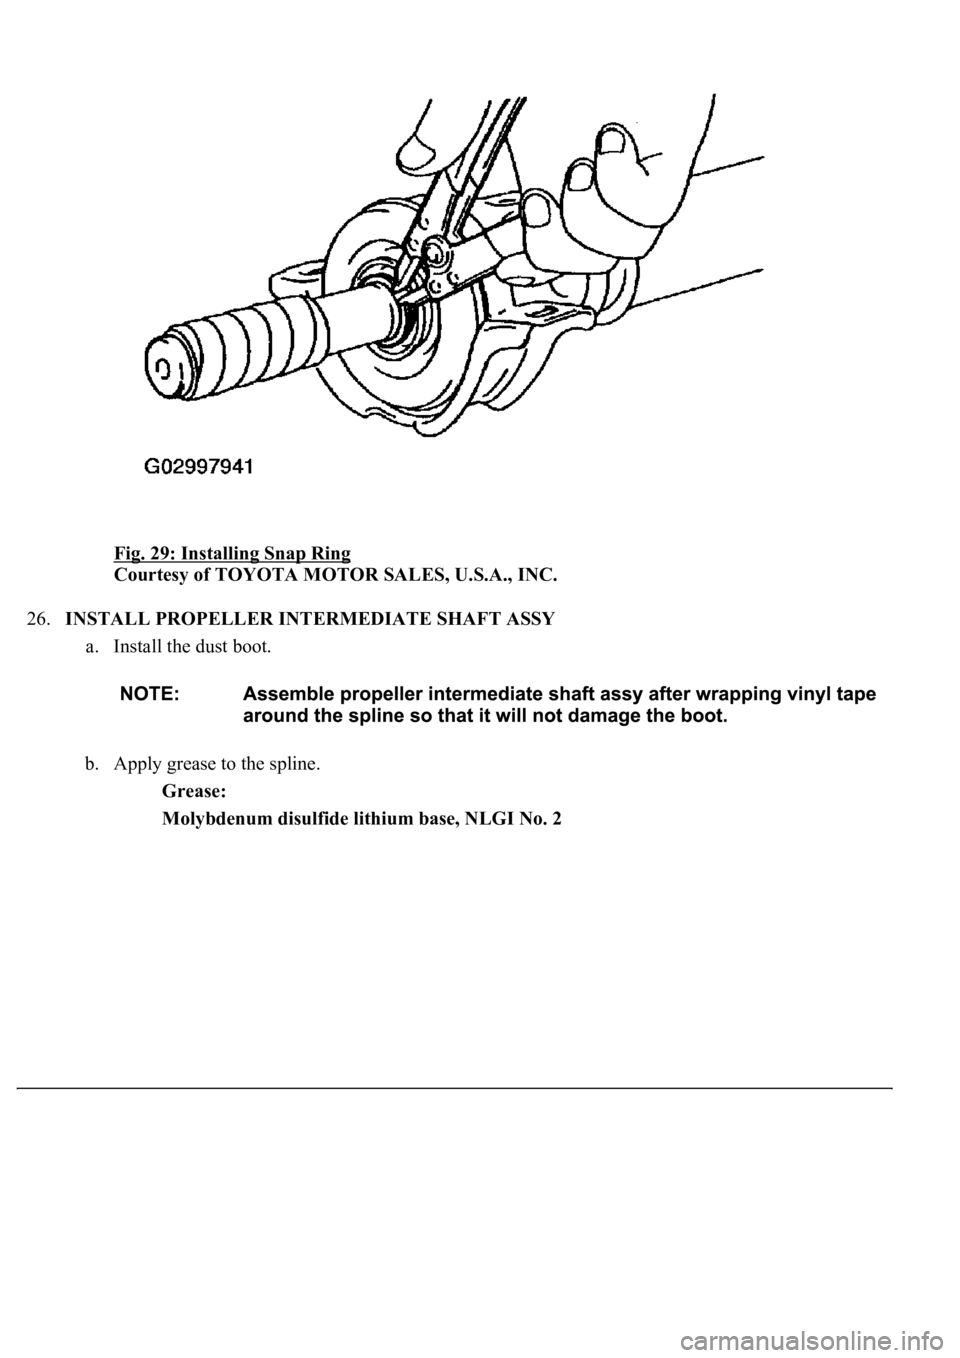
Fig. 29: Installing Snap Ring
Courtesy of TOYOTA MOTOR SALES, U.S.A., INC.
26.INSTALL PROPELLER INTERMEDIATE SHAFT ASSY
a. Install the dust boot.
b. Apply grease to the spline.
Grease:
Molybdenum disulfide lithium base, NLGI No. 2
Page 2335 of 4500
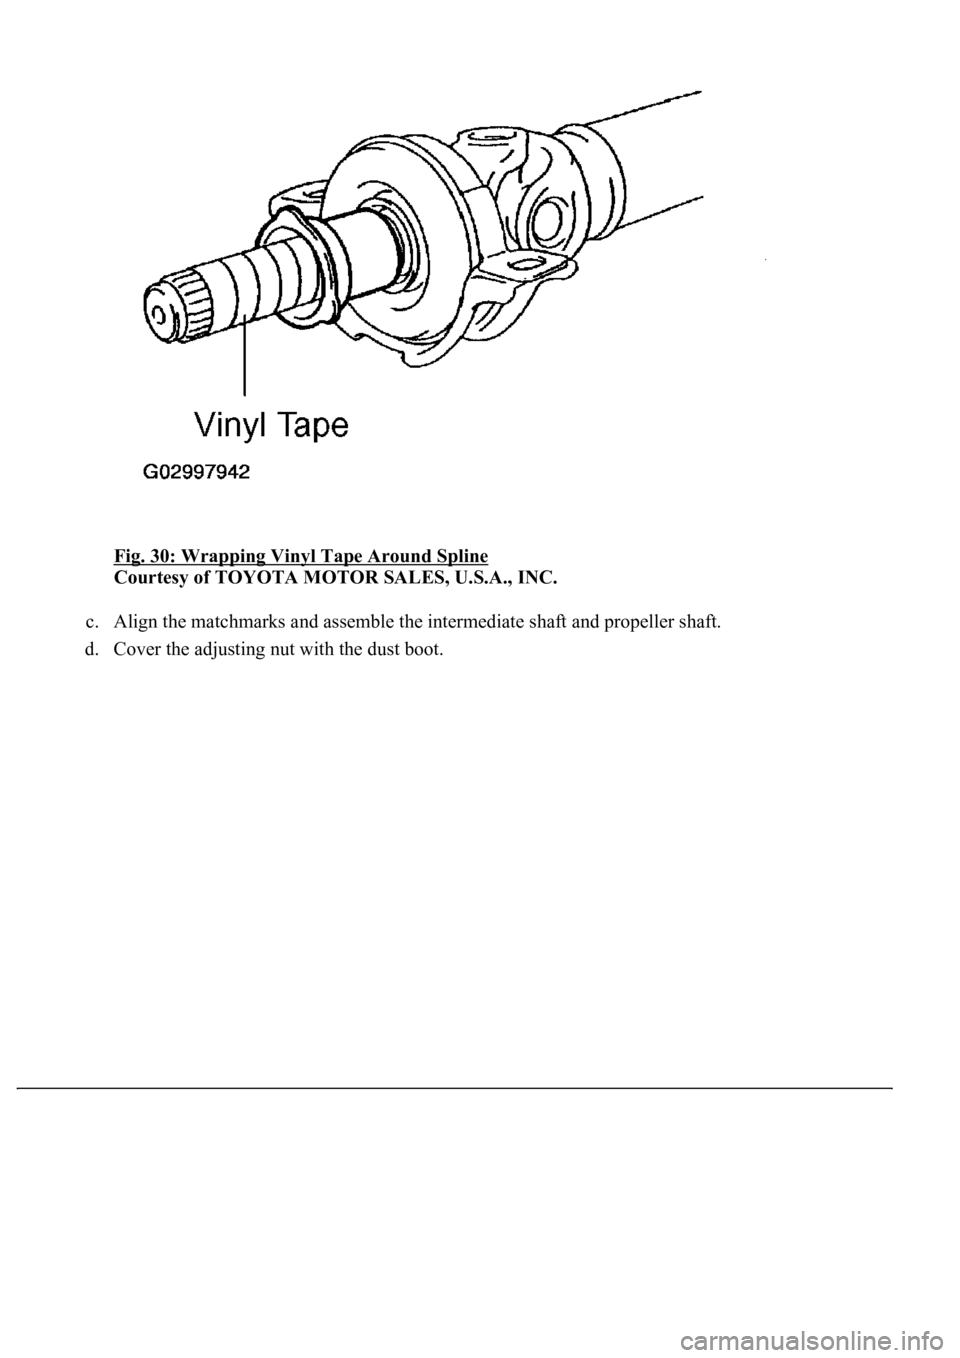
Fig. 30: Wrapping Vinyl Tape Around Spline
Courtesy of TOYOTA MOTOR SALES, U.S.A., INC.
c. Align the matchmarks and assemble the intermediate shaft and propeller shaft.
d. Cover the ad
justing nut with the dust boot.
