inflation pressure LEXUS LS430 2006 Owners Manual
[x] Cancel search | Manufacturer: LEXUS, Model Year: 2006, Model line: LS430, Model: LEXUS LS430 2006Pages: 419, PDF Size: 11.19 MB
Page 4 of 419
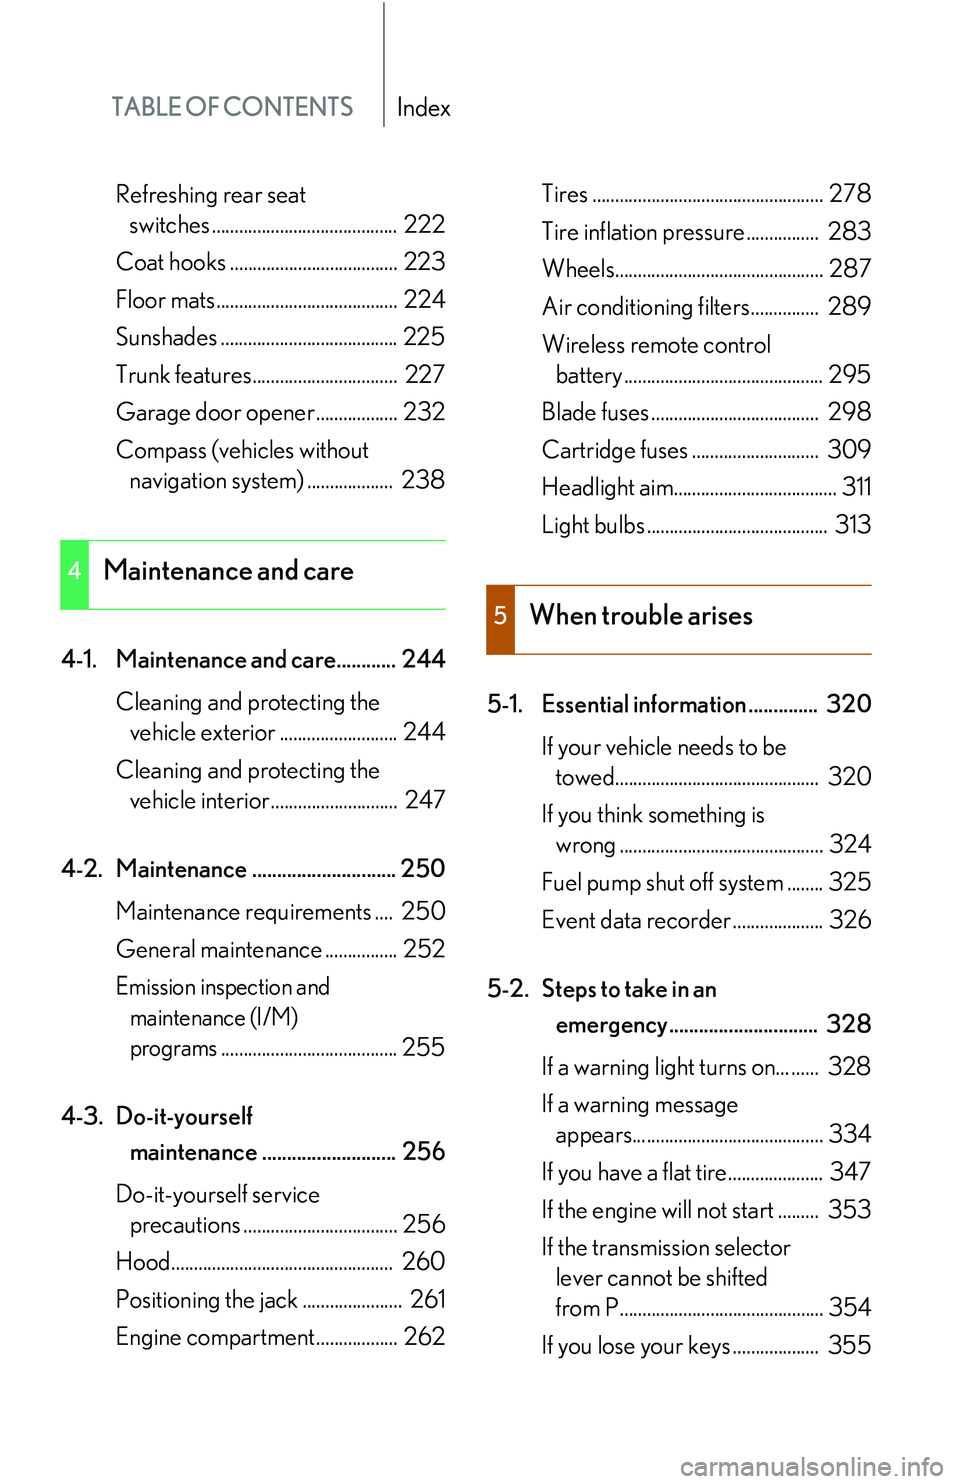
TABLE OF CONTENTSIndex
Refreshing rear seat
switches ......................................... 222
Coat hooks ..................................... 223
Floor mats........................................ 224
Sunshades ....................................... 225
Trunk features................................ 227
Garage door opener .................. 232
Compass (vehicles without
navigation syst em)
................... 238
4-1. Maintenance and care............ 244 Cleaning and protecting the
vehicle exterior .......................... 244
Cleaning and protecting the
vehicle interior............................ 247
4-2. Maintenance ............................. 250 Maintenance requ irements
.... 250
General maintenance ................ 252
Emission inspection and
maintenance (I/M)
programs....................................... 255
4-3. Do-it-yourself
maintenance ........................... 256
Do-it-yourself service
precautions .................................. 256
Hood................................................. 260
Positioning the jack ...................... 261
Engine compartment.................. 262 Tires ................................................... 278
Tire inflation pressure................ 283
Wheels.............................................. 287
Air conditioning filters............... 289
Wireless remote control
battery ............................................ 295
Blade fuses ..................................... 298
Cartridge fuses ............................ 309
Headlight aim.................................... 311
Light bulbs ........................................ 313
5-1. Essential information .............. 320 If your vehicle needs to be
towed............................................. 320
If you think something is
wrong ............................................. 324
Fuel pump shut off system ........ 325
Event data recorder .................... 326
5-2. Steps to take in an
emergency .............................. 328
If a warning light turns on... ...... 328
If a warning message
appears.......................................... 334
If you have a flat tire..................... 347
If the engine will not start ......... 353
If the transmission selector
lever cannot be shifted
from P............................................. 354
If you lose your keys ................... 355
4Maintenance and care
5When trouble arises
Page 7 of 419
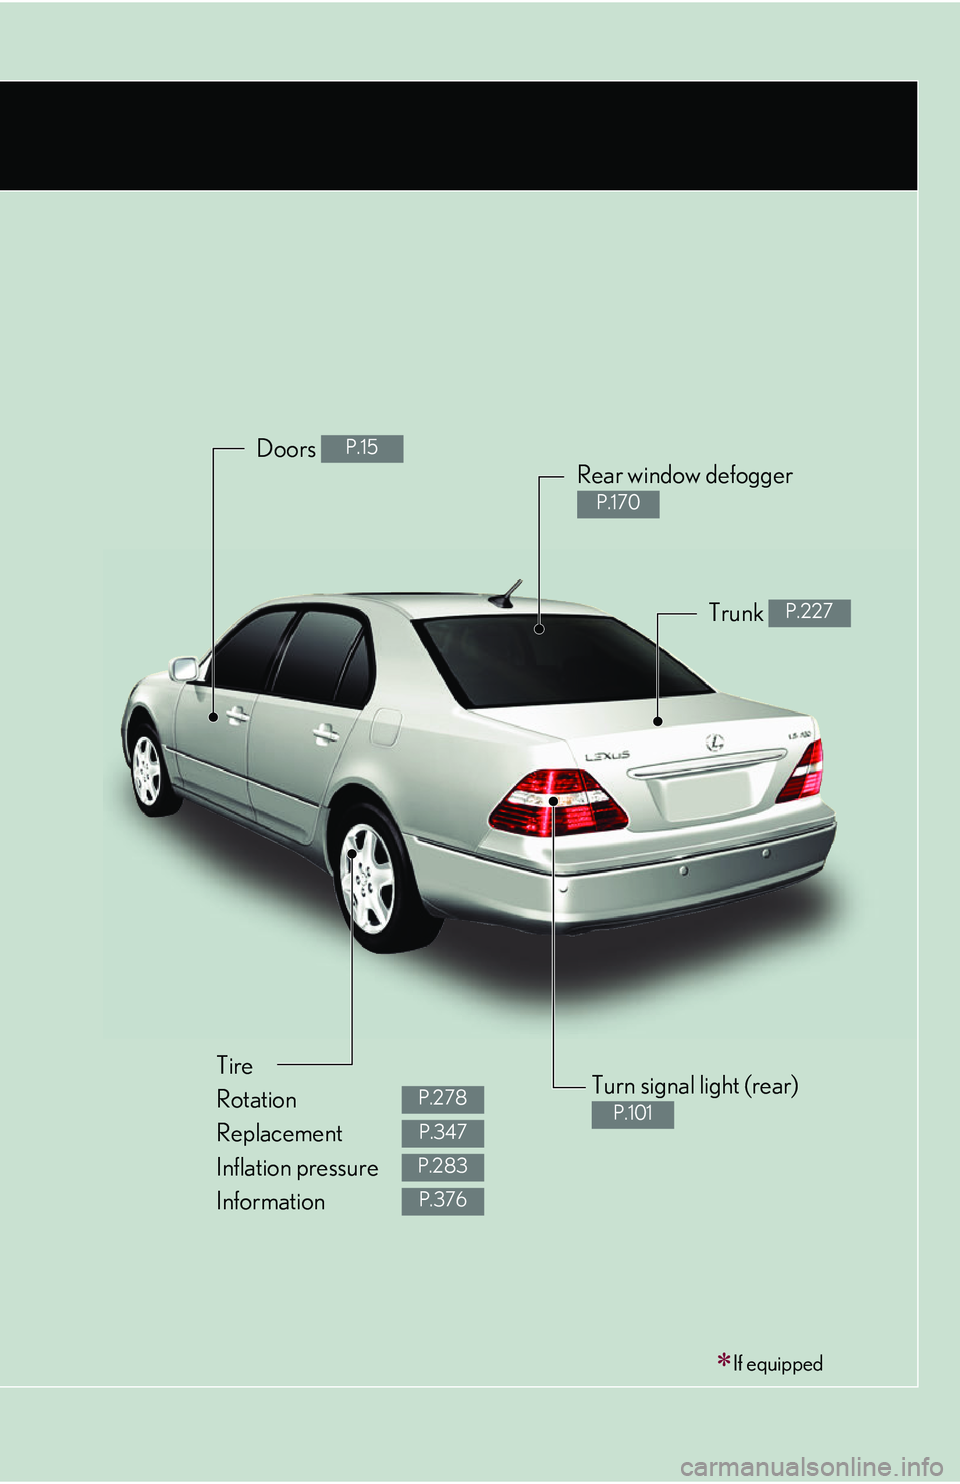
Doors P.15
Rear window defogger
P.170
Trunk P.227
Tire
Rotation
Replacement
Inflation pressure
Information
P.278
P.347
P.283
P.376
Turn signal light (rear)
P.101
If equipped
Page 259 of 419
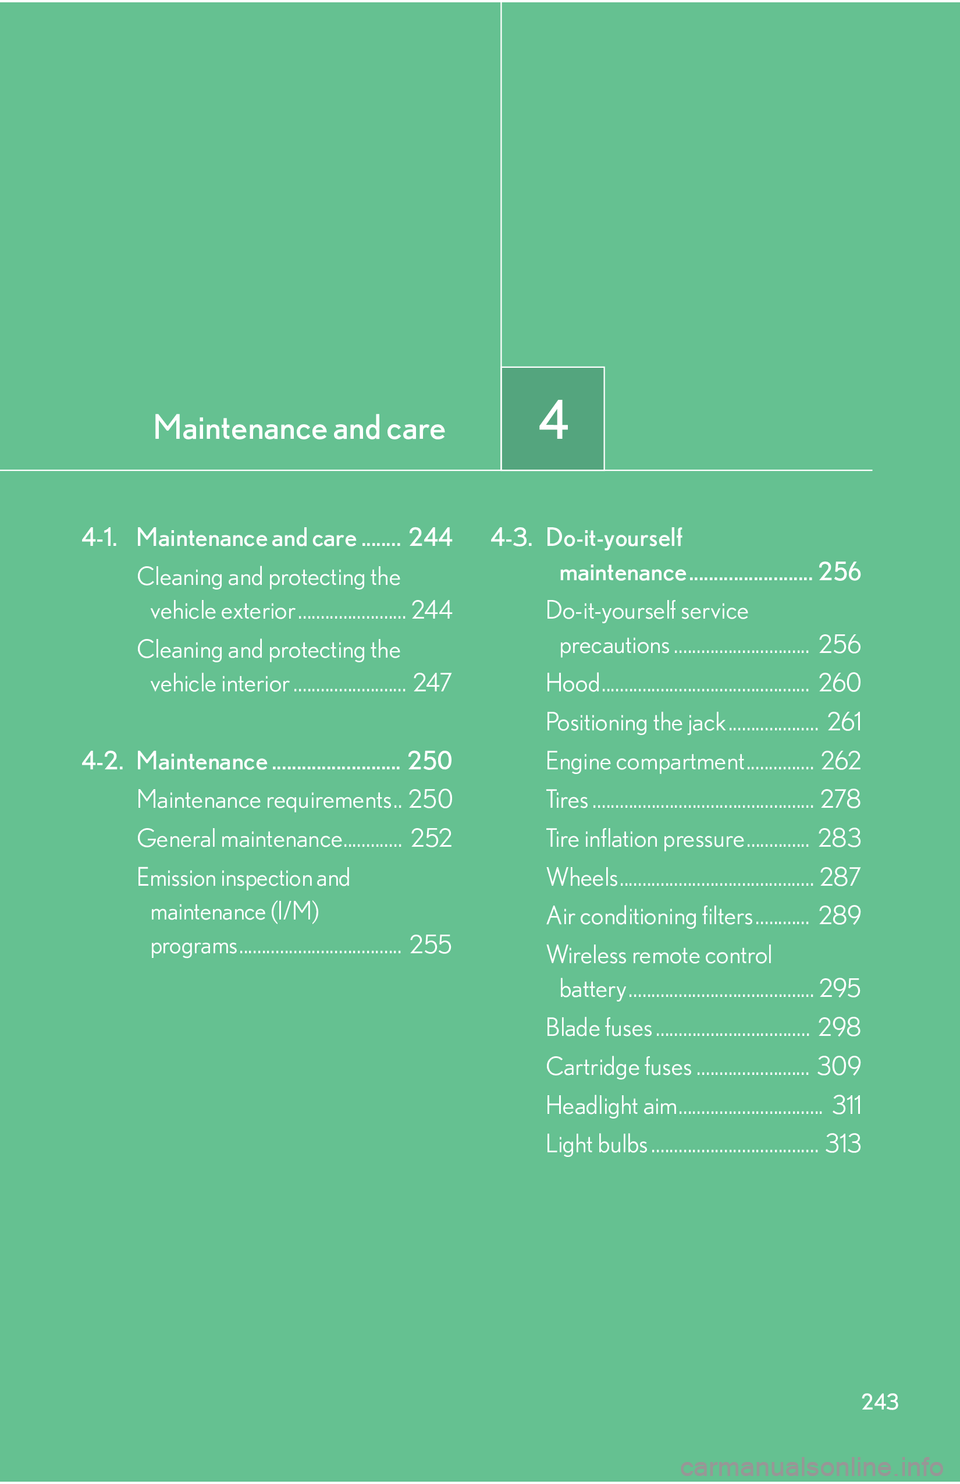
4Maintenance and care
243
4-1. Maintenance and care ........ 244
Cleaning and protecting the vehicle exterior ........................ 244
Cleaning and protecting the vehicle interior ......................... 247
4-2. Maintenance .......................... 250 Maintenance requirements.. 250
General maintenance............. 252
Emission inspection and
maintenance (I/M)
programs.................................... 255 4-3. Do-it-yourself
maintenance ......................... 256
Do-it-yourself service
precautions .............................. 256
Hood.............................................. 260
Positioning the jack .................... 261
Engine compartment ............... 262
Tires ................................................. 278
Tire inflation pressure .............. 283
Wheels ........................................... 287
Air conditioning filters
............ 289
Wireless remote control battery ......................................... 295
Blade fuses .................................. 298
Cartridge fuses ......................... 309
Headlight aim................................ 311
Light bulbs ..................................... 313
Page 270 of 419
254
4-2. Maintenance
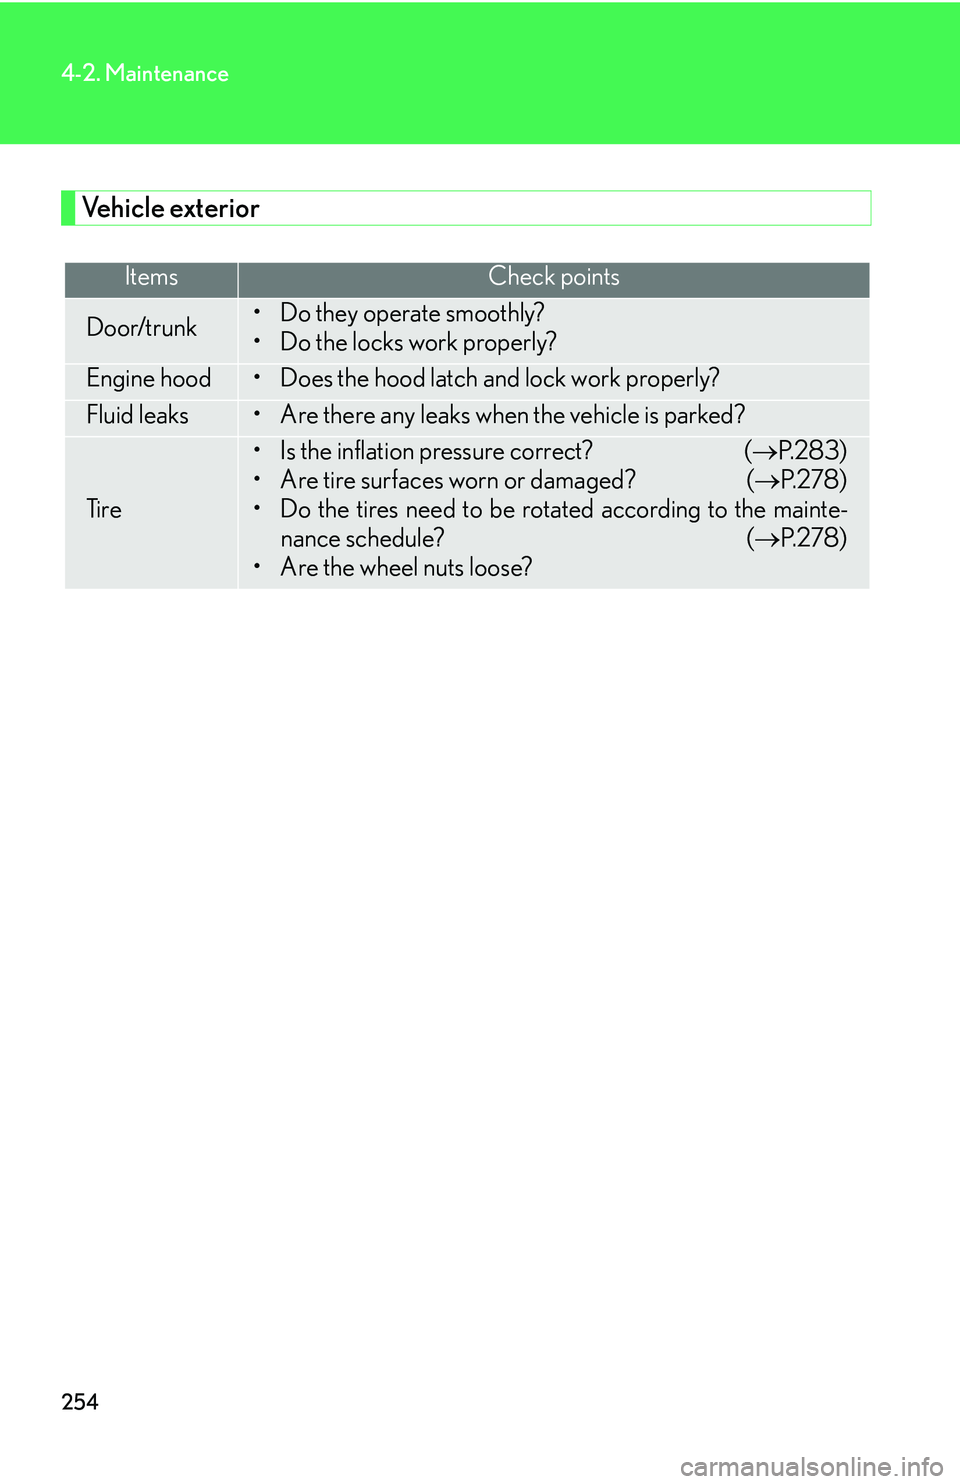
Vehicle exterior
ItemsCheck points
Door/trunk• Do they operate smoothly?
• Do the locks work properly?
Engine hood• Does the hood latch and lock work properly?
Fluid leaks• Are there any leaks when the vehicle is parked?
Ti r e
• Is the inflation pressure correct? ( P. 2 8 3 )
• Are tire surfaces worn or damaged? ( P. 2 7 8 )
• Do the tires need to be rotated according to the mainte- nance schedule? ( P. 2 7 8 )
• Are the wheel nuts loose?
Page 273 of 419
257
4-3. Do-it-yourself maintenance
4
Maintenance and care
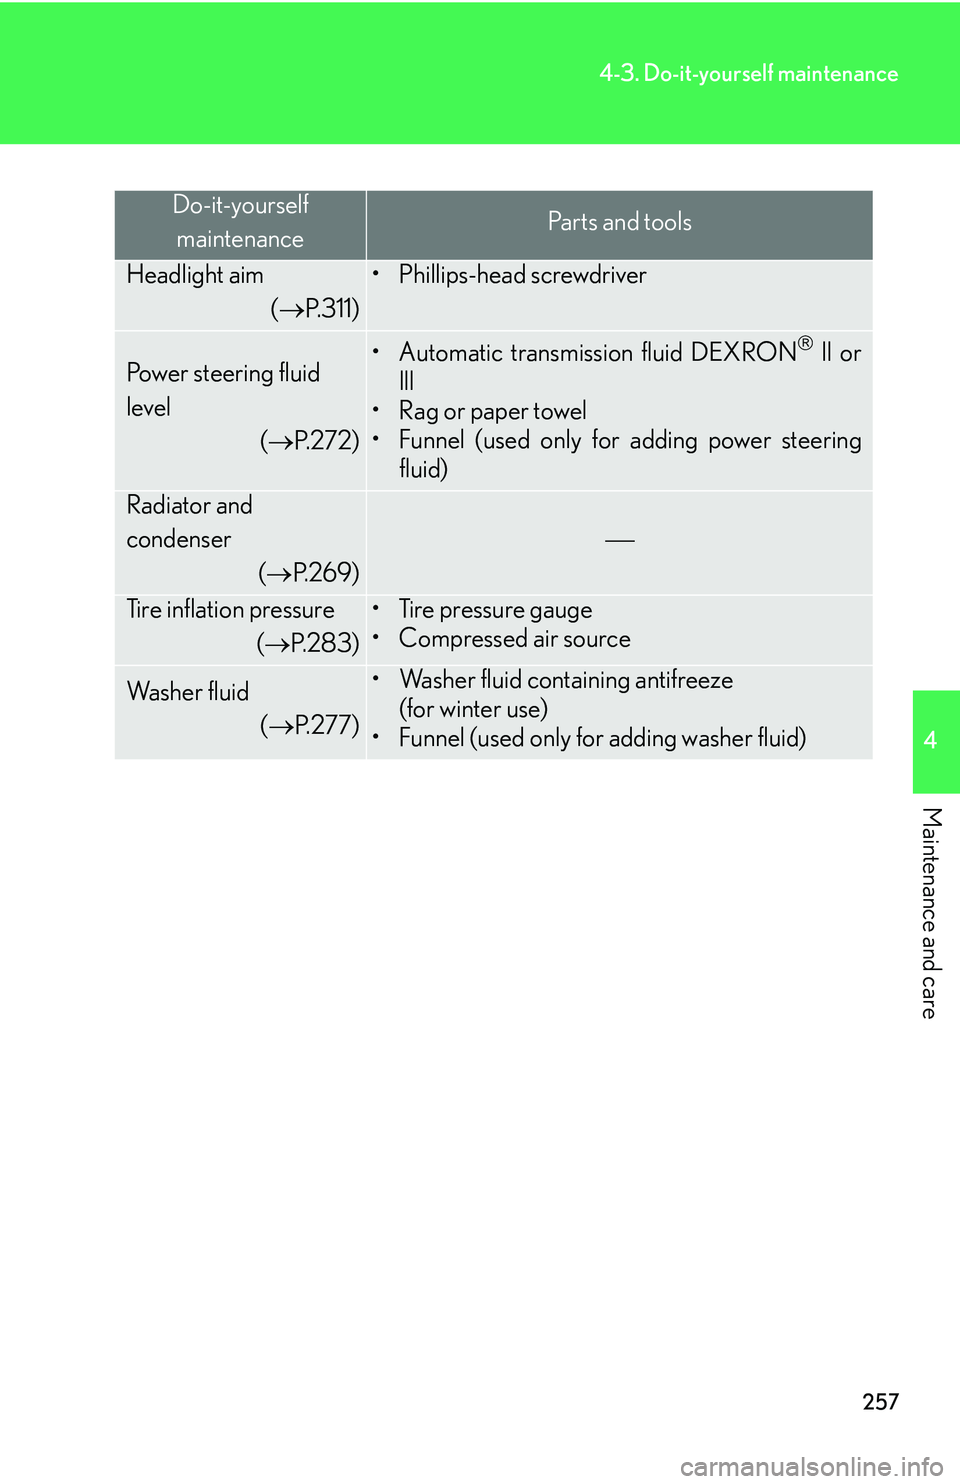
Do-it-yourself maintenancePa r t s a n d t o o l s
Headlight aim
( P.311)
• Phillips-head screwdriver
Power steering fluid
level
(P. 2 7 2 )
• Automatic transmission fluid DEXRON ll or
lll
• Rag or paper towel
• Funnel (used only for adding power steering fluid)
Radiator and
condenser
(P. 2 6 9 )
Tire inflation pressure
(P. 2 8 3 )
• Tire pressure gauge
• Compressed air source
Wa s h e r f l u i d
(P. 2 7 7 )
• Washer fluid containing antifreeze
(for winter use)
• Funnel (used only for adding washer fluid)
Page 296 of 419
280
4-3. Do-it-yourself maintenance
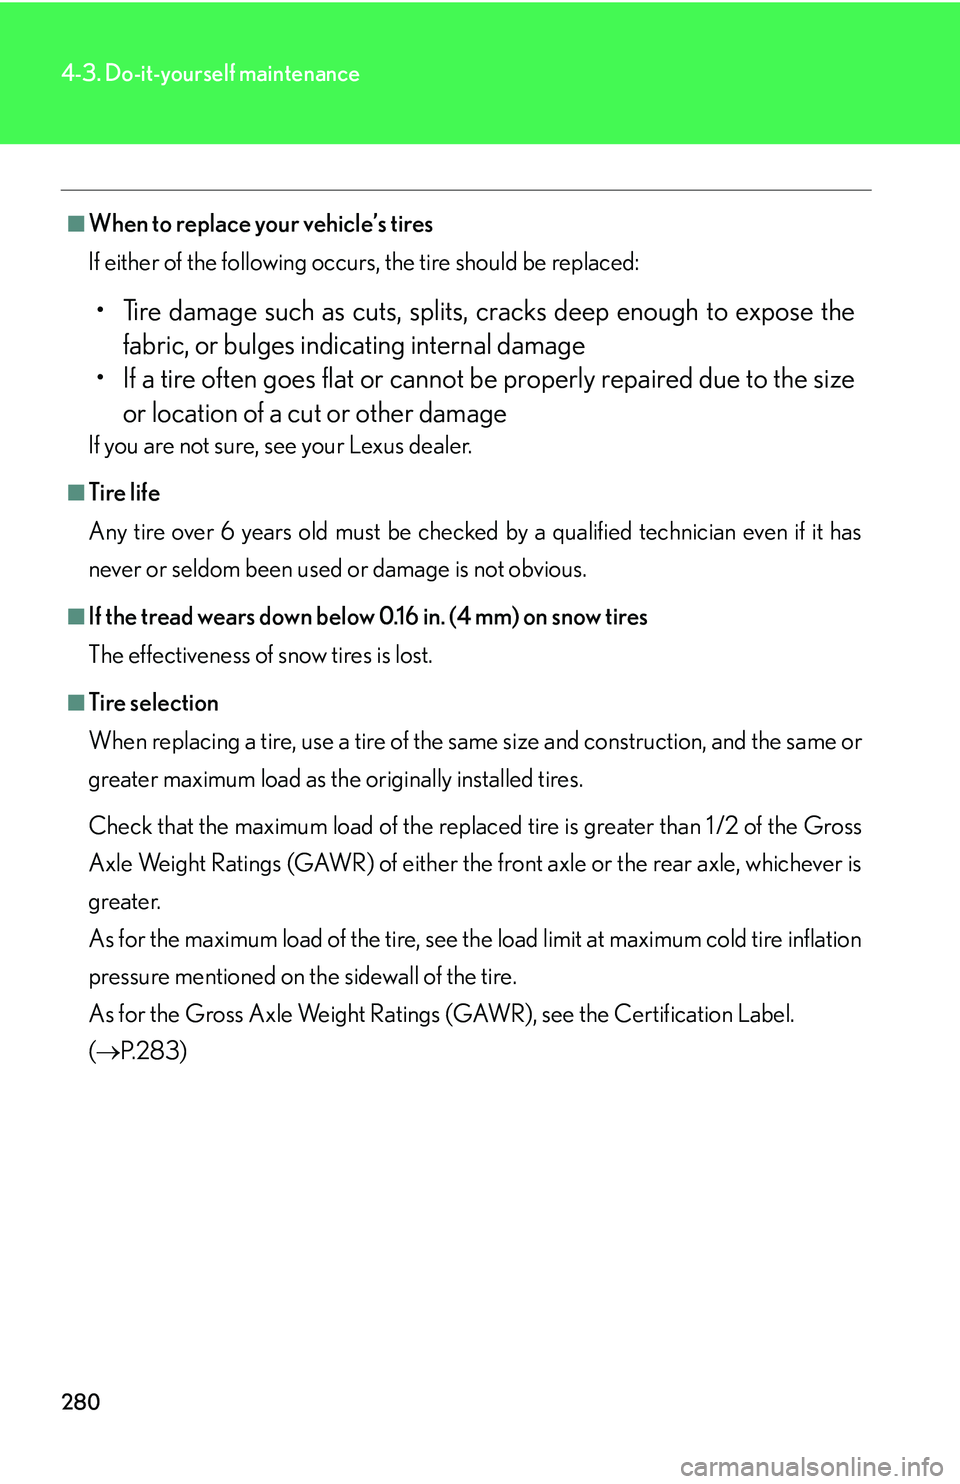
■When to replace your vehicle’s tires
If either of the following occurs, the tire should be replaced:
• Tire damage such as cuts, splits, cracks deep enough to expose the
fabric, or bulges indicating internal damage
• If a tire often goes flat or cannot be pr
operly repaired due to the size
or location of a cut or other damage
If you are not sure, see your Lexus dealer.
■Tire life
Any tire over 6 years old must be checked by a qualified technician even if it has
ne
ver or seldom been used or damage is not obvious.
■If the tread wears down below 0.16 in. (4 mm) on snow tires
The effectiveness of snow tires is lost.
■Tire selection
When replacing a tire, use a tire of the sa me siz
e and construction, and the same or
greater maximum load as the originally installed tires.
Check that the maximum load of the replaced t
ire is greater than 1 /2 of the Gross
Axle Weight Ratings (GAWR) of either the front axle or the rear axle, whichever is
greater.
As for the maximum load of the tire, see the load limit a
t maximum cold tire inflation
pressure mentioned on the sidewall of the tire.
As for the Gross Axle Weight Ratings (GAWR), see the Certification Label.
( P.283 )
Page 298 of 419
282
4-3. Do-it-yourself maintenance
+
CAUTION
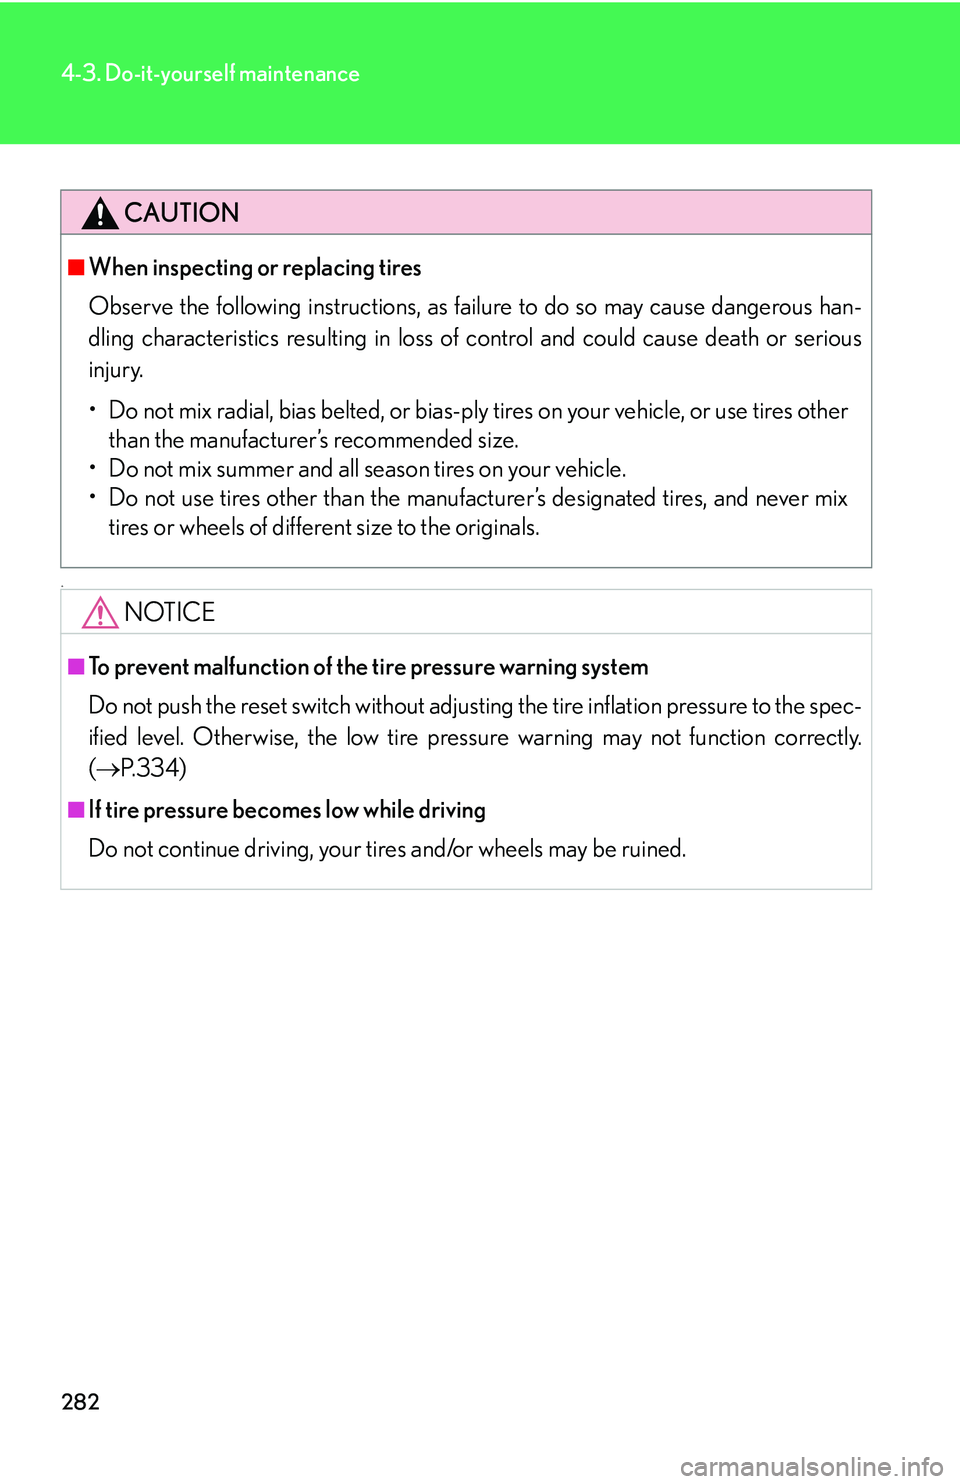
■When inspecting or replacing tires
Observe the following instructions, as failure to do so may cause dangerous han-
dling characteristics resulting in loss of contr
ol and could cause death or serious
injury.
• Do not mix radial, bias belted, or bias-ply tir
es on your vehicle, or use tires other
than the manufacturer’s recommended size.
• Do not mix summer and all season tires on your vehicle.
• Do not use tires other than the manufact ur
er’s designated tires, and never mix
tires or wheels of different size to the originals.
NOTICE
■To prevent malfunction of the tire pressure warning system
Do not push the reset switch without adjusting the tire inflation pressure to the spec-
ified level. Otherwise, the low tire pressure warning may not function correctly.
( P.334 )
■If tire pressure becomes low while driving
Do not continue driving, your ti r
es and/or wheels may be ruined.
Page 299 of 419
283
4-3. Do-it-yourself maintenance
4
Maintenance and care
Tire inflation pressure
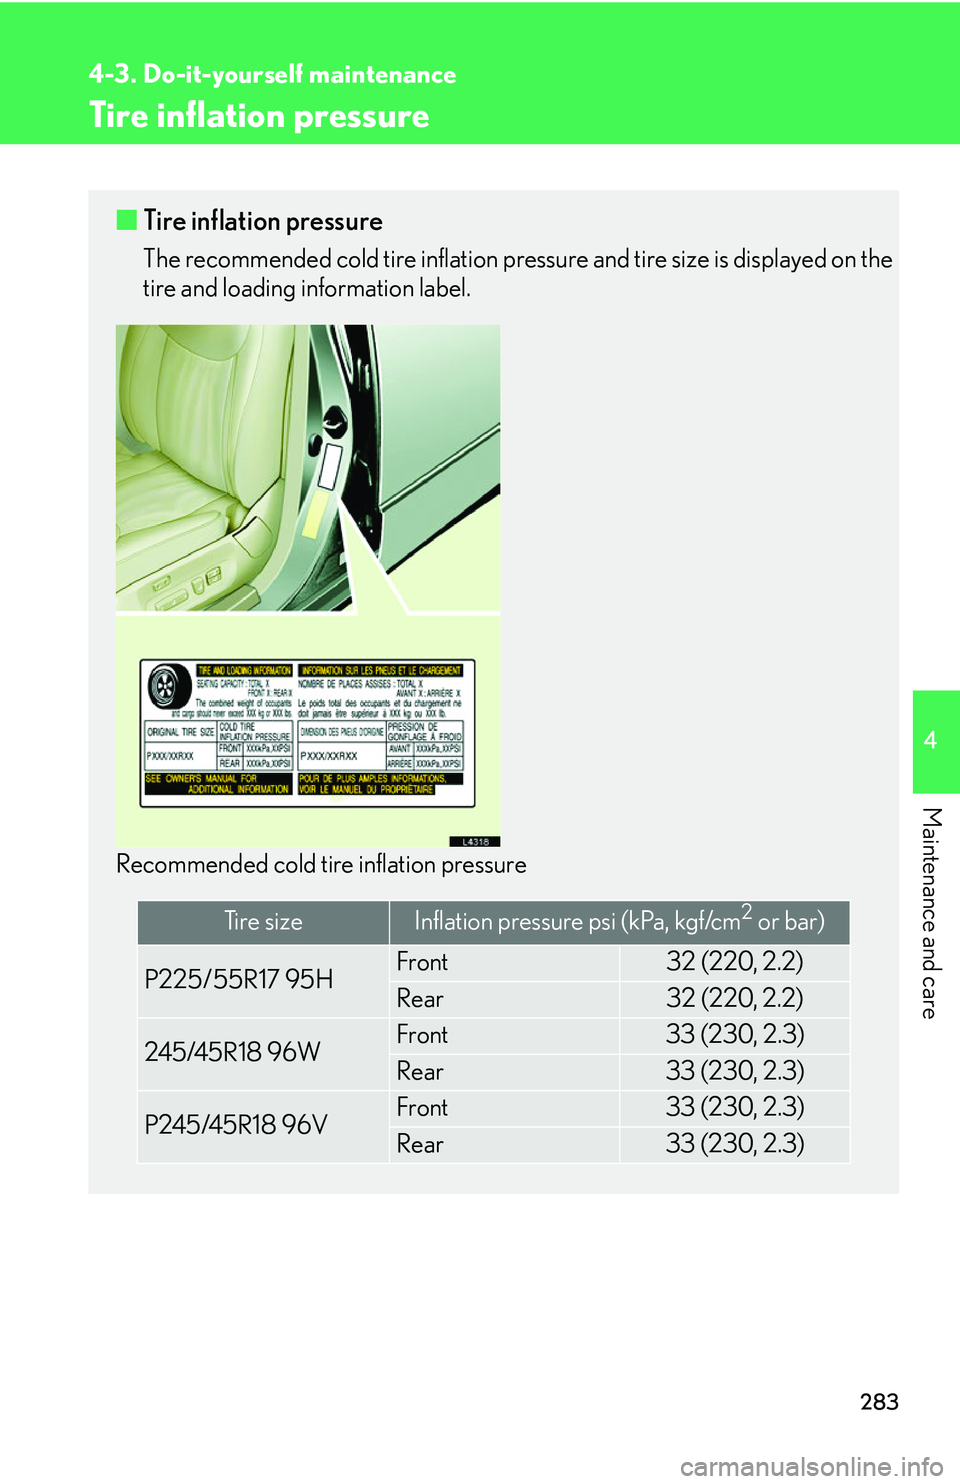
■Tire inflation pressure
The recommended cold tire inflation pressure and tire size is displayed on the
tire and loading information label.
Recommended cold tire inflation pressure
Ti r e s i z eInflation pressure psi (kPa, kgf/cm2 or bar)
P225/55R17 95HFront32 (220, 2.2)
Rear32 (220, 2.2)
245/45R18 96WFront33 (230, 2.3)
Rear33 (230, 2.3)
P245/45R18 96VFront33 (230, 2.3)
Rear33 (230, 2.3)
Page 300 of 419
284
4-3. Do-it-yourself maintenance
For sustained high speeds above 100 mph (160 km/h), in countries where such
speeds are permitted by law, add the below pressure to the front tires and rear
tires, but never exceed the maximum cold tire inflation pressure molded on the
tire sidewall.
• P225/55R17 95H: 3 psi (20 kPa, 0.2 kgf/cm2 or bar)
• 245/45R18 96W: 6 psi (40 kPa, 0.4 kgf/cm2 or bar)
• P245/45R18 96V: 6 psi (40 kPa, 0.4 kgf/cm2 or bar)
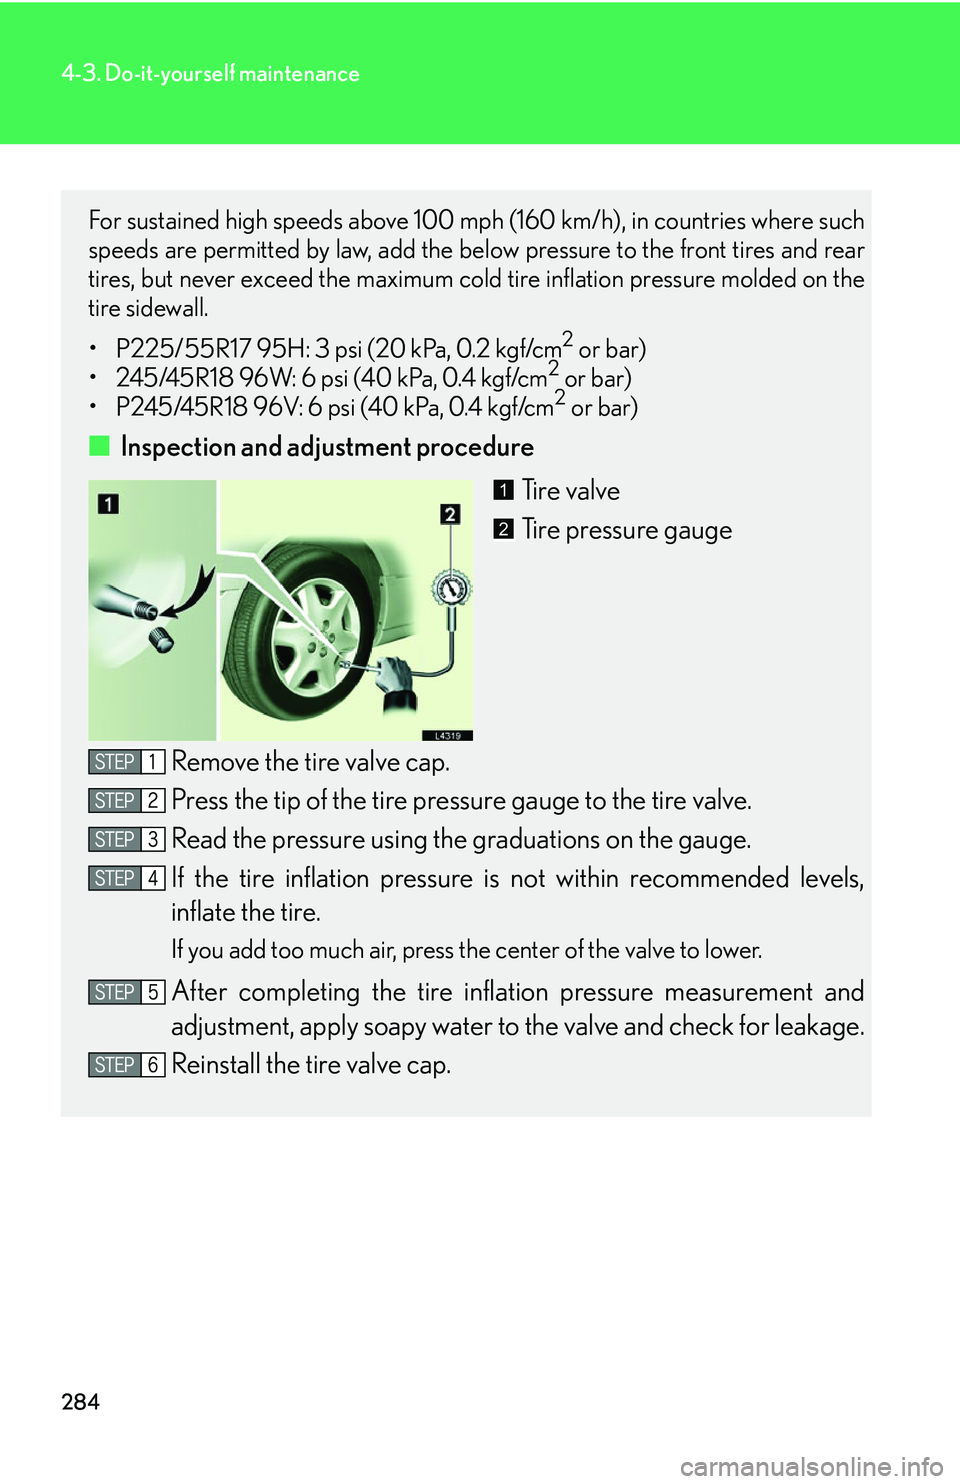
■ Inspection and adjustment procedure
Ti r e v a l v e
Tire pressure gauge
Remove the tire valve cap.
Press the tip of the tire pressure gauge to the tire valve.
Read the pressure using the graduations on the gauge.
If the tire inflation pressure is not within r
ecommended levels,
inflate the tire.
If you add too much air, press the center of the valve to lower.
After completing the tire inflation pressure measurement and
adjustment, apply soapy water to the v
alve and check for leakage.
Reinstall the tire valve cap.
1
2
Page 301 of 419
285
4-3. Do-it-yourself maintenance
4
Maintenance and care
■Tire inflation pressure check interval
You should check the tire inflation pressur
e every two weeks, or at least once a
month.
Do not forget the spare. The inflation pressure for the spare tire should be the same
as
that for the standard tire. ( P.364 )
■Effects of incorrect tire inflation pressure
Driving with incorrect tire inflation pressure may result in the following:
•Wasting fuel
• Reducing driving comfort and tire life
• Making your vehicle less safe to drive
If a tire needs frequent refilling, have it checked by your Lexus dealer.
■Instructions for checking tire inflation pressure
When checking tire inflation pressure, observing the following;
• Check only when the tires are cold.
If your vehicle has been parked for at least 3 hours and has not been driven for
mor
e than 1 mile or 1.5 km since, you will get an accurate cold tire inflation pres -
sure reading.
• Always use a tire pressure gauge.
The appearance of the tire can be misleadi n
g. In addition, tire inflation pressures
that are even just a few pounds off can degrade ride and handling.
• Do not bleed or reduce tire inflation pressure after driving.
It is normal for the tire inflation pressure to be higher after driving.
• Never exceed the vehicle weight capacity.
Passengers and luggage weight should be pla
ced so that the vehicle is bal-
anced.