ECO LEXUS LS500 2019 Owners Manual
[x] Cancel search | Manufacturer: LEXUS, Model Year: 2019, Model line: LS500, Model: LEXUS LS500 2019Pages: 512, PDF Size: 9.71 MB
Page 364 of 512
364 6-2. Maintenance
LS500_OM_(U)_1810 6-2.Maintenance
■
Repair and replacement
It is recommended that genuine Lexus parts
be used for repairs to ensure performance
of each system. If non-Lexus parts are used
in replacement or if a repair shop other than
a Lexus dealer perfor ms repairs, confirm
the warranty coverage. ■
Allow inspection and repairs to be per-
formed by a Lexus dealer●
Lexus technicians are well-trained spe-
cialists and are kept up to date with the
latest service information. They are well
informed about the operation of all sys-
tems on your vehicle.●
Keep a copy of the repa ir order. It proves
that the maintenance that has been per-
formed is under warra nty coverage. If any
problem should arise while your vehicle is
under warranty, your Lexus dealer will
promptly take care of it. General maintenance should be per-
formed on a daily basis. This can be
done by yourself or by a Lexus dealer.
Scheduled maintenance should be
performed at specified intervals
according to the maintenance sched-
ule. For details about ma intenance items and
schedules, refer to the “Warranty and Ser-
vice Guide”, “Owner’s Manual Supple-
ment” or “Scheduled Maintenance”.
■
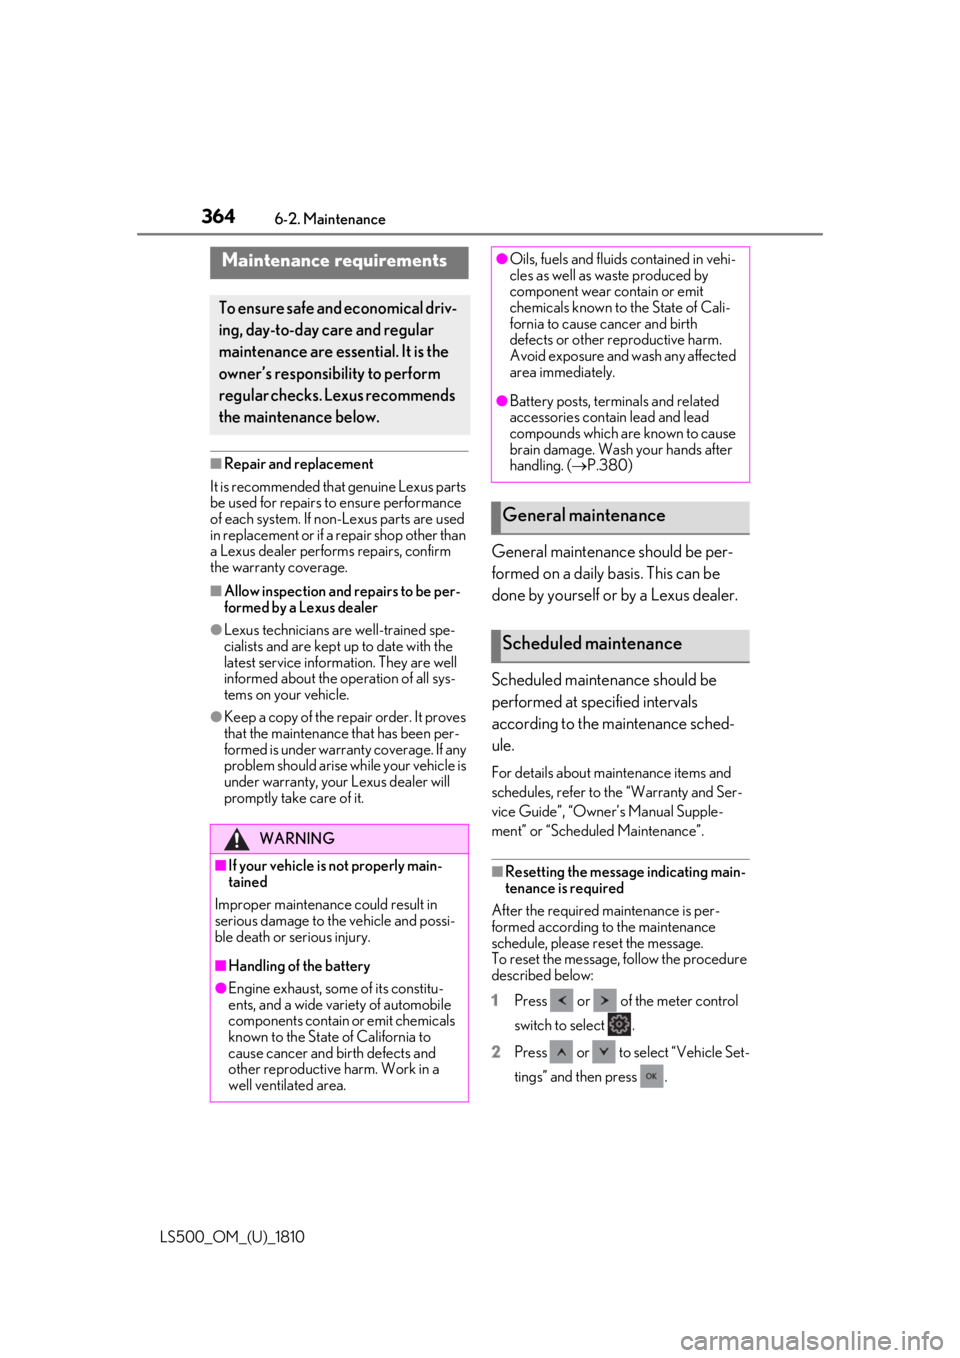
Resetting the message indicating main-
tenance is required
After the required maintenance is per-
formed according to the maintenance
schedule, please reset the message.
To reset the message, follow the procedure
described below:
1 Press or of the meter control
switch to select .
2 Press or to select “Vehicle Set-
tings” and then press .Maintenance requirements To ensure safe and economical driv-
ing, day-to-day care and regular
maintenance are essential. It is the
owner’s responsibility to perform
regular checks. Lexus recommends
the maintenance below.
WARNING
■
If your vehicle is not properly main-
tained
Improper maintenanc e could result in
serious damage to the vehicle and possi-
ble death or serious injury.
■
Handling of the battery
●
Engine exhaust, some of its constitu-
ents, and a wide variety of automobile
components contain or emit chemicals
known to the State of California to
cause cancer and birth defects and
other reproductive harm. Work in a
well ventilated area. ●
Oils, fuels and fluids contained in vehi-
cles as well as waste produced by
component wear contain or emit
chemicals known to the State of Cali-
fornia to cause cancer and birth
defects or other re productive harm.
Avoid exposure and wash any affected
area immediately. ●
Battery posts, terminals and related
accessories contai n lead and lead
compounds which are known to cause
brain damage. Wash your hands after
handling. ( P.380)
General maintenance
Scheduled maintenance
Page 365 of 512
3656-2. Maintenance
LS500_OM_(U)_1810 6
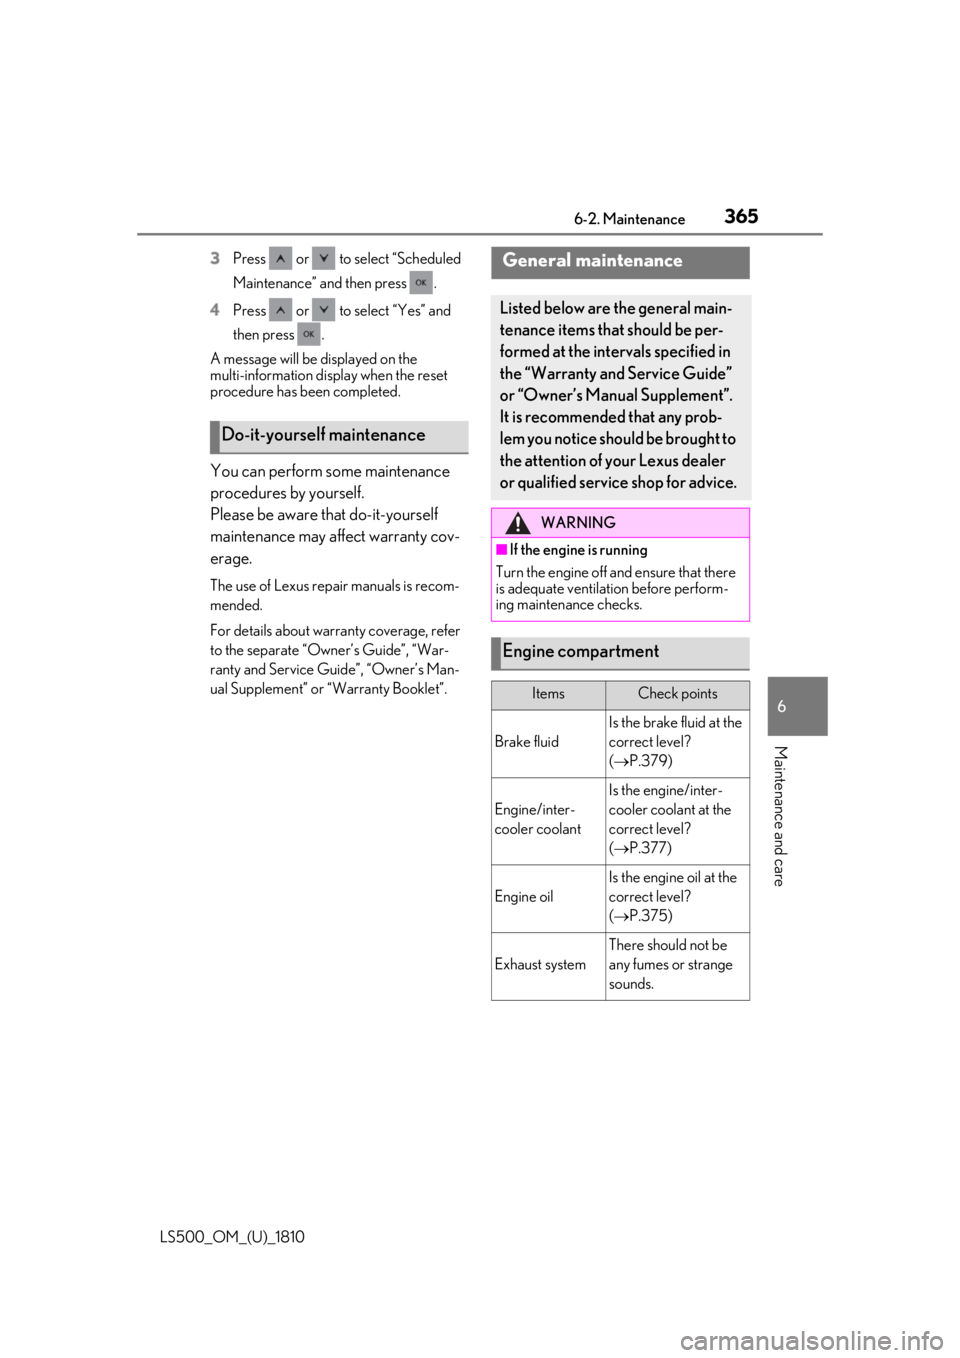
Maintenance and care 3 Press or to select “Scheduled
Maintenance” and then press .
4 Press or to select “Yes” and
then press .
A message will be displayed on the
multi-information disp lay when the reset
procedure has been completed.
You can perform some maintenance
procedures by yourself.
Please be aware that do-it-yourself
maintenance may affect warranty cov-
erage. The use of Lexus repair manuals is recom-
mended.
For details about warra nty coverage, refer
to the separate “Owner’s Guide”, “War-
ranty and Service Guide”, “Owner’s Man-
ual Supplement” or “Warranty Booklet”.Do-it-yourself maintenance General maintenance Listed below are the general main-
tenance items that should be per-
formed at the intervals specified in
the “Warranty and Service Guide”
or “Owner’s Manual Supplement”.
It is recommended that any prob-
lem you notice should be brought to
the attention of your Lexus dealer
or qualified service shop for advice. WARNING■
If the engine is running
Turn the engine off and ensure that there
is adequate ventilati on before perform-
ing maintenance checks.
Engine compartment Items Check points
Brake fluid Is the brake fluid at the
correct level?
( P.379)
Engine/inter-
cooler coolant Is the engine/inter-
cooler coolant at the
correct level?
( P.377)
Engine oil Is the engine oil at the
correct level?
( P.375)
Exhaust system There should not be
any fumes or strange
sounds.
Page 370 of 512
370 6-3. Do-it-yourself maintenance
LS500_OM_(U)_1810 Tire inflation pres-
sure ( P.395) • Tire pressure gauge
•Compressed air
source
Washer fluid
( P.379) • Water or washer
fluid containing anti-
freeze (for winter
use)
• Funnel (used only for
adding water or
washer fluid)
WARNING
The engine compartment contains many
mechanisms and fluids that may move
suddenly, become hot, or become elec-
trically energized. To avoid death or seri-
ous injury, observe the following
precautions. ■
When working on the engine com-
partment●
Keep hands, clothi ng and tools away
from the moving fan and engine drive
belt.●
Be careful not to touch the engine,
radiator, exhaust manifold, etc. right
after driving as they may be hot. Oil
and other fluids may also be hot.
●
Do not leave anything that may burn
easily, such as paper and rags, in the
engine compartment.
●
Do not smoke, cause sparks or expose
an open flame to fuel. Fuel fumes are
flammable.
■
When working near the electric cool-
ing fan or radiator grille
Be sure the engine switch is off.
With the engine switch in IGNITION
ON mode, the electric cooling fan may
automatically start to run if the air condi-
tioning is on and/or the coolant tempera-
ture is high. ( P.378)Items Parts and tools ■
Safety glasses
Wear safety glasses to prevent flying or
falling material, fluid spray, etc. from get-
ting in your eyes.
NOTICE■
If you remove the air cleaner filter
Driving with the air cleaner filter
removed may cause excessive engine
wear due to dirt in the air.
Page 380 of 512
380 6-3. Do-it-yourself maintenance
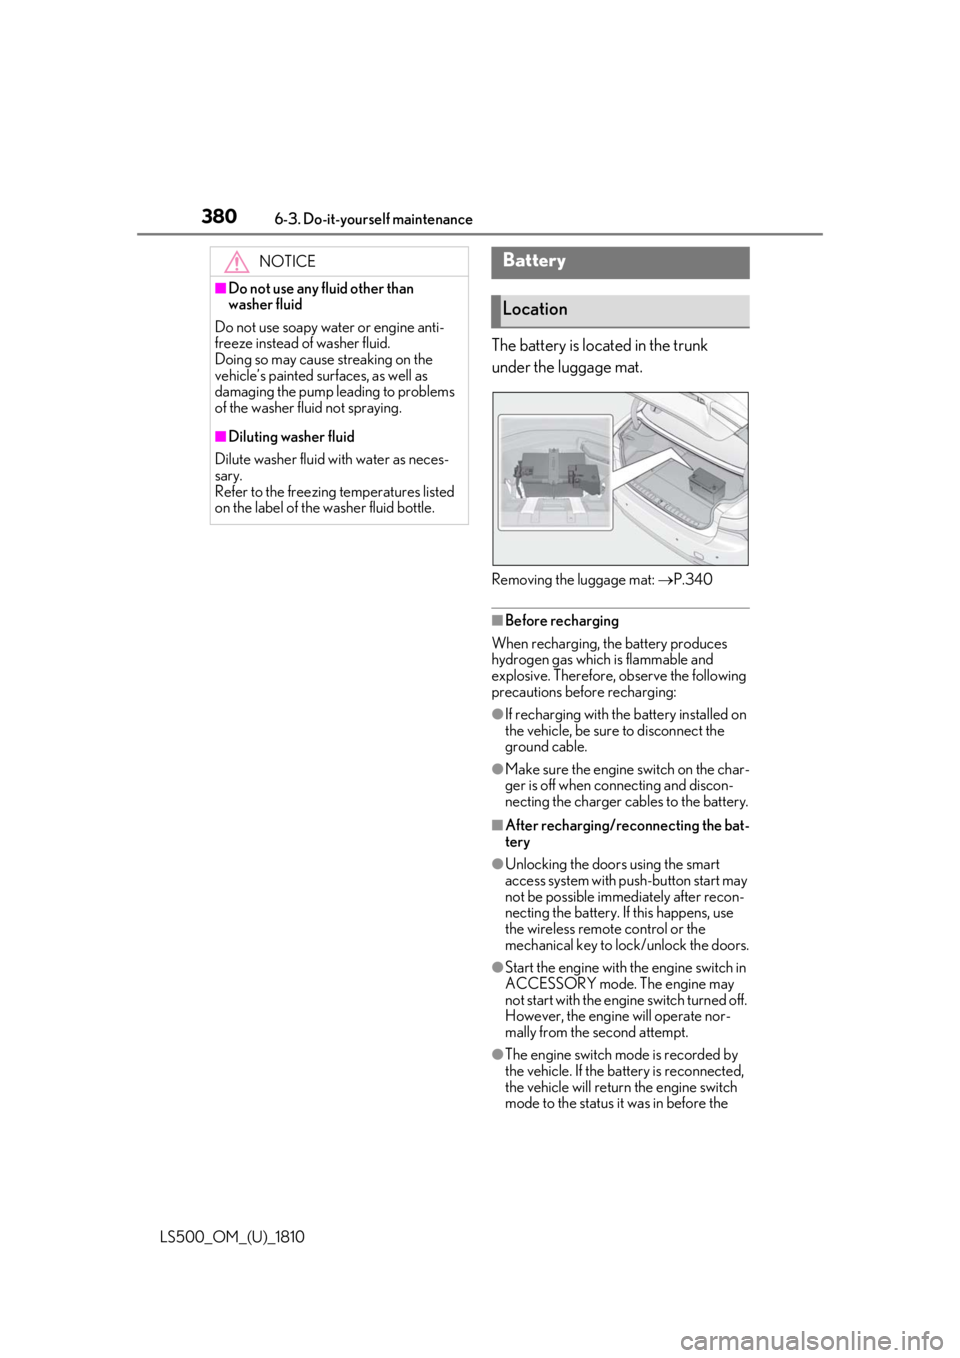
LS500_OM_(U)_1810 The battery is located in the trunk
under the luggage mat.
Removing the luggage mat: P.340
■
Before recharging
When recharging, the battery produces
hydrogen gas which is flammable and
explosive. Therefore, observe the following
precautions before recharging: ●
If recharging with the battery installed on
the vehicle, be sure to disconnect the
ground cable. ●
Make sure the engine switch on the char-
ger is off when connecting and discon-
necting the charger cables to the battery. ■
After recharging/reconnecting the bat-
tery ●
Unlocking the doors using the smart
access system with pu sh-button start may
not be possible immediately after recon-
necting the battery. If this happens, use
the wireless remote control or the
mechanical key to lo ck/unlock the doors.
●
Start the engine with the engine switch in
ACCESSORY mode. The engine may
not start with the engine switch turned off.
However, the engine will operate nor-
mally from the second attempt.
●
The engine switch mode is recorded by
the vehicle. If the battery is reconnected,
the vehicle will return the engine switch
mode to the status it was in before the NOTICE■
Do not use any fluid other than
washer fluid
Do not use soapy water or engine anti-
freeze instead of washer fluid.
Doing so may cause streaking on the
vehicle’s painted surfaces, as well as
damaging the pump leading to problems
of the washer fluid not spraying. ■
Diluting washer fluid
Dilute washer fluid with water as neces-
sary.
Refer to the freezing temperatures listed
on the label of the washer fluid bottle. Battery
Location
Page 383 of 512
3836-3. Do-it-yourself maintenance
LS500_OM_(U)_1810 6
Maintenance and care ■
When to replace your vehicle’s tires
Tires should be replaced if: ●
The treadwear indicators are showing on
a tire.●
You have tire damage such as cuts, splits,
cracks deep enough to expose the fabric,
and bulges indicating internal damage●
A tire goes flat repeatedly or cannot be
properly repaired due to the size or loca-
tion of a cut or other damage
If you are not sure, consult with your Lexus
dealer. ■
Tire life
Any tire over 6 years old must be checked
by a qualified technician even if it has sel-
dom or never been used or damage is not
obvious. ■
Maximum load of tire
Check that the maximum load of the
replacement tire is greater than 1/2 of the
Gross Axle Weight Ratings (GAWR) of
either the front axle or the rear axle, which-
ever is greater.
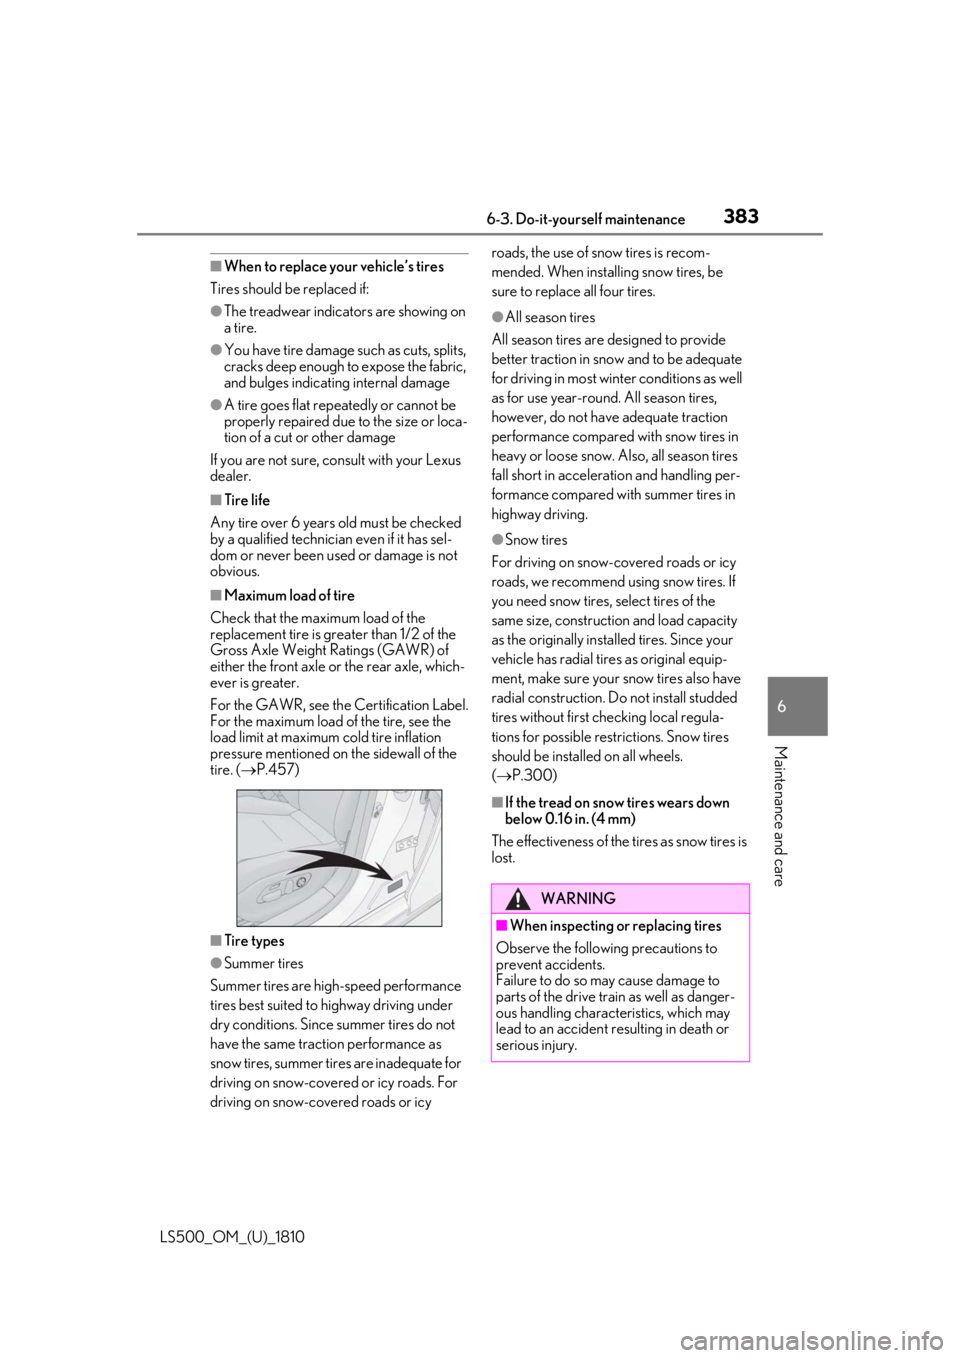
For the GAWR, see the Certification Label.
For the maximum load of the tire, see the
load limit at maximum cold tire inflation
pressure mentioned on the sidewall of the
tire. ( P.457)
■
Tire types
●
Summer tires
Summer tires are high-speed performance
tires best suited to highway driving under
dry conditions. Since summer tires do not
have the same traction performance as
snow tires, summer tires are inadequate for
driving on snow-covered or icy roads. For
driving on snow-covered roads or icy roads, the use of snow tires is recom-
mended. When installing snow tires, be
sure to replace all four tires. ●
All season tires
All season tires are designed to provide
better traction in snow and to be adequate
for driving in most winter conditions as well
as for use year-round. All season tires,
however, do not have adequate traction
performance compared with snow tires in
heavy or loose snow. Also, all season tires
fall short in accelerati on and handling per-
formance compared with summer tires in
highway driving. ●
Snow tires
For driving on snow-covered roads or icy
roads, we recommend using snow tires. If
you need snow tires, select tires of the
same size, construction and load capacity
as the originally instal led tires. Since your
vehicle has radial tires as original equip-
ment, make sure your snow tires also have
radial construction. Do not install studded
tires without first checking local regula-
tions for possible restrictions. Snow tires
should be installed on all wheels.
( P.300) ■
If the tread on snow tires wears down
below 0.16 in. (4 mm)
The effectiveness of the tires as snow tires is
lost.
WARNING
■
When inspecting or replacing tires
Observe the following precautions to
prevent accidents.
Failure to do so may cause damage to
parts of the drive train as well as danger-
ous handling characteristics, which may
lead to an accident resulting in death or
serious injury.
Page 384 of 512
384 6-3. Do-it-yourself maintenance
LS500_OM_(U)_1810
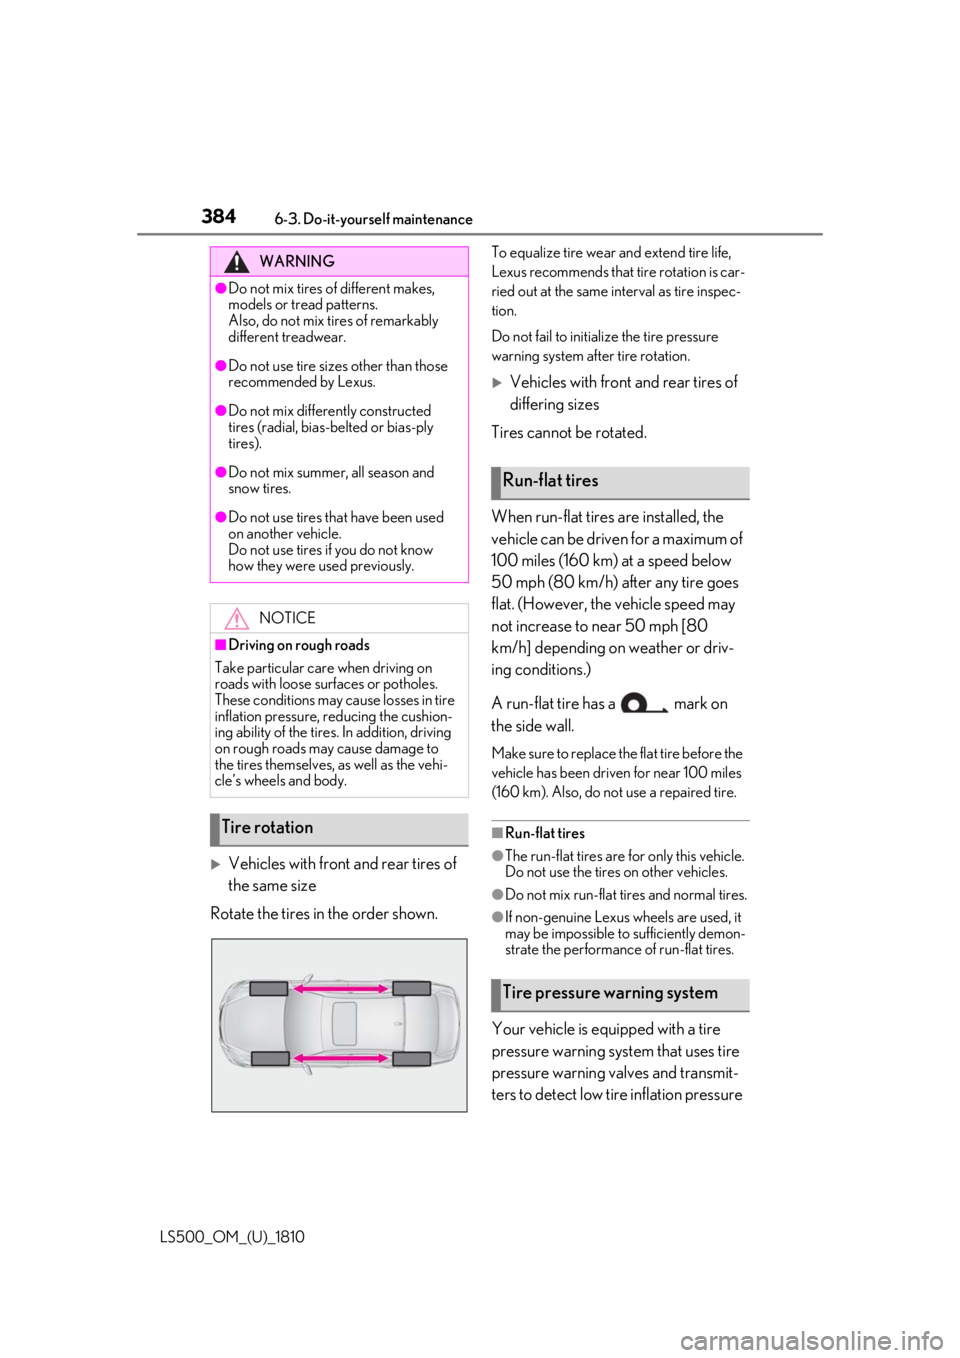
Vehicles with front and rear tires of
the same size
Rotate the tires in the order shown. To equalize tire wear and extend tire life,
Lexus recommends that tire rotation is car-
ried out at the same in terval as tire inspec-
tion.
Do not fail to initialize the tire pressure
warning system after tire rotation.
Vehicles with front and rear tires of
differing sizes
Tires cannot be rotated.
When run-flat tires are installed, the
vehicle can be driven for a maximum of
100 miles (160 km) at a speed below
50 mph (80 km/h) after any tire goes
flat. (However, the vehicle speed may
not increase to near 50 mph [80
km/h] depending on weather or driv-
ing conditions.)
A run-flat tire has a mark on
the side wall. Make sure to replace the flat tire before the
vehicle has been driven for near 100 miles
(160 km). Also, do not use a repaired tire.
■
Run-flat tires ●
The run-flat tires are for only this vehicle.
Do not use the tires on other vehicles. ●
Do not mix run-flat tires and normal tires.
●
If non-genuine Lexus wheels are used, it
may be impossible to sufficiently demon-
strate the performance of run-flat tires.
Your vehicle is equipped with a tire
pressure warning system that uses tire
pressure warning valves and transmit-
ters to detect low ti re inflation pressure WARNING●
Do not mix tires of different makes,
models or tread patterns.
Also, do not mix tires of remarkably
different treadwear.●
Do not use tire sizes other than those
recommended by Lexus.●
Do not mix differently constructed
tires (radial, bias-b elted or bias-ply
tires).●
Do not mix summer, all season and
snow tires.●
Do not use tires that have been used
on another vehicle.
Do not use tires if you do not know
how they were used previously.
NOTICE■
Driving on rough roads
Take particular care when driving on
roads with loose surfaces or potholes.
These conditions may cause losses in tire
inflation pressure, reducing the cushion-
ing ability of the tires. In addition, driving
on rough roads may cause damage to
the tires themselves, as well as the vehi-
cle’s wheels and body.
Tire rotation Run-flat tires
Tire pressure warning system
Page 387 of 512
3876-3. Do-it-yourself maintenance
LS500_OM_(U)_1810 6
Maintenance and care
For vehicles sold in Canada
When replacing the tires or wheels, the
tire pressure warning valve and trans-
mitters must be installed to the wheels
which will be installed to the vehicle.
When new tire pressure warning
valves and transmitte rs are installed,
new ID codes must be registered in the
tire pressure warning computer and
the tire pressure warning system must
be initialized. ( P.389)■
Replacing tires and wheels
If the ID codes of the tire pressure warning
valve and transmitters are not registered,
the tire pressure warning system will not
work properly. In this case, after driving for
about 20 minutes, the tire pressure warning light will blink for approximately 1 minute
and then illuminate to indicate a system
malfunction.
Installing tire pressure warning
valves and transmitters NOTICE■
Repairing or replac ing tires, wheels,
tire pressure warning valves, trans-
mitters and tire valve caps ●
When removing or fitting the wheels,
tires or the tire pressure warning
valves and transmitters, contact your
Lexus dealer as the tire pressure warn-
ing valves and transmitters may be
damaged if not handled correctly.
●
Make sure to install the tire valve caps.
If the tire valve caps are not installed,
water may enter the valves of the tire
pressure warning valve and transmit-
ters and the valves may become stuck.
●
When replacing tire valve caps, do not
use tire valve caps other than those
specified. The cap may become stuck.
Page 389 of 512
3896-3. Do-it-yourself maintenance
LS500_OM_(U)_1810 6
Maintenance and care ■
Initialization procedure●
Make sure to perform the initialization
procedure after adjusting the tire inflation
pressure.
Also, make sure the tires are cold before
performing the initialization procedure or
adjusting the tire inflation pressure.●
If the engine switch is turned off during
initialization, it is not necessary to restart
the initialization pr ocedure from the
beginning as it will begin automatically
when the engine switch is turned back to
IGNITION ON mode.●
If initialization has accidentally been
started when it is not necessary, adjust
the tire inflation pres sure to the specified
level when the tires are cold and then
perform the initia lization procedure
again.●
While the position of each tire is being
determined and the inflation pressures
are not being displayed on the
multi-information display, if the inflation
pressure of a tire drops, the tire pressure
warning light will come on.■
If the tire pressure warning system is not
initialized properly●
In the following situations, initialization
may take longer than usual to be com-
pleted or may not be possible. (Usually,
the vehicle will need to be driven for
approximately 10 to 30 minutes to com-
plete initialization.) If initialization is not
complete after drivin g approximately 30
minutes, continue driving for a while.
• If the vehicle is driven on an unpaved
road, it may take longer to complete ini-
tialization.
• If the vehicle is backed up while perform-
ing initialization, data collected during ini-
tialization will be cleared and it will take
longer than normal to complete.
• If the vehicle is driven in heavy traffic or
another situation where other vehicles
are driven close by, it may take time for
the system to recognize the tire pressure
warning valve and tran smitters of your
vehicle over those of other vehicles.
If initialization is no t complete after driving
for approximately 1 hour, park the vehicle in a safe place for approximately 20 minutes
and then drive the vehicle again. ●
In the following situations, initialization
will not be started or was not completed
properly and the system will not operate
properly. Perform the initialization proce-
dure again.
• If, when attempting to start initialization,
the tire pressure warning light does not
blink 3 times.
• If, when the vehicle has been driven for
about 20 minutes after performing ini-
tialization, the tire pressure warning light
blinks for approximately 1 minute and
then illuminates. ●
If initialization canno t be completed after
performing the above procedure, con-
tact your Lexus dealer.
Every tire pressure warning valve and
transmitter has a unique ID code.
When replacing a tire pressure warn-
ing valve and transmitter, it is necessary
to register the ID codes.
The ID codes can be registered on
of the multi-information display.
1 Park the vehicle in a safe place, turn
the engine switch off, wait 20 min-
utes or more, and then start the
engine. WARNING■
When initializing the tire pressure
warning system
Do not initialize the tire pressure warning
system without first adjusting the tire
inflation pressure to the specified level.
Otherwise, the tire pressure warning
light may not come on even if the tire
inflation pressure is low, or it may come
on when the tire in flation pressure is
actually normal.
Registering ID codes
Page 391 of 512
3916-3. Do-it-yourself maintenance
LS500_OM_(U)_1810 6
Maintenance and care approximately 10 to 30 minutes to com-
plete ID code registration.)
If ID code registration is not complete
after driving for approximately 30 min-
utes, continue driving for a while.
• If the vehicle is driven on an unpaved
road, it may take longer than normal to
complete registration.
• If the vehicle is backed up while perform-
ing registration, data collected during
registration will be cleared, and it will take
longer than normal to complete.
• If the vehicle is driven in heavy traffic or
another situation where other vehicles
are driven close by, it may take time for
the system to recognize the tire pressure
warning valve and tran smitters of your
vehicle over those of other vehicles.
• If a wheel with a tire pressure warning
valve and transmitter installed is inside or
near the vehicle, registration of the ID
codes for the installed wheels may not be
possible.
If ID registration is not complete after driv-
ing for approximately 1 hour, park the vehi-
cle in a safe place for approximately 20
minutes and then perform the ID code reg-
istration procedure again. ●
In the following situat ions, ID code regis-
tration will not be started or was not com-
pleted properly and the system will not
operate properly. Perform the ID code
registration procedure again.
• If, when attempting to start ID code regis-
tration, the tire pressure warning light
does not blink slowly 3 times.
• If, when the vehicle has been driven for
about 20 minutes after performing ID
code registration, the tire pressure warn-
ing light blinks for approximately 1 minute
and then illuminates.
●
If ID code registration cannot be com-
pleted after performing the above proce-
dure, contact your Lexus dealer. Stop the vehicle in a safe place on a
hard, flat surface.
Set the parking brake.
Shift the shift position to P.
Disabling the height control. (if
equipped) ( P.293)
Stop the engine. ■
Jack and tools
As your vehicle is eq uipped with run-flat
tires, the following tools for replacing a tire
are not included with your vehicle. They can
be purchased at your Lexus dealer. ●
Wheel nut wrench ●
Jack ●
Jack handleReplacing the tire When raising your vehicle with a
jack, position the jack correctly.
Improper placement may damage
your vehicle or cause injury.
If necessary tire replacement
seems difficult to perform, contact
your Lexus dealer.
Before jacking up the vehicle
Page 395 of 512
3956-3. Do-it-yourself maintenance
LS500_OM_(U)_1810 6
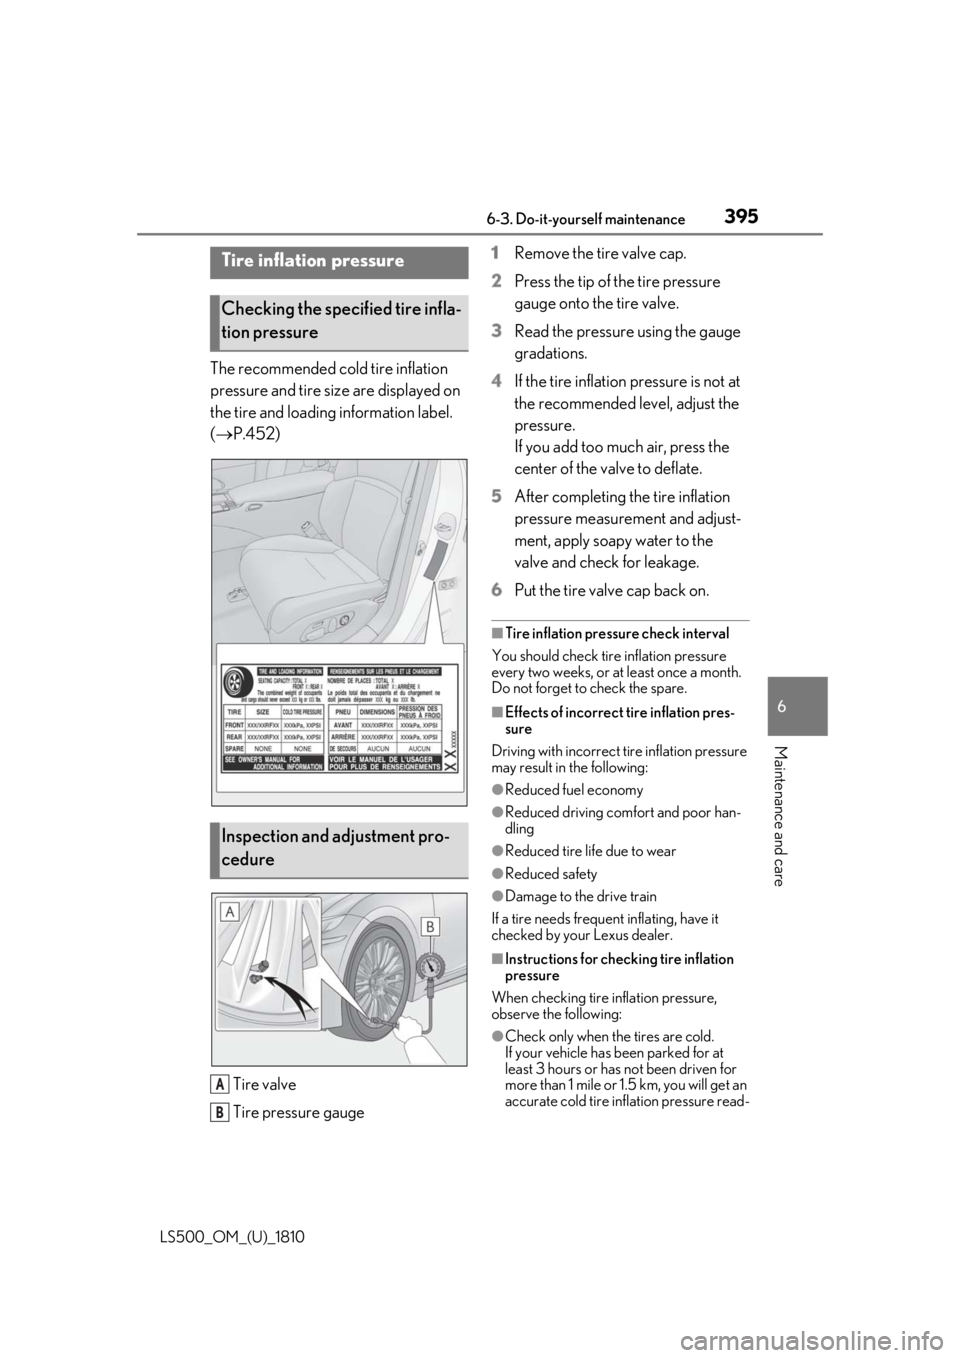
Maintenance and care The recommended cold tire inflation
pressure and tire size are displayed on
the tire and loading information label.
( P.452)
Tire valve
Tire pressure gauge 1 Remove the tire valve cap.
2 Press the tip of the tire pressure
gauge onto the tire valve.
3 Read the pressure using the gauge
gradations.
4 If the tire inflation pressure is not at
the recommended level, adjust the
pressure.
If you add too much air, press the
center of the valve to deflate.
5 After completing the tire inflation
pressure measurement and adjust-
ment, apply soapy water to the
valve and check for leakage.
6 Put the tire valve cap back on. ■
Tire inflation pressure check interval
You should check tire inflation pressure
every two weeks, or at least once a month.
Do not forget to check the spare. ■
Effects of incorrect tire inflation pres-
sure
Driving with incorrect ti re inflation pressure
may result in the following: ●
Reduced fuel economy ●
Reduced driving comfort and poor han-
dling ●
Reduced tire life due to wear ●
Reduced safety ●
Damage to the drive train
If a tire needs frequent inflating, have it
checked by your Lexus dealer.
■
Instructions for checking tire inflation
pressure
When checking tire inflation pressure,
observe the following:
●
Check only when the tires are cold.
If your vehicle has been parked for at
least 3 hours or has not been driven for
more than 1 mile or 1.5 km, you will get an
accurate cold tire inflation pressure read-Tire inflation pressure
Checking the specified tire infla-
tion pressure
Inspection and adjustment pro-
cedure
A
B