fuse LEXUS LS500H 2020 Owners Manual
[x] Cancel search | Manufacturer: LEXUS, Model Year: 2020, Model line: LS500H, Model: LEXUS LS500H 2020Pages: 516, PDF Size: 10.38 MB
Page 4 of 516
4TABLE OF CONTENTS
5-6. Using the other interior featuresOther interior features .............. 346
Garage door opener.................. 354
6-1. Maintenance and care Cleaning and protecting the vehi-cle exterior ................................... 362
Cleaning and protecting the vehi- cle interior .................................... 365
6-2. Maintenance Maintenance requirements ..... 368
General maintenance ................ 369
Emission inspection and mainte- nance (I/M) programs ............ 372
6-3. Do-it-yourself maintenance Do-it-yourself service precautions........................................................... 373
Hood.................................................. 375
Positioning a floor jack............... 375
Engine compartment.................. 377
Battery .............................................. 385
Tires ................................................... 387
Replacing the tire ......................... 395
Tire inflation pressure ................. 399
Wheels.............................................. 400
Air conditioning filter..................402
Electronic key battery ................ 403
Checking and replacing fuses ........................................................... 405
Light bulbs ....................................... 4087-1. Essential information
Emergency flashers ..................... 410
If your vehicle has to be stopped in an emergency ............................. 410
If the vehicle is trapped in rising water ................................................. 411
7-2. Steps to take in an emergency If your vehicle needs to be towed............................................................ 413
If you think something is wrong ............................................................ 417
Fuel pump shut off system ......... 418
If a warning light turns on or a warn- ing buzzer sounds...................... 419
If a warning messa ge is displayed
.......................................................... 429
If you have a flat tire .................... 433
If the engine will not start .......... 434
If you lose your keys.................... 436
If the fuel filler door cannot be opened .......................................... 436
If the electronic key does not oper- ate properly ................................. 437
If the vehicle battery is discharged .......................................................... 439
If your vehicle overheats ........... 444
If the vehicle becomes stuck ... 447
8-1. Specifications Maintenance data (fuel, oil level, etc.) ................................................. 450
Fuel information............................ 459
6Maintenance and care
7When trouble arises
8Vehicle specifications
Page 349 of 516
3495-6. Using the other interior features
5
Interior features
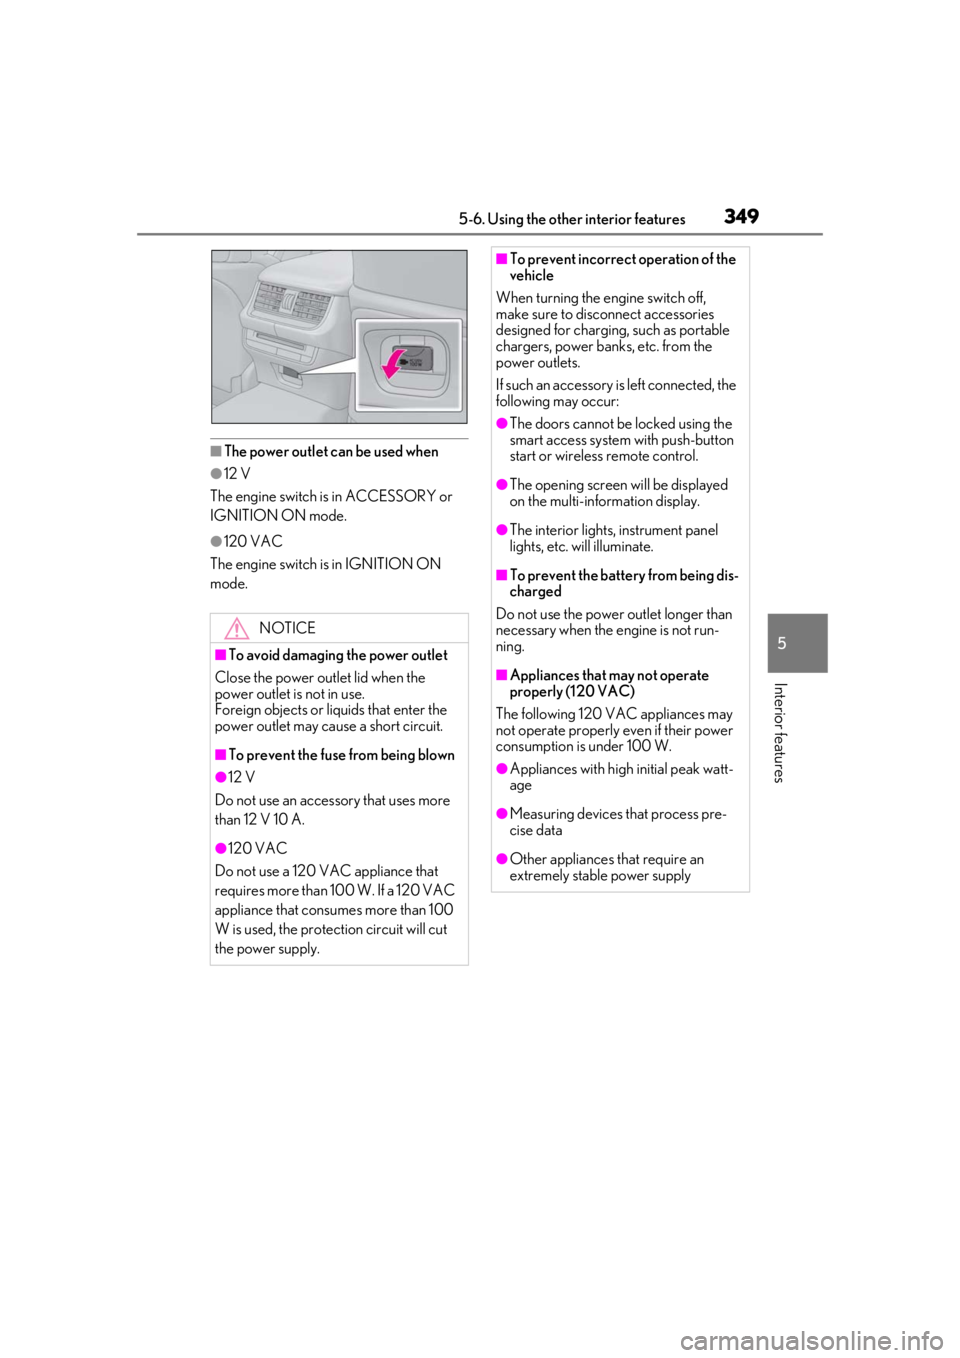
■The power outlet can be used when
●12 V
The engine switch is in ACCESSORY or
IGNITION ON mode.
●120 VAC
The engine switch is in IGNITION ON
mode.
NOTICE
■To avoid damaging the power outlet
Close the power outlet lid when the
power outlet is not in use.
Foreign objects or liquids that enter the
power outlet may cause a short circuit.
■To prevent the fuse from being blown
●12 V
Do not use an accessory that uses more
than 12 V 10 A.
●120 VAC
Do not use a 120 VAC appliance that
requires more than 100 W. If a 120 VAC
appliance that consumes more than 100
W is used, the protection circuit will cut
the power supply.
■To prevent incorrect operation of the
vehicle
When turning the engine switch off,
make sure to disc onnect accessories
designed for charging , such as portable
chargers, power banks, etc. from the
power outlets.
If such an accessory is left connected, the
following may occur:
●The doors cannot be locked using the
smart access system with push-button
start or wireless remote control.
●The opening screen will be displayed
on the multi-information display.
●The interior lights, instrument panel
lights, etc. will illuminate.
■To prevent the battery from being dis-
charged
Do not use the power outlet longer than
necessary when the engine is not run-
ning.
■Appliances that may not operate
properly (120 VAC)
The following 120 VAC appliances may
not operate properly even if their power
consumption is under 100 W.
●Appliances with high initial peak watt-
age
●Measuring devices that process pre-
cise data
●Other appliances that require an
extremely stable power supply
Page 361 of 516
361
6
6
Maintenance and care
Maintenance and care
.6-1. Maintenance and careCleaning and protecting the vehi-cle exterior ................................ 362
Cleaning and protecting the vehi- cle interior ................................. 365
6-2. Maintenance Maintenance requirements........................................................ 368
General maintenance ............. 369
Emission inspection and mainte- nance (I/M) programs ......... 372
6-3. Do-it-yourself maintenance Do-it-yourself service precautions........................................................ 373
Hood............................................... 375
Positioning a floor jack............ 375
Engine compartment............... 377
Battery ........................................... 385
Tires ................................................ 387
Replacing the tire ...................... 395
Tire inflation pressure .............. 399
Wheels........................................... 400
Air conditioning filter...............402
Electronic key battery ............. 403
Checking and replacing fuses ........................................................ 405
Light bulbs .................................... 408
Page 363 of 516
3636-1. Maintenance and care
6
Maintenance and care
●Do not use detergent on the brake cali-
pers when they are hot.
●Wash detergent off immediately after
use.
■Bumpers and side moldings
Do not scrub with abrasive cleaners.
■Front side windows water-repellent
coating (if equipped)
●The following precautions can extend the
effectiveness of the water-repellent coat-
ing.
• Remove any dirt, etc. from the front side windows regularly.
• Do not allow dirt and dust to accumulate
on the windows for a long period.
Clean the windows with a soft, damp
cloth as soon as possible.
• Do not use wax or glass cleaners that contain abrasives when cleaning the win-
dows.
• Do not use any metallic objects to remove condensation build up.
●When the water-repellent performance
has become insufficie nt, the coating can
be repaired. Contact your Lexus dealer.
■Plated portions
If dirt cannot be removed, clean the parts as
follows:
●Use a soft cloth dampened with an
approximately 5% solution of neutral
detergent and water to clean the dirt off.
●Wipe the surface with a dry, soft cloth to
remove any remaining moisture.
●To remove oily deposits, use alcohol wet
wipes or a similar product.
WARNING
■When washing the vehicle
Do not apply water to the inside of the
engine compartment. Doing so may
cause the electrical components, etc. to
catch fire.
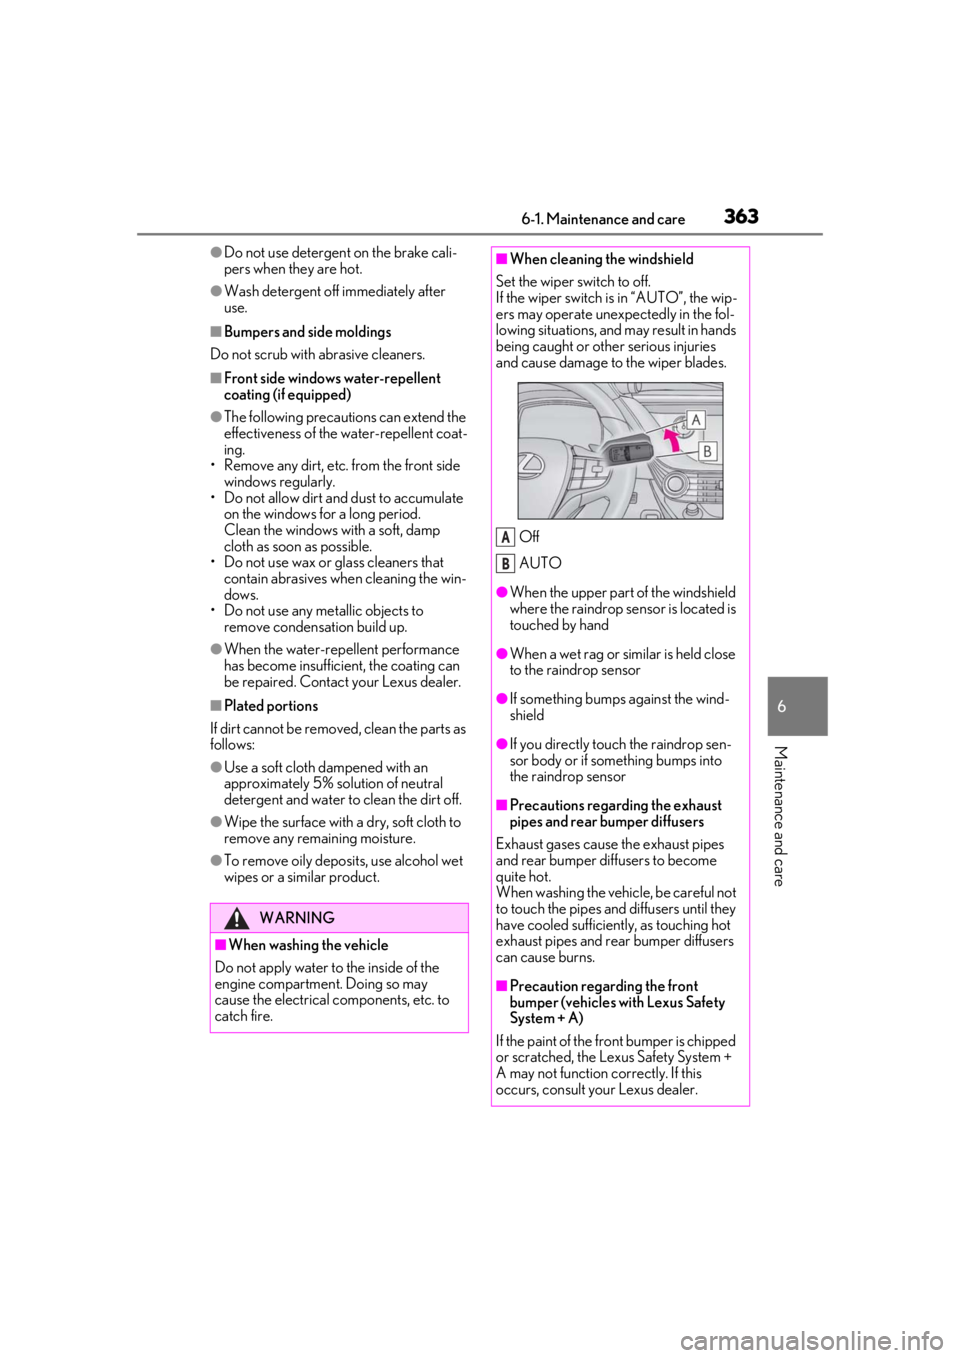
■When cleaning the windshield
Set the wiper switch to off.
If the wiper switch is in “AUTO”, the wip-
ers may operate unexpectedly in the fol-
lowing situations, and may result in hands
being caught or other serious injuries
and cause damage to the wiper blades.
Off
AUTO
●When the upper part of the windshield
where the raindrop sensor is located is
touched by hand
●When a wet rag or similar is held close
to the raindrop sensor
●If something bumps against the wind-
shield
●If you directly touch the raindrop sen-
sor body or if something bumps into
the raindrop sensor
■Precautions regarding the exhaust
pipes and rear bumper diffusers
Exhaust gases cause the exhaust pipes
and rear bumper diffusers to become
quite hot.
When washing the vehicle, be careful not
to touch the pipes and diffusers until they
have cooled sufficiently, as touching hot
exhaust pipes and rear bumper diffusers
can cause burns.
■Precaution regarding the front
bumper (vehicles with Lexus Safety
System + A)
If the paint of the front bumper is chipped
or scratched, the Le xus Safety System +
A may not function correctly. If this
occurs, consult your Lexus dealer.
A
B
Page 373 of 516
3736-3. Do-it-yourself maintenance
6
Maintenance and care
6-3.Do-it-yourself maintenance
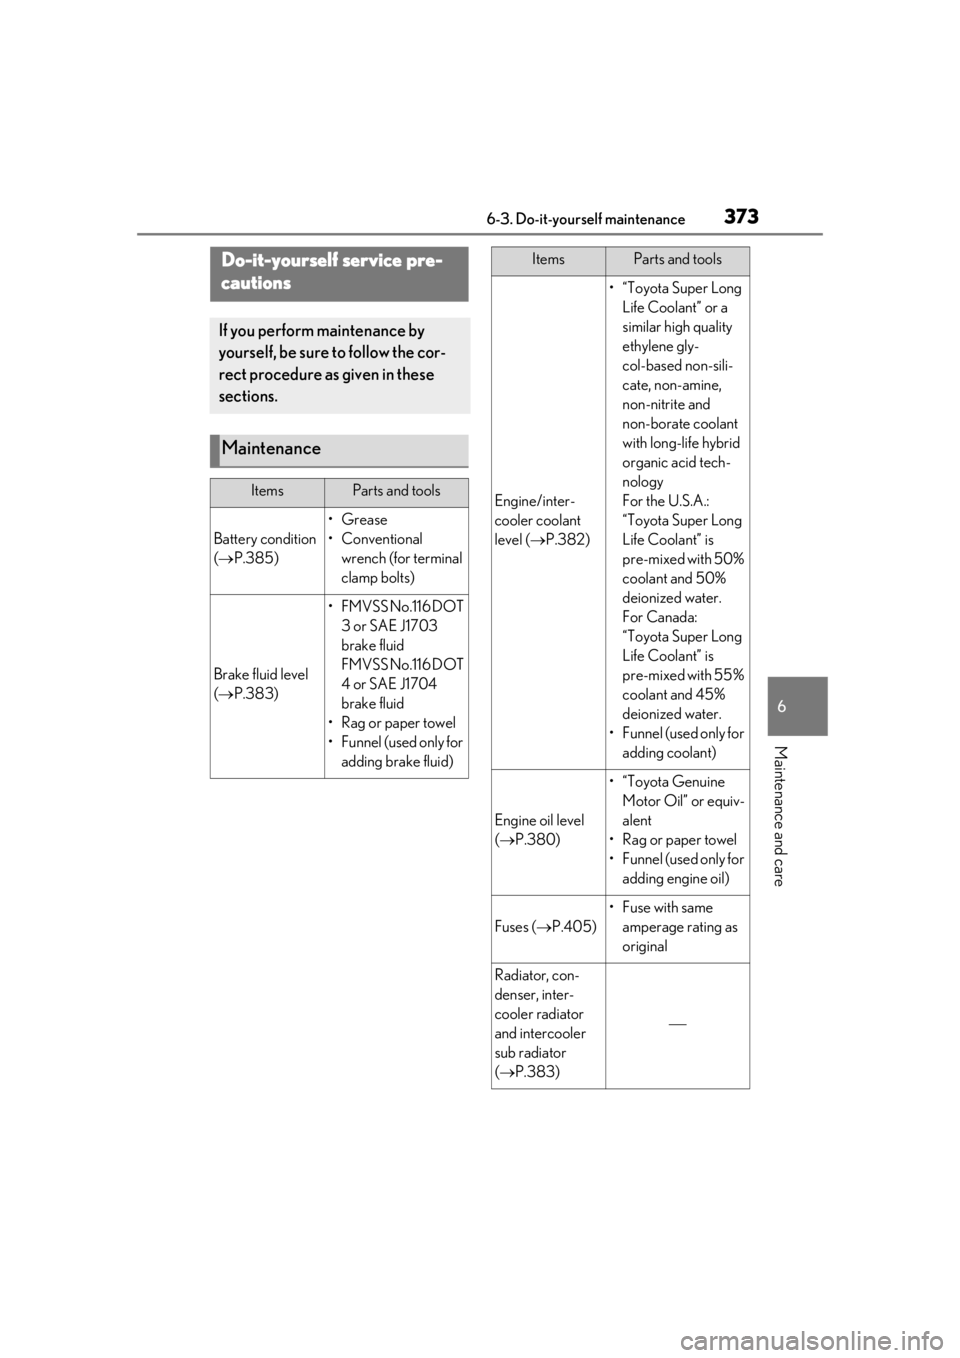
Do-it-yourself service pre-
cautions
If you perform maintenance by
yourself, be sure to follow the cor-
rect procedure as given in these
sections.
Maintenance
ItemsParts and tools
Battery condition
( P.385)
•Grease
• Conventional
wrench (for terminal
clamp bolts)
Brake fluid level
( P.383)
• FMVSS No.116 DOT
3 or SAE J1703
brake fluid
FMVSS No.116 DOT
4 or SAE J1704
brake fluid
•Rag or paper towel
• Funnel (used only for adding brake fluid)
Engine/inter-
cooler coolant
level ( P.382)
•“Toyota Super Long
Life Coolant” or a
similar high quality
ethylene gly-
col-based non-sili-
cate, non-amine,
non-nitrite and
non-borate coolant
with long-life hybrid
organic acid tech-
nology
For the U.S.A.:
“Toyota Super Long
Life Coolant” is
pre-mixed with 50%
coolant and 50%
deionized water.
For Canada:
“Toyota Super Long
Life Coolant” is
pre-mixed with 55%
coolant and 45%
deionized water.
•Funnel (used only for adding coolant)
Engine oil level
( P.380)
•“Toyota Genuine
Motor Oil” or equiv-
alent
• Rag or paper towel
•Funnel (used only for adding engine oil)
Fuses ( P.405)
•Fuse with same
amperage rating as
original
Radiator, con-
denser, inter-
cooler radiator
and intercooler
sub radiator
( P.383)
ItemsParts and tools
Page 377 of 516
3776-3. Do-it-yourself maintenance
6
Maintenance and care
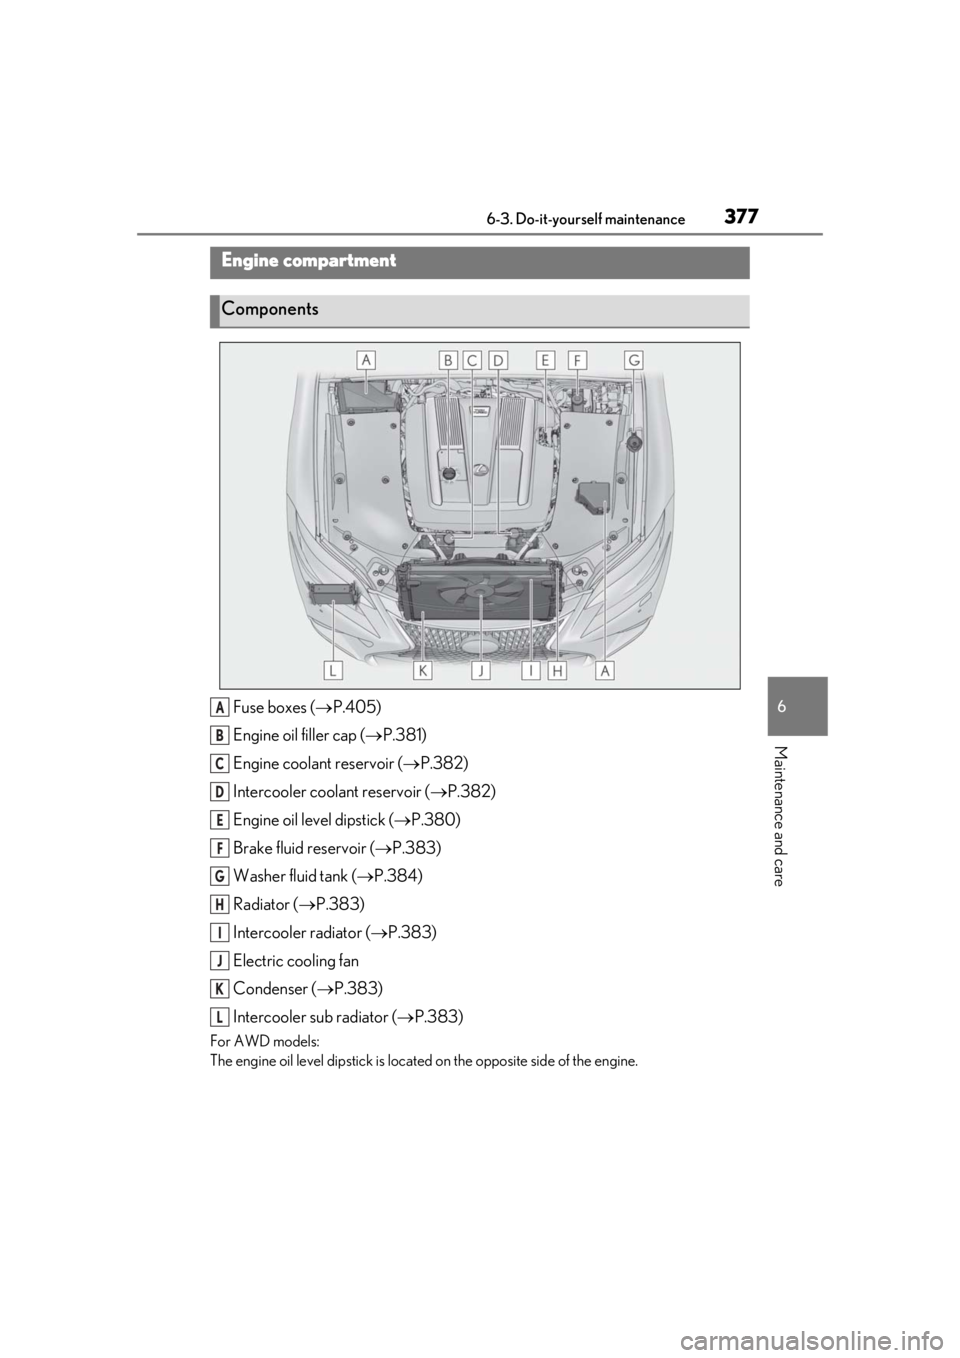
Fuse boxes (P.405)
Engine oil filler cap ( P.381)
Engine coolant reservoir ( P.382)
Intercooler coolant reservoir ( P.382)
Engine oil level dipstick ( P.380)
Brake fluid reservoir ( P.383)
Washer fluid tank ( P.384)
Radiator ( P.383)
Intercooler radiator ( P.383)
Electric cooling fan
Condenser ( P.383)
Intercooler sub radiator ( P.383)
For AWD models:
The engine oil level dipstick is locate d on the opposite side of the engine.
Engine compartment
Components
A
B
C
D
E
F
G
H
I
J
K
L
Page 405 of 516
4056-3. Do-it-yourself maintenance
6
Maintenance and care
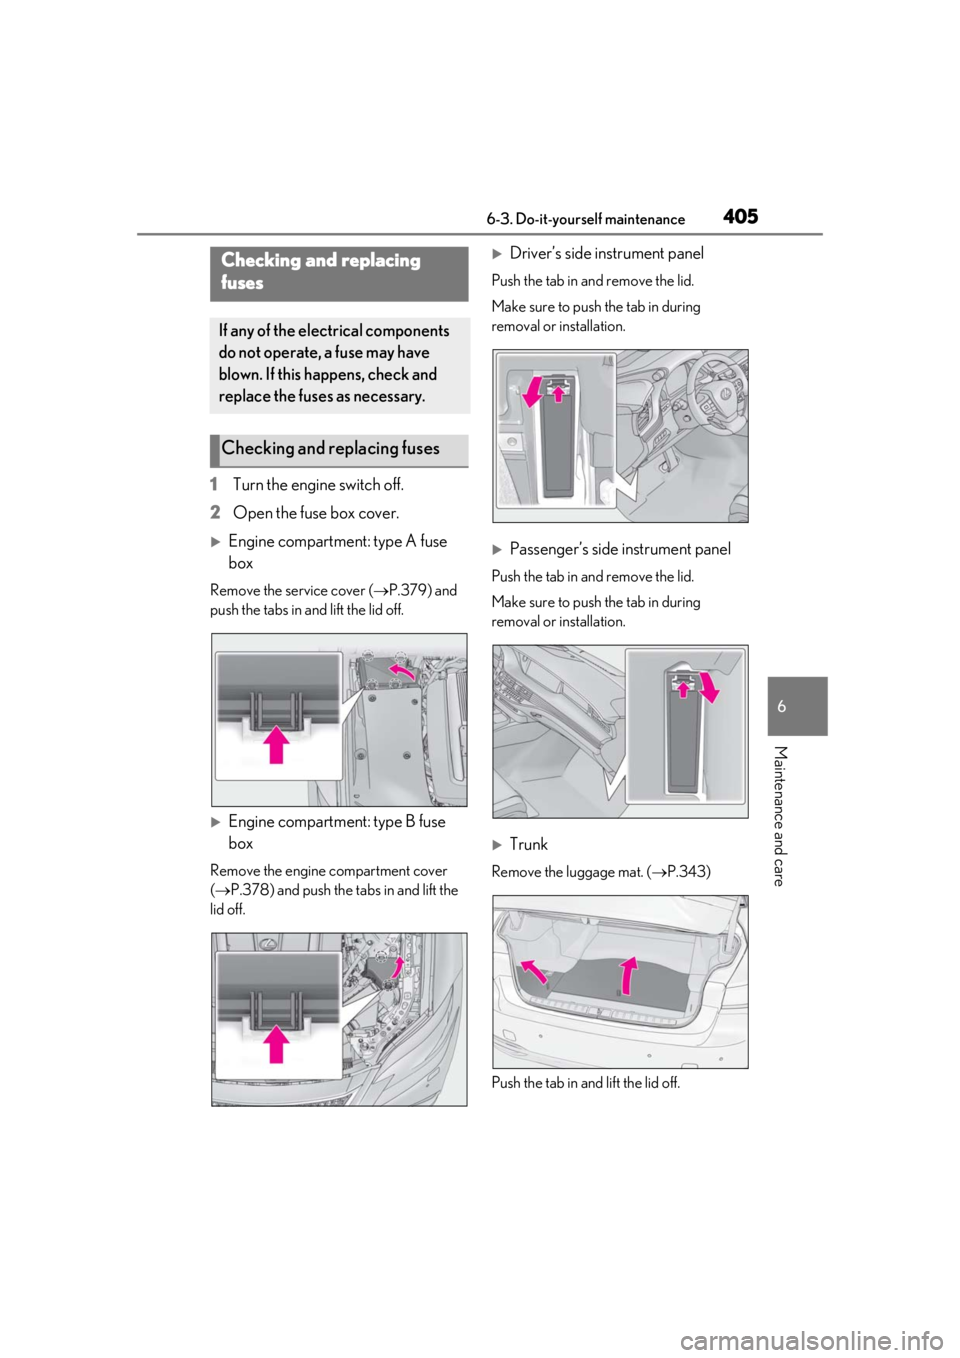
1Turn the engine switch off.
2 Open the fuse box cover.
Engine compartment: type A fuse
box
Remove the service cover ( P.379) and
push the tabs in and lift the lid off.
Engine compartment: type B fuse
box
Remove the engine compartment cover
( P.378) and push the ta bs in and lift the
lid off.
Driver’s side instrument panel
Push the tab in and remove the lid.
Make sure to push the tab in during
removal or installation.
Passenger’s side instrument panel
Push the tab in and remove the lid.
Make sure to push the tab in during
removal or installation.
Trunk
Remove the luggage mat. ( P.343)
Push the tab in and lift the lid off.
Checking and replacing
fuses
If any of the electrical components
do not operate, a fuse may have
blown. If this happens, check and
replace the fuses as necessary.
Checking and replacing fuses
Page 406 of 516
4066-3. Do-it-yourself maintenance
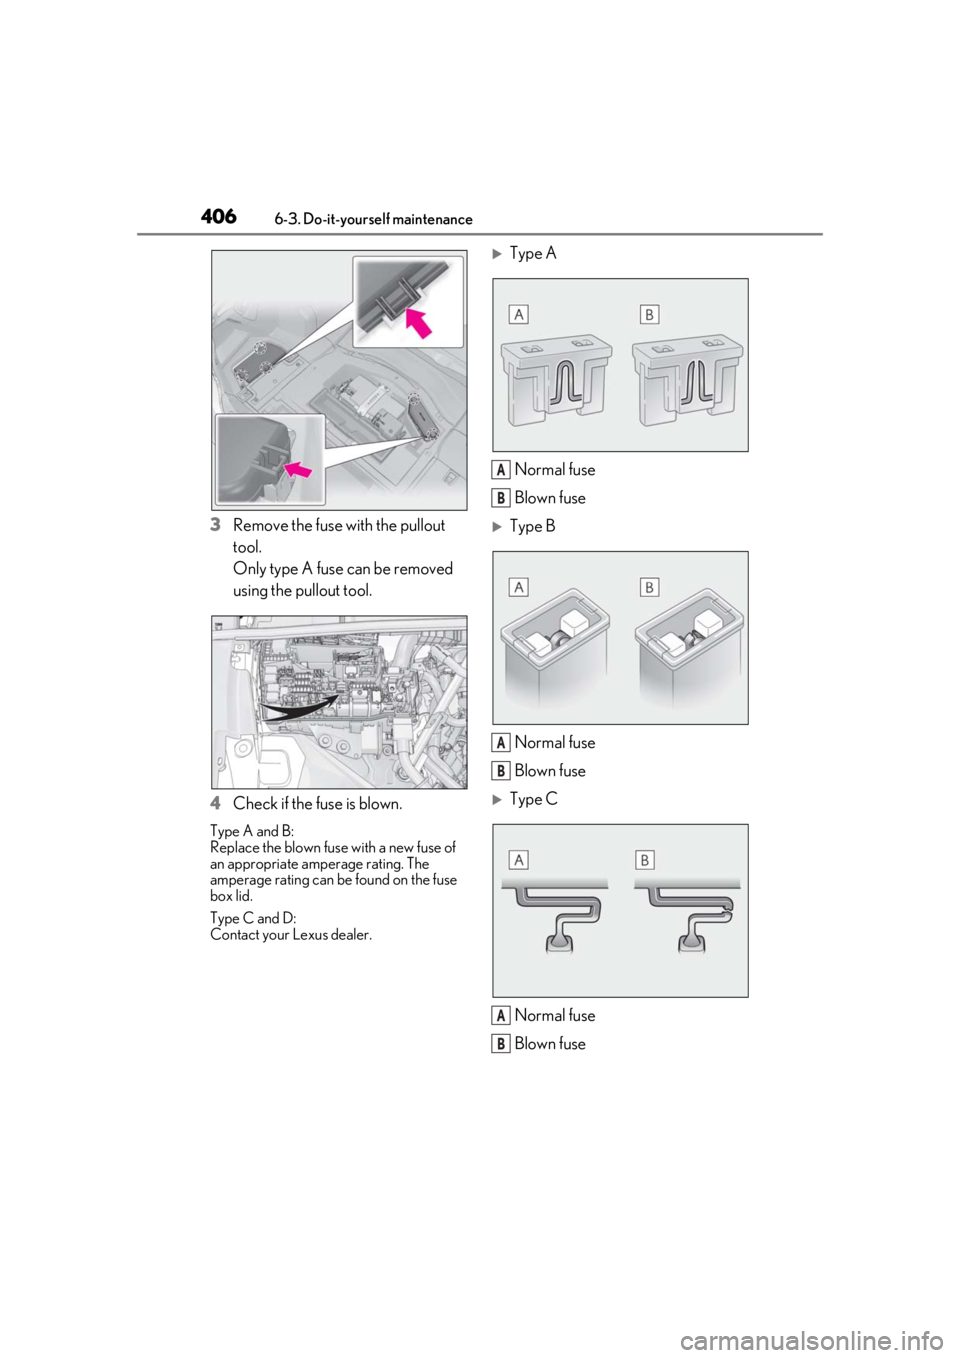
3Remove the fuse with the pullout
tool.
Only type A fuse can be removed
using the pullout tool.
4 Check if the fuse is blown.
Type A and B:
Replace the blown fuse with a new fuse of
an appropriate amperage rating. The
amperage rating can be found on the fuse
box lid.
Type C and D:
Contact your Lexus dealer.
Type A
Normal fuse
Blown fuse
Type B
Normal fuse
Blown fuse
Type CNormal fuse
Blown fuse
A
B
A
B
A
B
Page 407 of 516
4076-3. Do-it-yourself maintenance
6
Maintenance and care
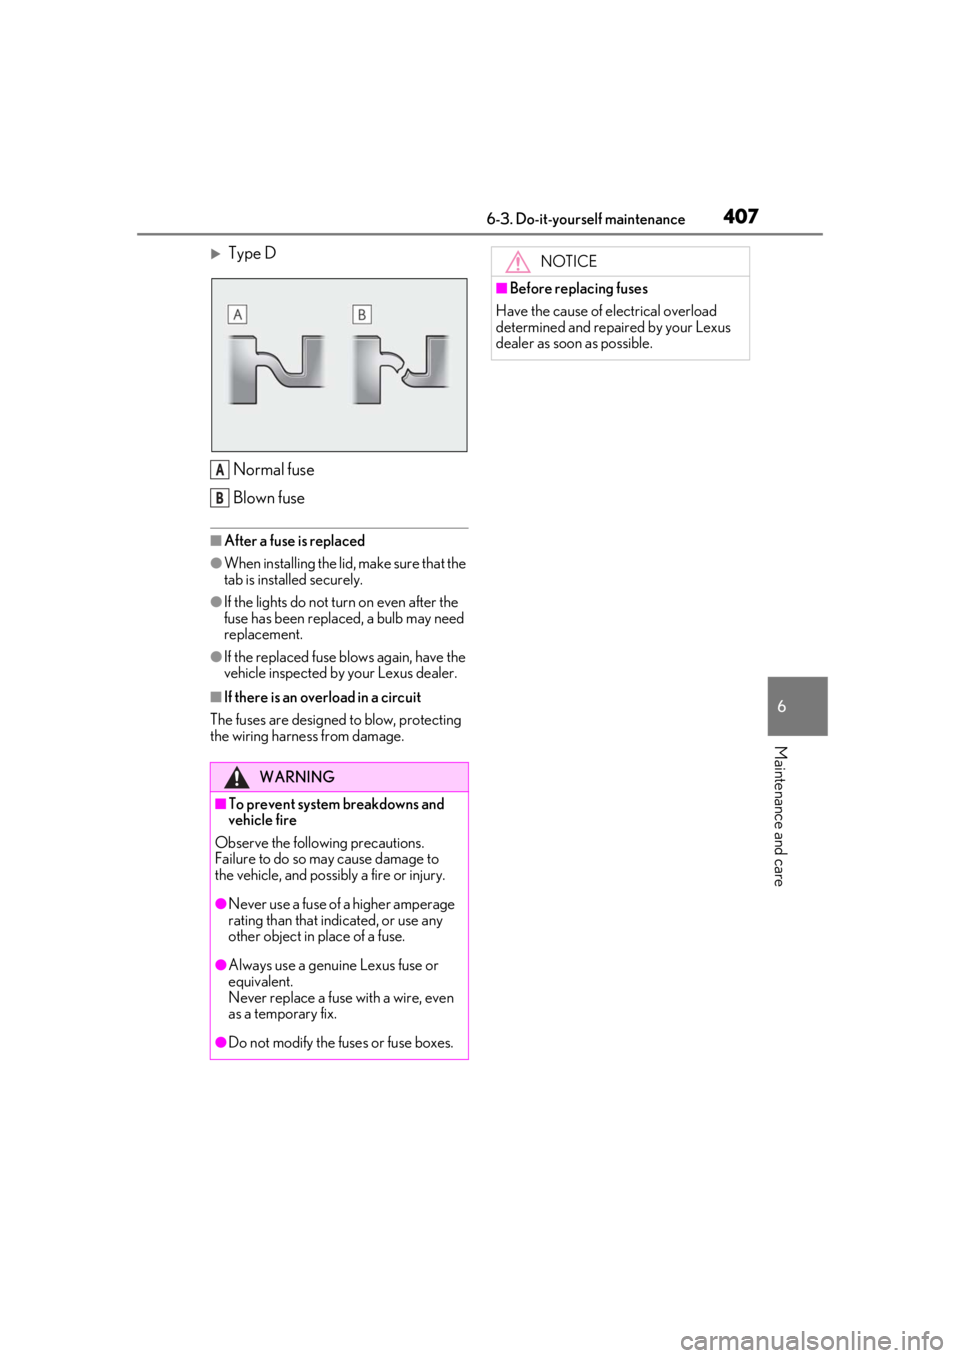
Type DNormal fuse
Blown fuse
■After a fuse is replaced
●When installing the lid, make sure that the
tab is installed securely.
●If the lights do not turn on even after the
fuse has been replaced, a bulb may need
replacement.
●If the replaced fuse blows again, have the
vehicle inspected by your Lexus dealer.
■If there is an overload in a circuit
The fuses are designed to blow, protecting
the wiring harness from damage.
WARNING
■To prevent system breakdowns and
vehicle fire
Observe the following precautions.
Failure to do so may cause damage to
the vehicle, and possibly a fire or injury.
●Never use a fuse of a higher amperage
rating than that indicated, or use any
other object in place of a fuse.
●Always use a genuine Lexus fuse or
equivalent.
Never replace a fuse with a wire, even
as a temporary fix.
●Do not modify the fuses or fuse boxes.
A
B
NOTICE
■Before replacing fuses
Have the cause of electrical overload
determined and repaired by your Lexus
dealer as soon as possible.
Page 437 of 516
4357-2. Steps to take in an emergency
7
When trouble arises
( P.439)
The battery terminal connections
may be loose or corroded.
( P.385)
The engine starting system may be
malfunctioning due to an electrical
problem such as electronic key battery
depletion or a blown fuse. However, an
interim measure is available to start the
engine. ( P.435)
One of the following may be the cause
of the problem:
One or both of the battery terminals
may be disconnected. ( P.385)
The battery may be discharged.
( P.439)
There may be a malfunction in the
steering lock system.
Contact your Lexus dealer if the problem
cannot be repaired, or if repair procedures
are unknown.
When the engine does not start, the
following steps can be used as an
interim measure to start the engine if
the engine switch is functioning nor- mally.
Do not use this starting procedure
except in cases of emergency.
1
Press the parking brake switch to
check that the parking brake is set.
(P.176)
Parking brake indicator will come on.
2 Turn the engine switch to ACCES-
SORY mode.
3 Press and hold the engine switch
for about 15 seconds while
depressing the brake pedal firmly.
Even if the engine can be started using
the above steps, the system may be
malfunctioning. Have the vehicle
inspected by your Lexus dealer.
The starter motor does not turn
over
The starter motor does not turn
over, the interior lights and head-
lights do not turn on, or the horn
does not sound.
Starting the engine in an emer-
gency