checking LEXUS LX470 2007 Owners Manual
[x] Cancel search | Manufacturer: LEXUS, Model Year: 2007, Model line: LX470, Model: LEXUS LX470 2007Pages: 426, PDF Size: 10.95 MB
Page 4 of 426
TABLE OF CONTENTSIndex
iv
3-5. Other interior features............ 221Sun visors.......................................... 221
Vanity mirror .................................. 222
Clock ................................................. 223
Outside temperature display ............................................ 224
Ashtrays ........................................... 225
Cigarette lighter ........................... 227
Power outlet ................................... 228
Seat heaters ................................... 230
Coat hooks ..................................... 232
Armrest ............................................ 233
Floor mats........................................ 234
Luggage compartment features .......................................... 235
Garage door opener .................. 237
Compass........................................... 242
Lexus Link System ....................... 246
4-1. Maintenance and care............ 260 Cleaning and protecting the vehicle exterior ......................... 260
Cleaning and protecting the vehicle interior............................ 262 4-2. Maintenance.............................. 265
Maintenance requirements ..... 265
General maintena nce ................ 267
Emission inspection and maintenance (I/M)
programs ...................................... 270
4-3. Do-it-yourself maintenance ... 271 Do-it-yourself service precautions .................................... 271
Hood.................................................. 275
Engine compartment.................. 276
Tires ................................................... 292
Tire inflation pressure................ 302
Wheels............................................. 306
Air conditioning filter................. 308
Wireless remote control battery ........................................... 309
Checking and replacing fuses ................................................... 311
Light bulbs ...................................... 320
5-1. Essential information .............. 328 If your vehicle needs to be towed............................................. 328
If you think something is wrong ............................................. 333
Fuel pump shut off system ........ 334
Event data recorder ................... 335
4Maintenance and care
5When trouble arises
Page 277 of 426

Maintenance and care4
259
4-1. Maintenance and care ......... 260Cleaning and protecting the vehicle exterior........................ 260
Cleaning and protecting the vehicle interior......................... 262 4-2. Maintenance........................... 265
Maintenance requirements............................ 265
General maintena nce .............. 267
Emission inspection and maintenance (I/M)
programs ................................... 270
4-3. Do-it-yourself maintenance.......................... 271
Do-it-yourself service precautions ................................. 271
Hood .............................................. 275
Engine compartment ............... 276
Tires ................................................. 292
Tire inflation pressure .............. 302
Wheels .......................................... 306
Air conditioning filter ............. 308
Wireless remote control battery ........................................ 309
Checking and replacing fuses ................................................ 311
Light bulbs.................................... 320
Page 295 of 426
277
4-3. Do-it-yourself maintenance
4
Maintenance and care
Engine oilWith the engine at operating temperat ure and turned off, check the oil
level on the dipstick.
■ Checking the engine oil
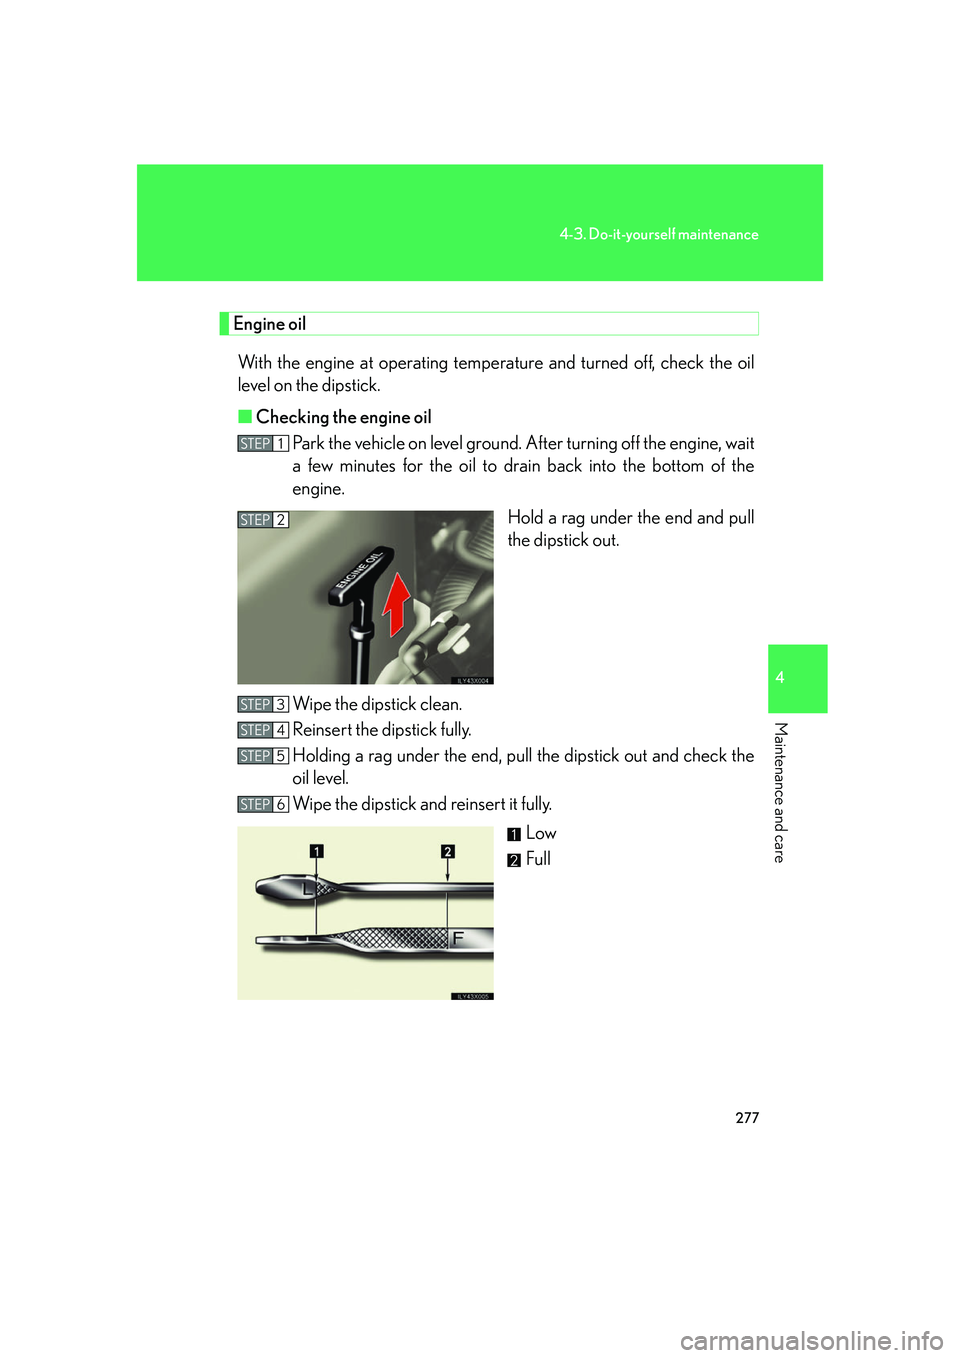
Park the vehicle on level ground . After turning off the engine, wait
a few minutes for the oil to drain back into the bottom of the
engine.
Hold a rag under the end and pull
the dipstick out.
Wipe the dipstick clean.
Reinsert the dipstick fully.
Holding a rag under the end, pull the dipstick out and check the
oil level.
Wipe the dipstick and reinsert it fully.
Low
Full
STEP1
STEP2
STEP3
STEP4
STEP5
STEP6
Page 296 of 426
278
4-3. Do-it-yourself maintenance
■Adding engine oil
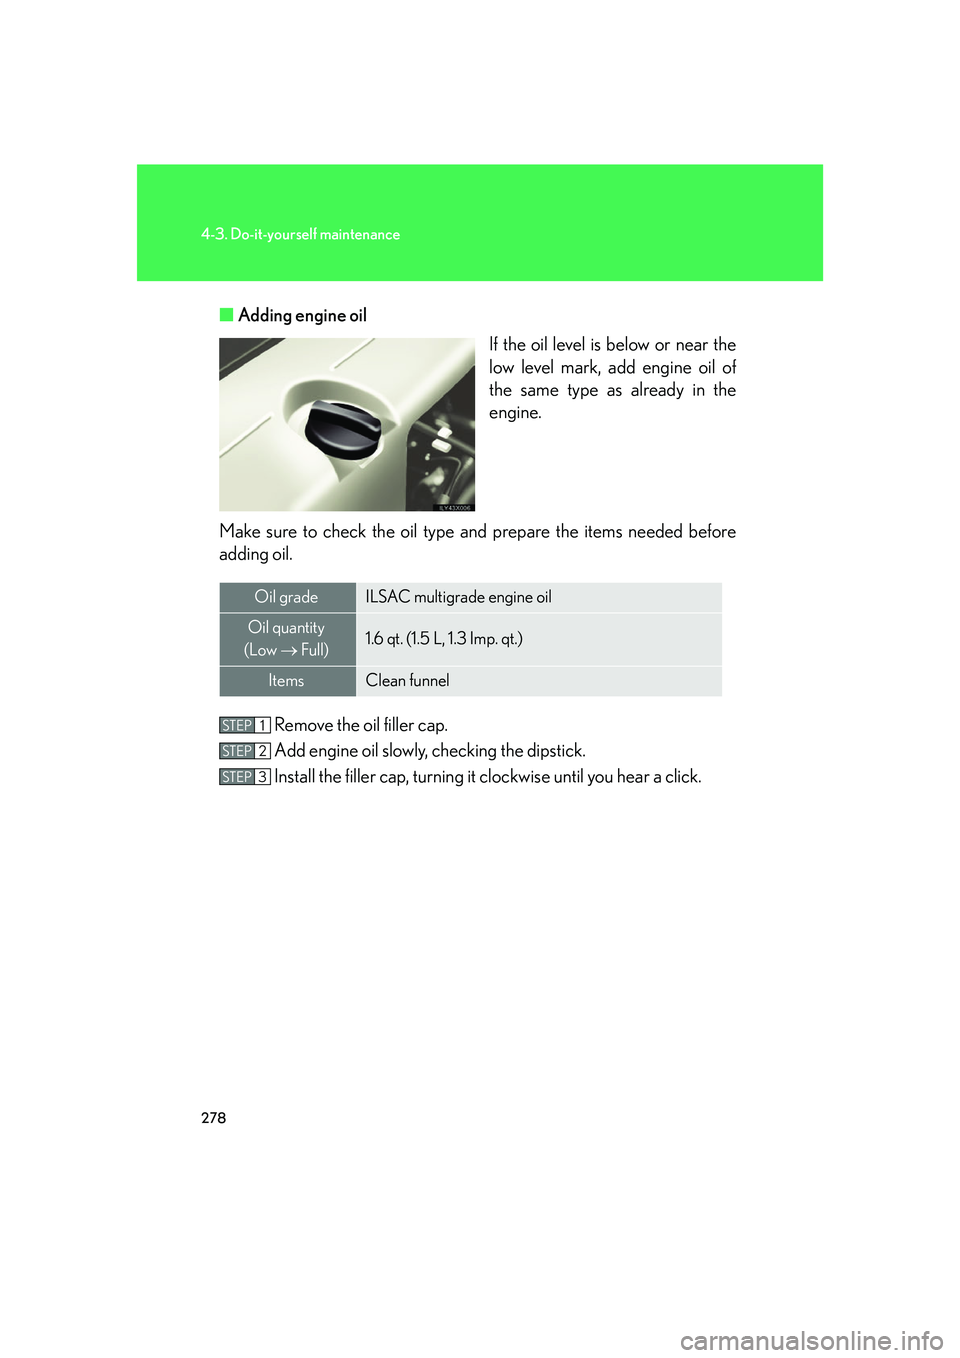
If the oil level is below or near the
low level mark, add engine oil of
the same type as already in the
engine.
Make sure to check th e oil type and prepare the items needed before
adding oil.
Remove the oil filler cap.
Add engine oil slowly, checking the dipstick.
Install the filler cap, turning it clockwise until you hear a click.
Oil gradeILSAC multigrade engine oil
Oil quantity
(Low Full)1.6 qt. (1.5 L, 1.3 Imp. qt.)
ItemsClean funnel
STEP1
STEP2
STEP3
Page 302 of 426

284
4-3. Do-it-yourself maintenance
Brake fluid■ Checking fluid level
The brake fluid level should be
between the “MAX” and “MIN”
lines on the tank.
Make sure to check the fluid type and prepare the necessary items.
■ Adding fluid
Fluid typeFMVSS No.116 DOT 3 or SAE J1703 brake fluid
ItemsClean funnel
■Brake fluid can absorb moisture from the air
Excess moisture in the fluid can cause a dangerous loss of braking efficiency. Use
only newly opened brake fluid.
CAUTION
■When filling the reservoir
Take care because brake fluid can harm your hands or eyes and damage painted
surfaces.
If fluid gets in your eyes, flush your eyes with clean water immediately.
If you still experience discomfort, see a doctor.
Page 304 of 426

286
4-3. Do-it-yourself maintenance
Power steering fluid■ Fluid level
The fluid level should be within the appropriate range.
Full (when hot)
Add fluid (when hot)
Full (when cold)
Add fluid (when cold)
Hot: Vehicle has been driven arou nd 50 mph (80 km/h) for 20 min-
utes, or slightly longer in frig id temperatures. (Fluid tempera-
ture, 140°F - 175°F [60°C - 80°C]).
Cold: Engine has not been run for about five hours. (Room tempera- ture, 50°F - 85°F [10°C - 30°C]).
■ Checking the fluid level
Make sure to check the fluid type and prepare the necessary items.
Clean all dirt off the reservoir.
Remove the cap by turning it counterclockwise.
Wipe the dipstick clean.
Reinstall and remove the reservoir cap again.
Check the fluid level.
Fluid typeAutomatic transmission fluid DEXRON® II or III
ItemsRag or paper, Clean funnel (only for adding fluid)
STEP1
STEP2
STEP3
STEP4
STEP5
Page 305 of 426

287
4-3. Do-it-yourself maintenance
4
Maintenance and care
Suspension fluid AHC■ Fluid level
The fluid level should be within the appropriate range.
Full
Add fluid
CAUTION
■When checking the reservoir
Take care, as the reservoir may be hot.
NOTICE
■When adding fluid
Avoid overfilling, or the power steering may be damaged.
■After replacing the reservoir cap
Check the steering box case, vane pump and hose connections for leaks or dam-
age.
Page 306 of 426

288
4-3. Do-it-yourself maintenance
■Checking the fluid level
Check the fluid level under the unloaded condition.
Start the engine and put the vehicle height in the “LO” (Low)
mode and then “N” (Normal) mode.
Turn off the ignition switch about 30 seconds after the “N” (Nor-
mal) mode indicator light comes on.
Make sure the fluid level is between “MAX” and “MIN”.
If the fluid level is lower than “MIN ”, have suspension fluid AHC filled by
your Lexus dealer.
Battery
■ Exterior
Make sure that the battery terminals ar e not corroded and that there are
no loose connections, cracks, or loose clamps.
Terminals
Hold-down clamp
STEP1
STEP2
STEP3
Page 307 of 426

289
4-3. Do-it-yourself maintenance
4
Maintenance and care
■Checking battery condition
Check the battery condition using the indicator color.
Blue: Good condition
White: Charging is necessary.
Have the vehicle inspected by
your Lexus dealer.
Red: Not working properly,
have the battery checked by
your Lexus dealer.
■Before recharging
When recharging, the battery produces hydrogen gas which is flammable and
explosive. Therefore, before recharging:
●If recharging with the battery installed on the vehicle, be sure to disconnect the
ground cable.
●Make sure the power switch on the charger is off when connecting and discon-
necting the charger cables to the battery.
Page 310 of 426

292
4-3. Do-it-yourself maintenance
Tires
Replace or rotate tires in accordance with maintenance schedules and
tread wear.
■Checking tires
New tread
Tread wear indicator
Worn tread
The location of tread wear indi-
cators is shown by the “TWI” or
“” marks, etc., molded on the
sidewall of each tire.
Check spare tire condition and
inflation pressure if not rotated.
■ Tire rotation
Rotate the tires in the order
shown.
Lexus recommends tire rotation
in accordance with the mainte-
nance schedule to equalize tire
wear and extend tire life.
Do not fail to initialize the tire
pressure warning system after
tire rotation.
■The tire pressure warning system
Your Lexus is equipped with a tire pressure warning system that uses
tire pressure warning valves and tr ansmitters to detect low tire infla-
tion pressure before serious problems arise. ( P. 340)
Front