rear view mirror LEXUS RX350 2015 User Guide
[x] Cancel search | Manufacturer: LEXUS, Model Year: 2015, Model line: RX350, Model: LEXUS RX350 2015Pages: 886, PDF Size: 11 MB
Page 92 of 886
921-3. Adjustable components (seats, mirrors, steering wheel)
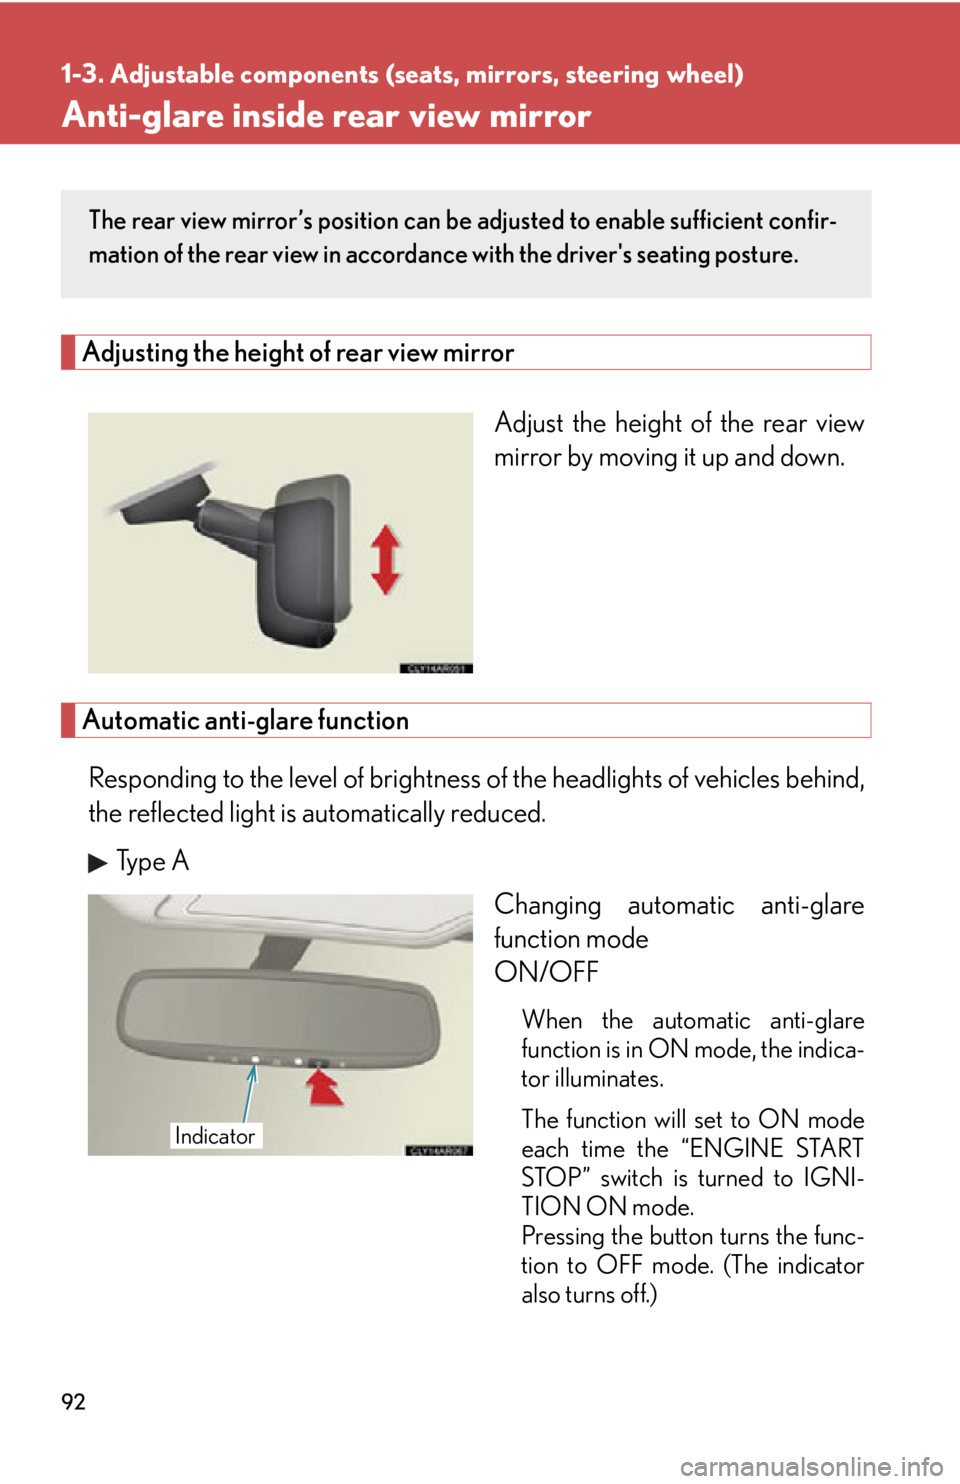
Anti-glare inside rear view mirror Adjusting the height of rear view mirror
Adjust the height of the rear view
mirror by moving it up and down.
Automatic anti-glare function
Responding to the level of brightness of the headlights of vehicles behind,
the reflected light is automatically reduced.
Type A
Changing automatic anti-glare
function mode
ON/OFF
When the automatic anti-glare
function is in ON mode, the indica-
tor illuminates.
The function will set to ON mode
each time the “ENGINE START
STOP” switch is turned to IGNI-
TION ON mode.
Pressing the button turns the func-
tion to OFF mode. (The indicator
also turns off.)The rear view mirror’s position can be adjusted to enable sufficient confir-
mation of the rear view in accordance with the driver's seating posture.
Indicator
Page 95 of 886
9511-3. Adjustable components (seats, mirrors, steering wheel)
Before driving Outside rear view mirrors
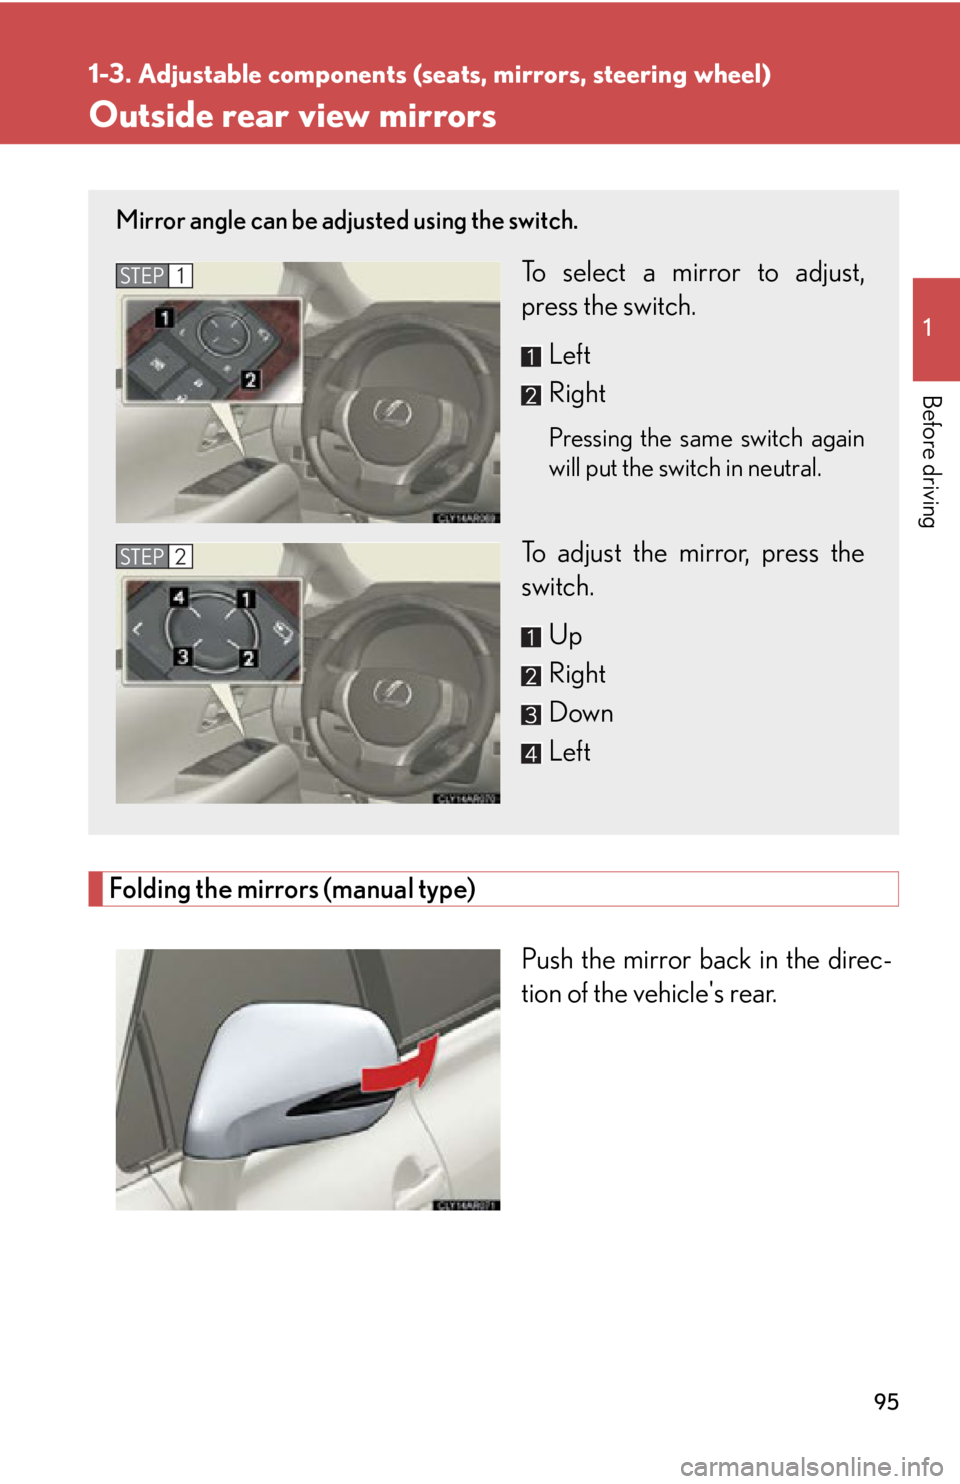
Folding the mirrors (manual type)
Push the mirror back in the direc-
tion of the vehicle's rear. Mirror angle can be adjusted using the switch.
To select a mirror to adjust,
press the switch.
Left
Right Pressing the same switch again
will put the switch in neutral.
To adjust the mirror, press the
switch.
Up
Right
Down
LeftSTEP 1
STEP 2
Page 96 of 886
961-3. Adjustable components (s eats, mirrors, steering wheel)
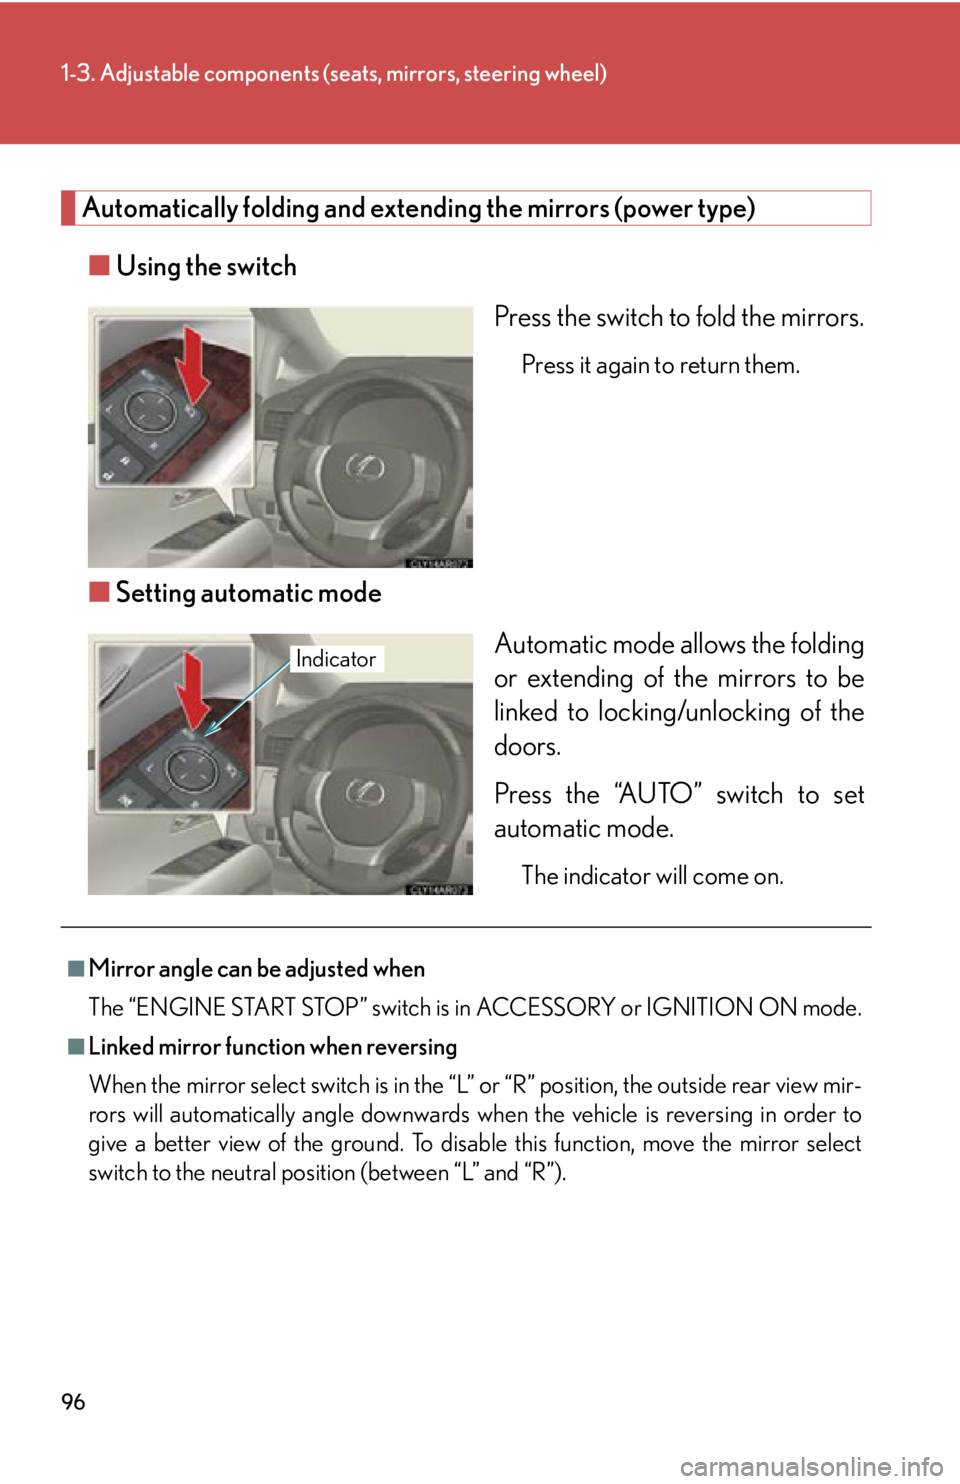
Automatically folding and extending the mirrors (power type)
■ Using the switch
Press the switch to fold the mirrors. Press it again to return them.
■ Setting automatic mode
Automatic mode allows the folding
or extending of the mirrors to be
linked to locking/unlocking of the
doors.
Press the “AUTO” switch to set
automatic mode. The indicator will come on.Indicator
■
Mirror angle can be adjusted when
The “ENGINE START STOP” switch is in ACCESSORY or IGNITION ON mode.■
Linked mirror function when reversing
When the mirror select switch is in the “L ” or “R” position, the outside rear view mir-
rors will automatically angl e downwards when the vehicle is reversing in order to
give a better view of the ground. To disable this function, move the mirror select
switch to the neutral positi on (between “L” and “R”).
Page 97 of 886
971-3. Adjustable components (seats, mirrors, steering wheel)
1
Before driving ■
When the mirrors are fogged up
The outside rear view mirrors can be cleared using the mirror defoggers. Turn on
the rear window defogger to turn on the outside rear view mirror defoggers.
( P. 3 6 1 )■
Automatic adjustment of the mirror angl e (vehicles with driving position mem-
ory)
A desired mirror face angle can be entered to memory and recalled automatically
by the driving position memory. ( P. 76 )■
Auto anti-glare function (if equipped)
When the anti-glare inside rear view mirr or is set to automatic mode, the outside
rear view mirrors will activate in conjunction with the anti-glare inside rear view mir-
ror to reduce reflected light. ( P. 9 2 )
CAUTION■
When driving the vehicle
Observe the following precautions while driving.
Failing to do so may result in loss of control of the vehicle and cause an accident,
resulting in death or serious injury. ●
Do not adjust the mirrors while driving.●
Do not drive with the mirrors folded.●
Both the driver and passenger side mirrors must be extended and properly
adjusted before driving.■
When a mirror is moving
To avoid personal injury and mirror malfunction, be careful not to get your hand
caught by the moving mirror.■
When the mirror defoggers are operating
Do not touch the rear view mirror surface s, as they can become very hot and burn
you.
Page 153 of 886
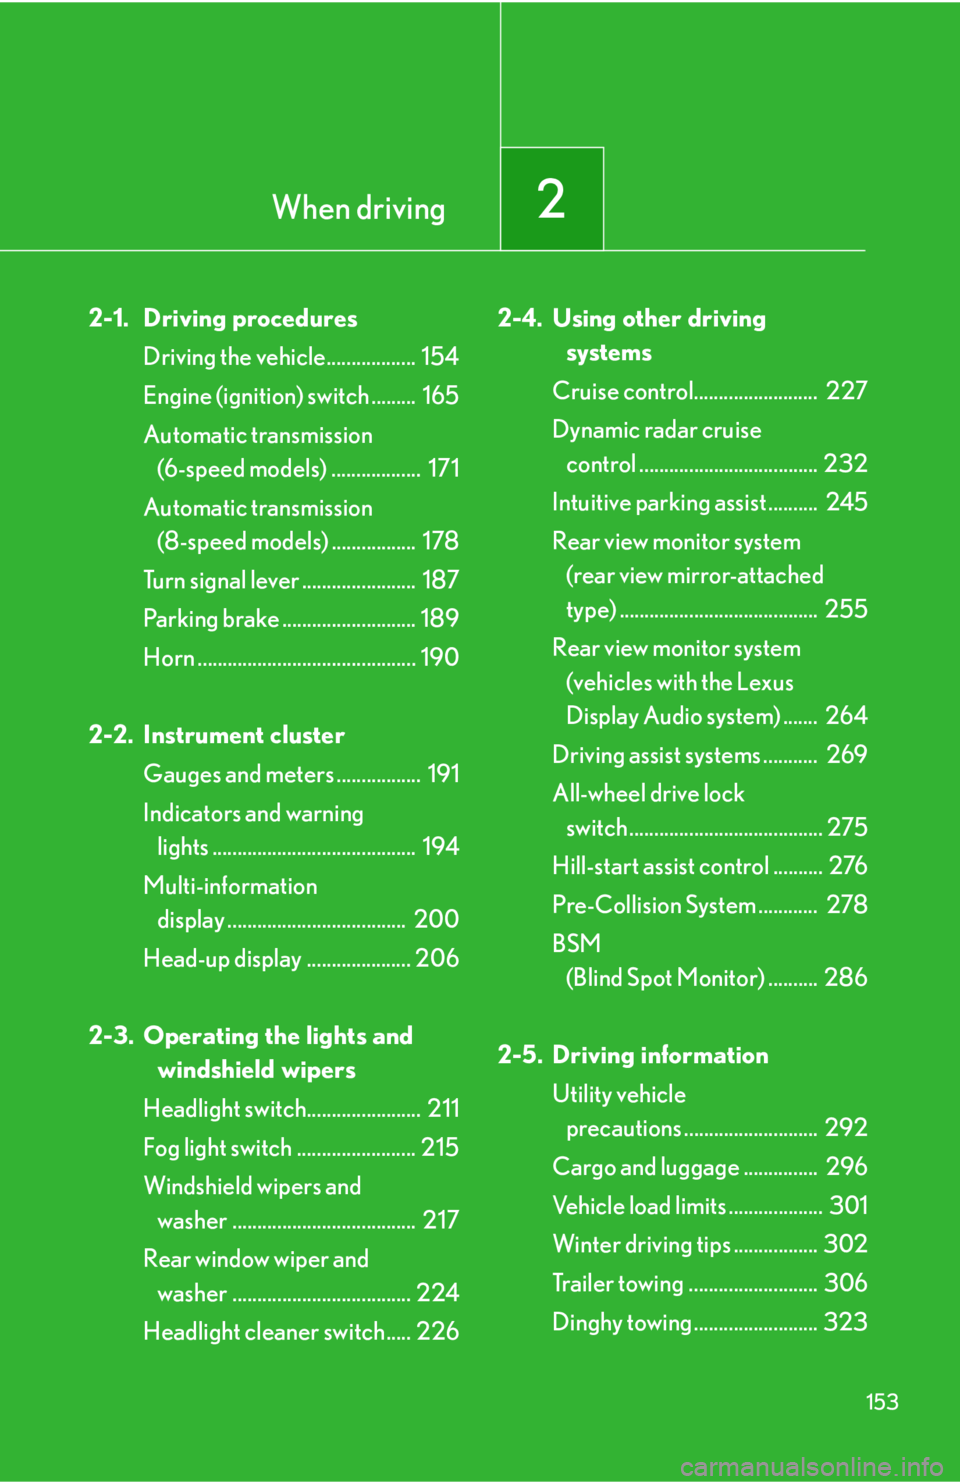
When driving
2
1532-1. Driving procedures
Driving the vehicle.................. 154
Engine (ignition) switch ......... 165
Automatic transmission
(6-speed models) .................. 171
Automatic transmission
(8-speed models) ................. 178
Turn signal lever ....................... 187
Parking brake ........................... 189
Horn ............................................ 190
2-2. Instrument cluster
Gauges and meters ................. 191
Indicators and warning
lights ......................................... 194
Multi-information
display .................................... 200
Head-up display ..................... 206
2-3. Operating the lights and
windshield wipers
Headlight switch....................... 211
Fog light switch ........................ 215
Windshield wipers and
washer ..................................... 217
Rear window wiper and
washer .................................... 224
Headlight cleaner switch..... 226 2-4. Using other driving
systems
Cruise control......................... 227
Dynamic radar cruise
control .................................... 232
Intuitive parking assist .......... 245
Rear view monitor system
(rear view mirror-attached
type) ........................................ 255
Rear view monitor system
(vehicles with the Lexus
Display Audio system) ....... 264
Driving assist systems ........... 269
All-wheel drive lock
switch ....................................... 275
Hill-start assist control .......... 276
Pre-Collision System ............ 278
BSM
(Blind Spot Monitor) .......... 286
2-5. Driving information
Utility vehicle
precautions ........................... 292
Cargo and luggage ............... 296
Vehicle load limits ................... 301
Winter driving tips ................. 302
Trailer towing .......................... 306
Dinghy towing ......................... 323
Page 158 of 886

1582-1. Driving procedures
CAUTION●
Do not shift the shift lever to R while the vehicle is moving forward.
Doing so can damage the transmission and may result in a loss of vehicle control.●
Do not shift the shift lever to D while the vehicle is moving backward.
Doing so can damage the transmission and may result in a loss of vehicle control.●
Moving the shift lever to N while the vehicle is moving will disengage the engine
from the transmission. Engine braking is not available when N is selected.●
During normal driving, do not turn off the engine. Turning the engine off while
driving will not cause loss of steering or braking control, but the power assist to
these systems will be lost. This will make it more difficult to steer and brake, so you
should pull over and stop the vehicle as soon as it is safe to do so.
However, in the event of an emergency, such as if it becomes impossible to stop
the vehicle in the normal way: P. 8 0 4●
Use engine braking (downshift) to maintain a safe speed when driving down a
steep hill.
Using the brakes continuously may cause the brakes to overheat and lose effec-
tiveness. ( P. 171, 178)●
When stopped on an incline, use the brake pedal and parking brake to prevent
the vehicle from rolling backward or forward, causing an accident. ●
Do not adjust the position of the steering wheel, the seat, or the inside or outside
rear view mirrors while driving.
Doing so may result in a loss of vehicle control that can cause accidents, resulting
in death or serious injury.●
Always check that all passengers' arms, heads or other parts of their body are not
outside the vehicle, as this may result in death or serious injury.●
Do not drive in excess of the speed limit. Even if the legal speed limit permits it, do
not drive over 85 mph (140 km/h) unless your vehicle has high-speed capability
tires. Driving over 85 mph (140 km/h) may result in tire failure, loss of control and
possible injury. Be sure to consult a tire dealer to determine whether the tires on
your vehicle are high-speed capability tires or not before driving at such speeds.
Page 194 of 886
1942-2. Instrument cluster
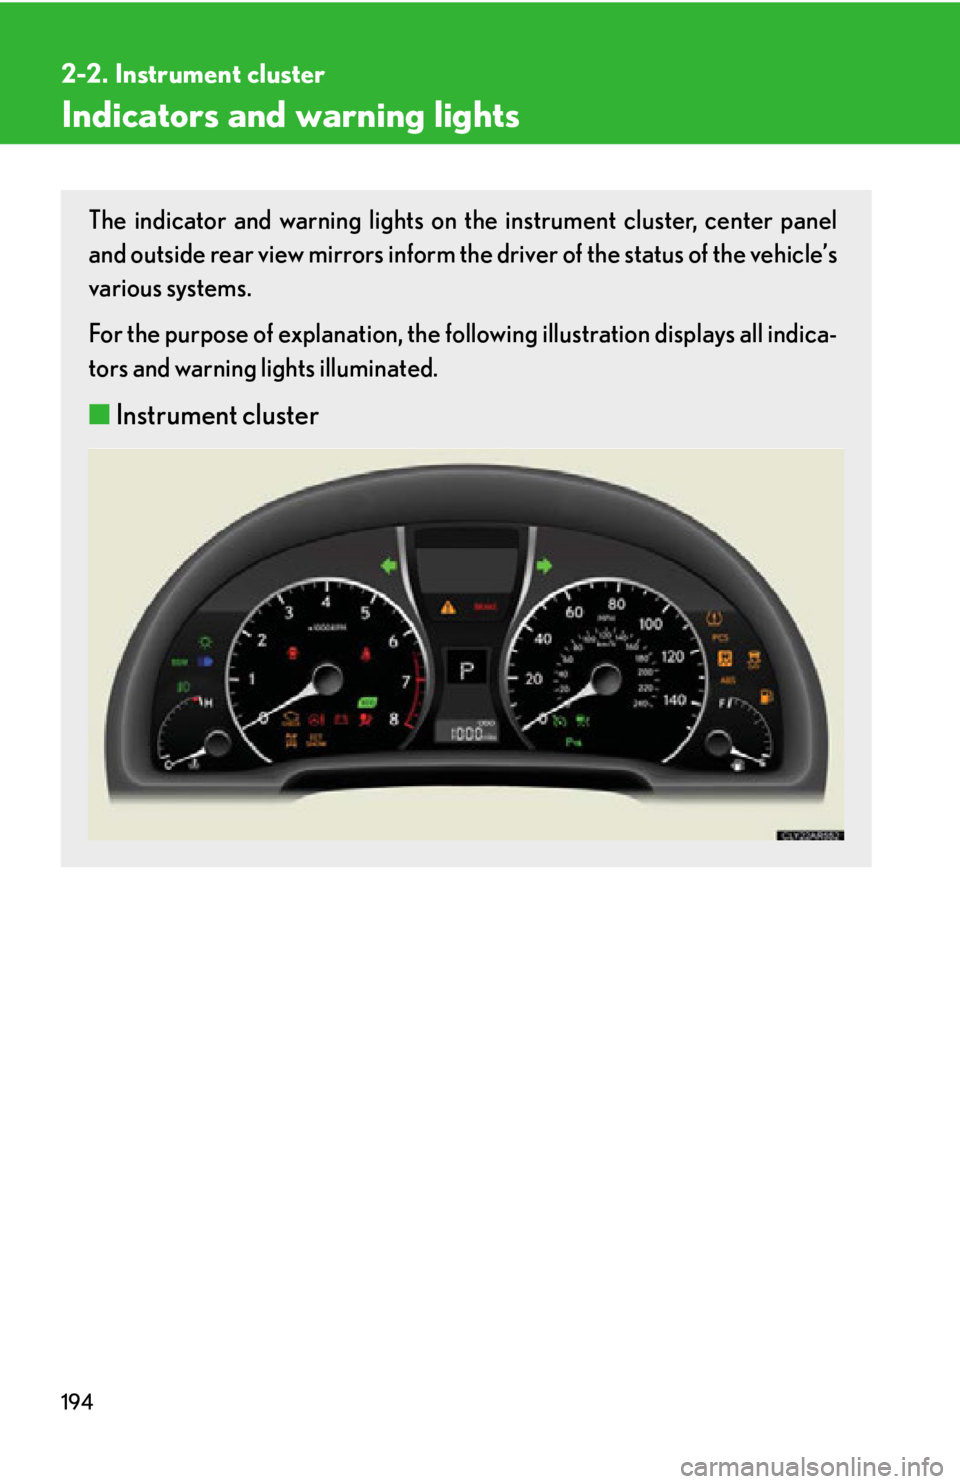
Indicators and warning lights The indicator and warning lights on th e instrument cluster, center panel
and outside rear view mirrors inform the driver of the status of the vehicle’s
various systems.
For the purpose of explanation, the following illustration displays all indica-
tors and warning lights illuminated.
■ Instrument cluster
Page 196 of 886
1962-2. Instrument cluster
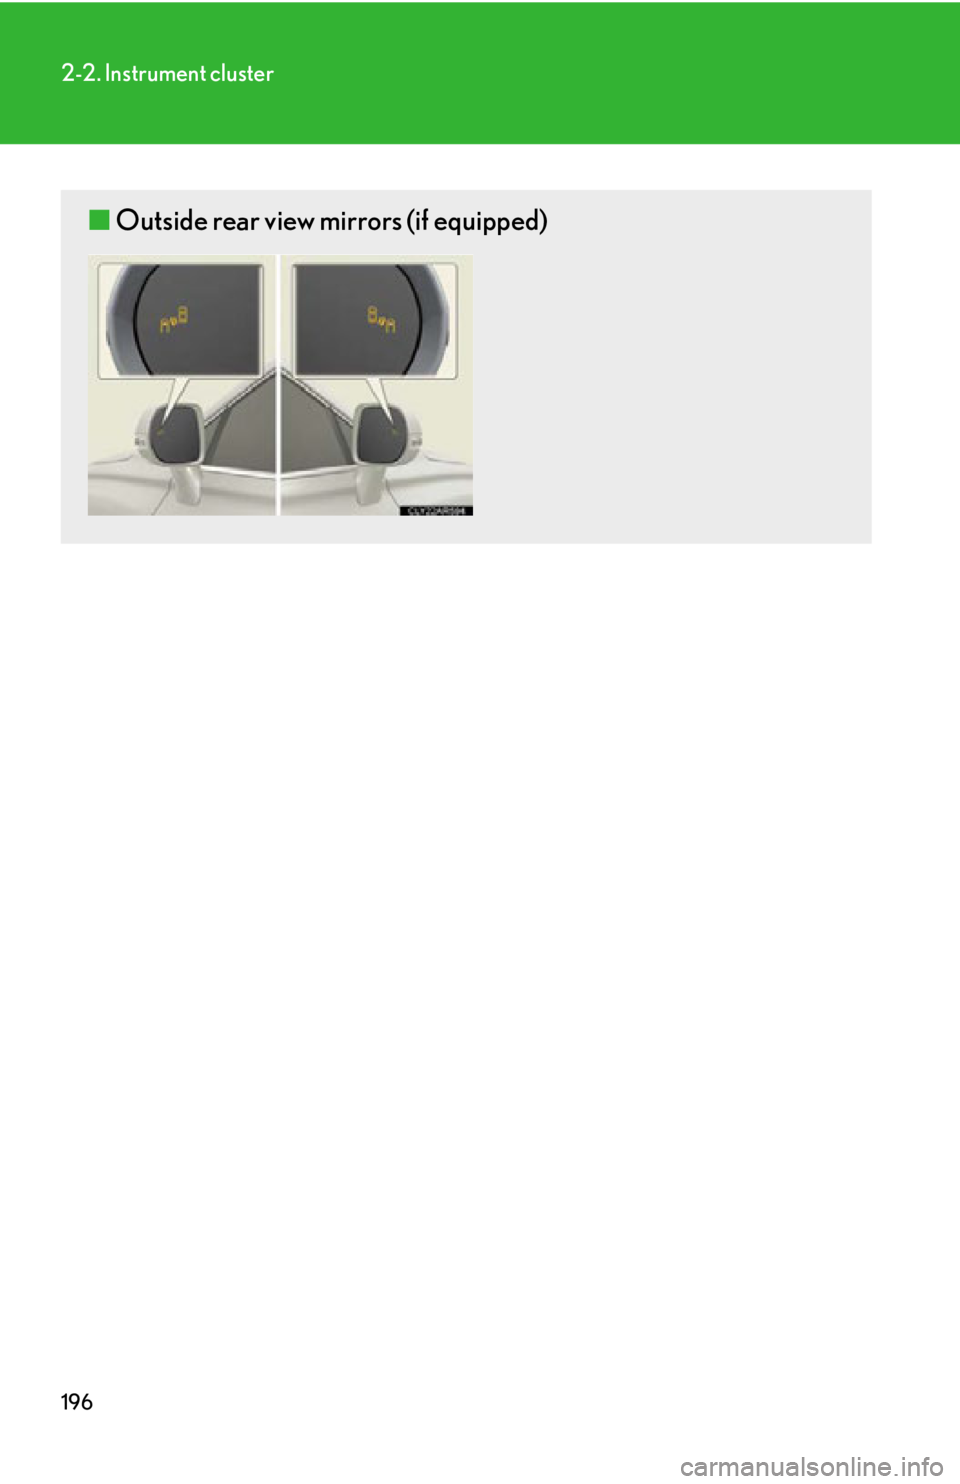
■ Outside rear view mirrors (if equipped)
Page 198 of 886
1982-2. Instrument cluster
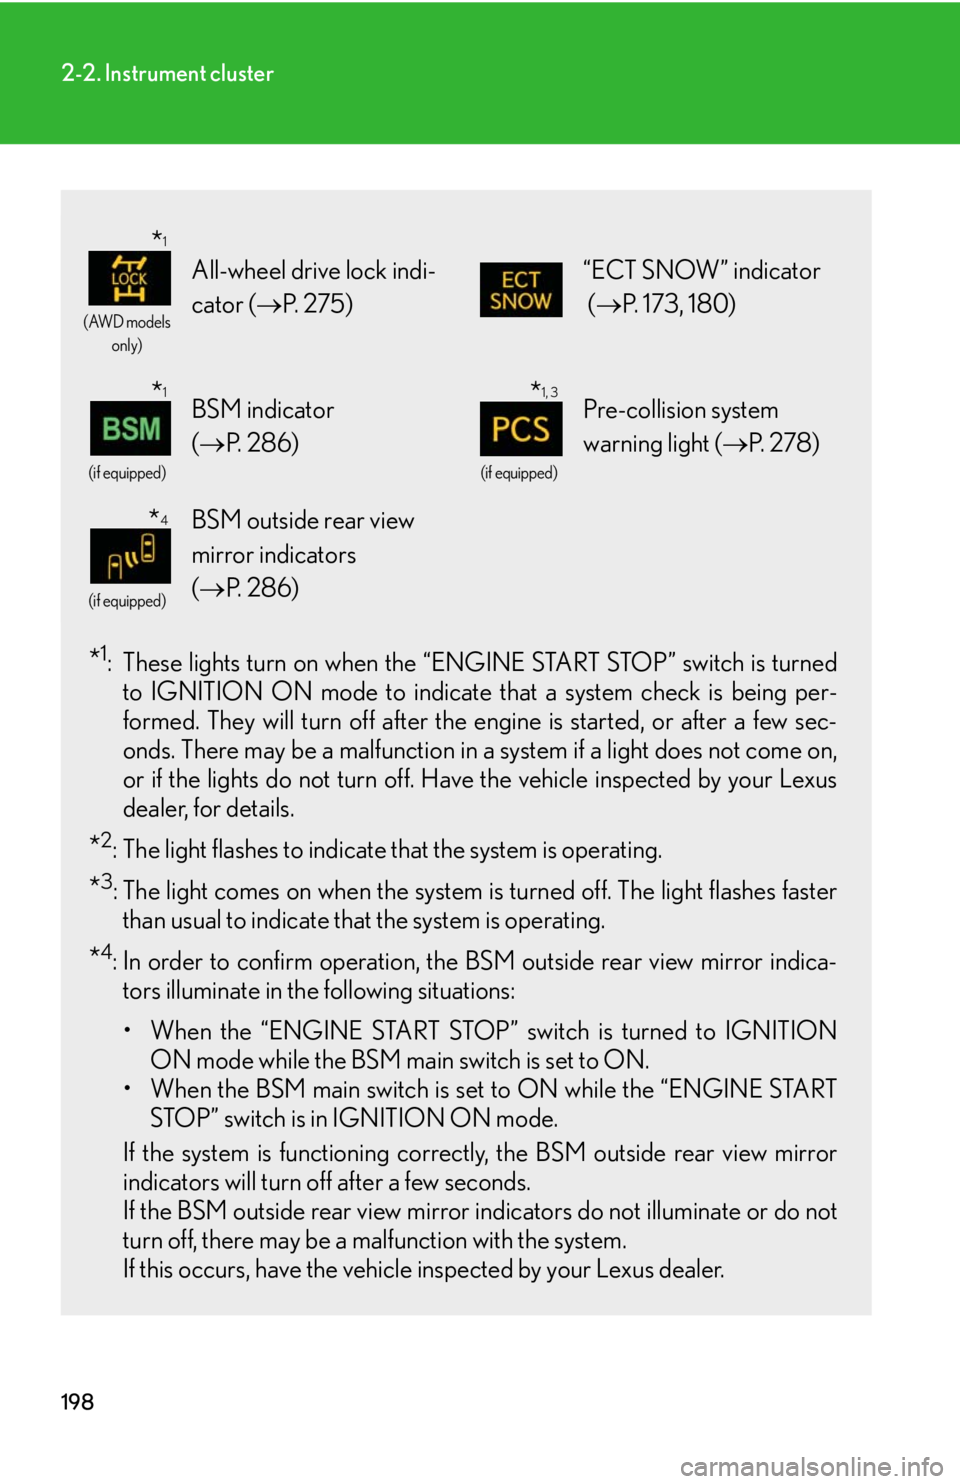
* 1
: These lights turn on when the “E NGINE START STOP” switch is turned
to IGNITION ON mode to indicate that a system check is being per-
formed. They will turn off after the en gine is started, or after a few sec-
onds. There may be a malfunction in a system if a light does not come on,
or if the lights do not turn off. Have the vehicle inspected by your Lexus
dealer, for details.
* 2
: The light flashes to indicate that the system is operating.
* 3
: The light comes on when the system is turned off. The light flashes faster
than usual to indicate that the system is operating.
* 4
: In order to confirm operation, the BSM outside rear view mirror indica-
tors illuminate in the following situations:
• When the “ENGINE START STOP” switch is turned to IGNITION
ON mode while the BSM main switch is set to ON.
• When the BSM main switch is set to ON while the “ENGINE START
STOP” switch is in IGNITION ON mode.
If the system is functioning correctly, the BSM outside rear view mirror
indicators will turn off after a few seconds.
If the BSM outside rear view mirror indicators do not illuminate or do not
turn off, there may be a malfunction with the system.
If this occurs, have the vehicle inspected by your Lexus dealer. (AWD models
only)
All-wheel drive lock indi-
cator ( P. 2 7 5 ) “ECT SNOW” indicator
( P. 173, 180) (if equipped)
BSM indicator
( P. 2 8 6 ) (if equipped)
Pre-collision system
warning light ( P. 2 7 8 )(if equipped)
BSM outside rear view
mirror indicators
( P. 2 8 6 )* 1
* 1
* 1, 3
* 4
Page 255 of 886
2552-4. Using other driving systems
2
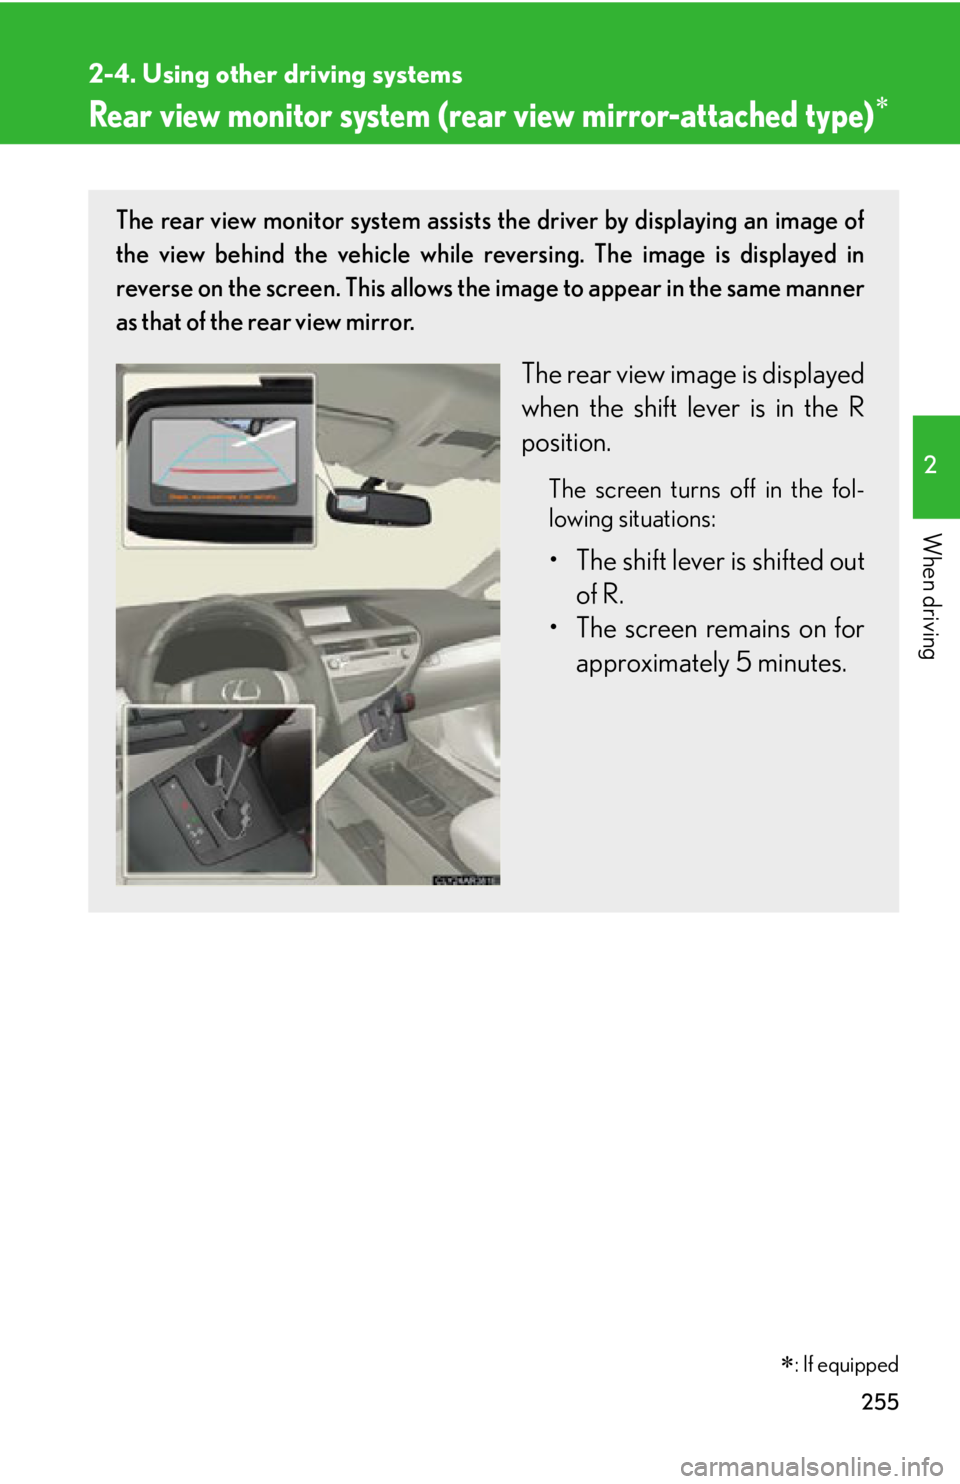
When driving Rear view monitor system (rea r view mirror-attached type) The rear view monitor system assists the driver by displaying an image of
the view behind the vehicle while re versing. The image is displayed in
reverse on the screen. This allows the image to appear in the same manner
as that of the rear view mirror.
The rear view image is displayed
when the shift lever is in the R
position. The screen turns off in the fol-
lowing situations:
• The shift lever is shifted out
of R.
• The screen remains on for
approximately 5 minutes.
: If equipped