window LINCOLN AVIATOR 2003 Owners Manual
[x] Cancel search | Manufacturer: LINCOLN, Model Year: 2003, Model line: AVIATOR, Model: LINCOLN AVIATOR 2003Pages: 288, PDF Size: 3.32 MB
Page 1 of 288
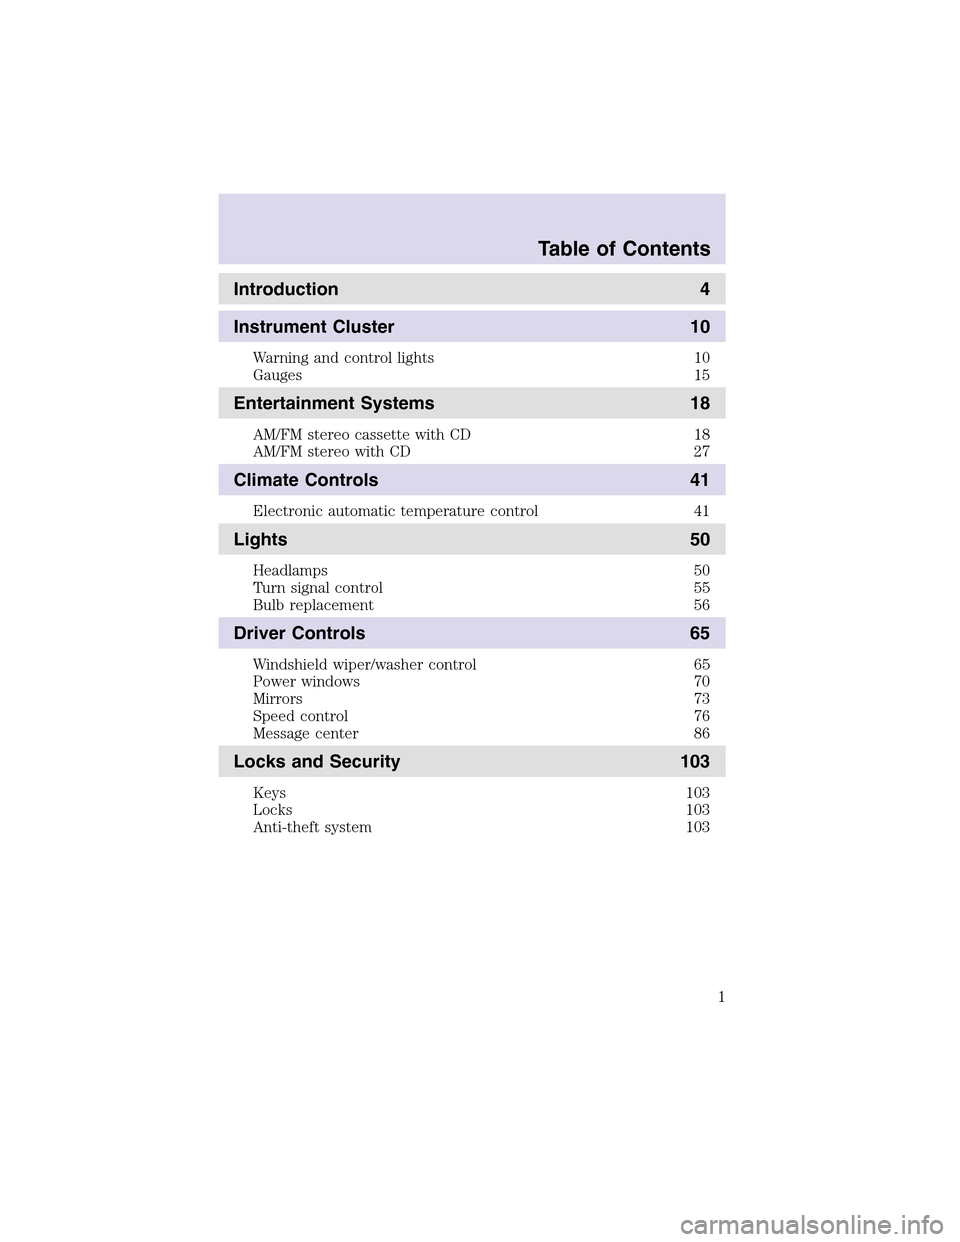
Introduction 4
Instrument Cluster 10
Warning and control lights 10
Gauges 15
Entertainment Systems 18
AM/FM stereo cassette with CD 18
AM/FM stereo with CD 27
Climate Controls 41
Electronic automatic temperature control 41
Lights 50
Headlamps 50
Turn signal control 55
Bulb replacement 56
Driver Controls 65
Windshield wiper/washer control 65
Power windows 70
Mirrors 73
Speed control 76
Message center 86
Locks and Security 103
Keys 103
Locks 103
Anti-theft system 103
Table of Contents
1
Page 8 of 288
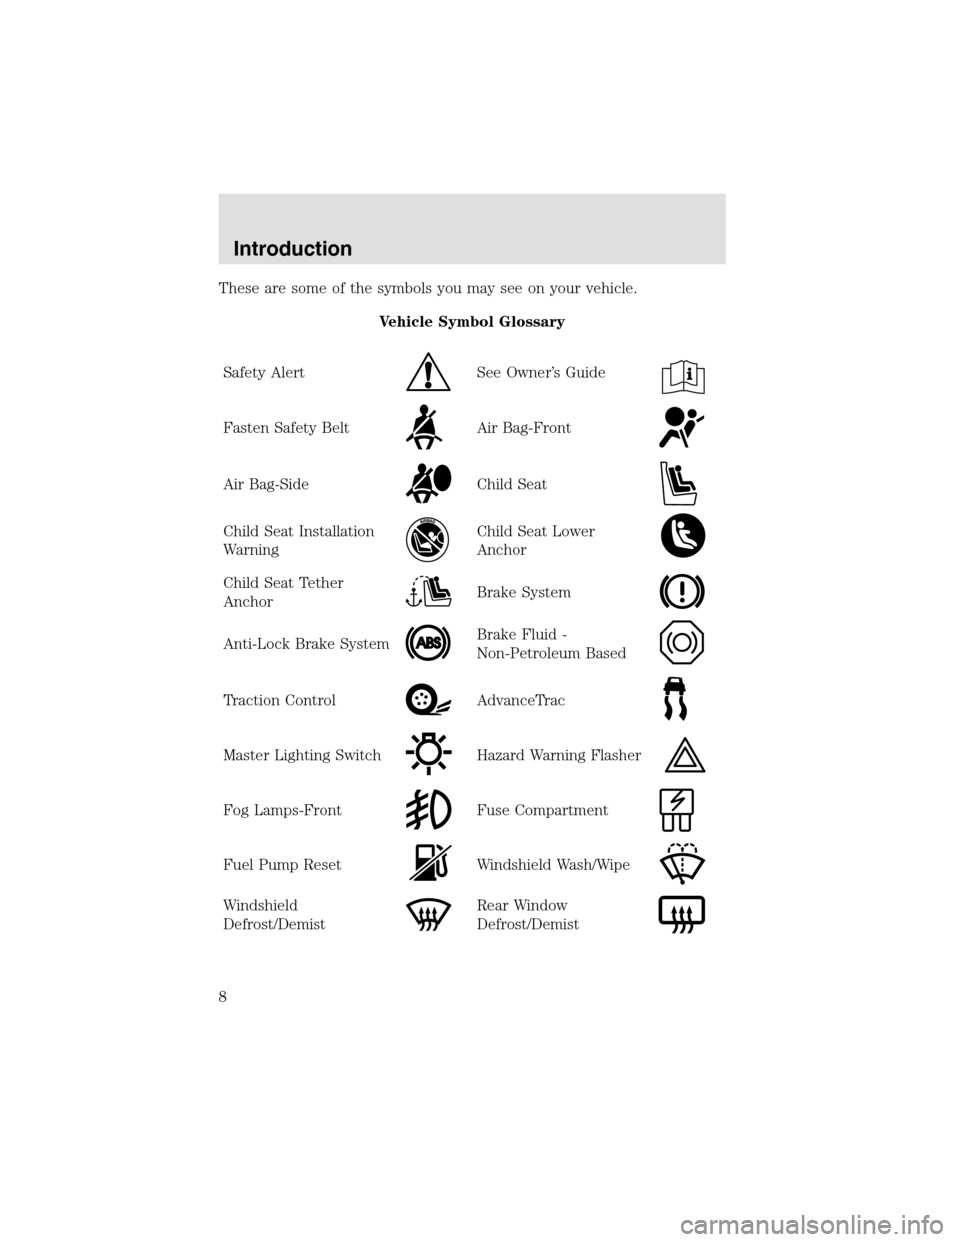
These are some of the symbols you may see on your vehicle.
Vehicle Symbol Glossary
Safety Alert
See Owner’s Guide
Fasten Safety BeltAir Bag-Front
Air Bag-SideChild Seat
Child Seat Installation
WarningChild Seat Lower
Anchor
Child Seat Tether
AnchorBrake System
Anti-Lock Brake SystemBrake Fluid -
Non-Petroleum Based
Traction ControlAdvanceTrac
Master Lighting SwitchHazard Warning Flasher
Fog Lamps-FrontFuse Compartment
Fuel PumpResetWindshield Wash/Wipe
Windshield
Defrost/DemistRear Window
Defrost/Demist
Introduction
8
Page 9 of 288
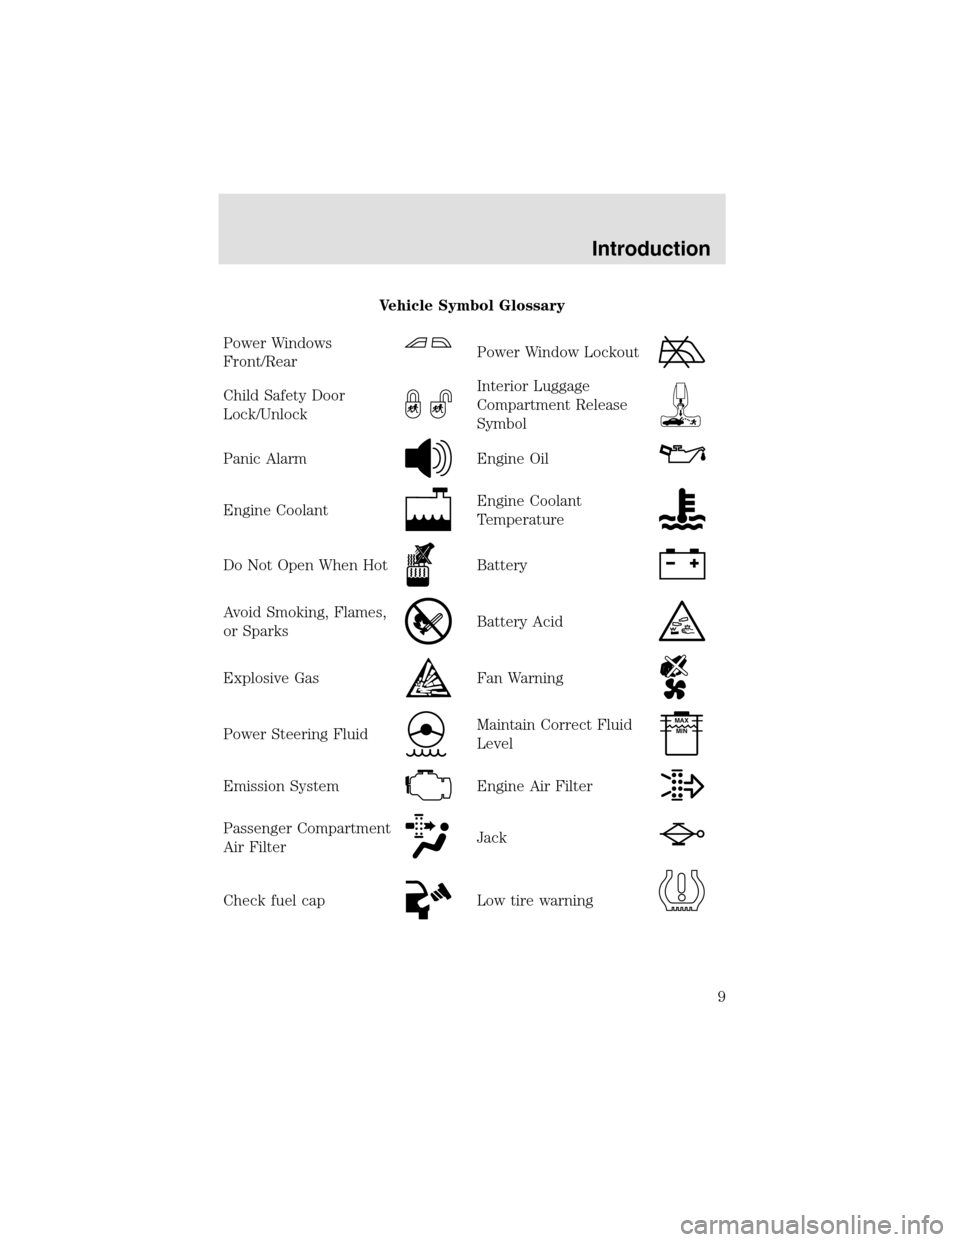
Vehicle Symbol Glossary
Power Windows
Front/Rear
Power Window Lockout
Child Safety Door
Lock/UnlockInterior Luggage
Compartment Release
Symbol
Panic AlarmEngine Oil
Engine CoolantEngine Coolant
Temperature
Do Not Open When HotBattery
Avoid Smoking, Flames,
or SparksBattery Acid
Explosive GasFan Warning
Power Steering FluidMaintain Correct Fluid
LevelMAX
MIN
Emission SystemEngine Air Filter
Passenger Compartment
Air FilterJack
Check fuel capLow tire warning
Introduction
9
Page 42 of 288
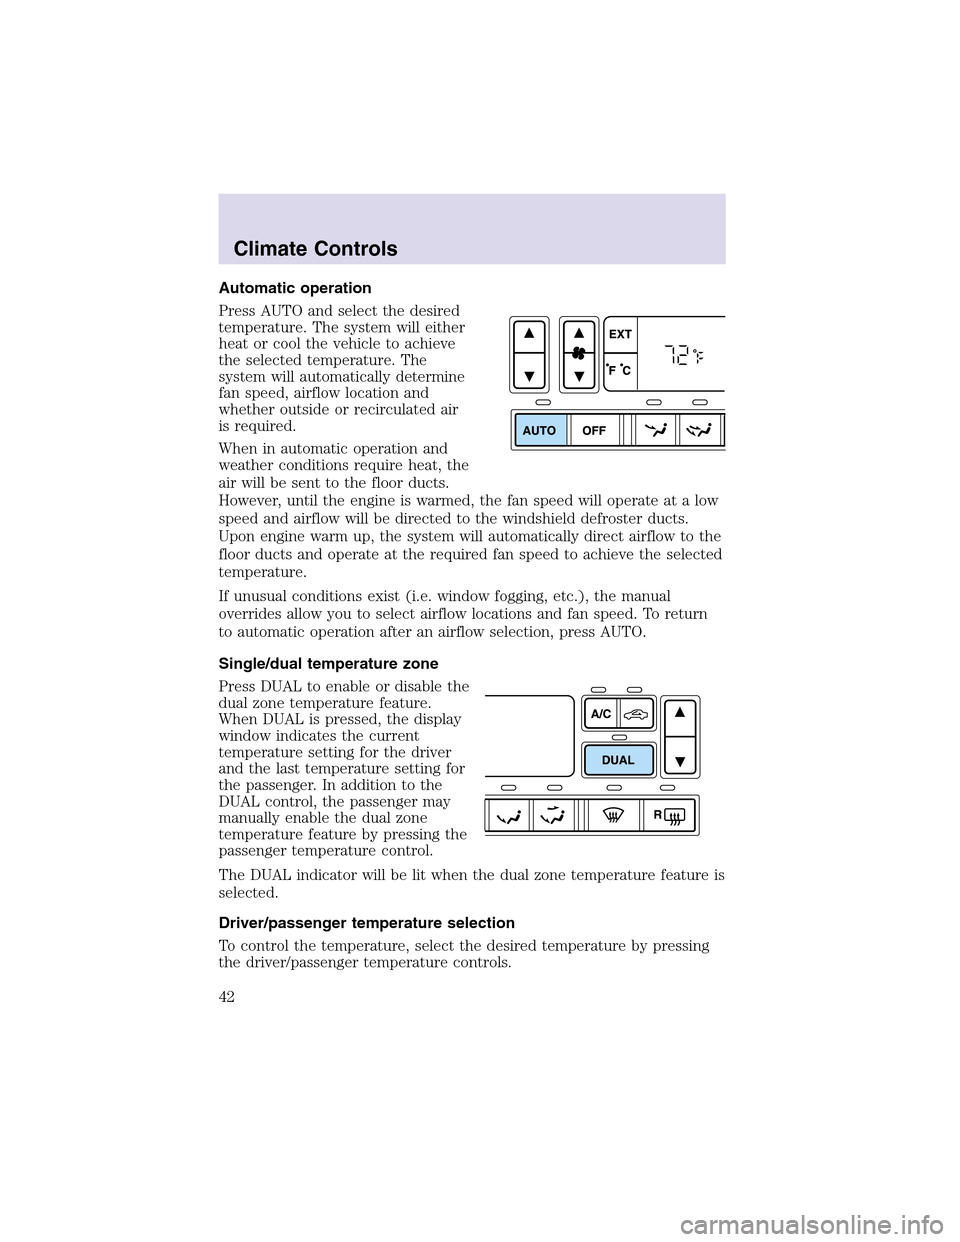
Automatic operation
Press AUTO and select the desired
temperature. The system will either
heat or cool the vehicle to achieve
the selected temperature. The
system will automatically determine
fan speed, airflow location and
whether outside or recirculated air
is required.
When in automatic operation and
weather conditions require heat, the
air will be sent to the floor ducts.
However, until the engine is warmed, the fan speed will operate at a low
speed and airflow will be directed to the windshield defroster ducts.
Upon engine warm up, the system will automatically direct airflow to the
floor ducts and operate at the required fan speed to achieve the selected
temperature.
If unusual conditions exist (i.e. window fogging, etc.), the manual
overrides allow you to select airflow locations and fan speed. To return
to automatic operation after an airflow selection, press AUTO.
Single/dual temperature zone
Press DUAL to enable or disable the
dual zone temperature feature.
When DUAL is pressed, the display
window indicates the current
temperature setting for the driver
and the last temperature setting for
the passenger. In addition to the
DUAL control, the passenger may
manually enable the dual zone
temperature feature by pressing the
passenger temperature control.
The DUAL indicator will be lit when the dual zone temperature feature is
selected.
Driver/passenger temperature selection
To control the temperature, select the desired temperature by pressing
the driver/passenger temperature controls.
Climate Controls
42
Page 43 of 288
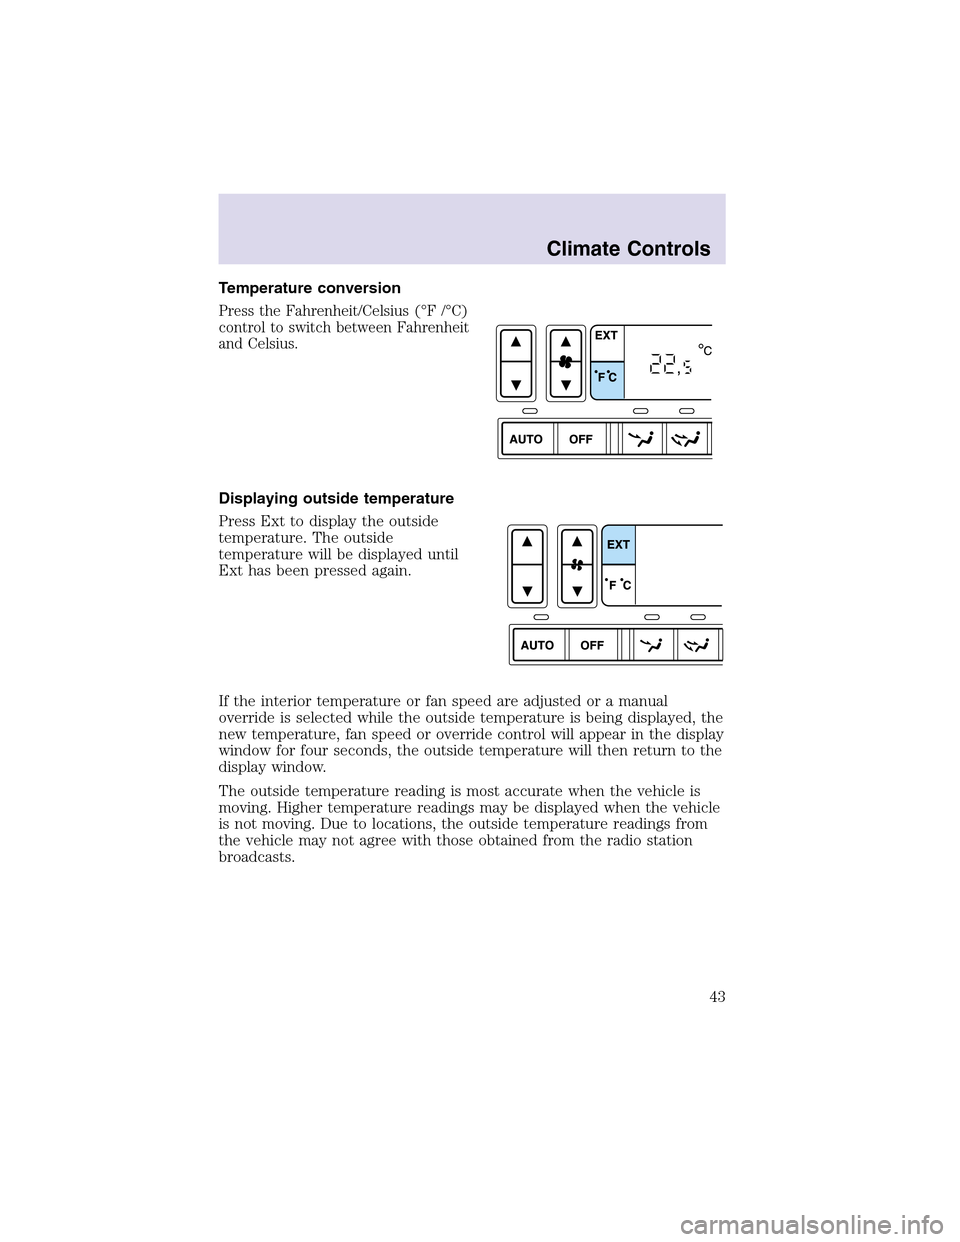
Temperature conversion
Press the Fahrenheit/Celsius (°F /°C)
control to switch between Fahrenheit
and Celsius.
Displaying outside temperature
Press Ext to display the outside
temperature. The outside
temperature will be displayed until
Ext has been pressed again.
If the interior temperature or fan speed are adjusted or a manual
override is selected while the outside temperature is being displayed, the
new temperature, fan speed or override control will appear in the display
window for four seconds, the outside temperature will then return to the
display window.
The outside temperature reading is most accurate when the vehicle is
moving. Higher temperature readings may be displayed when the vehicle
is not moving. Due to locations, the outside temperature readings from
the vehicle may not agree with those obtained from the radio station
broadcasts.
Climate Controls
43
Page 45 of 288
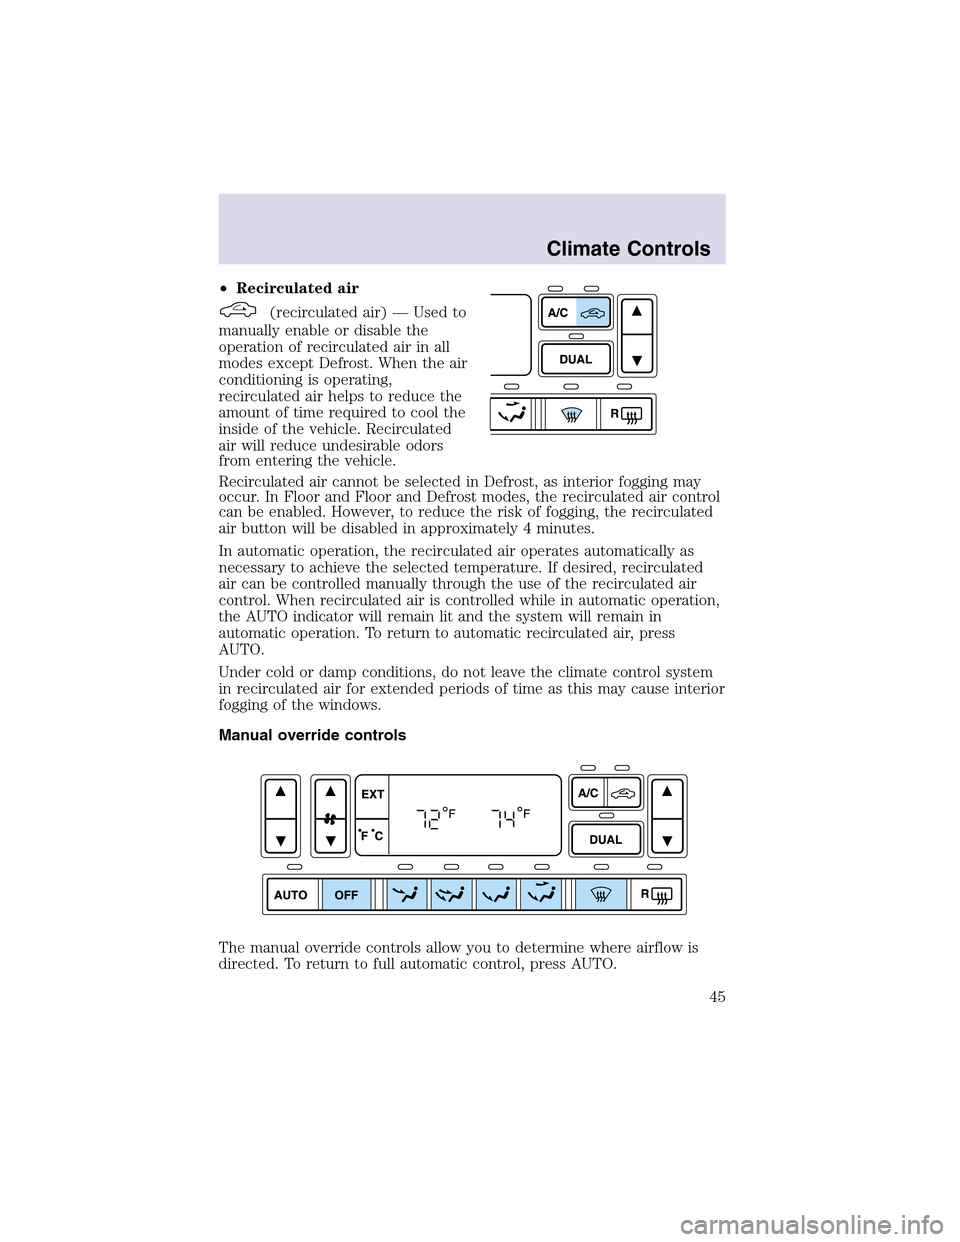
•Recirculated air
(recirculated air) — Used to
manually enable or disable the
operation of recirculated air in all
modes except Defrost. When the air
conditioning is operating,
recirculated air helps to reduce the
amount of time required to cool the
inside of the vehicle. Recirculated
air will reduce undesirable odors
from entering the vehicle.
Recirculated air cannot be selected in Defrost, as interior fogging may
occur. In Floor and Floor and Defrost modes, the recirculated air control
can be enabled. However, to reduce the risk of fogging, the recirculated
air button will be disabled in approximately 4 minutes.
In automatic operation, the recirculated air operates automatically as
necessary to achieve the selected temperature. If desired, recirculated
air can be controlled manually through the use of the recirculated air
control. When recirculated air is controlled while in automatic operation,
the AUTO indicator will remain lit and the system will remain in
automatic operation. To return to automatic recirculated air, press
AUTO.
Under cold or dampconditions, do not leave the climate control system
in recirculated air for extended periods of time as this may cause interior
fogging of the windows.
Manual override controls
The manual override controls allow you to determine where airflow is
directed. To return to full automatic control, press AUTO.
Climate Controls
45
Page 46 of 288
•Off-Outside air is shut out and the fan will not operate. This mode will
reduce undesirable odors from entering the vehicle but may increase
the possibility of interior window fogging.
•Panel - Distributes outside or recirculated air through the instrument
panel registers. The A/C compressor will only function if the outside
temperature is above approximately 2°C (35°F). The system will allow
some airflow through the floor ducts.
•Panel and Floor -Distributes outside or recirculated air through the
instrument panel registers and floor ducts. The A/C compressor will
only function if the outside temperature is above approximately 2°C
(35°F). The air distributed through the floor ducts will be slightly
warmer than that sent to the instrument panel registers.
•Floor -Distributes outside or recirculated air through the floor ducts.
The A/C compressor will only function if the outside temperature is
above approximately 2°C (35°F).
•Floor & Defrost -Distributes outside or recirculated air through the
floor ducts, windshield defroster ducts and the side window demisters.
The A/C compressor will operate automatically if the outside
temperature is above approximately 2°C (35°F). The air distributed
through the floor ducts will be slightly warmer than that sent to the
windshield defroster ducts and the side window demisters.
•Defrost-Distributes outside air through the windshield defroster ducts
and the side window demisters. The A/C compressor will operate
automatically if the outside temperature is above approximately 2°C
(35°F). This mode will clear ice and fog from the windshield.
Operating tips
•To reduce fogging in humid weather, place the climate control system
in Defrost mode and Rear Defrost before driving.
•To reduce humidity buildupinside the vehicle in warm weather
conditions, don’t drive with the climate control system in the Off
mode.
•To reduce humidity buildupinside the vehicle in cold weather
conditions, don’t drive with the climate control system in recirculation
mode or Off mode.
•Remove any snow, ice or leaves from the exterior base of the
windshield.
•To increase the efficiency of the A/C, drive with the windows slightly
open for 2–3 minutes after start up or until the vehicle has been
“aired out.”
Climate Controls
46
Page 49 of 288
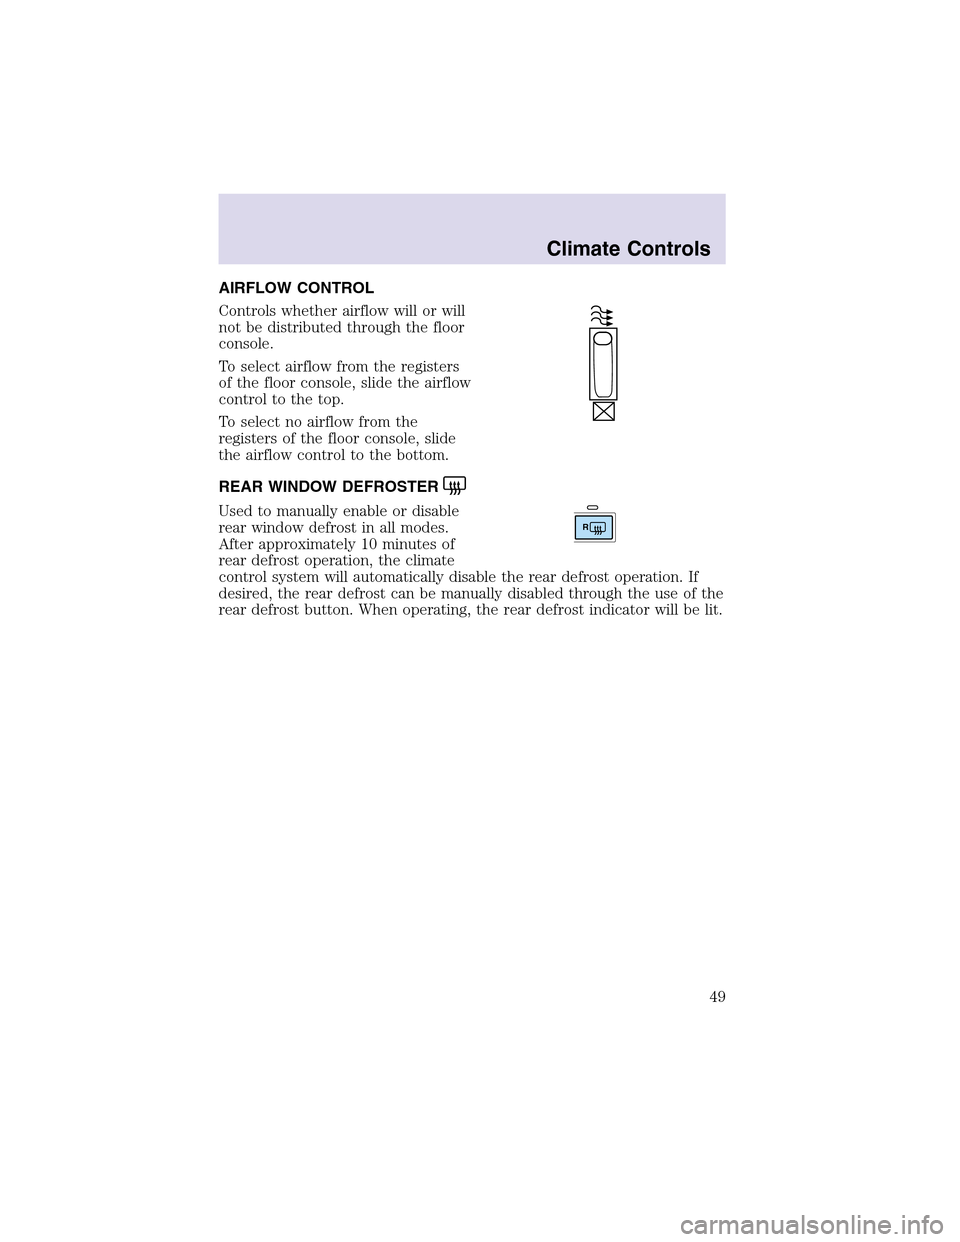
AIRFLOW CONTROL
Controls whether airflow will or will
not be distributed through the floor
console.
To select airflow from the registers
of the floor console, slide the airflow
control to the top.
To select no airflow from the
registers of the floor console, slide
the airflow control to the bottom.
REAR WINDOW DEFROSTER
Used to manually enable or disable
rear window defrost in all modes.
After approximately 10 minutes of
rear defrost operation, the climate
control system will automatically disable the rear defrost operation. If
desired, the rear defrost can be manually disabled through the use of the
rear defrost button. When operating, the rear defrost indicator will be lit.R
Climate Controls
49
Page 65 of 288
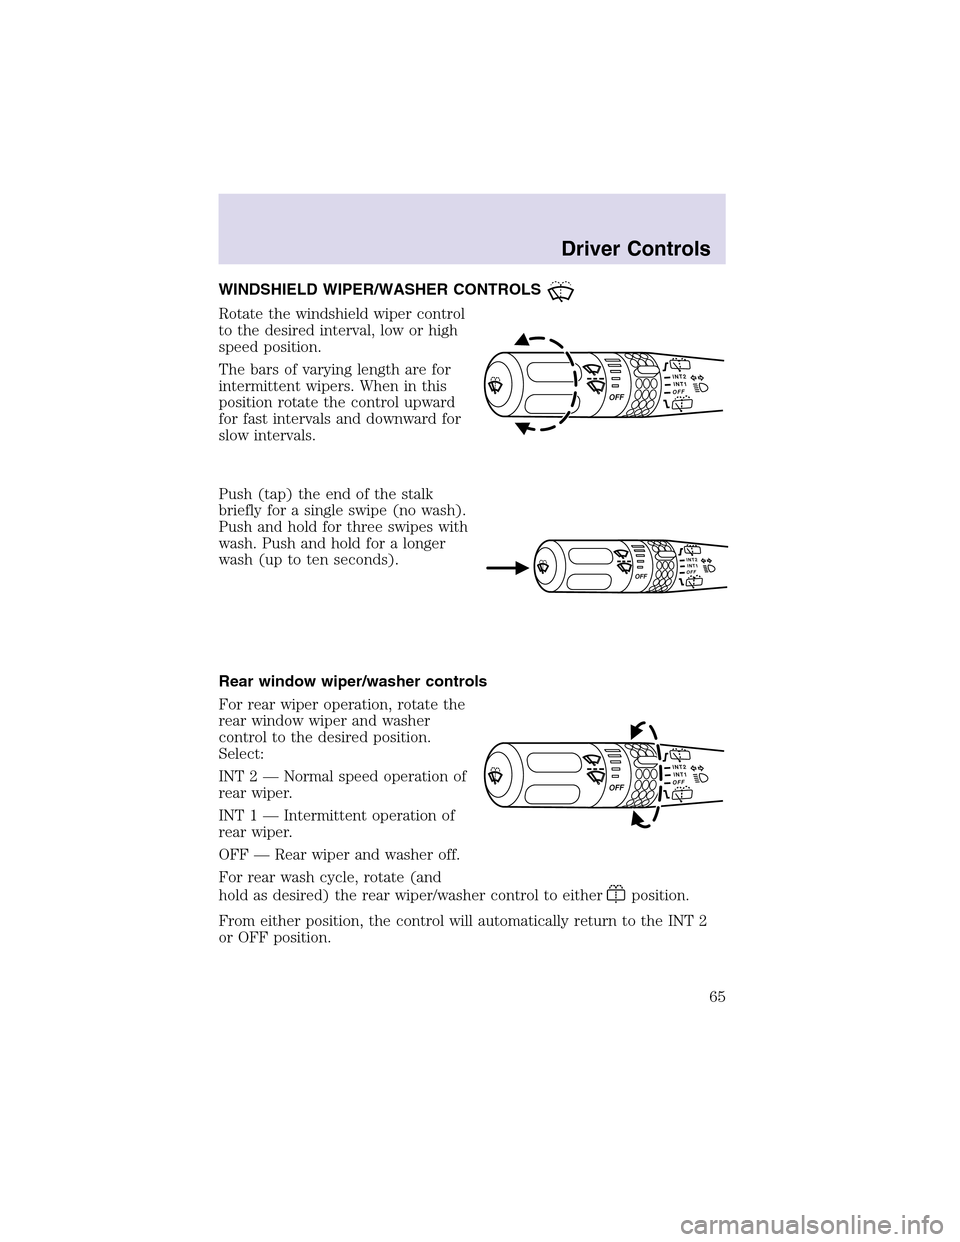
WINDSHIELD WIPER/WASHER CONTROLS
Rotate the windshield wiper control
to the desired interval, low or high
speed position.
The bars of varying length are for
intermittent wipers. When in this
position rotate the control upward
for fast intervals and downward for
slow intervals.
Push (tap) the end of the stalk
briefly for a single swipe (no wash).
Push and hold for three swipes with
wash. Push and hold for a longer
wash (upto ten seconds).
Rear window wiper/washer controls
For rear wiper operation, rotate the
rear window wiper and washer
control to the desired position.
Select:
INT 2 — Normal speed operation of
rear wiper.
INT 1 — Intermittent operation of
rear wiper.
OFF — Rear wiper and washer off.
For rear wash cycle, rotate (and
hold as desired) the rear wiper/washer control to either
position.
From either position, the control will automatically return to the INT 2
or OFF position.
Driver Controls
65
Page 66 of 288
Windshield wiper blades
Check the wiper blades for wear at least twice a year or when they seem
less effective. Substances such as tree sapand some hot wax treatments
used by commercial car washes reduce the effectiveness of wiper blades.
Checking the wiper blades
If the wiper blades do not wipe properly, clean both the windshield and
wiper blades using undiluted windshield wiper solution or a mild
detergent. Rinse thoroughly with clean water. To avoid damaging the
blades, do not use fuel, kerosene, paint thinner or other solvents.
Changing the wiper blades
It is recommended that wiper blades are renewed before winter.
To replace the wiper blades:
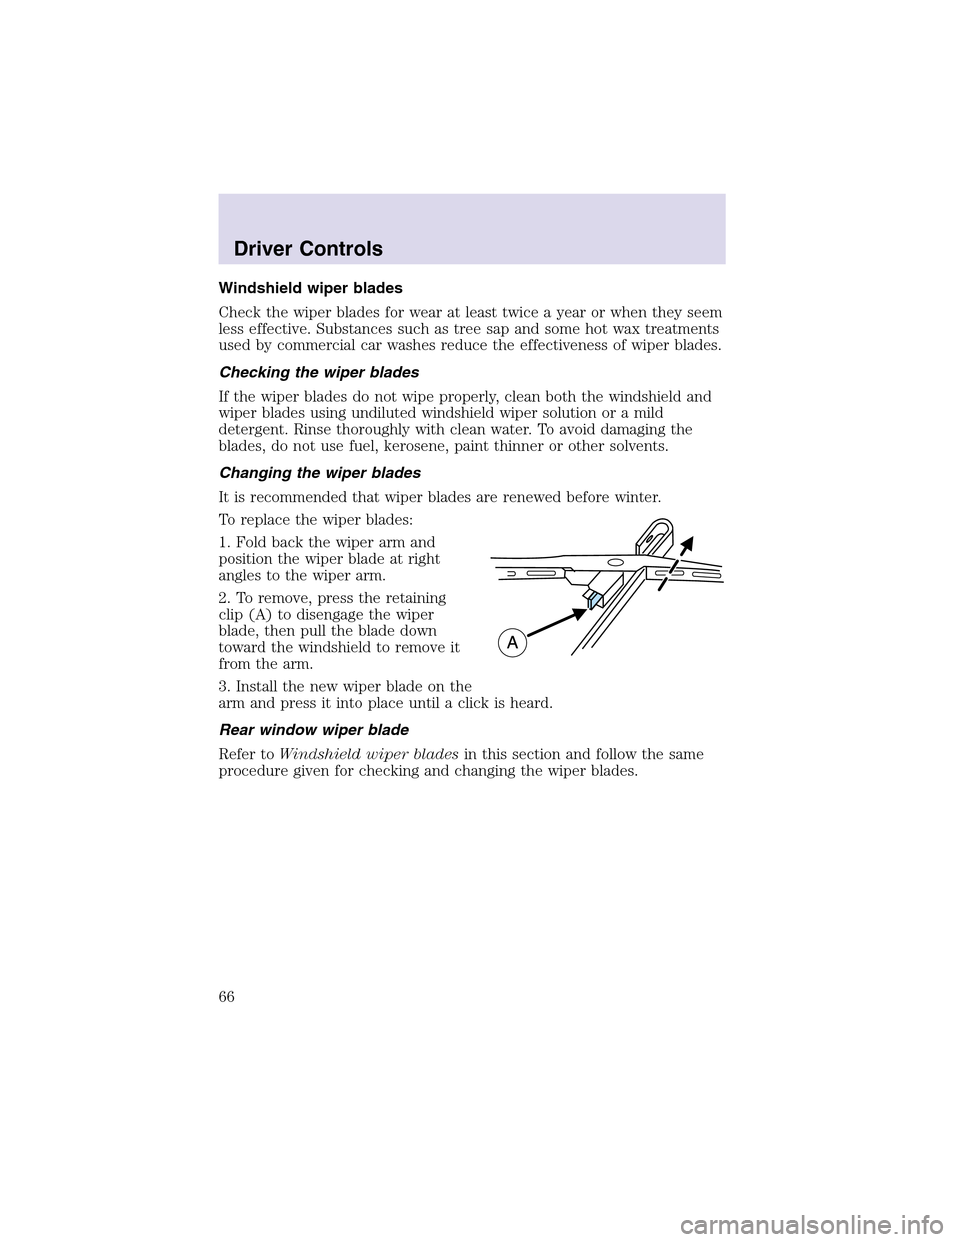
1. Fold back the wiper arm and
position the wiper blade at right
angles to the wiper arm.
2. To remove, press the retaining
clip(A) to disengage the wiper
blade, then pull the blade down
toward the windshield to remove it
from the arm.
3. Install the new wiper blade on the
arm and press it into place until a click is heard.
Rear window wiper blade
Refer toWindshield wiper bladesin this section and follow the same
procedure given for checking and changing the wiper blades.
Driver Controls
66