hood open LINCOLN AVIATOR 2004 Owners Manual
[x] Cancel search | Manufacturer: LINCOLN, Model Year: 2004, Model line: AVIATOR, Model: LINCOLN AVIATOR 2004Pages: 336, PDF Size: 3.69 MB
Page 86 of 336
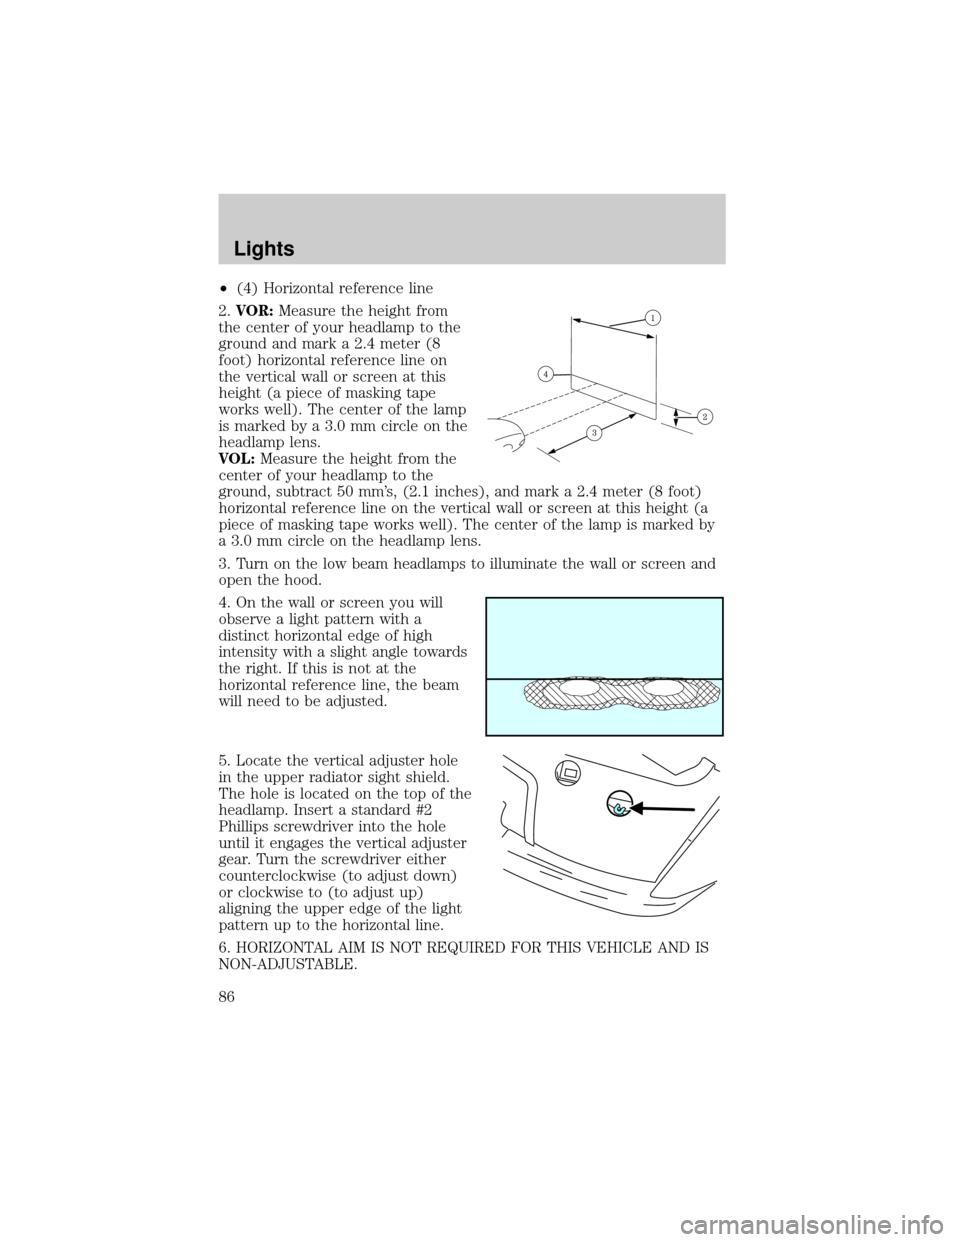
²(4) Horizontal reference line
2.VOR:Measure the height from
the center of your headlamp to the
ground and mark a 2.4 meter (8
foot) horizontal reference line on
the vertical wall or screen at this
height (a piece of masking tape
works well). The center of the lamp
is marked by a 3.0 mm circle on the
headlamp lens.
VOL:Measure the height from the
center of your headlamp to the
ground, subtract 50 mm's, (2.1 inches), and mark a 2.4 meter (8 foot)
horizontal reference line on the vertical wall or screen at this height (a
piece of masking tape works well). The center of the lamp is marked by
a 3.0 mm circle on the headlamp lens.
3. Turn on the low beam headlamps to illuminate the wall or screen and
open the hood.
4. On the wall or screen you will
observe a light pattern with a
distinct horizontal edge of high
intensity with a slight angle towards
the right. If this is not at the
horizontal reference line, the beam
will need to be adjusted.
5. Locate the vertical adjuster hole
in the upper radiator sight shield.
The hole is located on the top of the
headlamp. Insert a standard #2
Phillips screwdriver into the hole
until it engages the vertical adjuster
gear. Turn the screwdriver either
counterclockwise (to adjust down)
or clockwise to (to adjust up)
aligning the upper edge of the light
pattern up to the horizontal line.
6. HORIZONTAL AIM IS NOT REQUIRED FOR THIS VEHICLE AND IS
NON-ADJUSTABLE.
Lights
86
Page 87 of 336
7. Close the hood and turn off the lamps.
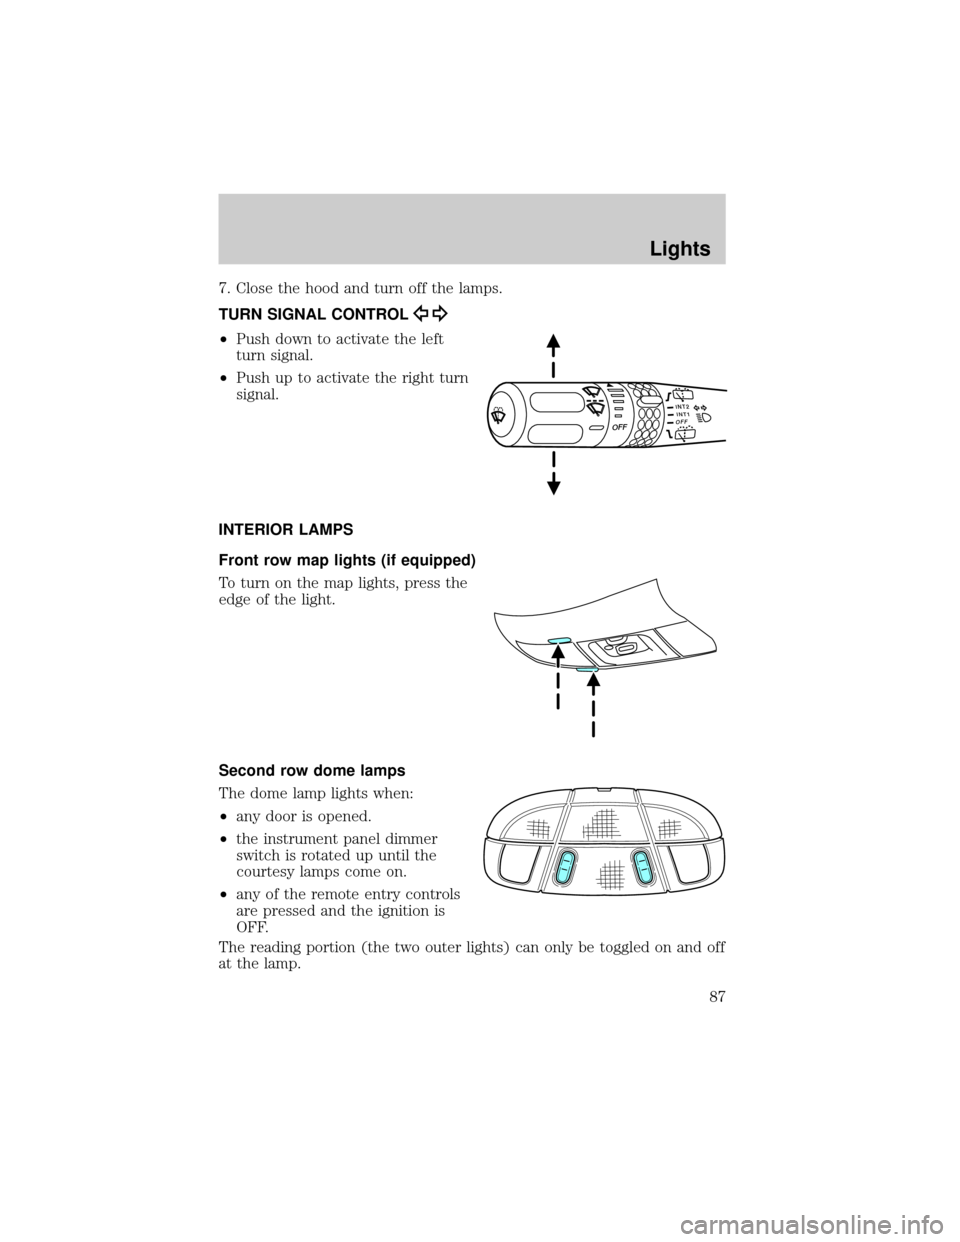
TURN SIGNAL CONTROL
²Push down to activate the left
turn signal.
²Push up to activate the right turn
signal.
INTERIOR LAMPS
Front row map lights (if equipped)
To turn on the map lights, press the
edge of the light.
Second row dome lamps
The dome lamp lights when:
²any door is opened.
²the instrument panel dimmer
switch is rotated up until the
courtesy lamps come on.
²any of the remote entry controls
are pressed and the ignition is
OFF.
The reading portion (the two outer lights) can only be toggled on and off
at the lamp.
INT2OFFOFFINT1
Lights
87
Page 90 of 336
Liftgate lamps
To change the liftgate lamp bulbs:
1. Use a small screwdriver to
remove the liftgate lamp lens.
2. To remove the old bulb, twist
1¤4
turn and pull it out.
3. Twist in a new bulb.
4. Align and press the liftgate lamp
lens back on and test the lamp
operation.
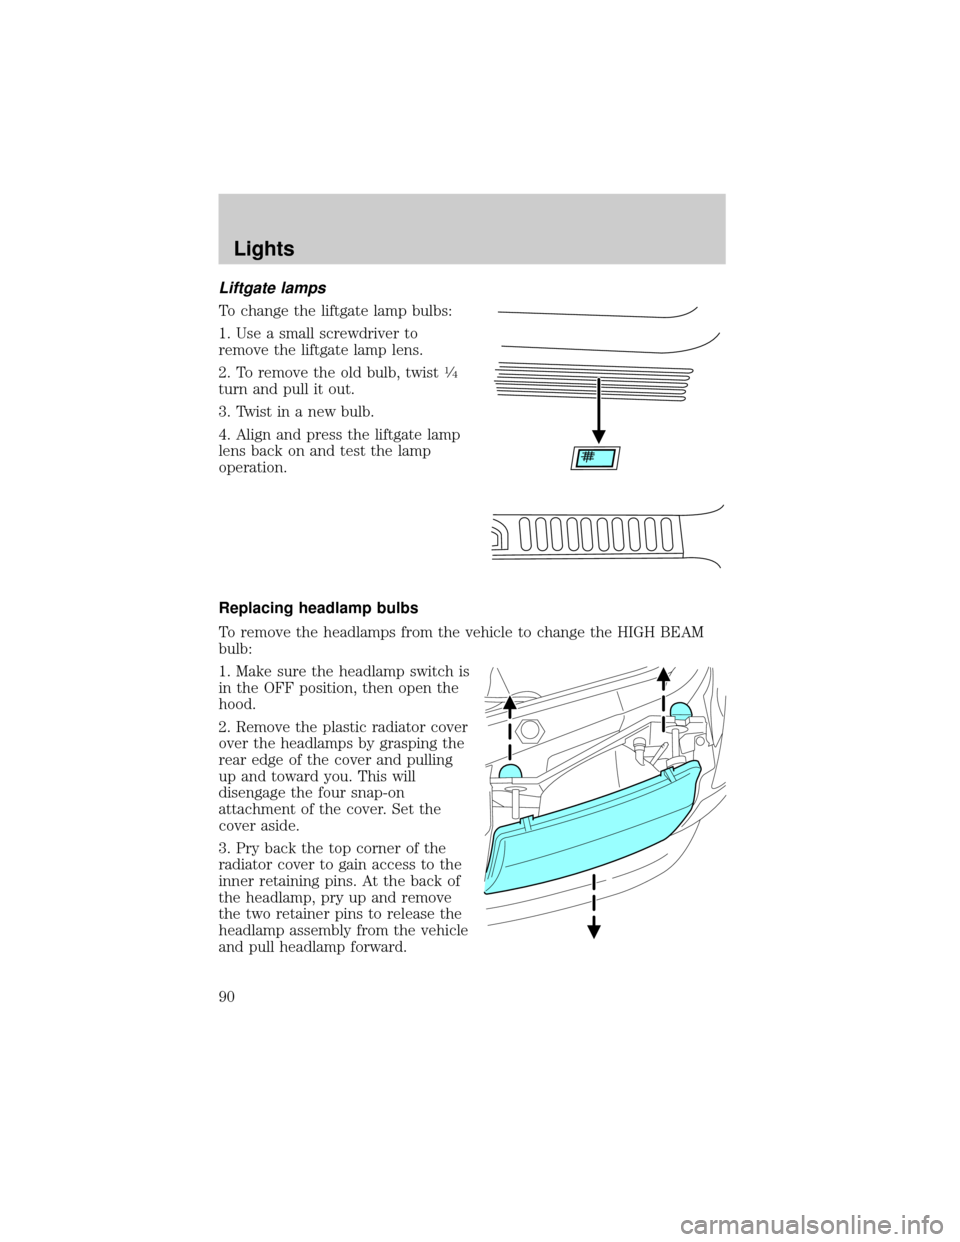
Replacing headlamp bulbs
To remove the headlamps from the vehicle to change the HIGH BEAM
bulb:
1. Make sure the headlamp switch is
in the OFF position, then open the
hood.
2. Remove the plastic radiator cover
over the headlamps by grasping the
rear edge of the cover and pulling
up and toward you. This will
disengage the four snap-on
attachment of the cover. Set the
cover aside.
3. Pry back the top corner of the
radiator cover to gain access to the
inner retaining pins. At the back of
the headlamp, pry up and remove
the two retainer pins to release the
headlamp assembly from the vehicle
and pull headlamp forward.
Lights
90
Page 92 of 336
Replacing HID headlamp bulbs (if equipped)
The low beam headlamps on your vehicle use a ªhigh intensity dischargeº
source. These lamps operate at a high voltage. The bulb is NOT
replaceable. When the bulb is burned out, the bulb assembly must be
replaced by your dealer or a qualified technician.
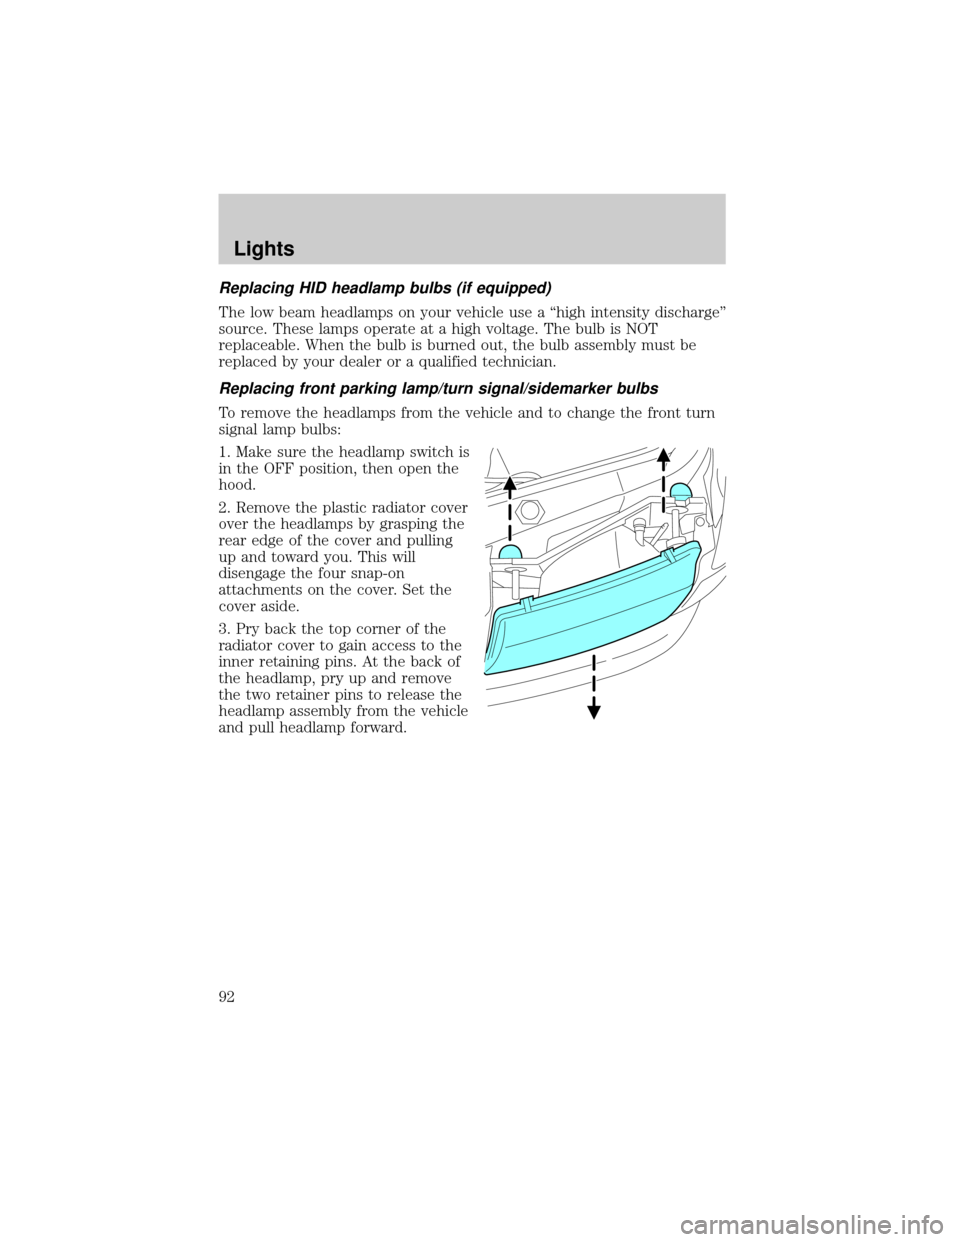
Replacing front parking lamp/turn signal/sidemarker bulbs
To remove the headlamps from the vehicle and to change the front turn
signal lamp bulbs:
1. Make sure the headlamp switch is
in the OFF position, then open the
hood.
2. Remove the plastic radiator cover
over the headlamps by grasping the
rear edge of the cover and pulling
up and toward you. This will
disengage the four snap-on
attachments on the cover. Set the
cover aside.
3. Pry back the top corner of the
radiator cover to gain access to the
inner retaining pins. At the back of
the headlamp, pry up and remove
the two retainer pins to release the
headlamp assembly from the vehicle
and pull headlamp forward.
Lights
92
Page 150 of 336
Arming the system
When armed, this system will help protect your vehicle from
unauthorized entry. When unauthorized entry occurs, the system will
flash the headlamps and/or parking lamps, and will chirp the horn.
The system is ready to arm whenever the key is removed from the
ignition. Any of the following actions will prearm the alarm system:
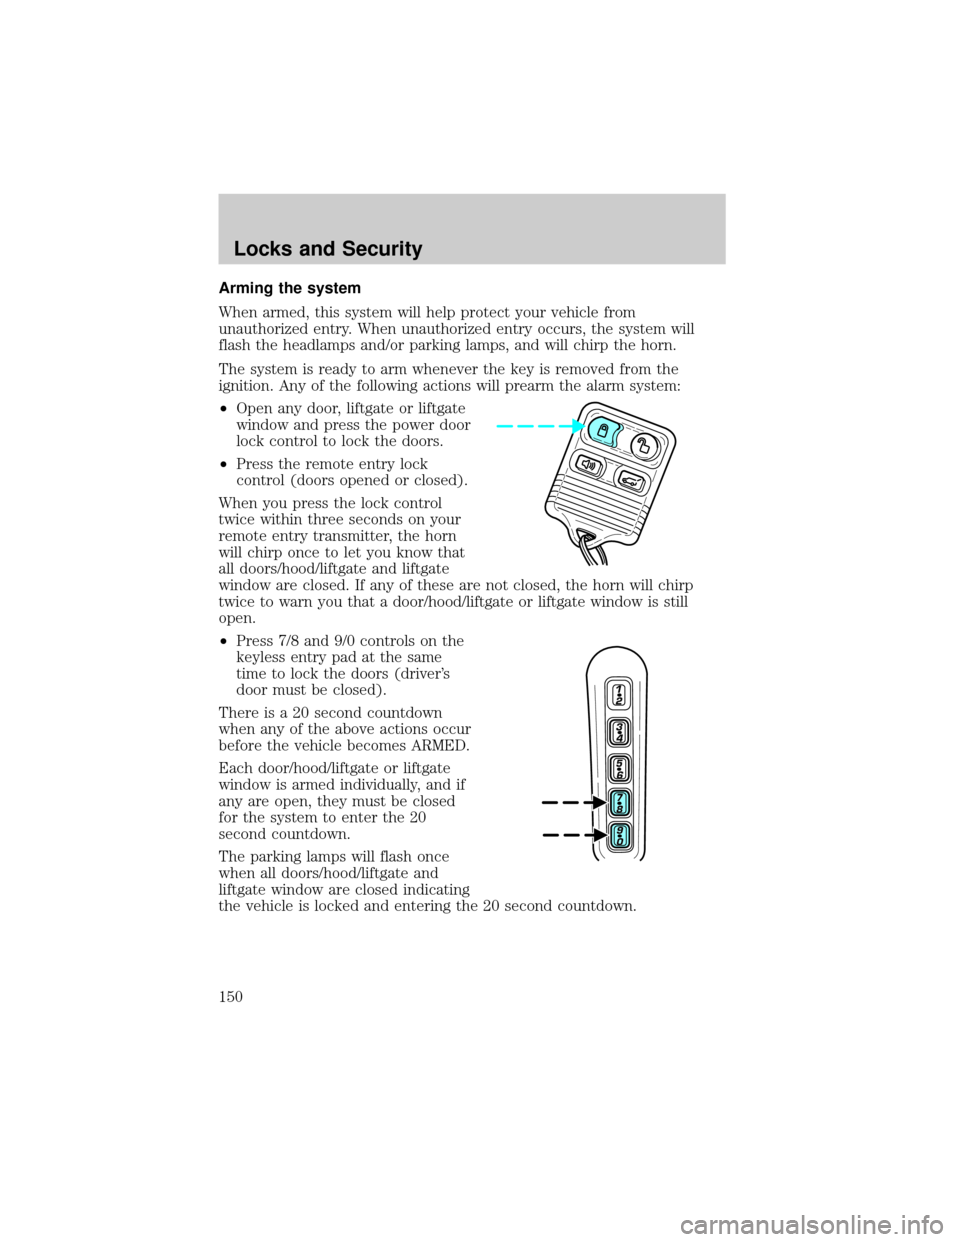
²Open any door, liftgate or liftgate
window and press the power door
lock control to lock the doors.
²Press the remote entry lock
control (doors opened or closed).
When you press the lock control
twice within three seconds on your
remote entry transmitter, the horn
will chirp once to let you know that
all doors/hood/liftgate and liftgate
window are closed. If any of these are not closed, the horn will chirp
twice to warn you that a door/hood/liftgate or liftgate window is still
open.
²Press 7/8 and 9/0 controls on the
keyless entry pad at the same
time to lock the doors (driver's
door must be closed).
There is a 20 second countdown
when any of the above actions occur
before the vehicle becomes ARMED.
Each door/hood/liftgate or liftgate
window is armed individually, and if
any are open, they must be closed
for the system to enter the 20
second countdown.
The parking lamps will flash once
when all doors/hood/liftgate and
liftgate window are closed indicating
the vehicle is locked and entering the 20 second countdown.
Locks and Security
150
Page 152 of 336
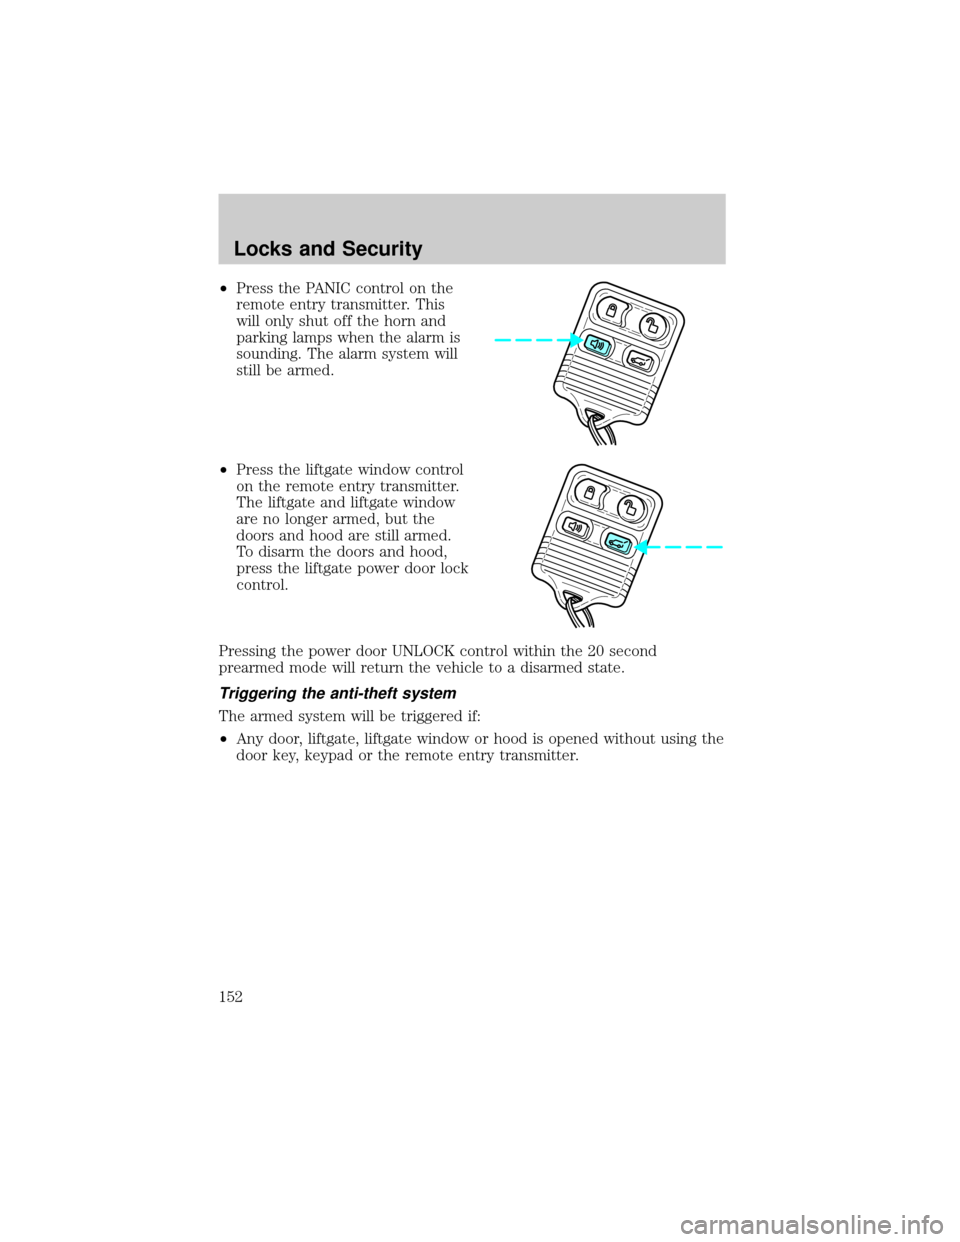
²Press the PANIC control on the
remote entry transmitter. This
will only shut off the horn and
parking lamps when the alarm is
sounding. The alarm system will
still be armed.
²Press the liftgate window control
on the remote entry transmitter.
The liftgate and liftgate window
are no longer armed, but the
doors and hood are still armed.
To disarm the doors and hood,
press the liftgate power door lock
control.
Pressing the power door UNLOCK control within the 20 second
prearmed mode will return the vehicle to a disarmed state.
Triggering the anti-theft system
The armed system will be triggered if:
²Any door, liftgate, liftgate window or hood is opened without using the
door key, keypad or the remote entry transmitter.
Locks and Security
152
Page 179 of 336
How does the Safety CanopyYsystem work?
The design and development of the
Safety Canopyysystem included
recommended testing procedures
that were developed by a group of
automotive safety experts known as
the Side Airbag Technical Working
Group. These recommended testing
procedures help reduce the risk of
injuries related to the deployment of
side airbags (including the Safety
Canopyy).
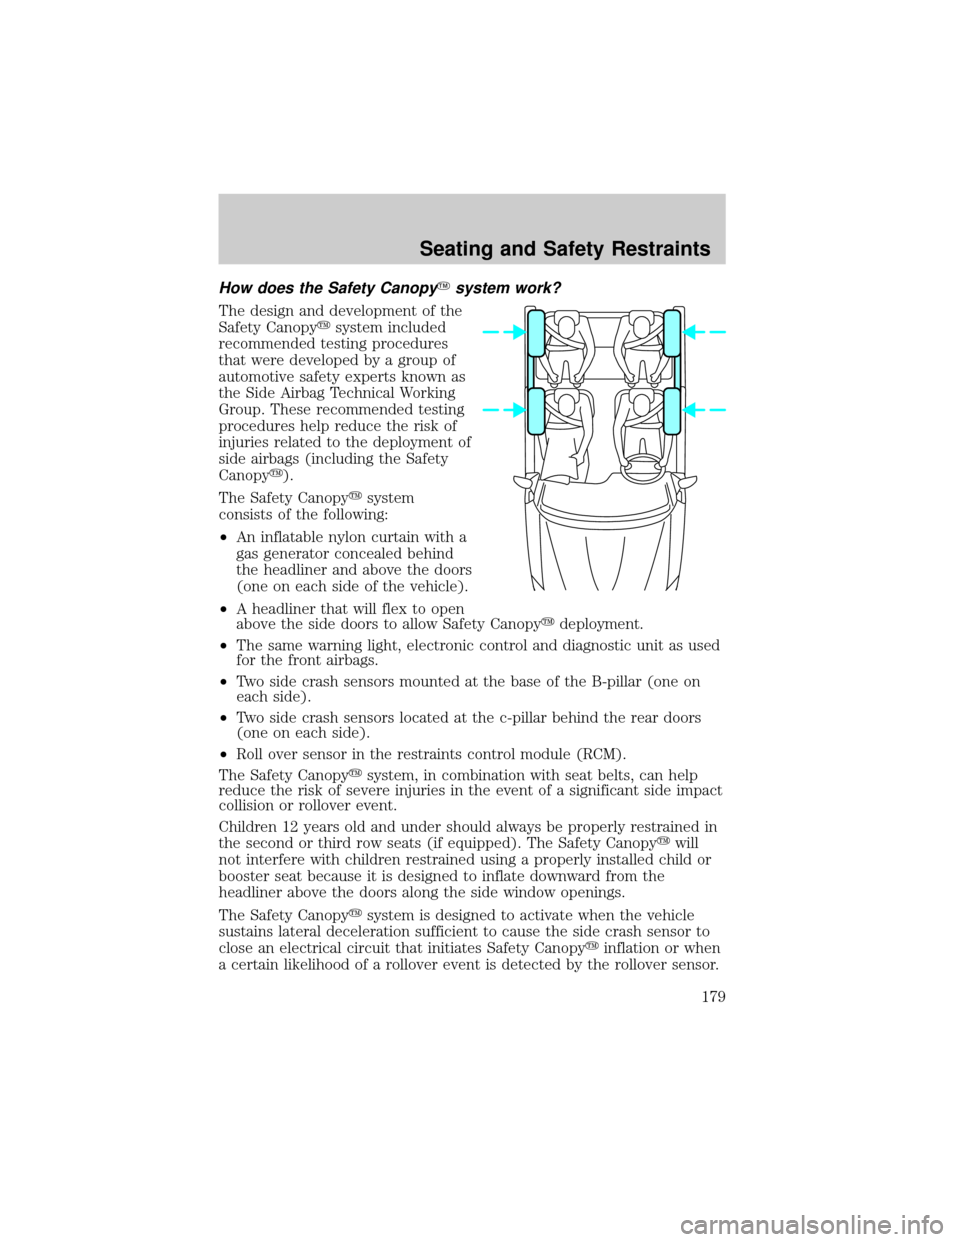
The Safety Canopyysystem
consists of the following:
²An inflatable nylon curtain with a
gas generator concealed behind
the headliner and above the doors
(one on each side of the vehicle).
²A headliner that will flex to open
above the side doors to allow Safety Canopyydeployment.
²The same warning light, electronic control and diagnostic unit as used
for the front airbags.
²Two side crash sensors mounted at the base of the B-pillar (one on
each side).
²Two side crash sensors located at the c-pillar behind the rear doors
(one on each side).
²Roll over sensor in the restraints control module (RCM).
The Safety Canopyysystem, in combination with seat belts, can help
reduce the risk of severe injuries in the event of a significant side impact
collision or rollover event.
Children 12 years old and under should always be properly restrained in
the second or third row seats (if equipped). The Safety Canopyywill
not interfere with children restrained using a properly installed child or
booster seat because it is designed to inflate downward from the
headliner above the doors along the side window openings.
The Safety Canopyysystem is designed to activate when the vehicle
sustains lateral deceleration sufficient to cause the side crash sensor to
close an electrical circuit that initiates Safety Canopyyinflation or when
a certain likelihood of a rollover event is detected by the rollover sensor.
Seating and Safety Restraints
179
Page 273 of 336
Working with the engine on
1. Set the parking brake and shift to P (Park).
2. Block the wheels.
Note:Do not start your engine with the air cleaner removed and do not
remove it while the engine is running.
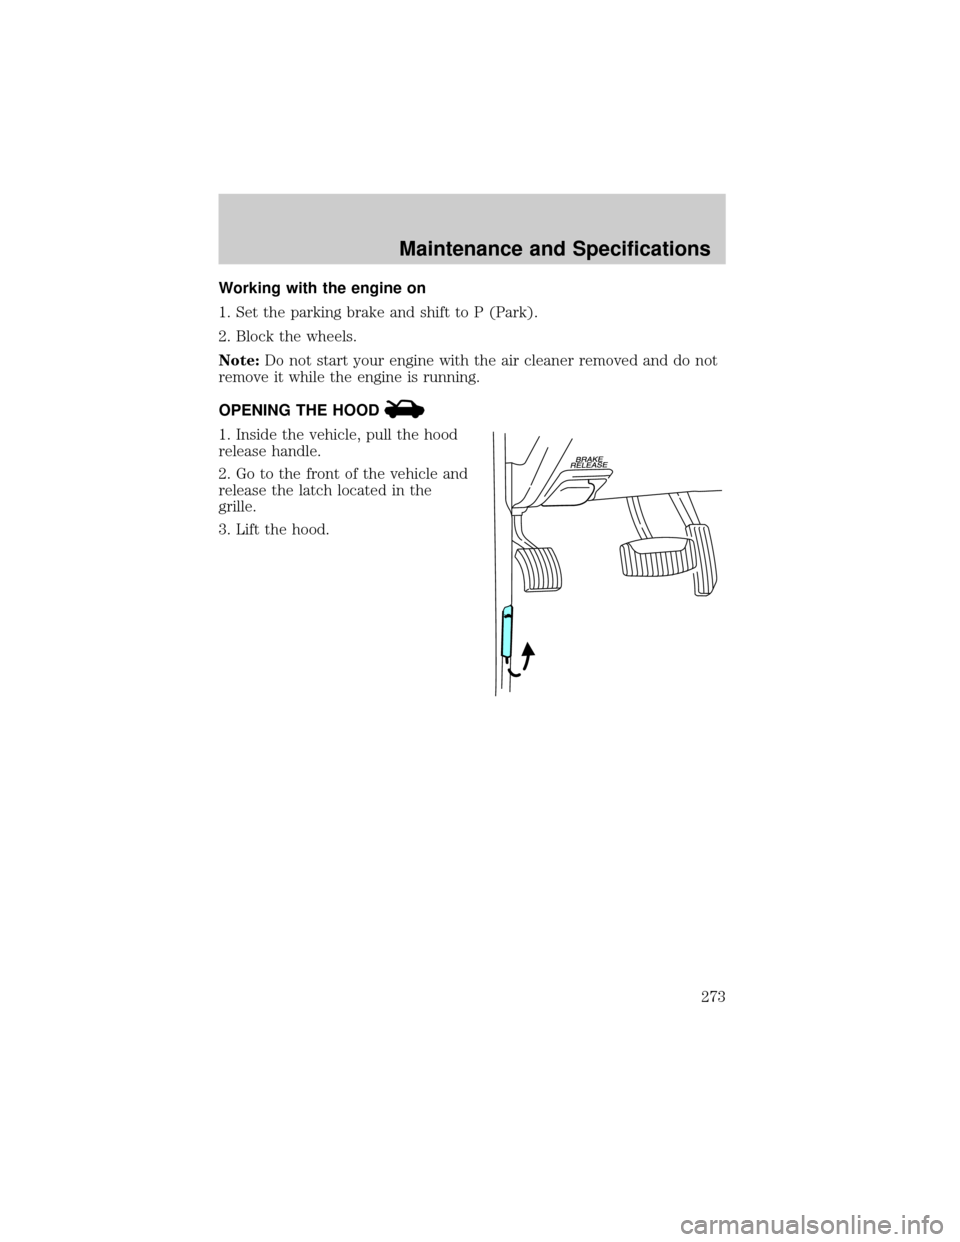
OPENING THE HOOD
1. Inside the vehicle, pull the hood
release handle.
2. Go to the front of the vehicle and
release the latch located in the
grille.
3. Lift the hood.
Maintenance and Specifications
273
Page 276 of 336
ENGINE OIL
Checking the engine oil
Refer to the scheduled maintenance guide for the appropriate intervals
for checking the engine oil.
1. Make sure the vehicle is on level ground.
2. Turn the engine off and wait a few minutes for the oil to drain into the
oil pan.
3. Set the parking brake and ensure the gearshift is securely latched in P
(Park).
4. Open the hood. Protect yourself from engine heat.
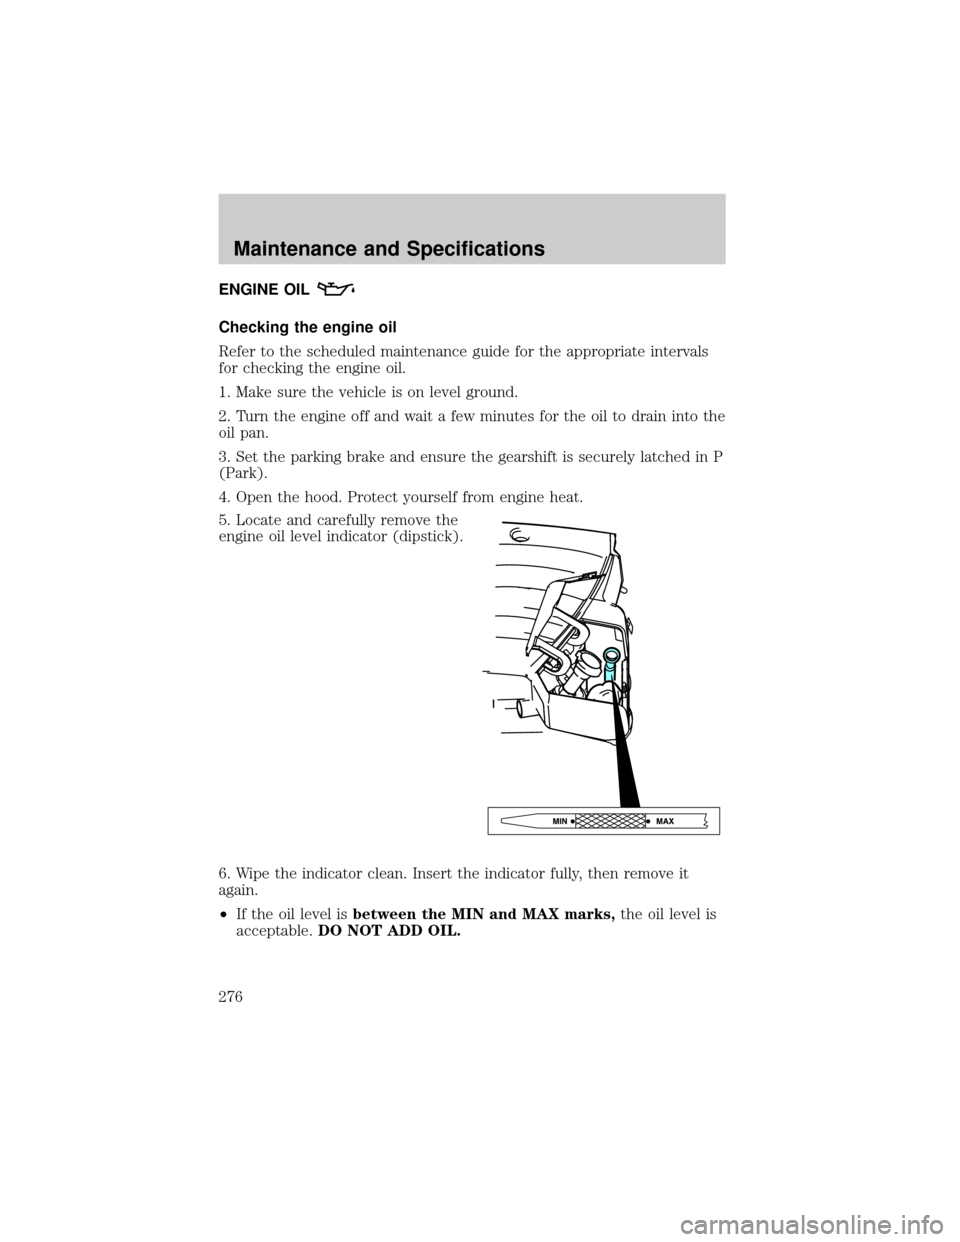
5. Locate and carefully remove the
engine oil level indicator (dipstick).
6. Wipe the indicator clean. Insert the indicator fully, then remove it
again.
²If the oil level isbetween the MIN and MAX marks,the oil level is
acceptable.DO NOT ADD OIL.
Maintenance and Specifications
276