odometer LINCOLN AVIATOR 2004 Owners Manual
[x] Cancel search | Manufacturer: LINCOLN, Model Year: 2004, Model line: AVIATOR, Model: LINCOLN AVIATOR 2004Pages: 336, PDF Size: 3.69 MB
Page 14 of 336

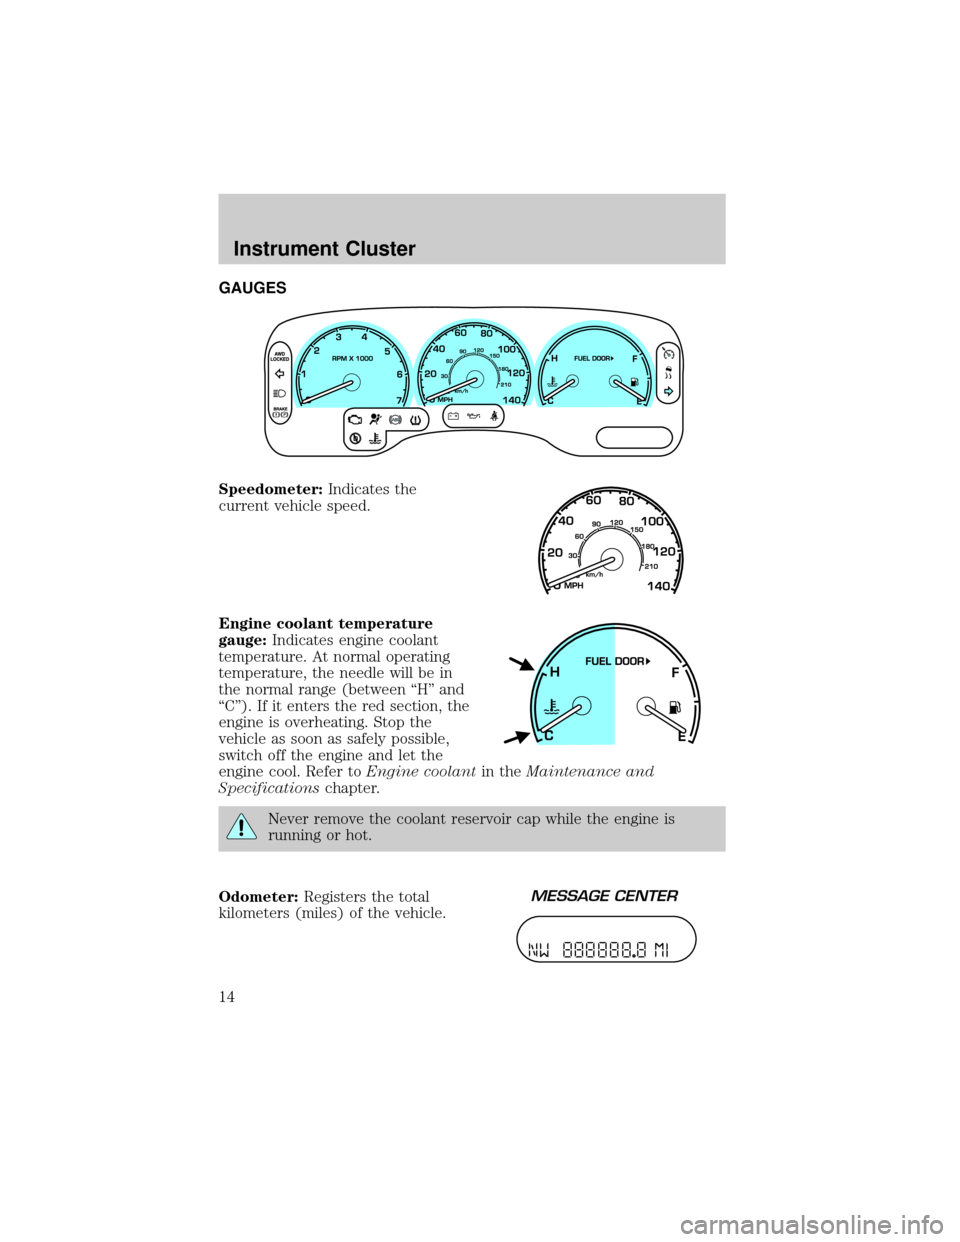
GAUGES
Speedometer:Indicates the
current vehicle speed.
Engine coolant temperature
gauge:Indicates engine coolant
temperature. At normal operating
temperature, the needle will be in
the normal range (between ªHº and
ªCº). If it enters the red section, the
engine is overheating. Stop the
vehicle as soon as safely possible,
switch off the engine and let the
engine cool. Refer toEngine coolantin theMaintenance and
Specificationschapter.
Never remove the coolant reservoir cap while the engine is
running or hot.
Odometer:Registers the total
kilometers (miles) of the vehicle.
Instrument Cluster
14
Page 15 of 336

Refer toMessage Centerin theDrivers Controlschapter on how to
switch the display from Metric to English.
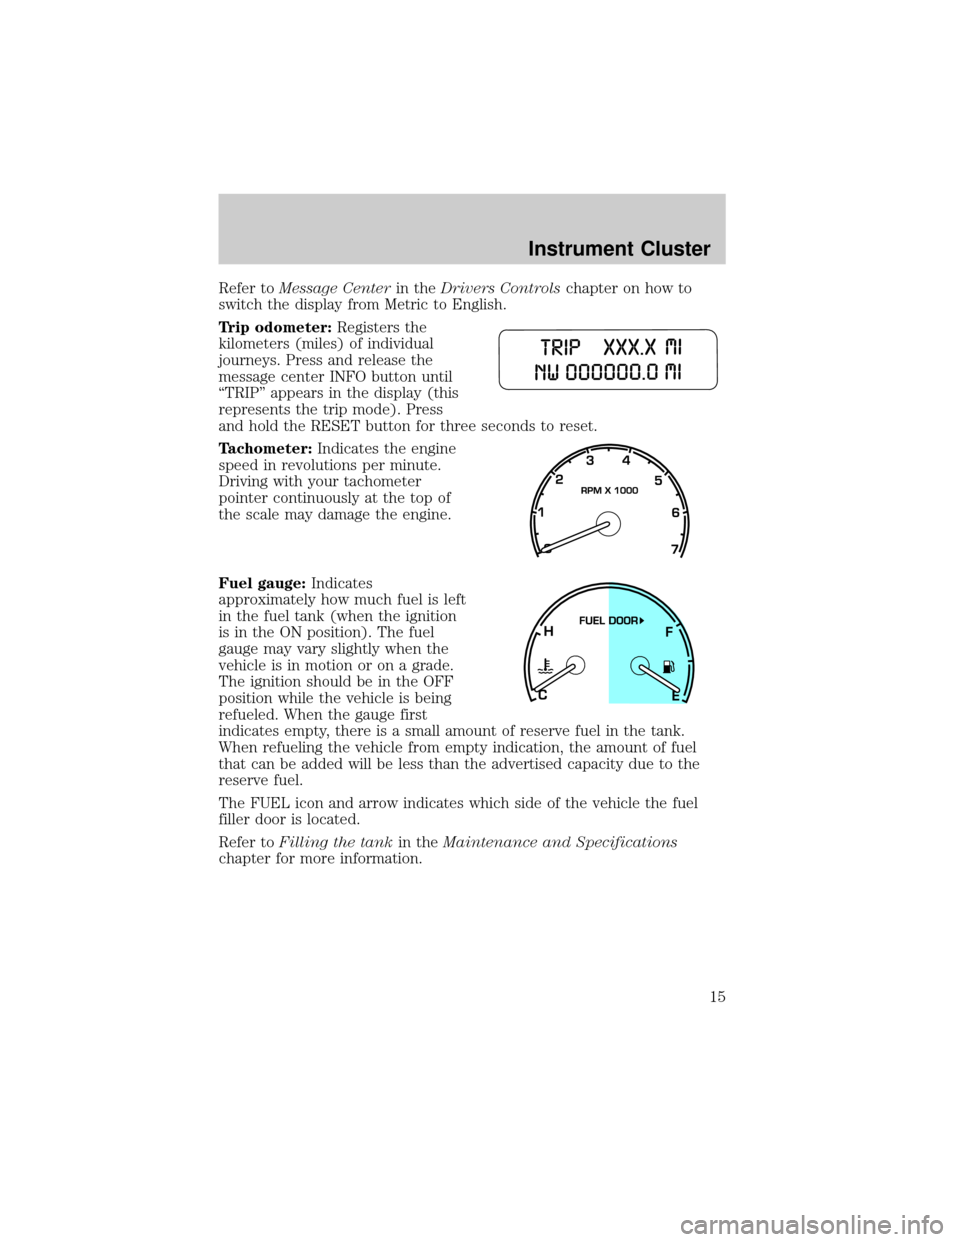
Trip odometer:Registers the
kilometers (miles) of individual
journeys. Press and release the
message center INFO button until
ªTRIPº appears in the display (this
represents the trip mode). Press
and hold the RESET button for three seconds to reset.
Tachometer:Indicates the engine
speed in revolutions per minute.
Driving with your tachometer
pointer continuously at the top of
the scale may damage the engine.
Fuel gauge:Indicates
approximately how much fuel is left
in the fuel tank (when the ignition
is in the ON position). The fuel
gauge may vary slightly when the
vehicle is in motion or on a grade.
The ignition should be in the OFF
position while the vehicle is being
refueled. When the gauge first
indicates empty, there is a small amount of reserve fuel in the tank.
When refueling the vehicle from empty indication, the amount of fuel
that can be added will be less than the advertised capacity due to the
reserve fuel.
The FUEL icon and arrow indicates which side of the vehicle the fuel
filler door is located.
Refer toFilling the tankin theMaintenance and Specifications
chapter for more information.
Instrument Cluster
15
Page 119 of 336

Selectable features
Reset
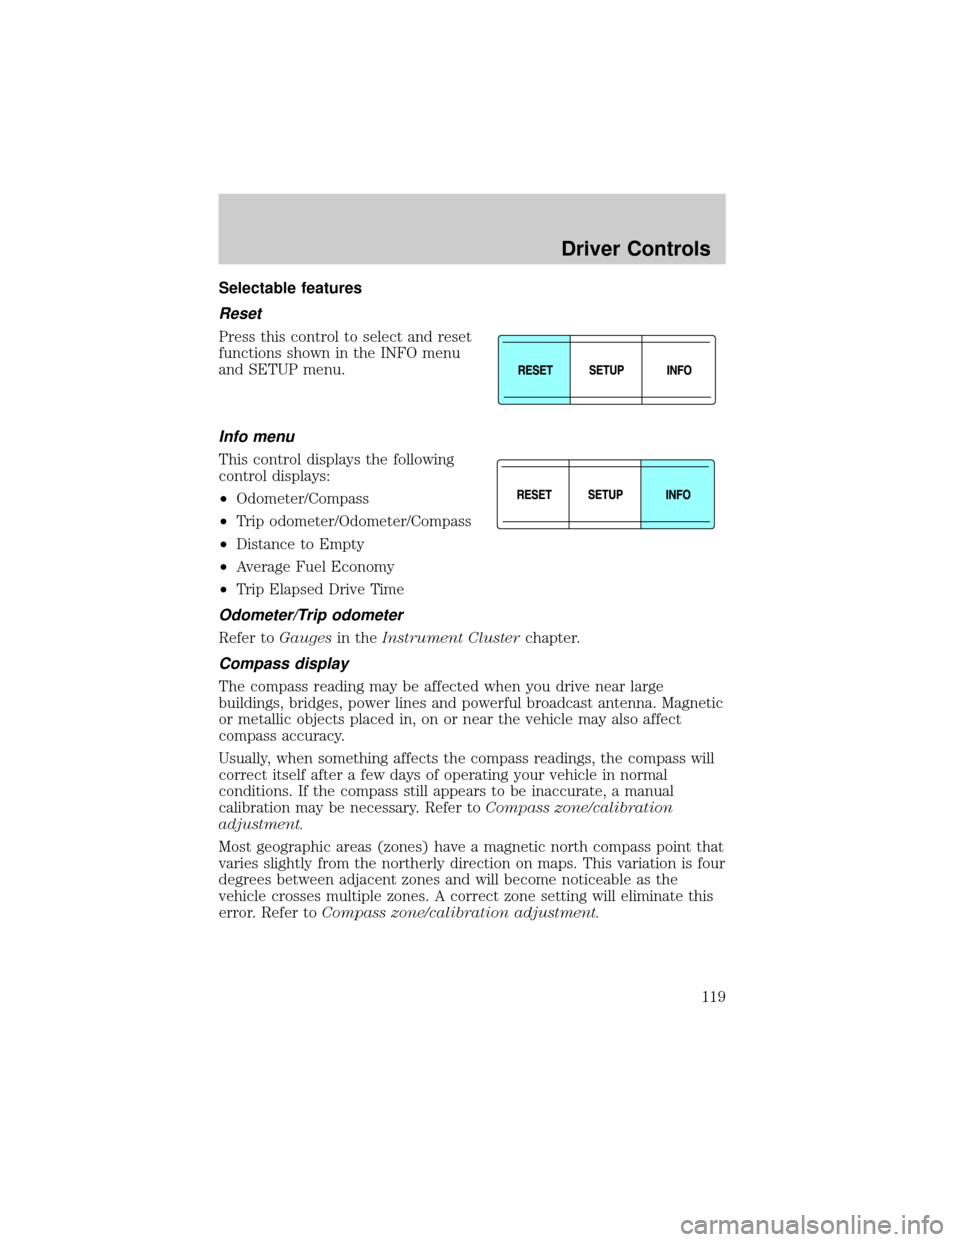
Press this control to select and reset
functions shown in the INFO menu
and SETUP menu.
Info menu
This control displays the following
control displays:
²Odometer/Compass
²Trip odometer/Odometer/Compass
²Distance to Empty
²Average Fuel Economy
²Trip Elapsed Drive Time
Odometer/Trip odometer
Refer toGaugesin theInstrument Clusterchapter.
Compass display
The compass reading may be affected when you drive near large
buildings, bridges, power lines and powerful broadcast antenna. Magnetic
or metallic objects placed in, on or near the vehicle may also affect
compass accuracy.
Usually, when something affects the compass readings, the compass will
correct itself after a few days of operating your vehicle in normal
conditions. If the compass still appears to be inaccurate, a manual
calibration may be necessary. Refer toCompass zone/calibration
adjustment.
Most geographic areas (zones) have a magnetic north compass point that
varies slightly from the northerly direction on maps. This variation is four
degrees between adjacent zones and will become noticeable as the
vehicle crosses multiple zones. A correct zone setting will eliminate this
error. Refer toCompass zone/calibration adjustment.
Driver Controls
119
Page 120 of 336

Compass zone/calibration adjustment
Perform this adjustment in an open area free from steel structures and
high voltage lines.
For optimum calibration, turn off all electrical accessories (heater/air
conditioning, wipers, etc.) and make sure all vehicle doors are shut.
1. Turn ignition to the ON position.
2. Start the engine.
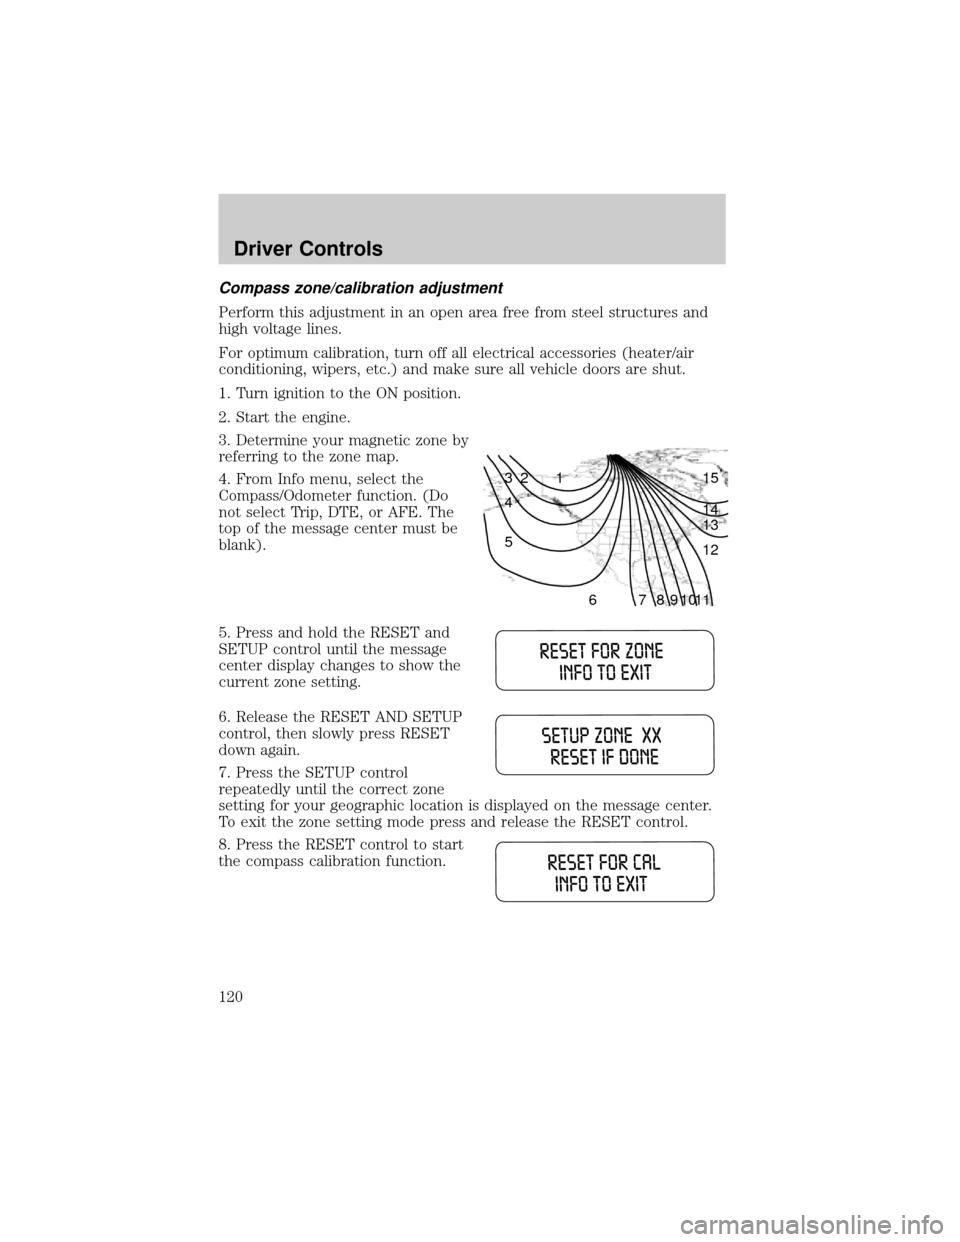
3. Determine your magnetic zone by
referring to the zone map.
4. From Info menu, select the
Compass/Odometer function. (Do
not select Trip, DTE, or AFE. The
top of the message center must be
blank).
5. Press and hold the RESET and
SETUP control until the message
center display changes to show the
current zone setting.
6. Release the RESET AND SETUP
control, then slowly press RESET
down again.
7. Press the SETUP control
repeatedly until the correct zone
setting for your geographic location is displayed on the message center.
To exit the zone setting mode press and release the RESET control.
8. Press the RESET control to start
the compass calibration function.
1 2 3
4
5
6 7 8 9 101112 13 14 15
Driver Controls
120
Page 258 of 336

In Canada:
Customer Relationship Centre
Ford Motor Company of Canada, Limited
P.O. Box 2000
Oakville, Ontario L6J 5E4
1-800-565-3673 (FORD)
www.ford.ca
If you own a Lincoln vehicle and are away from home when your vehicle
needs service, or if you need more help than the dealership could
provide, after following the steps described above, contact the Ford
Customer Relationship Center to find an authorized dealership to help
you.
In the United States:
Ford Motor Company
Customer Relationship Center
P.O. Box 6248
Dearborn, MI 48121
1-800-521-4140
(TDD for the hearing impaired: 1-800-232-5952)
www.customersaskford.com
In Canada:
Lincoln Centre
Ford Motor Company of Canada, Limited
P.O. Box 2000
Oakville, Ontario L6J 5E4
1-800-387-9333
www.lincolncanada.com
In order to help you service your Lincoln vehicle, please have the
following information available when contacting the Lincoln Centre:
²Your telephone number (home and business)
²The name of the dealer and the city where the dealership is located
²The year and make of your vehicle
²The date of vehicle purchase
²The current odometer reading
²The vehicle identification number (VIN)
If you still have a complaint involving a warranty dispute, you may wish
to contact the Dispute Settlement Board (U.S.).
In some states (in the U.S.) you must directly notify Ford in writing
before pursuing remedies under your state's warranty laws. Ford is also
allowed a final repair attempt in some states.
Customer Assistance
258
Page 290 of 336

The advertised capacity is the amount of the indicated capacity and the
empty reserve combined. Indicated capacity is the difference in the
amount of fuel in a full tank and a tank when the fuel gauge indicates
empty. Empty reserve is the small amount of fuel remaining in the fuel
tank after the fuel gauge indicates empty.
The amount of usable fuel in the empty reserve varies and should
not be relied upon to increase driving range. When refueling your
vehicle after the fuel gauge indicates empty, you might not be
able to refuel the full amount of the advertised capacity of the
fuel tank due to the empty reserve still present in the tank.
For consistent results when filling the fuel tank:
²Turn the engine/ignition switch to the off position prior to refueling,
an error in the reading will result if the engine is left running.
²Use the same filling rate setting (low Ð medium Ð high) each time
the tank is filled.
²Allow no more than 2 automatic click-offs when filling.
²Always use fuel with the recommended octane rating.
²Use a known quality gasoline, preferably a national brand.
²Use the same side of the same pump and have the vehicle facing the
same direction each time you fill up.
²Have the vehicle loading and distribution the same every time.
Your results will be most accurate if your filling method is consistent.
Calculating fuel economy
1. Fill the fuel tank completely and record the initial odometer reading
(in kilometers or miles).
2. Each time you fill the tank, record the amount of fuel added (in liters
or gallons).
3. After at least three to five tank fill-ups, fill the fuel tank and record
the current odometer reading.
4. Subtract your initial odometer reading from the current odometer
reading.
5. Follow one of the simple calculations in order to determine fuel
economy:
Calculation 1:Multiply liters used by 100, then divide by total
kilometers traveled.
Calculation 2:Divide total miles traveled by total gallons used.
Maintenance and Specifications
290