display LINCOLN AVIATOR 2005 Quick Reference Guide
[x] Cancel search | Manufacturer: LINCOLN, Model Year: 2005, Model line: AVIATOR, Model: LINCOLN AVIATOR 2005Pages: 12, PDF Size: 1.24 MB
Page 4 of 12

Audio System
(If your Aviator is equipped with a different audio
system, please refer to your Owner’s Guide.)
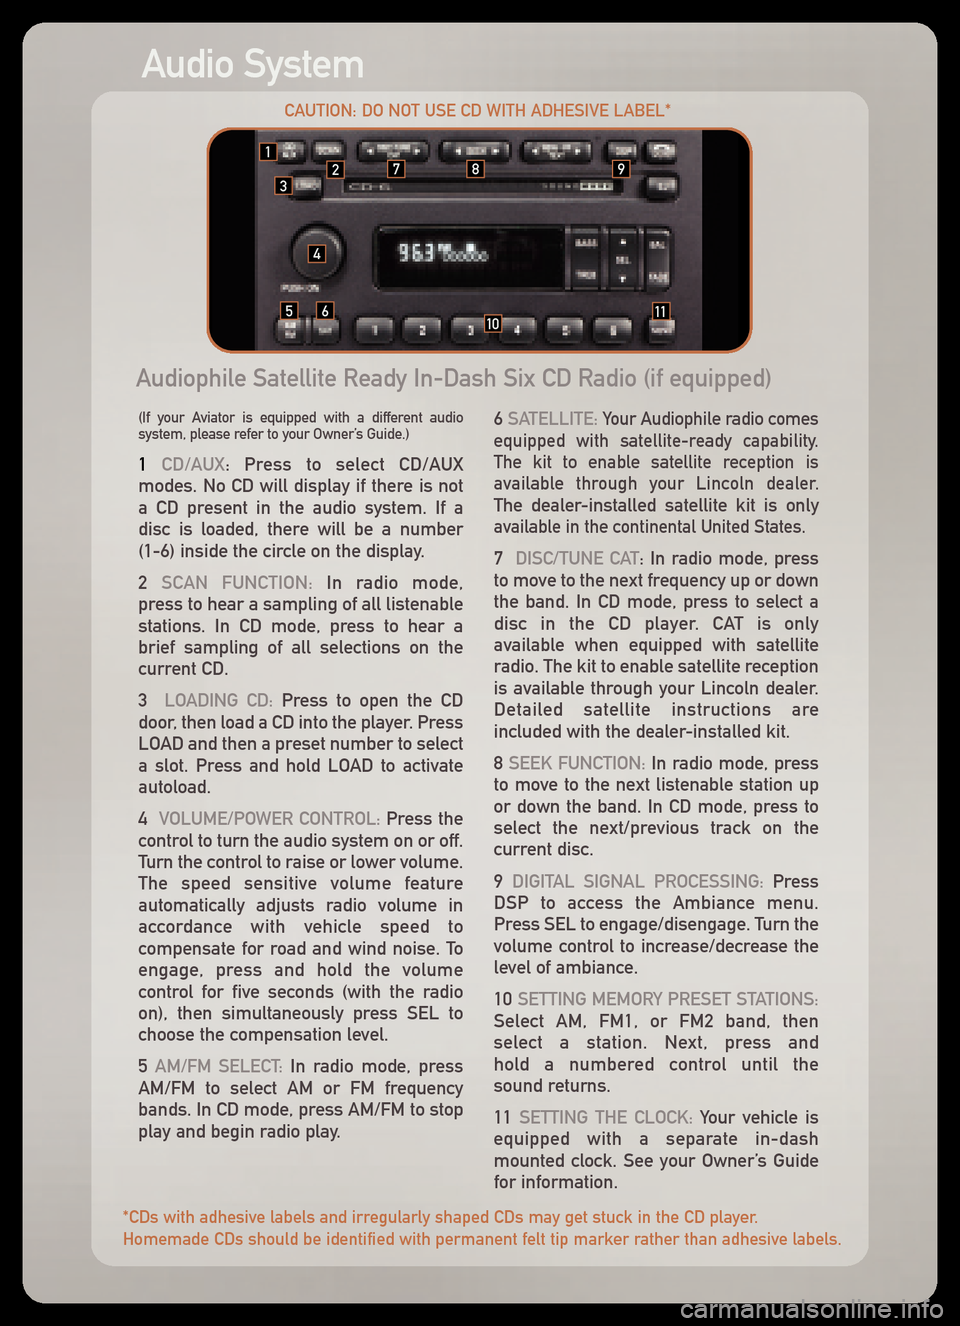
1 CD/AUX: Press to select CD/AUX
modes. No CD will display if there is not
a CD present in the audio system. If a
disc is loaded, there will be a number
(1�6) inside the circle on the display.
2 SCAN FUNCTION: In radio mode,
press to hear a sampling of all listenable
stations. In CD mode, press to hear abrief sampling of all selections on the
current CD.
3 LOADING CD:Press to open the CD
door, then load a CD into the player. Press
LOAD and then a preset number to select
a slot. Press and hold LOAD to activateautoload.
4 VOLUME/POWER CONTROL: Press the
control to turn the audio system on or off.
Turn the control to raise or lower volume.
The speed sensitive volume feature
automatically adjusts radio volume in
accordance with vehicle speed to
compensate for road and wind noise. To
engage, press and hold the volume
control for five seconds (with the radio
on), then simultaneously press SEL to
choose the compensation level.
5 AM/FM SELECT:In radio mode, press
AM/FM to select AM or FM frequency
bands. In CD mode, press AM/FM to stop
play and begin radio play. 6 SATELLITE:
Your Audiophile radio comes
equipped with satellite�ready capability.
The kit to enable satellite reception is
available through your Lincoln dealer.
The dealer�installed satellite kit is onlyavailable in the continental United States.
7 DISC/TUNE CAT: In radio mode, press
to move to the next frequency up or down
the band. In CD mode, press to select a
disc in the CD player. CAT is onlyavailable when equipped with satellite
radio. The kit to enable satellite reception
is available through your Lincoln dealer.
Detailed satellite instructions are
included with the dealer�installed kit.
8 SEEK FUNCTION: In radio mode, press
to move to the next listenable station up
or down the band. In CD mode, press to
select the next/previous track on the
current disc.
9 DIGITAL SIGNAL PROCESSING: Press
DSP to access the Ambiance menu.
Press SEL to engage/disengage. Turn the
volume control to increase/decrease the
level of ambiance.
10 SETTING MEMORY PRESET STATIONS:
Select AM, FM1, or FM2 band, then
select a station. Next, press and
hold a numbered control until the
sound returns.
11 SETTING THE CLOCK:Your vehicle is
equipped with a separate in�dash
mounted clock. See your Owner’s Guidefor information.
Audiophile Satellite Ready In�Dash Six CD Radio (if equipped)
123
4
56
789
1110
*CDs with adhesive labels and irregularly shaped CDs may get stuck in the CD player.
Homemade CDs should be identified with permanent felt tip marker rather than adhesive labels.CAUTION: DO NOT USE CD WITH ADHESIVE LABEL*
Page 5 of 12

Climate Control
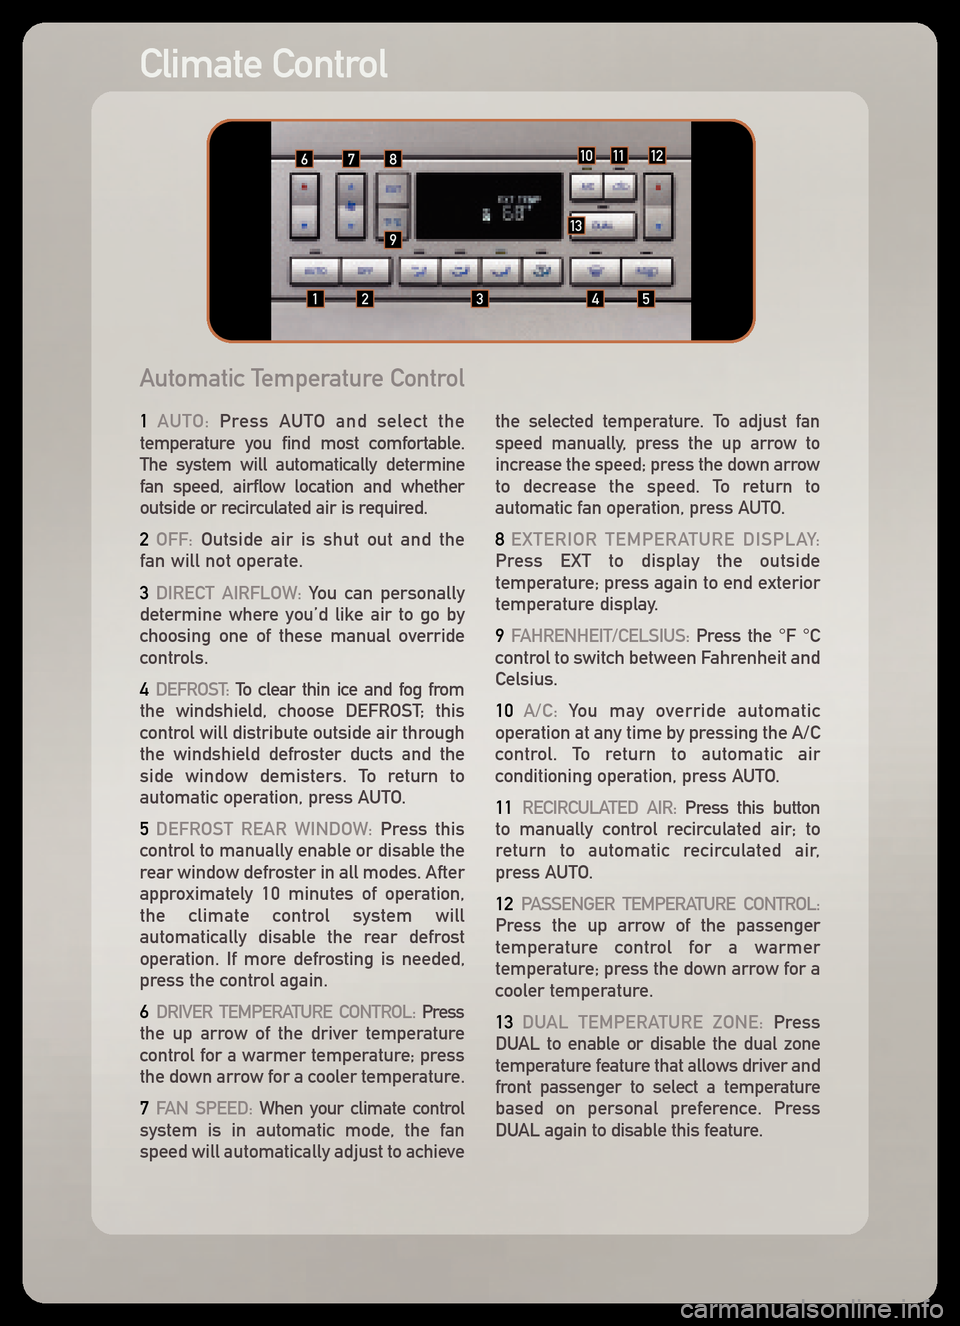
1AUTO: Press AUTO and select the
temperature you find most comfortable.
The system will automatically determinefan speed, airflow location and whether
outside or recirculated air is required.
2OFF: Outside air is shut out and the
fan will not operate.
3DIRECT AIRFLOW: You can personally
determine where you’d like air to go by
choosing one of these manual override
controls.
4DEFROST: To clear thin ice and fog from
the windshield, choose DEFROST; this
control will distribute outside air through
the windshield defroster ducts and the
side window demisters. To return to
automatic operation, press AUTO.
5DEFROST REAR WINDOW: Press this
control to manually enable or disable the
rear window defroster in all modes. After
approximately 10 minutes of operation,
the climate control system will
automatically disable the rear defrost
operation. If more defrosting is needed,
press the control again.
6DRIVER TEMPERATURE CONTROL: Press
the up arrow of the driver temperature
control for a warmer temperature; press
the down arrow for a cooler temperature.
7FAN SPEED: When your climate control
system is in automatic mode, the fanspeed will automatically adjust to
achievethe selected temperature. To adjust fan
speed manually, press the up arrow to
increase the speed; press the down arrow
to decrease the speed. To return to
automatic fan operation, press AUTO.
8EXTERIOR TEMPERATURE DISPLAY:
Press EXT to display the outside
temperature; press again to end exterior
temperature display.
9FAHRENHEIT/CELSIUS: Press the °F °C
control to switch between Fahrenheit andCelsius.
10A/C: You may override automatic
operation at any time by pressing the A/C
control. To return to automatic air
conditioning operation, press AUTO.
11RECIRCULATED AIR: Press this button
to manually control recirculated air; to
return to automatic recirculated air,
press AUTO.
12PASSENGER TEMPERATURE CONTROL:
Press the up arrow of the passenger
temperature control for a warmer
temperature; press the down arrow for a
cooler temperature.
13 DUAL TEMPERATURE ZONE: Press
DUAL to enable or disable the dual zone
temperature feature that allows driver and
front passenger to select a temperature
based on personal preference. Press
DUAL again to disable this feature.
Automatic Temperature Control
101112
12345
678
913
Page 8 of 12

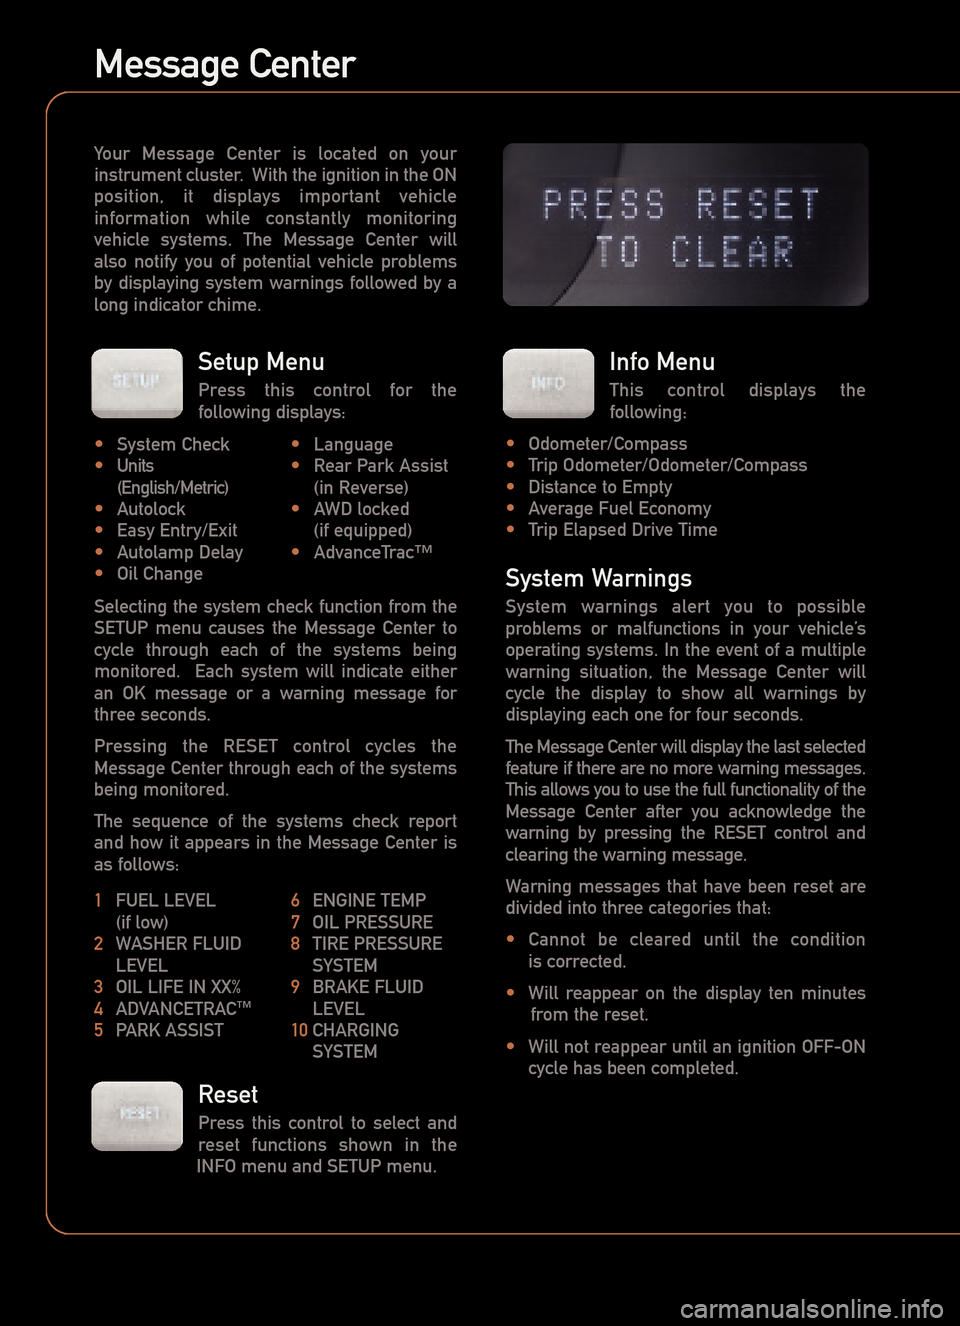
Your Message Center is located on your
instrument cluster. With the ignition in the ON
position, it displays important vehicleinformation while constantly monitoring
vehicle systems. The Message Center will
also notify you of potential vehicle problems
by displaying system warnings followed by along indicator chime.
Reset
Press this control to select and
reset functions shown in the
INFO menu and SETUP menu.
Info Menu
This control displays the
following:
•Odometer/Compass
•Trip Odometer/Odometer/Compass
•Distance to Empty
•Average Fuel Economy
•Trip Elapsed Drive Time
Setup Menu
Press this control for the
following displays:
Selecting the system check function from the
SETUP menu causes the Message Center to
cycle through each of the systems being
monitored. Each system will indicate either
an OK message or a warning message for
three seconds.
Pressing the RESET control cycles the
Message Center through each of the systems
being monitored.
The sequence of the systems check report
and how it appears in the Message Center isas follows:
System Warnings
System warnings alert you to possible
problems or malfunctions in your vehicle’s
operating systems. In the event of a multiple
warning situation, the Message Center will
cycle the display to show all warnings by
displaying each one for four seconds.
The Message Center will display the last selected
feature if there are no more warning messages.
This allows you to use the full functionality of the
Message Center after you acknowledge the
warning by pressing the RESET control and
clearing the warning message.
Warning messages that have been reset are
divided into three categories that:
•Cannot be cleared until the condition
is corrected.
•Will reappear on the display ten minutes
from the reset.
•Will not reappear until an ignition OFF�ON
cycle has been completed.
Message Center
1FUEL LEVEL
(if low)
2WASHER FLUID LEVEL
3OIL LIFE IN XX%
4ADVANCETRAC
™5 PARK ASSIST6ENGINE TEMP
7OIL PRESSURE
8TIRE PRESSURE SYSTEM
9BRAKE FLUID LEVEL
10CHARGING SYSTEM
• System Check
•Units(English/Metric)
•Autolock
•Easy Entry/Exit
•Autolamp Delay
•Oil Change•Language
•Rear Park Assist
(in Reverse)
•AWD locked(if equipped)
•AdvanceTrac™
Page 12 of 12

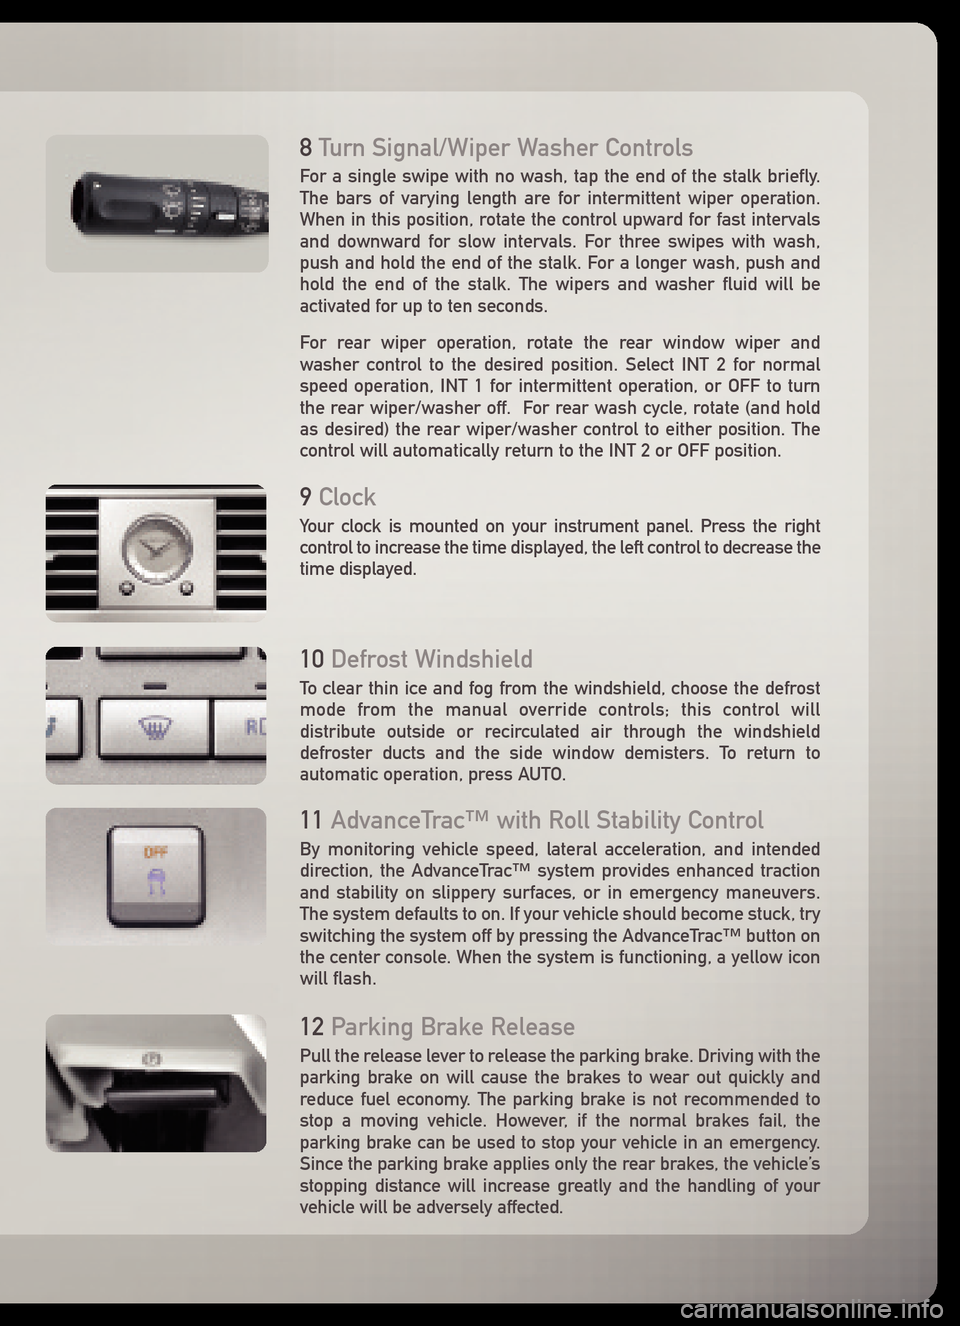
12Parking Brake Release
Pull the release lever to release the parking brake. Driving with the
parking brake on will cause the brakes to wear out quickly and
reduce fuel economy. The parking brake is not recommended to
stop a moving vehicle. However, if the normal brakes fail, the
parking brake can be used to stop your vehicle in an emergency.
Since the parking brake applies only the rear brakes, the vehicle’s
stopping distance will increase greatly and the handling of your
vehicle will be adversely affected.
11AdvanceTrac™ with Roll Stability Control
By monitoring vehicle speed, lateral acceleration, and intended
direction, the AdvanceTrac™ system provides enhanced traction
and stability on slippery surfaces, or in emergency maneuvers.
The system defaults to on. If your vehicle should become stuck, try
switching the system off by pressing the AdvanceTrac™ button on
the center console. When the system is functioning, a yellow iconwill flash.
10Defrost Windshield
To clear thin ice and fog from the windshield, choose the defrost
mode from the manual override controls; this control will
distribute outside or recirculated air through the windshield
defroster ducts and the side window demisters. To return to
automatic operation, press AUTO.
8Turn Signal/Wiper Washer Controls
For a single swipe with no wash, tap the end of the stalk briefly.
The bars of varying length are for intermittent wiper operation.
When in this position, rotate the control upward for fast intervals
and downward for slow intervals. For three swipes with wash,
push and hold the end of the stalk. For a longer wash, push and
hold the end of the stalk. The wipers and washer fluid will beactivated for up to ten seconds.
For rear wiper operation, rotate the rear window wiper and
washer control to the desired position. Select INT 2 for normal
speed operation, INT 1 for intermittent operation, or OFF to turn
the rear wiper/washer off. For rear wash cycle, rotate (and hold
as desired) the rear wiper/washer control to either position. The
control will automatically return to the INT 2 or OFF position.
9Clock
Your clock is mounted on your instrument panel. Press the right
control to increase the time displayed, the left control to decrease the
time displayed.