navigation system LINCOLN AVIATOR 2021 Owners Manual
[x] Cancel search | Manufacturer: LINCOLN, Model Year: 2021, Model line: AVIATOR, Model: LINCOLN AVIATOR 2021Pages: 667, PDF Size: 7.01 MB
Page 11 of 667
Motorcraft Parts - Excluding: Plug-In Hybrid
Electric Vehicle (PHEV) ..........................446
Motorcraft Parts - Plug-In Hybrid Electric Vehicle (PHEV) .........................................
448
Vehicle Identification Number .................
450
Capacities and Specifications - Excluding: Plug-In Hybrid Electric Vehicle (PHEV)
......................................................................
450
Capacities and Specifications - Plug-In Hybrid Electric Vehicle (PHEV) ............
462
Bulb Specification Chart ............................
473
Vehicle Identification
Installing the Vehicle Identification Card ......................................................................
474
Network Connectivity
Connecting the Vehicle to a Mobile Network .....................................................
475
Network Connectivity – Troubleshooting ......................................................................
476
Vehicle Wi-Fi Hotspot
Creating a Vehicle Wi-Fi Hotspot ............
479Changing the Vehicle Wi-Fi Hotspot Name
or Password ..............................................
479
Audio System
General Information .....................................
481
Audio Unit .....................................................
482
Digital Radio .................................................
484
Satellite Radio ..............................................
487
USB Port ........................................................
490
SYNC™ 3
General Information ...................................
492
Using Voice Recognition ...........................
494
Entertainment ..............................................
506
Climate ............................................................
518
Phone ..............................................................
521
Navigation .....................................................
523
Electric Vehicle Information .......................
531
Apps ................................................................
537
Settings ..........................................................
540
SYNC™ 3 Troubleshooting ........................
542Accessories
Accessories
..................................................
559
Lincoln Protect
Lincoln Protect ..............................................
561
Scheduled Maintenance
General Maintenance Information ..........
564
Normal Scheduled Maintenance ............
568
Special Operating Conditions Scheduled Maintenance ............................................
572
Customer Information
Rollover Warning .........................................
576
Radio Frequency Certification Labels ......................................................................
576
Appendices
Electromagnetic Compatibility ................
609
End User License Agreement ...................
614
Declaration of Conformity .........................
644
Declaration of Conformity - Vehicles With: SYNC 3 ......................................................
645
8
Aviator (CTV) Canada/United States of America, enUSA, Edition date: 202007, Second-Printing Table of Contents
Page 21 of 667
EVENT DATA
This vehicle is equipped with an event data
recorder. The main purpose of an event data
recorder is to record, in certain crash or near
crash-like situations, such as an airbag
deployment or hitting a road obstacle; this
data will assist in understanding how a
vehicle
’s systems performed. The event data
recorder is designed to record data related
to vehicle dynamics and safety systems for
a short period of time, typically 30 seconds
or less.
The event data recorder in this vehicle is
designed to record such data as:
• How various systems in your vehicle
were operating.
• Whether or not the driver and passenger
seatbelts were buckled/fastened.
• How far (if at all) the driver was
depressing the accelerator and/or the
brake pedal.
• How fast the vehicle was traveling.
• Where the driver was positioning the
steering wheel. This data can help provide a better
understanding of the circumstances in which
crashes and injuries occur.
Note:
Event data recorder data is recorded
by your vehicle only if a non-trivial crash
situation occurs; no data is recorded by the
event data recorder under normal driving
conditions and no personal data or
information (for example name, gender, age,
and crash location) is recorded. However,
parties, such as law enforcement, could
combine the event data recorder data with
the type of personally identifying data
routinely acquired during a crash
investigation.
To read data recorded by an event data
recorder, special equipment is required, and
access to the vehicle or the event data
recorder is needed. In addition to the vehicle
manufacturer, other parties, such as law
enforcement, that have such special
equipment, can read the information if they
have access to the vehicle or the event data
recorder. SETTINGS DATA
Your vehicle has electronic control units that
have the ability to store data based on your
personalized settings. The data is stored
locally in the vehicle or on devices that you
connect to it, for example, a USB drive or
digital music player. You can delete some of
this data and also choose whether to share
it through the services to which you
subscribe. See Settings (page 540).
Comfort and Convenience Data
Data recorded includes, for example:
• Seat and steering wheel position.
• Climate control settings.
• Radio presets.
Entertainment Data
Data recorded includes, for example:
• Music, videos or album art.
• Contacts and corresponding address
book entries.
• Navigation destinations.
18
Aviator (CTV) Canada/United States of America, enUSA, Edition date: 202007, Second-Printing Data Privacy
Page 79 of 667

PRINCIPLE OF OPERATION
MyKey allows you to program keys with
restricted driving modes to promote good
driving habits. You can program the
restrictions to all keys except one. Any keys
that you did not program are administrator
keys or admin keys.
You can use admin keys to:
•
Create a MyKey with certain vehicle
restrictions.
• Program certain MyKey settings.
• Clear all MyKey restrictions.
After you program a MyKey, you can view
the following information through the
information display:
• The total number of admin keys and
MyKeys for your vehicle.
• The total distance a MyKey driver
traveled with your vehicle.
Note: Every MyKey receives the same
restrictions and settings. You cannot
program them individually. Note:
For vehicles equipped with a
push-button start switch: When both a MyKey
and an admin key are present when you
start your vehicle, the system recognizes the
admin key only.
Standard Settings
Not every vehicle includes the features listed
below. If your vehicle has this equipment,
then you cannot change the following
settings when using a MyKey:
• Seatbelt reminder or Belt-Minder™. MyKey
mutes the audio system until drivers, and
in some instances, passengers, fasten
their seatbelts. Note: If your vehicle
includes an AM/FM radio or a very basic
audio system, then the radio may not
mute.
• Earlier low-fuel warning. The low-fuel
warning activates earlier for MyKey
drivers, giving them more time to refuel. •
Certain driver alerts, stability systems or
parking aids turn on automatically when
you use the MyKey system. For example,
Blind Spot Information System (BLIS),
cross traffic alert, lane departure warning
or forward collision warning. Note: MyKey
drivers may be able to turn the lane
departure warning feature off, but this
feature turns back on automatically with
every new key cycle.
• Restricted touchscreen operation in some
markets. For example, MyKey may
prevent manual navigation destination
input while the vehicle is in any gear
other than park (P) or when the vehicle
reaches a certain rate of speed.
• Satellite radio adult content restrictions,
if this feature is available in your market.
Optional Settings
You can configure certain vehicle feature
settings when you first create a MyKey. You
can also change the settings afterward with
an admin key.
76
Aviator (CTV) Canada/United States of America, enUSA, Edition date: 202007, Second-Printing MyKey™
Page 137 of 667
GENERAL INFORMATION
WARNING: Driving while distracted
can result in loss of vehicle control, crash
and injury. We strongly recommend that
you use extreme caution when using any
device that may take your focus off the
road. Your primary responsibility is the safe
operation of your vehicle. We recommend
against the use of any hand-held device
while driving and encourage the use of
voice-operated systems when possible.
Make sure you are aware of all applicable
local laws that may affect the use of
electronic devices while driving.
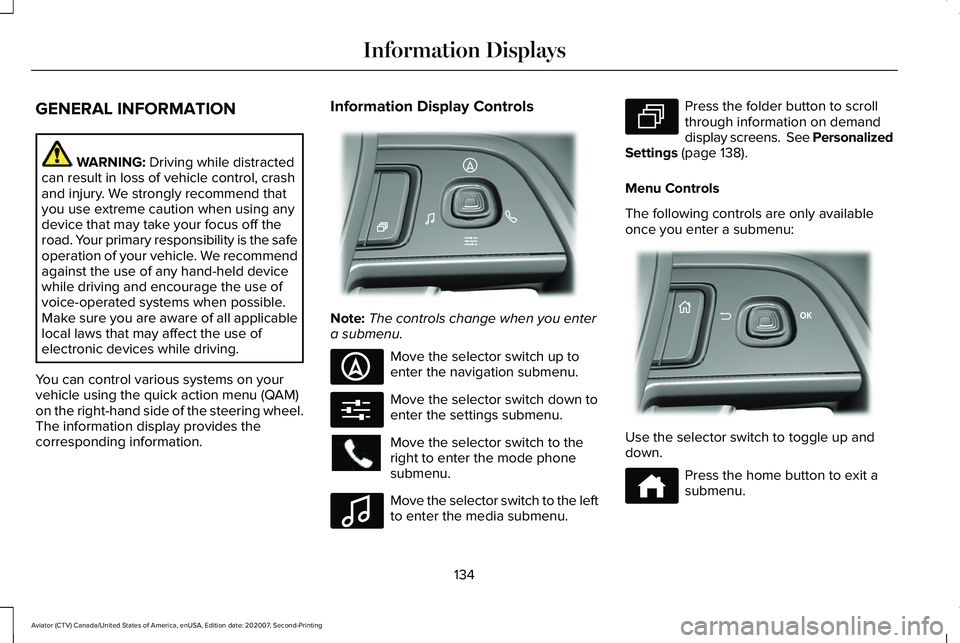
You can control various systems on your
vehicle using the quick action menu (QAM)
on the right-hand side of the steering wheel.
The information display provides the
corresponding information. Information Display Controls
Note:
The controls change when you enter
a submenu. Move the selector switch up to
enter the navigation submenu.
Move the selector switch down to
enter the settings submenu.
Move the selector switch to the
right to enter the mode phone
submenu.
Move the selector switch to the left
to enter the media submenu. Press the folder button to scroll
through information on demand
display screens. See Personalized
Settings (page 138).
Menu Controls
The following controls are only available
once you enter a submenu: Use the selector switch to toggle up and
down.
Press the home button to exit a
submenu.
134
Aviator (CTV) Canada/United States of America, enUSA, Edition date: 202007, Second-Printing Information DisplaysE281220 E281481 E280315 E100027 E281483 E299701 E272621
Page 140 of 667
Navigation (If Equipped)
Navigation
Menu options covered in the SYNC chapter.
See Navigation (page 523).
Hybrid Display Information
Displays unique hybrid vehicle information
when you shut off your vehicle or come to a
stop.
Brake Coach
The Brake Coach appears after the vehicle
has come to a stop. It coaches you to brake
in a manner that maximizes the amount of
energy returned through the regenerative
braking system. The percent displayed is an indication of the
regenerative braking efficiency with 100%
representing the maximum amount of energy
recovery. Brake Coach can be turned on or
off in the settings menu.
Trip Summary
Displays upon shutting off your vehicle. The
values are cumulative since you last started
your vehicle.
The information shown is the same as the
This Trip on demand screen.
See
Personalized Settings (page 138).
Vehicle Charging Status
Displays when you shut off your vehicle and
when you turn on your vehicle while plugged
in. Charging status includes the charge start
or charge end time as appropriate. You can
modify your vehicles charge settings through
the touchscreen. See SYNC™ 3 (page 492).
137
Aviator (CTV) Canada/United States of America, enUSA, Edition date: 202007, Second-Printing Information Displays
Page 167 of 667
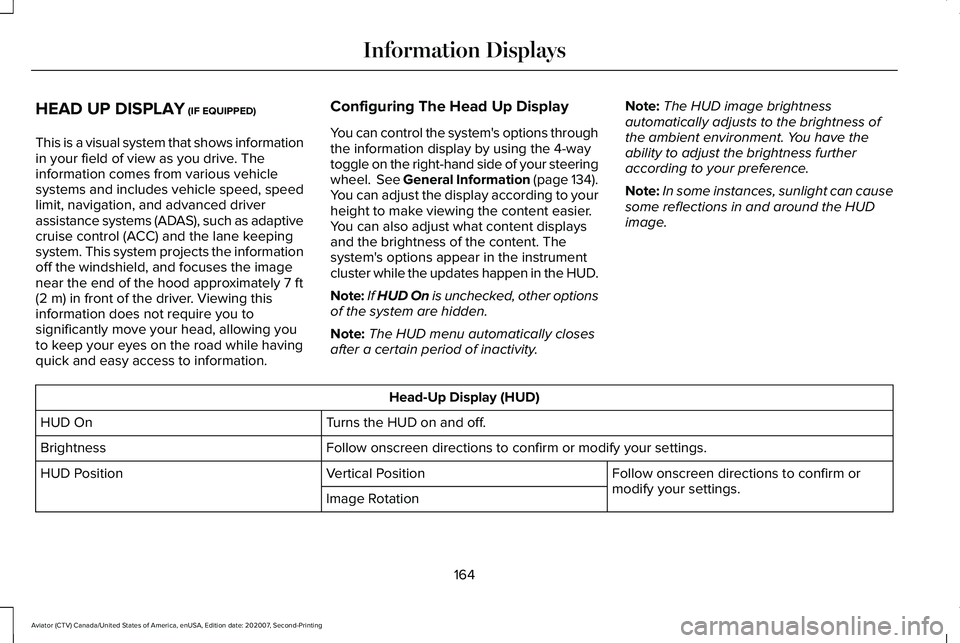
HEAD UP DISPLAY (IF EQUIPPED)
This is a visual system that shows information
in your field of view as you drive. The
information comes from various vehicle
systems and includes vehicle speed, speed
limit, navigation, and advanced driver
assistance systems (ADAS), such as adaptive
cruise control (ACC) and the lane keeping
system. This system projects the information
off the windshield, and focuses the image
near the end of the hood approximately
7 ft
(2 m) in front of the driver. Viewing this
information does not require you to
significantly move your head, allowing you
to keep your eyes on the road while having
quick and easy access to information. Configuring The Head Up Display
You can control the system's options through
the information display by using the 4-way
toggle on the right-hand side of your steering
wheel.
See General Information (page 134).
You can adjust the display according to your
height to make viewing the content easier.
You can also adjust what content displays
and the brightness of the content. The
system's options appear in the instrument
cluster while the updates happen in the HUD.
Note: If HUD On is unchecked, other options
of the system are hidden.
Note: The HUD menu automatically closes
after a certain period of inactivity. Note:
The HUD image brightness
automatically adjusts to the brightness of
the ambient environment. You have the
ability to adjust the brightness further
according to your preference.
Note: In some instances, sunlight can cause
some reflections in and around the HUD
image. Head-Up Display (HUD)
Turns the HUD on and off.
HUD On
Follow onscreen directions to confirm or modify your settings.
Brightness
Follow onscreen directions to confirm or
modify your settings.
Vertical Position
HUD Position
Image Rotation
164
Aviator (CTV) Canada/United States of America, enUSA, Edition date: 202007, Second-Printing Information Displays
Page 169 of 667
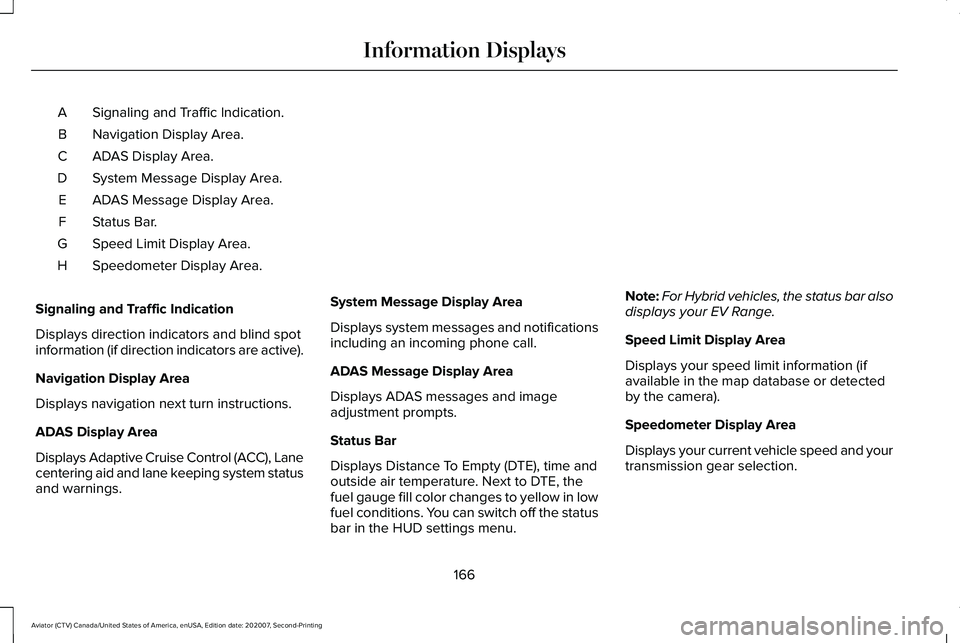
Signaling and Traffic Indication.
A
Navigation Display Area.
B
ADAS Display Area.
C
System Message Display Area.
D
ADAS Message Display Area.
E
Status Bar.
F
Speed Limit Display Area.
G
Speedometer Display Area.
H
Signaling and Traffic Indication
Displays direction indicators and blind spot
information (if direction indicators are active).
Navigation Display Area
Displays navigation next turn instructions.
ADAS Display Area
Displays Adaptive Cruise Control (ACC), Lane
centering aid and lane keeping system status
and warnings. System Message Display Area
Displays system messages and notifications
including an incoming phone call.
ADAS Message Display Area
Displays ADAS messages and image
adjustment prompts.
Status Bar
Displays Distance To Empty (DTE), time and
outside air temperature. Next to DTE, the
fuel gauge fill color changes to yellow in low
fuel conditions. You can switch off the status
bar in the HUD settings menu.Note:
For Hybrid vehicles, the status bar also
displays your EV Range.
Speed Limit Display Area
Displays your speed limit information (if
available in the map database or detected
by the camera).
Speedometer Display Area
Displays your current vehicle speed and your
transmission gear selection.
166
Aviator (CTV) Canada/United States of America, enUSA, Edition date: 202007, Second-Printing Information Displays
Page 191 of 667
Linking a Personal Profile to Your Remote
Control or Mobile Device
You can save preset memory positions for
up to three remote controls, by assigning a
remote control to a personal profile in your
SYNC 3. You can assign three additional
remote controls set up as Phone as a Key.
See Keys and Remote Controls (page 66).
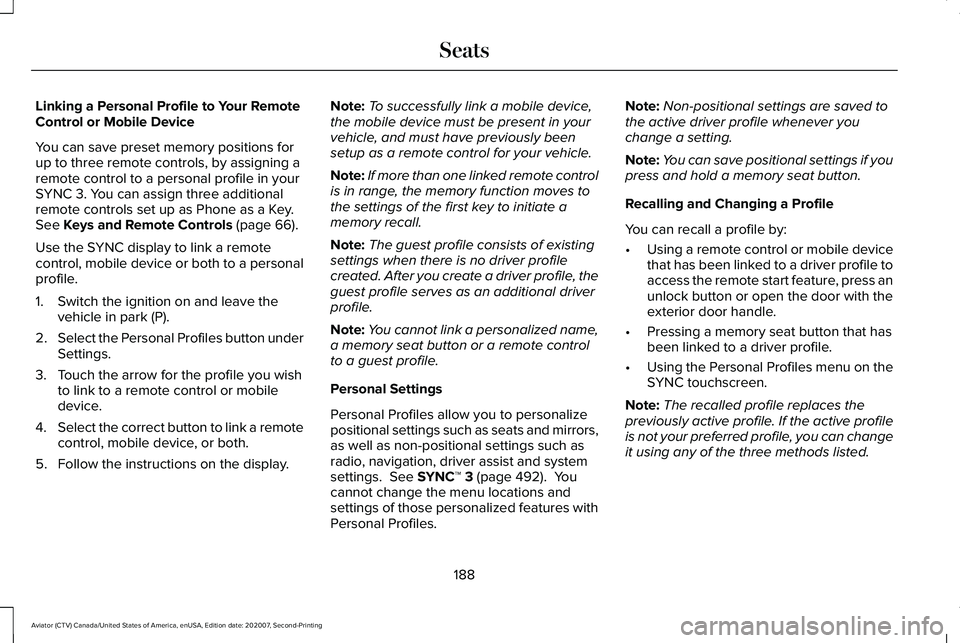
Use the SYNC display to link a remote
control, mobile device or both to a personal
profile.
1. Switch the ignition on and leave the vehicle in park (P).
2. Select the Personal Profiles button under
Settings.
3. Touch the arrow for the profile you wish to link to a remote control or mobile
device.
4. Select the correct button to link a remote
control, mobile device, or both.
5. Follow the instructions on the display. Note:
To successfully link a mobile device,
the mobile device must be present in your
vehicle, and must have previously been
setup as a remote control for your vehicle.
Note: If more than one linked remote control
is in range, the memory function moves to
the settings of the first key to initiate a
memory recall.
Note: The guest profile consists of existing
settings when there is no driver profile
created. After you create a driver profile, the
guest profile serves as an additional driver
profile.
Note: You cannot link a personalized name,
a memory seat button or a remote control
to a guest profile.
Personal Settings
Personal Profiles allow you to personalize
positional settings such as seats and mirrors,
as well as non-positional settings such as
radio, navigation, driver assist and system
settings.
See SYNC™ 3 (page 492). You
cannot change the menu locations and
settings of those personalized features with
Personal Profiles. Note:
Non-positional settings are saved to
the active driver profile whenever you
change a setting.
Note: You can save positional settings if you
press and hold a memory seat button.
Recalling and Changing a Profile
You can recall a profile by:
• Using a remote control or mobile device
that has been linked to a driver profile to
access the remote start feature, press an
unlock button or open the door with the
exterior door handle.
• Pressing a memory seat button that has
been linked to a driver profile.
• Using the Personal Profiles menu on the
SYNC touchscreen.
Note: The recalled profile replaces the
previously active profile. If the active profile
is not your preferred profile, you can change
it using any of the three methods listed.
188
Aviator (CTV) Canada/United States of America, enUSA, Edition date: 202007, Second-Printing Seats
Page 304 of 667
Note:
The system disables until the next key
cycle if your vehicle slows down due to driver
inactivity twice within a key cycle.
SWITCHING INTELLIGENT MODE
ON AND OFF WARNING: You are responsible for
controlling your vehicle at all times. The
system is designed to be an aid and does
not relieve you of your responsibility to
drive with due care and attention. Failure
to follow this instruction could result in the
loss of control of your vehicle, personal
injury or death.
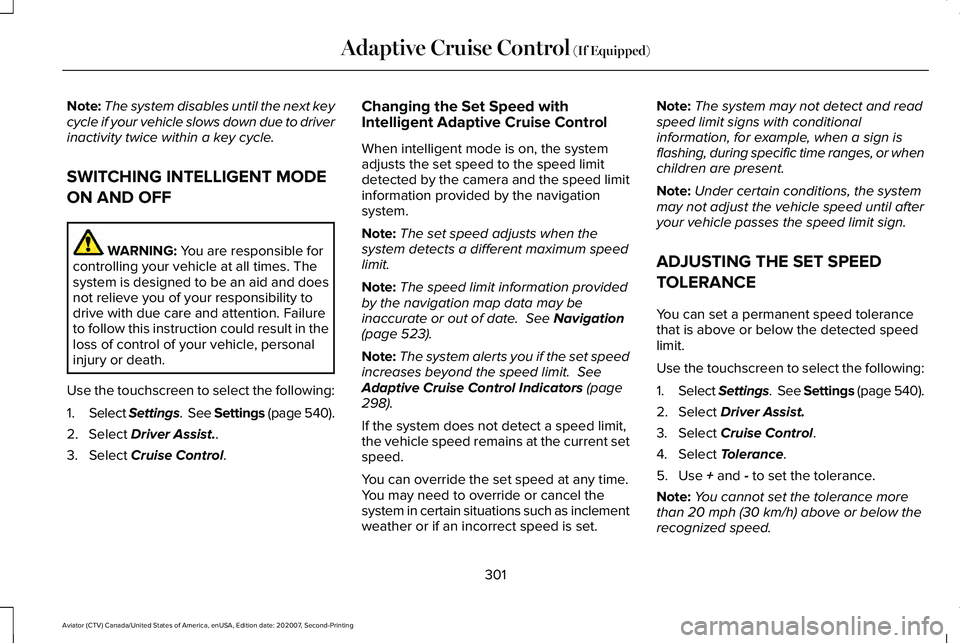
Use the touchscreen to select the following:
1. Select Settings. See Settings (page 540).
2. Select
Driver Assist..
3. Select
Cruise Control. Changing the Set Speed with
Intelligent Adaptive Cruise Control
When intelligent mode is on, the system
adjusts the set speed to the speed limit
detected by the camera and the speed limit
information provided by the navigation
system.
Note:
The set speed adjusts when the
system detects a different maximum speed
limit.
Note: The speed limit information provided
by the navigation map data may be
inaccurate or out of date.
See Navigation
(page 523).
Note: The system alerts you if the set speed
increases beyond the speed limit.
See
Adaptive Cruise Control Indicators (page
298).
If the system does not detect a speed limit,
the vehicle speed remains at the current set
speed.
You can override the set speed at any time.
You may need to override or cancel the
system in certain situations such as inclement
weather or if an incorrect speed is set. Note:
The system may not detect and read
speed limit signs with conditional
information, for example, when a sign is
flashing, during specific time ranges, or when
children are present.
Note: Under certain conditions, the system
may not adjust the vehicle speed until after
your vehicle passes the speed limit sign.
ADJUSTING THE SET SPEED
TOLERANCE
You can set a permanent speed tolerance
that is above or below the detected speed
limit.
Use the touchscreen to select the following:
1. Select Settings. See Settings (page 540).
2. Select Driver Assist.
3. Select
Cruise Control.
4. Select
Tolerance.
5. Use
+ and - to set the tolerance.
Note: You cannot set the tolerance more
than
20 mph (30 km/h) above or below the
recognized speed.
301
Aviator (CTV) Canada/United States of America, enUSA, Edition date: 202007, Second-Printing Adaptive Cruise Control
(If Equipped)
Page 324 of 667
SPEED SIGN RECOGNITION (IF
EQUIPPED)
Principle of Operation WARNING:
You are responsible for
controlling your vehicle at all times. The
system is designed to be an aid and does
not relieve you of your responsibility to
drive with due care and attention. Failure
to follow this instruction could result in the
loss of control of your vehicle, personal
injury or death. WARNING:
In cold and severe
weather conditions the system may not
function. Rain, snow and spray can all limit
sensor performance. WARNING:
The system may not
operate properly if the sensor is blocked.
Keep the windshield free from obstruction. The system is designed to detect speed limit
signs to inform you of the current speed limit.
Detected speed signs appear in the
information display. The sensor is behind the
interior mirror.
Note:
Do not carry out windshield repairs in
the immediate area surrounding the sensor.
Note: Speed sign data provided by the
navigation system contains information
integrated to the data carrier release.
Note: The system may not detect all speed
signs and may incorrectly read signs.
Note: If your vehicle has a suspension kit
not approved by us, the system may not
correctly function.
Note: Always replace headlamp bulbs with
those specifically designed for your vehicle.
Other bulbs could reduce system
performance.
The system turns on when you switch the
ignition on and you cannot switch the system
off. Using Speed Sign Recognition
Setting the System Speed Warning
You can set the system speed warning to
alert you when the vehicle speed exceeds
the speed limit recognized by the system by
a certain speed tolerance.
Note:
The system remembers the last setting
when you start your vehicle.
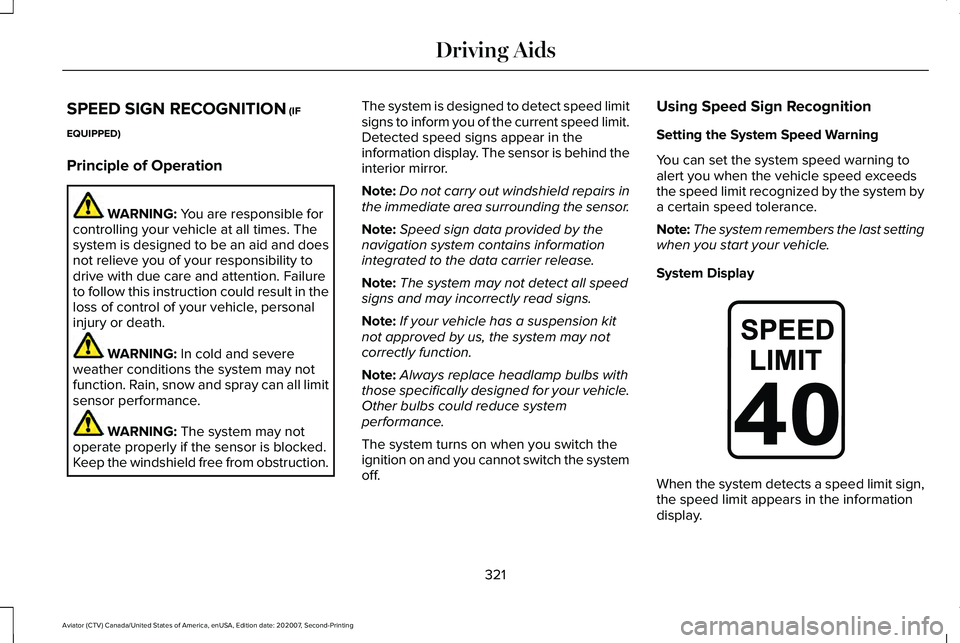
System Display When the system detects a speed limit sign,
the speed limit appears in the information
display.
321
Aviator (CTV) Canada/United States of America, enUSA, Edition date: 202007, Second-Printing Driving AidsE317824