key LINCOLN CONTINENTAL 1996 Customer Assistance Guide
[x] Cancel search | Manufacturer: LINCOLN, Model Year: 1996, Model line: CONTINENTAL, Model: LINCOLN CONTINENTAL 1996Pages: 320, PDF Size: 1.8 MB
Page 68 of 320

Pressing the MENU button once will allow you
to enable or disable the EXPRESS WINDOW
feature. This feature allows one tap down
operation on the driver's window using the
window switch on the driver's door armrest.
Pressing MENU again will allow you to enable
or disable the AUTO DOOR LOCK feature.
This feature automatically locks all doors when
the driver shifts out of PARK, all doors are
closed, the driver's seat is occupied, and the
vehicle is traveling over three mph (5 km/h).
Pressing MENU again will allow you to
enable or disable the HORN CHIRP feature.
When HORN CHIRP is ON the horn will
briefly sound when the Remote Entry Key
Fob LOCK button is pressed. This verifies
the doors have been locked and the ANTI-
THEFT system has been armed (if equipped).
Pressing MENU again will allow you to
enable or disable the SEAT ACCESS feature.
When ON, the driver's seat will move back 2
inches (5 cm) or toend of seat track travel when the vehicle is
turned off and the ignition key is removed.
Upon the driver entering the vehicle and
closing the door, the seat will move
forward to its previous position.
Pressing MENU again will allow you to enable or
disable the REVERSE MIRRORS feature. When
ON, the outside rearview mirrors tilt down when
the gearshift is placed in R (Reverse). This
provides for an improved view of the side of the
vehicle and curb area when backing up. When
you shift out of REVERSE the mirrors return to
their previous positions.
Odometer
The odometer tells you the total number of miles
(kilometers) your vehicle has been driven.
If the odometer displays the word Error, please
contact your dealer for service.
65
Page 74 of 320
The Climate Control System
Electronic Automatic Temperature
Control System
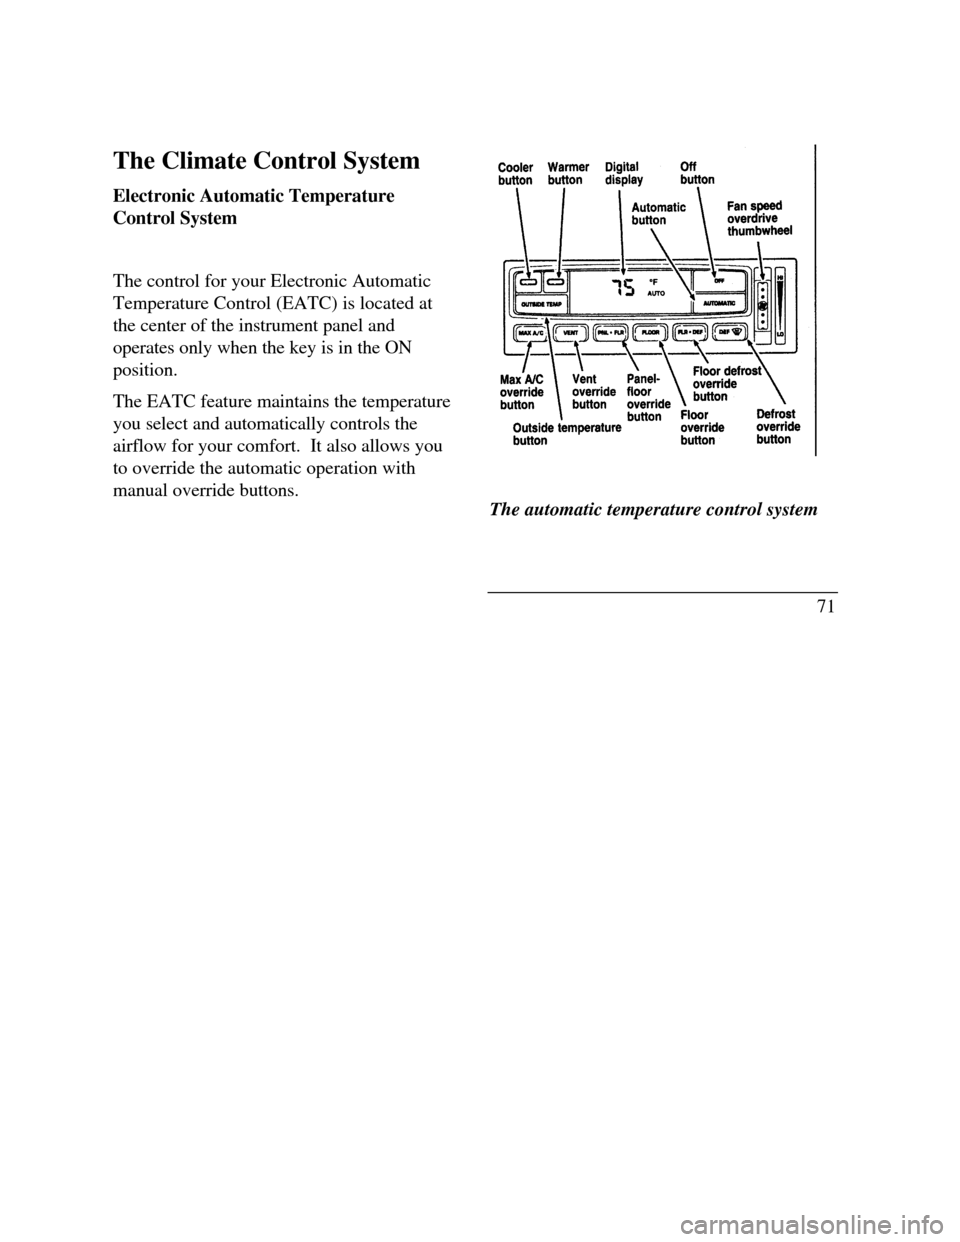
The control for your Electronic Automatic
Temperature Control (EATC) is located at
the center of the instrument panel and
operates only when the key is in the ON
position.
The EATC feature maintains the temperature
you select and automatically controls the
airflow for your comfort. It also allows you
to override the automatic operation with
manual override buttons.The automatic temperature control system
71
Page 82 of 320
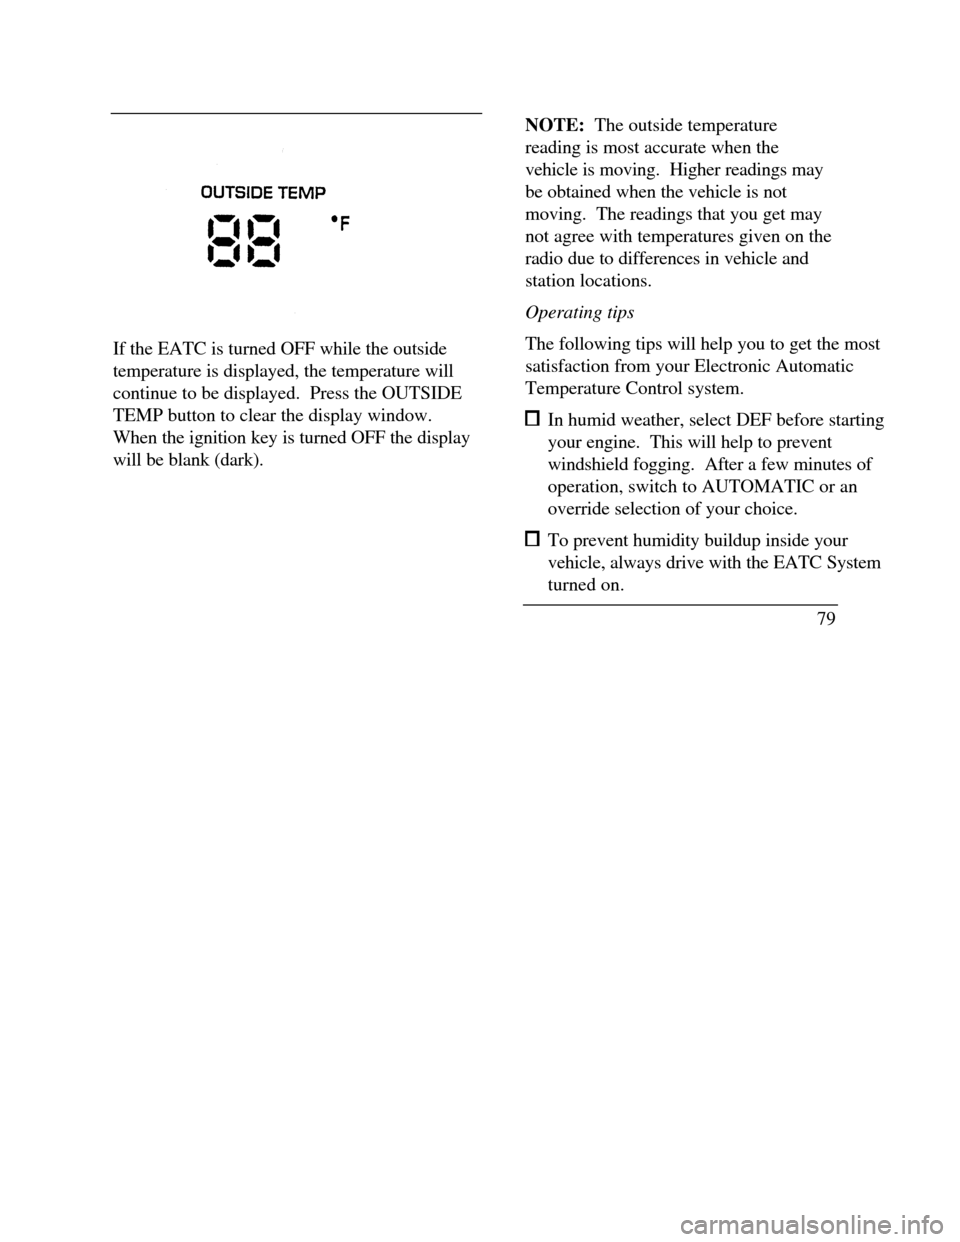
If the EATC is turned OFF while the outside
temperature is displayed, the temperature will
continue to be displayed. Press the OUTSIDE
TEMP button to clear the display window.
When the ignition key is turned OFF the display
will be blank (dark).NOTE: The outside temperature
reading is most accurate when the
vehicle is moving. Higher readings may
be obtained when the vehicle is not
moving. The readings that you get may
not agree with temperatures given on the
radio due to differences in vehicle and
station locations.
Operating tips
The following tips will help you to get the most
satisfaction from your Electronic Automatic
Temperature Control system. In humid weather, select DEF before starting
your engine. This will help to prevent
windshield fogging. After a few minutes of
operation, switch to AUTOMATIC or an
override selection of your choice. To prevent humidity buildup inside your
vehicle, always drive with the EATC System
turned on.
79
Page 84 of 320
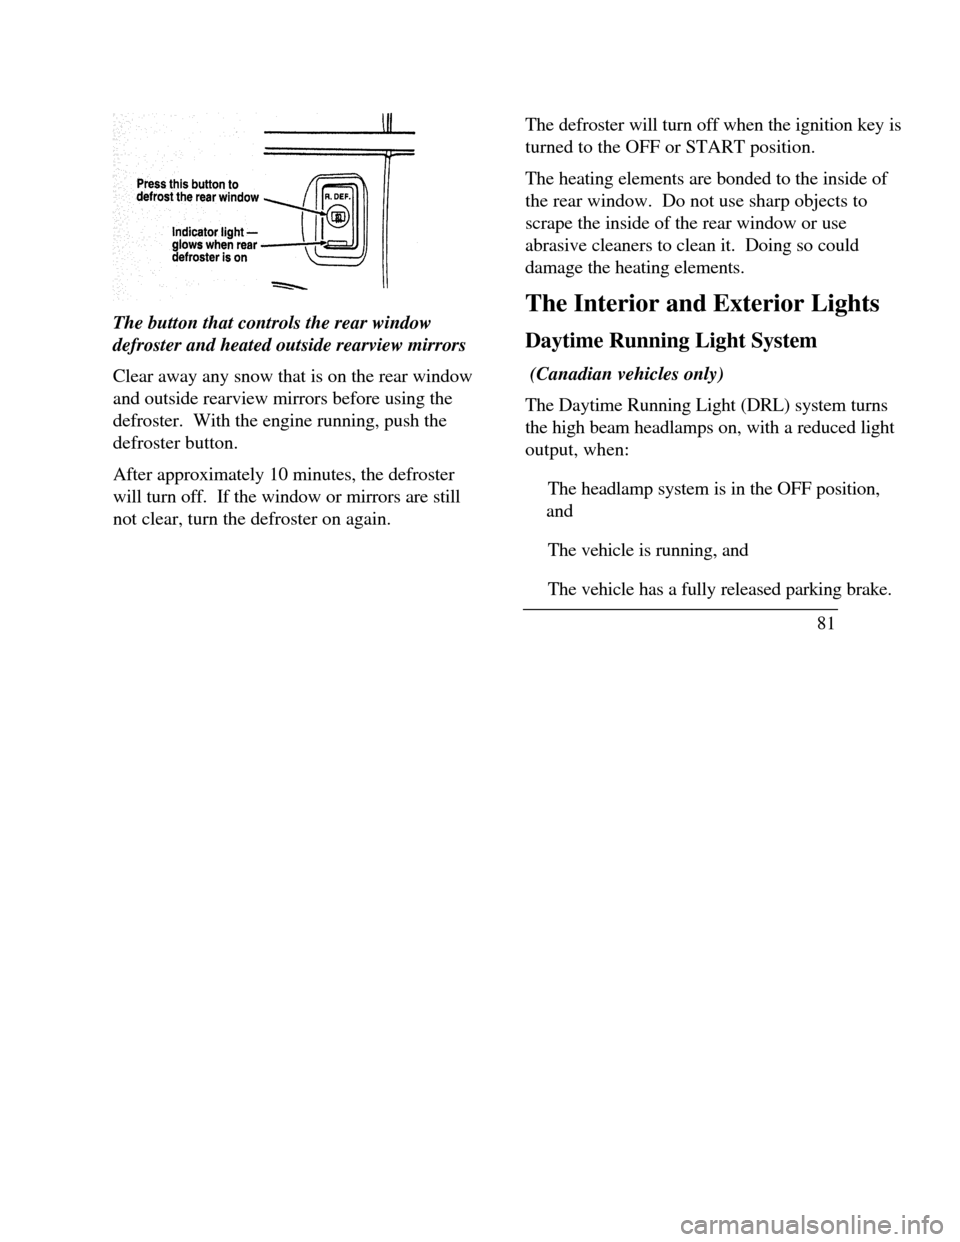
The button that controls the rear window
defroster and heated outside rearview mirrors
Clear away any snow that is on the rear window
and outside rearview mirrors before using the
defroster. With the engine running, push the
defroster button.
After approximately 10 minutes, the defroster
will turn off. If the window or mirrors are still
not clear, turn the defroster on again.The defroster will turn off when the ignition key is
turned to the OFF or START position.
The heating elements are bonded to the inside of
the rear window. Do not use sharp objects to
scrape the inside of the rear window or use
abrasive cleaners to clean it. Doing so could
damage the heating elements.
The Interior and Exterior Lights
Daytime Running Light System
(Canadian vehicles only)
The Daytime Running Light (DRL) system turns
the high beam headlamps on, with a reduced light
output, when:
œ The headlamp system is in the OFF position,
and
œ The vehicle is running, and
œ The vehicle has a fully released parking brake.
81
Page 86 of 320
Cleaning the Exterior Lamps
Do not use dry paper towel, chemical solvents or
abrasive cleaners to clean the lamps, as these
may cause scratches or crack the lamps.
Setting the Autolamp On/Off Delay System
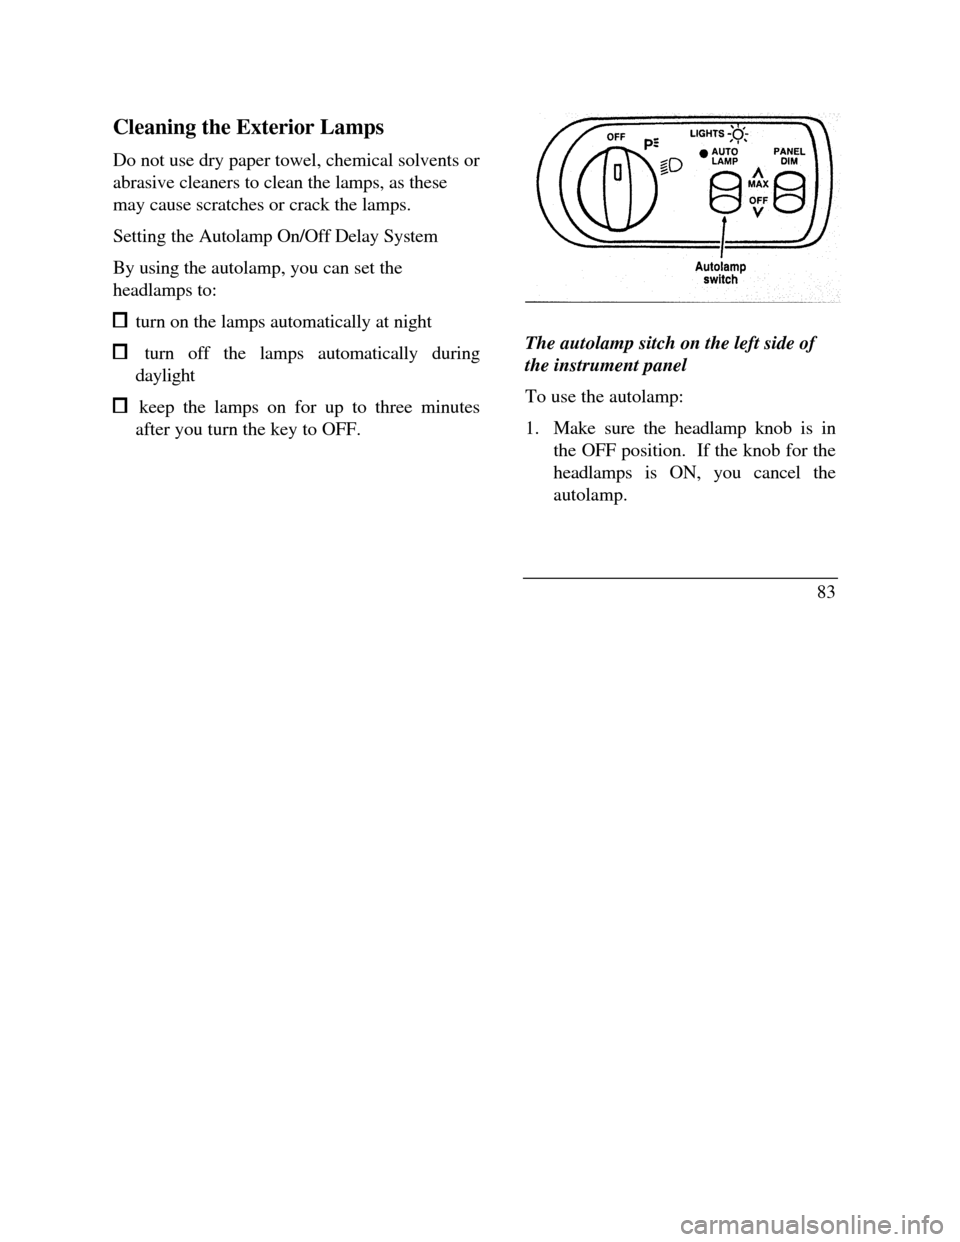
By using the autolamp, you can set the
headlamps to: turn on the lamps automatically at night turn off the lamps automatically during
daylight keep the lamps on for up to three minutes
after you turn the key to OFF.Autolamp switch
The autolamp sitch on the left side of
the instrument panel
To use the autolamp:
1. Make sure the headlamp knob is in
the OFF position. If the knob for the
headlamps is ON, you cancel the
autolamp.
83
Page 87 of 320

If the autolamp is active, the headlamp system
will come on immediately after starting your
vehicle. If your vehicle is running before you
activate the autolamp, there may be a 15 second
delay before the headlights illuminate.
2.Turn the ignition key to ON or start your
vehicle.
3.Find the autolamp switch to the left of the
steering wheel on the instrument panel.
4. Push the autolamp switch up toward the
MAX position. As you press this switch, the
autolamp system's status will be displayed in
the message center. The system can be
turned OFF or can be set to provide light for
up to three (3) minutes after you turn your
vehicle off.
84Do not put any articles on top of the photocell
that is located in the top left corner of the
instrument panel. This photocell controls the
autolamp. If you cover it, the photocell reacts
as if it is nighttime, and the lamps turn on.
To turn the autolamp off, push the switch down
until the message center display reaches OFF.
Turning On Interior
Lights/Instrument Panel Illumination
You can brighten or dim the lights in the
instrument panel and the compass display
in the inside rearview mirror (if
equipped) with the PANEL DIM switch
located on the instrument panel.
Page 89 of 320
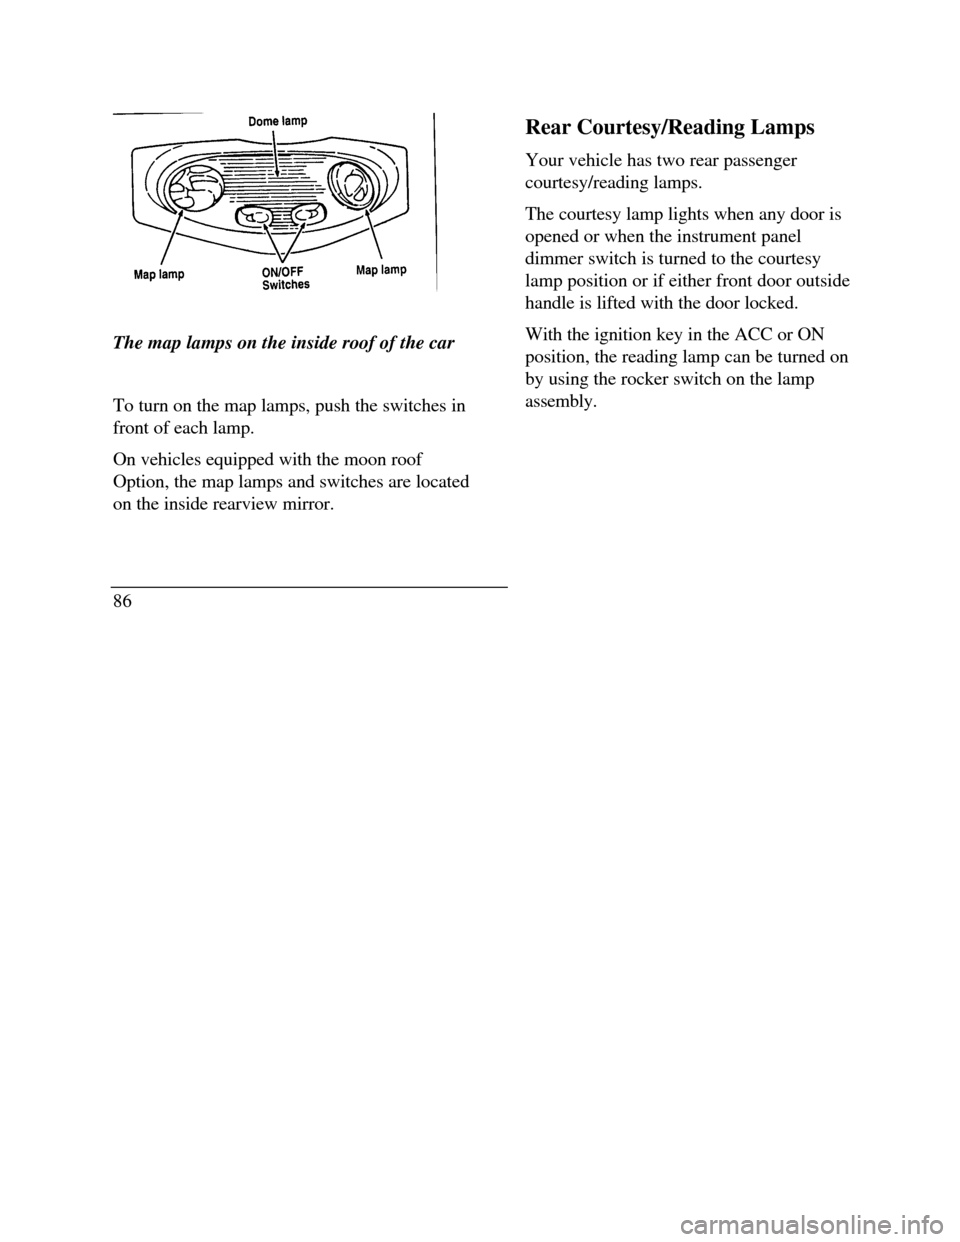
Map lamp Dome lamp ON/OFF Switches
The map lamps on the inside roof of the car
To turn on the map lamps, push the switches in
front of each lamp.
On vehicles equipped with the moon roof
Option, the map lamps and switches are located
on the inside rearview mirror.
86Rear Courtesy/Reading Lamps
Your vehicle has two rear passenger
courtesy/reading lamps.
The courtesy lamp lights when any door is
opened or when the instrument panel
dimmer switch is turned to the courtesy
lamp position or if either front door outside
handle is lifted with the door locked.
With the ignition key in the ACC or ON
position, the reading lamp can be turned on
by using the rocker switch on the lamp
assembly.
Page 93 of 320

If the turn signal stays on after you turn, move
the lever back to the center (off) position. A
warning chime will sound after approximately
one-half mile (one kilometer) of driving if you do
not return the lever to off.
For lane changes, move the lever far enough to
signal but not to latch. The lever will return to
the off position when you release it.
NOTE: The flash rate of the turn signal will
speed up considerably if the Lighting Control
Module detects a left or right turn lamp bulb
(front or rear) is burned out.
High Beams
To turn on the high beams, turn the headlamp
control switch to the headlamp ON position (or
activate the autolamp feature) and push the turn
signal lever away from you until it latches. When
the high beams are ON, the high beam indicator
light on the instrument cluster comes on.
90To turn off the high beams, pull the lever toward
you until it latches. The high beam indicator
light turns off.
Flashing the Lights
To flash the headlamps, pull the lever toward
you for a moment and then release it. The
headlamps will flash whether the headlamp knob
is in the on or off position.
Windshield Wipers and Washer
To turn on the windshield wipers, the ignition
key must be turned to the ON or ACC position.
Rotate the knob towards "S" to activate the
wipers. The first seven detents are interval wipe
positions, the eighth detent is the LO position
and the ninth detent is the HI position.
To turn the wipers off, turn the knob to the OFF
position.
Page 103 of 320

To set the childproof lock on each rear door, open
the rear door.
Find the lever at the black label with the word
LOCKED in white letters. Move the lever up.
To release the childproof lock, open the rear door
from the outside.
Move the lever down.
Using the Power Door Locks
Your vehicle has power door locks. The controls
to lock the doors are on the trim panel of the front
door. When you close the doors after you set the
door locks, the doors remain locked. If the power
mechanism ever fails, the manual door lock will
override the power controls.
100The power locks on the driver's door
Smart Locks
The Smart Locks feature helps prevent you from
locking the keys in your vehicle. With the key in
the ignition (in any switch position) and either
the driver's or passenger's door open, the doors
cannot be locked using the front door lock
switches.
NOTE: Your vehicle can still be locked, while
the key is in the ignition, by manually pressing
down the lock button or with remote/keyless
entry.
Page 104 of 320
Illuminated Entry System with Theater
Lighting
The interior lights will illuminate for approximately
25 seconds when either front door handle is lifted,
any button on the keyless entry pad is pressed, or
the remote entry system UNLOCK button is
pushed. If the amount of light outside your vehicle
is below a predetermined level, the exterior lights
will also illuminate.
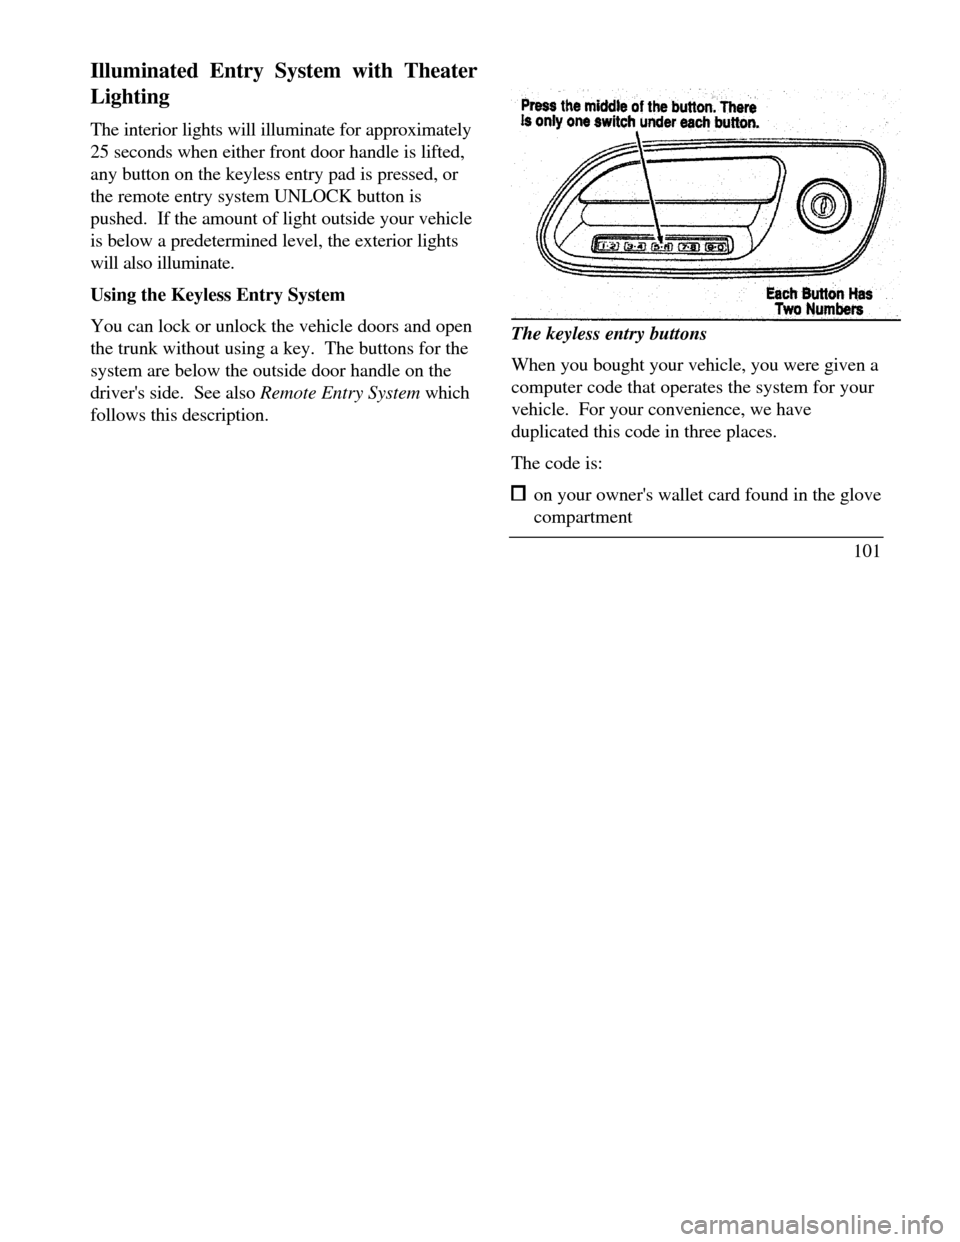
Using the Keyless Entry System
You can lock or unlock the vehicle doors and open
the trunk without using a key. The buttons for the
system are below the outside door handle on the
driver's side. See also Remote Entry System which
follows this description.The keyless entry buttons
When you bought your vehicle, you were given a
computer code that operates the system for your
vehicle. For your convenience, we have
duplicated this code in three places.
The code is: on your owner's wallet card found in the glove
compartment
101