key LINCOLN CONTINENTAL 1996 Customer Assistance Guide
[x] Cancel search | Manufacturer: LINCOLN, Model Year: 1996, Model line: CONTINENTAL, Model: LINCOLN CONTINENTAL 1996Pages: 320, PDF Size: 1.8 MB
Page 115 of 320

/!\WARNINGDo not let children play with the powerwindows. They may seriously hurtthemselves. Make sure occupants areclear of the window(s) before closing.NOTE: Your vehicle is also equipped with a
delayed accessory timer. This allows some of your
accessories to remain on for up to 10 minutes after
the key is turned to the OFF position. The
accessory timer is cancelled if any door is opened
or the key is turned to the ON position.
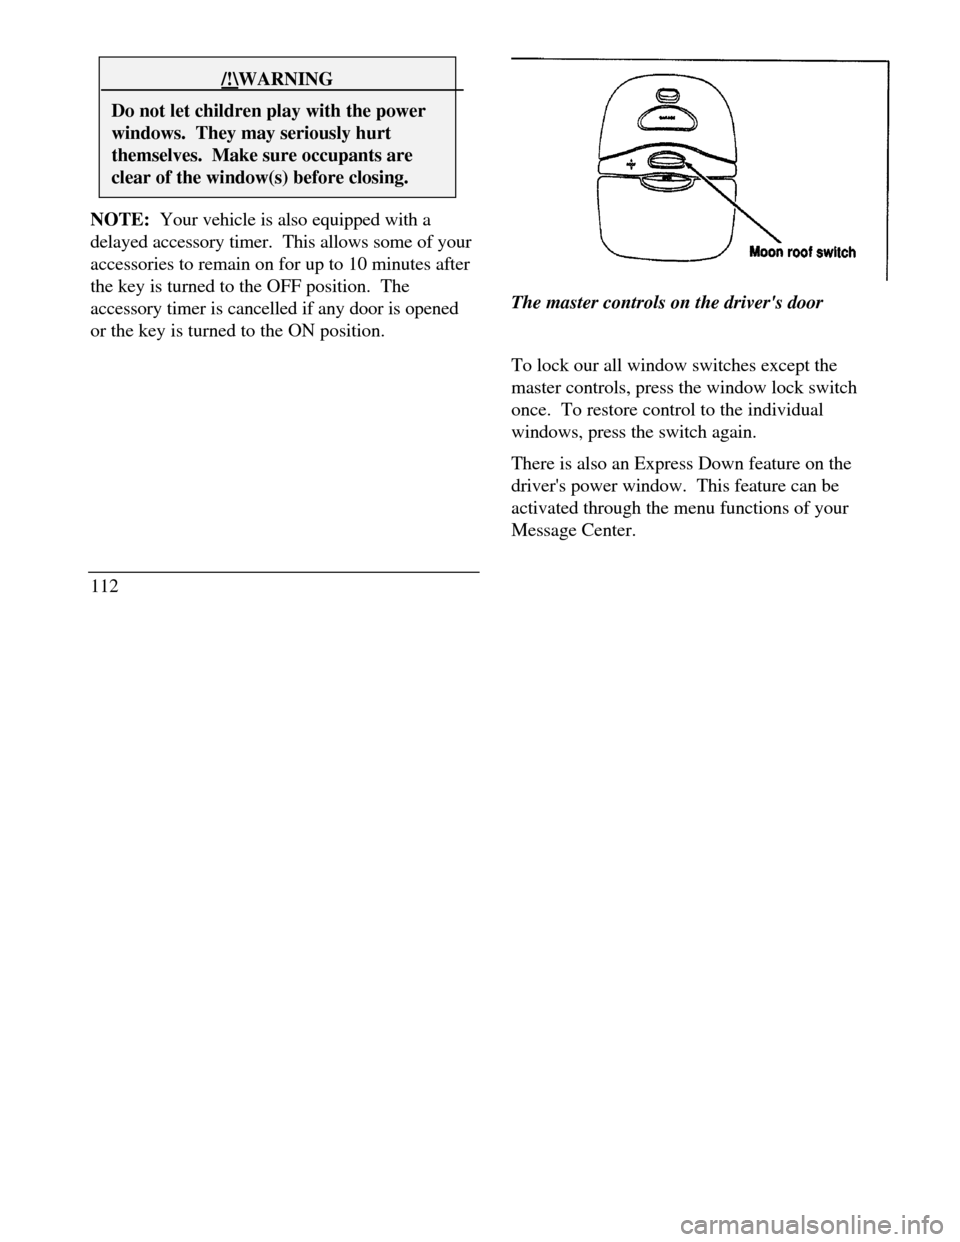
112The master controls on the driver's door
To lock our all window switches except the
master controls, press the window lock switch
once. To restore control to the individual
windows, press the switch again.
There is also an Express Down feature on the
driver's power window. This feature can be
activated through the menu functions of your
Message Center.
Page 120 of 320

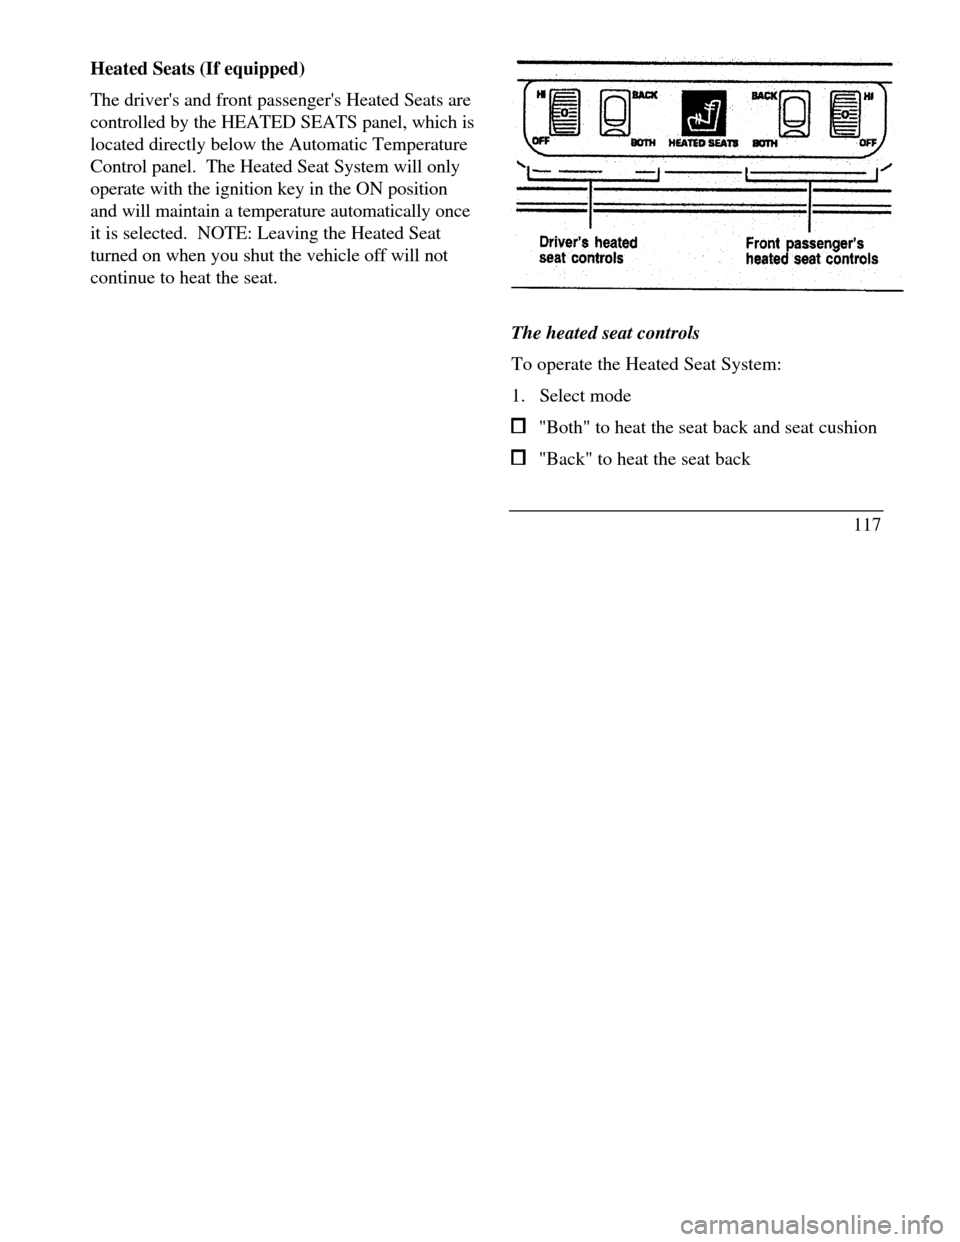
Heated Seats (If equipped)
The driver's and front passenger's Heated Seats are
controlled by the HEATED SEATS panel, which is
located directly below the Automatic Temperature
Control panel. The Heated Seat System will only
operate with the ignition key in the ON position
and will maintain a temperature automatically once
it is selected. NOTE: Leaving the Heated Seat
turned on when you shut the vehicle off will not
continue to heat the seat.heated seat controls
The heated seat controls
To operate the Heated Seat System:
1. Select mode "Both" to heat the seat back and seat cushion "Back" to heat the seat back
117
Page 122 of 320

Memory Profile System
The Personality Memory Feature customizes your
Continental for up to two (2) drivers. The
following features are automatically recalled when
unlocking the doors using the remote entry
transmitter, keyless entry keypad, or by pressing
the Memory 1 or Memory 2 switches on the
driver's door: All driver's seat positions except power lumbar
and head restraint. Both left and right outside mirror settings. Radio station presets including the last selected
station and band and 0 preset preferences on
FMI, FM2, and AM. Instrument panel dimming setting. Autolamp delay time-out setting. Ride/Steering menu setting. Feature Menu settingsThe Ride/Steering menu is located in the
Message Center. The RIDE display allows you
to adjust the suspension feel to FIRM,
NORMAL, or PLUSH.
Pressing the Ride/Steering menu switch again
brings the STEERING display. This allows you
to adjust steering effort to LOW, NORMAL, or
HIGH.
For more information on ride/steering options,
see Road Calibrated Suspension later in this
chapter.
Personality Memory also allows you to
customize settings from the Feature menu
located in the Message Center. The Feature
menu contains five (5) features that you can
enable or disable. The features are listed in the
order they appear in the Feature menu. EXPRESS WINDOW - for one tap down
operation of the driver's window.
119
Page 123 of 320

AUTO DOOR LOCKS - automatically locks all
doors when the driver shifts out of PARK, all
doors are closed, and the vehicle speed is at
least three mph (five km/h). HORN CHIRP - sounds an audible "chirp"
when you press the LOCK button on the remote
entry transmitter to verify that the doors have
been locked and the vehicle's anti-theft system
has been armed (if equipped). SEAT ACCESS - moves the driver's seat back
two (2) inches or to the end of the seat track
when the vehicle is turned off and the ignition
key is removed. Upon the driver entering the
vehicle and closing the door, the seat will move
forward to its previous position. REVERSE MIRROR - when the vehicle is
shifted to REVERSE, the outside rearview
mirrors tilt down. This provides an improved
view of the side of the vehicle and curb area
when backing up. When you shift out of
REVERSE, the mirrors return to their previous
positions.
120Recalling Personality Memory
All of these settings are automatically recalled
when the driver unlocks the door using the
remote entry transmitter, keyless entry keypad or
presses either Memory I or Memory 2 switch
inside the driver's door. The vehicle must be in
PARK or NEUTRAL to recall Personality
Memory settings.
Remote Entry
Pressing the UNLOCK button on the remote
entry transmitter unlocks the driver's door and
recalls all of the Personality Memory settings.
Two transmitters are delivered with the vehicle.
One is programmed to always recall Memory I
and the other will always recall Memory 2.
Personality Memory 1 or 2 is indicated on the
back of the transmitter.
Personality Memory recall from the remote
transmitter can be disabled. This is done by sliding
the switch on the back of the transmitter to OFF.
Personality Memory can still be recalled using
Page 124 of 320

keyless entry code or the Memory I or Memory 2
switches.
Keyless Entry
Up to three unique keyless entry codes can be
programmed by the customer. Two of the codes
can be assigned to recall Personality Memory I or
Memory 2. Each time the 5-digit code is entered on
the keypad, the driver's door will unlock and
Personality Memory 1 or Memory 2 will be
recalled.
NOTE: Please note that even though the driver's
Personality Memory may be recalled using remote
or keyless entry, the seats and mirrors will not
move to the driver's set positions until the driver's
door is opened.
Memory Switches
Pressing either the Memory I or Memory 2 switch
on the driver's door will also recall the Personality
Memory settings as selected, providing your
vehicle is in P (Park) or N (Neutral).Auto Save
Any change made by the driver to one of the
above Personality Memory settings will be
updated and saved automatically. The display,
SAVED TO DRIVER I or SAVED TO
DRIVER 2, will appear on the Message Center
for five (5) seconds as a confirmation of the
update to Personality Memory. If a radio preset
is changed the radio display will also show
SAVED.
If the driver does not use the remote entry
transmitter, or keyless entry keypad to unlock the
doors upon entering or does not press the
Memory I or Memory 2 switch, then any change
to one of the Personality Memory settings
(except radio presets) will not be automatically
saved. Instead the driver will be prompted by the
Message Center whether to save the settings to
Driver 1 or Driver 2.
121
Page 138 of 320

Trunk
Opening the Trunk Manually
Locate the trunk lock in the rear reflector to the
right of the license plate to insert the key. Turn the
key to the right to open the trunk.The trunk lock cylinderUsing the Power Trunk Release
You can use your power trunk release feature in
three ways:
With your electric trunk release, you can open
the trunk from inside your vehicle by pressing
the TRUNK RELEASE button located on the
driver side door. The TRUNK RELEASE
button will only function when the vehicle is
traveling under three mph (five km/h).
To open your trunk with the keyless entry
system, press 5/6 on the keyless entry pad
within five seconds of entering the keyless code.
You can also open the trunk by pressing the
TRUNK button on the remote entry transmitter.
To prevent inadvertent activation, the trunk
button must be depressed twice within five (5)
seconds to open the trunk.
135
Page 148 of 320

Quick Summary To utilize your vehicle's assistance request
feature, YOUR CELLULAR PHONE MUST BE
ACTIVATED. Roadside or emergency assistance can be
requested whenever your key is in the
RUN/START position and for two minutes after
the vehicle is turned off. An assistance request is initiated by pressing
either the tow truck or ambulance button located
in the overhead console. When a button is pressed, a warning lamp located
in the overhead console begins to flash and status
messages are displayed on the vehicle's message
center. (Messages are only displayed when your
key is in the RUN/START position.) The vehicle's cellular phone automatically
places a call to a 24 hour emergency
response center. When contact is made, the vehicle sends an
electronic data message to the response center's
computer. This data message includes latitude
and longitude coordinates obtained from the
vehicle's positioning system. Once the data transmission is complete, the
call is forwarded to a response center
operator who confirms your location using a
computerized map. The vehicle's cellular handset is locked-out,
the phone is automatically placed in "hands
free" mode and voice communication is
established with the operator through the
"hands free" microphone. Typically, voice communication with an
operator is established within one minute
after an assistance button is pressed.
145
Page 152 of 320

when appropriate, stay in direct phone contact
with you until emergency help arrives notify pre-designated family contacts or friends
of the emergency situation, if requested, or if no
response is received from the vehicle.
NOTE: If You are certain of your location, a direct
phone call to 911 or other emergency services may
provide a faster response.
Activation and Deactivation
When either of the two Lincoln RESCU buttons is
pressed, a warning light, located in the overhead
console, will begin to flash and status messages will
be displayed on the vehicle's message center,
confirming an assistance request has been made.
The warning light will continue to flash throughout
the activation.The RESCU Warning light
The system can be activated whenever your
ignition key is in the RUN/START Position and
for two Minutes after your vehicle is turned off.
In most situations, the assistance request can
ONLY be terminated and the system reset when
a special tone is sent to the vehicle by the
Lincoln Security Response Center. (See
Automatic Redial later in this chapter for
exceptions.) Operation will continue even if the
vehicle is turned off during an activation
(although visual feedback via the Message
Center will not be available in this situation).
149
Page 165 of 320

Manual tuning adjusts your radio to any
allowable broadcast frequency, whether or not a
station is present on that frequency. (See All
About Radio Frequencies in this section.) Using the "SEEK" function
Press the right *) side of the 'SEEK" button to
select the next listenable station up the
frequency band. Press the left (.4) side of the
button to select the next listenable station
down the frequency band. By holding the
button down, listenable stations can be passed
over to reach the desired station. Using the 'SCAN" function
Pressing the "SCAN" button will begin the
scan mode up the frequency band, stopping on
each listenable station for approximately five
seconds.
To stop the scan mode on the presently
sampled station, press the "SCAN" button again.
162 Setting the station MEMORY PRESET buttons
Your radio is equipped with 6 station
memory buttons. These buttons can be used
to select up to 6 preset AM stations and 12
FM stations (6 in FMI and 6 in FM2)
1Select a band, then select a frequency.
2.Press one of the memory buttons and hold
until the sound returns and the lamp above
the memory button lights up. That
memory button is now set.
3.Follow the above steps for each memory
preset button.
NOTE:Custom memory presets
can be recalled using the keyless entry
system. See Memory Profile System in
the Features chapter.
Page 183 of 320

To operate:
1.Start the engine.
2.Depress and hold the brake pedal.
3.Depress the thumb button (console-mounted
gearshift only).
4.Move the gearshift lever out of P (Park).
Your vehicle is equipped with a Brake Shift
Interlock safety feature. This feature prevents
the gearshift from being moved from the P
(Park) position until the brake pedal is
depressed. This feature is active when the
ignition is in the ON position. If the gearshift
lever CANNOT be moved from P (Park) with
the brake pedal depressed:
1.Turn the engine off and remove the ignition
key.
2.Apply parking brake.
3.Reinsert the ignition key and turn clockwise
to the first position (OFF).
1804.Depress the brake pedal, depress the
thumb button (console-mounted gearshift
only), move the gearshift lever to N
(Neutral) and start the engine.
If you need to shift out of P (Park) by using
the alternate procedure described above, it is
possible that a fuse has blown and that your
brakelamps may also not be functional.
Please refer to the Servicing Your
Continental chapter for instructions on
checking and replacing fuses./! WARNINGDO NOT DRIVE YOUR VEHICLEUNTIL YOU VERIFY THAT THEBRAKELAMPS ARE WORKING.