open hood LINCOLN CONTINENTAL 1996 Customer Assistance Guide
[x] Cancel search | Manufacturer: LINCOLN, Model Year: 1996, Model line: CONTINENTAL, Model: LINCOLN CONTINENTAL 1996Pages: 320, PDF Size: 1.8 MB
Page 111 of 320

THIS DEVICE COMPLIES WITH PART 15
OF THE FCC RULES. OPERATION IS
SUBJECT TO THE FOLLOWING TWO
CONDITIONS: (1) THIS DEVICE MAY NOT
CAUSE HARMFUL INTERFERENCE, AND
(2) THIS DEVICE MUST ACCEPT ANY
INTERFERENCE RECEIVED, INCLUDING
INTERFERENCE THAT MAY CAUSE
UNDESIRED OPERATION.
NOTE: All transmitters to be used on your vehicle
must be programmed/reprogrammed at the same
time.
Battery Saver
When the ignition is turned off, the vehicle will turn
off battery voltage to the interior lights after 45
minutes.
This will prevent draining of the battery if those
lights have been left on inadvertently or if a door is
not completely closed. BatterV voltage to these
108lamps will be restored when the outside front
door handles are lifted, the keyless entry keypad
is used, the remote entry transmitter is used, any
door is opened, the trunk is opened, or the
ignition key is turned to the ON position.
Anti-theft System
When armed, this system helps protect your
vehicle against break-ins or theft by monitoring
all doors, the hood, and the trunk lock cylinder.
When an unauthorized entry occurs, the system
triggers and will: flash the headlamps, parking lamps, interior
lamps, and alarm indicator light honk the horn prevent the engine from starting
Page 114 of 320

Triggering the alarm system
The armed system will be triggered if: any door is opened without disarming the
system (see previous paragraphs), or the trunk lock cylinder is removed, or
NOTE: You can open the trunk with your key
without setting off the alarm. the hood is opened.
Disarming a triggered system
The alarm can be disarmed by: unlocking a front door with the key using the keyless entry unlock code using the UNLOCK button of the remote entry
transmitterNOTE: The flashing lights and honking horn
will shut off automatically approximately
three minutes after the system is triggered.
It will trigger again if another intrusion
occurs. However, the engine will not be
allowed to start until the system is disarmed.
Windows
Using the Power Windows
Each door has a power control that opens and
closes the window on that door. The driver's
door has a master control panel that operates all
four windows.
Power windows can only be opened or closed
when the ignition is in the ON or ACC position
or during the ten minute delayed accessory
period after the ignition is turned off.
111
Page 236 of 320

3.Block the wheels. This will prevent your
vehicle from moving unexpectedly.
Working with the engine on:
1. Set the parking brake fully and make sure that
the gearshift is securely latched in P (Park).
2.Block the wheels. This will prevent your
vehicle from moving unexpectedly./! WARNINGDo not start your engine with the aircleaner removed and do not remove it whilethe engine is running./! WARNINGThe cooling fan is automatic and may comeon at any time. Always disconnect thenegative terminal of the battery beforeworking near the fan.234If the battery is disconnected' the computer must
releam its idle control. See Battery in the Index.
NOTE: The engine compartment light may be
switched on or off at the light assembly. The light
assembly is located on the hood on the driver's side.
To turn the light on, pull the switch toward you; to
turn it off, push it away from you. The switch may
remain in the on position at all times, as the light will
turn off when the hood is closed.
Opening the Hood
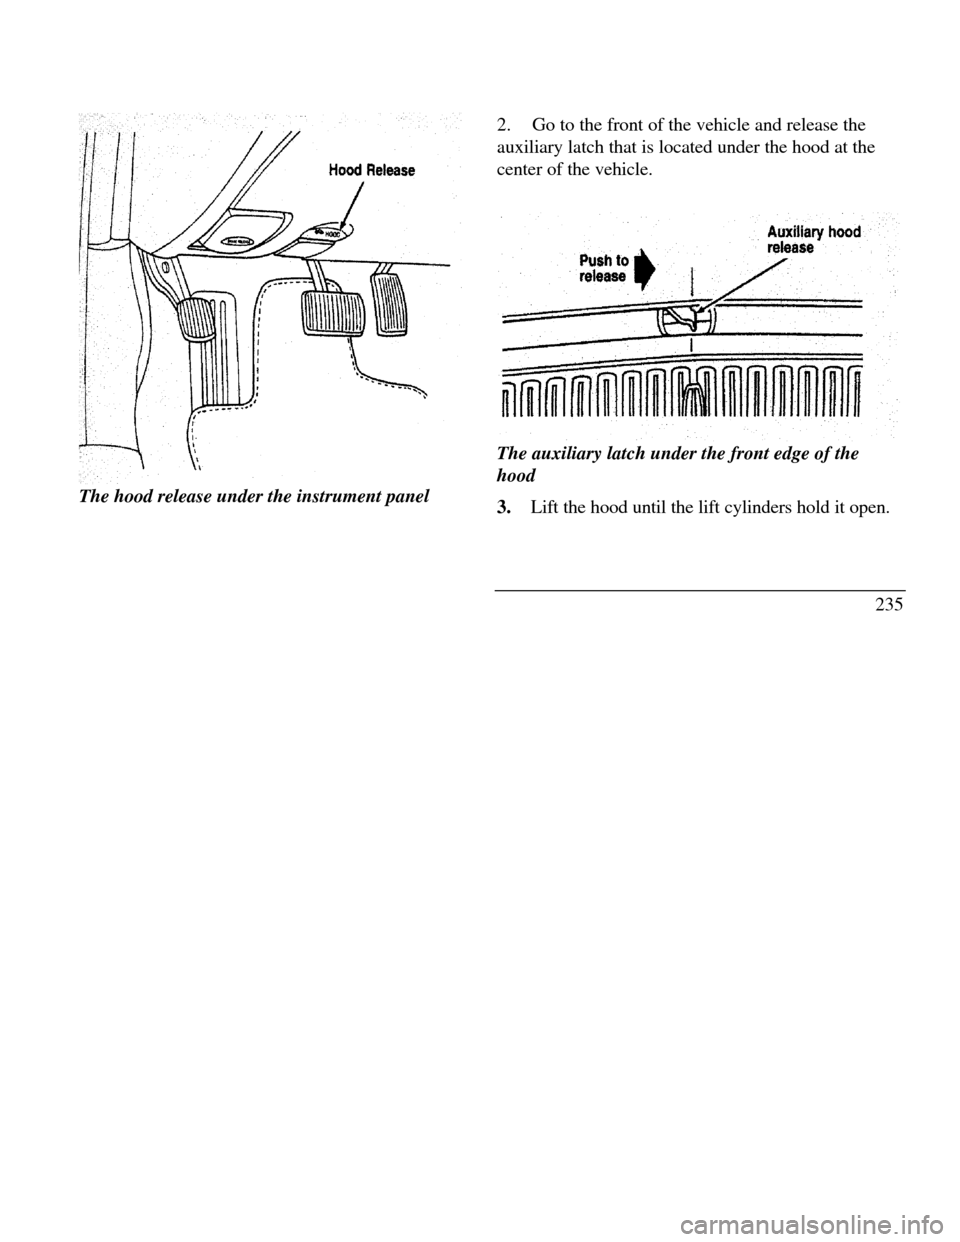
1. Inside the vehicle, pull the hood release handle
located under the bottom left comer of the
instrument panel.
Page 237 of 320

The hood release under the instrument panel2.Go to the front of the vehicle and release the
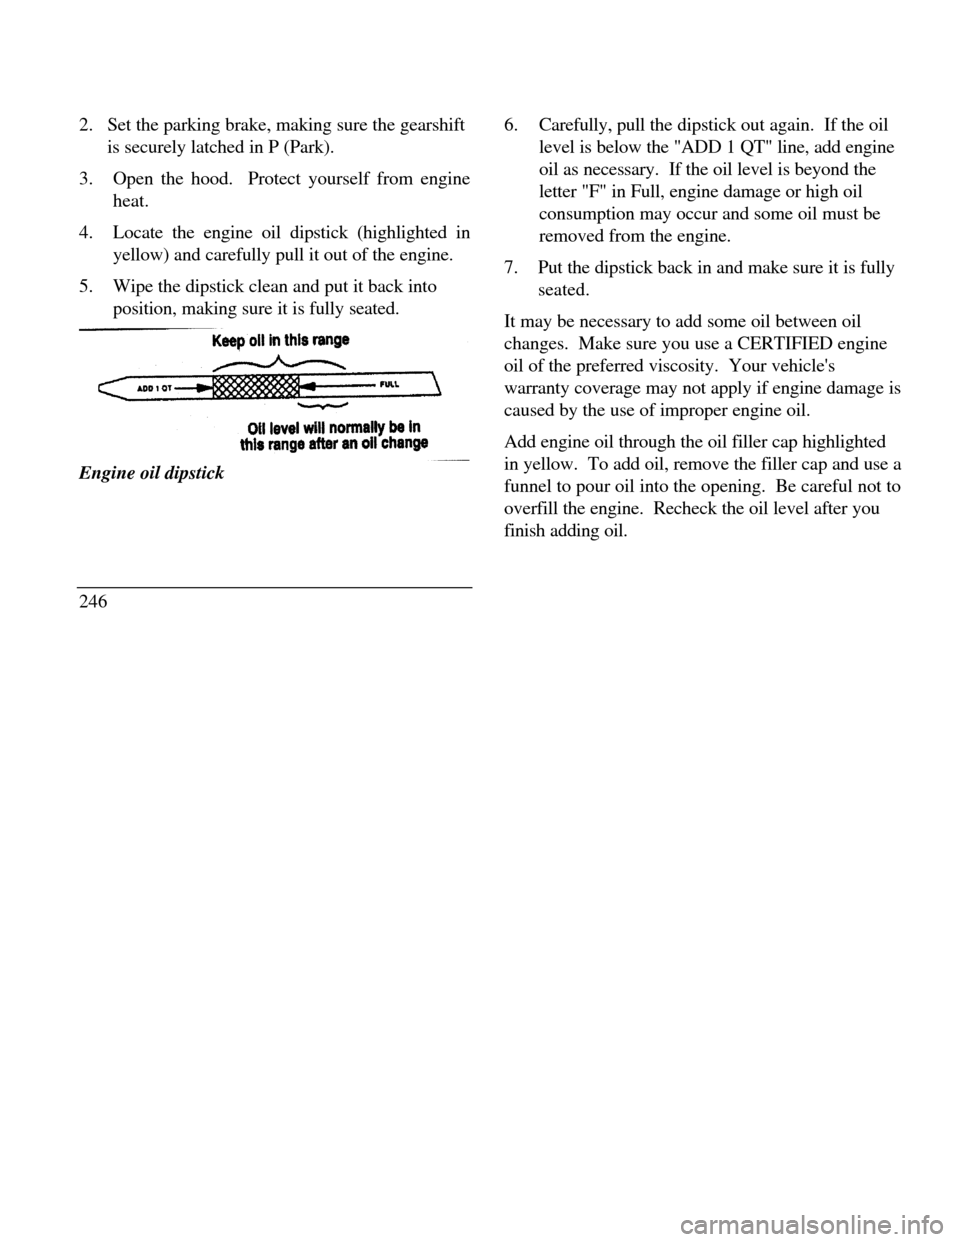
auxiliary latch that is located under the hood at the
center of the vehicle.
Auxiliary hood releaseThe auxiliary latch under the front edge of the
hood
3.Lift the hood until the lift cylinders hold it open.
235
Page 238 of 320

Whenever you close the hood, latch it securely.
NOTE: Apply lubricant to the hood latch at six-
month intervals to maintain smooth and trouble-
free operation.
NOTE: Read and understand Precautions When
Servicing Your Vehicle at the beginning of this
chapter before opening the hood.
236Engine Compartment
Your vehicle has a 4.6 liter 4V SFI engine. The
following page shows a diagram of where to find
items that you should regularly service.
Page 248 of 320

2.Set the parking brake, making sure the gearshift
is securely latched in P (Park).
3.Open the hood. Protect yourself from engine
heat.
4.Locate the engine oil dipstick (highlighted in
yellow) and carefully pull it out of the engine.
5.Wipe the dipstick clean and put it back into
position, making sure it is fully seated.Engine oil dipstick
2466.Carefully, pull the dipstick out again. If the oil
level is below the "ADD 1 QT" line, add engine
oil as necessary. If the oil level is beyond the
letter "F" in Full, engine damage or high oil
consumption may occur and some oil must be
removed from the engine.
7.Put the dipstick back in and make sure it is fully
seated.
It may be necessary to add some oil between oil
changes. Make sure you use a CERTIFIED engine
oil of the preferred viscosity. Your vehicle's
warranty coverage may not apply if engine damage is
caused by the use of improper engine oil.
Add engine oil through the oil filler cap highlighted
in yellow. To add oil, remove the filler cap and use a
funnel to pour oil into the opening. Be careful not to
overfill the engine. Recheck the oil level after you
finish adding oil.
Page 284 of 320

Horizontal aim adjustment
1.Open the hood and lift the front end cover
from its velcro attachments. Locate the
horizontal level indicator and adjustment
screw.
2.Use a 4mm socket and ratchet to turn the
horizontal adjusting screw until the horizontal
indicator is in line with the "0" reference.
282Vertical aim adjustment
NOTE: The numbers shown on the vial indicate
beam direction in degrees up or down.
1.Locate the vertical level indicator and adjustment
screw.
2.Use a 4mm socket and ratchet to turn the vertical
adjustment screw until the bubble in the
horizontal level indicator is centered in the vial.
3. Replace the front end cover and close the hood.