LINCOLN CONTINENTAL 2002 Manual Online
Manufacturer: LINCOLN, Model Year: 2002, Model line: CONTINENTAL, Model: LINCOLN CONTINENTAL 2002Pages: 240, PDF Size: 1.79 MB
Page 81 of 240

CHECK CHARGING SYSTEM.Displayed when the electrical system is
not maintaining proper voltage. If you are operating electrical accessories
when the engine is idling at a low speed, turn off as many of the
electrical loads as soon as possible. If the warning stays on or comes on
when the engine is operating at normal speeds, have the electrical
system checked as soon as possible.
LOW FUEL LEVEL.Displayed when you have approximately 80 km (50
miles) to empty.
LOW ENGINE COOLANT.Displayed when the engine coolant level is
low. Stop the vehicle as soon as safely possible, turn off the engine and
let it cool. Check the coolant and level. Refer toEngine coolantin the
Maintenance and specificationschapter.
LOW TIRE PRESSURE (if equipped).Displayed when the tire
pressure is low. Check the tire pressure. Refer toChecking the tire
pressurein theMaintenance and specificationschapter.
GEAR DISPLAY DATA ERR.Displayed when the data used to provide
the redundant gear selection display on the instrument cluster is missing
or invalid. In this case, the instrument cluster redundant gear selection
display is turned off. The driver should use the mechanical position
indication on the center console gear selector as temporary indication. If
this warning stays on, contact your dealer as soon as safely possible.
CHECK/TIGHTEN FUEL CAP.Displayed when the fuel filler cap is
not properly installed. Proper fuel filler cap installation is checked
automatically as the vehicle is driven but not until after some fuel is used
(fuel gauge drops below full). Once the fuel filler cap is properly
secured, the ªCHECK/TIGHTEN FUEL CAPº message will turn off after a
short period of driving. Refer toFuel Filler Capin theMaintenance
and specificationschapter.
BRAKE LAMP OUT.Displayed when the brake lamps are activated and
at least one is burned out. Check the lamps as soon as safely possible
and have the burned out lamp replaced. The center high-mount
brakelamp is not monitored.
CHECK TRACTION CONTROL.Displayed when the Traction
Controlysystem is not operating properly. If this message is displayed
on the message centerandthe amber T/C OFF light in the Traction
Controlyon/off switch isnotilluminated, the Traction Controlysystem
will be partially operable. If this warning stays on, contact your dealer for
service as soon as possible. For further information, refer toTraction
controlyin theDrivingchapter.
Driver Controls
81
Page 82 of 240
CHECK RIDE CONTROL.Displayed when the air suspension system is
not operating properly. If this message is displayed while driving, pull off
the road as soon as safely possible. The message may also be displayed if
the vehicle is loaded beyond the recommended maximum payload. This
is a normal condition if the vehicle is overloaded. To correct this
condition:
1. Remove or redistribute the payload per the recommended maximum
requirements.
2. Turn the ignition switch from ON to OFF to ON again.
If the message reappears:
1. Turn the air suspension switch (located in the trunk) OFF.
2. Contact your dealer for service as soon as safely possible.
For more information, refer toAir suspensionin theDrivingchapter.
TRUNK AJAR.Displayed when the trunk is not completely closed.
CHECK STEERING ASSIST.Displayed when the steering system is
not operating properly. If this message is displayed while driving, pull off
the road as soon as safely possible. If this warning stays on, contact your
dealer for service as soon as possible.
LOW WASHER FLUID.Indicates the washer fluid reservoir is less than
one quarter full. Check the washer fluid level. Refer toChecking and
adding washer fluidin theMaintenance and specificationschapter.
AIR LEVELING DISABLED.Displayed when the air suspension switch
is in the OFF position.
TAIL LAMP OUT.Displayed when the tail lamps are activated and at
least one is burned out. Check the lamps as soon as possible and have
the burned out lamp replaced.
CHECK FRT TURN LAMPS.Displayed when the turn signals are
activated and at least one is burned out. Check the lamps as soon as
safely possible and have the burned out lamp replaced.
TURN ON HEADLAMPS.Displayed when the headlamps are activated
by the autolamp sensor.
E/M (if equipped)
Press this control to switch the
odometer and display readouts from
metric (kilometers) to English
(miles) units.
E/M
Driver Controls
82
Page 83 of 240
DRIVER ID (if equipped)
Press this control and use SELECT
to choose DRIVER 1 or DRIVER 2
when choosing operator selectable
features. Seat and mirror positions
and nine operator selectable features, found under the MENU and
VEHICLE HANDLING controls, will be saved to DRIVER 1 or DRIVER 2.
These will be automatically recalled when the drivers identify themselves
to the system with the remote entry transmitter (refer toBasic
Operation of Memory Profile Systemin this section) or selecting
DRIVER 1 or DRIVER 2 in the message center. When a vehicle setting is
changed, the message center will display ªSAVED TO DRIVER 1 or
DRIVER 2º for 5 seconds to confirm the change has been made. Press
the SELECT to choose ªOFFº for temporary position/setting changes
which will not be stored.
MENU
Press this control to change various
convenience settings throughout the
vehicle. Each press of the MENU
control will display the following:
²Traction control (returns to ªONº everytime vehicle is started).
²Express window (completely goes down with one touch on the power
switch).
²Auto lock (locks the doors when the vehicle reaches 5 km/h [3 mph]).
²Horn chirp (sounds horn one time whenever the doors are locked
using the remote transmitter).
²Seat access (moves seat back to aid entry/exit from the vehicle).
²Reverse mirrors (tilts the exterior mirrors downward to assist parking
using reverse).
²English/metric (changes the odometer and display readouts)
Press the SELECT control to change the settings to ON or OFF.
These settings will be saved to the vehicle not individualized settings.
Vehicles equipped with the DRIVER ID control, the settings will be saved
to DRIVER 1 or DRIVER 2.
DRIVER ID
MENU
Driver Controls
83
Page 84 of 240
SELECT
Press the SELECT control to change
settings in MENU or VEHICLE
HANDLING modes.
VEHICLE HANDLING
Press this control to adjust the
STEERING EFFORT SETTINGS
between NORMAL, LOW and HIGH.
Vehicles equipped with the DRIVER
ID control, press this control once
to adjust RIDE CONTROL SETTINGS between NORMAL, PLUSH and
FIRM. Press this control a second time to adjust the STEERING EFFORT
SETTINGS between NORMAL, LOW and HIGH. The combination of firm
ride control and low steering effort cannot be selected.
Press the SELECT control to change settings.
TRIP
Press this control to display the first
of two trip odometers. Press it again
to display the second trip odometer.
To reset the displayed trip
odometer, press the RESET control.
DISPLAY
Press this control to turn the
message center display off. Press it
again to turn the display on.
Warnings override an off display and
must be reset for the display to be off again.
RESET
Press this control to reset:
²warnings
²average fuel economy
²trip odometers
The other selectable features are unaffected by pressing RESET.
SELECT
VEHICLE HANDLING
TRIP
RESET
DISPLAY
RESET
Driver Controls
84
Page 85 of 240
DTE/ECON
²Press the DTE/ECON control
once to display approximately
how far you can drive before
running out of fuel, or the
distance to empty (DTE). To ensure accuracy, turn the ignition OFF
when you fill the tank.
²Press the DTE/ECON control a second time to display the average fuel
economy in liters/100 kilometers or miles/gallon, based on distance
traveled and rate of fuel used information.
²To reset this feature, press the
RESET control while average fuel
economy is displayed (while you
are driving).
The DTE function will flash for 5 seconds and sound a tone for 1 second
when you have approximately:
²40 km (25 miles)
²16 km (10 miles)
DTE is calculated using a running average fuel economy initialized by the
factory. This value is not the same as the average fuel economy display.
The running average fuel economy is based on more than 800 kilometers
(500 miles) of driving history, and is reinitialized if the battery is
disconnected.
If the FUEL LEVEL ERROR message is displayed, there is a problem
with the fuel indication system and you should contact your dealer for
service as soon as possible.
Checking your highway fuel economy using the electronic
message center display
The following procedure will allow you to accurately monitor your actual
highway fuel economy. Since this procedure requires the vehicle speed
control system to be set to highway speeds, it must be run only on
suitable roadways where long distance speed control can be safely
maintained.
DTE ECON
RESET
Driver Controls
85
Page 86 of 240
![LINCOLN CONTINENTAL 2002 Manual Online You may notice gradual improvement in fuel economy over the course of
your vehicles break-in period (approximately 1 600 kilometers [1 000
miles]).
1. Set the speed control. Refer toSpeed controlin t LINCOLN CONTINENTAL 2002 Manual Online You may notice gradual improvement in fuel economy over the course of
your vehicles break-in period (approximately 1 600 kilometers [1 000
miles]).
1. Set the speed control. Refer toSpeed controlin t](/img/15/6880/w960_6880-85.png)
You may notice gradual improvement in fuel economy over the course of
your vehicle's break-in period (approximately 1 600 kilometers [1 000
miles]).
1. Set the speed control. Refer toSpeed controlin this chapter.
2. Press the Distance to Empty
(DTE) Economy (ECON) control
until ªAverage Miles per Gallonº is
displayed.
3. Press the RESET control to clear
the DTE/ECON system memory.
²Actual highway fuel economy is
now displayed.This current average measure will change as the
speed control system changes the engine speed to maintain a constant
vehicle speed. This is most noticeable in hilly environments.
It is important to press the RESET control after setting the speed
control to get accurate highway fuel economy readings.
DTE ECON
RESET
Driver Controls
86
Page 87 of 240
KEYS
The vehicle is equipped with a master key and valet key lock system.
The master key will access doors, trunk, glove box, ignition and remote
trunk release. The valet key (marked ªvaletº) will access doors and
ignition only. Before using this key, lock the trunk remote control to
disable theTrunk remote controlon the drivers door, then lock the
glove compartment with your master key.
Refer to theSecurilockyPassive Anti-Theft Systemsection in the
Locks and securitychapter for information on Securilockykeys.
POWER DOOR LOCKS
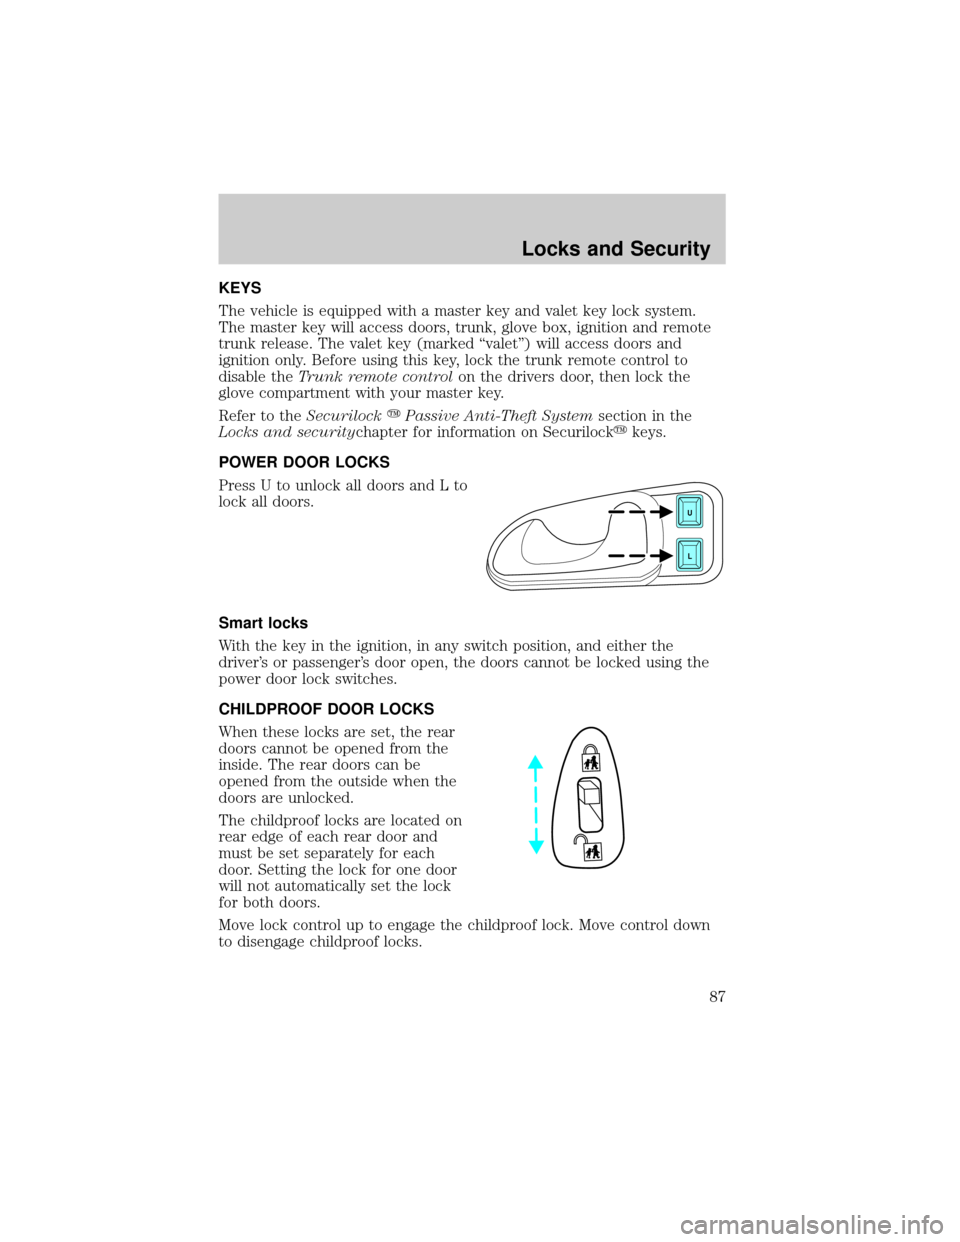
Press U to unlock all doors and L to
lock all doors.
Smart locks
With the key in the ignition, in any switch position, and either the
driver's or passenger's door open, the doors cannot be locked using the
power door lock switches.
CHILDPROOF DOOR LOCKS
When these locks are set, the rear
doors cannot be opened from the
inside. The rear doors can be
opened from the outside when the
doors are unlocked.
The childproof locks are located on
rear edge of each rear door and
must be set separately for each
door. Setting the lock for one door
will not automatically set the lock
for both doors.
Move lock control up to engage the childproof lock. Move control down
to disengage childproof locks.
U
L
Locks and Security
87
Page 88 of 240
TRUNK REMOTE CONTROL
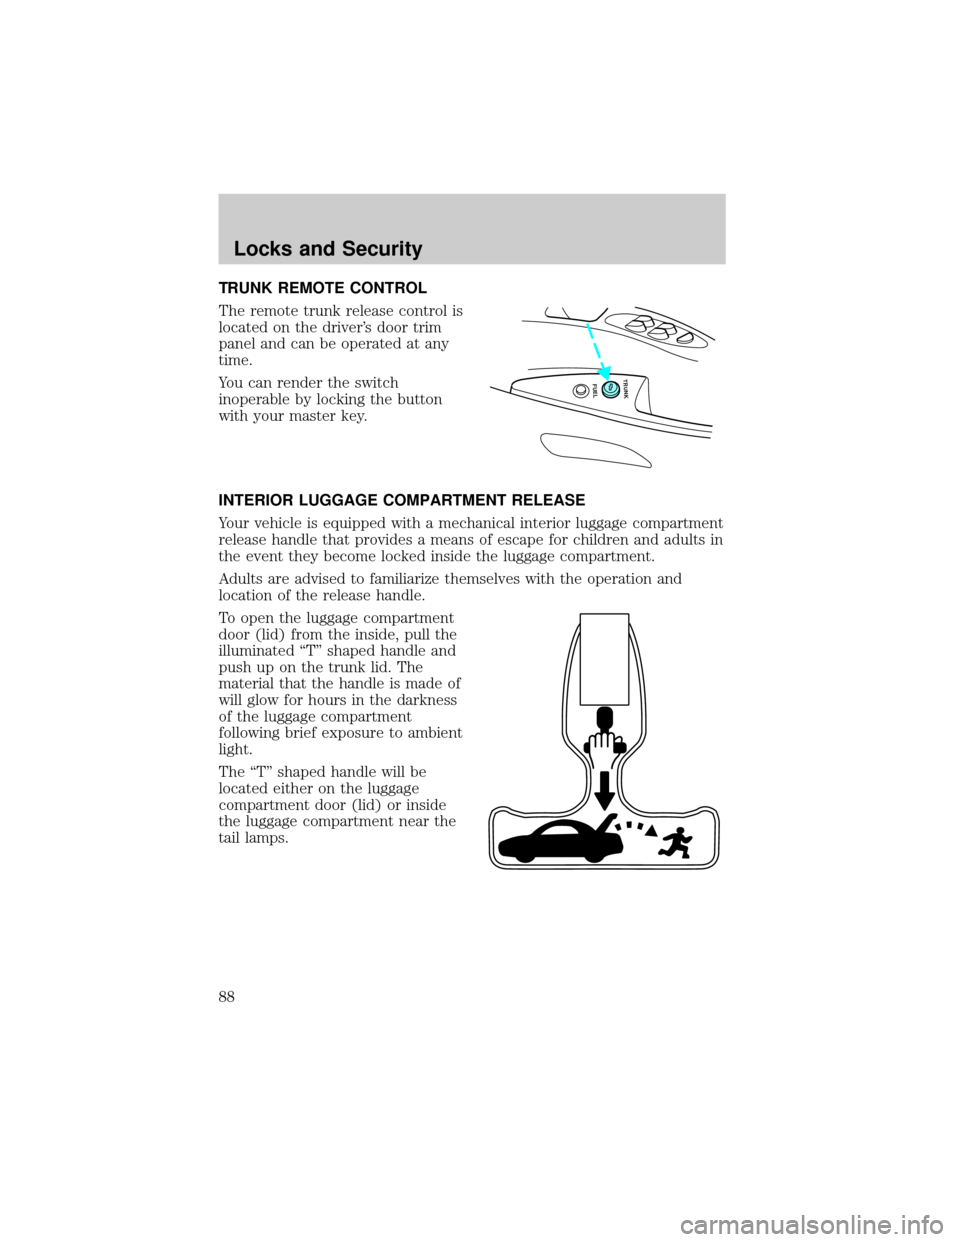
The remote trunk release control is
located on the driver's door trim
panel and can be operated at any
time.
You can render the switch
inoperable by locking the button
with your master key.
INTERIOR LUGGAGE COMPARTMENT RELEASE
Your vehicle is equipped with a mechanical interior luggage compartment
release handle that provides a means of escape for children and adults in
the event they become locked inside the luggage compartment.
Adults are advised to familiarize themselves with the operation and
location of the release handle.
To open the luggage compartment
door (lid) from the inside, pull the
illuminated ªTº shaped handle and
push up on the trunk lid. The
material that the handle is made of
will glow for hours in the darkness
of the luggage compartment
following brief exposure to ambient
light.
The ªTº shaped handle will be
located either on the luggage
compartment door (lid) or inside
the luggage compartment near the
tail lamps.
FUEL TRUNK
Locks and Security
88
Page 89 of 240
Keep vehicle doors and
luggage compartment
locked and keep keys out of a
child's reach. Unsupervised
children could lock themselves in
an open trunk and risk injury.
Children should be taught not to
play in vehicles.
On hot days, the temperature in the trunk or vehicle interior can
rise very quickly. Exposure of people or animals to these high
temperatures for even a short time can cause death or serious
heat-related injuries, including brain damage. Small children are
particularly at risk.
FUEL DOOR RELEASE
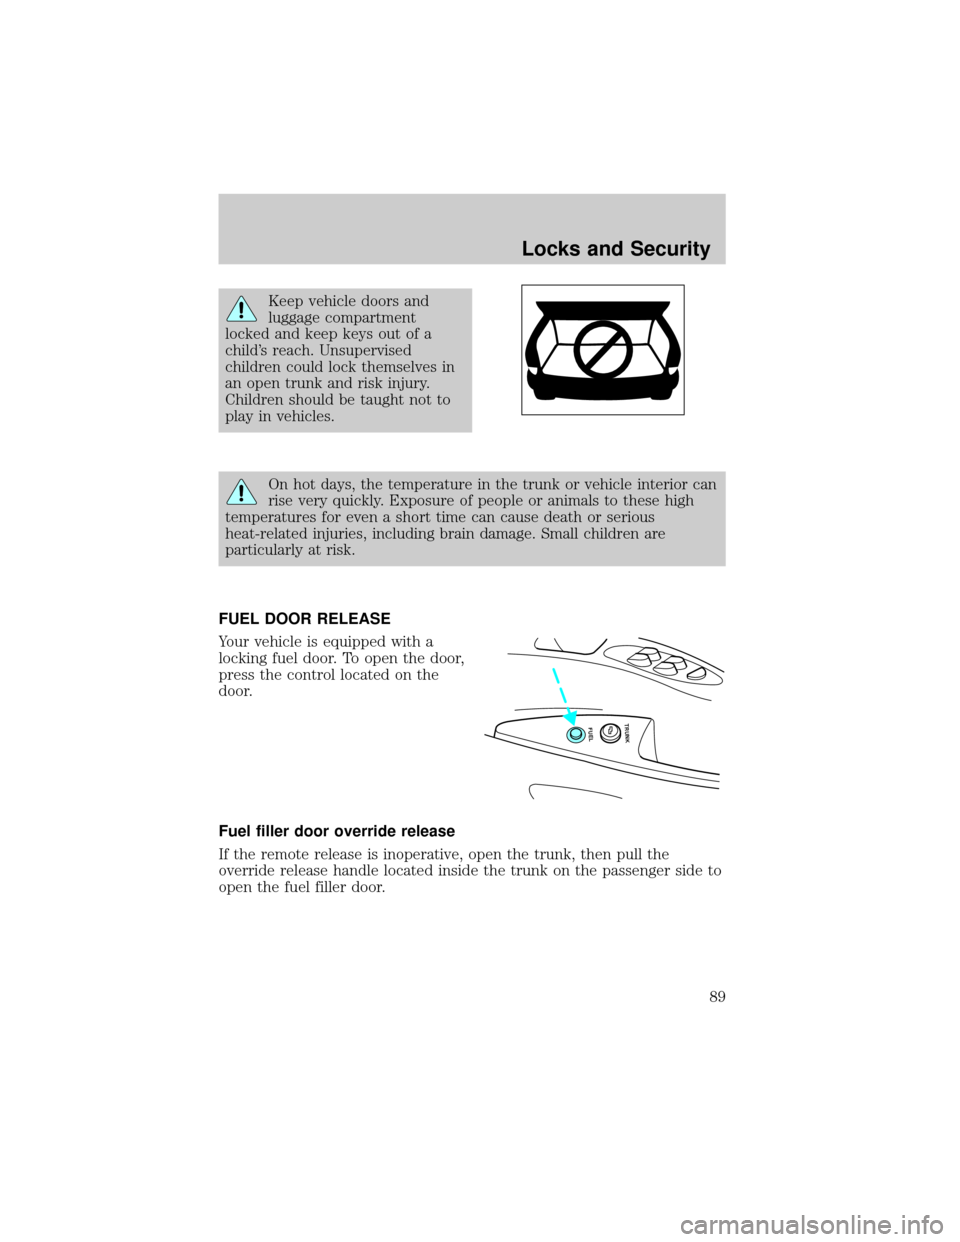
Your vehicle is equipped with a
locking fuel door. To open the door,
press the control located on the
door.
Fuel filler door override release
If the remote release is inoperative, open the trunk, then pull the
override release handle located inside the trunk on the passenger side to
open the fuel filler door.
FUEL TRUNK
Locks and Security
89
Page 90 of 240
REMOTE ENTRY SYSTEM
The remote entry system allows you to lock or unlock all vehicle doors
without a key.
The remote entry features operate in any ignition position except when
the vehicle is running and the transmission isnotin P (park) or N
(Neutral).
If there is any potential remote keyless entry problem with your vehicle,
ensureALL key fobs(remote entry transmitters) are brought to the
dealership, to aid in troubleshooting.
This device complies with part 15 of the FCC rules and with RS-210 of
Industry Canada. Operation is subject to the following two conditions:
(1) This device may not cause harmful interference, and (2) This device
must accept any interference received, including interference that may
cause undesired operation.
Changes or modifications not expressly approved by the party
responsible for compliance could void the user's authority to
operate the equipment.
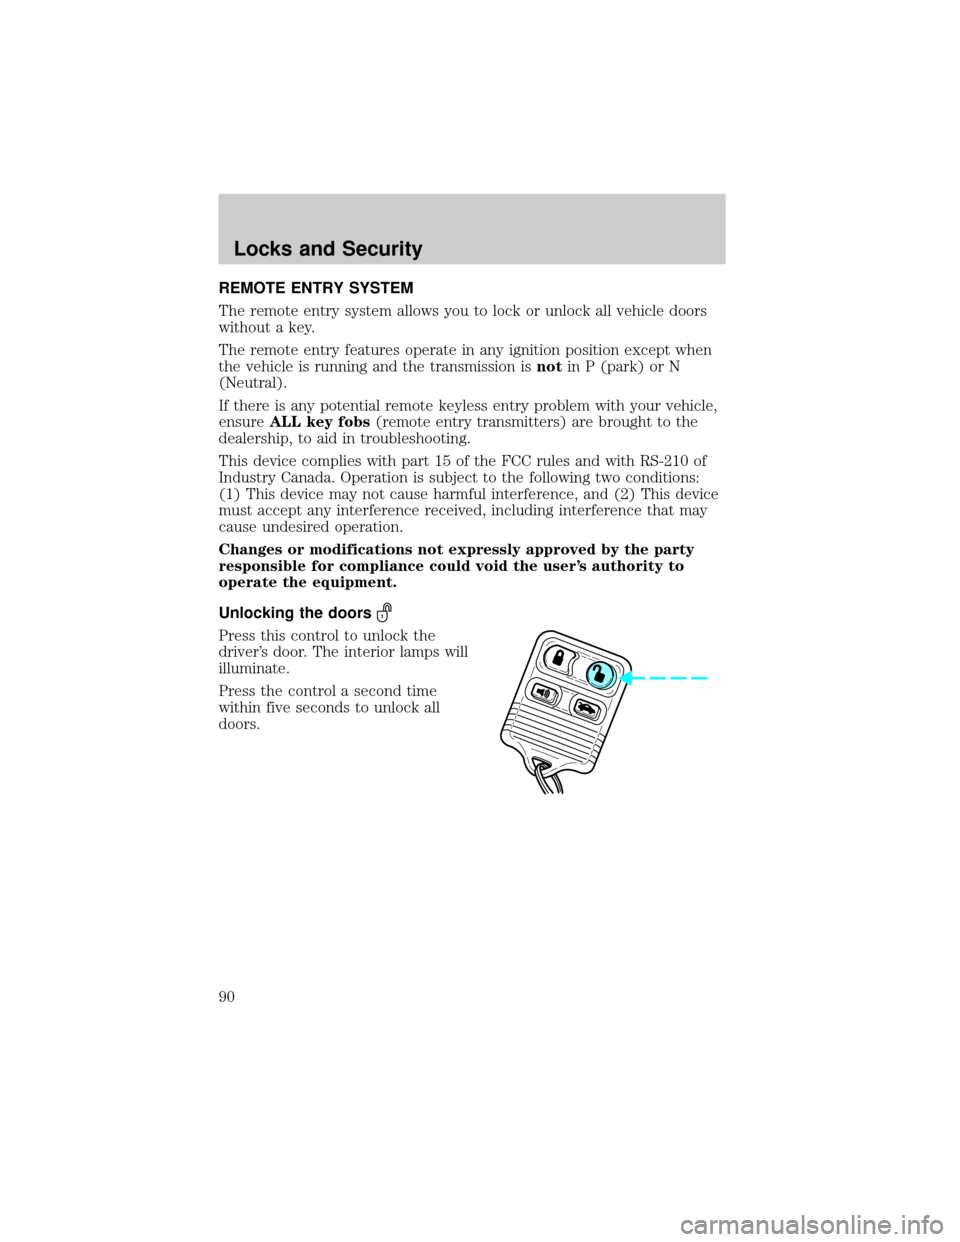
Unlocking the doors
Press this control to unlock the
driver's door. The interior lamps will
illuminate.
Press the control a second time
within five seconds to unlock all
doors.
Locks and Security
90