engine coolant LINCOLN CONTINENTAL 2019 Owners Manual
[x] Cancel search | Manufacturer: LINCOLN, Model Year: 2019, Model line: CONTINENTAL, Model: LINCOLN CONTINENTAL 2019Pages: 627, PDF Size: 6.39 MB
Page 7 of 627
Cruise Control
Principle of Operation
................................234
Using Adaptive Cruise Control ................
234
Driving Aids
Driver Alert ....................................................
243
Lane Keeping System ................................
244
Blind Spot Information System ................
250
Cross Traffic Alert ........................................
252
Steering .........................................................
256
Pre-Collision Assist .....................................
257
Drive Control .................................................
261
Load Carrying
Load Limit ......................................................
263
Towing
Towing a Trailer ...........................................
268
Recommended Towing Weights .............
269
Essential Towing Checks ..........................
270
Towing the Vehicle on Four Wheels ......
272Driving Hints
Breaking-In
....................................................
273
Economical Driving .....................................
273
Driving Through Water ...............................
273
Floor Mats ......................................................
274
Roadside Emergencies
Roadside Assistance ..................................
276
Hazard Flashers ...........................................
277
Fuel Shutoff ...................................................
277
Jump Starting the Vehicle .........................
278
Post-Crash Alert System ............................
281
Transporting the Vehicle ...........................
282
Customer Assistance
Getting the Services You Need ...............
283
In California (U.S. Only) ..............................
284
The Better Business Bureau (BBB) Auto Line Program (U.S. Only) .......................
285
Utilizing the Mediation/Arbitration Program (Canada Only) ..........................................
286
Getting Assistance Outside the U.S. and Canada ......................................................
287Ordering Additional Owner's Literature
......................................................................
289
Reporting Safety Defects (U.S. Only) ......
290
Reporting Safety Defects (Canada Only) ......................................................................
290
Fuses
Fuse Specification Chart ...........................
292
Changing a Fuse .........................................
307
Maintenance
General Information ....................................
310
Opening and Closing the Hood ...............
310
Under Hood Overview - 2.7L/3.0L ...........
312
Under Hood Overview - 3.7L .....................
314
Engine Oil Dipstick - 2.7L/3.0L ..................
316
Engine Oil Dipstick - 3.7L ...........................
316
Engine Oil Check .........................................
316
Oil Change Indicator Reset ........................
317
Engine Coolant Check ................................
318
Automatic Transmission Fluid Check ......
323
Brake Fluid Check .......................................
323
Power Steering Fluid Check .....................
324
4
Continental (CPL) Canada/United States of America, enUSA, Edition date: 201807, Second-Printing Table of Contents
Page 11 of 627
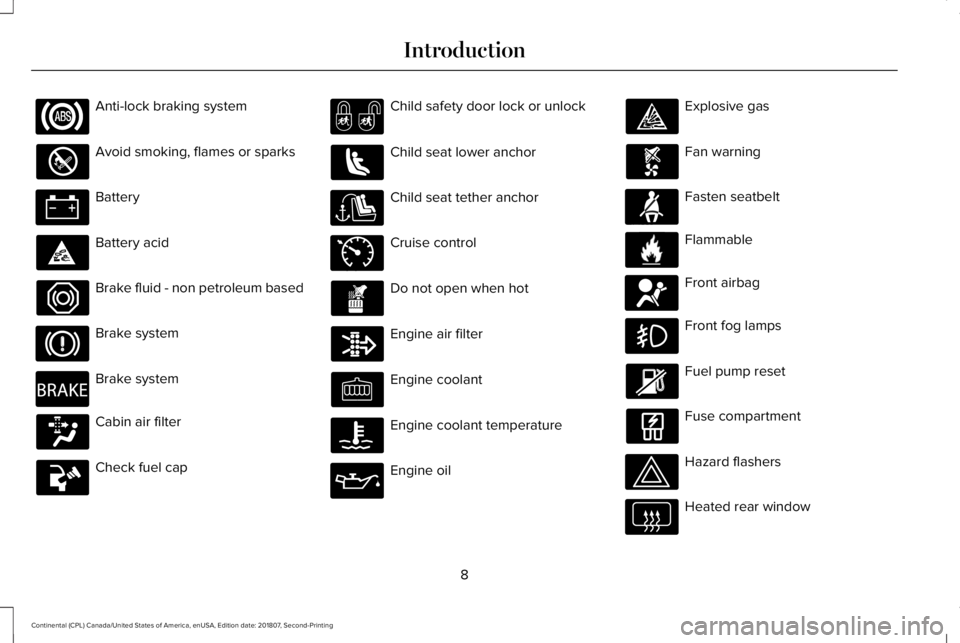
Anti-lock braking system
Avoid smoking, flames or sparks
Battery
Battery acid
Brake fluid - non petroleum based
Brake system
Brake system
Cabin air filter
Check fuel cap Child safety door lock or unlock
Child seat lower anchor
Child seat tether anchor
Cruise control
Do not open when hot
Engine air filter
Engine coolant
Engine coolant temperature
Engine oil Explosive gas
Fan warning
Fasten seatbelt
Flammable
Front airbag
Front fog lamps
Fuel pump reset
Fuse compartment
Hazard flashers
Heated rear window
8
Continental (CPL) Canada/United States of America, enUSA, Edition date: 201807, Second-Printing Introduction E270480 E71340 E71880 E231160 E67017
Page 112 of 627
Brake System Warning Lamp
WARNING: Driving your vehicle with
the warning lamp on is dangerous. A
significant decrease in braking
performance may occur. It may take you
longer to stop your vehicle. Have your
vehicle checked as soon as possible.
Driving extended distances with the
parking brake engaged can cause brake
failure and the risk of personal injury.
Note: Indicators vary depending on region.
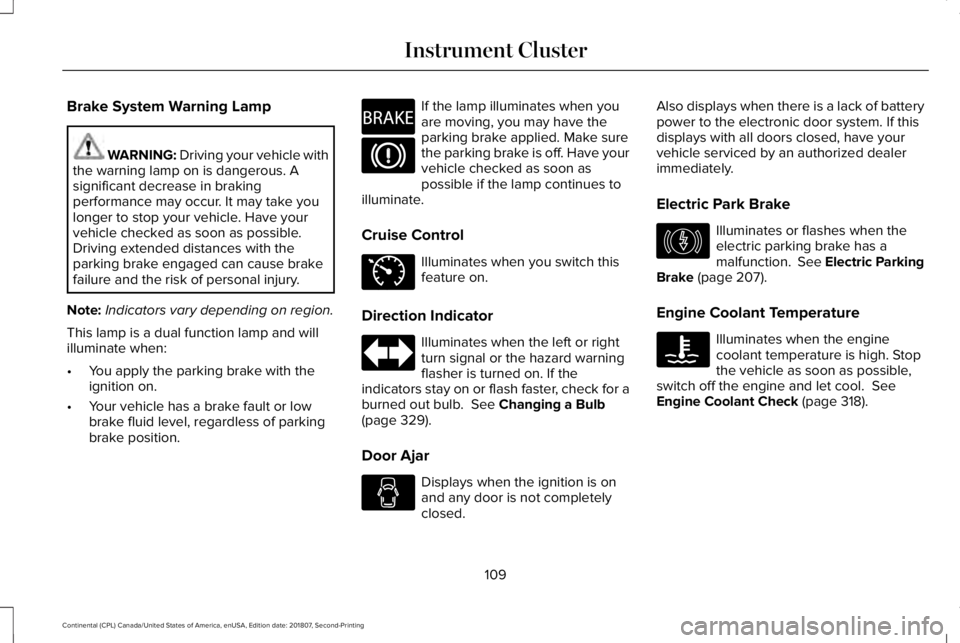
This lamp is a dual function lamp and will
illuminate when:
• You apply the parking brake with the
ignition on.
• Your vehicle has a brake fault or low
brake fluid level, regardless of parking
brake position. If the lamp illuminates when you
are moving, you may have the
parking brake applied. Make sure
the parking brake is off. Have your
vehicle checked as soon as
possible if the lamp continues to
illuminate.
Cruise Control Illuminates when you switch this
feature on.
Direction Indicator Illuminates when the left or right
turn signal or the hazard warning
flasher is turned on. If the
indicators stay on or flash faster, check for a
burned out bulb. See Changing a Bulb
(page 329).
Door Ajar Displays when the ignition is on
and any door is not completely
closed.Also displays when there is a lack of battery
power to the electronic door system. If this
displays with all doors closed, have your
vehicle serviced by an authorized dealer
immediately.
Electric Park Brake
Illuminates or flashes when the
electric parking brake has a
malfunction.
See Electric Parking
Brake (page 207).
Engine Coolant Temperature Illuminates when the engine
coolant temperature is high. Stop
the vehicle as soon as possible,
switch off the engine and let cool.
See
Engine Coolant Check (page 318).
109
Continental (CPL) Canada/United States of America, enUSA, Edition date: 201807, Second-Printing Instrument ClusterE270480 E71340 E146190
Page 123 of 627
Tachometer
Indicates the engine speed in revolutions
per minute. Driving with your tachometer
pointer continuously at the top of the scale
may damage the engine.
Turbo Gauge (If Equipped)
Indicates the amount of manifold air pressure
in the engine.
Temperature Gauge
Indicates engine coolant temperature. At
normal operating temperature, the level
indicator will be in the normal range. If the
engine coolant temperature exceeds the
normal range, stop your vehicle as soon as
safely possible, switch off the engine and let
the engine cool.
WARNING: Do not remove the
coolant reservoir cap when the cooling
system is hot. Wait 10 minutes for the
cooling system to cool down. Cover the
coolant reservoir cap with a thick cloth to
prevent the possibility of scalding and
slowly remove the cap. Failure to follow
this instruction could result in personal
injury.
Head Up Display
(If Equipped)
See
Head Up Display (page 139).
Phone
See
General Information (page 418).
Audio
See
General Information (page 418).
Navigation
(If Equipped)
See
General Information (page 418). INFORMATION MESSAGES
Note:
Depending on your vehicle options
and instrument cluster type, not all of these
messages may be available and certain
messages may be abbreviated or shortened. Press the
OK button to acknowledge and
remove some messages from the information
display. Other messages will be removed
automatically after a short time.
Certain messages need to be confirmed
before you can access the menus.
120
Continental (CPL) Canada/United States of America, enUSA, Edition date: 201807, Second-Printing Information DisplaysE222314
Page 134 of 627
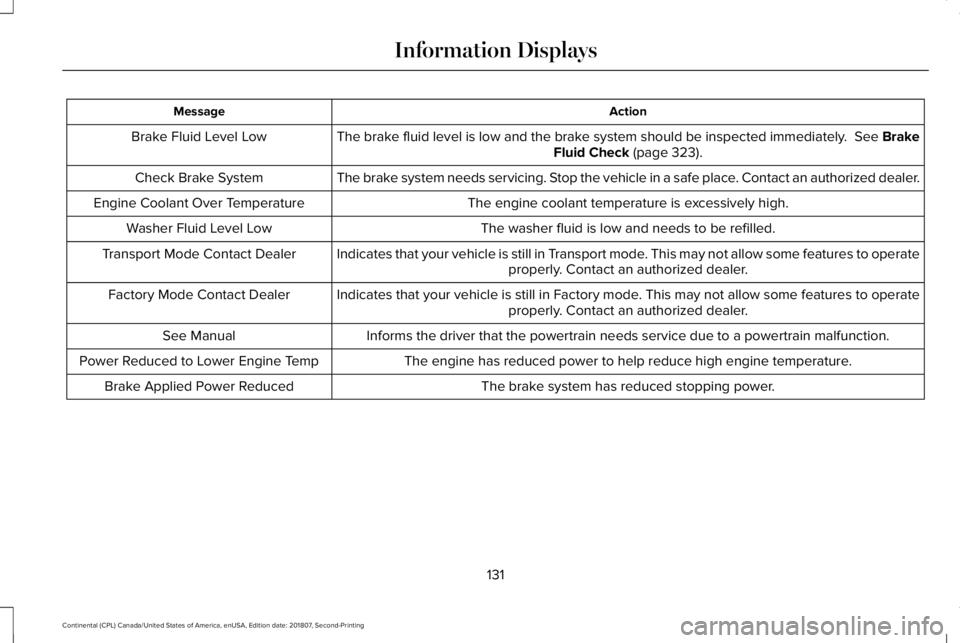
Action
Message
The brake fluid level is low and the brake system should be inspected immediately. See Brake
Fluid Check (page 323).
Brake Fluid Level Low
The brake system needs servicing. Stop the vehicle in a safe place. Contact an authorized dealer.
Check Brake System
The engine coolant temperature is excessively high.
Engine Coolant Over Temperature
The washer fluid is low and needs to be refilled.
Washer Fluid Level Low
Indicates that your vehicle is still in Transport mode. This may not allow some features to operateproperly. Contact an authorized dealer.
Transport Mode Contact Dealer
Indicates that your vehicle is still in Factory mode. This may not allow some features to operateproperly. Contact an authorized dealer.
Factory Mode Contact Dealer
Informs the driver that the powertrain needs service due to a powertrain\
malfunction.
See Manual
The engine has reduced power to help reduce high engine temperature.
Power Reduced to Lower Engine Temp
The brake system has reduced stopping power.
Brake Applied Power Reduced
131
Continental (CPL) Canada/United States of America, enUSA, Edition date: 201807, Second-Printing Information Displays
Page 182 of 627
WARNING: Do not fully close the
hood, or allow it to drop under its own
weight when using the engine block
heater. This could damage the power cable
and may cause an electrical short resulting
in fire, injury and property damage.
Note: The heater is most effective when
outdoor temperatures are below
0°F (-18°C).
The heater acts as a starting aid by warming
the engine coolant. This allows the climate
control system to respond quickly. The
equipment includes a heater element
(installed in the engine block) and a wire
harness. You can connect the system to a
grounded 120-volt AC electrical source. We recommend that you do the following for
a safe and correct operation:
•
Use a 16-gauge outdoor extension cord
that is product certified by Underwriter’ s
Laboratory (UL) or Canadian Standards
Association (CSA). This extension cord
must be suitable for use outdoors, in cold
temperatures, and be clearly marked
Suitable for Use with Outdoor
Appliances. Do not use an indoor
extension cord outdoors. This could
result in an electric shock or become a
fire hazard.
• Use as short an extension cord as
possible.
• Do not use multiple extension cords.
• Make sure that when in operation, the
extension cord plug and heater cord plug
connections are free and clear of water.
This could cause an electric shock or fire.
• Make sure your vehicle is parked in a
clean area, clear of combustibles.
• Make sure the heater, heater cord and
extension cord are firmly connected. •
Check for heat anywhere in the electrical
hookup once the system has been
operating for approximately 30 minutes.
• Make sure the system is unplugged and
properly stowed before starting and
driving your vehicle. Make sure the
protective cover seals the prongs of the
block heater cord plug when not in use.
• Make sure the heater system is checked
for proper operation before winter.
Using the Engine Block Heater
Make sure the receptacle terminals are clean
and dry prior to use. Clean them with a dry
cloth if necessary.
The heater uses 0.4 to 1.0 kilowatt-hours of
energy per hour of use. The system does not
have a thermostat. It achieves maximum
temperature after approximately three hours
of operation. Using the heater longer than
three hours does not improve system
performance and unnecessarily uses
electricity.
179
Continental (CPL) Canada/United States of America, enUSA, Edition date: 201807, Second-Printing Starting and Stopping the Engine
Page 316 of 627
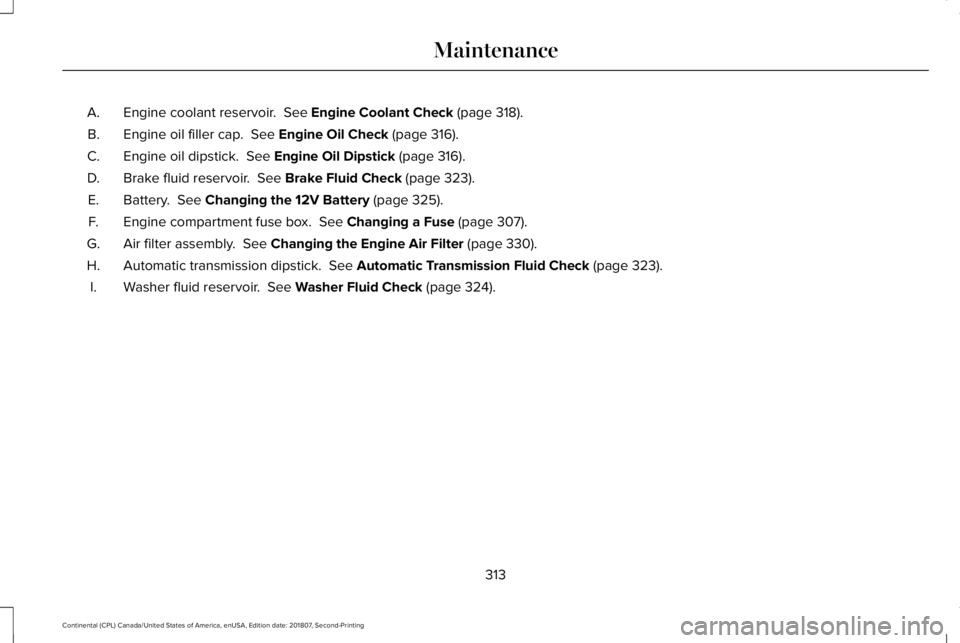
Engine coolant reservoir. See Engine Coolant Check (page 318).
A.
Engine oil filler cap.
See Engine Oil Check (page 316).
B.
Engine oil dipstick.
See Engine Oil Dipstick (page 316).
C.
Brake fluid reservoir.
See Brake Fluid Check (page 323).
D.
Battery.
See Changing the 12V Battery (page 325).
E.
Engine compartment fuse box.
See Changing a Fuse (page 307).
F.
Air filter assembly.
See Changing the Engine Air Filter (page 330).
G.
Automatic transmission dipstick.
See Automatic Transmission Fluid Check (page 323).
H.
Washer fluid reservoir.
See Washer Fluid Check (page 324).
I.
313
Continental (CPL) Canada/United States of America, enUSA, Edition date: 201807, Second-Printing Maintenance
Page 317 of 627
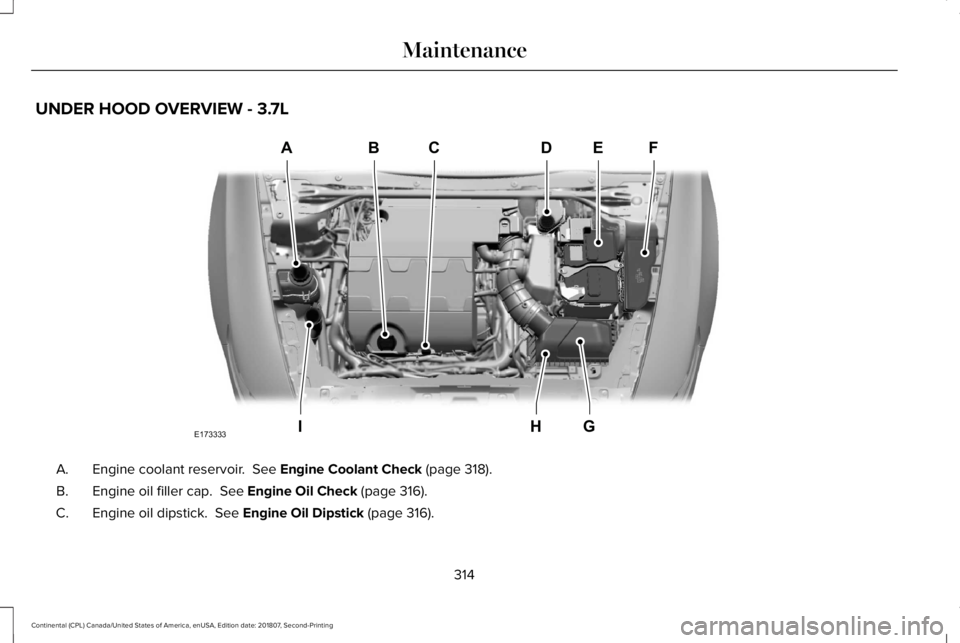
UNDER HOOD OVERVIEW - 3.7L
Engine coolant reservoir. See Engine Coolant Check (page 318).
A.
Engine oil filler cap.
See Engine Oil Check (page 316).
B.
Engine oil dipstick.
See Engine Oil Dipstick (page 316).
C.
314
Continental (CPL) Canada/United States of America, enUSA, Edition date: 201807, Second-Printing MaintenanceABCD
GHI
EF
E173333
Page 321 of 627
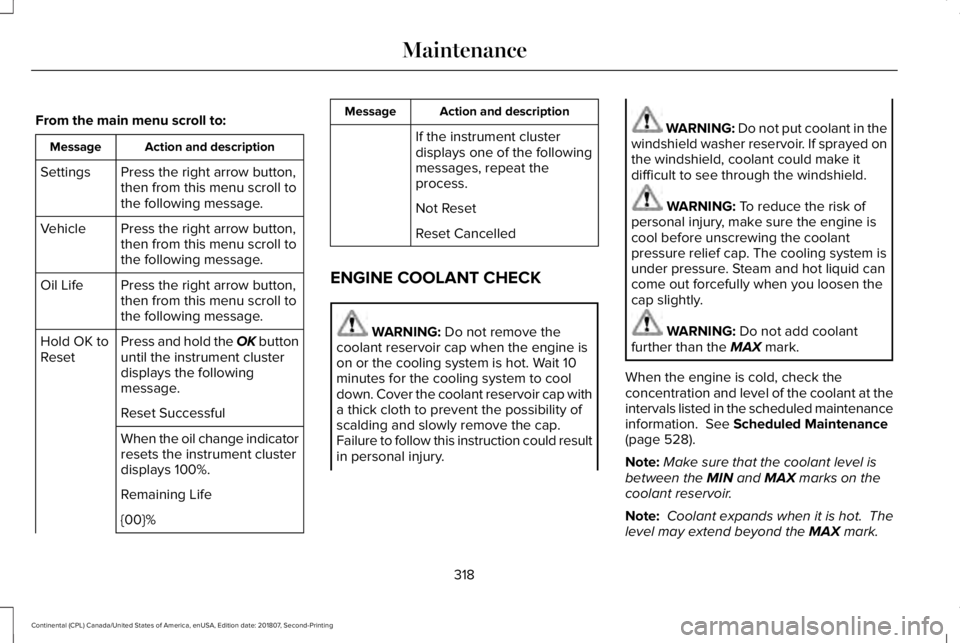
From the main menu scroll to:
Action and description
Message
Press the right arrow button,
then from this menu scroll to
the following message.
Settings
Press the right arrow button,
then from this menu scroll to
the following message.
Vehicle
Press the right arrow button,
then from this menu scroll to
the following message.
Oil Life
Press and hold the OK button
until the instrument cluster
displays the following
message.
Hold OK to
Reset
Reset Successful
When the oil change indicator
resets the instrument cluster
displays 100%.
Remaining Life
{00}% Action and description
Message
If the instrument cluster
displays one of the following
messages, repeat the
process.
Not Reset
Reset Cancelled
ENGINE COOLANT CHECK WARNING: Do not remove the
coolant reservoir cap when the engine is
on or the cooling system is hot. Wait 10
minutes for the cooling system to cool
down. Cover the coolant reservoir cap with
a thick cloth to prevent the possibility of
scalding and slowly remove the cap.
Failure to follow this instruction could result
in personal injury. WARNING:
Do not put coolant in the
windshield washer reservoir. If sprayed on
the windshield, coolant could make it
difficult to see through the windshield. WARNING:
To reduce the risk of
personal injury, make sure the engine is
cool before unscrewing the coolant
pressure relief cap. The cooling system is
under pressure. Steam and hot liquid can
come out forcefully when you loosen the
cap slightly. WARNING:
Do not add coolant
further than the MAX mark.
When the engine is cold, check the
concentration and level of the coolant at the
intervals listed in the scheduled maintenance
information.
See Scheduled Maintenance
(page 528).
Note: Make sure that the coolant level is
between the
MIN and MAX marks on the
coolant reservoir.
Note: Coolant expands when it is hot. The
level may extend beyond the
MAX mark.
318
Continental (CPL) Canada/United States of America, enUSA, Edition date: 201807, Second-Printing Maintenance
Page 322 of 627
Maintain coolant concentration within 48%
to 50%, which equates to a freeze point
between -29°F (-34°C) and -35°F (-37°C).
Coolant concentration should be checked
using a refractometer. We do not recommend
the use of hydrometers or coolant test strips
for measuring coolant concentration.
Adding Coolant WARNING:
Do not add engine
coolant when the engine is hot. Failure to
follow this instruction could result in
personal injury. WARNING:
Do not remove the
coolant reservoir cap when the engine is
on or the cooling system is hot. Wait 10
minutes for the cooling system to cool
down. Cover the coolant reservoir cap with
a thick cloth to prevent the possibility of
scalding and slowly remove the cap.
Failure to follow this instruction could result
in personal injury. WARNING:
Do not put coolant in the
windshield washer reservoir. If sprayed on
the windshield, coolant could make it
difficult to see through the windshield.
Note: Do not use stop leak pellets, cooling
system sealants, or non-specified additives
as they can cause damage to the engine
cooling or heating systems. Resulting
component damage may not be covered by
the vehicle Warranty.
Note: Automotive fluids are not
interchangeable.
It is very important to use prediluted coolant
approved to the correct specification in order
to avoid plugging the small passageways in
the engine cooling system.
See Capacities
and Specifications (page 373). Do not mix
different colors or types of coolant in your
vehicle. Mixing of engine coolants or using
an incorrect coolant may harm the engine or
cooling system components and may not be
covered by the vehicle Warranty. Note:
If prediluted coolant is not available,
use the approved concentrated coolant
diluting it to 50/50 with distilled water.
See
Capacities and Specifications (page 373).
Using water that has not been deionised
may contribute to deposit formation,
corrosion and plugging of the small cooling
system passageways.
Note: Coolants marketed for all makes and
models may not be approved to our
specifications and may cause damage to
the cooling system. Resulting component
damage may not be covered by the vehicle
Warranty.
If the coolant level is at or below the
minimum mark, add prediluted coolant
immediately.
To top up the coolant level do the following:
1. Unscrew the cap slowly. Any pressure escapes as you unscrew the cap.
2. Add prediluted coolant approved to the correct specification. See Capacities and
Specifications
(page 373).
3. Add enough prediluted coolant to reach
the correct level.
319
Continental (CPL) Canada/United States of America, enUSA, Edition date: 201807, Second-Printing Maintenance