LINCOLN LS 2002 Owners Manual
Manufacturer: LINCOLN, Model Year: 2002, Model line: LS, Model: LINCOLN LS 2002Pages: 288, PDF Size: 2.44 MB
Page 101 of 288

CHECK TRANSMISSION.Indicates the transmission is not operating
properly. If this warning stays on, contact your dealer as soon as
possible.
LOW FUEL LEVEL.Displayed when you have approximately 80 km
(50 miles) to empty.
CHECK FUEL CAP.Displayed when the fuel filler cap is not properly
installed. Check the fuel filler cap for proper installation. Refer toFuel
filler capin theMaintenance and specificationschapter.
LOW BRAKE FLUID.Indicates the brake fluid level is low and the
brake system should be inspected immediately. Refer toChecking and
adding brake fluidin theMaintenance and specificationschapter.
CHECK TAIL LAMPS.Displayed when the tail lamps are activated and
at least one is burned out. Check the lamps as soon as safely possible
and have the burned out lamp replaced.
CHECK BRAKE LAMPS.Displayed when the brake lamps are
activated and at least one is burned out. Check the lamps as soon as
safely possible and have the burned out lamp replaced. The center
high-mount brakelamp is not monitored.
CHECK FRT TURN LAMPS.Displayed when the turn signals are
activated and at least one is burned out. Check the lamps as soon as
safely possible and have the burned out lamp replaced.
CHECK SIDE REPEATER LAMPS (if equipped).Displayed when
the turn signals are activated and at least one is burned out. Check the
lamps as soon as possible and have the burned out lamp replaced.
CHECK REAR TURN LAMPS.Displayed when the turn signals are
activated and at least one is burned out. Check the lamps as soon as
possible and have the burned out lamp replaced.
CHECK TRACTION CONTROL (if equipped).Displayed when the
Traction Controlysystem is not operating properly. If this message is
displayed on the message centerandthe amber T/C OFF light in the
Traction Controlyon/off switch isnotilluminated, the Traction
Controlysystem will be partially operable. If this warning stays on,
contact your dealer for service as soon as possible. For further
information, refer toTraction controlyin theDrivingchapter.
Driver Controls
101
Page 102 of 288
CHECK ADVANCETRAC (if equipped).Displayed when the
AdvanceTracysystem is not operating properly. If this message is
displayed on the message center the AdvanceTracysystem will be
partially operable. If this warning stays on while the engine is running,
contact your dealer for service as soon as possible. For further
information, refer toAdvanceTracystability enhancement systemin
theDrivingchapter.
TRUNK AJAR.Displayed when the trunk is not completely closed.
LOW WASHER FLUID.Indicates the washer fluid reservoir is less than
one quarter full. Check the washer fluid level. Refer toChecking and
adding washer fluidin theMaintenance and specificationschapter.
CHECK AC (cabin) FILTER.Displayed when the A/C cabin filter life
remaining is 5 percent or less. When A/C filter life left is between 5%
and 0%, the CHANGE A/C FILTER SOON message will be displayed.
When A/C filter life left reaches 0%, the AC FILTER CHANGE
REQUIRED message will be displayed.
To reset the A/C filter monitoring system to 100% after each A/C Filter
change:
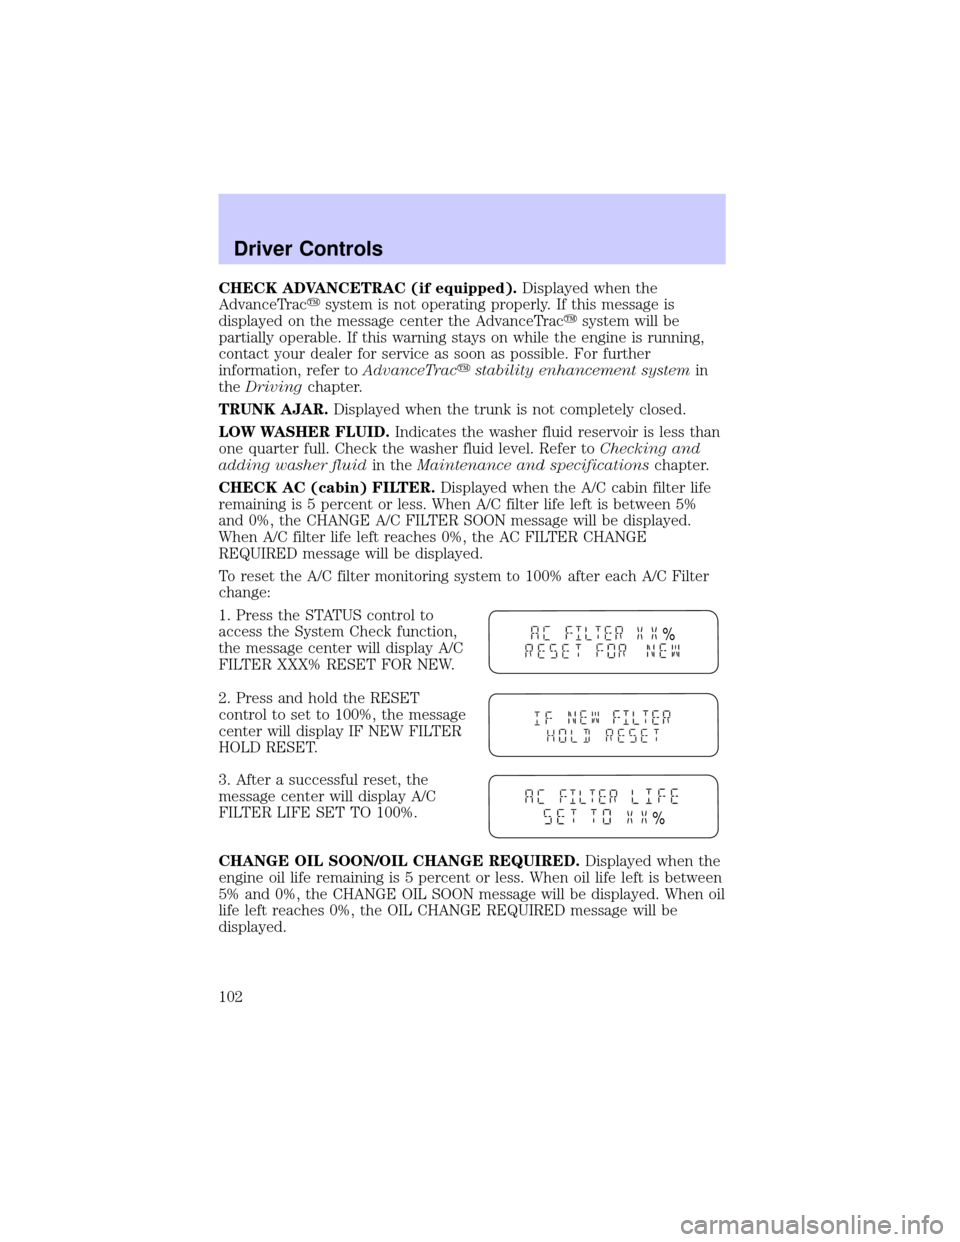
1. Press the STATUS control to
access the System Check function,
the message center will display A/C
FILTER XXX% RESET FOR NEW.
2. Press and hold the RESET
control to set to 100%, the message
center will display IF NEW FILTER
HOLD RESET.
3. After a successful reset, the
message center will display A/C
FILTER LIFE SET TO 100%.
CHANGE OIL SOON/OIL CHANGE REQUIRED.Displayed when the
engine oil life remaining is 5 percent or less. When oil life left is between
5% and 0%, the CHANGE OIL SOON message will be displayed. When oil
life left reaches 0%, the OIL CHANGE REQUIRED message will be
displayed.
%
%
Driver Controls
102
Page 103 of 288
An oil change is required whenever indicated by the message center.
USE ONLY RECOMMENDED ENGINE OILS.
To reset the oil monitoring system to 100% after each oil change
[approximately 8 000 km (5 000 miles) or 180 days] perform the
following:
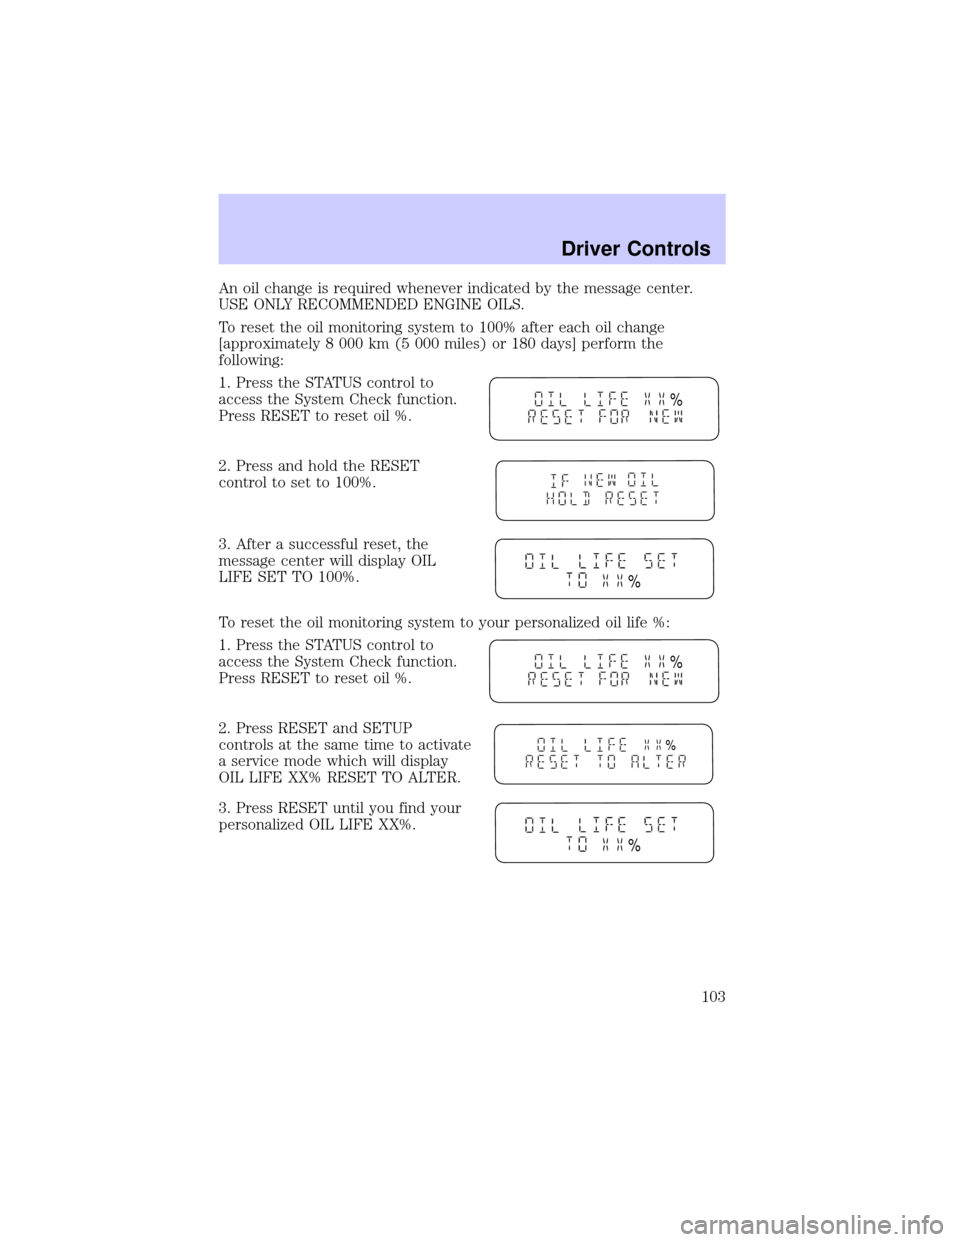
1. Press the STATUS control to
access the System Check function.
Press RESET to reset oil %.
2. Press and hold the RESET
control to set to 100%.
3. After a successful reset, the
message center will display OIL
LIFE SET TO 100%.
To reset the oil monitoring system to your personalized oil life %:
1. Press the STATUS control to
access the System Check function.
Press RESET to reset oil %.
2. Press RESET and SETUP
controls at the same time to activate
a service mode which will display
OIL LIFE XX% RESET TO ALTER.
3. Press RESET until you find your
personalized OIL LIFE XX%.
%
%
%
%
%
Driver Controls
103
Page 104 of 288
DATA ERROR.These messages indicate improper operation of the
vehicle network communication between electronic modules.
²Fuel computer
²Engine sensor
²Gear selection
²Door sensor
²Trunk sensor
²Exterior lamps
²Traction Controlyand AdvanceTracy(if equipped)
Contact your dealer as soon as possible if these messages occur on a
regular basis.
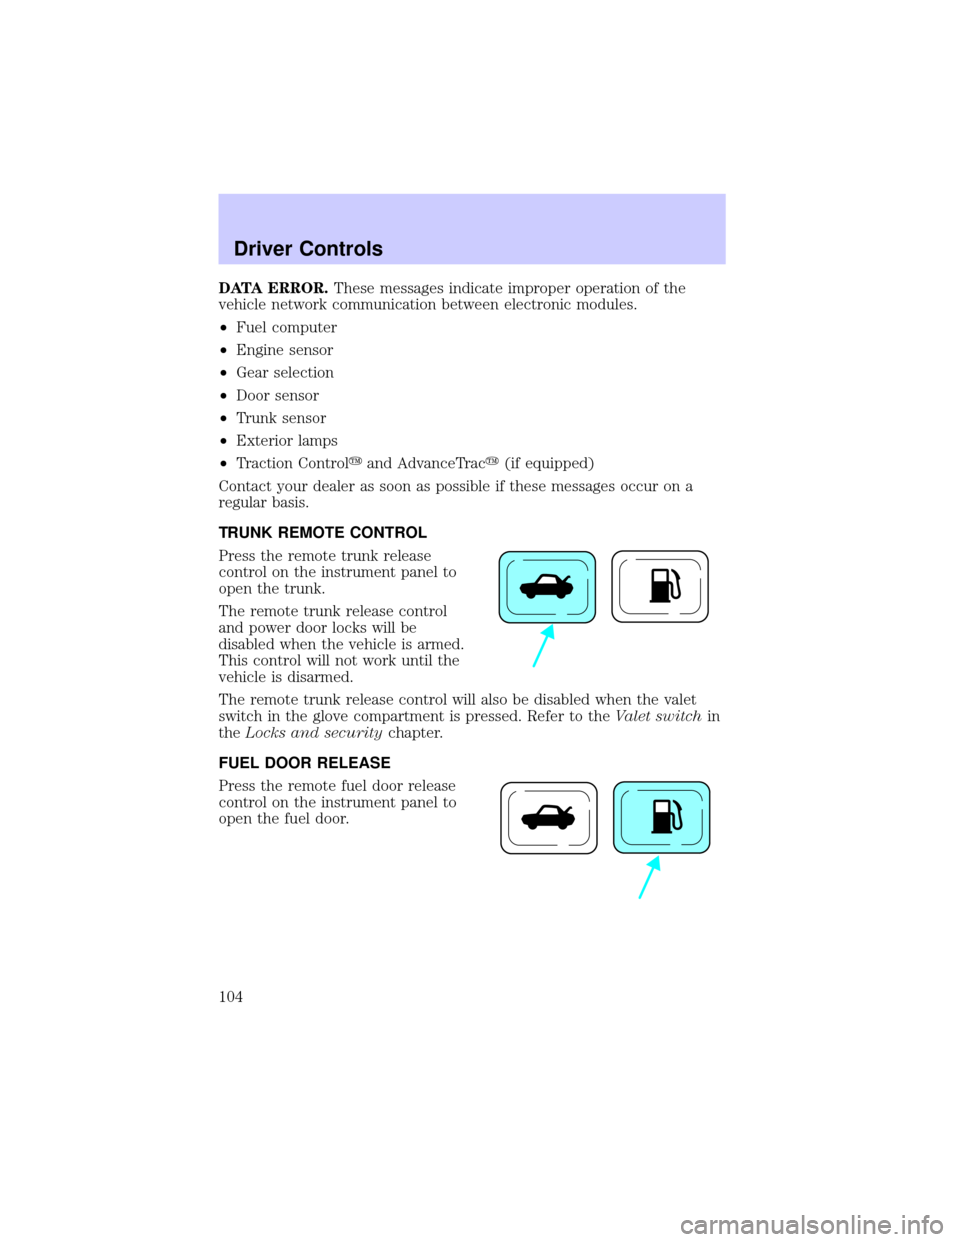
TRUNK REMOTE CONTROL
Press the remote trunk release
control on the instrument panel to
open the trunk.
The remote trunk release control
and power door locks will be
disabled when the vehicle is armed.
This control will not work until the
vehicle is disarmed.
The remote trunk release control will also be disabled when the valet
switch in the glove compartment is pressed. Refer to theValet switchin
theLocks and securitychapter.
FUEL DOOR RELEASE
Press the remote fuel door release
control on the instrument panel to
open the fuel door.
Driver Controls
104
Page 105 of 288
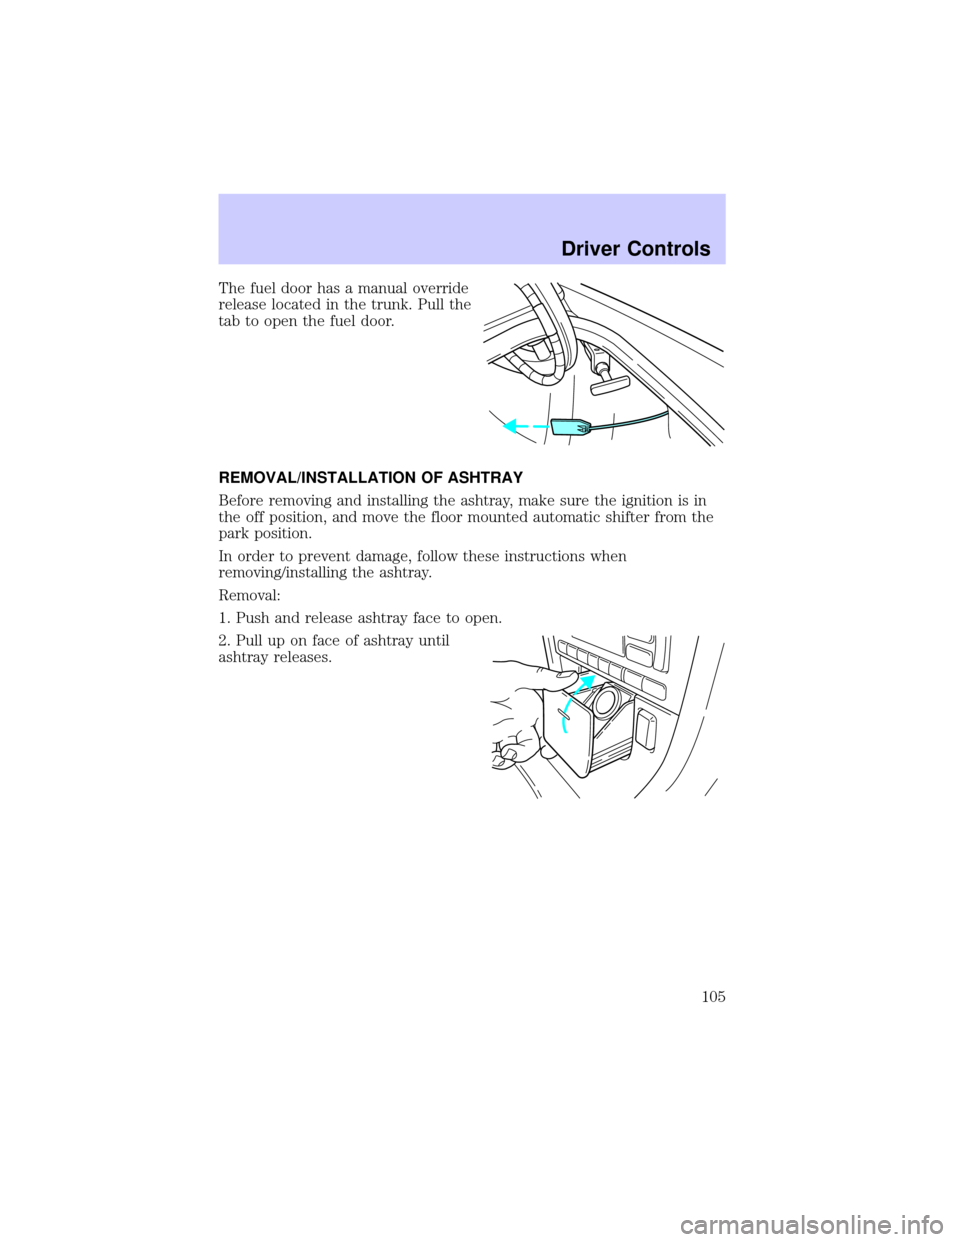
The fuel door has a manual override
release located in the trunk. Pull the
tab to open the fuel door.
REMOVAL/INSTALLATION OF ASHTRAY
Before removing and installing the ashtray, make sure the ignition is in
the off position, and move the floor mounted automatic shifter from the
park position.
In order to prevent damage, follow these instructions when
removing/installing the ashtray.
Removal:
1. Push and release ashtray face to open.
2. Pull up on face of ashtray until
ashtray releases.
Driver Controls
105
Page 106 of 288
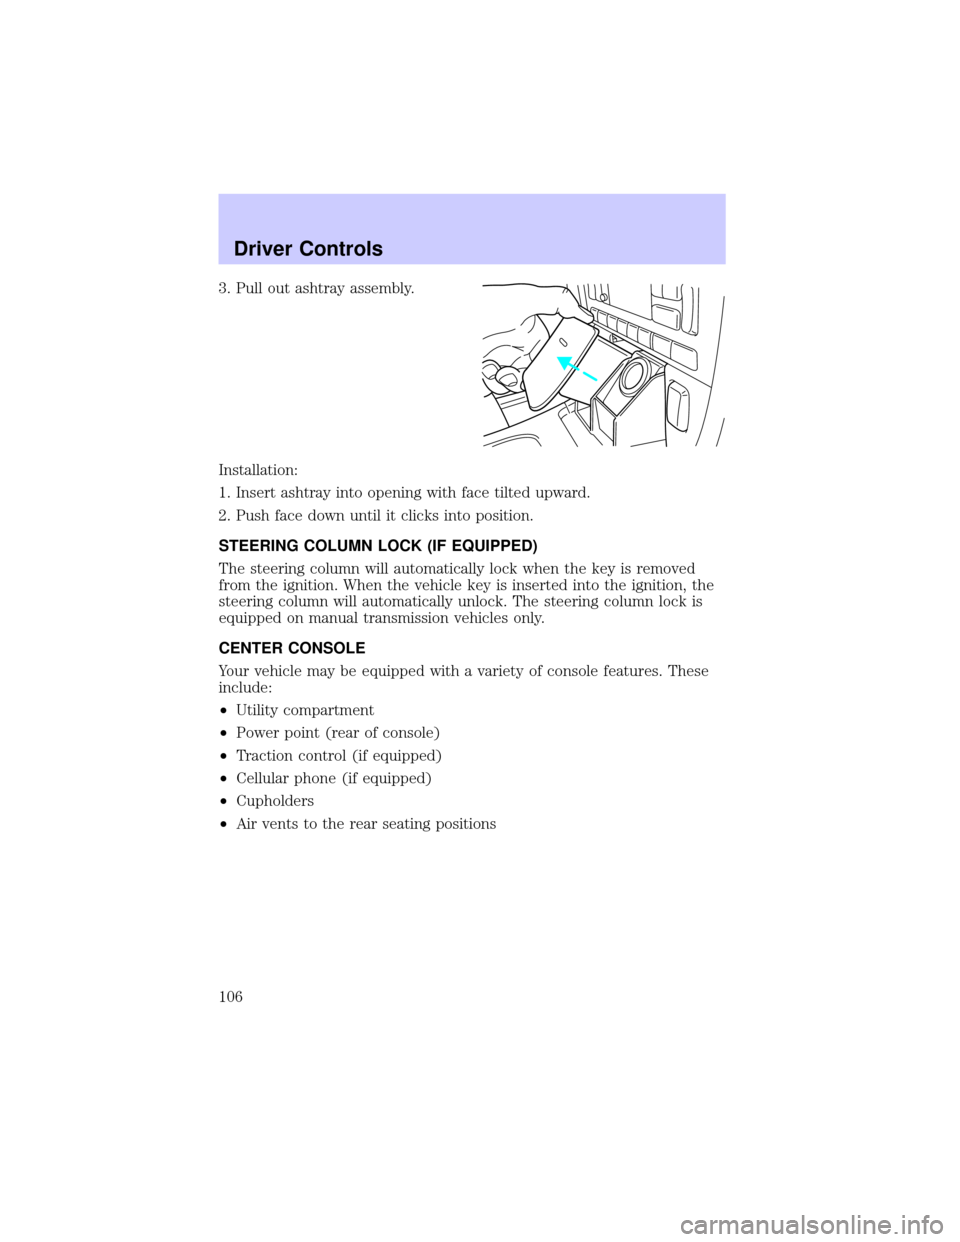
3. Pull out ashtray assembly.
Installation:
1. Insert ashtray into opening with face tilted upward.
2. Push face down until it clicks into position.
STEERING COLUMN LOCK (IF EQUIPPED)
The steering column will automatically lock when the key is removed
from the ignition. When the vehicle key is inserted into the ignition, the
steering column will automatically unlock. The steering column lock is
equipped on manual transmission vehicles only.
CENTER CONSOLE
Your vehicle may be equipped with a variety of console features. These
include:
²Utility compartment
²Power point (rear of console)
²Traction control (if equipped)
²Cellular phone (if equipped)
²Cupholders
²Air vents to the rear seating positions
Driver Controls
106
Page 107 of 288
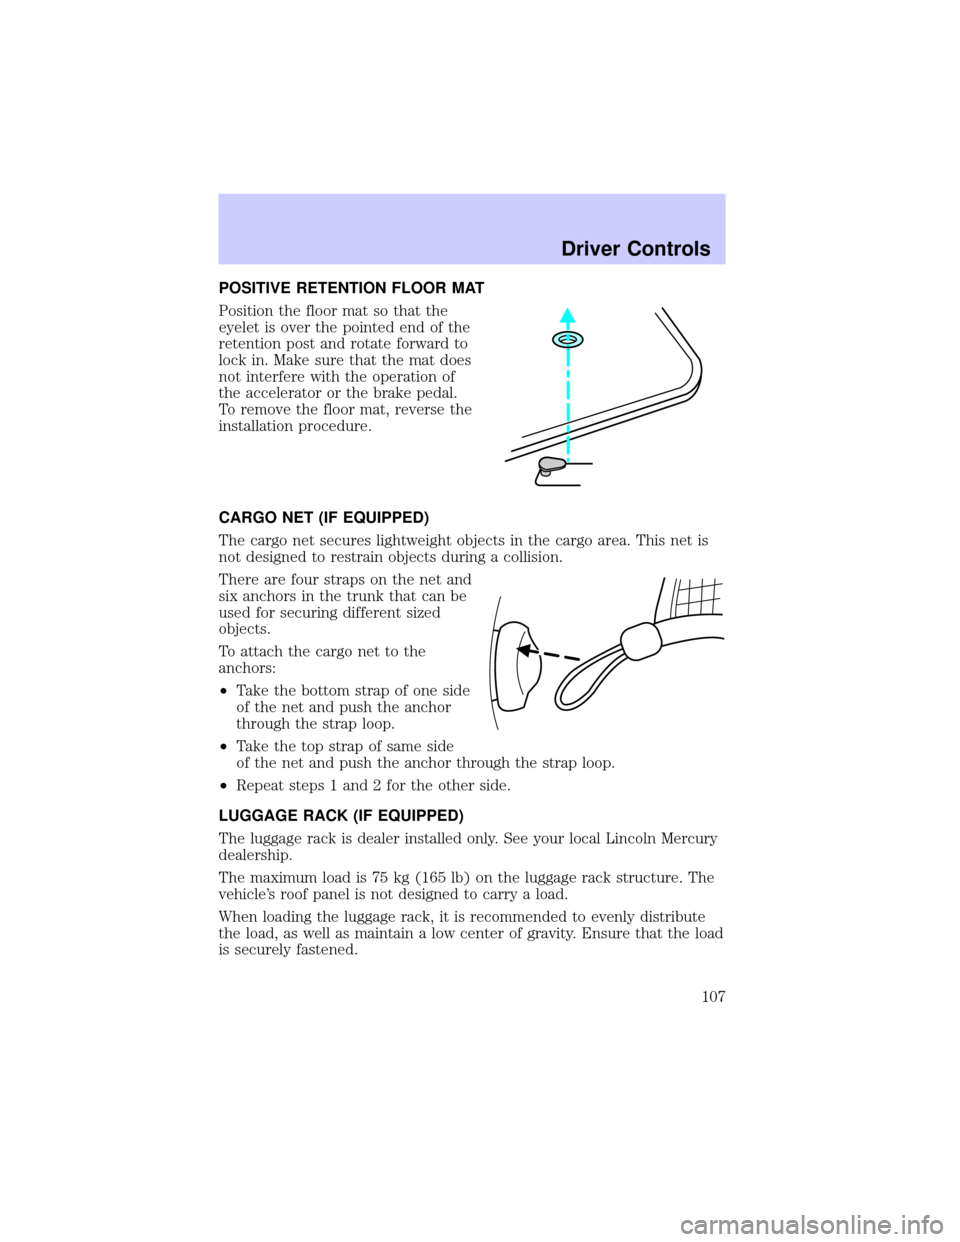
POSITIVE RETENTION FLOOR MAT
Position the floor mat so that the
eyelet is over the pointed end of the
retention post and rotate forward to
lock in. Make sure that the mat does
not interfere with the operation of
the accelerator or the brake pedal.
To remove the floor mat, reverse the
installation procedure.
CARGO NET (IF EQUIPPED)
The cargo net secures lightweight objects in the cargo area. This net is
not designed to restrain objects during a collision.
There are four straps on the net and
six anchors in the trunk that can be
used for securing different sized
objects.
To attach the cargo net to the
anchors:
²Take the bottom strap of one side
of the net and push the anchor
through the strap loop.
²Take the top strap of same side
of the net and push the anchor through the strap loop.
²Repeat steps 1 and 2 for the other side.
LUGGAGE RACK (IF EQUIPPED)
The luggage rack is dealer installed only. See your local Lincoln Mercury
dealership.
The maximum load is 75 kg (165 lb) on the luggage rack structure. The
vehicle's roof panel is not designed to carry a load.
When loading the luggage rack, it is recommended to evenly distribute
the load, as well as maintain a low center of gravity. Ensure that the load
is securely fastened.
Driver Controls
107
Page 108 of 288
KEYS
The vehicle is equipped with two master keys and a valet key lock
system. The master key will access the driver's door, trunk, glove box
and ignition. The valet key will access door and ignition only.
Refer to theSecurilock Passive Anti-Theft Systemsection for
information on Securilock keys.
Valet switch
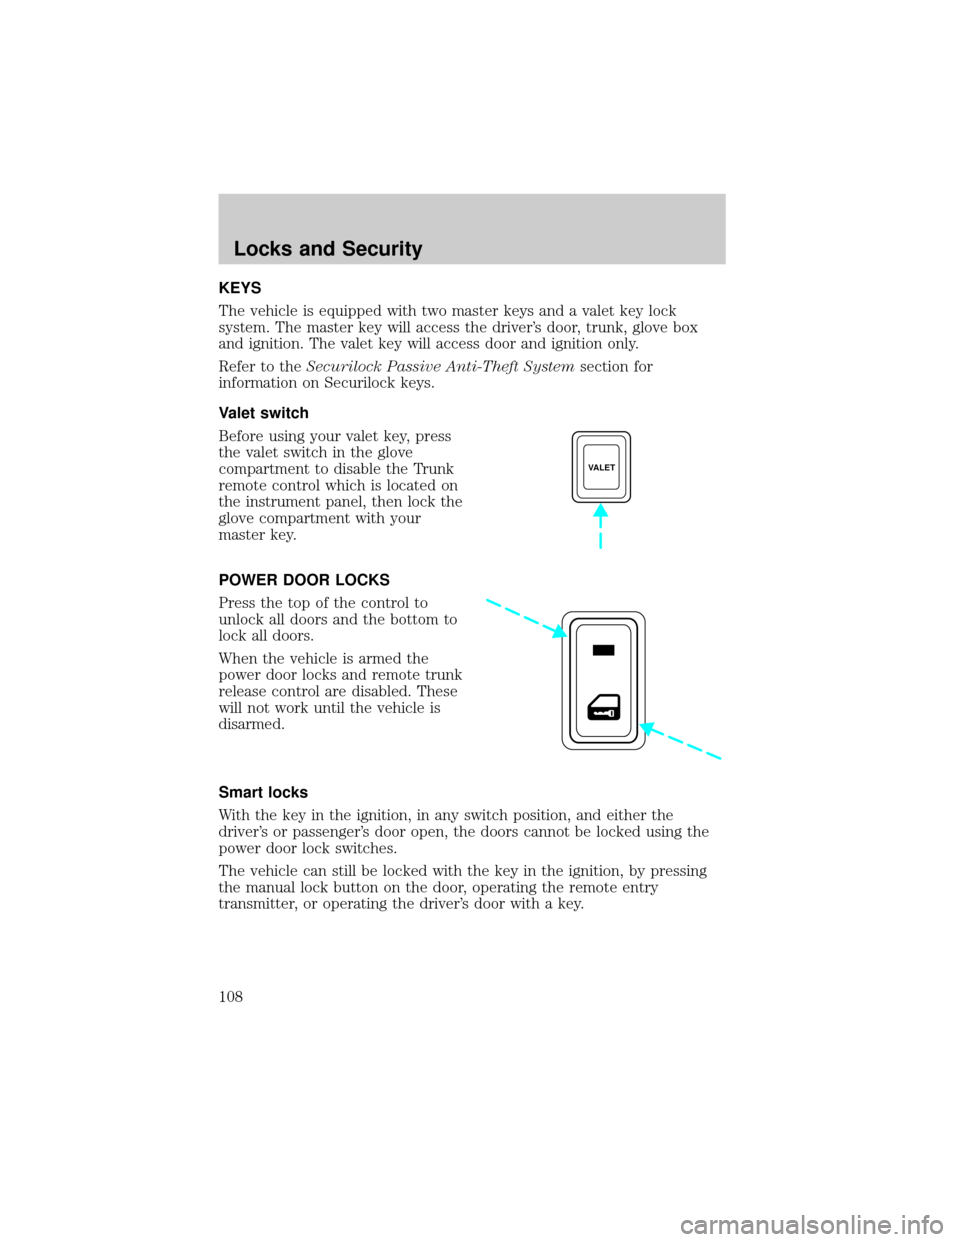
Before using your valet key, press
the valet switch in the glove
compartment to disable the Trunk
remote control which is located on
the instrument panel, then lock the
glove compartment with your
master key.
POWER DOOR LOCKS
Press the top of the control to
unlock all doors and the bottom to
lock all doors.
When the vehicle is armed the
power door locks and remote trunk
release control are disabled. These
will not work until the vehicle is
disarmed.
Smart locks
With the key in the ignition, in any switch position, and either the
driver's or passenger's door open, the doors cannot be locked using the
power door lock switches.
The vehicle can still be locked with the key in the ignition, by pressing
the manual lock button on the door, operating the remote entry
transmitter, or operating the driver's door with a key.
VALET
Locks and Security
108
Page 109 of 288
Central locking/Two step unlocking
When unlocking the driver door with the key, turn it once toward the
front of the vehicle to unlock that door only. Turn the key a second time
to unlock all doors. When locking, turn the key toward the back of the
vehicle to lock all doors.
Childproof door locks
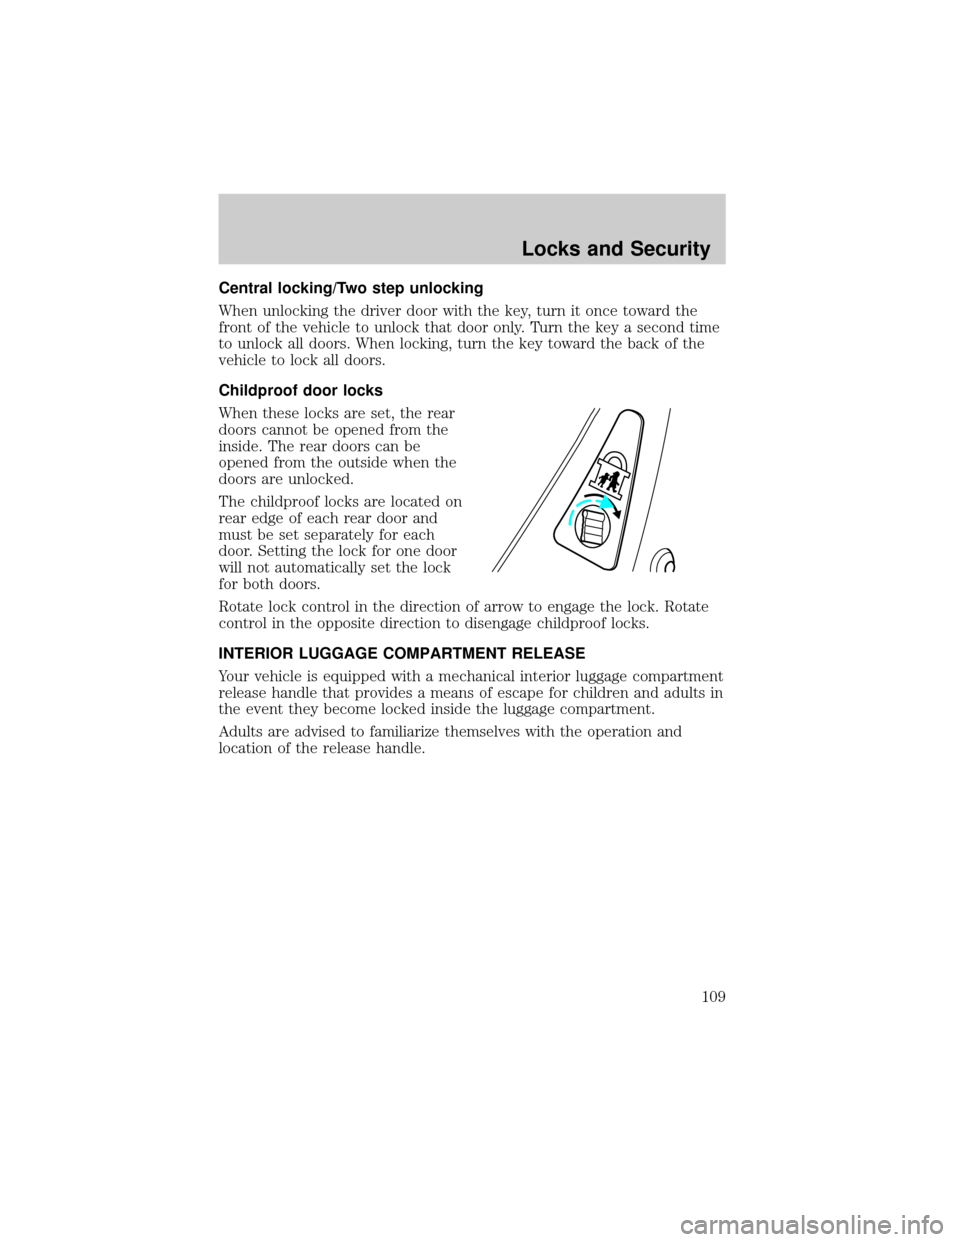
When these locks are set, the rear
doors cannot be opened from the
inside. The rear doors can be
opened from the outside when the
doors are unlocked.
The childproof locks are located on
rear edge of each rear door and
must be set separately for each
door. Setting the lock for one door
will not automatically set the lock
for both doors.
Rotate lock control in the direction of arrow to engage the lock. Rotate
control in the opposite direction to disengage childproof locks.
INTERIOR LUGGAGE COMPARTMENT RELEASE
Your vehicle is equipped with a mechanical interior luggage compartment
release handle that provides a means of escape for children and adults in
the event they become locked inside the luggage compartment.
Adults are advised to familiarize themselves with the operation and
location of the release handle.
Locks and Security
109
Page 110 of 288
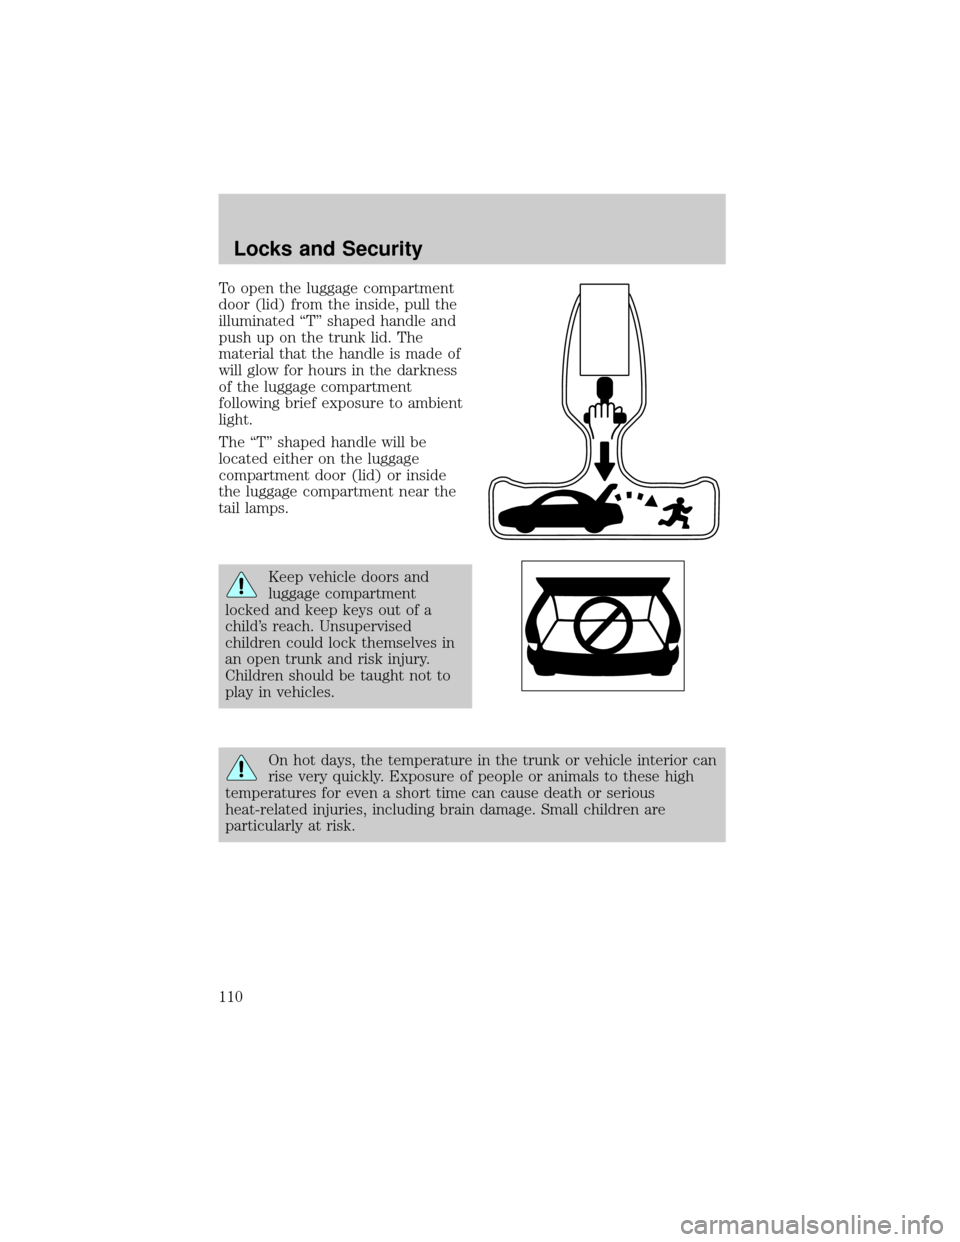
To open the luggage compartment
door (lid) from the inside, pull the
illuminated ªTº shaped handle and
push up on the trunk lid. The
material that the handle is made of
will glow for hours in the darkness
of the luggage compartment
following brief exposure to ambient
light.
The ªTº shaped handle will be
located either on the luggage
compartment door (lid) or inside
the luggage compartment near the
tail lamps.
Keep vehicle doors and
luggage compartment
locked and keep keys out of a
child's reach. Unsupervised
children could lock themselves in
an open trunk and risk injury.
Children should be taught not to
play in vehicles.
On hot days, the temperature in the trunk or vehicle interior can
rise very quickly. Exposure of people or animals to these high
temperatures for even a short time can cause death or serious
heat-related injuries, including brain damage. Small children are
particularly at risk.
Locks and Security
110