brake LINCOLN LS 2003 Owners Manual
[x] Cancel search | Manufacturer: LINCOLN, Model Year: 2003, Model line: LS, Model: LINCOLN LS 2003Pages: 288, PDF Size: 3.19 MB
Page 2 of 288
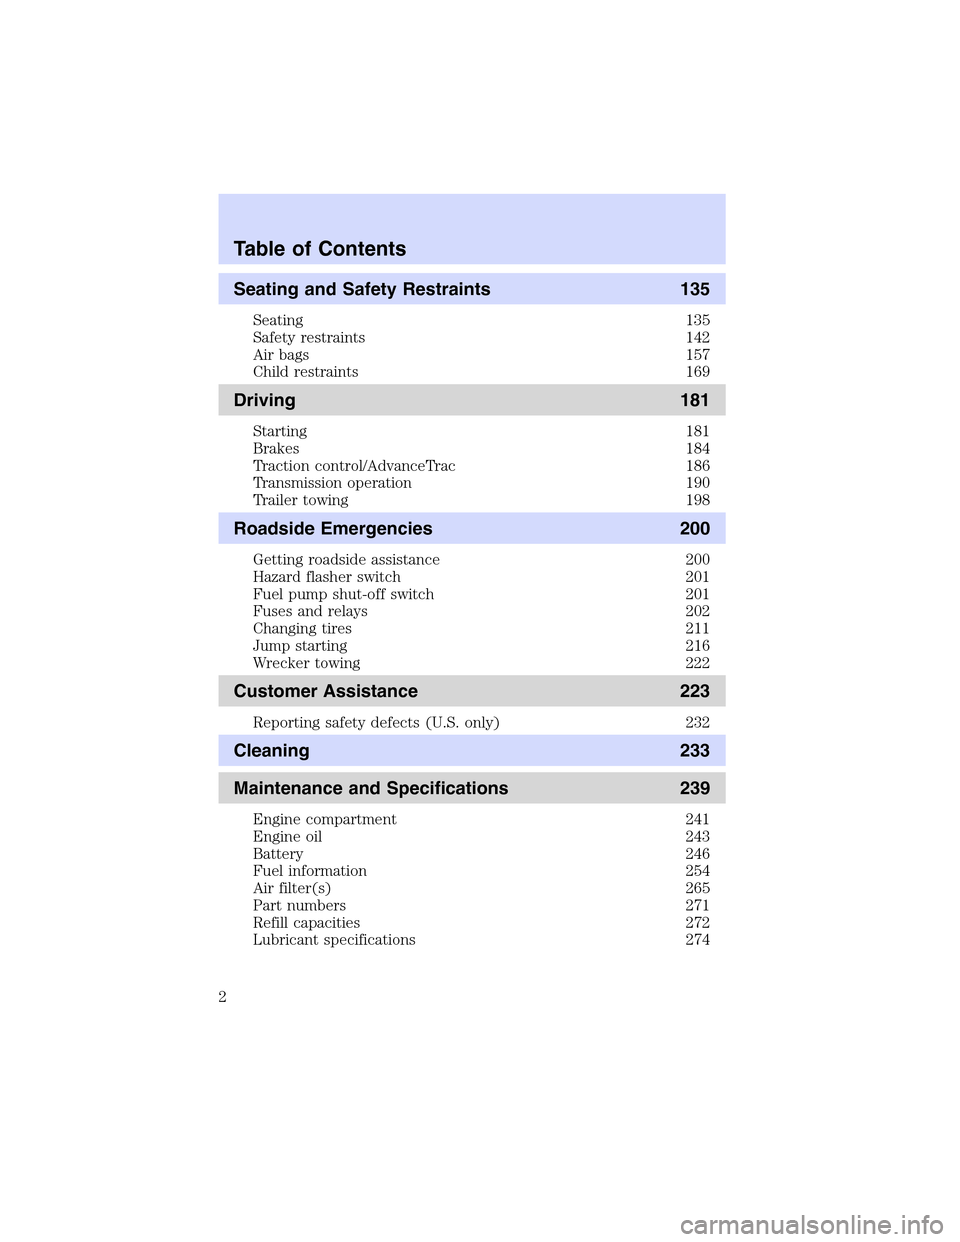
Seating and Safety Restraints 135
Seating 135
Safety restraints 142
Air bags 157
Child restraints 169
Driving 181
Starting 181
Brakes 184
Traction control/AdvanceTrac 186
Transmission operation 190
Trailer towing 198
Roadside Emergencies 200
Getting roadside assistance 200
Hazard flasher switch 201
Fuel pump shut-off switch 201
Fuses and relays 202
Changing tires 211
Jump starting 216
Wrecker towing 222
Customer Assistance 223
Reporting safety defects (U.S. only) 232
Cleaning 233
Maintenance and Specifications 239
Engine compartment 241
Engine oil 243
Battery 246
Fuel information 254
Air filter(s) 265
Part numbers 271
Refill capacities 272
Lubricant specifications 274
Table of Contents
2
Page 6 of 288
SPECIAL NOTICES
Emission warranty
The New Vehicle Limited Warranty includes Bumper-to-Bumper
Coverage, Safety Restraint Coverage, Corrosion Coverage, and 7.3L
Power Stroke Diesel Engine Coverage. In addition, your vehicle is eligible
for Emissions Defect and Emissions Performance Warranties. For a
detailed description of what is covered and what is not covered, refer to
theWarranty Guidethat is provided to you along with your Owner’s
Guide.
Special instructions
For your added safety, your vehicle is fitted with sophisticated electronic
controls.
Please read the sectionSupplemental Restraint System (SRS)
in theSeating and safety restraintschapter. Failure to follow
the specific warnings and instructions could result in personal injury.
Front seat mounted rear facing child or infant seats should
NEVERbe used in front of a passenger side air bag unless the
air bag can be and is turned OFF.
Data Recording
Computers in your vehicle are capable of recording detailed data
potentially including but not limited to information such as:
•the use of restraint systems including seat belts by the driver and
passengers,
•information about the performance of various systems and modules in
the vehicle, and
•information related to engine, throttle, steering, brake or other system
status.
Any of this information could potentially include information regarding
how the driver operates the vehicle potentially including but not limited
to information regarding vehicle speed, brake or accelerator application
or steering input. This information may be stored during regular
operation or in a crash or near crash event.
Introduction
6
Page 8 of 288
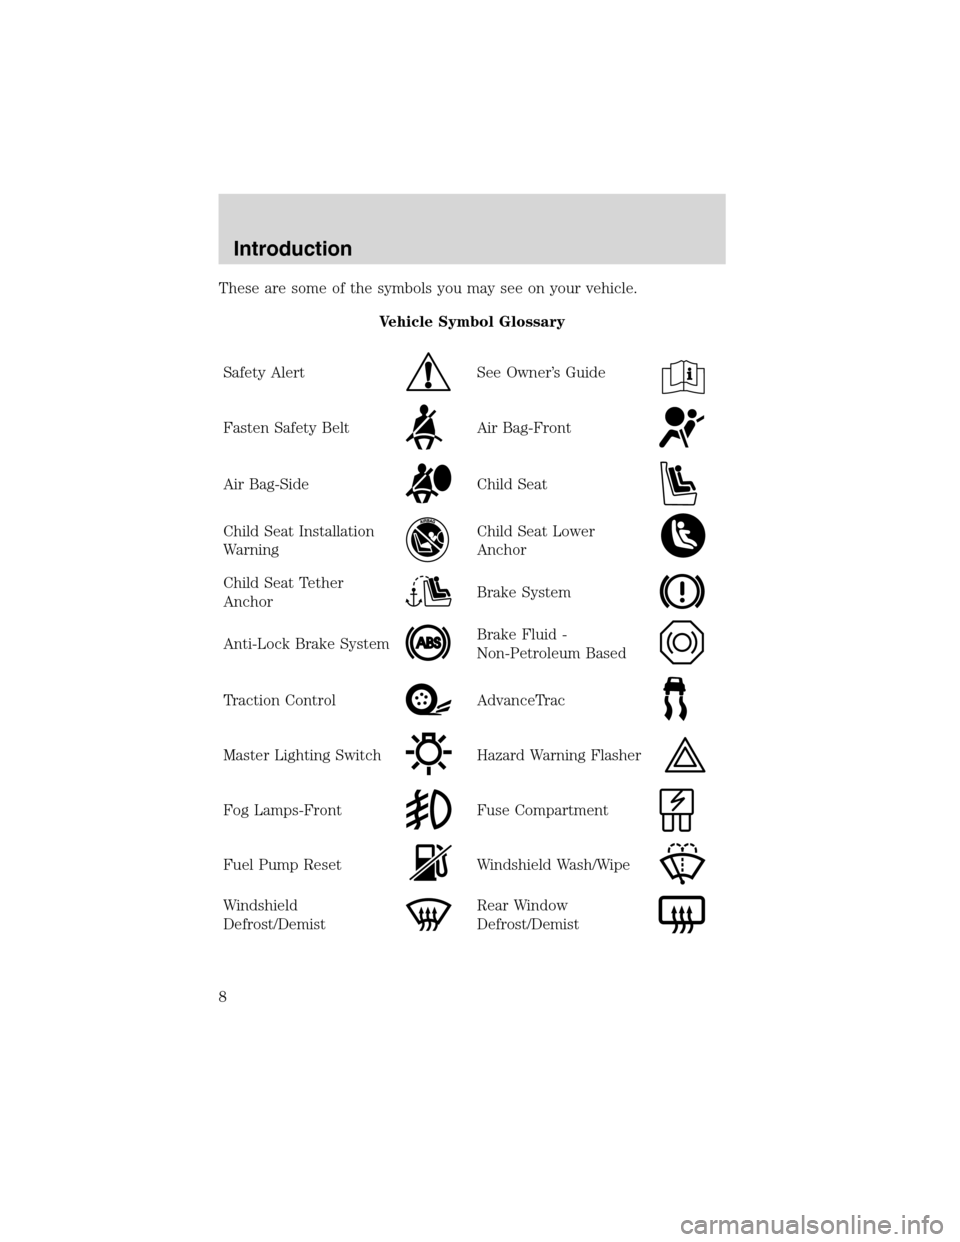
These are some of the symbols you may see on your vehicle.
Vehicle Symbol Glossary
Safety Alert
See Owner’s Guide
Fasten Safety BeltAir Bag-Front
Air Bag-SideChild Seat
Child Seat Installation
WarningChild Seat Lower
Anchor
Child Seat Tether
AnchorBrake System
Anti-Lock Brake SystemBrake Fluid -
Non-Petroleum Based
Traction ControlAdvanceTrac
Master Lighting SwitchHazard Warning Flasher
Fog Lamps-FrontFuse Compartment
Fuel Pump ResetWindshield Wash/Wipe
Windshield
Defrost/DemistRear Window
Defrost/Demist
Introduction
8
Page 11 of 288
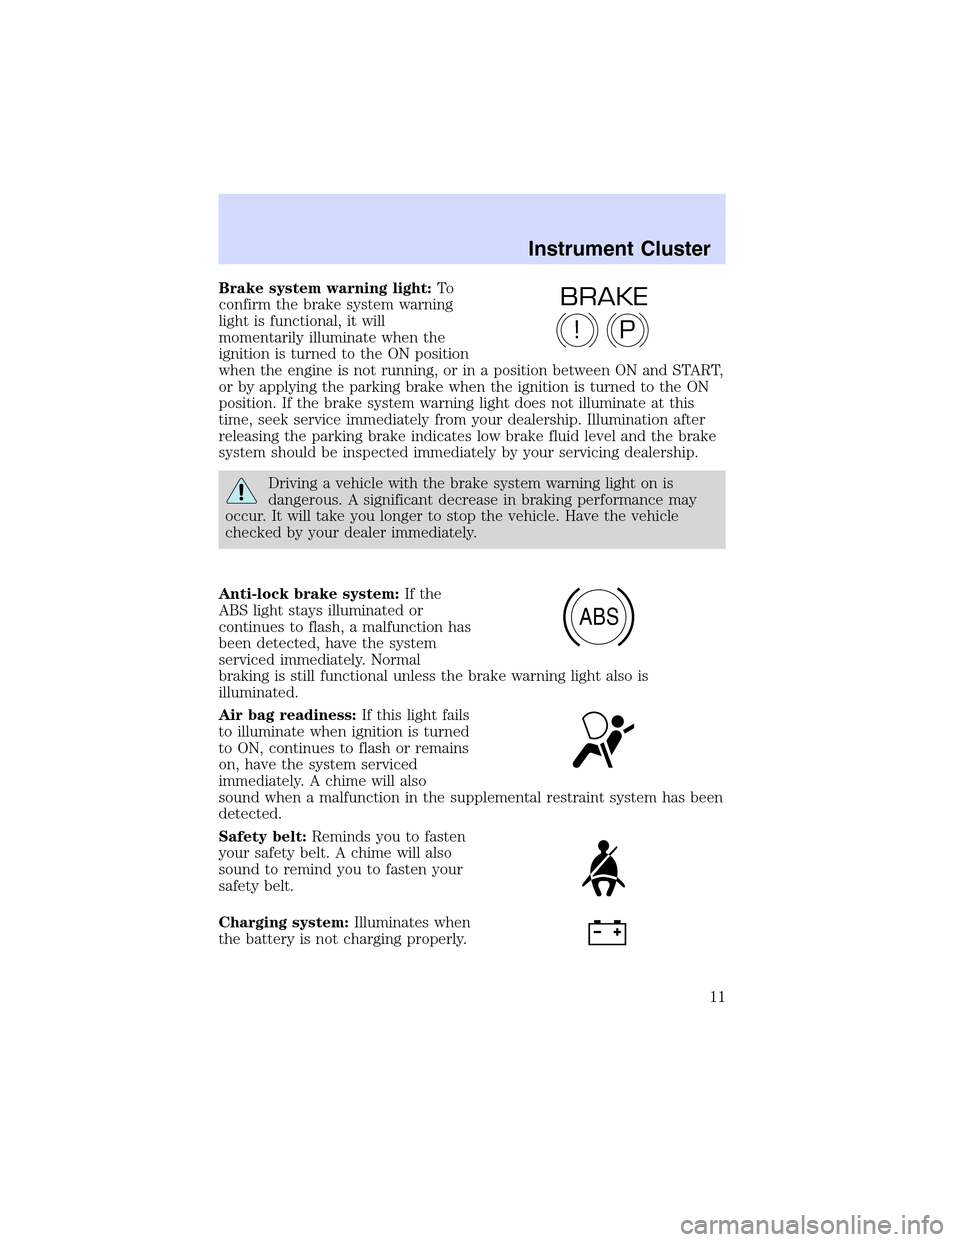
Brake system warning light:To
confirm the brake system warning
light is functional, it will
momentarily illuminate when the
ignition is turned to the ON position
when the engine is not running, or in a position between ON and START,
or by applying the parking brake when the ignition is turned to the ON
position. If the brake system warning light does not illuminate at this
time, seek service immediately from your dealership. Illumination after
releasing the parking brake indicates low brake fluid level and the brake
system should be inspected immediately by your servicing dealership.
Driving a vehicle with the brake system warning light on is
dangerous. A significant decrease in braking performance may
occur. It will take you longer to stop the vehicle. Have the vehicle
checked by your dealer immediately.
Anti-lock brake system:If the
ABS light stays illuminated or
continues to flash, a malfunction has
been detected, have the system
serviced immediately. Normal
braking is still functional unless the brake warning light also is
illuminated.
Air bag readiness:If this light fails
to illuminate when ignition is turned
to ON, continues to flash or remains
on, have the system serviced
immediately. A chime will also
sound when a malfunction in the supplemental restraint system has been
detected.
Safety belt:Reminds you to fasten
your safety belt. A chime will also
sound to remind you to fasten your
safety belt.
Charging system:Illuminates when
the battery is not charging properly.
P!
BRAKE
ABS
Instrument Cluster
11
Page 13 of 288
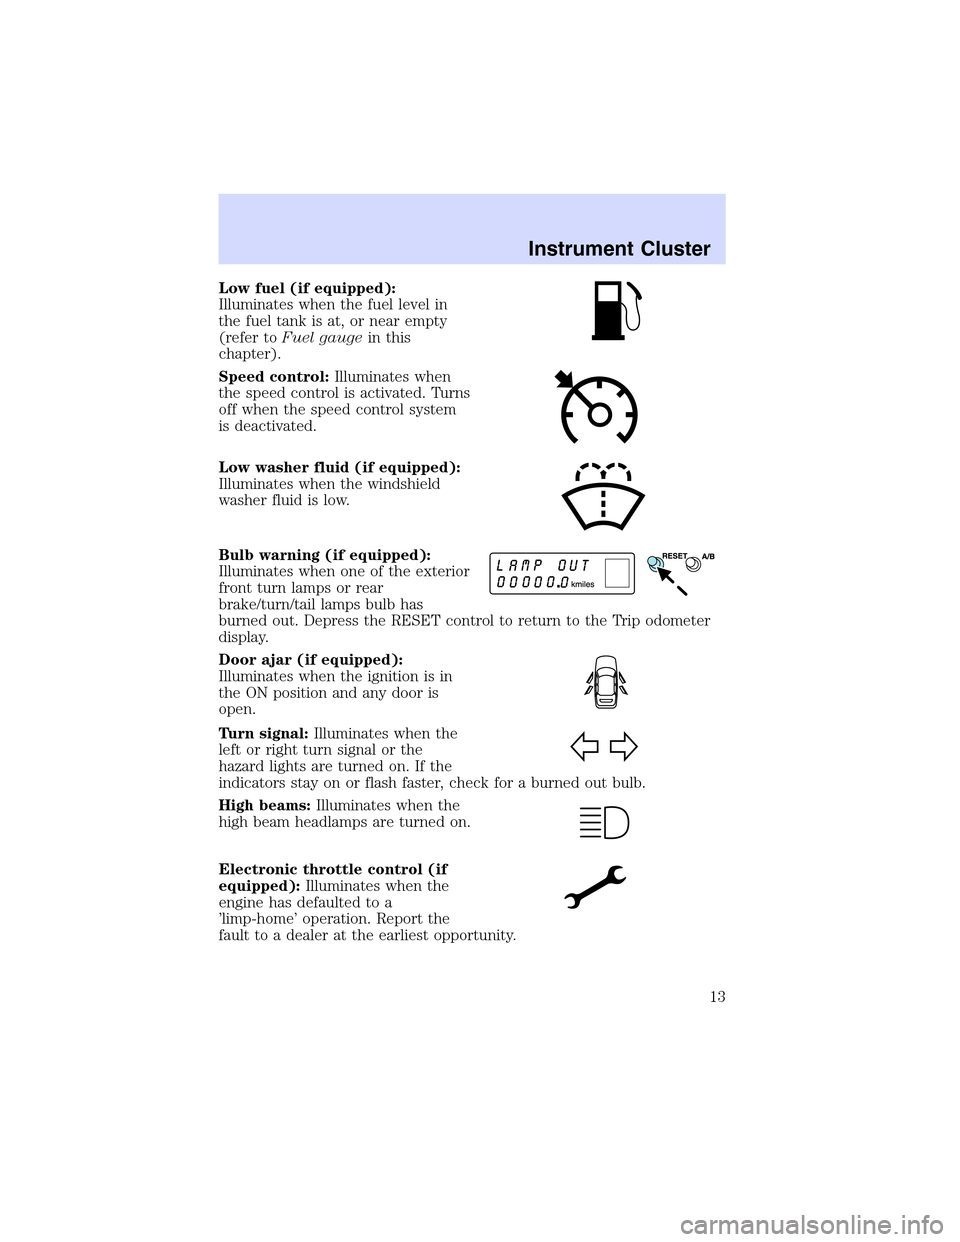
Low fuel (if equipped):
Illuminates when the fuel level in
the fuel tank is at, or near empty
(refer toFuel gaugein this
chapter).
Speed control:Illuminates when
the speed control is activated. Turns
off when the speed control system
is deactivated.
Low washer fluid (if equipped):
Illuminates when the windshield
washer fluid is low.
Bulb warning (if equipped):
Illuminates when one of the exterior
front turn lamps or rear
brake/turn/tail lamps bulb has
burned out. Depress the RESET control to return to the Trip odometer
display.
Door ajar (if equipped):
Illuminates when the ignition is in
the ON position and any door is
open.
Turn signal:Illuminates when the
left or right turn signal or the
hazard lights are turned on. If the
indicators stay on or flash faster, check for a burned out bulb.
High beams:Illuminates when the
high beam headlamps are turned on.
Electronic throttle control (if
equipped):Illuminates when the
engine has defaulted to a
’limp-home’operation. Report the
fault to a dealer at the earliest opportunity.
Instrument Cluster
13
Page 82 of 288
Function Trade Number
Foglamp 9145
Tail lamp, brakelamp, side lamp 3157K
Rear turn lamp 3157 A/K (amber)
Backup lamp 921
License plate lamp 168
High-mount brakelamp 3W4Z–13A613–AA
Map lamp (with moon roof) 906
Rail lamp (rear) 168
Map lamp (front) 906
Sun visor lighted mirror lamp Part # E9SB-13465-BA
Glove compartment 194
Ashtray 194
Luggage compartment lamp 212-2
All replacement bulbs are clear in color except where noted.
To replace all instrument panel lights - see your dealer.
Interior bulbs
Check the operation of all bulbs frequently.
Map lamps
For bulb replacement, see a qualified service technician or your dealer.
Replacing headlamp bulbs
The headlamp assembly contains the low beam bulb, the high beam bulb,
park/turn lamp bulb and led side marker. To replace any of these items,
the headlamp assembly must be removed from the vehicle as follows:
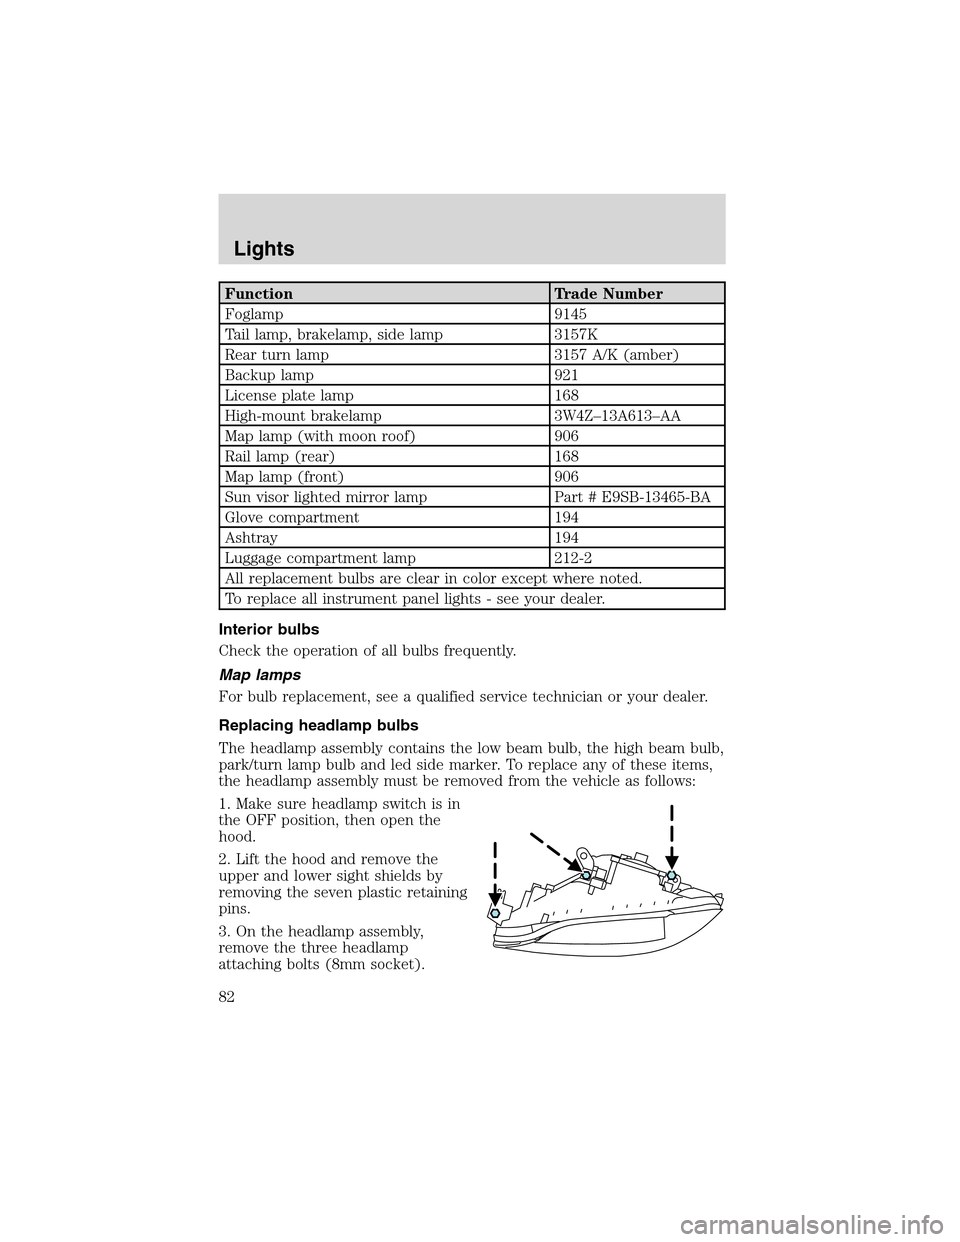
1. Make sure headlamp switch is in
the OFF position, then open the
hood.
2. Lift the hood and remove the
upper and lower sight shields by
removing the seven plastic retaining
pins.
3. On the headlamp assembly,
remove the three headlamp
attaching bolts (8mm socket).
Lights
82
Page 85 of 288
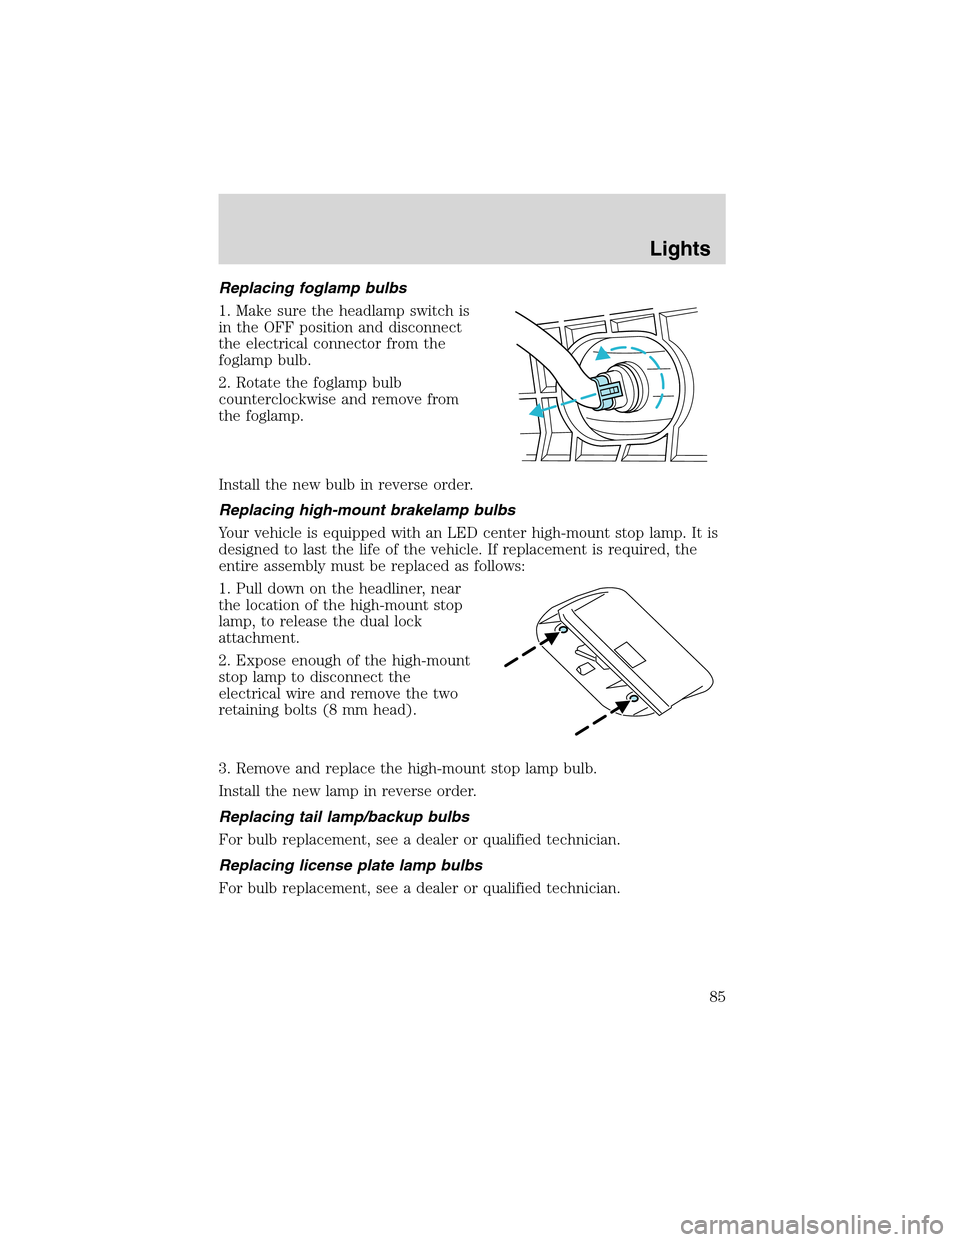
Replacing foglamp bulbs
1. Make sure the headlamp switch is
in the OFF position and disconnect
the electrical connector from the
foglamp bulb.
2. Rotate the foglamp bulb
counterclockwise and remove from
the foglamp.
Install the new bulb in reverse order.
Replacing high-mount brakelamp bulbs
Your vehicle is equipped with an LED center high-mount stop lamp. It is
designed to last the life of the vehicle. If replacement is required, the
entire assembly must be replaced as follows:
1. Pull down on the headliner, near
the location of the high-mount stop
lamp, to release the dual lock
attachment.
2. Expose enough of the high-mount
stop lamp to disconnect the
electrical wire and remove the two
retaining bolts (8 mm head).
3. Remove and replace the high-mount stop lamp bulb.
Install the new lamp in reverse order.
Replacing tail lamp/backup bulbs
For bulb replacement, see a dealer or qualified technician.
Replacing license plate lamp bulbs
For bulb replacement, see a dealer or qualified technician.
Lights
85
Page 95 of 288
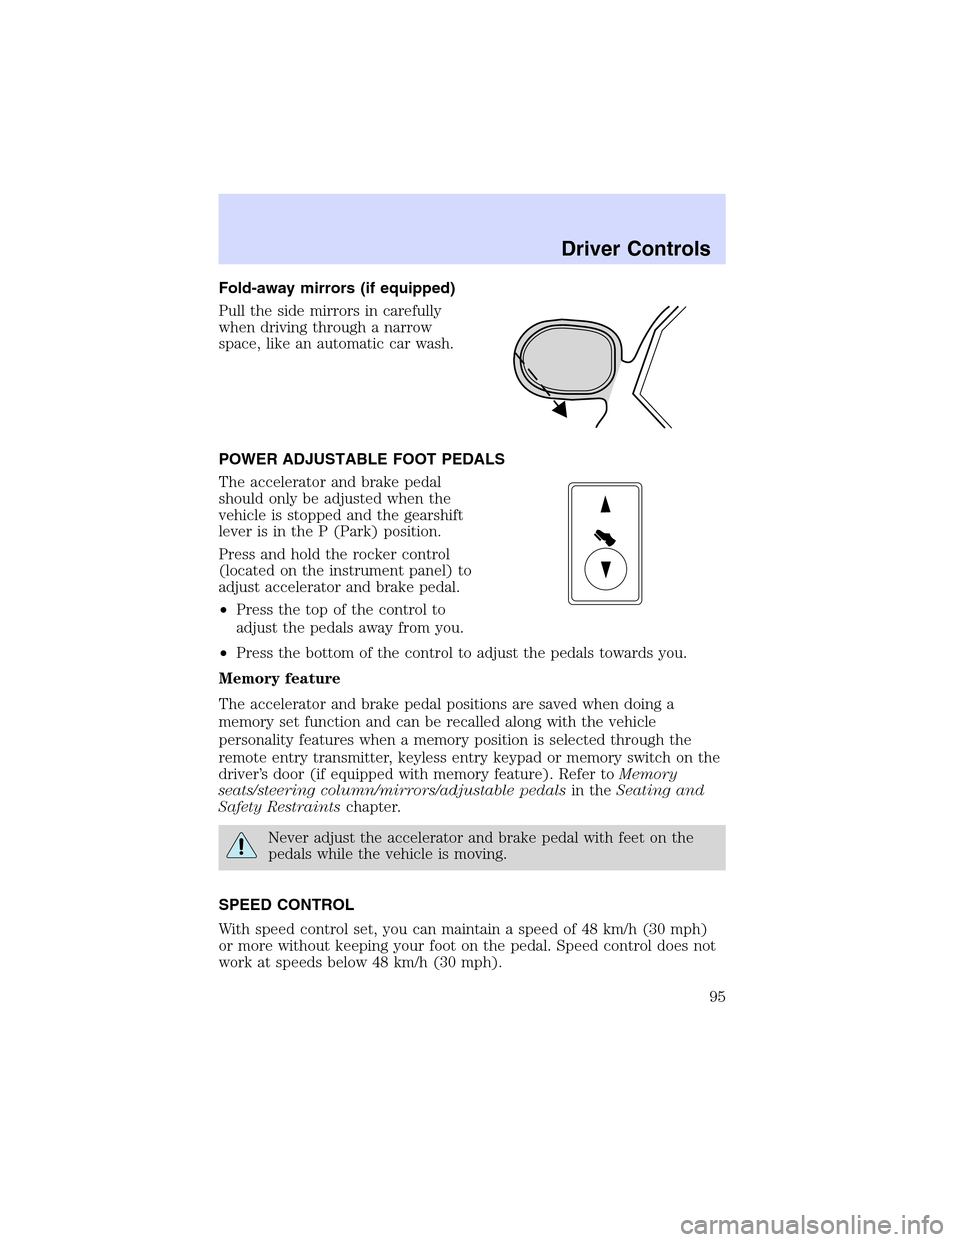
Fold-away mirrors (if equipped)
Pull the side mirrors in carefully
when driving through a narrow
space, like an automatic car wash.
POWER ADJUSTABLE FOOT PEDALS
The accelerator and brake pedal
should only be adjusted when the
vehicle is stopped and the gearshift
lever is in the P (Park) position.
Press and hold the rocker control
(located on the instrument panel) to
adjust accelerator and brake pedal.
•Press the top of the control to
adjust the pedals away from you.
•Press the bottom of the control to adjust the pedals towards you.
Memory feature
The accelerator and brake pedal positions are saved when doing a
memory set function and can be recalled along with the vehicle
personality features when a memory position is selected through the
remote entry transmitter, keyless entry keypad or memory switch on the
driver’s door (if equipped with memory feature). Refer toMemory
seats/steering column/mirrors/adjustable pedalsin theSeating and
Safety Restraintschapter.
Never adjust the accelerator and brake pedal with feet on the
pedals while the vehicle is moving.
SPEED CONTROL
With speed control set, you can maintain a speed of 48 km/h (30 mph)
or more without keeping your foot on the pedal. Speed control does not
work at speeds below 48 km/h (30 mph).
Driver Controls
95
Page 96 of 288
Do not use the speed control in heavy traffic or on roads that
are winding, slippery or unpaved.
Setting speed control
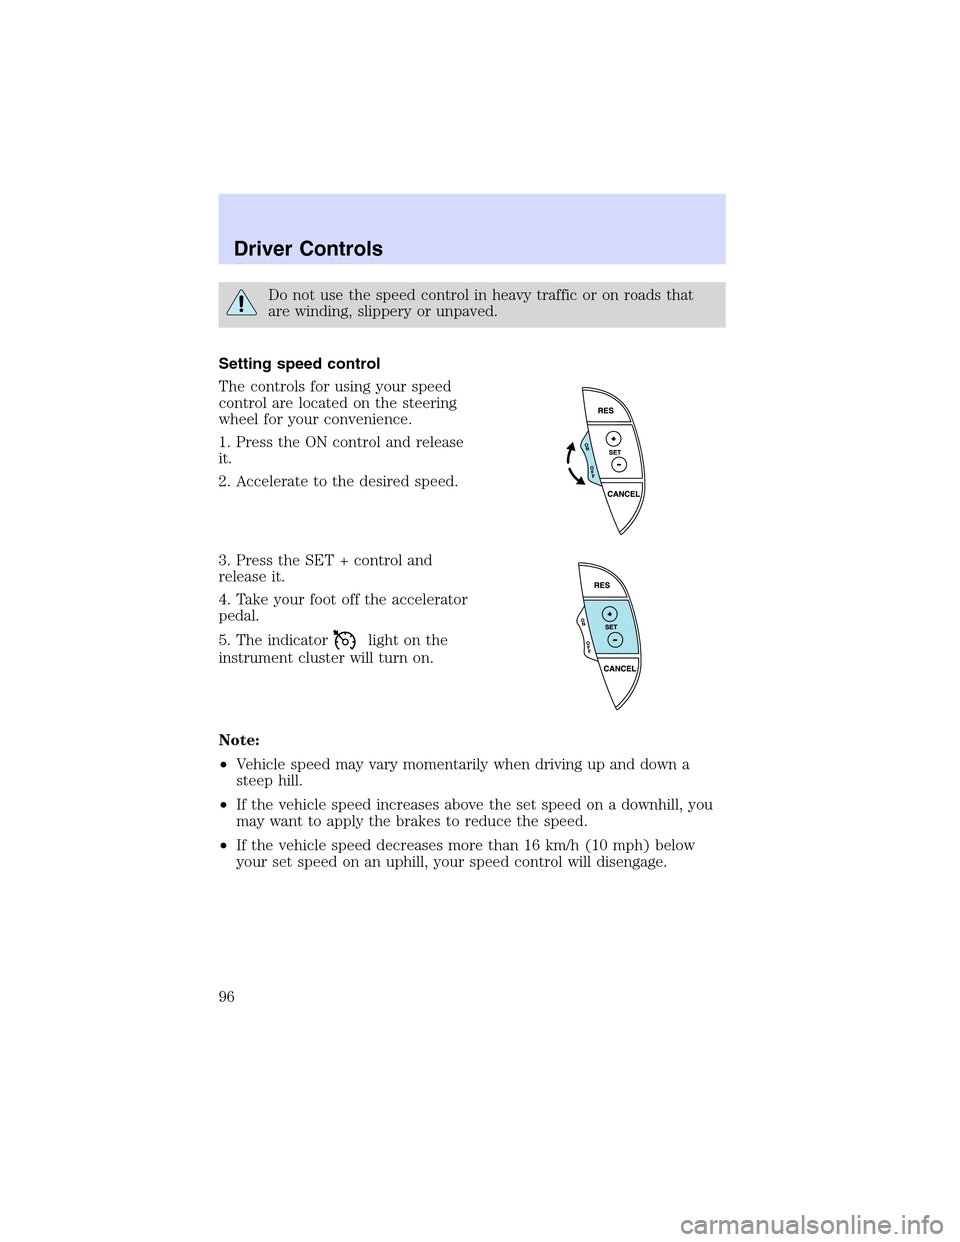
The controls for using your speed
control are located on the steering
wheel for your convenience.
1. Press the ON control and release
it.
2. Accelerate to the desired speed.
3. Press the SET + control and
release it.
4. Take your foot off the accelerator
pedal.
5. The indicator
light on the
instrument cluster will turn on.
Note:
•Vehicle speed may vary momentarily when driving up and down a
steep hill.
•If the vehicle speed increases above the set speed on a downhill, you
may want to apply the brakes to reduce the speed.
•If the vehicle speed decreases more than 16 km/h (10 mph) below
your set speed on an uphill, your speed control will disengage.
Driver Controls
96
Page 98 of 288
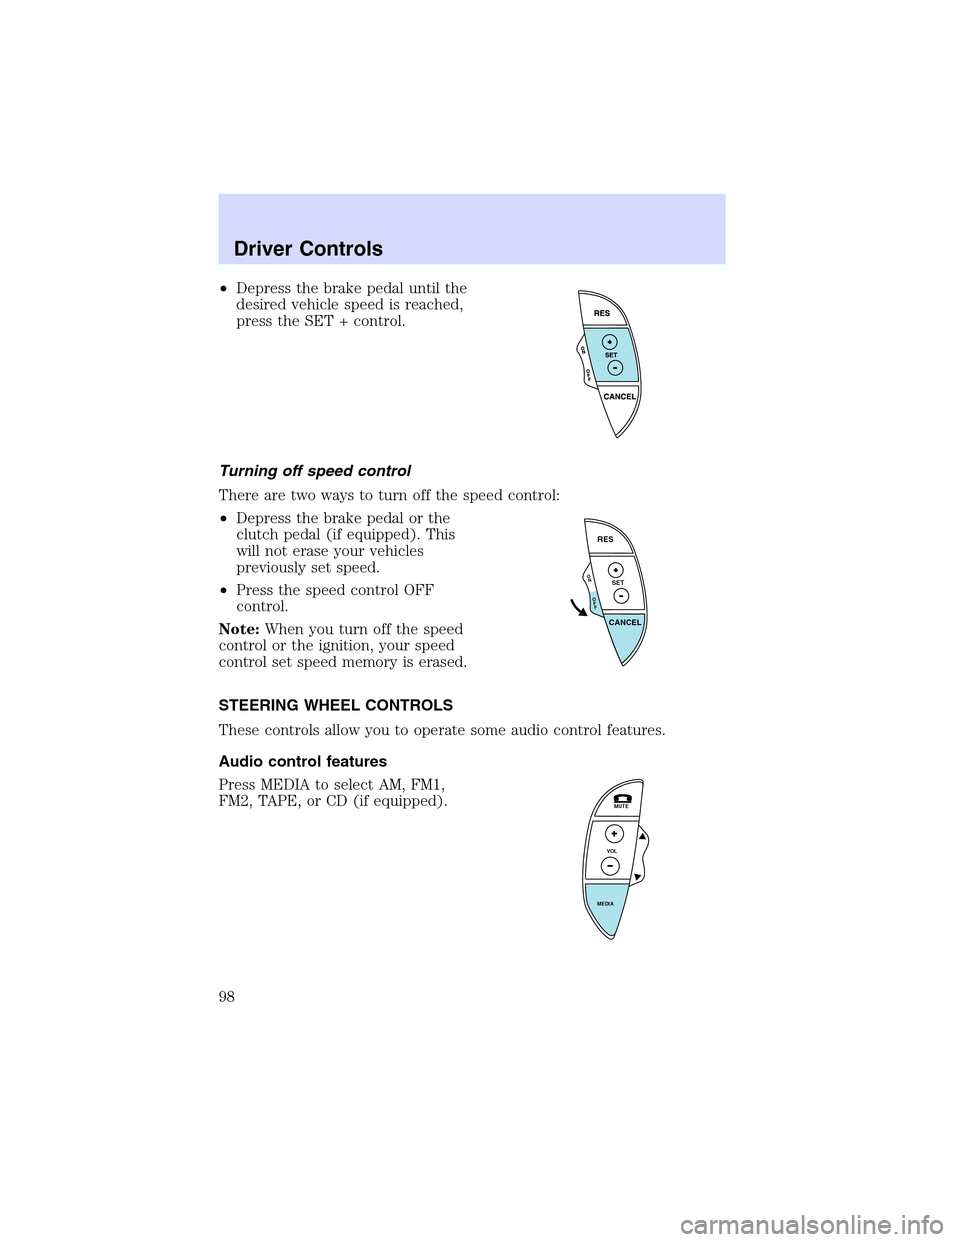
•Depress the brake pedal until the
desired vehicle speed is reached,
press the SET + control.
Turning off speed control
There are two ways to turn off the speed control:
•Depress the brake pedal or the
clutch pedal (if equipped). This
will not erase your vehicles
previously set speed.
•Press the speed control OFF
control.
Note:When you turn off the speed
control or the ignition, your speed
control set speed memory is erased.
STEERING WHEEL CONTROLS
These controls allow you to operate some audio control features.
Audio control features
Press MEDIA to select AM, FM1,
FM2, TAPE, or CD (if equipped).
O
N
O
F
F
RES
SET
CANCEL
MUTE
VOL
MEDIA
Driver Controls
98