clock LINCOLN MARK LT 2006 User Guide
[x] Cancel search | Manufacturer: LINCOLN, Model Year: 2006, Model line: MARK LT, Model: LINCOLN MARK LT 2006Pages: 256, PDF Size: 2.81 MB
Page 128 of 256
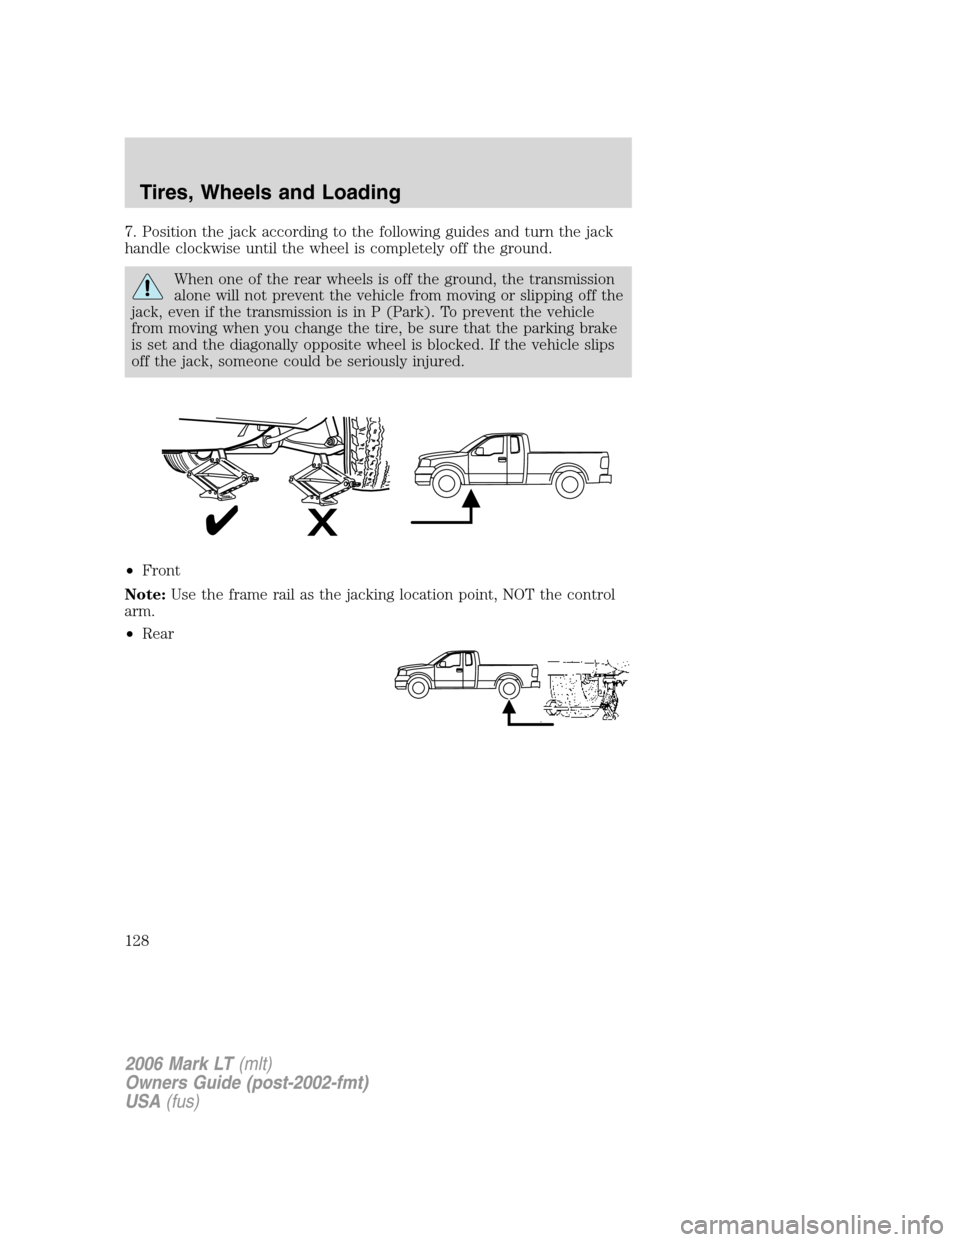
7. Position the jack according to the following guides and turn the jack
handle clockwise until the wheel is completely off the ground.
When one of the rear wheels is off the ground, the transmission
alone will not prevent the vehicle from moving or slipping off the
jack, even if the transmission is in P (Park). To prevent the vehicle
from moving when you change the tire, be sure that the parking brake
is set and the diagonally opposite wheel is blocked. If the vehicle slips
off the jack, someone could be seriously injured.
•Front
Note:Use the frame rail as the jacking location point, NOT the control
arm.
•Rear
2006 Mark LT(mlt)
Owners Guide (post-2002-fmt)
USA(fus)
Tires, Wheels and Loading
128
Page 129 of 256
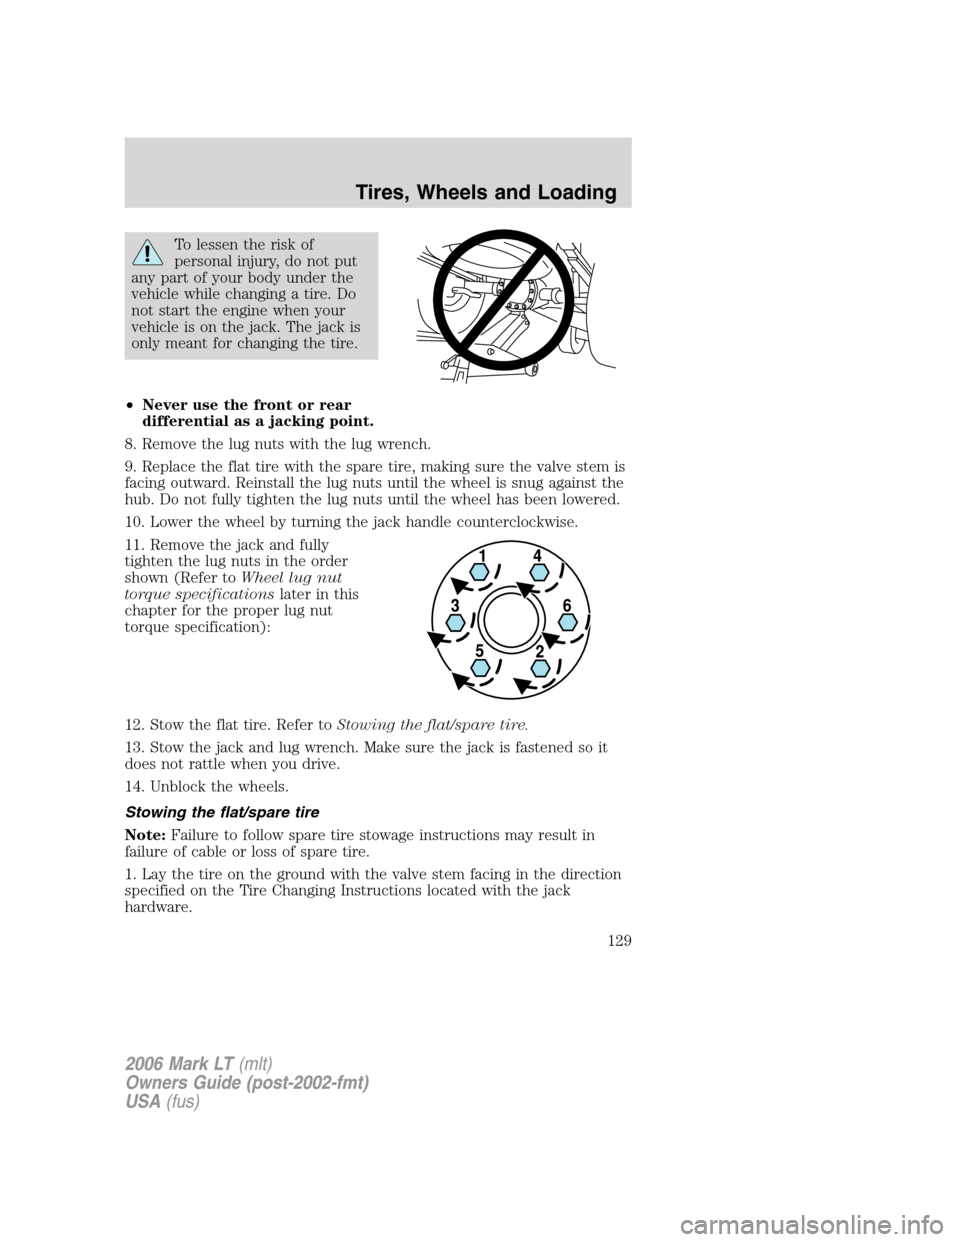
To lessen the risk of
personal injury, do not put
any part of your body under the
vehicle while changing a tire. Do
not start the engine when your
vehicle is on the jack. The jack is
only meant for changing the tire.
•Never use the front or rear
differential as a jacking point.
8. Remove the lug nuts with the lug wrench.
9. Replace the flat tire with the spare tire, making sure the valve stem is
facing outward. Reinstall the lug nuts until the wheel is snug against the
hub. Do not fully tighten the lug nuts until the wheel has been lowered.
10. Lower the wheel by turning the jack handle counterclockwise.
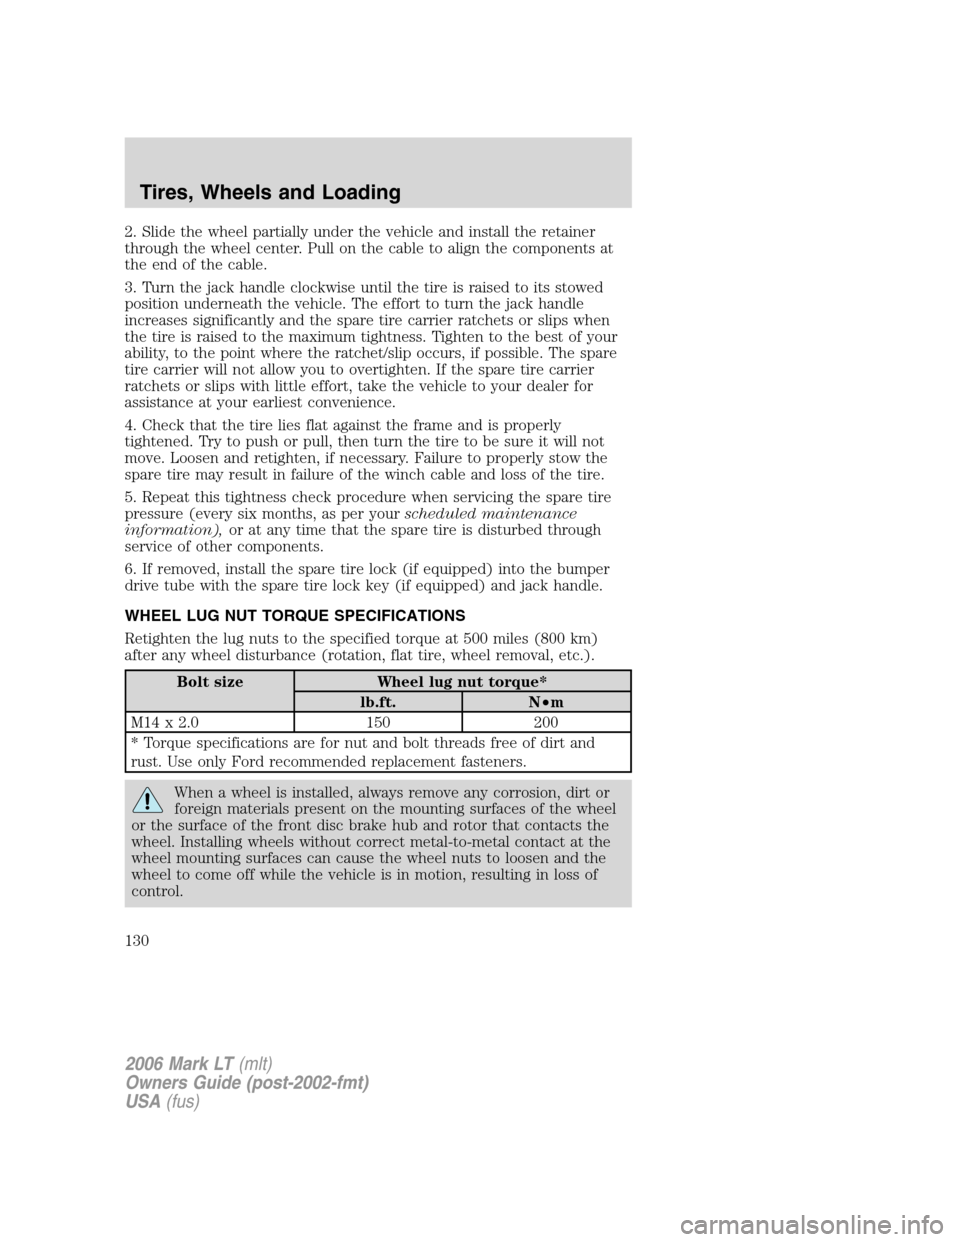
11. Remove the jack and fully
tighten the lug nuts in the order
shown (Refer toWheel lug nut
torque specificationslater in this
chapter for the proper lug nut
torque specification):
12. Stow the flat tire. Refer toStowing the flat/spare tire.
13. Stow the jack and lug wrench. Make sure the jack is fastened so it
does not rattle when you drive.
14. Unblock the wheels.
Stowing the flat/spare tire
Note:Failure to follow spare tire stowage instructions may result in
failure of cable or loss of spare tire.
1. Lay the tire on the ground with the valve stem facing in the direction
specified on the Tire Changing Instructions located with the jack
hardware.
2006 Mark LT(mlt)
Owners Guide (post-2002-fmt)
USA(fus)
Tires, Wheels and Loading
129
Page 130 of 256
2. Slide the wheel partially under the vehicle and install the retainer
through the wheel center. Pull on the cable to align the components at
the end of the cable.
3. Turn the jack handle clockwise until the tire is raised to its stowed
position underneath the vehicle. The effort to turn the jack handle
increases significantly and the spare tire carrier ratchets or slips when
the tire is raised to the maximum tightness. Tighten to the best of your
ability, to the point where the ratchet/slip occurs, if possible. The spare
tire carrier will not allow you to overtighten. If the spare tire carrier
ratchets or slips with little effort, take the vehicle to your dealer for
assistance at your earliest convenience.
4. Check that the tire lies flat against the frame and is properly
tightened. Try to push or pull, then turn the tire to be sure it will not
move. Loosen and retighten, if necessary. Failure to properly stow the
spare tire may result in failure of the winch cable and loss of the tire.
5. Repeat this tightness check procedure when servicing the spare tire
pressure (every six months, as per yourscheduled maintenance
information),or at any time that the spare tire is disturbed through
service of other components.
6. If removed, install the spare tire lock (if equipped) into the bumper
drive tube with the spare tire lock key (if equipped) and jack handle.
WHEEL LUG NUT TORQUE SPECIFICATIONS
Retighten the lug nuts to the specified torque at 500 miles (800 km)
after any wheel disturbance (rotation, flat tire, wheel removal, etc.).
Bolt size Wheel lug nut torque*
lb.ft. N•m
M14 x 2.0 150 200
* Torque specifications are for nut and bolt threads free of dirt and
rust. Use only Ford recommended replacement fasteners.
When a wheel is installed, always remove any corrosion, dirt or
foreign materials present on the mounting surfaces of the wheel
or the surface of the front disc brake hub and rotor that contacts the
wheel. Installing wheels without correct metal-to-metal contact at the
wheel mounting surfaces can cause the wheel nuts to loosen and the
wheel to come off while the vehicle is in motion, resulting in loss of
control.
2006 Mark LT(mlt)
Owners Guide (post-2002-fmt)
USA(fus)
Tires, Wheels and Loading
130
Page 182 of 256
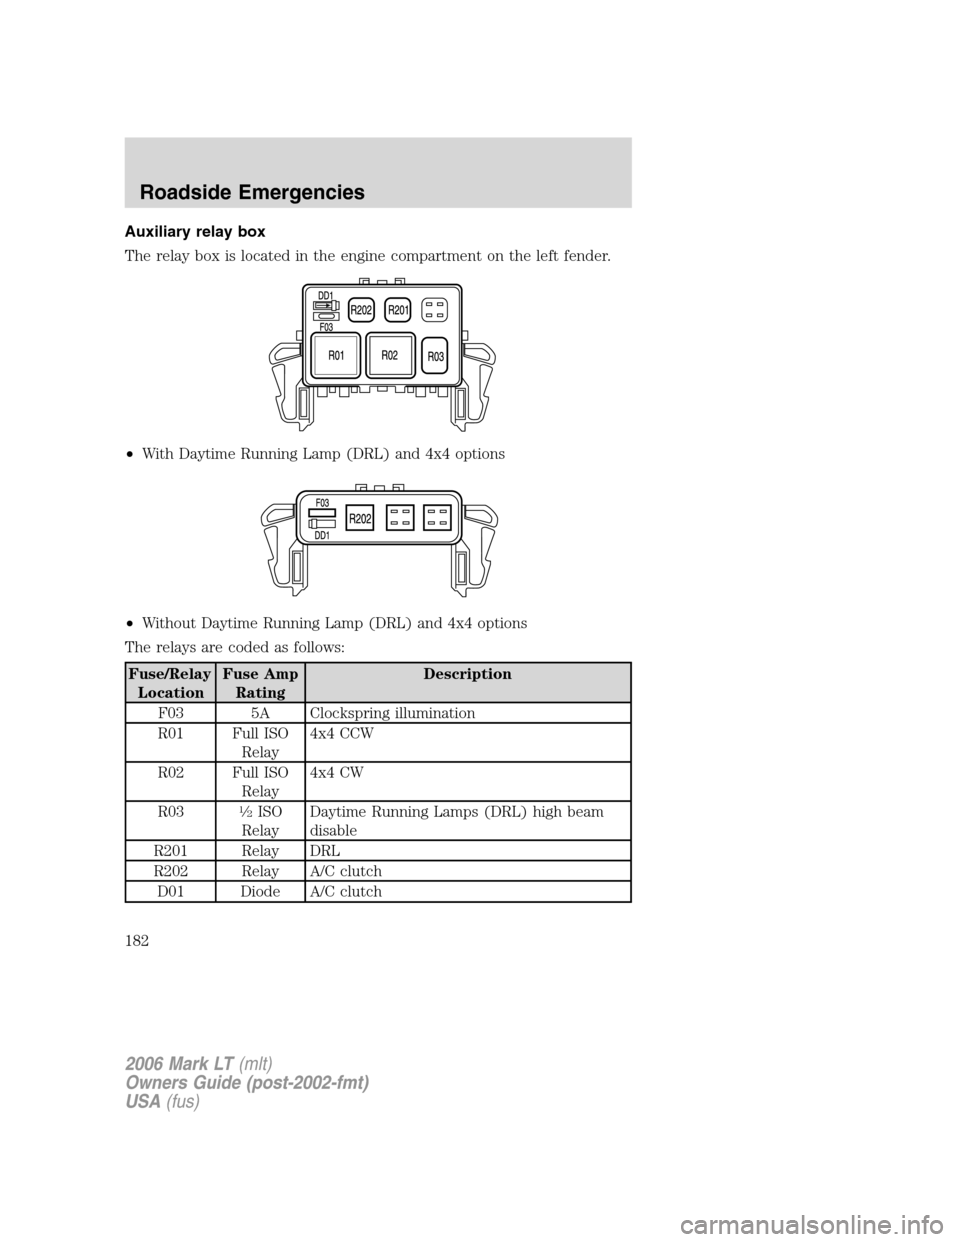
Auxiliary relay box
The relay box is located in the engine compartment on the left fender.
•With Daytime Running Lamp (DRL) and 4x4 options
•Without Daytime Running Lamp (DRL) and 4x4 options
The relays are coded as follows:
Fuse/Relay
LocationFuse Amp
RatingDescription
F03 5A Clockspring illumination
R01 Full ISO
Relay4x4 CCW
R02 Full ISO
Relay4x4 CW
R03
1�2ISO
RelayDaytime Running Lamps (DRL) high beam
disable
R201 Relay DRL
R202 Relay A/C clutch
D01 Diode A/C clutch
2006 Mark LT(mlt)
Owners Guide (post-2002-fmt)
USA(fus)
Roadside Emergencies
182
Page 209 of 256
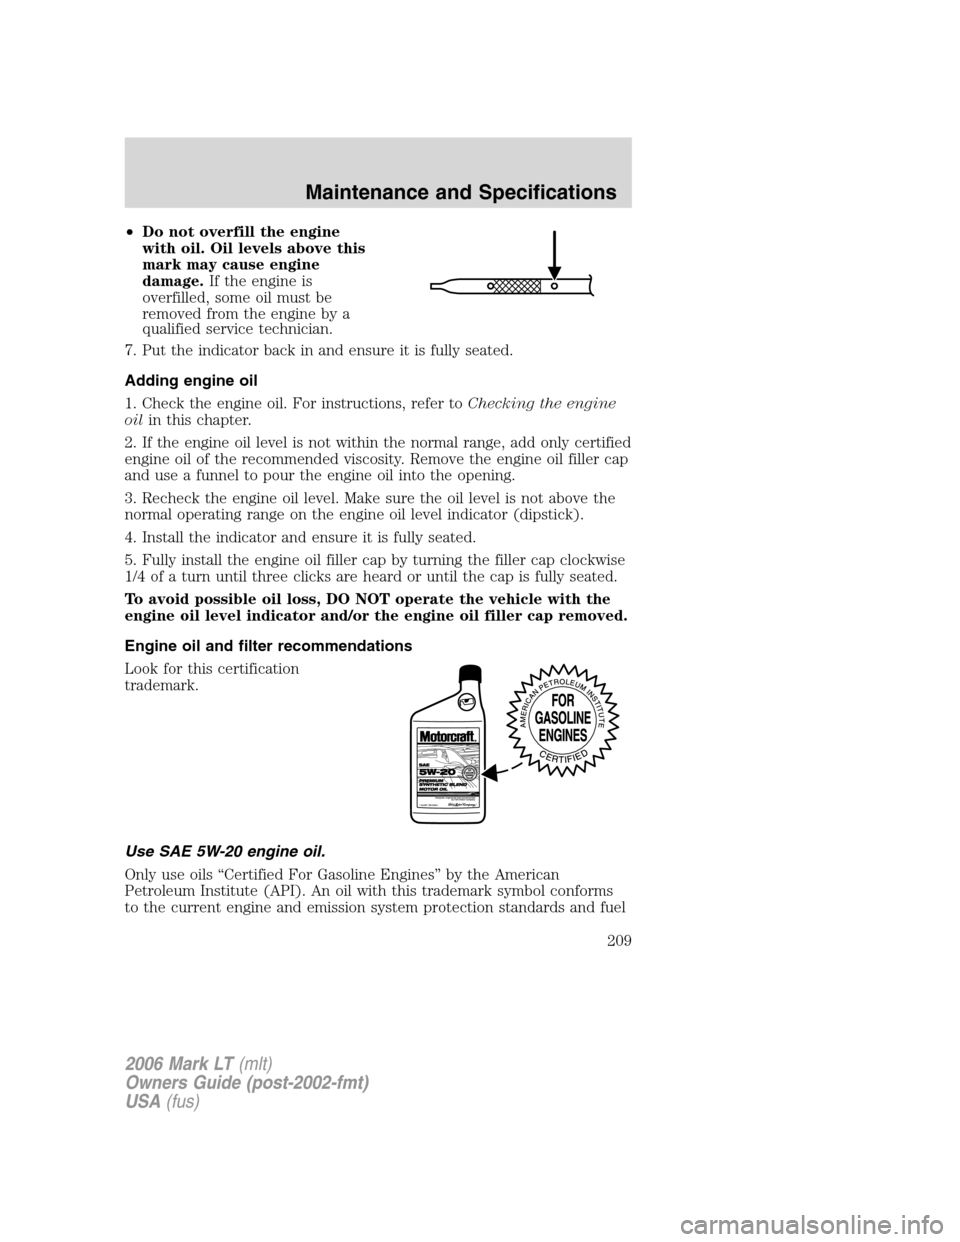
•Do not overfill the engine
with oil. Oil levels above this
mark may cause engine
damage.If the engine is
overfilled, some oil must be
removed from the engine by a
qualified service technician.
7. Put the indicator back in and ensure it is fully seated.
Adding engine oil
1. Check the engine oil. For instructions, refer toChecking the engine
oilin this chapter.
2. If the engine oil level is not within the normal range, add only certified
engine oil of the recommended viscosity. Remove the engine oil filler cap
and use a funnel to pour the engine oil into the opening.
3. Recheck the engine oil level. Make sure the oil level is not above the
normal operating range on the engine oil level indicator (dipstick).
4. Install the indicator and ensure it is fully seated.
5. Fully install the engine oil filler cap by turning the filler cap clockwise
1/4 of a turn until three clicks are heard or until the cap is fully seated.
To avoid possible oil loss, DO NOT operate the vehicle with the
engine oil level indicator and/or the engine oil filler cap removed.
Engine oil and filter recommendations
Look for this certification
trademark.
Use SAE 5W-20 engine oil.
Only use oils “Certified For Gasoline Engines” by the American
Petroleum Institute (API). An oil with this trademark symbol conforms
to the current engine and emission system protection standards and fuel
2006 Mark LT(mlt)
Owners Guide (post-2002-fmt)
USA(fus)
Maintenance and Specifications
209
Page 212 of 256
3. Run the engine until it reaches normal operating temperature.
4. Allow the engine to idle for at least one minute.
5. Turn the A/C on and allow the engine to idle for at least one minute.
6. Release the parking brake. With your foot on the brake pedal and with
the A/C on, put the vehicle in D (Drive) and allow the engine to idle for
at least one minute.
7. Drive the vehicle to complete the relearning process.
•The vehicle may need to be driven 10 miles (16 km) or more to
relearn the idle and fuel trim strategy.
•If you do not allow the engine to relearn its idle trim, the idle
quality of your vehicle may be adversely affected until the idle
trim is eventually relearned.
If the battery has been disconnected or a new battery has been installed,
the clock and radio settings must be reset once the battery is
reconnected.
•Always dispose of automotive
batteries in a responsible manner.
Follow your local authorized
standards for disposal. Call your
local authorized recycling center
to find out more about recycling
automotive batteries.
ENGINE COOLANT
Checking engine coolant
The concentration and level of engine coolant should be checked at the
mileage intervals listed inscheduled maintenance information.The
coolant concentration should be maintained at 50/50 coolant and distilled
water, which equates to a freeze point of -34°F (-36°C). Coolant
concentration testing is possible with a hydrometer or antifreeze tester
(such as the Rotunda Battery and Antifreeze Tester, 014–R1060). The
level of coolant should be maintained at the “FULL COLD” level or
within the “COLD FILL RANGE” in the coolant reservoir. If the level falls
below, add coolant per the instructions in theAdding engine coolant
section.
L
E
A
D
RETURN
RECYCLE
2006 Mark LT(mlt)
Owners Guide (post-2002-fmt)
USA(fus)
Maintenance and Specifications
212
Page 215 of 256
•Do not add extra inhibitors or additives to the coolant.These
can be harmful and compromise the corrosion protection of the engine
coolant.
Add the proper mixture of coolant and water to the “COLD FILL
RANGE” level. Follow these steps to add engine coolant.
To reduce the risk of personal injury, make sure the engine is
cool before unscrewing the coolant pressure relief cap. The
cooling system is under pressure; steam and hot liquid can come out
forcefully when the cap is loosened slightly.
1. Before you begin, turn the engine off and let it cool.
2. When the engine is cool, wrap a thick cloth around the coolant
pressure relief cap on the coolant reservoir (an opaque plastic bottle).
Slowly turn cap counterclockwise (left) until pressure begins to release.
3. Step back while the pressure releases.
4. When you are sure that all the pressure has been released, use the
cloth to turn it counterclockwise and remove the cap.
5. Fill the coolant reservoir slowly with the proper coolant mixture (see
above), to within the “COLD FILL RANGE”.
6. Replace the cap. Turn until tightly installed. Turn cap until click is
heard/felt to ensure it is tightly installed.
After any coolant has been added, check the coolant concentration, refer
toChecking engine coolantsection. If the concentration is not 50/50
(protection to –34° F/–36° C), drain some coolant and adjust the
concentration. It may take several drains and additions to obtain a 50/50
coolant concentration.
Whenever coolant has been added, the coolant level in the coolant
reservoir should be checked the next few times you drive the vehicle. If
necessary, add enough 50/50 concentration of engine coolant and
distilled water to bring the liquid level to the proper level.
If you have to add more than 1.0 quart (1.0 liter) of engine coolant per
month, have your dealer check the engine cooling system. Your cooling
system may have a leak. Operating an engine with a low level of coolant
can result in engine overheating and possible engine damage.
Recycled engine coolant
Ford Motor Company does NOT recommend the use of recycled engine
coolant in vehicles originally equipped with Motorcraft Premium Gold
Engine Coolant since a Ford-approved recycling process is not yet
available.
2006 Mark LT(mlt)
Owners Guide (post-2002-fmt)
USA(fus)
Maintenance and Specifications
215
Page 220 of 256
Refueling
Fuel vapor burns violently and a fuel fire can cause severe
injuries. To help avoid injuries to you and others:
•Read and follow all the instructions on the pump island;
•Turn off your engine when you are refueling;
•Do not smoke if you are near fuel or refueling your vehicle;
•Keep sparks, flames and smoking materials away from fuel;
•Stay outside your vehicle and do not leave the fuel pump unattended
when refueling your vehicle — this is against the law in some places;
•Keep children away from the fuel pump; never let children pump fuel
Use the following guidelines to avoid static build-up when filling an
ungrounded fuel container:
•Place approved fuel container on the ground.
•DO NOT fill a fuel container while it is in the vehicle (including the
cargo area).
•Keep the fuel pump nozzle in contact with the fuel container while
filling.
•DO NOT use a device that would hold the fuel pump handle in the fill
position.
Fuel Filler Cap
Your fuel tank filler cap has an indexed design with a 1/4 turn on/off
feature.
When fueling your vehicle:
1. Turn the engine off.
2. Carefully turn the filler cap counterclockwise 1/4 turn to remove it.
3. Pull to remove the cap from the fuel filler pipe.
4. To install the cap, align the tabs on the cap with the notches on the
filler pipe.
5. Turn the filler cap clockwise 1/4 turn turn until it clicks at least once.
“CHECK FUEL CAP” will display in the message center when the fuel
filler cap is not properly installed. Proper fuel filler cap installation is
checked automatically as the vehicle is driven, but not until after some
fuel is used (fuel gauge drops below full). Once the fuel filler cap is
properly secured, “CHECK FUEL CAP” will turn off after a short period
of driving.
2006 Mark LT(mlt)
Owners Guide (post-2002-fmt)
USA(fus)
Maintenance and Specifications
220
Page 247 of 256
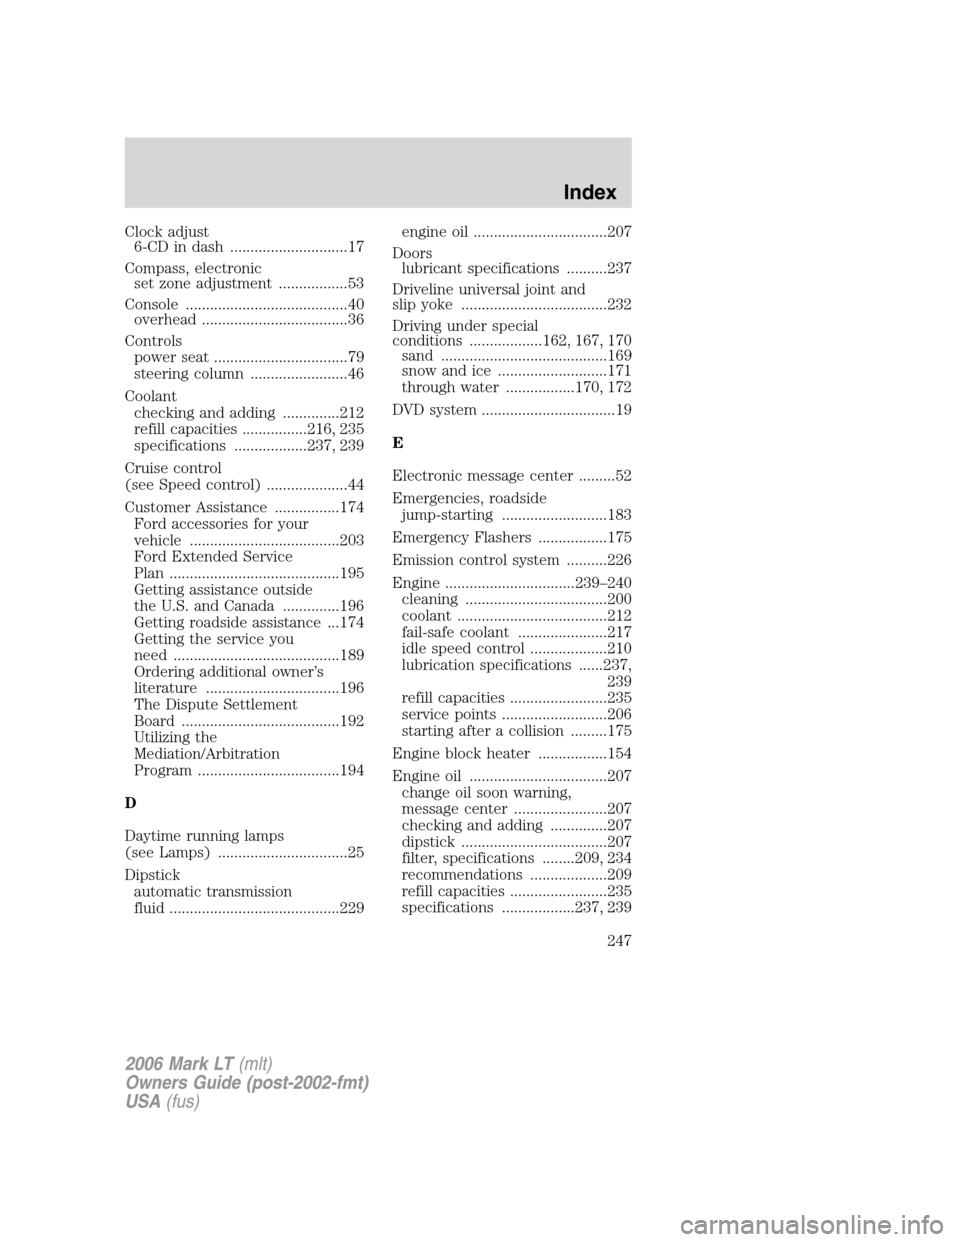
Clock adjust
6-CD in dash .............................17
Compass, electronic
set zone adjustment .................53
Console ........................................40
overhead ....................................36
Controls
power seat .................................79
steering column ........................46
Coolant
checking and adding ..............212
refill capacities ................216, 235
specifications ..................237, 239
Cruise control
(see Speed control) ....................44
Customer Assistance ................174
Ford accessories for your
vehicle .....................................203
Ford Extended Service
Plan ..........................................195
Getting assistance outside
the U.S. and Canada ..............196
Getting roadside assistance ...174
Getting the service you
need .........................................189
Ordering additional owner’s
literature .................................196
The Dispute Settlement
Board .......................................192
Utilizing the
Mediation/Arbitration
Program ...................................194
D
Daytime running lamps
(see Lamps) ................................25
Dipstick
automatic transmission
fluid ..........................................229engine oil .................................207
Doors
lubricant specifications ..........237
Driveline universal joint and
slip yoke ....................................232
Driving under special
conditions ..................162, 167, 170
sand .........................................169
snow and ice ...........................171
through water .................170, 172
DVD system .................................19
E
Electronic message center .........52
Emergencies, roadside
jump-starting ..........................183
Emergency Flashers .................175
Emission control system ..........226
Engine ................................239–240
cleaning ...................................200
coolant .....................................212
fail-safe coolant ......................217
idle speed control ...................210
lubrication specifications ......237,
239
refill capacities ........................235
service points ..........................206
starting after a collision .........175
Engine block heater .................154
Engine oil ..................................207
change oil soon warning,
message center .......................207
checking and adding ..............207
dipstick ....................................207
filter, specifications ........209, 234
recommendations ...................209
refill capacities ........................235
specifications ..................237, 239
2006 Mark LT(mlt)
Owners Guide (post-2002-fmt)
USA(fus)
Index
247
Page 250 of 256
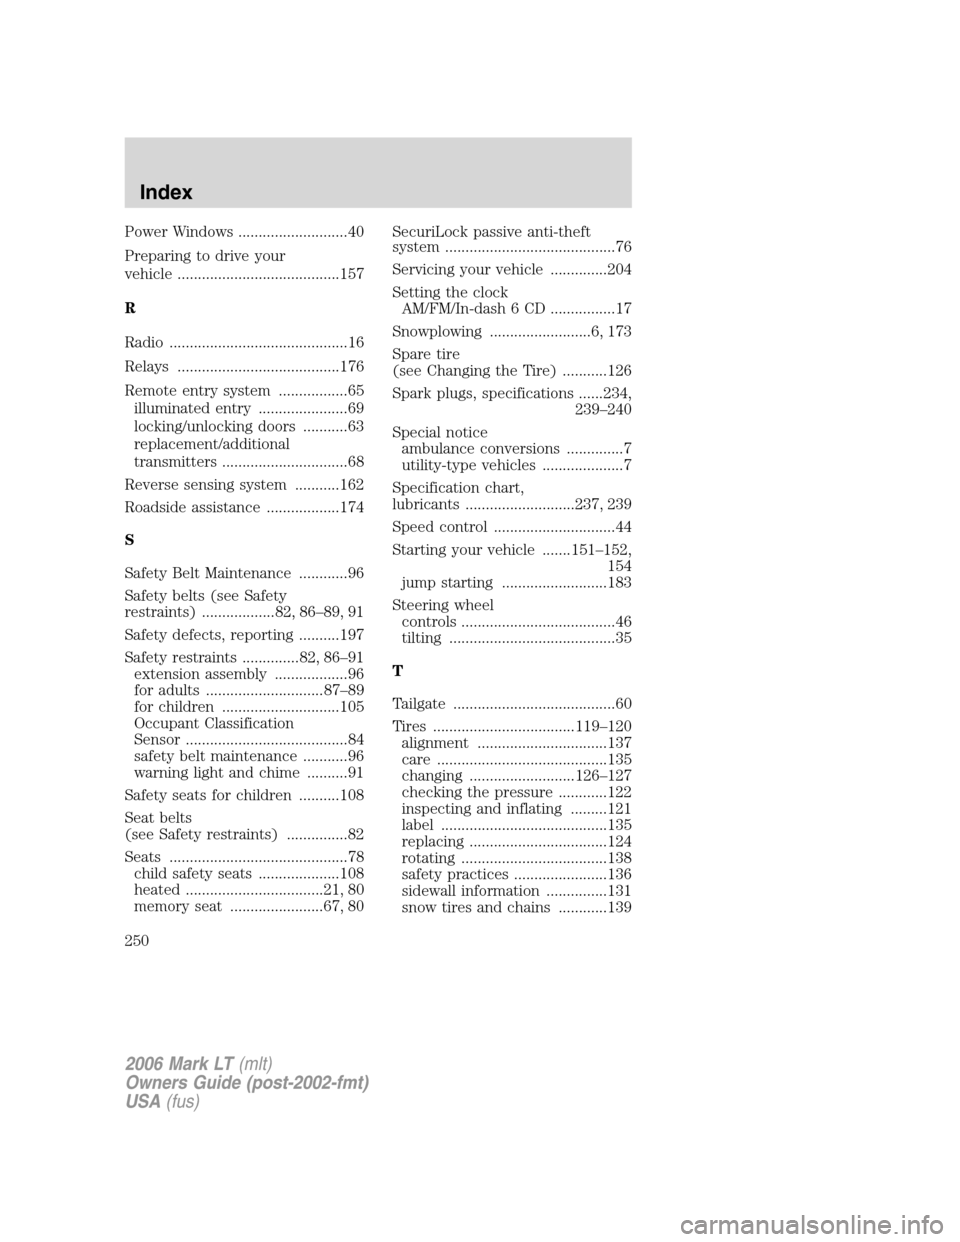
Power Windows ...........................40
Preparing to drive your
vehicle ........................................157
R
Radio ............................................16
Relays ........................................176
Remote entry system .................65
illuminated entry ......................69
locking/unlocking doors ...........63
replacement/additional
transmitters ...............................68
Reverse sensing system ...........162
Roadside assistance ..................174
S
Safety Belt Maintenance ............96
Safety belts (see Safety
restraints) ..................82, 86–89, 91
Safety defects, reporting ..........197
Safety restraints ..............82, 86–91
extension assembly ..................96
for adults .............................87–89
for children .............................105
Occupant Classification
Sensor ........................................84
safety belt maintenance ...........96
warning light and chime ..........91
Safety seats for children ..........108
Seat belts
(see Safety restraints) ...............82
Seats ............................................78
child safety seats ....................108
heated ..................................21, 80
memory seat .......................67, 80SecuriLock passive anti-theft
system ..........................................76
Servicing your vehicle ..............204
Setting the clock
AM/FM/In-dash 6 CD ................17
Snowplowing .........................6, 173
Spare tire
(see Changing the Tire) ...........126
Spark plugs, specifications ......234,
239–240
Special notice
ambulance conversions ..............7
utility-type vehicles ....................7
Specification chart,
lubricants ...........................237, 239
Speed control ..............................44
Starting your vehicle .......151–152,
154
jump starting ..........................183
Steering wheel
controls ......................................46
tilting .........................................35
T
Tailgate ........................................60
Tires ...................................119–120
alignment ................................137
care ..........................................135
changing ..........................126–127
checking the pressure ............122
inspecting and inflating .........121
label .........................................135
replacing ..................................124
rotating ....................................138
safety practices .......................136
sidewall information ...............131
snow tires and chains ............139
2006 Mark LT(mlt)
Owners Guide (post-2002-fmt)
USA(fus)
Index
250