clock LINCOLN MARK LT 2006 Owners Manual
[x] Cancel search | Manufacturer: LINCOLN, Model Year: 2006, Model line: MARK LT, Model: LINCOLN MARK LT 2006Pages: 256, PDF Size: 2.81 MB
Page 17 of 256
Bass:Press to adjust the bass setting. Use//SEEK.
Treble:Press to adjust the treble setting. Use
//SEEK.
Balance:Press to adjust the audio between the left and right speakers.
Use
//, SEEK.
Fade:Press to adjust the audio between the front and rear speakers.
Use
//, SEEK.
Occupancy mode:Use
//SEEKselect and optimize
sound for ALL SEATS, DRIVERS SEAT or REAR SEATS.
Speed sensitive volume:Radio volume automatically changes slightly
with vehicle speed to compensate for road and wind noise.
Use
//SEEKto adjust.
Setting the clock:Press until SELECT HOUR or SELECT MINS is
displayed. Press
//SEEKto adjust the hours/minutes.
RDS: Allows you to search RDS-equipped stations for a certain category
of music format: Classic, Country, Info, Jazz/RB, Religious, Rock, Soft,
Top 40. RDS (only available in FM mode) must be activated to access
Find and Show functions.
To activate, press and hold MENU until RDS (ON/OFF) appears in the
display. Use
/.SEEKto toggle RDS ON/OFF. Press MENU
repeatedly to scroll through Find, Show and RDS. When RDS is Off, you
will not be able to access Find and Show functions.
Find:Allows you to search RDS-equipped stations for the desired music
category. Use
/to find the desired program type, then use
SEEKor SCAN to begin the search.
Show:Allows you to display the name of the radio station or program
type. Use
//SEEKto show type, name or none.
Track/Folder Mode:Available only on MP3 discs in CD mode. In Track
Mode, pressing
SEEKwill scroll through all tracks on the disc.
In Folder mode, pressing
SEEKwill scroll only through tracks
within the selected folder.
2006 Mark LT(mlt)
Owners Guide (post-2002-fmt)
USA(fus)
Entertainment Systems
17
Page 24 of 256
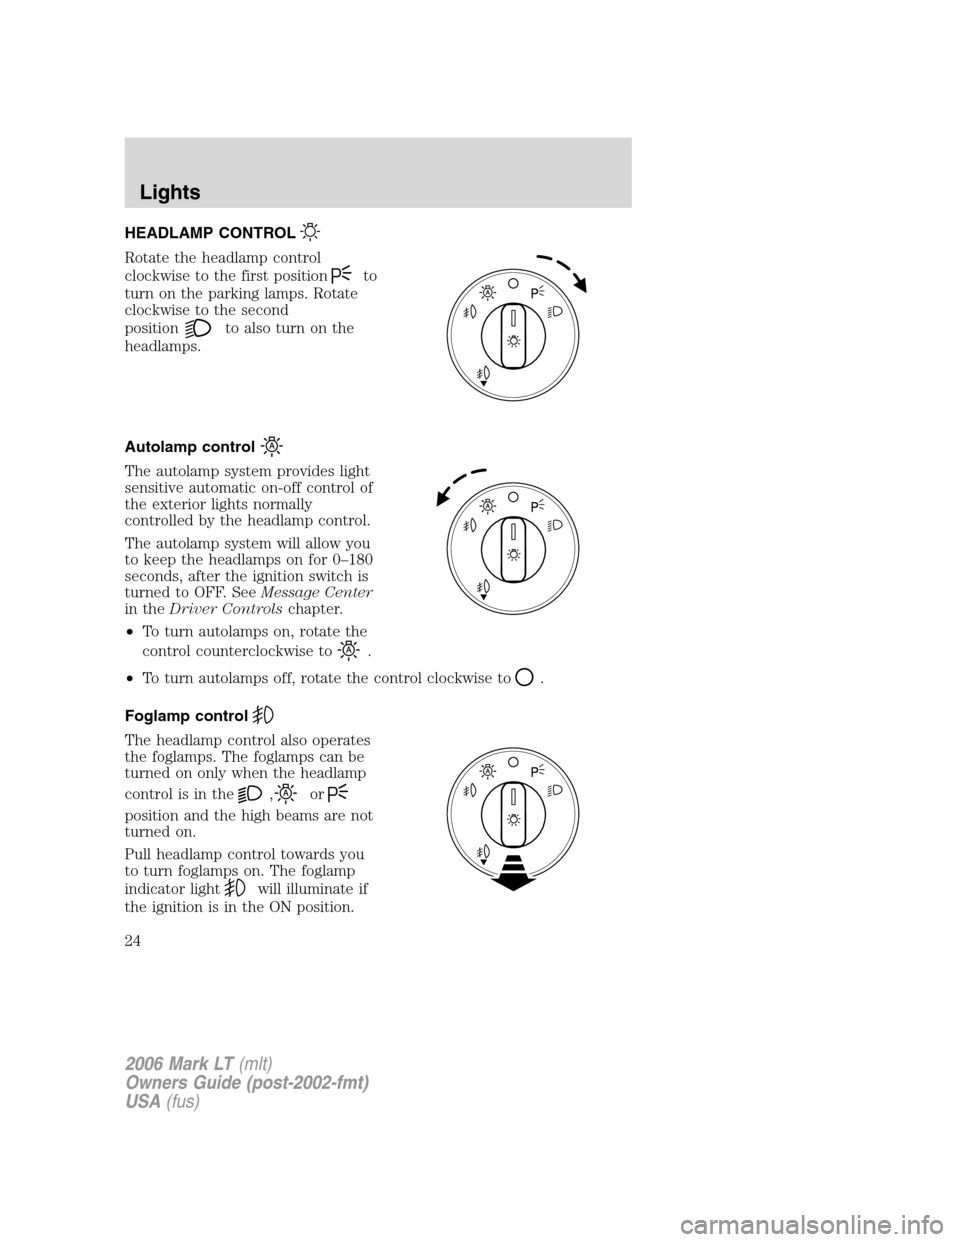
HEADLAMP CONTROL
Rotate the headlamp control
clockwise to the first position
to
turn on the parking lamps. Rotate
clockwise to the second
position
to also turn on the
headlamps.
Autolamp control
The autolamp system provides light
sensitive automatic on-off control of
the exterior lights normally
controlled by the headlamp control.
The autolamp system will allow you
to keep the headlamps on for 0–180
seconds, after the ignition switch is
turned to OFF. SeeMessage Center
in theDriver Controlschapter.
•To turn autolamps on, rotate the
control counterclockwise to
.
•To turn autolamps off, rotate the control clockwise to
.
Foglamp control
The headlamp control also operates
the foglamps. The foglamps can be
turned on only when the headlamp
control is in the
,or
position and the high beams are not
turned on.
Pull headlamp control towards you
to turn foglamps on. The foglamp
indicator light
will illuminate if
the ignition is in the ON position.
2006 Mark LT(mlt)
Owners Guide (post-2002-fmt)
USA(fus)
Lights
24
Page 27 of 256
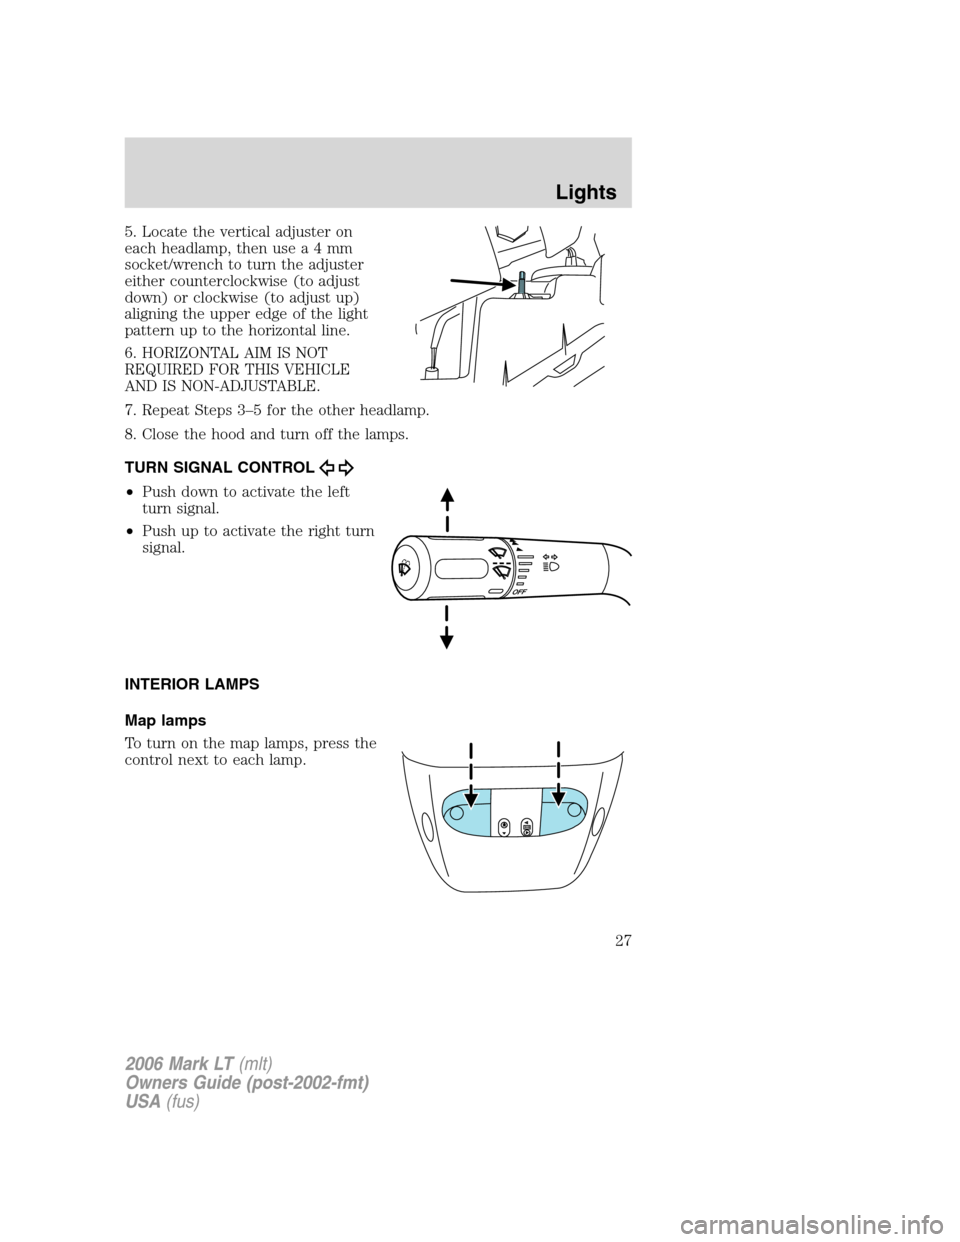
5. Locate the vertical adjuster on
each headlamp, then usea4mm
socket/wrench to turn the adjuster
either counterclockwise (to adjust
down) or clockwise (to adjust up)
aligning the upper edge of the light
pattern up to the horizontal line.
6. HORIZONTAL AIM IS NOT
REQUIRED FOR THIS VEHICLE
AND IS NON-ADJUSTABLE.
7. Repeat Steps 3–5 for the other headlamp.
8. Close the hood and turn off the lamps.
TURN SIGNAL CONTROL
•Push down to activate the left
turn signal.
•Push up to activate the right turn
signal.
INTERIOR LAMPS
Map lamps
To turn on the map lamps, press the
control next to each lamp.
2006 Mark LT(mlt)
Owners Guide (post-2002-fmt)
USA(fus)
Lights
27
Page 31 of 256
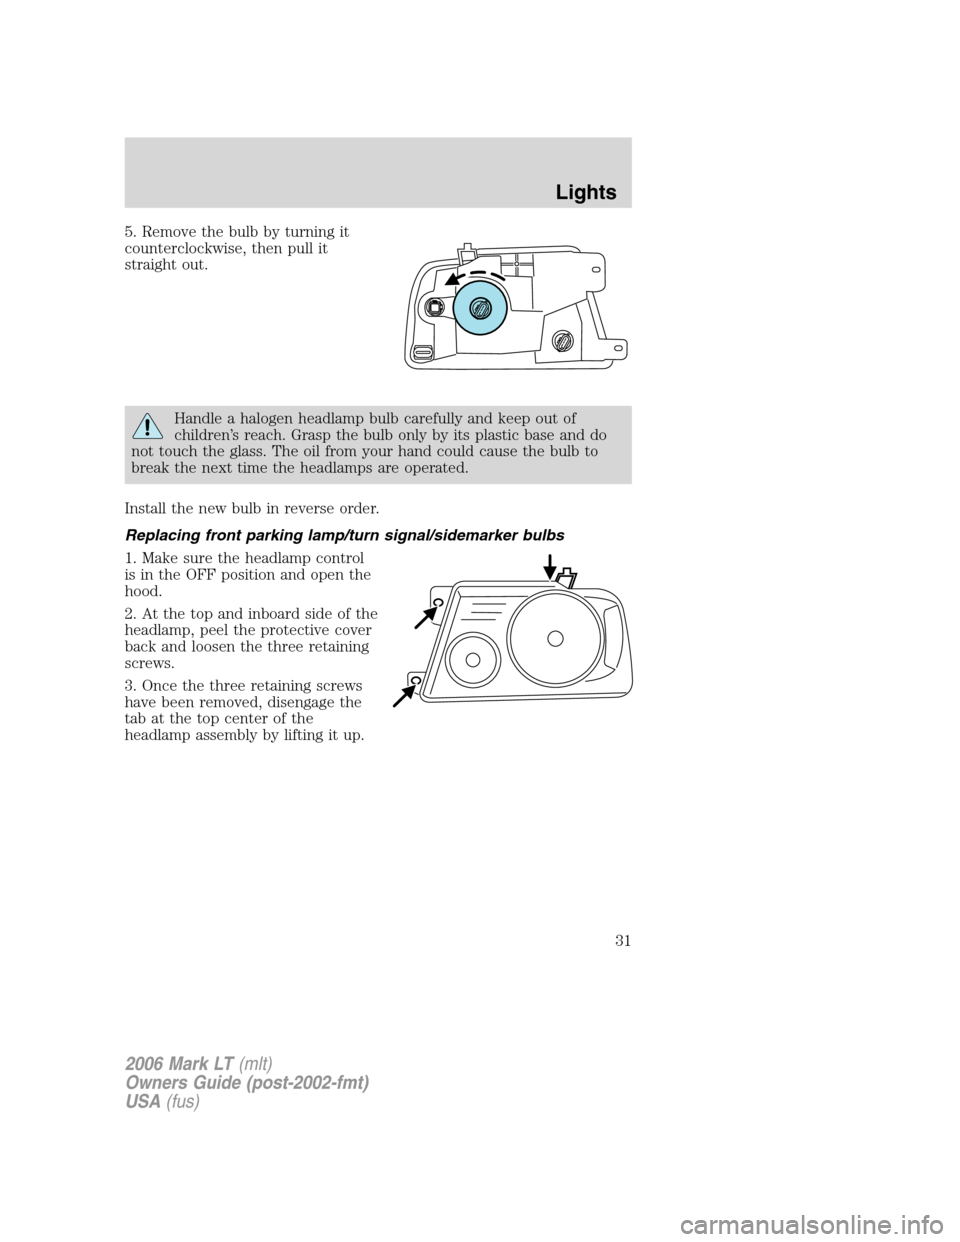
5. Remove the bulb by turning it
counterclockwise, then pull it
straight out.
Handle a halogen headlamp bulb carefully and keep out of
children’s reach. Grasp the bulb only by its plastic base and do
not touch the glass. The oil from your hand could cause the bulb to
break the next time the headlamps are operated.
Install the new bulb in reverse order.
Replacing front parking lamp/turn signal/sidemarker bulbs
1. Make sure the headlamp control
is in the OFF position and open the
hood.
2. At the top and inboard side of the
headlamp, peel the protective cover
back and loosen the three retaining
screws.
3. Once the three retaining screws
have been removed, disengage the
tab at the top center of the
headlamp assembly by lifting it up.
2006 Mark LT(mlt)
Owners Guide (post-2002-fmt)
USA(fus)
Lights
31
Page 32 of 256
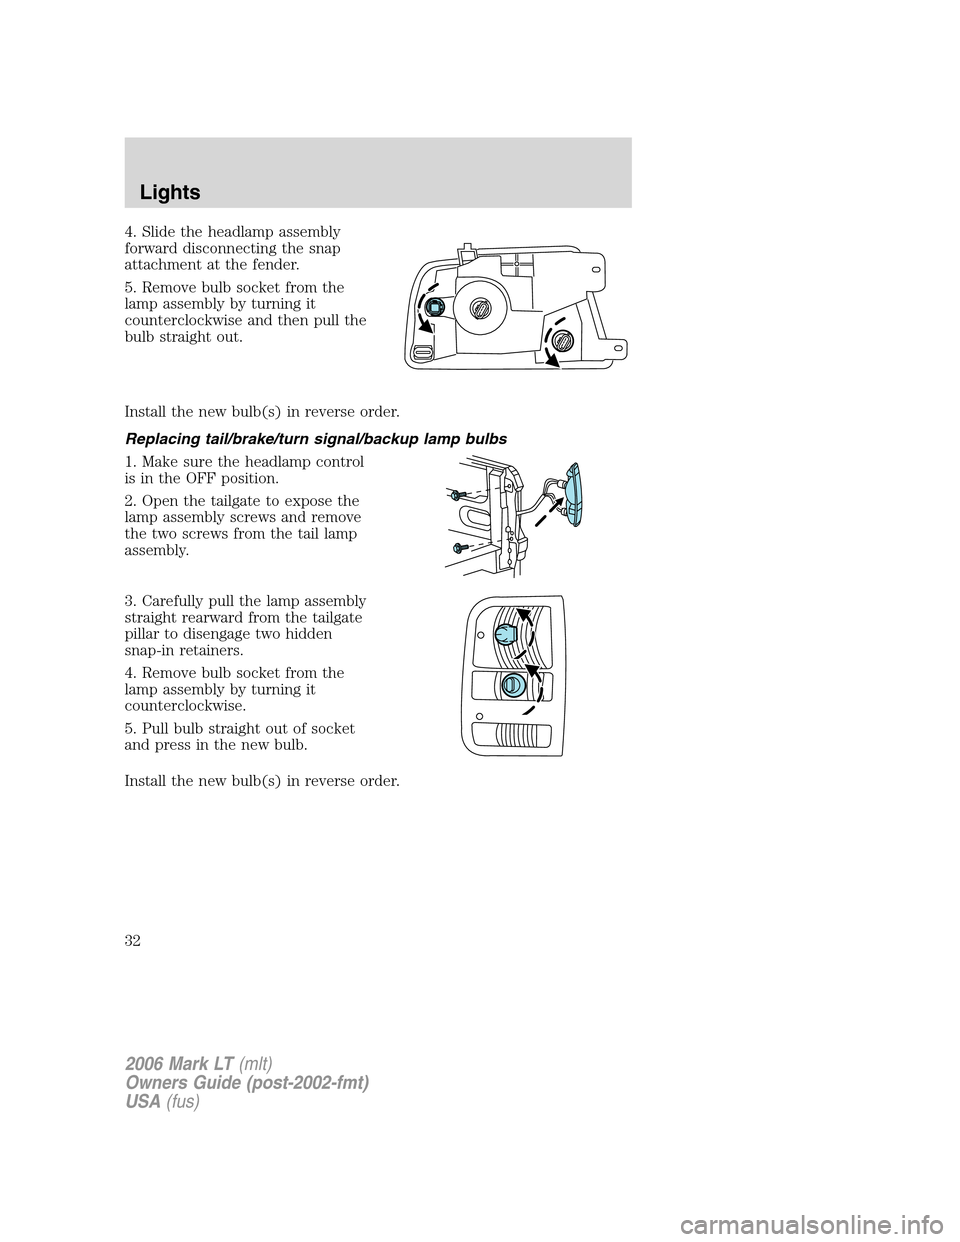
4. Slide the headlamp assembly
forward disconnecting the snap
attachment at the fender.
5. Remove bulb socket from the
lamp assembly by turning it
counterclockwise and then pull the
bulb straight out.
Install the new bulb(s) in reverse order.
Replacing tail/brake/turn signal/backup lamp bulbs
1. Make sure the headlamp control
is in the OFF position.
2. Open the tailgate to expose the
lamp assembly screws and remove
the two screws from the tail lamp
assembly.
3. Carefully pull the lamp assembly
straight rearward from the tailgate
pillar to disengage two hidden
snap-in retainers.
4. Remove bulb socket from the
lamp assembly by turning it
counterclockwise.
5. Pull bulb straight out of socket
and press in the new bulb.
Install the new bulb(s) in reverse order.
2006 Mark LT(mlt)
Owners Guide (post-2002-fmt)
USA(fus)
Lights
32
Page 33 of 256
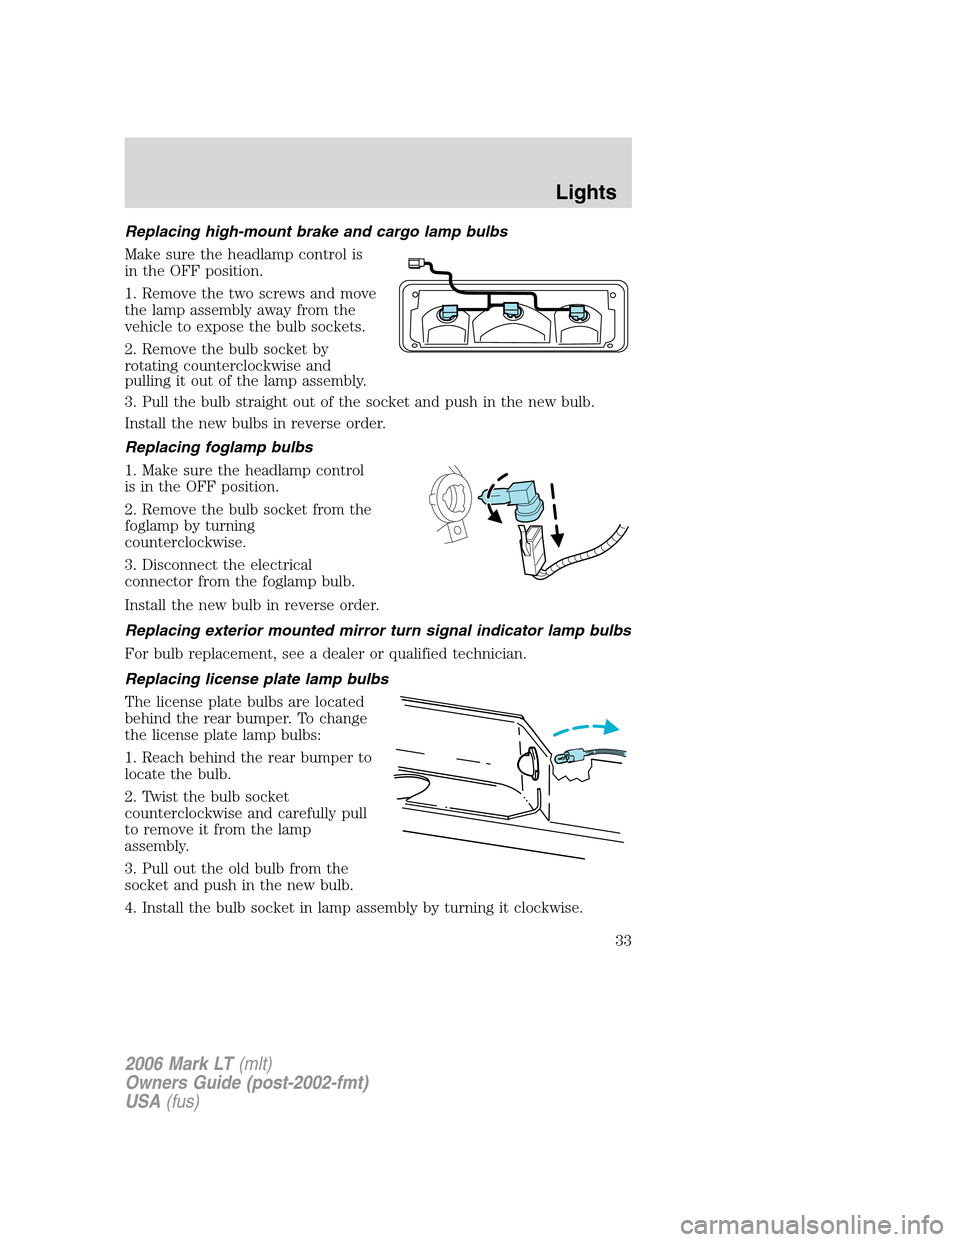
Replacing high-mount brake and cargo lamp bulbs
Make sure the headlamp control is
in the OFF position.
1. Remove the two screws and move
the lamp assembly away from the
vehicle to expose the bulb sockets.
2. Remove the bulb socket by
rotating counterclockwise and
pulling it out of the lamp assembly.
3. Pull the bulb straight out of the socket and push in the new bulb.
Install the new bulbs in reverse order.
Replacing foglamp bulbs
1. Make sure the headlamp control
is in the OFF position.
2. Remove the bulb socket from the
foglamp by turning
counterclockwise.
3. Disconnect the electrical
connector from the foglamp bulb.
Install the new bulb in reverse order.
Replacing exterior mounted mirror turn signal indicator lamp bulbs
For bulb replacement, see a dealer or qualified technician.
Replacing license plate lamp bulbs
The license plate bulbs are located
behind the rear bumper. To change
the license plate lamp bulbs:
1. Reach behind the rear bumper to
locate the bulb.
2. Twist the bulb socket
counterclockwise and carefully pull
to remove it from the lamp
assembly.
3. Pull out the old bulb from the
socket and push in the new bulb.
4. Install the bulb socket in lamp assembly by turning it clockwise.
2006 Mark LT(mlt)
Owners Guide (post-2002-fmt)
USA(fus)
Lights
33
Page 42 of 256
Accessory delay
With accessory delay, the window switches may be used for up to ten
minutes after the ignition switch is turned to the OFF position or until
the driver’s door is opened.
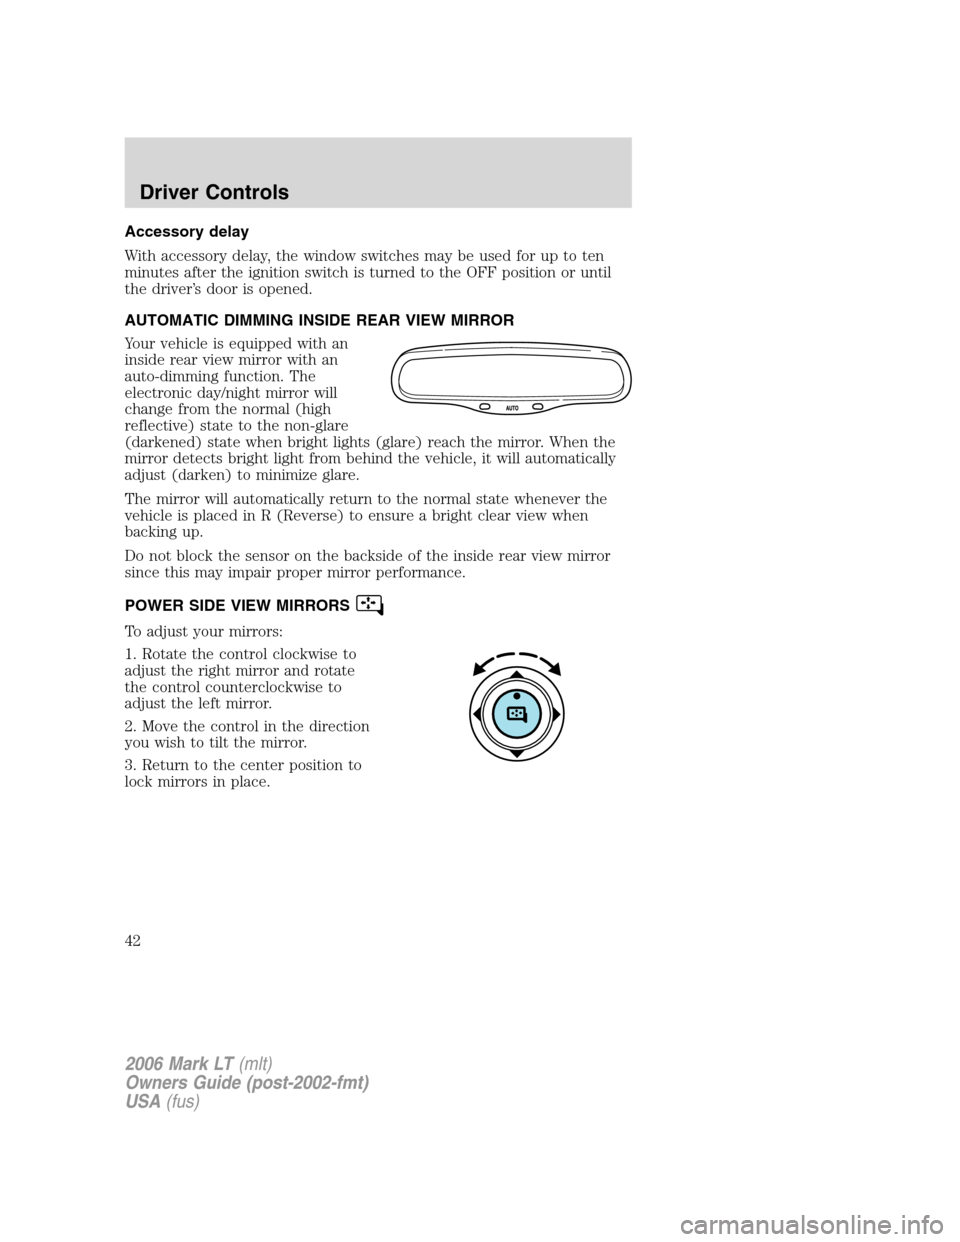
AUTOMATIC DIMMING INSIDE REAR VIEW MIRROR
Your vehicle is equipped with an
inside rear view mirror with an
auto-dimming function. The
electronic day/night mirror will
change from the normal (high
reflective) state to the non-glare
(darkened) state when bright lights (glare) reach the mirror. When the
mirror detects bright light from behind the vehicle, it will automatically
adjust (darken) to minimize glare.
The mirror will automatically return to the normal state whenever the
vehicle is placed in R (Reverse) to ensure a bright clear view when
backing up.
Do not block the sensor on the backside of the inside rear view mirror
since this may impair proper mirror performance.
POWER SIDE VIEW MIRRORS
To adjust your mirrors:
1. Rotate the control clockwise to
adjust the right mirror and rotate
the control counterclockwise to
adjust the left mirror.
2. Move the control in the direction
you wish to tilt the mirror.
3. Return to the center position to
lock mirrors in place.
2006 Mark LT(mlt)
Owners Guide (post-2002-fmt)
USA(fus)
Driver Controls
42
Page 61 of 256
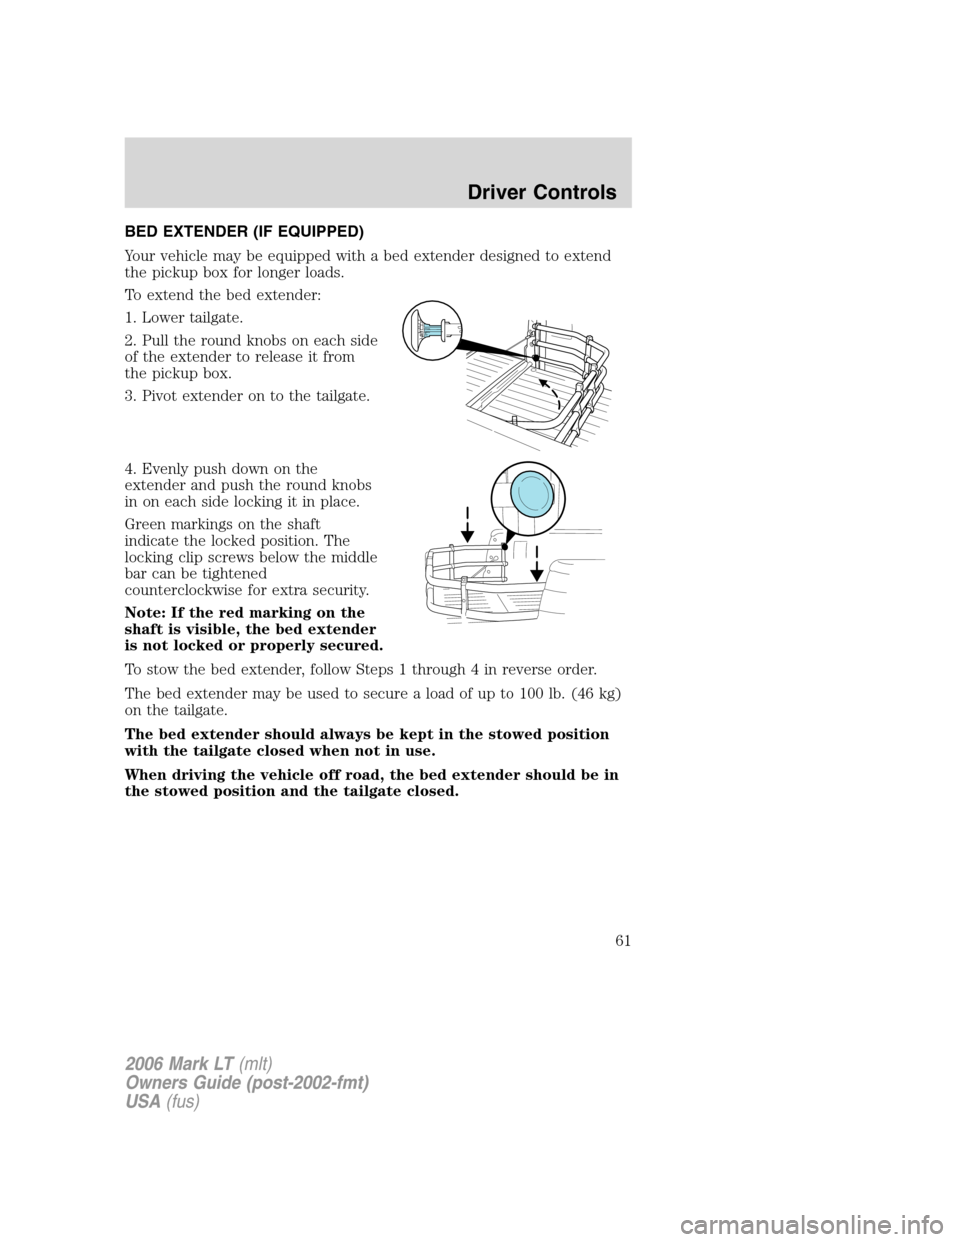
BED EXTENDER (IF EQUIPPED)
Your vehicle may be equipped with a bed extender designed to extend
the pickup box for longer loads.
To extend the bed extender:
1. Lower tailgate.
2. Pull the round knobs on each side
of the extender to release it from
the pickup box.
3. Pivot extender on to the tailgate.
4. Evenly push down on the
extender and push the round knobs
in on each side locking it in place.
Green markings on the shaft
indicate the locked position. The
locking clip screws below the middle
bar can be tightened
counterclockwise for extra security.
Note: If the red marking on the
shaft is visible, the bed extender
is not locked or properly secured.
To stow the bed extender, follow Steps 1 through 4 in reverse order.
The bed extender may be used to secure a load of up to 100 lb. (46 kg)
on the tailgate.
The bed extender should always be kept in the stowed position
with the tailgate closed when not in use.
When driving the vehicle off road, the bed extender should be in
the stowed position and the tailgate closed.
2006 Mark LT(mlt)
Owners Guide (post-2002-fmt)
USA(fus)
Driver Controls
61
Page 126 of 256
Conventional spare tire information
If you have the spare tire that is the same size as your other road tires,
you can use the spare as you would any of the other tires. The spare tire
will be equivalent to your road tires, although it may not have the same
appearance (black-side wall instead of outlined-white letters).
Location of the spare tire and tools
The spare tire and tools for your vehicle are stowed in the following
locations:
Tool Location
Spare tire Under the vehicle, just forward of
the rear bumper
Jack, jack handle and lug nut
wrenchUnder the rear seat on the
passenger side
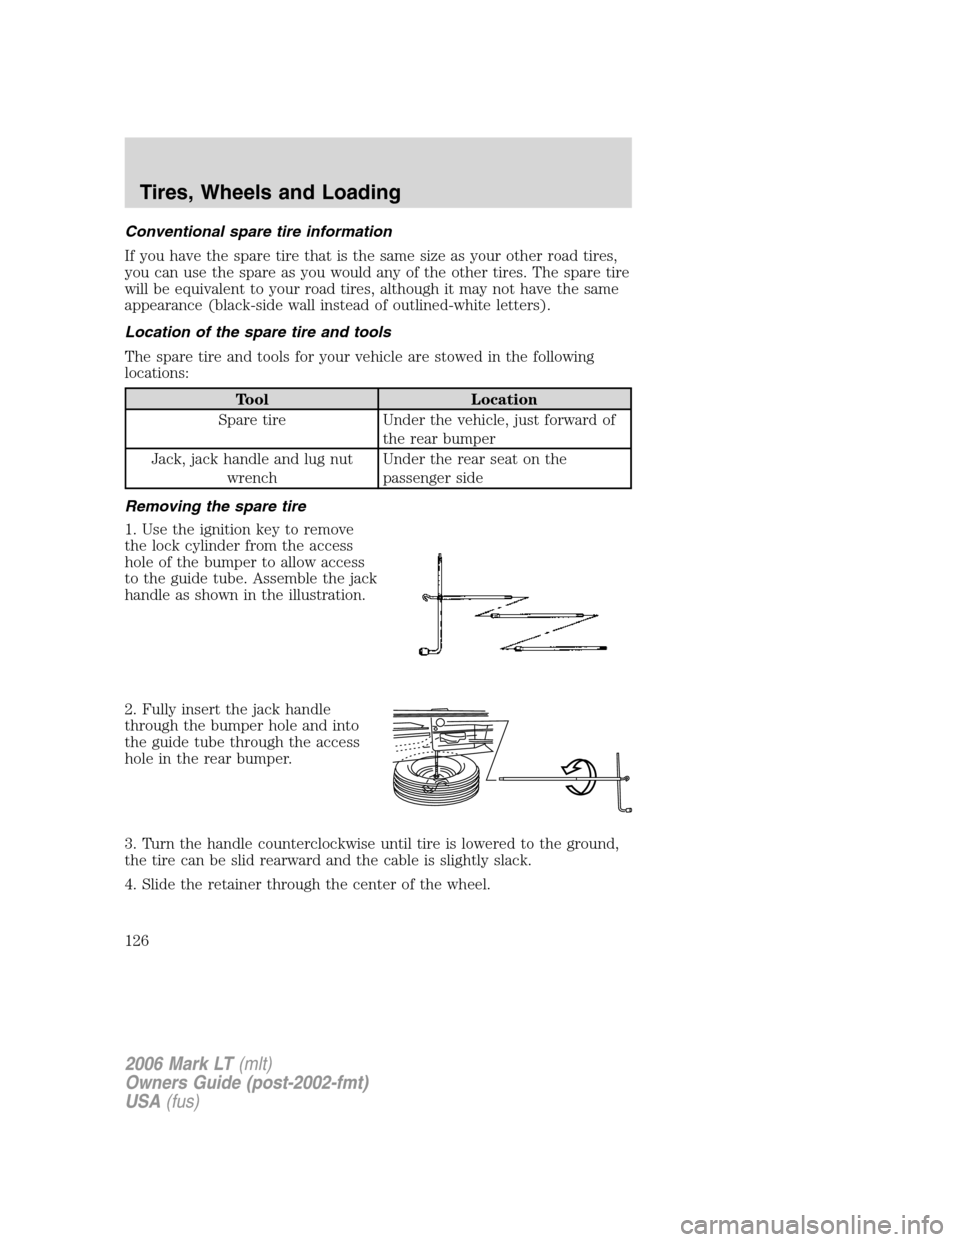
Removing the spare tire
1. Use the ignition key to remove
the lock cylinder from the access
hole of the bumper to allow access
to the guide tube. Assemble the jack
handle as shown in the illustration.
2. Fully insert the jack handle
through the bumper hole and into
the guide tube through the access
hole in the rear bumper.
3. Turn the handle counterclockwise until tire is lowered to the ground,
the tire can be slid rearward and the cable is slightly slack.
4. Slide the retainer through the center of the wheel.
2006 Mark LT(mlt)
Owners Guide (post-2002-fmt)
USA(fus)
Tires, Wheels and Loading
126
Page 127 of 256
Tire change procedure
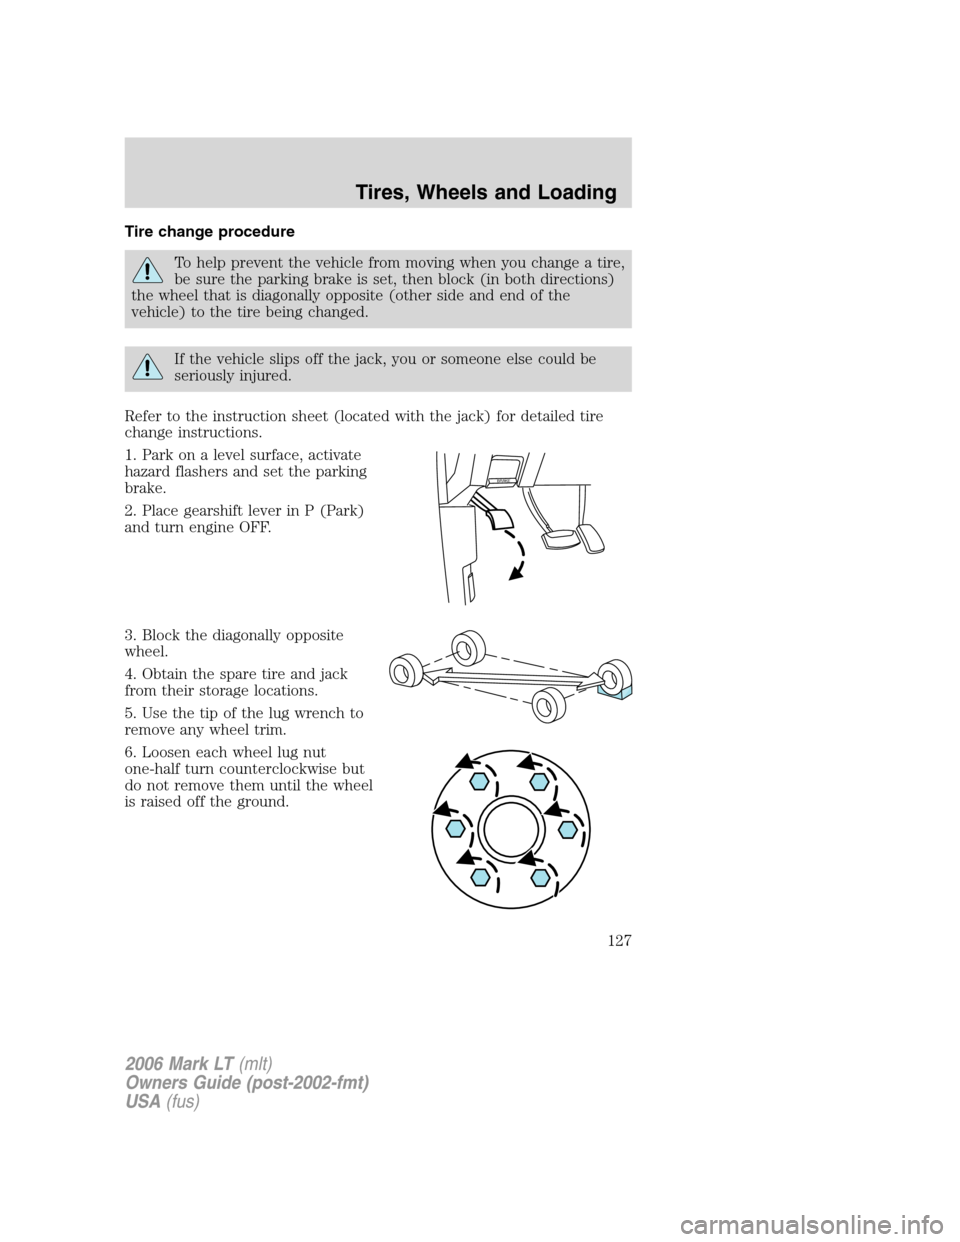
To help prevent the vehicle from moving when you change a tire,
be sure the parking brake is set, then block (in both directions)
the wheel that is diagonally opposite (other side and end of the
vehicle) to the tire being changed.
If the vehicle slips off the jack, you or someone else could be
seriously injured.
Refer to the instruction sheet (located with the jack) for detailed tire
change instructions.
1. Park on a level surface, activate
hazard flashers and set the parking
brake.
2. Place gearshift lever in P (Park)
and turn engine OFF.
3. Block the diagonally opposite
wheel.
4. Obtain the spare tire and jack
from their storage locations.
5. Use the tip of the lug wrench to
remove any wheel trim.
6. Loosen each wheel lug nut
one-half turn counterclockwise but
do not remove them until the wheel
is raised off the ground.
BRAKE
2006 Mark LT(mlt)
Owners Guide (post-2002-fmt)
USA(fus)
Tires, Wheels and Loading
127