key LINCOLN MARK VIII 1998 Owner's Manual
[x] Cancel search | Manufacturer: LINCOLN, Model Year: 1998, Model line: MARK VIII, Model: LINCOLN MARK VIII 1998Pages: 170, PDF Size: 1.37 MB
Page 88 of 170

Before starting the vehicle:
1. Make sure all vehicle occupants have buckled their safety belts. For
more information on safety belts and their proper usage, refer to the
Seating and safety restraintschapter.
2. Make sure the headlamps and vehicle accessories are off.
3. Make sure the parking brake is
set.
4. Make sure the gearshift is in P
(Park).
5. Turn the key to 4 (ON) without
turning the key to 5 (START).
1
3
2
4
5
Starting
89
Page 90 of 170
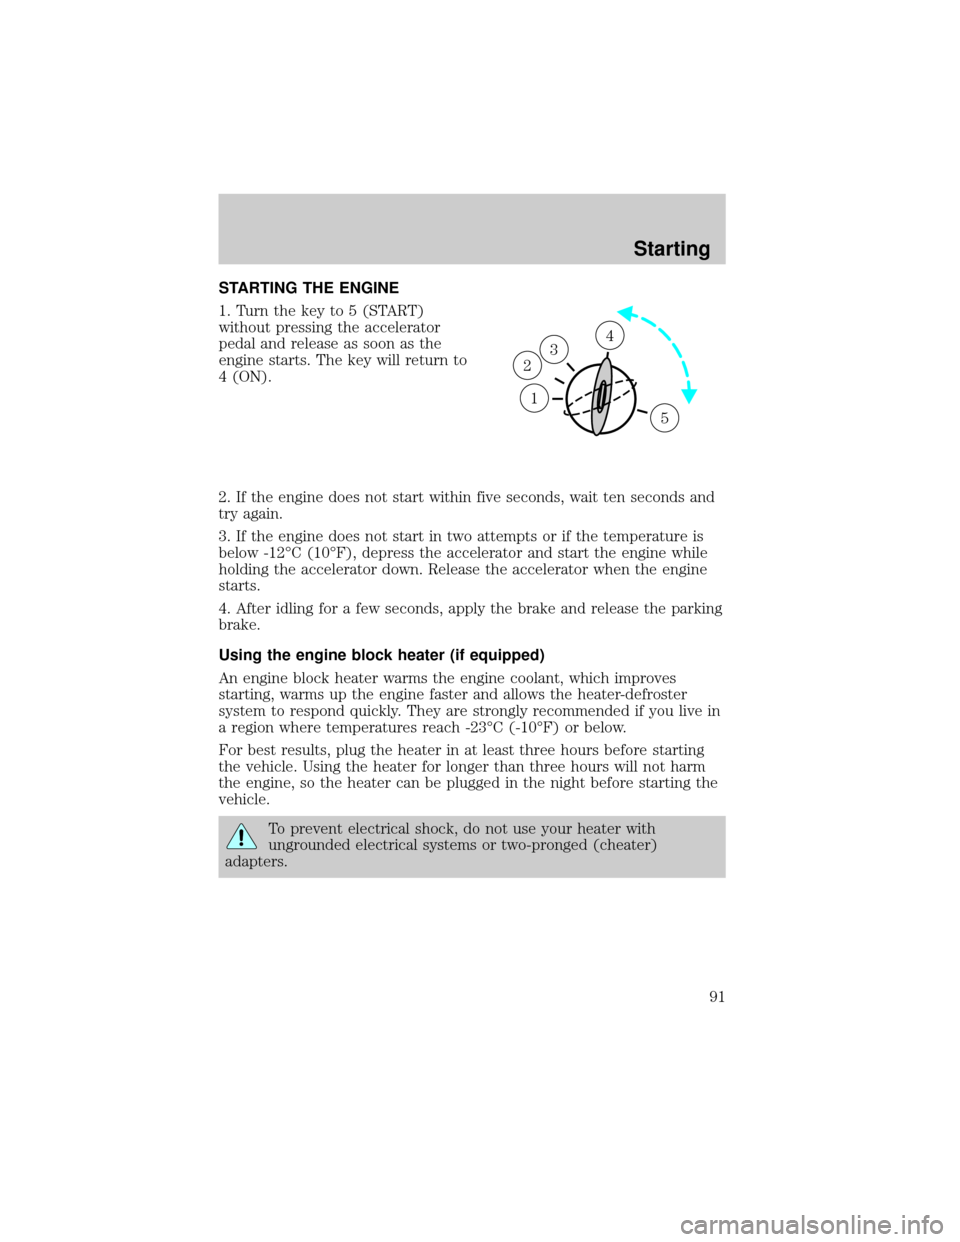
STARTING THE ENGINE
1. Turn the key to 5 (START)
without pressing the accelerator
pedal and release as soon as the
engine starts. The key will return to
4 (ON).
2. If the engine does not start within five seconds, wait ten seconds and
try again.
3. If the engine does not start in two attempts or if the temperature is
below -12ÉC (10ÉF), depress the accelerator and start the engine while
holding the accelerator down. Release the accelerator when the engine
starts.
4. After idling for a few seconds, apply the brake and release the parking
brake.
Using the engine block heater (if equipped)
An engine block heater warms the engine coolant, which improves
starting, warms up the engine faster and allows the heater-defroster
system to respond quickly. They are strongly recommended if you live in
a region where temperatures reach -23ÉC (-10ÉF) or below.
For best results, plug the heater in at least three hours before starting
the vehicle. Using the heater for longer than three hours will not harm
the engine, so the heater can be plugged in the night before starting the
vehicle.
To prevent electrical shock, do not use your heater with
ungrounded electrical systems or two-pronged (cheater)
adapters.
1
3
2
4
5
Starting
91
Page 97 of 170
1. Apply the parking brake, turn ignition key to LOCK, then remove the
key.
2. Insert the key and turn it to OFF. Apply the brake pedal and shift to N
(Neutral).
3. Start the vehicle.
If it is necessary to use the above procedure to move the gearshift, it is
possible that a fuse has blown and the vehicle's brake lamps may not be
operating properly. Refer toFuses and relaysin theRoadside
emergencieschapter.
Do not drive your vehicle until you verify that the brakelamps
are working.
If your vehicle gets stuck in mud or snow it may be rocked out by
shifting from forward and reverse gears in a steady pattern. Press lightly
on the accelerator in each gear.
Do not rock the vehicle for more than a few minutes. The
transmission and tires may be damaged or the engine can
overheat.
Always set the parking brake fully and make sure the gearshift is
latched in P (Park). Turn off the ignition whenever you leave
your vehicle.
Driving with a 4±speed automatic transmission
Understanding gearshift positions
Hold the brake pedal down while you move the gearshift lever
from position to position. If you do not hold the brake pedal
down, your vehicle may move unexpectedly and injure someone.
Driving
98
Page 106 of 170
HAZARD LIGHTS CONTROL
Use only in an emergency to warn traffic of vehicle breakdown,
approaching danger, etc. The hazard flashers can be operated when the
ignition is off.
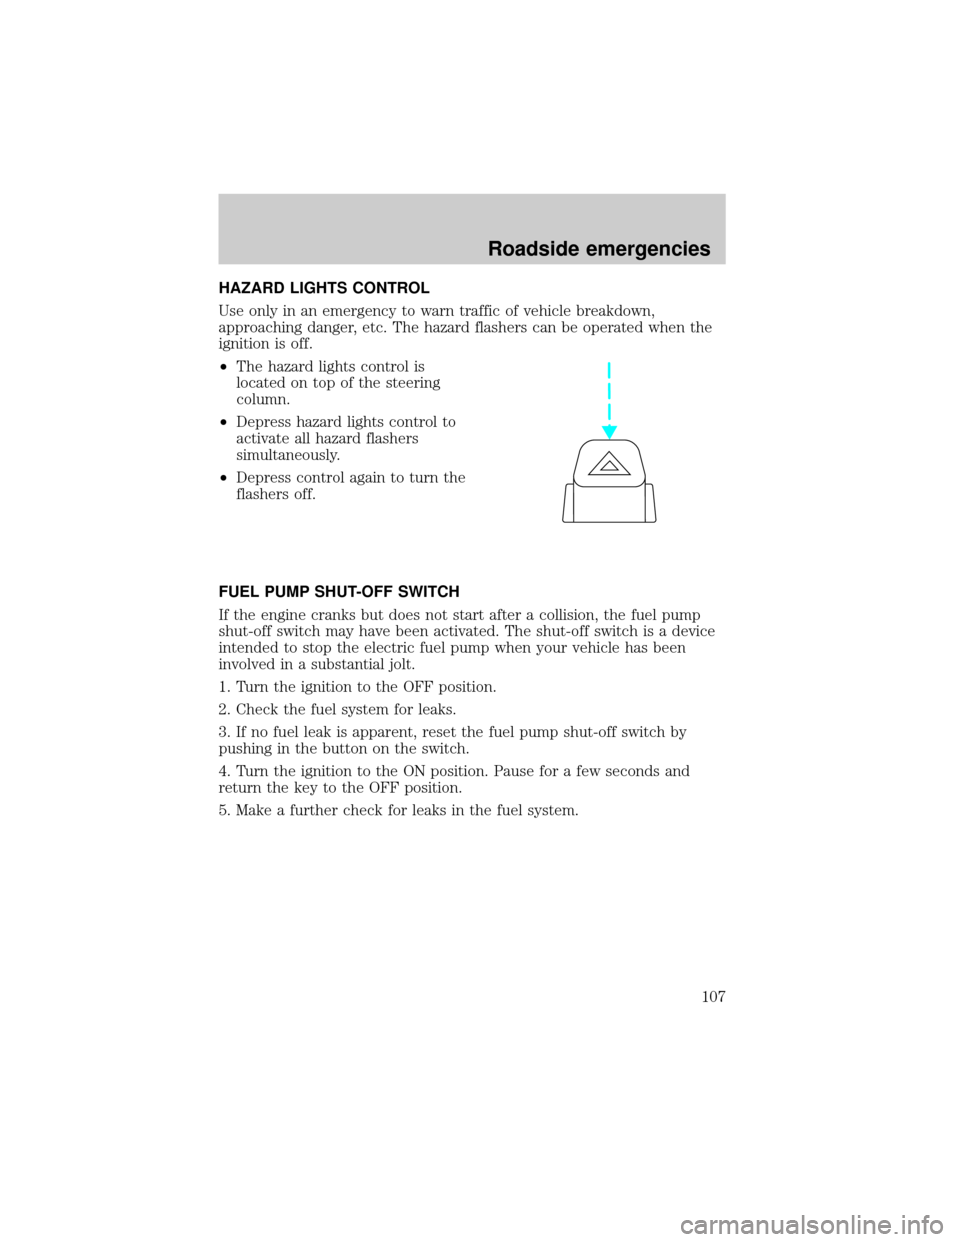
²The hazard lights control is
located on top of the steering
column.
²Depress hazard lights control to
activate all hazard flashers
simultaneously.
²Depress control again to turn the
flashers off.
FUEL PUMP SHUT-OFF SWITCH
If the engine cranks but does not start after a collision, the fuel pump
shut-off switch may have been activated. The shut-off switch is a device
intended to stop the electric fuel pump when your vehicle has been
involved in a substantial jolt.
1. Turn the ignition to the OFF position.
2. Check the fuel system for leaks.
3. If no fuel leak is apparent, reset the fuel pump shut-off switch by
pushing in the button on the switch.
4. Turn the ignition to the ON position. Pause for a few seconds and
return the key to the OFF position.
5. Make a further check for leaks in the fuel system.
Roadside emergencies
107
Page 111 of 170

Fuse/Relay
LocationFuse Amp
RatingDescription
25 10A Steering Column/Ignition/Lighting Module
(Right Low-Beam Headlamp)
26 15A Steering Column/Ignition/Lighting Module
(Courtesy Lighting, Demand Lighting)
27 Ð Not Used
28 10A Instrument Cluster, I/P Warning Indicator
Display, Air Suspension/EVO Steering
Module, Rear Window Defrost Module,
Steering Wheel Position Sensor,
Transmission Control Switch
29 Ð Not Used
30 10A Heated Mirrors
31 10A Steering Column/Ignition/Lighting Module
(Park Lamps)
32 15A Brake On/Off Switch, Brake Pressure
Switch
33 Ð Not Used
34 15A Heated Seats, Backup Lamps, Speed
Control, Daytime Running Lamps, A/C
Cycling Switch, Digital Transmission Range
Sensor, Intake Manifold Runner Control
Module
35 10A Driver's Power and Heated Seats
36 Ð Not Used
37 Ð Not Used
38 10A Data Link Connector
39 Ð Not Used
40 Ð Not Used
41 10A Keyless Entry, Power Door Locks, Power
Mirror Switch, Memory/Recall Switch,
Driver's Door Module
Roadside emergencies
112
Page 117 of 170
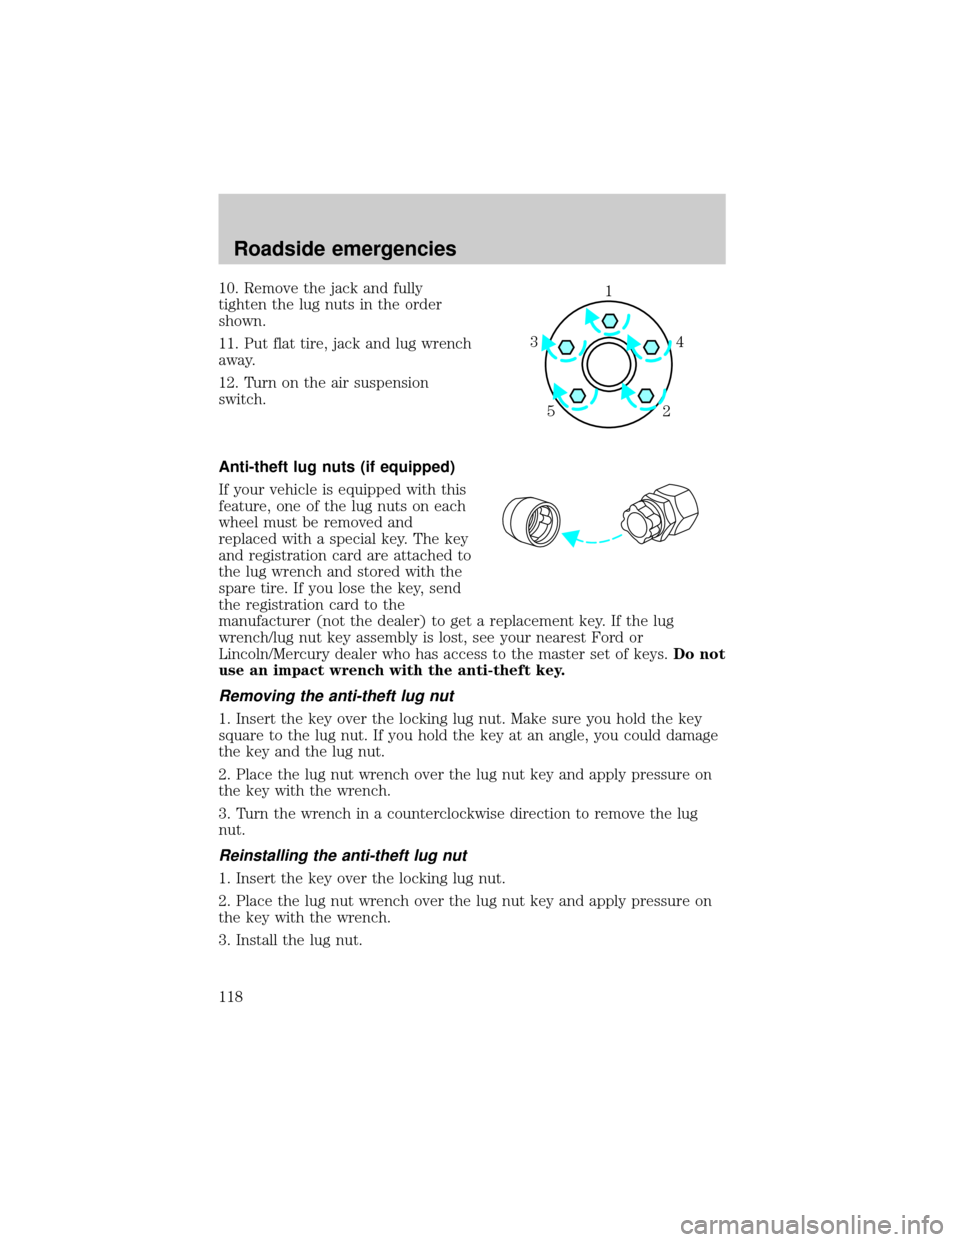
10. Remove the jack and fully
tighten the lug nuts in the order
shown.
11. Put flat tire, jack and lug wrench
away.
12. Turn on the air suspension
switch.
Anti-theft lug nuts (if equipped)
If your vehicle is equipped with this
feature, one of the lug nuts on each
wheel must be removed and
replaced with a special key. The key
and registration card are attached to
the lug wrench and stored with the
spare tire. If you lose the key, send
the registration card to the
manufacturer (not the dealer) to get a replacement key. If the lug
wrench/lug nut key assembly is lost, see your nearest Ford or
Lincoln/Mercury dealer who has access to the master set of keys.Do not
use an impact wrench with the anti-theft key.
Removing the anti-theft lug nut
1. Insert the key over the locking lug nut. Make sure you hold the key
square to the lug nut. If you hold the key at an angle, you could damage
the key and the lug nut.
2. Place the lug nut wrench over the lug nut key and apply pressure on
the key with the wrench.
3. Turn the wrench in a counterclockwise direction to remove the lug
nut.
Reinstalling the anti-theft lug nut
1. Insert the key over the locking lug nut.
2. Place the lug nut wrench over the lug nut key and apply pressure on
the key with the wrench.
3. Install the lug nut.
1
4 3
52
Roadside emergencies
118
Page 123 of 170
Working with the engine off
1. Set the parking brake and
ensure the gearshift is securely latched in P (Park).
2. Turn off the engine and remove the key.
3. Block the wheels to prevent the vehicle from moving unexpectedly.
Working with the engine on
1. Set the parking brake and
ensure the gearshift is securely latched in P (Park).
2. Block the wheels to prevent the vehicle from moving unexpectedly.
Do not start your engine with the air cleaner removed and do
not remove it while the engine is running.
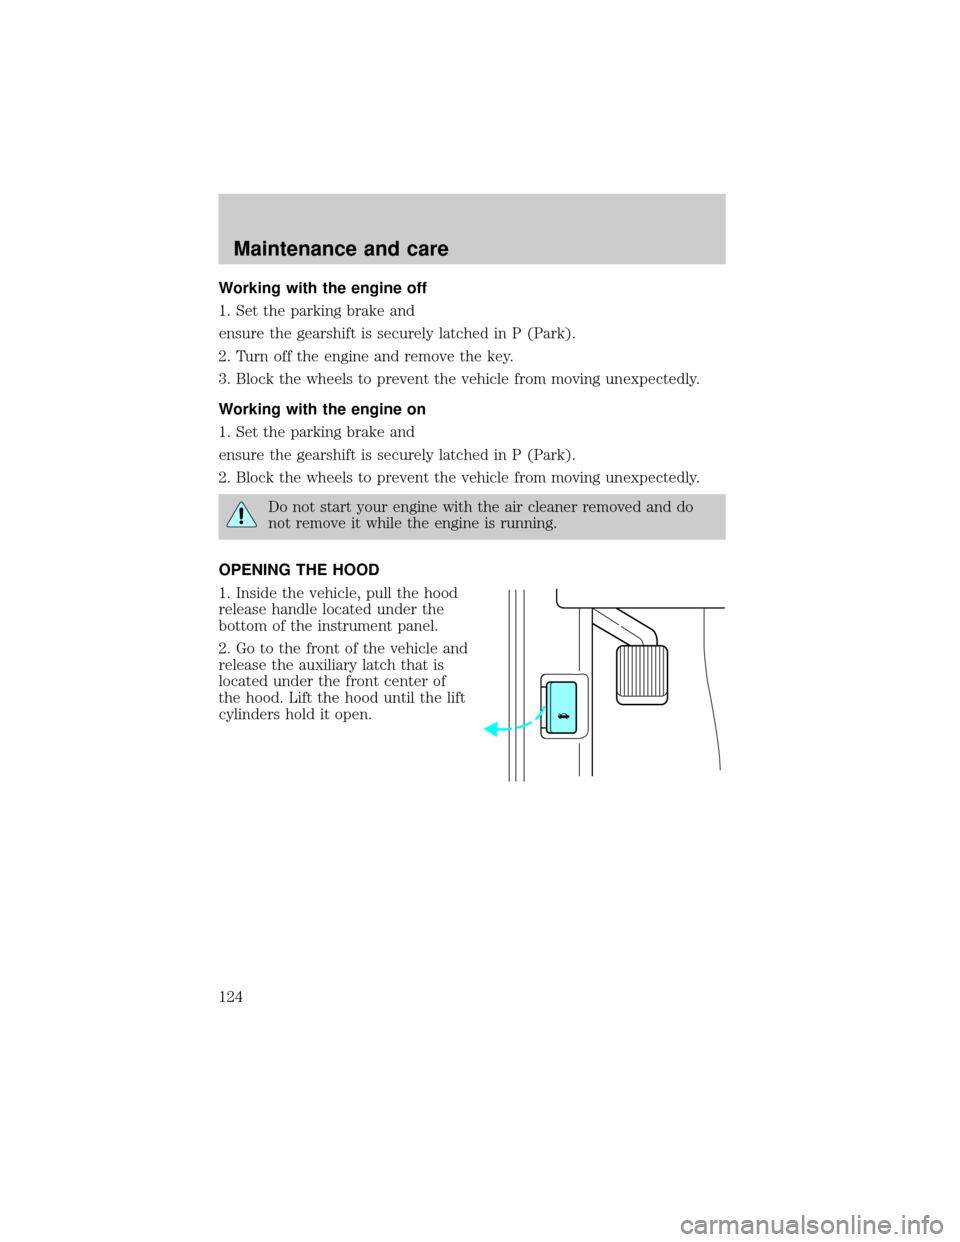
OPENING THE HOOD
1. Inside the vehicle, pull the hood
release handle located under the
bottom of the instrument panel.
2. Go to the front of the vehicle and
release the auxiliary latch that is
located under the front center of
the hood. Lift the hood until the lift
cylinders hold it open.
Maintenance and care
124
Page 168 of 170

Heating ........................................34
High beams
indicator light .............................8
Hood
release lever ............................124
Ignition
positions of the ignition ...........40
Instrument panel
lighting up panel
and interior ...............................33
Jump-starting
your vehicle ........................119,120
attaching cables ......................120
disconnecting cables ..............121
Keyless entry system
autolock .....................................63
keypad .......................................60
programming entry code ....61,62
Keys
key in ignition chime ...............12
Lamps
headlamps ........................146,151
interior lamps ...........................52
map lamps .................................52
Lights, warning and indicator
air bag ........................................10
anti-lock brakes (ABS) ..............6
anti-theft ...................................11
brake ............................................6
charging system ..........................7
check engine ..........................9,10
cruise indicator ...........................8
oil pressure .................................7
overdrive off ..............................11
safety belt ...................................9
turn signal indicator ...................8
Lubricant specifications ...........163
Message center ...........................14
reset button ..............................20
Mirrors
cleaning ...................................160
side view mirrors (power) .......54Moon roof ....................................51
Panic alarm feature, remote
entry system ................................60
Parking brake ..............................94
Parts (see Motorcraft parts) ....161
Power door locks ........................54
Power steering
fluid, checking and adding ....132
Refill capacities for fluids ........162
Relays ........................................108
Remote entry system .................58
locking/unlocking doors ......58,59
Reporting safety defects ..........167
Safety restraints
automatic locking mode
(retractor) ............................73,74
extension assembly ..................75
for children ...............................81
lap and shoulder belts .............72
maintenance ..............................76
proper use .................................71
warning light and chime .....11,76
Safety seats for children
attaching with tether straps ....86
automatic locking mode
(retractor) .................................83
in rear seat ................................86
tether anchorage hardware .....87
Seats ............................................66
adjusting the seat, power ........66
auto-glide ..................................69
heated seats ..............................67
lumbar support .........................68
rear seat access ........................70
Servicing your vehicle ..............123
precautions when servicing ...123
Speed control ..............................43
canceling a set speed ...............46
indicator light ...........................47
resuming a set speed ...............47
tap up/tap down .......................45
turning off .................................43
Index
169