LINCOLN MKC 2015 Owner's Manual
Manufacturer: LINCOLN, Model Year: 2015, Model line: MKC, Model: LINCOLN MKC 2015Pages: 490, PDF Size: 4.74 MB
Page 21 of 490
See Power Windows (page 97).
C
See
Head Restraints (page 141).
D
See
Fastening the Safety Belts (page 38).
E
See
Rear Seats (page 146).
F
See
Power Seats (page 143).
G
See
Electric Parking Brake (page 183).
H
See
Opening and Closing the Hood (page 279).
I
18
MKC (TME), enUSA At a Glance
Page 22 of 490
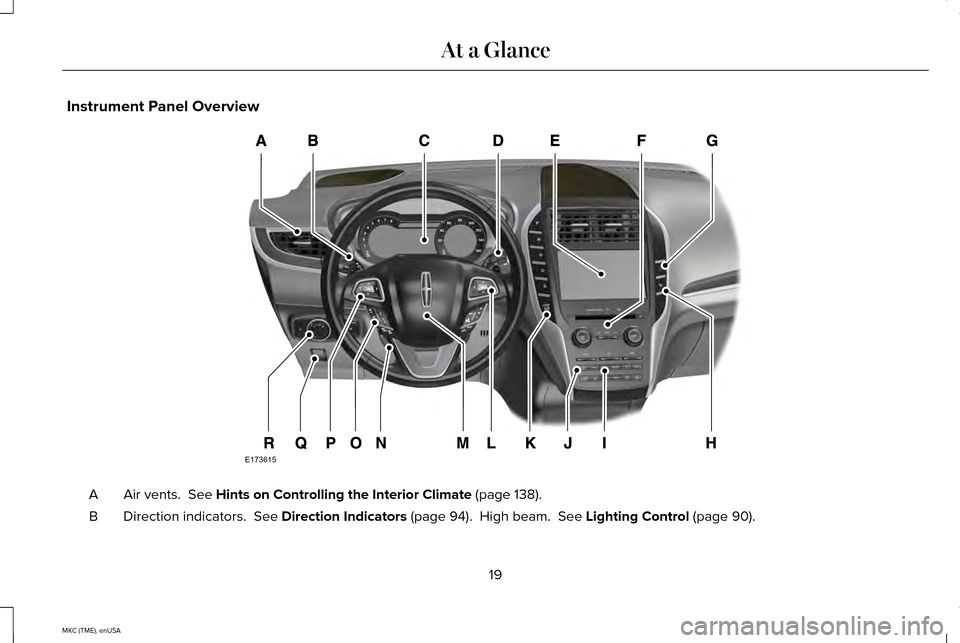
Instrument Panel Overview
Air vents. See Hints on Controlling the Interior Climate (page 138).
A
Direction indicators.
See Direction Indicators (page 94). High beam. See Lighting Control (page 90).
B
19
MKC (TME), enUSA At a GlanceE173615
Page 23 of 490
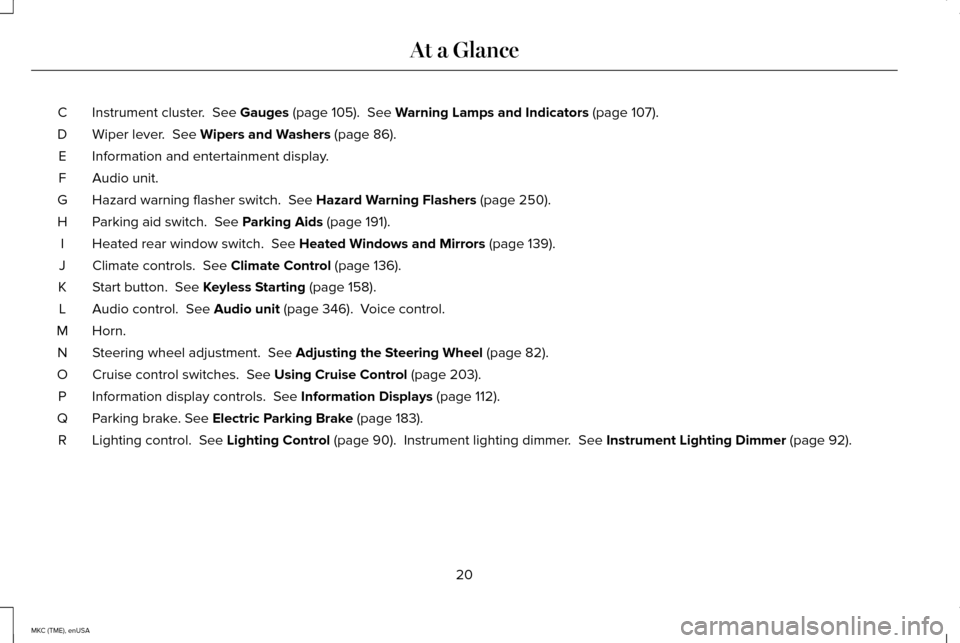
Instrument cluster. See Gauges (page 105). See Warning Lamps and Indicators (page 107).
C
Wiper lever.
See Wipers and Washers (page 86).
D
Information and entertainment display.
E
Audio unit.
F
Hazard warning flasher switch.
See Hazard Warning Flashers (page 250).
G
Parking aid switch.
See Parking Aids (page 191).
H
Heated rear window switch.
See Heated Windows and Mirrors (page 139).
I
Climate controls.
See Climate Control (page 136).
J
Start button.
See Keyless Starting (page 158).
K
Audio control.
See Audio unit (page 346). Voice control.
L
Horn.M
Steering wheel adjustment.
See Adjusting the Steering Wheel (page 82).
N
Cruise control switches.
See Using Cruise Control (page 203).
O
Information display controls.
See Information Displays (page 112).
P
Parking brake.
See Electric Parking Brake (page 183).
Q
Lighting control.
See Lighting Control (page 90). Instrument lighting dimmer. See Instrument Lighting Dimmer (page 92).
R
20
MKC (TME), enUSA At a Glance
Page 24 of 490
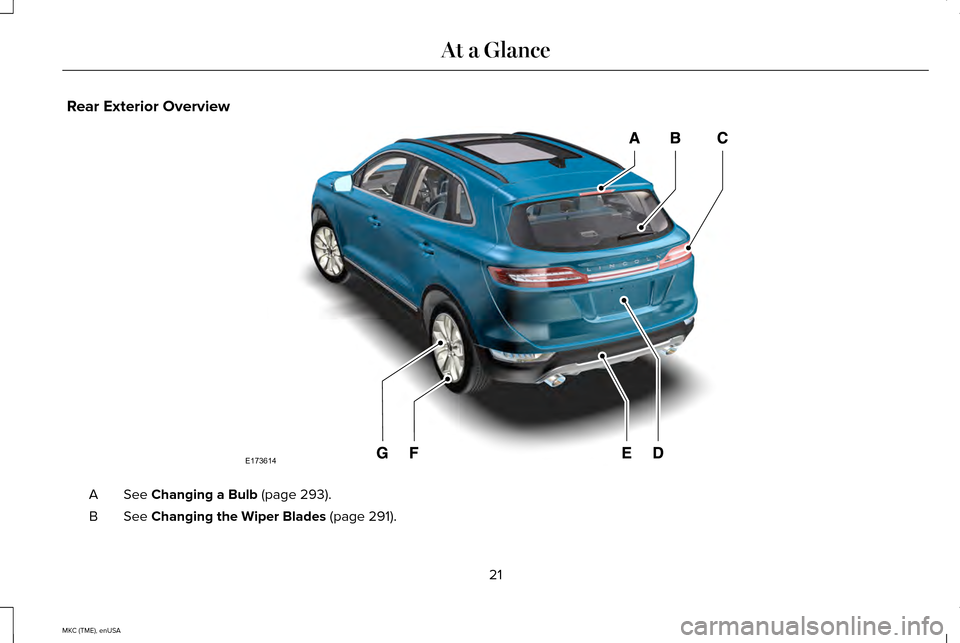
Rear Exterior Overview
See Changing a Bulb (page 293).
A
See
Changing the Wiper Blades (page 291).
B
21
MKC (TME), enUSA At a GlanceE173614
Page 25 of 490
See Changing a Bulb (page 293).
C
Liftgate.
See Manual Liftgate (page 73). See Power Liftgate (page 74).
D
See
Changing a Road Wheel (page 328).
E
Tire pressures.
See Wheels and Tires (page 308).
F
See
Tire Care (page 310).
G
22
MKC (TME), enUSA At a Glance
Page 26 of 490
GENERAL INFORMATION
See the following sections for directions on
how to properly use safety restraints for
children.
WARNINGS
Always make sure your child is secured
properly in a device that is appropriate
for their height, age and weight. Child safety
restraints must be bought separately from
your vehicle. Failure to follow these
instructions and guidelines may result in an
increased risk of serious injury or death to
your child. WARNINGS
All children are shaped differently. The
recommendations for safety restraints
are based on probable child height, age and
weight thresholds from National Highway
Traffic Safety Administration and other safety
organizations, or are the minimum
requirements of law. Ford recommends
checking with a NHTSA Certified Child
Passenger Safety Technician (CPST) and
consult your pediatrician to make sure your
child seat is appropriate for your child, and
is compatible with and properly installed in
your vehicle. To locate a child seat fitting
station and CPST, contact the NHTSA toll WARNINGS
free at 1-888-327-4236 or go to
http://www.nhtsa.dot.gov. In Canada, check
with your local St. John Ambulance office for
referral to a CPST or for further information,
contact your provincial ministry of
transportation, locate your local St. John
Ambulance office by searching for St. John
Ambulance on the internet, or Transport
Canada at 1-800-333-0371
(http://www.tc.gc.ca). Failure to properly
restrain children in safety seats made
especially for their height, age, and weight
may result in an increased risk of serious
injury or death to your child. 23
MKC (TME), enUSA Child Safety
Page 27 of 490
Recommendations for Safety Restraints for Children
Recommended restraint type
Child size, height, weight, or age
Child
Use a child safety seat (sometimes called aninfant carrier, convertible seat, or toddler seat).
Children weighing 40 lb (18 kg) or less (generally age four or
younger).
Infants or toddlers
Use a belt-positioning booster seat.
Children who have outgrown or no longer properly fit in a child
safety seat (generally children who are less than 4 ft. 9 in. (1.45 m)\
tall, are greater than age four and less than age 12, and between 40 lb (18 kg) and 80 lb (36 kg) and upward to 100 lb (45 kg) if recommended by your child restraint manufacturer).
Small children
Use a vehicle safety belt having the lap beltsnug and low across the hips, shoulder belt
centered across the shoulder and chest, and seat back upright.
Children who have outgrown or no longer properly fit in a belt-
positioning booster seat (generally children who are at least 4 ft. 9 in. (1.45 m) tall or greater than 80 lb (36 kg) or 100 lb (45 kg) if recommended by child restraint manufacturer).
Larger children
24
MKC (TME), enUSA Child Safety
Page 28 of 490
•
You are required by law to properly use
safety seats for infants and toddlers in
the United States and Canada.
• Many states and provinces require that
small children use approved booster
seats until they reach age eight, a height
of 4 feet 9 inches (1.45 meters) tall, or 80
pounds (36 kilograms). Check your local
and state or provincial laws for specific
requirements about the safety of children
in your vehicle.
• When possible, always properly restrain
children 12 years of age and under in a
rear seating position of your vehicle.
Accident statistics suggest that children
are safer when properly restrained in the
rear seating positions than in a front
seating position. See Front Passenger
Sensing System (page 49). INSTALLING CHILD SEATS
Child Seats
Use a child safety seat (sometimes called an
infant carrier, convertible seat, or toddler
seat) for infants, toddlers, or children
weighing 40 pounds (18 kilograms) or less
(generally age four or younger).Using Lap and Shoulder Belts WARNINGS
Airbags can kill or injure a child in a
child seat. Never place a rear-facing
child seat in front of an active airbag. If you
must use a forward-facing child seat in the
front seat, move the seat upon which the
child seat is installed all the way back. Airbags can kill or injure a child in a
child seat. Children 12 and under
should be properly restrained in the rear seat
whenever possible. Depending on where you secure a
child restraint, and depending on the
child restraint design, you may block access
to certain safety belt buckle assemblies and
LATCH lower anchors, rendering those
features potentially unusable. To avoid risk
of injury, occupants should only use seating
positions where they are able to be properly
restrained. 25
MKC (TME), enUSA Child SafetyE142594
Page 29 of 490
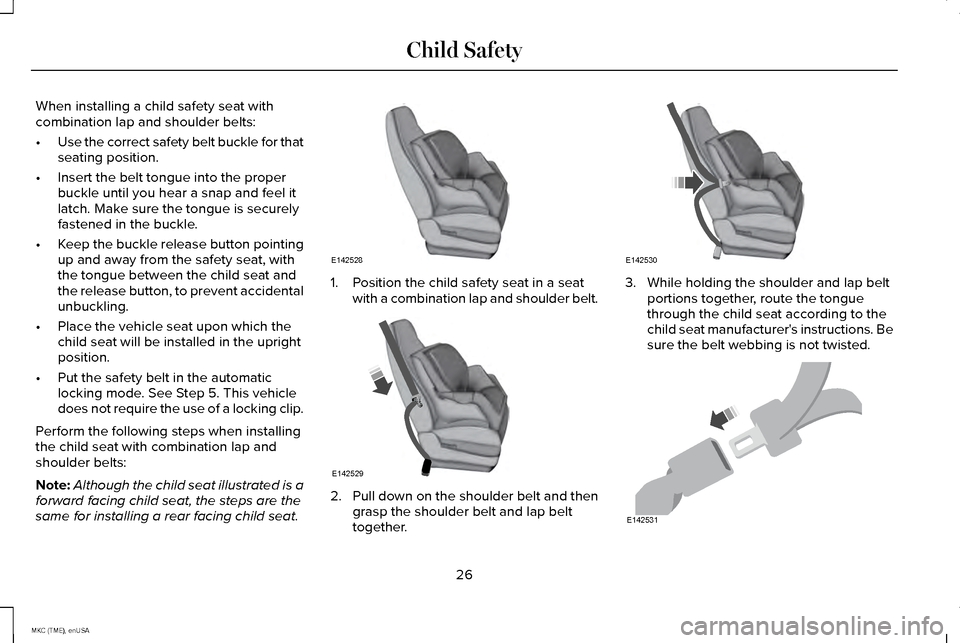
When installing a child safety seat with
combination lap and shoulder belts:
•
Use the correct safety belt buckle for that
seating position.
• Insert the belt tongue into the proper
buckle until you hear a snap and feel it
latch. Make sure the tongue is securely
fastened in the buckle.
• Keep the buckle release button pointing
up and away from the safety seat, with
the tongue between the child seat and
the release button, to prevent accidental
unbuckling.
• Place the vehicle seat upon which the
child seat will be installed in the upright
position.
• Put the safety belt in the automatic
locking mode. See Step 5. This vehicle
does not require the use of a locking clip.
Perform the following steps when installing
the child seat with combination lap and
shoulder belts:
Note: Although the child seat illustrated is a
forward facing child seat, the steps are the
same for installing a rear facing child seat. 1. Position the child safety seat in a seat
with a combination lap and shoulder belt. 2.
Pull down on the shoulder belt and then
grasp the shoulder belt and lap belt
together. 3. While holding the shoulder and lap belt
portions together, route the tongue
through the child seat according to the
child seat manufacturer's instructions. Be
sure the belt webbing is not twisted. 26
MKC (TME), enUSA Child SafetyE142528 E142529 E142530 E142531
Page 30 of 490
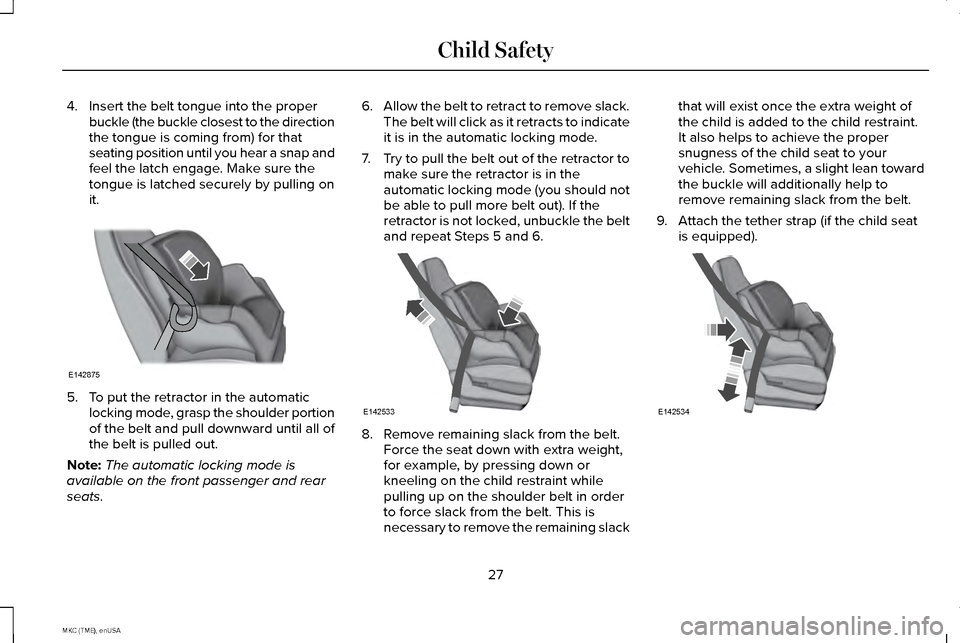
4. Insert the belt tongue into the proper
buckle (the buckle closest to the direction
the tongue is coming from) for that
seating position until you hear a snap and
feel the latch engage. Make sure the
tongue is latched securely by pulling on
it. 5. To put the retractor in the automatic
locking mode, grasp the shoulder portion
of the belt and pull downward until all of
the belt is pulled out.
Note: The automatic locking mode is
available on the front passenger and rear
seats. 6.
Allow the belt to retract to remove slack.
The belt will click as it retracts to indicate
it is in the automatic locking mode.
7. Try to pull the belt out of the retractor to
make sure the retractor is in the
automatic locking mode (you should not
be able to pull more belt out). If the
retractor is not locked, unbuckle the belt
and repeat Steps 5 and 6. 8. Remove remaining slack from the belt.
Force the seat down with extra weight,
for example, by pressing down or
kneeling on the child restraint while
pulling up on the shoulder belt in order
to force slack from the belt. This is
necessary to remove the remaining slack that will exist once the extra weight of
the child is added to the child restraint.
It also helps to achieve the proper
snugness of the child seat to your
vehicle. Sometimes, a slight lean toward
the buckle will additionally help to
remove remaining slack from the belt.
9. Attach the tether strap (if the child seat is equipped). 27
MKC (TME), enUSA Child SafetyE142875 E142533 E142534