manual transmission LINCOLN MKC 2015 Owners Manual
[x] Cancel search | Manufacturer: LINCOLN, Model Year: 2015, Model line: MKC, Model: LINCOLN MKC 2015Pages: 490, PDF Size: 4.74 MB
Page 63 of 490
Vehicles with automatic climate control can
be configured to operate when the vehicle
is remote started. See Automatic Climate
Control (page 136). A manual climate control
system will run at the setting it was set to
when you switched the vehicle off.
Many states and provinces have restrictions
for the use of remote start. Check your local
and state or provincial laws for specific
requirements regarding remote start
systems.
The remote start system will not work if:
• The ignition is on.
• The alarm system is triggered.
• You disable the feature.
• The hood is open.
• The transmission is not in
P.
• The vehicle battery voltage is too low.
• The service engine soon light is on. Remote Starting the Vehicle
Note:
You must press each button within
three seconds of each other. Your vehicle
will not remote start if you do not follow this
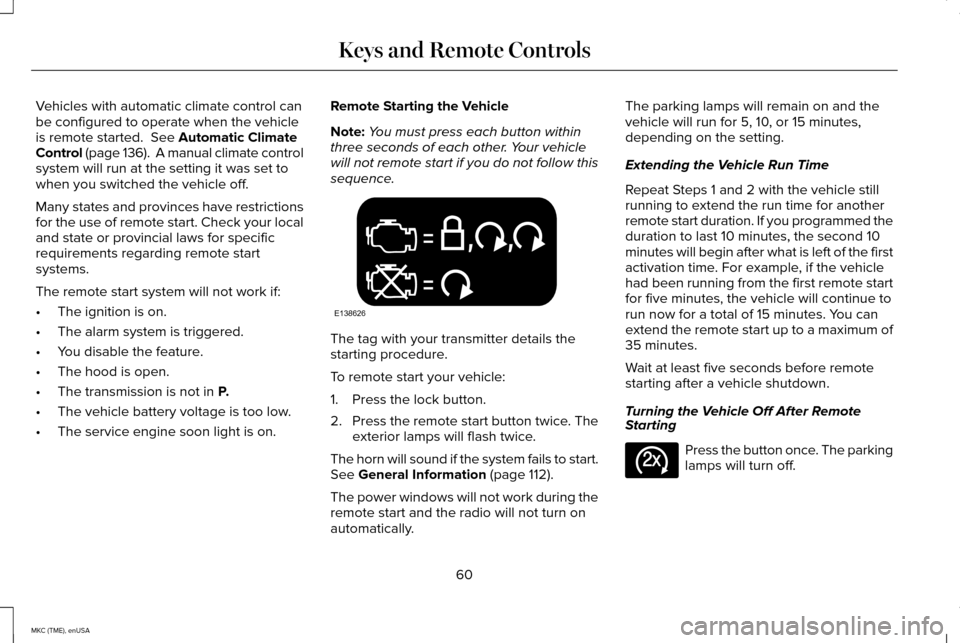
sequence. The tag with your transmitter details the
starting procedure.
To remote start your vehicle:
1. Press the lock button.
2.
Press the remote start button twice. The
exterior lamps will flash twice.
The horn will sound if the system fails to start.
See
General Information (page 112).
The power windows will not work during the
remote start and the radio will not turn on
automatically. The parking lamps will remain on and the
vehicle will run for 5, 10, or 15 minutes,
depending on the setting.
Extending the Vehicle Run Time
Repeat Steps 1 and 2 with the vehicle still
running to extend the run time for another
remote start duration. If you programmed the
duration to last 10 minutes, the second 10
minutes will begin after what is left of the first
activation time. For example, if the vehicle
had been running from the first remote start
for five minutes, the vehicle will continue to
run now for a total of 15 minutes. You can
extend the remote start up to a maximum of
35 minutes.
Wait at least five seconds before remote
starting after a vehicle shutdown.
Turning the Vehicle Off After Remote
Starting
Press the button once. The parking
lamps will turn off.
60
MKC (TME), enUSA Keys and Remote ControlsE138626 E138625
Page 136 of 490
Transmission
Action
Message
See an authorized dealer.
Transmission Malfunction Service Now
The transmission is overheating and needs to cool. Stop in a safe place as soon as possible.
Transmission Overheating Stop Safely
See an authorized dealer.
Transmission Service Required
The transmission is getting hot. Stop to let it cool.
Transmission Too Hot Press Brake
The transmission has overheated and has limited functionality. See Automatic Transmission
(page 171).
Transmission Limited Function See Manual
The transmission is too cold. Wait for it to warm up before you drive.
Transmission Warming Up Please Wait
A reminder to shift into park. In addition, this message is typical afte\
r reconnecting or rechargingthe battery until you cycle the ignition to the on mode.
See Changing the 12V Battery (page
288).
Transmission Not in Park
The transmission has adjusted the shift strategy.
Transmission Adjusted
The transmission is adjusting the shift strategy.
Transmission Adapt Mode
The transmission is locked and unable to select gears.
Transmission Indicate Mode Lockup On
The transmission is unlocked and free to select gears.
Transmission Indicate Mode Lockup Off
You have selected an invalid gear.
Invalid Gear Selection
You need to depress the brake pedal.
Press Brake Pedal
133
MKC (TME), enUSA Information Displays
Page 137 of 490
Action
Message
You need to depress the brake pedal before you can shift from P park.
Depress Brake to Shift from Park
You need to press the N neutral button again to enter neutral hold. See Automatic Transmission (page
171).
Press N again to Enter Stay in Neutral
Mode
Neutral hold is active.
See Automatic Transmission (page 171).
Stay in Neutral Mode Engaged
Neutral hold is active.
See Towing the Vehicle on Four Wheels (page 244).
Stay in Neutral Tow Engaged See Manual
to Disable
There is a system fault and you need to depress the park brake before you exit your vehicle. See an authorized dealer.
SHIFT SYS FAULT Confirm Park Brake
Apply Before Exiting the Vehicle
There is a system fault and you need to depress the park brake before you exit your vehicle.See an authorized dealer.
SHIFT SYS FAULT Cannot Shift Trans Use
Park Brake to Secure Vehicle
See an authorized dealer.
SHIFT SYS FAULT Service Required
There is a system fault while you are shifting your vehicle to
P park. See an authorized dealer.
SHIFT SYS FAULT Vehicle is Shifting to
Park
There is a system fault while you are shifting your vehicle to
R reverse. See your authorized
dealer.
SHIFT SYS FAULT Reverse Unavailable
Service Required
See an authorized dealer.
SHIFT SYS FAULT Drive Unavailable Select
S for Drive Service Required
See an authorized dealer.
SHIFT SYS FAULT Neutral Unavailable
Service Required
134
MKC (TME), enUSA Information Displays
Page 176 of 490
The message Stay in Neutral mode
engaged will appear in your information
display screen when your vehicle has
entered Stay in Neutral mode.
Note: During this mode the
N button will
flash continuously and your instrument
cluster will display N as the selected gear.
Exiting Stay in Neutral mode
To disable Stay in Neutral mode select
another gear. See the
Putting the Vehicle
in Gear for instructions on how to do this.
Entering a Carwash
Note: Always put your vehicle in Stay in
Neutral mode when entering an automatic
car wash. Failure to do this could result in
vehicle damage not covered by warranty.
Drive (D)
The normal driving position for the best fuel
economy. Sport (S)
Putting the vehicle in sport (S):
•
Provides additional engine braking and
extends lower gear operation to enhance
performance for uphill climbs, hilly terrain
or mountainous areas. This will increase
engine RPM during engine braking
• Provides additional lower gear operation
through the automatic transmission shift
strategy
• Provides gear selection more quickly and
at higher engine speeds
SelectShift Automatic ™ Transmission
Your SelectShift Automatic transmission
gives you the ability to change gears
manually.
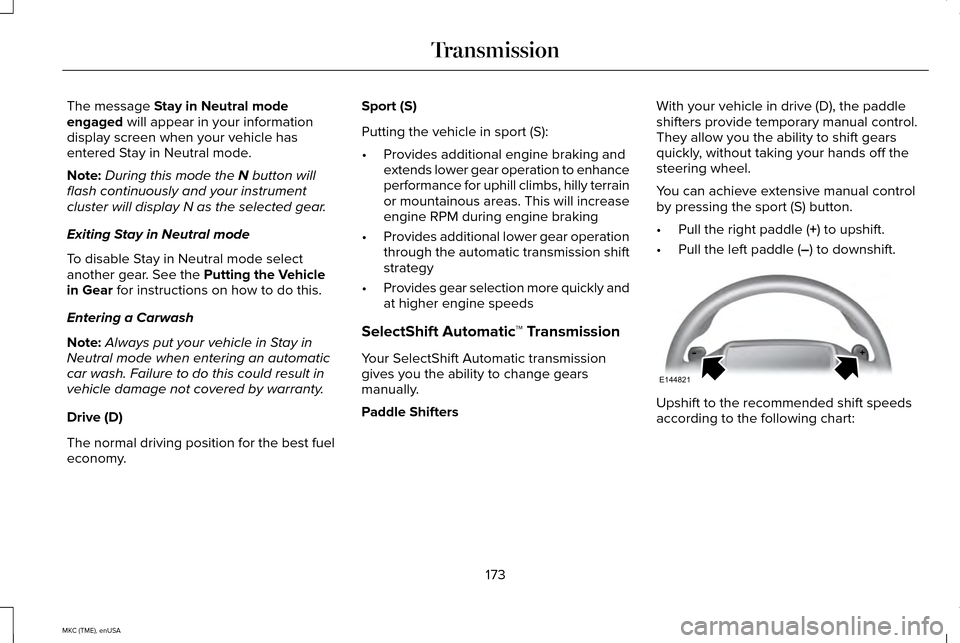
Paddle Shifters With your vehicle in drive (D), the paddle
shifters provide temporary manual control.
They allow you the ability to shift gears
quickly, without taking your hands off the
steering wheel.
You can achieve extensive manual control
by pressing the sport (S) button.
•
Pull the right paddle (
+) to upshift.
• Pull the left paddle (
–) to downshift. Upshift to the recommended shift speeds
according to the following chart:
173
MKC (TME), enUSA TransmissionE144821
Page 177 of 490
Upshifts when accelerating (recommended for best fuel economy)
mph (km/h)
Gear Upshift
To
From
15 mph (24 km/h)
2
1
25 mph (40 km/h)
3
2
40 mph (64 km/h)
4
3
45 mph (72 km/h)
5
4
50 mph (80 km/h)
6
5
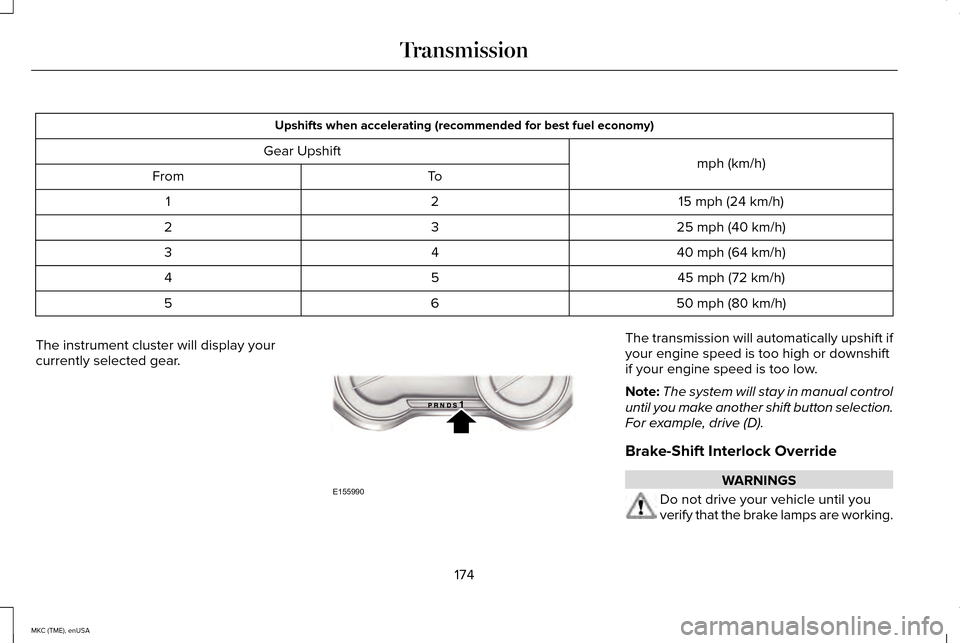
The instrument cluster will display your
currently selected gear. The transmission will automatically upshift if
your engine speed is too high or downshift
if your engine speed is too low.
Note:
The system will stay in manual control
until you make another shift button selection.
For example, drive (D).
Brake-Shift Interlock Override WARNINGS
Do not drive your vehicle until you
verify that the brake lamps are working.
174
MKC (TME), enUSA TransmissionE155990
Page 198 of 490
Automatic Steering into a Parking
Space
Note:
If your vehicle speed exceeds 6 mph
(10 km/h), the system switches off and you
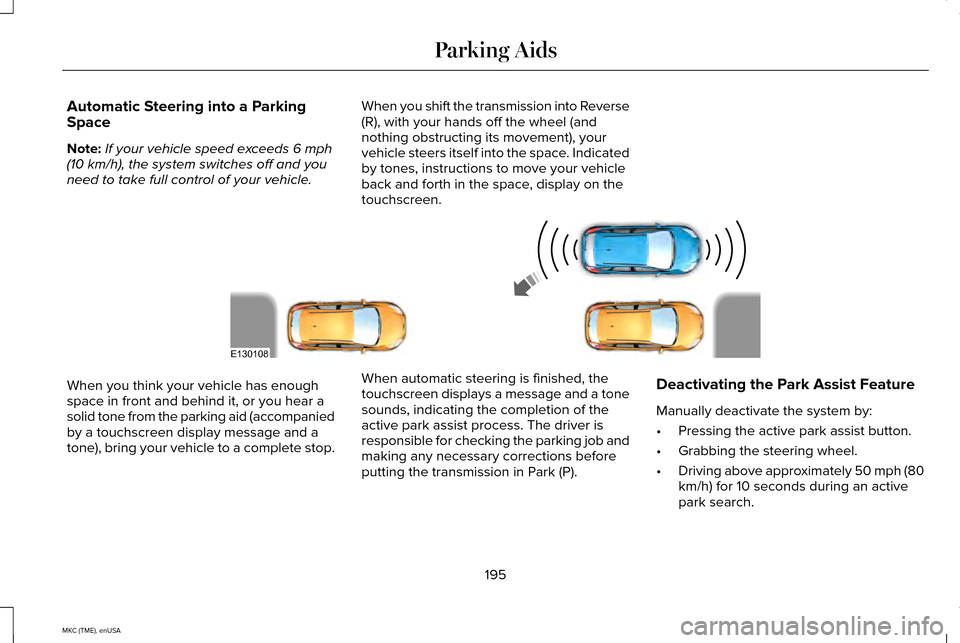
need to take full control of your vehicle. When you shift the transmission into Reverse
(R), with your hands off the wheel (and
nothing obstructing its movement), your
vehicle steers itself into the space. Indicated
by tones, instructions to move your vehicle
back and forth in the space, display on the
touchscreen.When you think your vehicle has enough
space in front and behind it, or you hear a
solid tone from the parking aid (accompanied
by a touchscreen display message and a
tone), bring your vehicle to a complete stop.
When automatic steering is finished, the
touchscreen displays a message and a tone
sounds, indicating the completion of the
active park assist process. The driver is
responsible for checking the parking job and
making any necessary corrections before
putting the transmission in Park (P).Deactivating the Park Assist Feature
Manually deactivate the system by:
•
Pressing the active park assist button.
• Grabbing the steering wheel.
• Driving above approximately 50 mph (80
km/h) for 10 seconds during an active
park search.
195
MKC (TME), enUSA Parking AidsE130108
Page 200 of 490
The touchscreen displays a message
requesting an indication of direction. Use the
direction indicator to signal which side of
your vehicle you want to exit the parking
space.
Note:
If there is no vehicle in front of you,
the Park Out Assist feature cannot be
activated.
Automatic Steering out of a Parking
Space
The system determines a suitable clearance
to the front and rear of your vehicle. The
touchscreen displays a message to shift to
Reverse (R), Drive (D) or Sport (S). When you shift the transmission into R
(Reverse), D (Drive) or S (Sport), with your
hands off the wheel (and nothing obstructing
its movement), your vehicle steers itself to
exit the space. If there is not sufficient
clearance to the vehicle in front of you, the
system displays instructions to move your
vehicle back and forth in the space. Parking
Aid is enabled to avoid contact to the
neighboring vehicles.
When automatic steering is finished, the
touchscreen displays a message informing
you to take control and a tone sounds,
indicating the completion of the Park Out
Assist process.
Note:
The driver is responsible for checking
traffic conditions at all times. Deactivating the Park Out Assist
Feature
Manually deactivate the system by:
•
Pressing the active park assist button.
• Grabbing the steering wheel.
• Driving above 6 mph (10 km/h) during
automatic steering.
• Turning off the traction control system.
Certain vehicle conditions can also
deactivate the system, such as:
• Traction control has activated on a
slippery or loose surface.
• There is an anti-lock brake system
activation or failure.
• Something touches the steering wheel.
If a problem occurs with the system, a
warning message is displayed, followed by
a tone. Occasional system messages may
occur in normal operation. For recurring or
frequent system faults, contact an authorized
dealer to have your vehicle serviced.
197
MKC (TME), enUSA Parking Aids
Page 205 of 490
Enhanced Park Aids
Note:
Enhanced park aids is only available
when the transmission is in Reverse (R).
Note: The reverse sensing system is not
effective at speeds above 3 mph (5 km/h)
and may not detect certain angular or
moving objects.
The system uses red, yellow and green
highlights which appear on top of the video
image when an object is detected by the
reverse sensing system. The alert highlights
the closest object detected. The reverse
sensing alert can be disabled and if visual
park aid alert is enabled, highlighted areas
are still displayed.
Selectable settings for this feature are ON
and OFF.
Manual Zoom WARNING
When manual zoom is on, the full area
behind your vehicle is not shown. Be
aware of your surroundings when using the
manual zoom feature. Note:
Manual zoom is only available when
the transmission is in Reverse (R).
Note: Only the centerline shows when you
enable manual zoom.
This allows you to get a closer view of an
object behind your vehicle. The zoomed
image keeps the bumper in the image to
provide a reference. The zoom is only active
while the transmission is in Reverse (R).
When you shift the transmission out of
Reverse (R), the feature automatically turns
off and you must enable it to use it used
again.
Selectable settings for this feature are ON
and OFF. The default setting for the manual
zoom is OFF.
Rear Camera Delay
When shifting the transmission out of
Reverse (R) and into any gear other than Park
(P), the camera image remains in the display
until your vehicle speed reaches 5 mph (8
km/h). This occurs when the rear camera
delay feature is on, or until a radio button is
selected. Selectable settings for this feature are ON
and OFF. The default setting for the rear
camera delay is OFF.
202
MKC (TME), enUSA Parking Aids
Page 242 of 490
TOWING A TRAILER
WARNINGS
Do not exceed the GVWR or the
GAWR specified on the certification
label. Towing trailers beyond the
maximum recommended gross
trailer weight exceeds the limit of the
vehicle and could result in engine
damage, transmission damage,
structural damage, loss of vehicle
control, vehicle rollover and personal
injury. Your vehicle may have electrical items,
such as fuses or relays, related to
towing. See the Fuses chapter.
Your vehicle's load capacity designation
is by weight, not by volume, so you
cannot necessarily use all available
space when loading a vehicle. Towing a trailer places an extra load on
your vehicle's engine, transmission, axle,
brakes, tires and suspension. Inspect
these components periodically during,
and after, any towing operation.
Load Placement
To help minimize how trailer movement
affects your vehicle when driving:
•
Load the heaviest items closest to
the trailer floor.
• Load the heaviest items centered
between the left and right side trailer
tires.
• Load the heaviest items above the
trailer axles or just slightly forward
toward the trailer tongue. Do not
allow the final trailer tongue weight
to go above or below 10-15% of the
loaded trailer weight.
• Select a tow bar with the correct rise
or drop. When both the loaded
vehicle and trailer are connected, the
trailer frame should be level, or
slightly angled down toward your
vehicle, when viewed from the side. When driving with a trailer or payload, a
slight takeoff vibration or shudder may
be present due to the increased payload
weight. Additional information regarding
proper trailer loading and setting your
vehicle up for towing is located in
another chapter of this manual.
See
Load Limit (page 230). You can also find
the information in the
RV & Trailer
Towing Guide, available at an
authorized dealer.
TRAILER SWAY CONTROL (If Equipped) WARNING
Turning off trailer sway control
increases the risk of loss of vehicle
control, serious injury or death. Ford does
not recommend disabling this feature except
in situations where speed reduction may be
detrimental (such as hill climbing), the driver
has significant trailer towing experience, and
can control trailer sway and maintain safe
operation. 239
MKC (TME), enUSA Towing
Page 400 of 490
Hands-free calling is one of the main features
of SYNC. Once you pair your phone, you can
access many options using the touchscreen
or voice commands. While the system
supports a variety of features, many are
dependent on your cellular phone
’s
functionality.
At a minimum, most cellular phones with
Bluetooth wireless technology support the
following functions:
• Answering an incoming call.
• Ending a call.
• Using privacy mode.
• Dialing a number.
• Redialing.
• Call waiting notification.
• Caller ID.
Other features, such as text messaging using
Bluetooth and automatic phonebook
download, are phone-dependent features.
To check your phone ’s compatibility, see
your device ’s manual and visit
www.SYNCMyRide.com,
www.SYNCMyRide.ca or
www.syncmaroute.ca. Pairing Your Phone for the First Time WARNING
Driving while distracted can result in
loss of vehicle control, crash and injury.
We strongly recommend that you use
extreme caution when using any device that
may take your focus off the road. Your
primary responsibility is the safe operation
of your vehicle. We recommend against the
use of any hand-held device while driving
and encourage the use of voice-operated
systems when possible. Make sure you are
aware of all applicable local laws that may
affect the use of electronic devices while
driving The first thing you must do to use the phone
features of SYNC is to pair your
Bluetooth-enabled cellular phone with SYNC.
This allows you to use your phone in a
hands-free manner.
Note:
Put the transmission in park (P). Switch
on your vehicle ignition and the radio. 1. Touch Add Phone in the upper left
corner of the touchscreen. Find SYNC
appears on the screen, and instructs you
to begin the pairing process from your
device.
2. Make sure that Bluetooth is set to On and
that your cellular phone is in the proper
mode. See your device ’s manual if
necessary.
Note: Select
SYNC, and a six-digit PIN
appears on your device.
3. If prompted to enter a PIN on your device, it does not support Secure Simple
Pairing. To pair, enter the PIN displayed
on the touchscreen. Skip the next step.
4. When prompted on your phone ’s display,
confirm that the PIN provided by SYNC
matches the PIN displayed on your
cellular phone.
5. The display indicates when the pairing is
successful.
SYNC may prompt you with more phone
options. For more information on your
phone's capability, see your device's manual
and visit the website.
397
MKC (TME), enUSA MyLincoln Touch™