key LINCOLN MKC 2016 Owner's Manual
[x] Cancel search | Manufacturer: LINCOLN, Model Year: 2016, Model line: MKC, Model: LINCOLN MKC 2016Pages: 432, PDF Size: 4.89 MB
Page 74 of 432
Three warning tones sound as the liftgate
begins to power close. One short chime
indicates a problem with the open or close
request, caused by:
•
The ignition is on and the transmission
is not in park (P).
• The battery voltage is below the
minimum operating voltage.
• The vehicle speed is at or above 3 mph
(5 km/h).
If the liftgate starts to close after it has fully
opened, this indicates there may be
excessive weight on the liftgate or a possible
gas strut failure. A repetitive chime sounds
and the liftgate closes under control. Remove
any excessive weight from the liftgate. If the
liftgate continues to close after opening,
have the system checked by an authorized
dealer.
Opening and Closing the Liftgate WARNING
Make sure all persons are clear of the
power liftgate area before using the
power liftgate control. Note:
Be careful when opening or closing
the liftgate in a garage or other enclosed
area to avoid damaging the liftgate.
Note: Do not leave the liftgate open while
driving. This could damage the liftgate and
its components.
From the Instrument Panel Press the button on the instrument
panel.
With the Remote Control Press the button twice within three
seconds.
With the Outside Control Button
Opening the Liftgate
1. Unlock the liftgate with the remote control or power door unlock control. If
an intelligent access key is within
3 ft
(1 m) of the liftgate, the liftgate unlocks
when you press the liftgate release
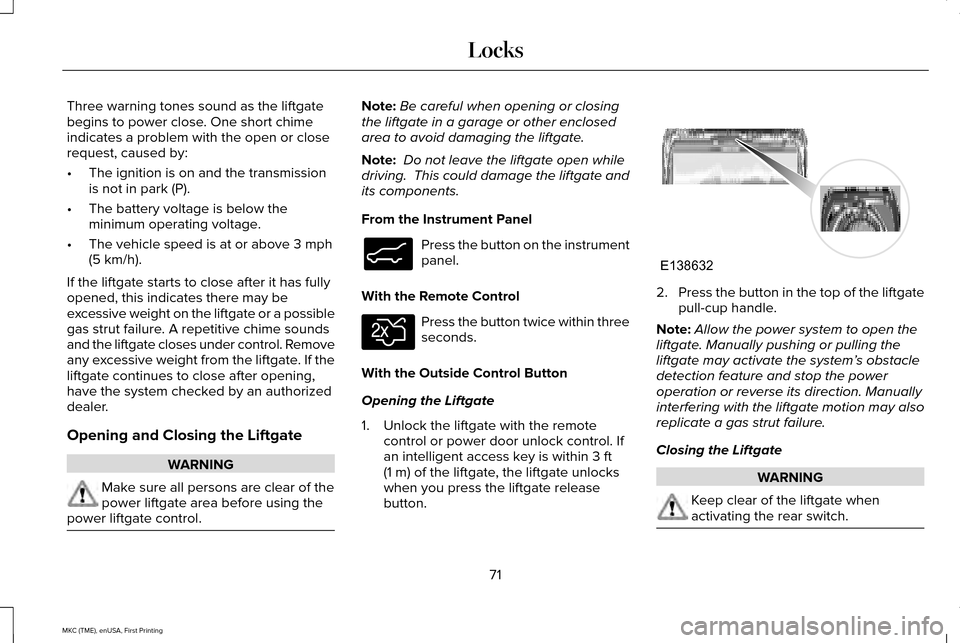
button. 2.
Press the button in the top of the liftgate
pull-cup handle.
Note: Allow the power system to open the
liftgate. Manually pushing or pulling the
liftgate may activate the system’ s obstacle
detection feature and stop the power
operation or reverse its direction. Manually
interfering with the liftgate motion may also
replicate a gas strut failure.
Closing the Liftgate WARNING
Keep clear of the liftgate when
activating the rear switch.
71
MKC (TME), enUSA, First Printing LocksE138633 E138630 E138632
Page 76 of 432
When Opening
The system stops when it detects an
obstacle and three tones sound. Once you
remove the obstacle, you can continue to
operate the liftgate.
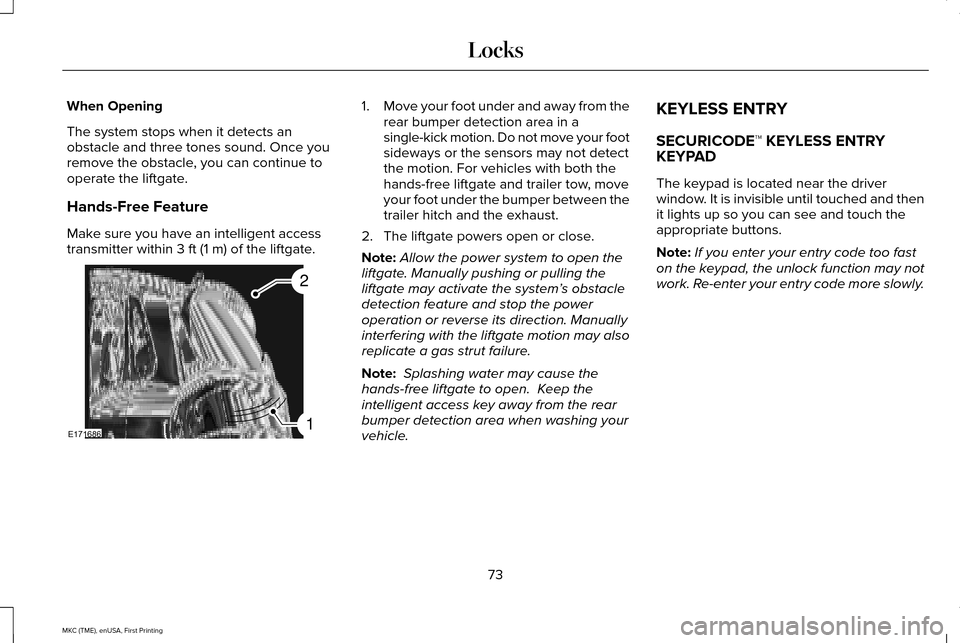
Hands-Free Feature
Make sure you have an intelligent access
transmitter within 3 ft (1 m) of the liftgate. 1.
Move your foot under and away from the
rear bumper detection area in a
single-kick motion. Do not move your foot
sideways or the sensors may not detect
the motion. For vehicles with both the
hands-free liftgate and trailer tow, move
your foot under the bumper between the
trailer hitch and the exhaust.
2. The liftgate powers open or close.
Note: Allow the power system to open the
liftgate. Manually pushing or pulling the
liftgate may activate the system’ s obstacle
detection feature and stop the power
operation or reverse its direction. Manually
interfering with the liftgate motion may also
replicate a gas strut failure.
Note: Splashing water may cause the
hands-free liftgate to open. Keep the
intelligent access key away from the rear
bumper detection area when washing your
vehicle. KEYLESS ENTRY
SECURICODE™ KEYLESS ENTRY
KEYPAD
The keypad is located near the driver
window. It is invisible until touched and then
it lights up so you can see and touch the
appropriate buttons.
Note:
If you enter your entry code too fast
on the keypad, the unlock function may not
work. Re-enter your entry code more slowly.
73
MKC (TME), enUSA, First Printing LocksE171686
2
1
Page 77 of 432
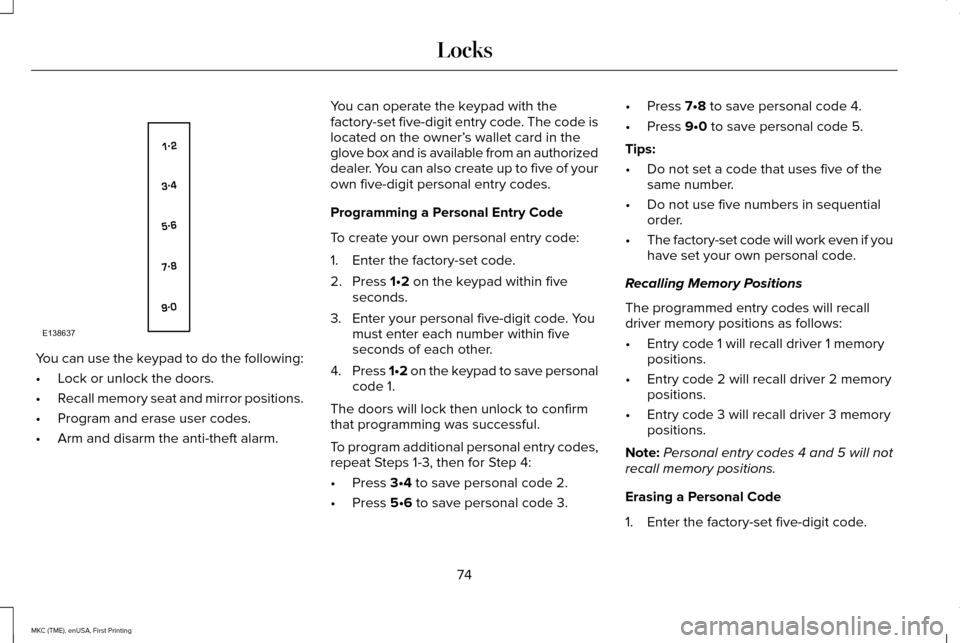
You can use the keypad to do the following:
•
Lock or unlock the doors.
• Recall memory seat and mirror positions.
• Program and erase user codes.
• Arm and disarm the anti-theft alarm. You can operate the keypad with the
factory-set five-digit entry code. The code is
located on the owner’
s wallet card in the
glove box and is available from an authorized
dealer. You can also create up to five of your
own five-digit personal entry codes.
Programming a Personal Entry Code
To create your own personal entry code:
1. Enter the factory-set code.
2. Press 1•2 on the keypad within five
seconds.
3. Enter your personal five-digit code. You must enter each number within five
seconds of each other.
4. Press 1•2 on the keypad to save personal
code 1.
The doors will lock then unlock to confirm
that programming was successful.
To program additional personal entry codes,
repeat Steps 1-3, then for Step 4:
• Press
3•4 to save personal code 2.
• Press
5•6 to save personal code 3. •
Press
7•8 to save personal code 4.
• Press
9•0 to save personal code 5.
Tips:
• Do not set a code that uses five of the
same number.
• Do not use five numbers in sequential
order.
• The factory-set code will work even if you
have set your own personal code.
Recalling Memory Positions
The programmed entry codes will recall
driver memory positions as follows:
• Entry code 1 will recall driver 1 memory
positions.
• Entry code 2 will recall driver 2 memory
positions.
• Entry code 3 will recall driver 3 memory
positions.
Note: Personal entry codes 4 and 5 will not
recall memory positions.
Erasing a Personal Code
1. Enter the factory-set five-digit code.
74
MKC (TME), enUSA, First Printing LocksE138637
Page 78 of 432
2. Press and release 1•2 on the keypad
within five seconds.
3. Press and hold 1•2 for two seconds. You
must do this within five seconds of
completing Step 2.
All personal codes will erase and only the
factory-set five-digit code will work.
Anti-Scan Feature
The keypad will go into an anti-scan mode
if you enter the wrong code seven times (35
consecutive button presses). This mode
disables the keypad for one minute and the
keypad lamp will flash.
The anti-scan feature turns off after any of
the following occur:
• One minute of keypad inactivity passes.
• You press the unlock button on the
remote control.
• You switch the ignition on.
• You unlock the vehicle using intelligent
access. Unlocking and Locking the Doors
To Unlock the Driver Door
Enter the factory-set five-digit code or your
personal code. You must press each number
within five seconds of each other. The
interior lamps will illuminate.
Note:
All doors will unlock if the two-stage
unlocking feature is disabled.
See Locking
and Unlocking (page 64).
To Unlock All Doors
Enter the factory-set code or your personal
code, then press
3•4 control within five
seconds.
To Lock All Doors
Press and hold
7•8 and 9•0 at the same time
with the driver door closed. You do not need
to enter the keypad code first.
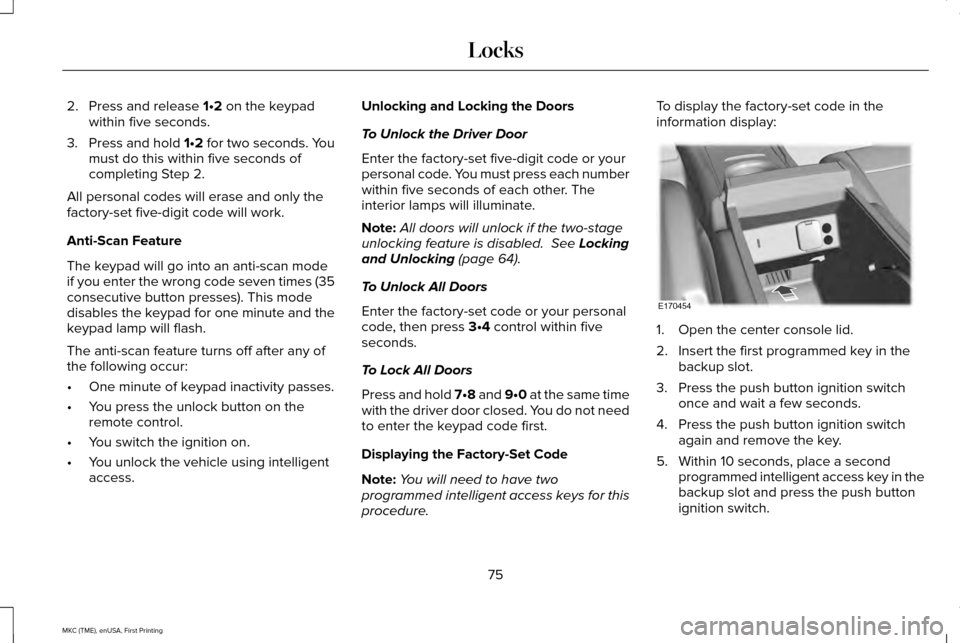
Displaying the Factory-Set Code
Note: You will need to have two
programmed intelligent access keys for this
procedure. To display the factory-set code in the
information display:
1. Open the center console lid.
2. Insert the first programmed key in the
backup slot.
3. Press the push button ignition switch once and wait a few seconds.
4. Press the push button ignition switch again and remove the key.
5. Within 10 seconds, place a second programmed intelligent access key in the
backup slot and press the push button
ignition switch.
75
MKC (TME), enUSA, First Printing LocksE170454
Page 80 of 432
PASSIVE ANTI-THEFT SYSTEM
Note:
The system is not compatible with
non-Ford aftermarket remote start systems.
Use of these systems may result in vehicle
starting problems and a loss of security
protection.
Note: Metallic objects, electronic devices or
a second coded key on the same key chain
may cause vehicle starting problems if they
are too close to the key when starting the
engine. Prevent these objects from touching
the coded key while starting the engine.
Switch the ignition off, move all objects on
the key chain away from the coded key and
restart the engine if a problem occurs.
Note: Do not leave a duplicate coded key
in the vehicle. Always take your keys and
lock all doors when leaving the vehicle. SecuriLock™
The system is an engine immobilization
system. The intended design is to help
prevent the engine from starting unless a
coded key programmed to your vehicle is
used. Using the wrong key may prevent the
engine from starting. A message may appear
in the information display.
If you are unable to start the engine with a
correctly coded key, a malfunction has
happened and a message may appear in the
information display.
Automatic Arming
The vehicle arms immediately after you
switch the ignition off.
Automatic Disarming
If you switch the ignition on with a coded key
you disarm the vehicle. If you unlock the
doors with the touch handle you disarm the
alarm.Replacement Keys
Note:
Your vehicle comes equipped with two
intelligent access keys.
The intelligent access key functions as a
programmed key that operates the driver
door lock and activates the intelligent access
with push button start system, as well as a
remote control.
If your programmed transmitters are lost or
stolen and you do not have an extra coded
key, you will need to have your vehicle
towed to an authorized dealer. You need to
erase the key codes from your vehicle and
program new coded keys.
Store an extra programmed key away from
the vehicle in a safe place to help prevent
any inconveniences. See your authorized
dealer to purchase additional spare or
replacement keys.
Programming a Spare Intelligent Access
Key
See your authorized dealer to have
additional keys programmed to your vehicle.
77
MKC (TME), enUSA, First Printing Security
Page 81 of 432
ANTI-THEFT ALARM
The system will warn you of an unauthorized
entry to your vehicle. It will be triggered if
any door, the luggage compartment or the
hood is opened without using the key,
remote control or keyless entry keypad.
The direction indicators will flash and the
horn will sound if unauthorized entry is
attempted while the alarm is armed.
Take all remote controls to an authorized
dealer if there is any potential alarm problem
with your vehicle.
Arming the Alarm
The alarm is ready to arm when there is not
a key in your vehicle. Electronically lock your
vehicle to arm the alarm.
Disarming the Alarm
Disarm the alarm by any of the following
actions:
•
Unlock the doors or luggage
compartment with the remote control or
keyless entry keypad.
• Switch your vehicle on or start your
vehicle.
• Use a key in the driver door to unlock
your vehicle, then switch your vehicle on
within 12 seconds.
Note: Pressing the panic button on the
remote control will stop the horn and signal
indicators, but will not disarm the system.
78
MKC (TME), enUSA, First Printing Security
Page 110 of 432
Service Engine Soon
If the service engine soon indicator
light stays illuminated after you
start the engine, it indicates that
the On Board Diagnostics system (OBD) has
detected a malfunction of your vehicle
emissions control system. Refer to On board
diagnostics (OBD) in the Fuel and Refueling
chapter for more information about having
your vehicle serviced. See Emission Control
System (page 169).
If the light is blinking, engine misfire is
occurring which could damage your catalytic
converter. Drive in a moderate fashion (avoid
heavy acceleration and deceleration) and
have your vehicle serviced immediately. WARNING
Under engine misfire conditions,
excessive exhaust temperatures could
damage the catalytic converter, the fuel
system, interior floor coverings or other
vehicle components, possibly causing a fire.
Have an authorized dealer service your
vehicle immediately. When you first switch the ignition on, before
engine start, the service engine soon
indicator light illuminates to check the bulb
and to indicate whether your vehicle is ready
for inspection maintenance testing.
Normally, the service engine soon light will
stay on until you crank the engine, and then
turn itself off if no malfunctions are present.
However, if after 15 seconds the service
engine soon light blinks eight times, it means
that your vehicle is not ready for inspection
maintenance testing. See Emission Control
System
(page 169).
Stability Control It will flash when the system is
active. If it remains illuminated or
does not illuminate when you
switch the ignition on, this indicates a
malfunction. During a malfunction, the system
will switch off. Have the system checked by
an authorized dealer immediately.
See
Using Stability Control (page 191). Stability Control Off It will illuminate when you switch
the system off. It will go out when
you switch the system back on or
when you switch the ignition off. See Using
Stability Control
(page 191).
AUDIBLE WARNINGS AND
INDICATORS
Keyless Warning Alert
The horn will sound twice when you exit your
vehicle with the intelligent access key and
your vehicle is in RUN, indicating your vehicle
is still on.
Headlamps On Warning Chime
Sounds when you remove the key from the
ignition and open the driver's door and you
have left the headlamps or parking lamps
on.
107
MKC (TME), enUSA, First Printing Instrument Cluster E138639
Page 112 of 432
GENERAL INFORMATION
WARNING
Driving while distracted can result in
loss of vehicle control, crash and injury.
We strongly recommend that you use
extreme caution when using any device that
may take your focus off the road. Your
primary responsibility is the safe operation
of your vehicle. We recommend against the
use of any hand-held device while driving
and encourage the use of voice-operated
systems when possible. Make sure you are
aware of all applicable local laws that may
affect the use of electronic devices while
driving. You can control various systems on your
vehicle using the information display controls
on the steering wheel. The information
display provides the corresponding
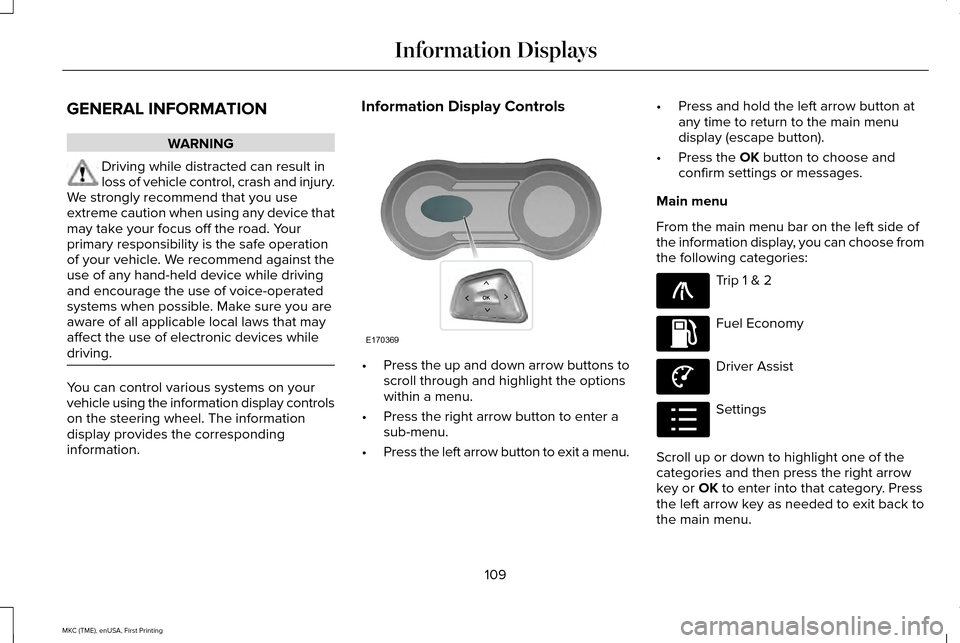
information. Information Display Controls
•
Press the up and down arrow buttons to
scroll through and highlight the options
within a menu.
• Press the right arrow button to enter a
sub-menu.
• Press the left arrow button to exit a menu. •
Press and hold the left arrow button at
any time to return to the main menu
display (escape button).
• Press the OK button to choose and
confirm settings or messages.
Main menu
From the main menu bar on the left side of
the information display, you can choose from
the following categories: Trip 1 & 2
Fuel Economy
Driver Assist
Settings
Scroll up or down to highlight one of the
categories and then press the right arrow
key or
OK to enter into that category. Press
the left arrow key as needed to exit back to
the main menu.
109
MKC (TME), enUSA, First Printing Information DisplaysE170369 E138660 E144640 E144639 E100023
Page 115 of 432
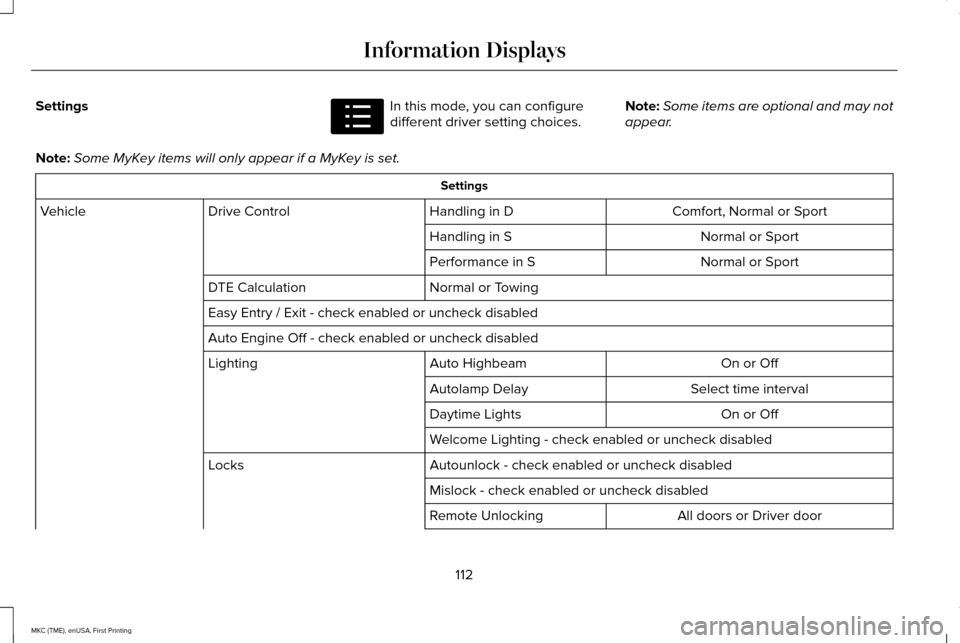
Settings In this mode, you can configure
different driver setting choices.
Note:
Some items are optional and may not
appear.
Note: Some MyKey items will only appear if a MyKey is set. Settings
Comfort, Normal or Sport
Handling in D
Drive Control
Vehicle
Normal or Sport
Handling in S
Normal or Sport
Performance in S
Normal or Towing
DTE Calculation
Easy Entry / Exit - check enabled or uncheck disabled
Auto Engine Off - check enabled or uncheck disabled
On or Off
Auto Highbeam
Lighting
Select time interval
Autolamp Delay
On or Off
Daytime Lights
Welcome Lighting - check enabled or uncheck disabled
Autounlock - check enabled or uncheck disabled
Locks
Mislock - check enabled or uncheck disabled All doors or Driver door
Remote Unlocking
112
MKC (TME), enUSA, First Printing Information DisplaysE100023
Page 116 of 432
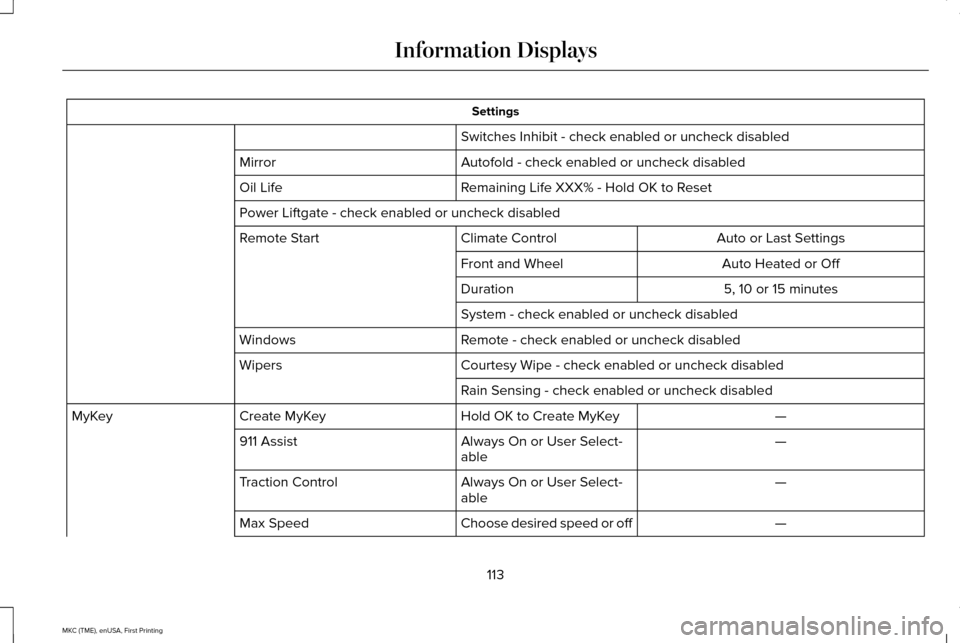
Settings
Switches Inhibit - check enabled or uncheck disabled
Autofold - check enabled or uncheck disabled
Mirror
Remaining Life XXX% - Hold OK to Reset
Oil Life
Power Liftgate - check enabled or uncheck disabled
Auto or Last Settings
Climate Control
Remote Start
Auto Heated or Off
Front and Wheel
5, 10 or 15 minutes
Duration
System - check enabled or uncheck disabled
Remote - check enabled or uncheck disabled
Windows
Courtesy Wipe - check enabled or uncheck disabled
Wipers
Rain Sensing - check enabled or uncheck disabled —
Hold OK to Create MyKey
Create MyKey
MyKey
—
Always On or User Select-
able
911 Assist
—
Always On or User Select-
able
Traction Control
—
Choose desired speed or off
Max Speed
113
MKC (TME), enUSA, First Printing Information Displays