Drive control LINCOLN MKC 2017 User Guide
[x] Cancel search | Manufacturer: LINCOLN, Model Year: 2017, Model line: MKC, Model: LINCOLN MKC 2017Pages: 538, PDF Size: 4.8 MB
Page 62 of 538
Note:
Not every feature applies to every
vehicle in every market. When they are
available for your vehicle, then they appear
in your information display, providing choices
to switch them on or off, or to select a more
specific setting.
• Various vehicle speed limits so the
MyKey driver cannot exceed certain
speeds. The information display shows
warnings followed by an audible tone
when the MyKey driver reaches the set
speed. You cannot override the set
speed by fully depressing the accelerator
pedal. WARNING
Do not set MyKey maximum speed limit
to a limit that will prevent the driver
from maintaining a safe speed considering
posted speed limits and prevailing road
conditions. The driver is always responsible
to drive in accordance with local laws and
prevailing conditions. Failure to do so could
result in accident or injury. •
Various vehicle speed reminders so
MyKey drivers know when their vehicle
speed approaches the limits. Warnings
appear in your information display and a
tone sounds when the MyKey drivers
exceed the set vehicle speed.
• The audio system's maximum volume
limits to 45% so MyKey drivers can
concentrate on the road. A message
appears in the information display when
MyKey drivers attempt to exceed the
limited volume. MyKey also disables the
automatic volume control. Note: If your
vehicle includes an AM/FM radio or a
very basic audio system, then the radio
may not limit.
• Always on setting. This setting forces
certain features to remain on and active
for MyKey drivers. For example, traction
control, AdvanceTrac, E911 or emergency
assistance and the do not disturb
features stay on even if a MyKey driver
uses the feature's control to switch it off. CREATING A MYKEY
Use the information display to create a
MyKey.
1. Switch the ignition on using the key or
the transmitter you want to program.
2. Access the main menu in the information
display and then scroll through the
menus to begin programming your
MyKey. See Information Displays (page
108
).
3. Follow the instructions in the display.
4. A confirmation message appears in the display after you finish programming your
MyKey. The programmed restrictions
apply when you restart your vehicle with
the programmed key or transmitter.
Note: Make sure you label the programmed
MyKey so you can distinguish it from the
admin keys.
You can also program the optional MyKey
settings.
59
MKC (TME) Canada/United States of America, enUSA, Edition date: 01/2016, First Printing MyKey™
Page 66 of 538
LOCKING AND UNLOCKING
You can use the power door lock or the
remote control to lock and unlock your
vehicle.
Power Door Locks
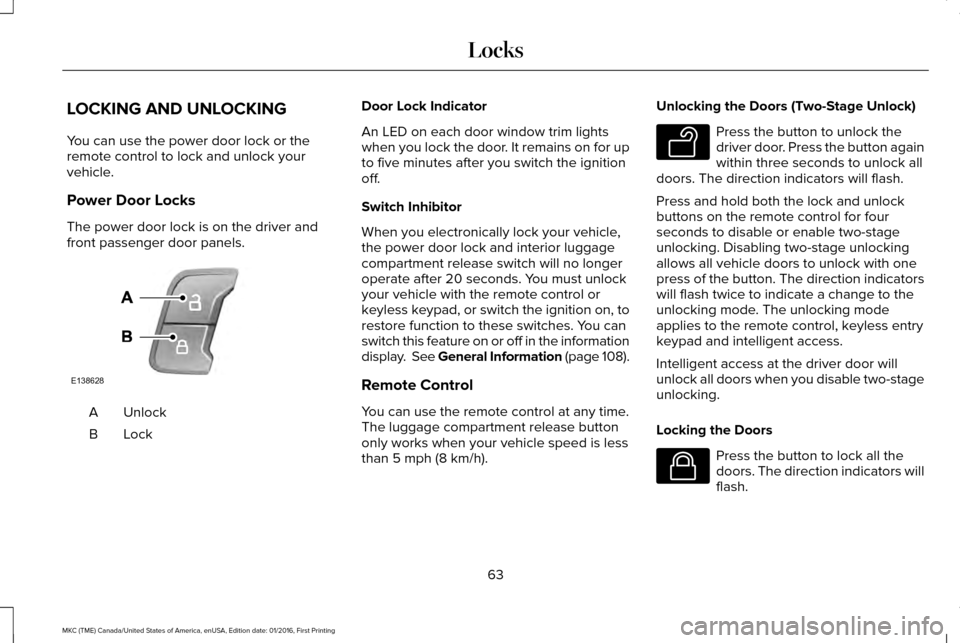
The power door lock is on the driver and
front passenger door panels.
Unlock
A
LockB Door Lock Indicator
An LED on each door window trim lights
when you lock the door. It remains on for up
to five minutes after you switch the ignition
off.
Switch Inhibitor
When you electronically lock your vehicle,
the power door lock and interior luggage
compartment release switch will no longer
operate after 20 seconds. You must unlock
your vehicle with the remote control or
keyless keypad, or switch the ignition on, to
restore function to these switches. You can
switch this feature on or off in the information
display. See General Information (page 108).
Remote Control
You can use the remote control at any time.
The luggage compartment release button
only works when your vehicle speed is less
than 5 mph (8 km/h).Unlocking the Doors (Two-Stage Unlock) Press the button to unlock the
driver door. Press the button again
within three seconds to unlock all
doors. The direction indicators will flash.
Press and hold both the lock and unlock
buttons on the remote control for four
seconds to disable or enable two-stage
unlocking. Disabling two-stage unlocking
allows all vehicle doors to unlock with one
press of the button. The direction indicators
will flash twice to indicate a change to the
unlocking mode. The unlocking mode
applies to the remote control, keyless entry
keypad and intelligent access.
Intelligent access at the driver door will
unlock all doors when you disable two-stage
unlocking.
Locking the Doors Press the button to lock all the
doors. The direction indicators will
flash.
63
MKC (TME) Canada/United States of America, enUSA, Edition date: 01/2016, First Printing LocksE138628 E138629 E138623
Page 67 of 538
Press the button again within three seconds
to confirm that all the doors are closed. The
doors lock again, a tone sounds and the
direction indicators flash if all the doors and
the luggage compartment are closed.
Mislock
If any door or the luggage compartment is
open, or if the hood is open on vehicles with
an anti-theft alarm or remote start, a tone
sounds and the direction indicators will not
flash. You can switch this feature on or off in
the information display. See General
Information (page 108).
Audible and Visual Locking Confirmation
If audible and visual locking confirmation is
configurable, you can turn it on or off using
the information display.
See General
Information (page 108).
Power Liftgate (If Equipped) WARNINGS
Make sure all persons are clear of the
power liftgate area before using the
power liftgate control. WARNINGS
Make sure to close and latch the
liftgate to prevent drawing exhaust
fumes into your vehicle. This will also prevent
passengers and cargo from falling out. If you
must drive with the liftgate open, keep the
vents or windows open so outside air comes
into your vehicle. Failure to follow this
warning could result in serious personal
injury. Note:
Be careful when opening or closing
the liftgate in a garage or other enclosed
area to avoid damaging the liftgate. Press twice within three seconds
to open, close or stop the
movement of a power liftgate. See
Power Liftgate
(page 68).
Mechanical Key
The intelligent access key also contains a
removable key blade that you can use to lock
and unlock your vehicle.
See Remote
Control (page 53). Turn the top of the key toward the front of
your vehicle once to lock all doors.
Turn the top of the key toward the rear of
your vehicle once to unlock the driver door
only.
Locking the Doors Individually
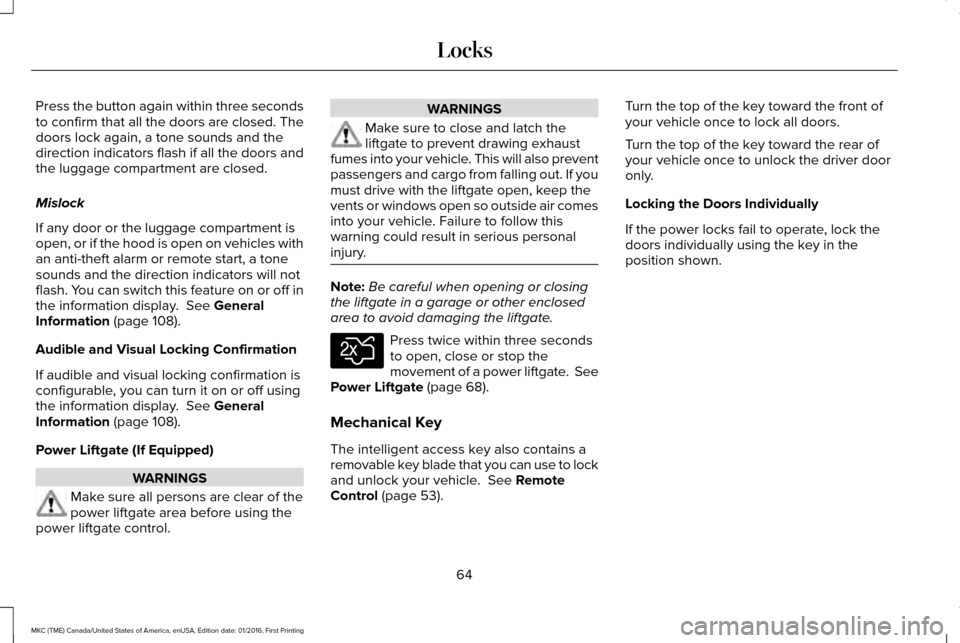
If the power locks fail to operate, lock the
doors individually using the key in the
position shown.
64
MKC (TME) Canada/United States of America, enUSA, Edition date: 01/2016, First Printing LocksE138630
Page 70 of 538
Note:
The doors will not autounlock if you
electronically lock your vehicle after you
switch the ignition off and before you open
the driver door.
Enabling or Disabling
You can enable or disable the autounlock
feature in the information display or an
authorized dealer can do it for you. See
General Information (page 108).
Illuminated Entry
The interior lamps and select exterior lamps
will light when you unlock the doors with the
remote control.
The system turns off the lights if:
• You start your vehicle.
• You press the remote control lock button.
• They are on for 25 seconds.
The lights will not turn off if:
• You switch them on with the lamp
control.
• Any door is open. Illuminated Exit
The interior lamps and select exterior lamps
will light when all doors are closed and you
switch the ignition off.
The lamps turn off if all the doors remain
closed and either of the following occurs:
•
After 25 seconds elapse.
• You lock your vehicle from the outside.
Battery Saver
If you leave the courtesy lamps or dome
lamps on and switch the ignition off, this
feature turns them off after some time.
Accessory Mode Battery Saver for
Intelligent Access Keys
If you leave your vehicle with the ignition on,
it will turn off 15 minutes after you close all
of the doors. Welcome Lighting
This feature lights select exterior lighting as
you approach your vehicle. You must have
an intelligent access key with you. The
feature turns off when you open a door,
liftgate, or unlock your vehicle. Welcome
lighting remains on for 25 seconds or until
you start your vehicle.
The feature is active when:
•
The feature is configured on in the
information display.
See General
Information (page 108).
• The ignition is off.
• All doors and the liftgate are closed.
• You lock your vehicle.
The feature is not active when:
• Your vehicle detects the intelligent
access key is inside.
• The intelligent access key is in close
range of the vehicle for more than two
minutes.
• The anti-theft alarm triggers.
67
MKC (TME) Canada/United States of America, enUSA, Edition date: 01/2016, First Printing Locks
Page 71 of 538
•
You do not start your vehicle for more
than five days.
• The vehicle battery charge is low.
Note: When this feature is disabled, you
must switch the ignition on to reset it.
Note: This feature may not correctly operate
if the intelligent access key is stored within
8–15 ft (2.4–4.6 m) of your vehicle while not
in use.
POWER LIFTGATE WARNINGS
It is extremely dangerous to ride in a
cargo area, inside or outside of a
vehicle. In a crash, people riding in these
areas are more likely to be seriously injured
or killed. Do not allow people to ride in any
area of your vehicle that is not equipped with
seats and seatbelts. Make sure everyone in
your vehicle is in a seat and properly using
a seatbelt. Failure to follow this warning
could result in serious personal injury or
death. WARNINGS
Make sure to close and latch the
liftgate to prevent drawing exhaust
fumes into your vehicle. This will also prevent
passengers and cargo from falling out. If you
must drive with the liftgate open, keep the
vents or windows open so outside air comes
into your vehicle. Failure to follow this
warning could result in serious personal
injury. Keep keys out of reach of children. Do
not allow children to operate or play
near an open or moving power liftgate. You
should supervise the operation of the power
liftgate at all times. Note:
Make sure that you close the liftgate
before operating or moving your vehicle,
especially in an enclosure, like a garage or
a parking structure. This could damage the
liftgate and its components.
Note: Do not hang anything, for example a
bike rack, from the glass or liftgate. This
could damage the liftgate and its
components. The liftgate only operates with the
transmission in park (P).
Three warning tones sound as the liftgate
begins to power close. One short chime
indicates a problem with the open or close
request, caused by:
•
The ignition is on and the transmission
is not in park (P).
• The battery voltage is below the
minimum operating voltage.
• The vehicle speed is at or above
3 mph
(5 km/h).
If the liftgate starts to close after it has fully
opened, this indicates there may be
excessive weight on the liftgate or a possible
strut failure. A repetitive chime sounds and
the liftgate closes under control. Remove any
excessive weight from the liftgate. If the
liftgate continues to close after opening,
have the system checked by an authorized
dealer.
68
MKC (TME) Canada/United States of America, enUSA, Edition date: 01/2016, First Printing Locks
Page 76 of 538
Note:
Personal entry codes 4 and 5 will not
recall memory positions.
Erasing a Personal Code
1. Enter the factory-set five-digit code.
2. Press and release 1•2 on the keypad
within five seconds.
3. Press and hold 1•2 for two seconds. You
must do this within five seconds of
completing Step 2.
All personal codes will erase and only the
factory-set five-digit code will work.
Anti-Scan Feature
The keypad will go into an anti-scan mode
if you enter the wrong code seven times (35
consecutive button presses). This mode
disables the keypad for one minute and the
keypad lamp will flash.
The anti-scan feature turns off after any of
the following occur:
• One minute of keypad inactivity passes.
• You press the unlock button on the
remote control. •
You switch the ignition on.
• You unlock the vehicle using intelligent
access.
Unlocking and Locking the Doors
To Unlock the Driver Door
Enter the factory-set five-digit code or your
personal code. You must press each number
within five seconds of each other. The
interior lamps will illuminate.
Note: All doors will unlock if the two-stage
unlocking feature is disabled.
See Locking
and Unlocking (page 63).
To Unlock All Doors
Enter the factory-set code or your personal
code, then press
3•4 control within five
seconds.
To Lock All Doors
Press and hold
7•8 and 9•0 at the same time
with the driver door closed. You do not need
to enter the keypad code first. Displaying the Factory-Set Code
Note:
You will need to have two
programmed intelligent access keys for this
procedure.
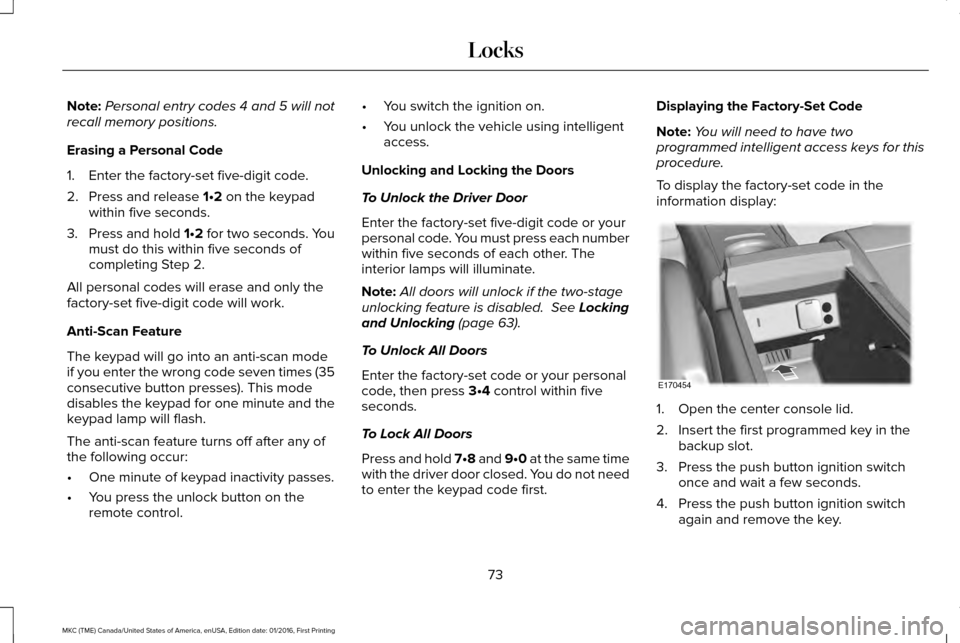
To display the factory-set code in the
information display: 1. Open the center console lid.
2. Insert the first programmed key in the
backup slot.
3. Press the push button ignition switch once and wait a few seconds.
4. Press the push button ignition switch again and remove the key.
73
MKC (TME) Canada/United States of America, enUSA, Edition date: 01/2016, First Printing LocksE170454
Page 78 of 538
PASSIVE ANTI-THEFT SYSTEM
Note:
The system is not compatible with
non-Lincoln aftermarket remote start
systems. Use of these systems may result
in engine starting problems and a loss of
security protection.
Note: Metallic objects, electronic devices
or a second coded key on the same key
chain may result in vehicle starting problems,
especially if they are too close to the key
when starting your vehicle. Prevent these
objects from touching the coded key when
starting your vehicle. Switch the ignition off,
move all objects on the key chain away from
the coded key and restart your vehicle if a
problem occurs.
Note: Do not leave a duplicate coded key
in your vehicle. Always take your keys and
lock all doors when leaving your vehicle. SecuriLock®
The system helps prevent the engine from
starting unless you use a coded key
programmed to your vehicle. Using the
wrong key may prevent your vehicle from
starting. A message may appear in the
information display.
If you are unable to start your vehicle with a
coded key, it is not operating correctly. A
message may appear in the information
display.
Automatic Arming
The system arms when you switch the
ignition off.
Automatic Disarming
The system disarms when you switch the
ignition on with a coded key.
Replacement Keys
Note:
Your vehicle comes with two keys. The intelligent access key functions as a
programmed key that operates the driver
door lock and turns on the intelligent access
with push button start system, as well as a
remote control.
If your programmed transmitters are lost or
stolen and you do not have an extra coded
key, you will need to have your vehicle
towed to an authorized dealer to program
new coded keys.
Store a spare intelligent access key away
from your vehicle in a safe place. You can
purchase replacement keys or remote
controls from an authorized dealer.
Programming a Spare Key
Note:
You can program a maximum of four
keys to your vehicle.
You must have two previously programmed
intelligent access keys inside your vehicle
and the new unprogrammed intelligent
access keys readily accessible. Contact an
authorized dealer to have the spare key
programmed if two previously programmed
keys are not available.
75
MKC (TME) Canada/United States of America, enUSA, Edition date: 01/2016, First Printing Security
Page 80 of 538
•
Unlock the doors or luggage
compartment with the remote control or
keyless entry keypad.
• Switch your vehicle on or start your
vehicle.
• Use a key in the driver door to unlock
your vehicle, then switch your vehicle on
within 12 seconds.
Note: Pressing the panic button on the
remote control will stop the horn and signal
indicators, but will not disarm the system.
77
MKC (TME) Canada/United States of America, enUSA, Edition date: 01/2016, First Printing Security
Page 93 of 538
When switched off in the information display,
the daytime running lamps are off in all
lighting control switch positions.
AUTOMATIC HIGH BEAM
CONTROL (If Equipped)
The system automatically turns on the high
beams if it is dark enough and no other traffic
is present. When it detects the headlights of
an approaching vehicle, the rear lamps of
the preceding vehicle or street lighting, the
system turns off the high beams before they
distract other drivers. The low beams remain
on.
Note: If it appears that automatic high beam
is not functioning properly, check the
windshield in front of the camera for a
blockage. A clear view of the road is
required for proper system operation. Make
sure that authorized personnel repair any
windshield damage in the area of the
camera's field of view. Note:
If the system detects a blockage such
as bird droppings, bug splatter, snow or ice,
and you do not observe changes, the system
may go into low beam mode until you clear
the blockage. A message may also appear
in the information display noting the front
camera is blocked.
Note: Typical road dust, dirt and water spots
do not affect the performance of the
automatic high beam control. However, in
cold or inclement weather conditions, you
may notice a decrease in the availability of
the automatic high beam control, especially
at start up. If you want to change the beam
state independently of the system, you may
switch the high beams on or off using the
lighting control switch. Automatic high beam
control resumes when conditions are correct.
Note: Modification of your vehicle ride height
such as using much larger tires, may
degrade feature performance.
A camera sensor, centrally mounted behind
the windshield of your vehicle, continuously
monitors conditions to decide when to switch
the high beams off and on. Once the system is active, the high beams
switch on if:
•
The ambient light level is low enough.
• There is no traffic in front of the vehicle.
• The vehicle speed is greater than
approximately 31 mph (50 km/h).
The high beams turn off if:
• The system detects the headlamps of an
approaching vehicle or the rear lamps of
a preceding vehicle.
• Vehicle speed falls below approximately
26 mph (42 km/h)
.
• The ambient light level is high enough
that high beams are not required.
• The system detects severe rain, snow or
fog.
• The camera is blocked.
Activating the System
Switch on the system in the information
display and switch the lighting control to the
autolamps position.
See Information
Displays (page 108). See Autolamps (page
87).
90
MKC (TME) Canada/United States of America, enUSA, Edition date: 01/2016, First Printing Lighting
Page 98 of 538
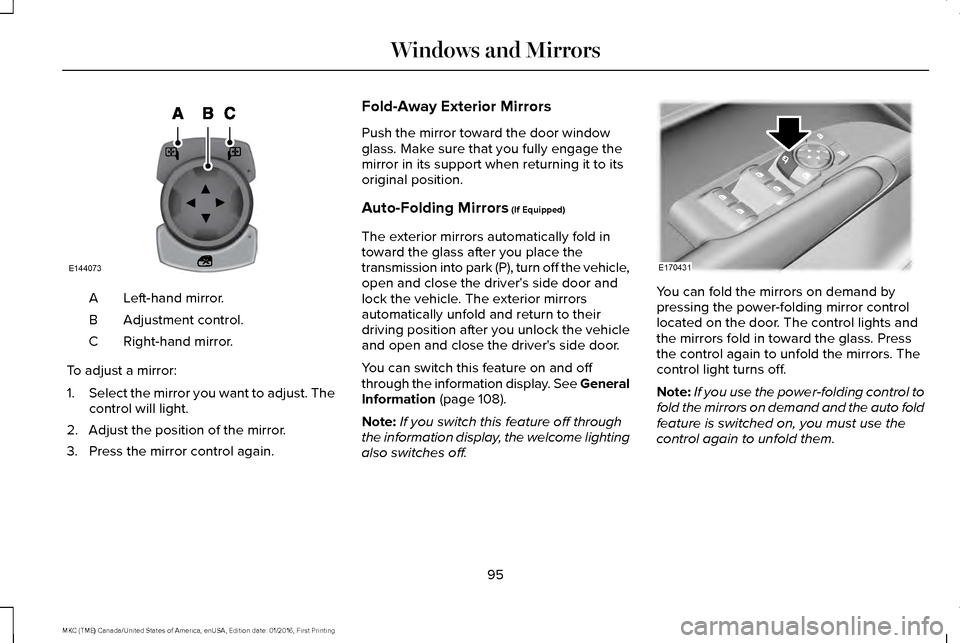
Left-hand mirror.
A
Adjustment control.
B
Right-hand mirror.
C
To adjust a mirror:
1. Select the mirror you want to adjust. The
control will light.
2. Adjust the position of the mirror.
3. Press the mirror control again. Fold-Away Exterior Mirrors
Push the mirror toward the door window
glass. Make sure that you fully engage the
mirror in its support when returning it to its
original position.
Auto-Folding Mirrors (If Equipped)
The exterior mirrors automatically fold in
toward the glass after you place the
transmission into park (P), turn off the vehicle,
open and close the driver's side door and
lock the vehicle. The exterior mirrors
automatically unfold and return to their
driving position after you unlock the vehicle
and open and close the driver's side door.
You can switch this feature on and off
through the information display. See General
Information
(page 108).
Note: If you switch this feature off through
the information display, the welcome lighting
also switches off. You can fold the mirrors on demand by
pressing the power-folding mirror control
located on the door. The control lights and
the mirrors fold in toward the glass. Press
the control again to unfold the mirrors. The
control light turns off.
Note:
If you use the power-folding control to
fold the mirrors on demand and the auto fold
feature is switched on, you must use the
control again to unfold them.
95
MKC (TME) Canada/United States of America, enUSA, Edition date: 01/2016, First Printing Windows and MirrorsE144073 E170431