ESP LINCOLN MKC 2018 User Guide
[x] Cancel search | Manufacturer: LINCOLN, Model Year: 2018, Model line: MKC, Model: LINCOLN MKC 2018Pages: 571, PDF Size: 4.39 MB
Page 79 of 571
PASSIVE ANTI-THEFT SYSTEM
Note: The system is not compatible withnon-Lincoln aftermarket remote startsystems. Use of these systems may resultin engine starting problems and a loss ofsecurity protection.
Note: Metallic objects, electronic devicesor a second coded key on the same keychain may result in vehicle starting problems,especially if they are too close to the keywhen starting your vehicle. Prevent theseobjects from touching the coded key whenstarting your vehicle. Switch the ignition off,move all objects on the key chain away fromthe coded key and restart your vehicle if aproblem occurs.
Note: Do not leave a duplicate coded keyin your vehicle. Always take your keys andlock all doors when leaving your vehicle.
SecuriLock®
The system helps prevent the engine fromstarting unless you use a coded keyprogrammed to your vehicle. Using thewrong key may prevent your vehicle fromstarting. A message may appear in theinformation display.
If you are unable to start your vehicle with acoded key, it is not operating correctly. Amessage may appear in the informationdisplay.
Automatic Arming
The system arms when you switch theignition off.
Automatic Disarming
The system disarms when you switch theignition on with a coded key.
Replacement Keys
Note:Your vehicle comes with two keys.
The intelligent access key functions as aprogrammed key that operates the driverdoor lock and turns on the intelligent accesswith push button start system, as well as aremote control.
If your programmed transmitters are lost orstolen and you do not have an extra codedkey, you will need to have your vehicletowed to an authorized dealer to programnew coded keys.
Store a spare intelligent access key awayfrom your vehicle in a safe place. You canpurchase replacement keys or remotecontrols from an authorized dealer.
Programming a Spare Key
Note:You can program a maximum of fourkeys to your vehicle.
You must have two previously programmedintelligent access keys inside your vehicleand the new unprogrammed intelligentaccess keys readily accessible. Contact anauthorized dealer to have the spare keyprogrammed if two previously programmedkeys are not available.
76
MKC (TME) Canada/United States of America, JJ7J 19A321 AA enUSA, Edition date: 201707, Second Printing
Security
Page 91 of 571
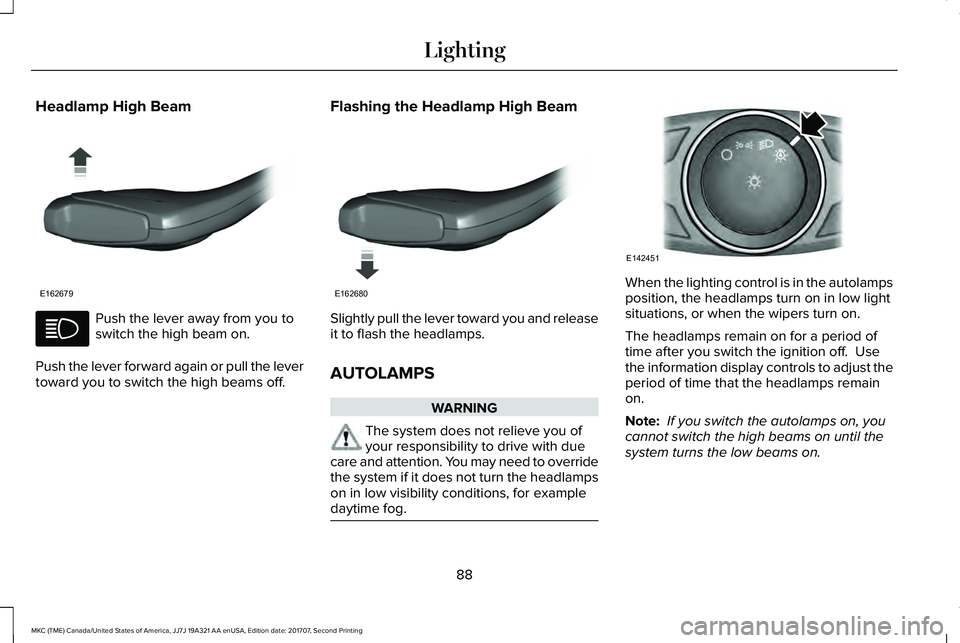
Headlamp High Beam
Push the lever away from you toswitch the high beam on.
Push the lever forward again or pull the levertoward you to switch the high beams off.
Flashing the Headlamp High Beam
Slightly pull the lever toward you and releaseit to flash the headlamps.
AUTOLAMPS
WARNING
The system does not relieve you ofyour responsibility to drive with duecare and attention. You may need to overridethe system if it does not turn the headlampson in low visibility conditions, for exampledaytime fog.
When the lighting control is in the autolampsposition, the headlamps turn on in low lightsituations, or when the wipers turn on.
The headlamps remain on for a period oftime after you switch the ignition off. Usethe information display controls to adjust theperiod of time that the headlamps remainon.
Note: If you switch the autolamps on, youcannot switch the high beams on until thesystem turns the low beams on.
88
MKC (TME) Canada/United States of America, JJ7J 19A321 AA enUSA, Edition date: 201707, Second Printing
LightingE162679 E162680 E142451
Page 93 of 571
HEADLAMP EXIT DELAY
After you switch the ignition off, you canswitch the headlamps on by pulling thedirection indicator lever toward you. You willhear a short tone. The headlamps will switchoff automatically after three minutes with anydoor open or 30 seconds after the last doorhas been closed. You can cancel this featureby pulling the direction indicator toward youagain or switching the ignition on.
DAYTIME RUNNING LAMPS (If
Equipped)
WARNING
The daytime running lamps systemdoes not activate the rear lamps andmay not provide adequate lighting duringlow visibility driving conditions. Make sureyou switch the headlamps on, as appropriate,during all low visibility conditions. Failure todo so may result in a crash.
Type One - Conventional (Non-Configurable)
The daytime running lamps turn on when:
1. Switching the ignition on.
2. The transmission is not in park (P) forvehicles with automatic transmissions, orreleasing the parking brake for vehicleswith manual transmissions.
3. The lighting control is in the off, parkinglamp or autolamps positions.
4. The headlamps are off.
Type Two - Configurable
Switch the daytime running lamps on or offusing the information display. SeeInformation Displays (page 109).
The daytime running lamps turn on when:
1. The lamps are on in the informationdisplay.
2. Switching the ignition on.
3. The transmission is not in park (P) forvehicles with automatic transmissions, orreleasing the parking brake for vehicleswith manual transmissions.
4. The lighting control is in the autolampsposition.
5. The headlamps are off.
The other lighting control switch positionsdo not turn on the daytime running lamps.
If the daytime running lamps are off in theinformation display, the lamps stay off in allswitch positions.
AUTOMATIC HIGH BEAM
CONTROL
WARNING
The system does not relieve you ofyour responsibility to drive with duecare and attention. You may need to overridethe system if it does not turn the high beamson or off.
90
MKC (TME) Canada/United States of America, JJ7J 19A321 AA enUSA, Edition date: 201707, Second Printing
Lighting
Page 107 of 571
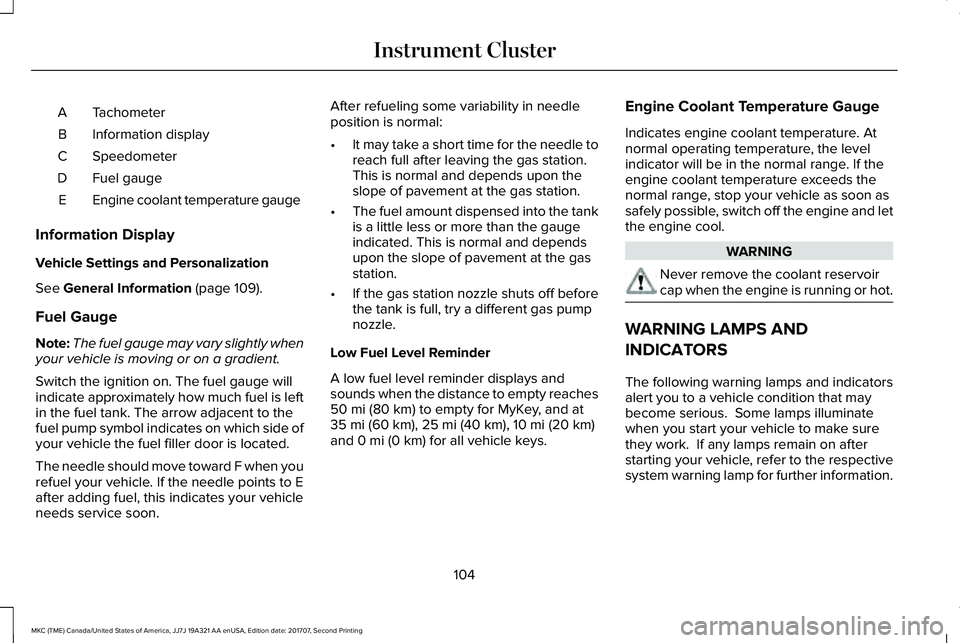
TachometerA
Information displayB
SpeedometerC
Fuel gaugeD
Engine coolant temperature gaugeE
Information Display
Vehicle Settings and Personalization
See General Information (page 109).
Fuel Gauge
Note:The fuel gauge may vary slightly whenyour vehicle is moving or on a gradient.
Switch the ignition on. The fuel gauge willindicate approximately how much fuel is leftin the fuel tank. The arrow adjacent to thefuel pump symbol indicates on which side ofyour vehicle the fuel filler door is located.
The needle should move toward F when yourefuel your vehicle. If the needle points to Eafter adding fuel, this indicates your vehicleneeds service soon.
After refueling some variability in needleposition is normal:
•It may take a short time for the needle toreach full after leaving the gas station.This is normal and depends upon theslope of pavement at the gas station.
•The fuel amount dispensed into the tankis a little less or more than the gaugeindicated. This is normal and dependsupon the slope of pavement at the gasstation.
•If the gas station nozzle shuts off beforethe tank is full, try a different gas pumpnozzle.
Low Fuel Level Reminder
A low fuel level reminder displays andsounds when the distance to empty reaches50 mi (80 km) to empty for MyKey, and at35 mi (60 km), 25 mi (40 km), 10 mi (20 km)and 0 mi (0 km) for all vehicle keys.
Engine Coolant Temperature Gauge
Indicates engine coolant temperature. Atnormal operating temperature, the levelindicator will be in the normal range. If theengine coolant temperature exceeds thenormal range, stop your vehicle as soon assafely possible, switch off the engine and letthe engine cool.
WARNING
Never remove the coolant reservoircap when the engine is running or hot.
WARNING LAMPS AND
INDICATORS
The following warning lamps and indicatorsalert you to a vehicle condition that maybecome serious. Some lamps illuminatewhen you start your vehicle to make surethey work. If any lamps remain on afterstarting your vehicle, refer to the respectivesystem warning lamp for further information.
104
MKC (TME) Canada/United States of America, JJ7J 19A321 AA enUSA, Edition date: 201707, Second Printing
Instrument Cluster
Page 108 of 571
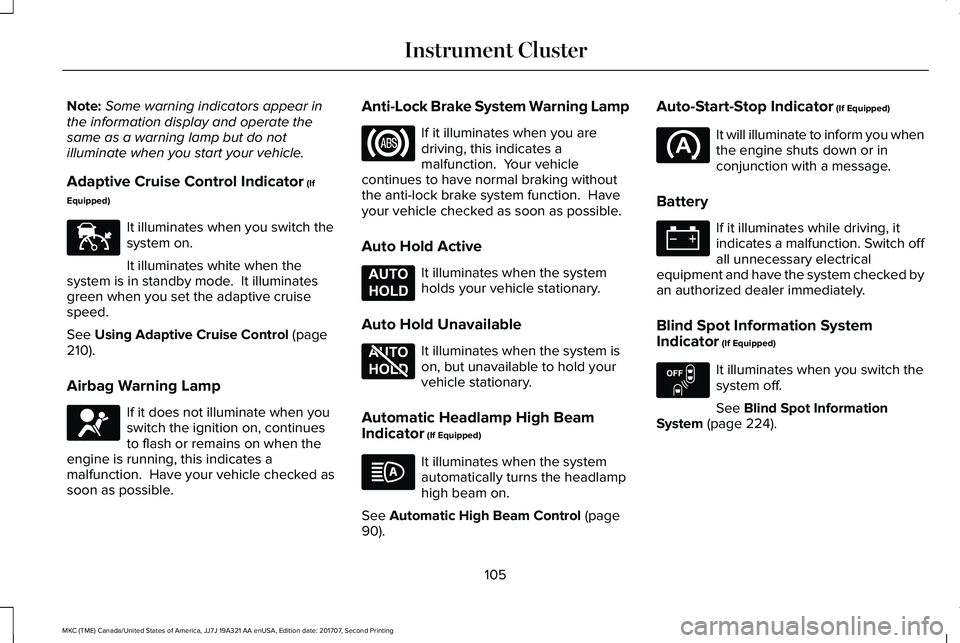
Note:Some warning indicators appear inthe information display and operate thesame as a warning lamp but do notilluminate when you start your vehicle.
Adaptive Cruise Control Indicator (If
Equipped)
It illuminates when you switch thesystem on.
It illuminates white when thesystem is in standby mode. It illuminatesgreen when you set the adaptive cruisespeed.
See Using Adaptive Cruise Control (page210).
Airbag Warning Lamp
If it does not illuminate when youswitch the ignition on, continuesto flash or remains on when theengine is running, this indicates amalfunction. Have your vehicle checked assoon as possible.
Anti-Lock Brake System Warning Lamp
If it illuminates when you aredriving, this indicates amalfunction. Your vehiclecontinues to have normal braking withoutthe anti-lock brake system function. Haveyour vehicle checked as soon as possible.
Auto Hold Active
It illuminates when the systemholds your vehicle stationary.
Auto Hold Unavailable
It illuminates when the system ison, but unavailable to hold yourvehicle stationary.
Automatic Headlamp High BeamIndicator (If Equipped)
It illuminates when the systemautomatically turns the headlamphigh beam on.
See Automatic High Beam Control (page90).
Auto-Start-Stop Indicator (If Equipped)
It will illuminate to inform you whenthe engine shuts down or inconjunction with a message.
Battery
If it illuminates while driving, itindicates a malfunction. Switch offall unnecessary electricalequipment and have the system checked byan authorized dealer immediately.
Blind Spot Information SystemIndicator (If Equipped)
It illuminates when you switch thesystem off.
See Blind Spot InformationSystem (page 224).
105
MKC (TME) Canada/United States of America, JJ7J 19A321 AA enUSA, Edition date: 201707, Second Printing
Instrument ClusterE144524 E67017 E197933 E197934 E151262
Page 112 of 571
GENERAL INFORMATION
WARNING
Driving while distracted can result inloss of vehicle control, crash and injury.We strongly recommend that you useextreme caution when using any device thatmay take your focus off the road. Yourprimary responsibility is the safe operationof your vehicle. We recommend against theuse of any hand-held device while drivingand encourage the use of voice-operatedsystems when possible. Make sure you areaware of all applicable local laws that mayaffect the use of electronic devices whiledriving.
You can control various systems on yourvehicle using the information display controlson the steering wheel. The informationdisplay shows the corresponding information.
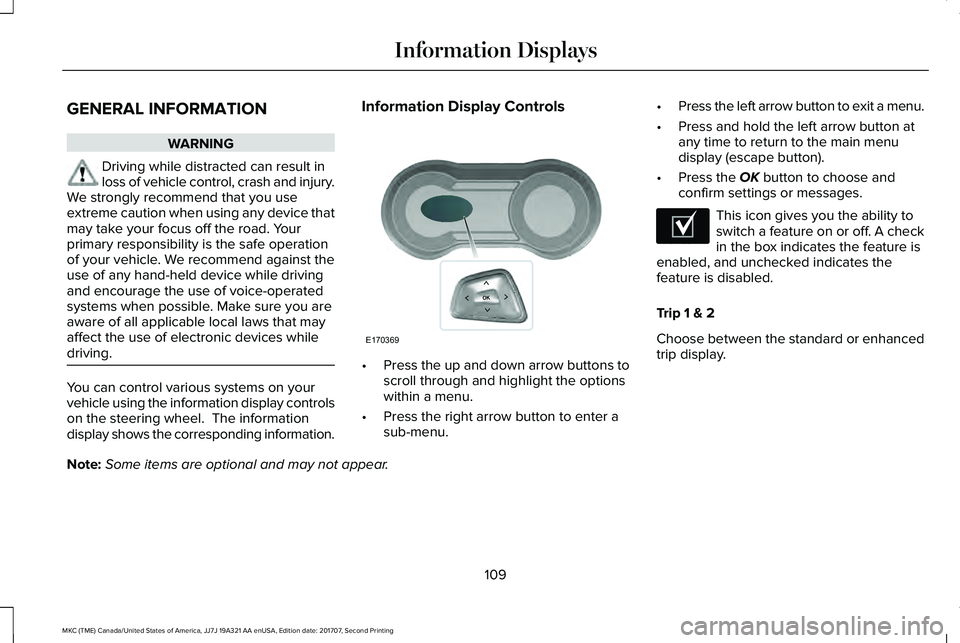
Information Display Controls
•Press the up and down arrow buttons toscroll through and highlight the optionswithin a menu.
•Press the right arrow button to enter asub-menu.
•Press the left arrow button to exit a menu.
•Press and hold the left arrow button atany time to return to the main menudisplay (escape button).
•Press the OK button to choose andconfirm settings or messages.
This icon gives you the ability toswitch a feature on or off. A checkin the box indicates the feature isenabled, and unchecked indicates thefeature is disabled.
Trip 1 & 2
Choose between the standard or enhancedtrip display.
Note:Some items are optional and may not appear.
109
MKC (TME) Canada/United States of America, JJ7J 19A321 AA enUSA, Edition date: 201707, Second Printing
Information DisplaysE170369 E204495
Page 149 of 571
HEATED SEATS (If Equipped)
Front Seats
WARNING
People who are unable to feel pain totheir skin because of advanced age,chronic illness, diabetes, spinal cord injury,medication, alcohol use, exhaustion or otherphysical conditions, must exercise care whenusing the heated seat. The heated seat maycause burns even at low temperatures,especially if used for long periods of time.Do not place anything on the seat thatinsulates against heat, such as a blanket orcushion. This may cause the heated seat tooverheat. Do not puncture the seat with pins,needles or other pointed objects. This maydamage the heating element which maycause the heated seat to overheat. Anoverheated seat may cause serious personalinjury.
Do not do the following:
•Place heavy objects on the seat.
•Operate the heated seat if water or anyother liquid spills on the seat. Allow theseat to dry thoroughly.
Note:The heated seats will only functionwhen the engine is running.
Press the heated seat symbol to cyclethrough the various heat settings and off.More indicator lights indicate warmersettings.
Note:After 90 minutes of operation, theheated seats switch off. Press the heatedseat symbol to switch the heated seats on.
Note:Depending on your remote startsettings, the heated seats may remain onafter you remote start your vehicle. Theheated seats may also turn on when youstart your vehicle if they were on when yourvehicle was turned off.
Rear Seats (If Equipped)
WARNING
Persons who are unable to feel pain tothe skin because of advanced age,chronic illness, diabetes, spinal cord injury,medication, alcohol use, exhaustion, or otherphysical conditions, must exercise care whenusing the seat heater. The seat heater maycause burns even at low temperatures,especially if used for long periods of time.Do not place anything on the seat thatinsulates against heat, such as a blanket orcushion, because this may cause the seatheater to overheat. Do not puncture the seatwith pins, needles, or other pointed objectsbecause this may damage the heatingelement which may cause the seat heater tooverheat. An overheated seat may causeserious personal injury.
146
MKC (TME) Canada/United States of America, JJ7J 19A321 AA enUSA, Edition date: 201707, Second Printing
SeatsE146322
Page 150 of 571
Do not do the following:
•Place heavy objects on the seat.
•Operate the seat heater if water or anyother liquid spills on the seat. Allow theseat to dry thoroughly.
Note:The heated seats will only functionwhen the engine is running.
The rear seat heat controls are located onthe rear of the center console.
Press the heated seat symbol to cyclethrough the various heat settings and off.More indicator lights indicate warmersettings.
CLIMATE CONTROLLED SEATS (If
Equipped)
Heated Seats
WARNING
People who are unable to feel pain totheir skin because of advanced age,chronic illness, diabetes, spinal cord injury,medication, alcohol use, exhaustion or otherphysical conditions, must use caution whenusing the heated seat. The heated seat maycause burns even at low temperatures,especially if used for long periods of time.Do not place anything on the seat that mayblock the heat, such as a blanket or cushion.This can cause the heated seat to overheat.Do not puncture the seat with pins, needlesor other pointed objects. This damages theheating element and can cause the heatedseat to overheat. An overheated seat maycause serious personal injury.
Do not do the following:
•Place heavy objects on the seat.
•Operate the seat heater if water or anyother liquid spills on the seat. Allow theseat to dry thoroughly.
Note:The heated seats only function whenthe engine is running.
Press the heated seat symbol to cyclethrough the various heat settings and off.More indicator lights indicate warmersettings.
Note:After 90 minutes of operation, theheated seats switch off. Press the heatedseat symbol to switch the heated seats on.
147
MKC (TME) Canada/United States of America, JJ7J 19A321 AA enUSA, Edition date: 201707, Second Printing
SeatsE146322 E146322
Page 155 of 571

2. The indicator light begins to flash after20 seconds. Without releasing thebutton, follow Step 1 in the Programmingsection.
For questions or comments, contactHomeLink at www.homelink.com,www.youtube.com/user/HomeLinkGentexor by calling the toll-free help line at1-800-355-3515.
FCC and RSS-210 Industry CanadaCompliance
This device complies with Part 15 of the FCCRules and with RSS-210 of Industry Canada.Operation is subject to the following twoconditions: (1) this device may not causeharmful interference, and (2) this device mustaccept any interference received, includinginterference that may cause undesiredoperation.
Note:Changes or modifications to yourdevice not expressly approved by the partyresponsible for compliance can void theuser’s authority to operate the equipment.
This equipment complies with FCC radiationexposure limits set forth for an uncontrolledenvironment. End Users must follow thespecific operating instructions for satisfyingRF exposure compliance. This transmittermust be at least 8 in (20 cm) from the userand must not be co-located or operating inconjunction with any other antenna ortransmitter.
The term “IC:” before thecertification/registration number only signifiesthat Industry Canada technical specificationswere met.
152
MKC (TME) Canada/United States of America, JJ7J 19A321 AA enUSA, Edition date: 201707, Second Printing
Universal Garage Door Opener (If Equipped)
Page 163 of 571
ENGINE BLOCK HEATER (If Equipped)
WARNINGS
Failure to follow engine block heaterinstructions could result in propertydamage or serious personal injury.
Do not use your heater withungrounded electrical systems ortwo-pronged adapters. There is a risk ofelectrical shock.
Do not fully close the hood, or allow itto drop under its own weight whenusing the engine block heater. This coulddamage the power cable and may cause anelectrical short resulting in fire, injury andproperty damage.
Note:The heater is most effective whenoutdoor temperatures are below 0°F (-18°C).
The heater acts as a starting aid by warmingthe engine coolant. This allows the climatecontrol system to respond quickly. Theequipment includes a heater element(installed in the engine block) and a wireharness. You can connect the system to agrounded 120-volt AC electrical source.
We recommend that you do the following fora safe and correct operation:
•Use a 16-gauge outdoor extension cordthat is product certified by Underwriter’sLaboratory (UL) or Canadian StandardsAssociation (CSA). This extension cordmust be suitable for use outdoors, in coldtemperatures, and be clearly markedSuitable for Use with OutdoorAppliances. Do not use an indoorextension cord outdoors. This couldresult in an electric shock or become afire hazard.
•Use as short an extension cord aspossible.
•Do not use multiple extension cords.
•Make sure that when in operation, theextension cord plug and heater cord plugconnections are free and clear of water.This could cause an electric shock or fire.
•Make sure your vehicle is parked in aclean area, clear of combustibles.
•Make sure the heater, heater cord andextension cord are firmly connected.
•Check for heat anywhere in the electricalhookup once the system has beenoperating for approximately 30 minutes.
•Make sure the system is unplugged andproperly stowed before starting anddriving your vehicle. Make sure theprotective cover seals the prongs of theblock heater cord plug when not in use.
•Make sure the heater system is checkedfor proper operation before winter.
Using the Engine Block Heater
Make sure the receptacle terminals are cleanand dry prior to use. Clean them with a drycloth if necessary.
The heater uses 0.4 to 1.0 kilowatt-hours ofenergy per hour of use. The system does nothave a thermostat. It achieves maximumtemperature after approximately three hoursof operation. Using the heater longer thanthree hours does not improve systemperformance and unnecessarily useselectricity.
160
MKC (TME) Canada/United States of America, JJ7J 19A321 AA enUSA, Edition date: 201707, Second Printing
Starting and Stopping the Engine