steering LINCOLN MKC 2018 Owner's Guide
[x] Cancel search | Manufacturer: LINCOLN, Model Year: 2018, Model line: MKC, Model: LINCOLN MKC 2018Pages: 571, PDF Size: 4.39 MB
Page 204 of 571
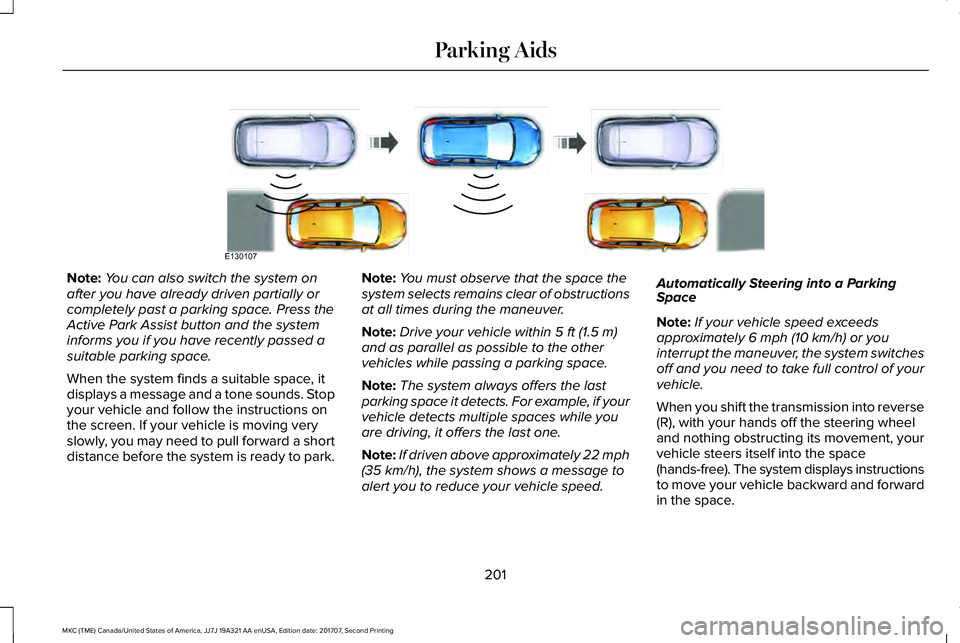
Note:You can also switch the system onafter you have already driven partially orcompletely past a parking space. Press theActive Park Assist button and the systeminforms you if you have recently passed asuitable parking space.
When the system finds a suitable space, itdisplays a message and a tone sounds. Stopyour vehicle and follow the instructions onthe screen. If your vehicle is moving veryslowly, you may need to pull forward a shortdistance before the system is ready to park.
Note:You must observe that the space thesystem selects remains clear of obstructionsat all times during the maneuver.
Note:Drive your vehicle within 5 ft (1.5 m)and as parallel as possible to the othervehicles while passing a parking space.
Note:The system always offers the lastparking space it detects. For example, if yourvehicle detects multiple spaces while youare driving, it offers the last one.
Note:If driven above approximately 22 mph(35 km/h), the system shows a message toalert you to reduce your vehicle speed.
Automatically Steering into a ParkingSpace
Note:If your vehicle speed exceedsapproximately 6 mph (10 km/h) or youinterrupt the maneuver, the system switchesoff and you need to take full control of yourvehicle.
When you shift the transmission into reverse(R), with your hands off the steering wheeland nothing obstructing its movement, yourvehicle steers itself into the space(hands-free). The system displays instructionsto move your vehicle backward and forwardin the space.
201
MKC (TME) Canada/United States of America, JJ7J 19A321 AA enUSA, Edition date: 201707, Second Printing
Parking AidsE130107
Page 206 of 571
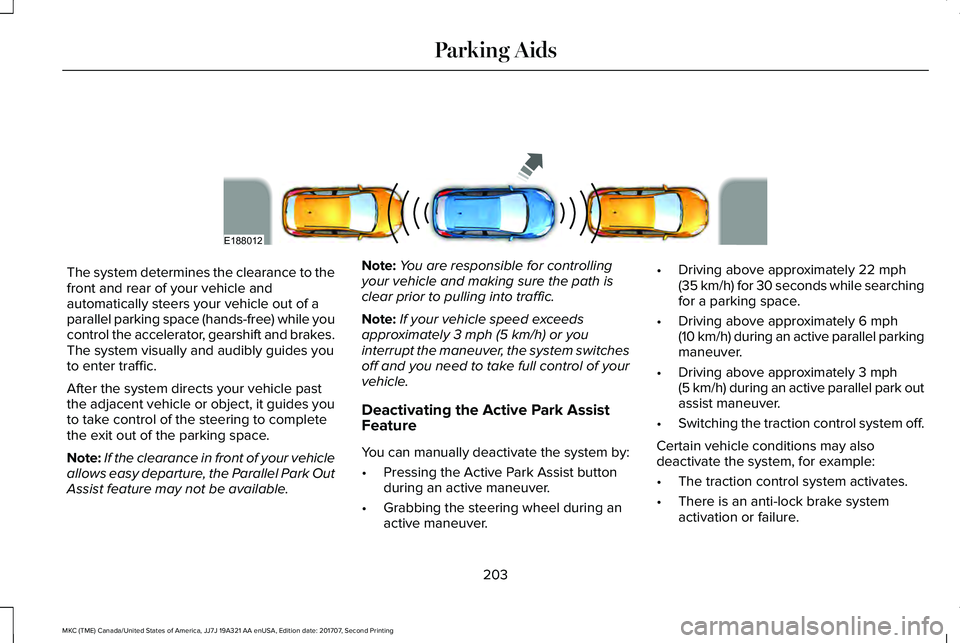
The system determines the clearance to thefront and rear of your vehicle andautomatically steers your vehicle out of aparallel parking space (hands-free) while youcontrol the accelerator, gearshift and brakes.The system visually and audibly guides youto enter traffic.
After the system directs your vehicle pastthe adjacent vehicle or object, it guides youto take control of the steering to completethe exit out of the parking space.
Note:If the clearance in front of your vehicleallows easy departure, the Parallel Park OutAssist feature may not be available.
Note:You are responsible for controllingyour vehicle and making sure the path isclear prior to pulling into traffic.
Note:If your vehicle speed exceedsapproximately 3 mph (5 km/h) or youinterrupt the maneuver, the system switchesoff and you need to take full control of yourvehicle.
Deactivating the Active Park AssistFeature
You can manually deactivate the system by:
•Pressing the Active Park Assist buttonduring an active maneuver.
•Grabbing the steering wheel during anactive maneuver.
•Driving above approximately 22 mph(35 km/h) for 30 seconds while searchingfor a parking space.
•Driving above approximately 6 mph(10 km/h) during an active parallel parkingmaneuver.
•Driving above approximately 3 mph(5 km/h) during an active parallel park outassist maneuver.
•Switching the traction control system off.
Certain vehicle conditions may alsodeactivate the system, for example:
•The traction control system activates.
•There is an anti-lock brake systemactivation or failure.
203
MKC (TME) Canada/United States of America, JJ7J 19A321 AA enUSA, Edition date: 201707, Second Printing
Parking AidsE188012
Page 210 of 571
Note:If the transmission is in reverse (R) andthe luggage compartment door or liftgate isopen, no rear view camera features willdisplay.
Note: When towing, the camera only seeswhat you are towing. This might not provideadequate coverage as it usually provides innormal operation and some objects mightnot be seen. In some vehicles, theguidelines may disappear when you connectthe trailer tow connector.
The camera may not operate correctly underthe following conditions:
•Nighttime or dark areas if one or bothreverse lamps are not operating.
•Mud, water or debris obstructs thecamera's view. Clean the lens with a soft,lint-free cloth and non-abrasive cleaner.
•The rear of your vehicle is hit ordamaged, causing the camera to becomemisaligned.
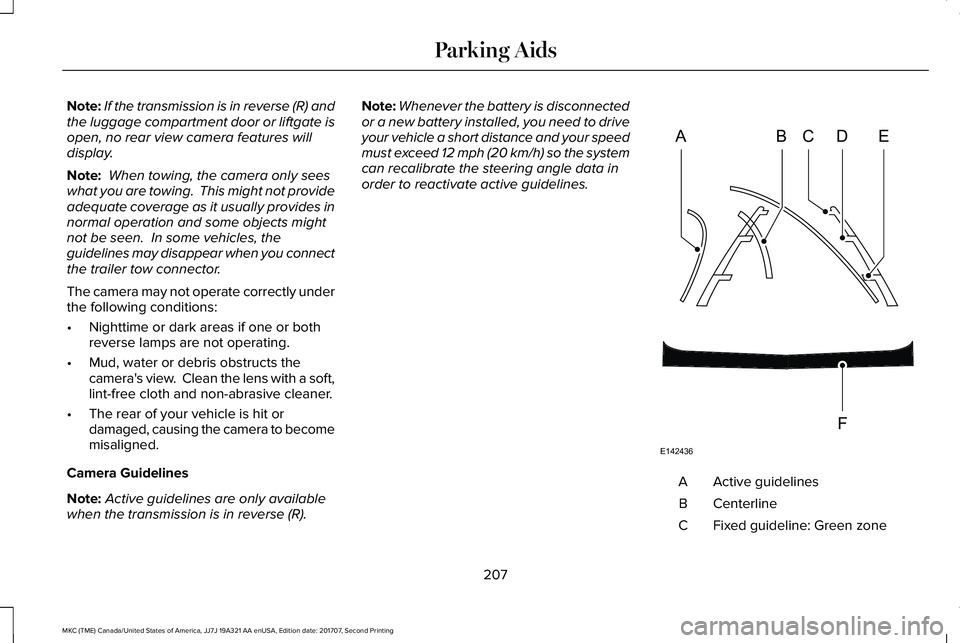
Camera Guidelines
Note:Active guidelines are only availablewhen the transmission is in reverse (R).
Note:Whenever the battery is disconnectedor a new battery installed, you need to driveyour vehicle a short distance and your speedmust exceed 12 mph (20 km/h) so the systemcan recalibrate the steering angle data inorder to reactivate active guidelines.
Active guidelinesA
CenterlineB
Fixed guideline: Green zoneC
207
MKC (TME) Canada/United States of America, JJ7J 19A321 AA enUSA, Edition date: 201707, Second Printing
Parking AidsABCD
F
E
E142436
Page 211 of 571
Fixed guideline: Yellow zoneD
Fixed guideline: Red zoneE
Rear bumperF
Active guidelines are only shown with fixedguidelines. To use active guidelines, turnthe steering wheel to point the guidelinestoward an intended path. If you change thesteering wheel position while reversing, yourvehicle might deviate from the originalintended path.
The fixed and active guidelines fade in andout depending on the steering wheelposition. The active guidelines do notdisplay when the steering wheel position isstraight.
Always use caution while reversing. Objectsin the red zone are closest to your vehicleand objects in the green zone are fartheraway. Objects are getting closer to yourvehicle as they move from the green zoneto the yellow or red zones. Use the side viewmirrors and rear view mirror to get bettercoverage on both sides and rear of thevehicle.
Manual Zoom
WARNING
When manual zoom is on, the full areabehind your vehicle may not show. Beaware of your surroundings when using themanual zoom feature.
Note:Manual zoom is only available whenthe transmission is in reverse (R).
Note:When you enable manual zoom, onlythe centerline is shown.
Selectable settings for this feature are Zoomin (+) and Zoom out (-). Press the symbol inthe camera screen to change the view. Thedefault setting is Zoom OFF.
This allows you to get a closer view of anobject behind your vehicle. The zoomedimage keeps the bumper in the image toprovide a reference. The zoom is only activewhile the transmission is in reverse (R).
Camera System Settings
The rear view camera system settings canbe changed in the display screen. SeeSettings (page 438).
Enhanced Park Aids or Park Pilot
Selectable settings for this feature are ONand OFF.
The system uses red, yellow and greenhighlights that appear on top of the videoimage when any of the sensing systemsdetect an object.
Rear Camera Delay
Selectable settings for this feature are ONand OFF.
The default setting for the rear camera delayis OFF.
When shifting the transmission out of reverse(R) and into any gear other than park (P), thecamera image remains in the display until:
•Your vehicle speed sufficiently increases.
•You shift your vehicle into park (P).
208
MKC (TME) Canada/United States of America, JJ7J 19A321 AA enUSA, Edition date: 201707, Second Printing
Parking Aids
Page 212 of 571
PRINCIPLE OF OPERATION
Cruise control lets you maintain a set speedwithout keeping your foot on the acceleratorpedal. You can use cruise control when yourvehicle speed is greater than 20 mph(30 km/h).
USING CRUISE CONTROL (If Equipped)
WARNINGS
Do not use cruise control on windingroads, in heavy traffic or when the roadsurface is slippery. This could result in lossof vehicle control, serious injury or death.
When you are going downhill, yourvehicle speed could increase abovethe set speed. The system does not applythe brakes.
Note:Cruise control disengages if thevehicle speed decreases more than 10 mph(16 km/h) below the set speed when drivinguphill.
To help the system to maintain the set speedwhen going downhill, downshift to a lowergear.
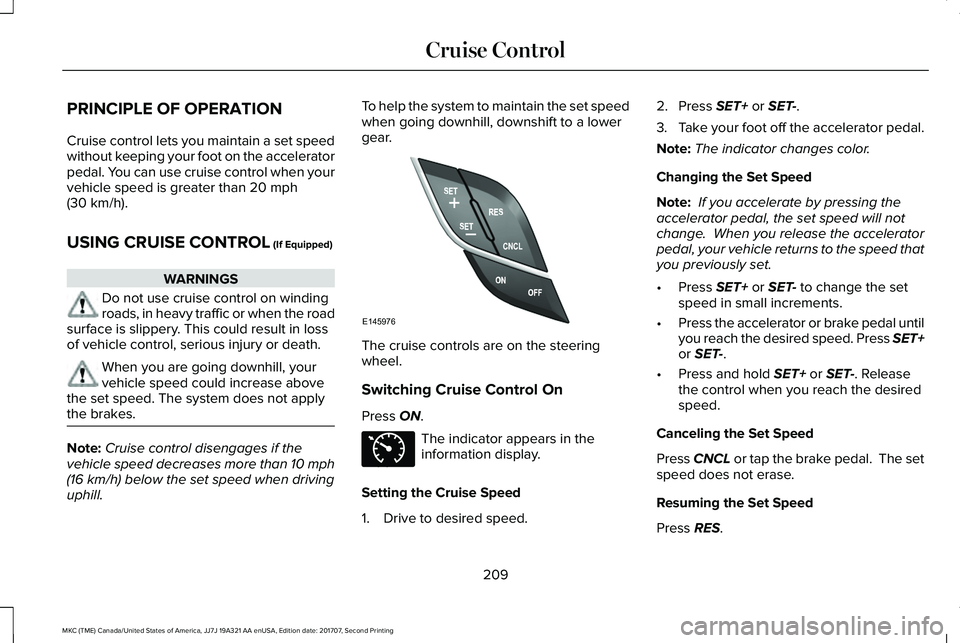
The cruise controls are on the steeringwheel.
Switching Cruise Control On
Press ON.
The indicator appears in theinformation display.
Setting the Cruise Speed
1. Drive to desired speed.
2. Press SET+ or SET-.
3.Take your foot off the accelerator pedal.
Note:The indicator changes color.
Changing the Set Speed
Note: If you accelerate by pressing theaccelerator pedal, the set speed will notchange. When you release the acceleratorpedal, your vehicle returns to the speed thatyou previously set.
•Press SET+ or SET- to change the setspeed in small increments.
•Press the accelerator or brake pedal untilyou reach the desired speed. Press SET+or SET-.
•Press and hold SET+ or SET-. Releasethe control when you reach the desiredspeed.
Canceling the Set Speed
Press CNCL or tap the brake pedal. The setspeed does not erase.
Resuming the Set Speed
Press RES.
209
MKC (TME) Canada/United States of America, JJ7J 19A321 AA enUSA, Edition date: 201707, Second Printing
Cruise ControlE145976 E71340
Page 213 of 571
Switching Cruise Control Off
Note:You erase the set speed when youswitch the system off.
Press OFF when the system is in stand bymode, or switch the ignition off.
USING ADAPTIVE CRUISE
CONTROL
WARNINGS
Always pay close attention to changingroad conditions when using adaptivecruise control. The system does not replaceattentive driving. Failing to pay attention tothe road may result in a crash, serious injuryor death.
Do not use the adaptive cruise controlwhen entering or leaving a highway,on roads with intersections or roundaboutsor non-vehicular traffic or roads that arewinding, slippery, unpaved, or steep slopes.
Do not use the system in poor visibility,for example fog, heavy rain, spray orsnow.
WARNINGS
Do not use the system when towing atrailer with aftermarket trailer brakecontrols. Aftermarket trailer brakes will notfunction properly when you switch thesystem on because the brakes areelectronically controlled. Failing to do so mayresult in loss of vehicle control, which couldresult in serious injury.
Do not use tire sizes other than thoserecommended because this can affectthe normal operation of the system. Failureto do so may result in a loss of vehiclecontrol, which could result in serious injury.
Adaptive cruise control may not detectstationary or slow moving vehiclesbelow 6 mph (10 km/h).
Adaptive cruise control does not detectpedestrians or objects in the road.
Adaptive cruise control does not detectoncoming vehicles in the same lane.
Adaptive cruise control is not a crashwarning or avoidance system.
Note:It is your responsibility to stay alert,drive safely and be in control of the vehicleat all times.
The system adjusts your vehicle speed tomaintain the set gap between you and thevehicle in front of you in the same lane. Youcan select four gap settings.
The system uses a radar sensor that projectsa beam directly in front of your vehicle.
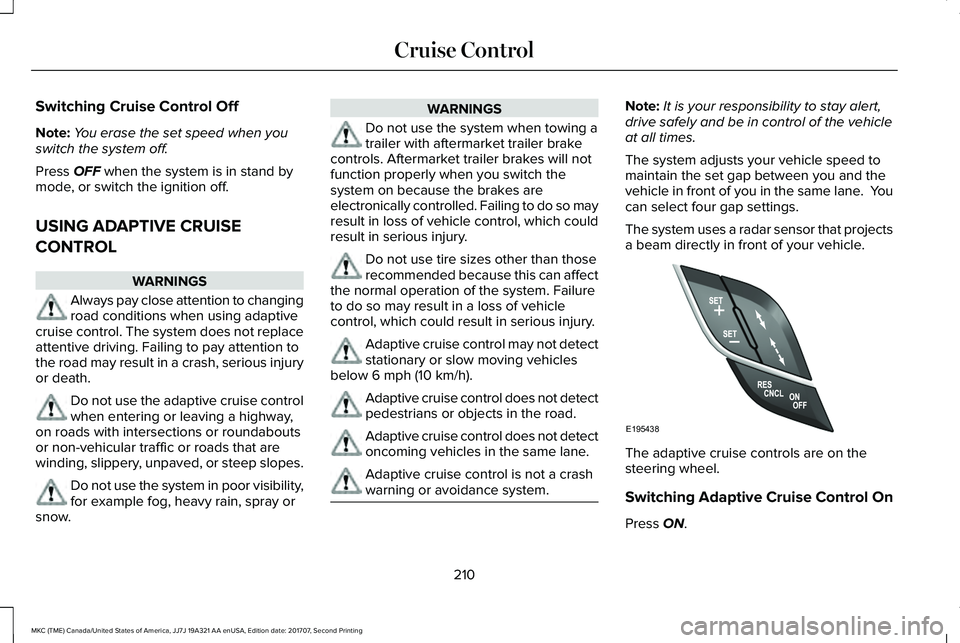
The adaptive cruise controls are on thesteering wheel.
Switching Adaptive Cruise Control On
Press ON.
210
MKC (TME) Canada/United States of America, JJ7J 19A321 AA enUSA, Edition date: 201707, Second Printing
Cruise ControlE195438
Page 221 of 571
When active, the system monitors youralertness level based upon your drivingbehavior in relation to the lane markings andother factors.
System Warnings
Note:The system does not issue warningsbelow approximately 40 mph (64 km/h).
The warning system has two stages. First,the system issues a temporary warning thatyou need to take a rest. This message onlyappears for a short time. If the systemdetects further reduction in driving alertness,it may issue another warning that remains inthe information display for a longer time. Youcan press OK on the steering wheel controlto clear the warning.
System Display
When active, the system runs automaticallyin the background and only issues a warningif required. You can view the status at anytime using the information display. SeeGeneral Information (page 109).
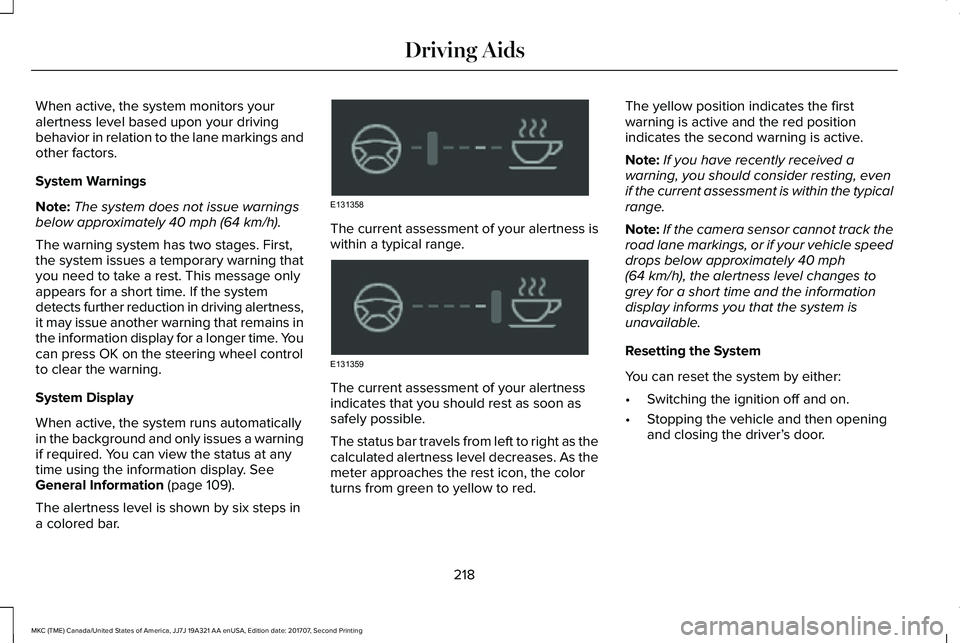
The alertness level is shown by six steps ina colored bar.
The current assessment of your alertness iswithin a typical range.
The current assessment of your alertnessindicates that you should rest as soon assafely possible.
The status bar travels from left to right as thecalculated alertness level decreases. As themeter approaches the rest icon, the colorturns from green to yellow to red.
The yellow position indicates the firstwarning is active and the red positionindicates the second warning is active.
Note:If you have recently received awarning, you should consider resting, evenif the current assessment is within the typicalrange.
Note:If the camera sensor cannot track theroad lane markings, or if your vehicle speeddrops below approximately 40 mph(64 km/h), the alertness level changes togrey for a short time and the informationdisplay informs you that the system isunavailable.
Resetting the System
You can reset the system by either:
•Switching the ignition off and on.
•Stopping the vehicle and then openingand closing the driver’s door.
218
MKC (TME) Canada/United States of America, JJ7J 19A321 AA enUSA, Edition date: 201707, Second Printing
Driving AidsE131358 E131359
Page 222 of 571
LANE KEEPING SYSTEM (If Equipped)
WARNINGS
The system is designed to aid thedriver. It is not intended to replace yourattention and judgment. You are stillresponsible to drive with due care andattention.
Always drive with due care andattention when using and operating thecontrols and features on your vehicle.
At all times, you are responsible forcontrolling your vehicle, supervisingthe system and intervening, if required.Failure to take care may result in the loss ofcontrol of your vehicle, serious personalinjury or death.
In cold and severe weather conditionsthe system may not function. Rain,snow and spray can all limit sensorperformance.
The system will not operate if thesensor cannot track the road lanemarkings.
WARNINGS
The sensor may incorrectly track lanemarkings as other structures or objects.This can result in a false or missed warning.
The system may not operate properlyif the sensor is blocked. Keep thewindshield free from obstruction.
If damage occurs in the immediate areasurrounding the sensor, have yourvehicle checked as soon as possible.
Note:The system works above 40 mph(64 km/h).
Note:The system works as long as thecamera can detect one lane marking.
Note:When you select aid or alert and aidmode and the system detects no steeringactivity for a short period, the system alertsyou to put your hands on the steering wheel.The system may detect a light grip or touchon the steering wheel as hands off driving.
Note:The system may not function if thecamera is blocked, or if the windshield isdamaged or dirty.
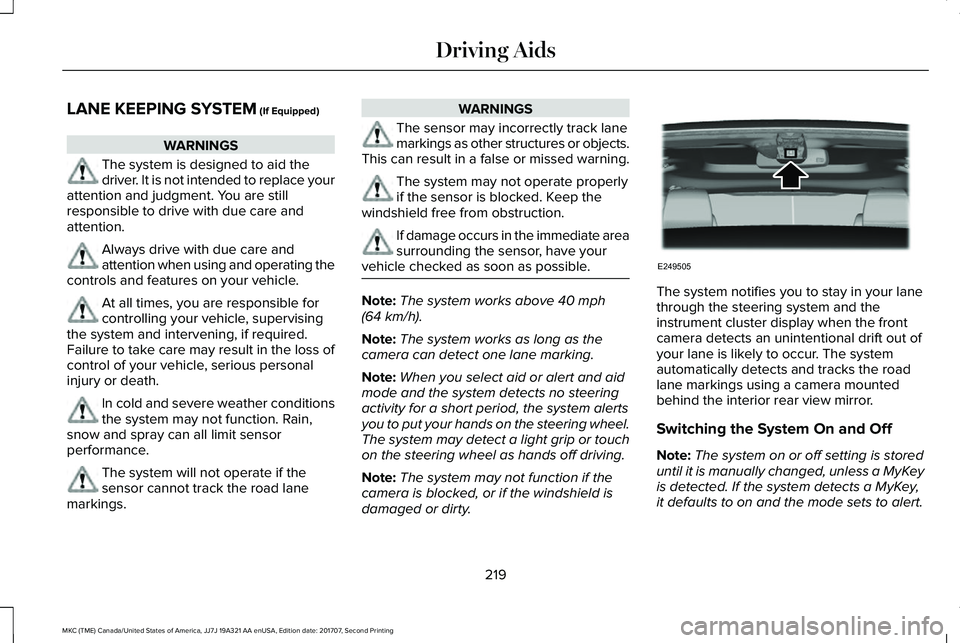
The system notifies you to stay in your lanethrough the steering system and theinstrument cluster display when the frontcamera detects an unintentional drift out ofyour lane is likely to occur. The systemautomatically detects and tracks the roadlane markings using a camera mountedbehind the interior rear view mirror.
Switching the System On and Off
Note:The system on or off setting is storeduntil it is manually changed, unless a MyKeyis detected. If the system detects a MyKey,it defaults to on and the mode sets to alert.
219
MKC (TME) Canada/United States of America, JJ7J 19A321 AA enUSA, Edition date: 201707, Second Printing
Driving AidsE249505
Page 223 of 571
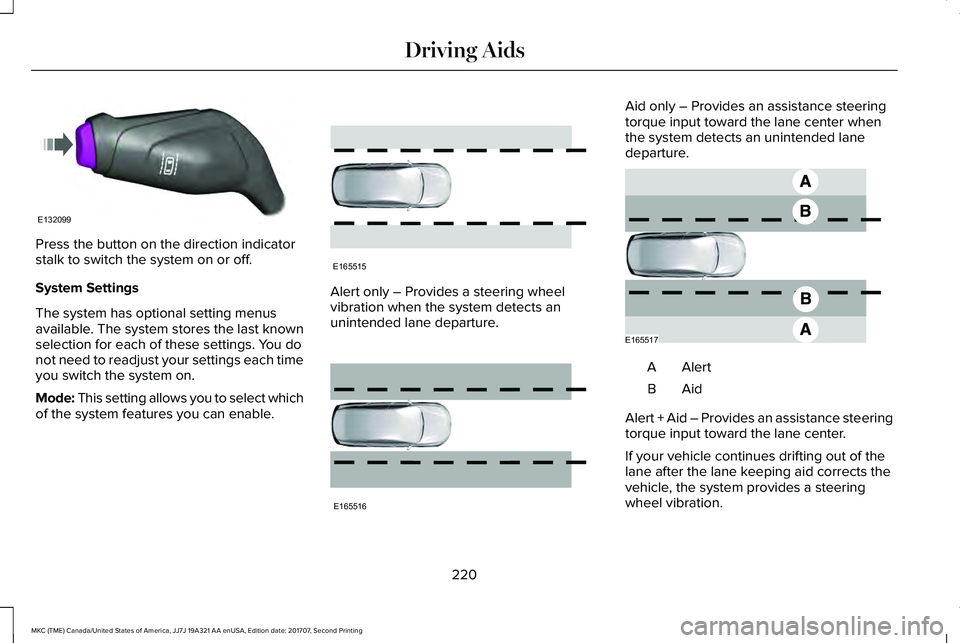
Press the button on the direction indicatorstalk to switch the system on or off.
System Settings
The system has optional setting menusavailable. The system stores the last knownselection for each of these settings. You donot need to readjust your settings each timeyou switch the system on.
Mode: This setting allows you to select whichof the system features you can enable.
Alert only – Provides a steering wheelvibration when the system detects anunintended lane departure.
Aid only – Provides an assistance steeringtorque input toward the lane center whenthe system detects an unintended lanedeparture.
AlertA
AidB
Alert + Aid – Provides an assistance steeringtorque input toward the lane center.
If your vehicle continues drifting out of thelane after the lane keeping aid corrects thevehicle, the system provides a steeringwheel vibration.
220
MKC (TME) Canada/United States of America, JJ7J 19A321 AA enUSA, Edition date: 201707, Second Printing
Driving AidsE132099 E165515 E165516 E165517
Page 224 of 571
Note:The alert and aid diagrams illustrategeneral zone coverage. They do not provideexact zone parameters.
Intensity: This setting affects the intensity ofthe steering wheel vibration used for the alertand alert + aid modes. This setting does notaffect the aid mode.
•Low
•Normal
•High
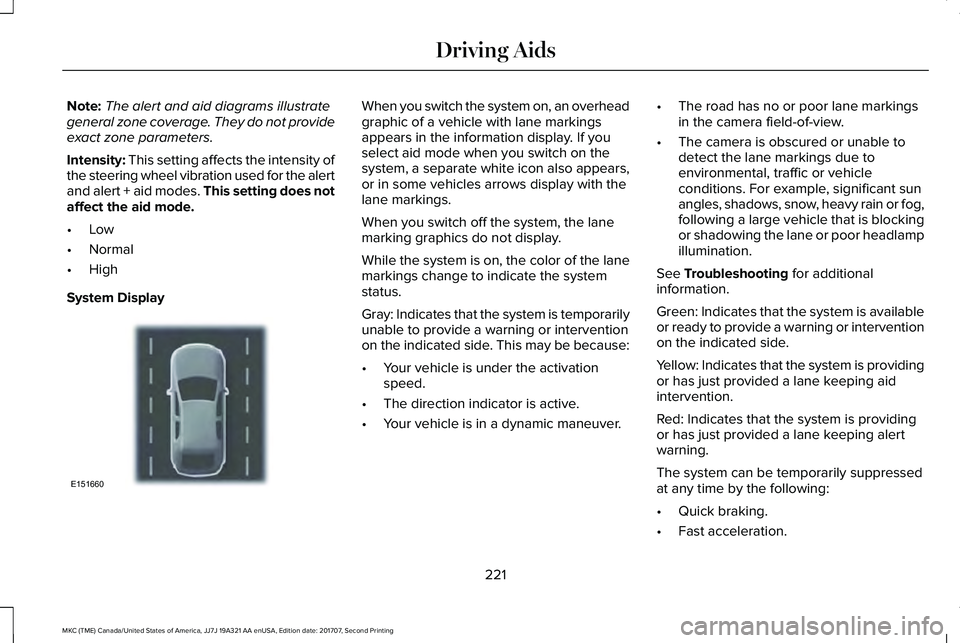
System Display
When you switch the system on, an overheadgraphic of a vehicle with lane markingsappears in the information display. If youselect aid mode when you switch on thesystem, a separate white icon also appears,or in some vehicles arrows display with thelane markings.
When you switch off the system, the lanemarking graphics do not display.
While the system is on, the color of the lanemarkings change to indicate the systemstatus.
Gray: Indicates that the system is temporarilyunable to provide a warning or interventionon the indicated side. This may be because:
•Your vehicle is under the activationspeed.
•The direction indicator is active.
•Your vehicle is in a dynamic maneuver.
•The road has no or poor lane markingsin the camera field-of-view.
•The camera is obscured or unable todetect the lane markings due toenvironmental, traffic or vehicleconditions. For example, significant sunangles, shadows, snow, heavy rain or fog,following a large vehicle that is blockingor shadowing the lane or poor headlampillumination.
See Troubleshooting for additionalinformation.
Green: Indicates that the system is availableor ready to provide a warning or interventionon the indicated side.
Yellow: Indicates that the system is providingor has just provided a lane keeping aidintervention.
Red: Indicates that the system is providingor has just provided a lane keeping alertwarning.
The system can be temporarily suppressedat any time by the following:
•Quick braking.
•Fast acceleration.
221
MKC (TME) Canada/United States of America, JJ7J 19A321 AA enUSA, Edition date: 201707, Second Printing
Driving AidsE151660