LINCOLN MKT 2012 Owners Manual
Manufacturer: LINCOLN, Model Year: 2012, Model line: MKT, Model: LINCOLN MKT 2012Pages: 437, PDF Size: 3.56 MB
Page 261 of 437
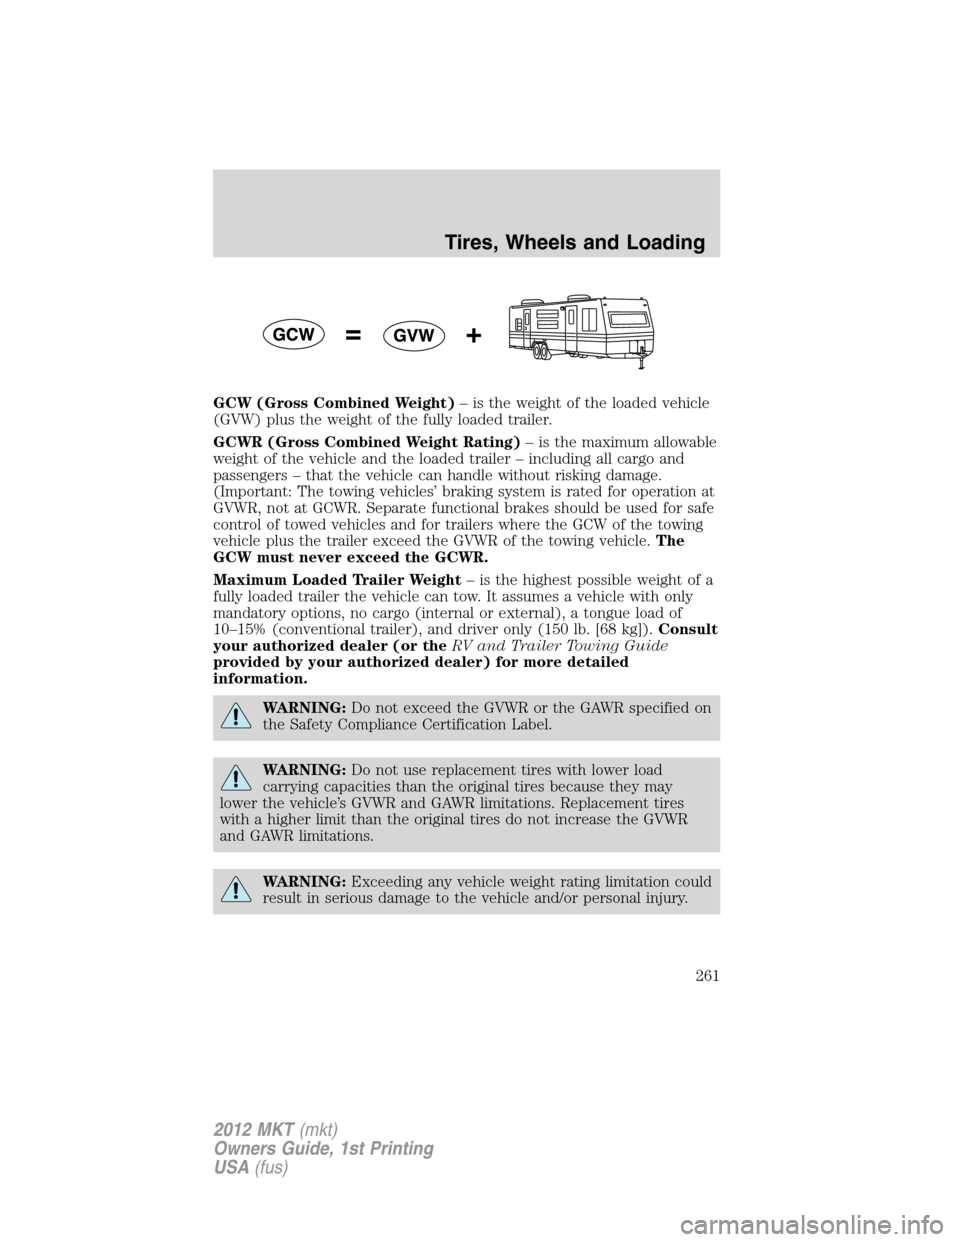
GCW (Gross Combined Weight)– is the weight of the loaded vehicle
(GVW) plus the weight of the fully loaded trailer.
GCWR (Gross Combined Weight Rating)– is the maximum allowable
weight of the vehicle and the loaded trailer – including all cargo and
passengers – that the vehicle can handle without risking damage.
(Important: The towing vehicles’ braking system is rated for operation at
GVWR, not at GCWR. Separate functional brakes should be used for safe
control of towed vehicles and for trailers where the GCW of the towing
vehicle plus the trailer exceed the GVWR of the towing vehicle.The
GCW must never exceed the GCWR.
Maximum Loaded Trailer Weight– is the highest possible weight of a
fully loaded trailer the vehicle can tow. It assumes a vehicle with only
mandatory options, no cargo (internal or external), a tongue load of
10–15% (conventional trailer), and driver only (150 lb. [68 kg]).Consult
your authorized dealer (or theRV and Trailer Towing Guide
provided by your authorized dealer) for more detailed
information.
WARNING:Do not exceed the GVWR or the GAWR specified on
the Safety Compliance Certification Label.
WARNING:Do not use replacement tires with lower load
carrying capacities than the original tires because they may
lower the vehicle’s GVWR and GAWR limitations. Replacement tires
with a higher limit than the original tires do not increase the GVWR
and GAWR limitations.
WARNING:Exceeding any vehicle weight rating limitation could
result in serious damage to the vehicle and/or personal injury.
Tires, Wheels and Loading
261
2012 MKT(mkt)
Owners Guide, 1st Printing
USA(fus)
Page 262 of 437
Steps for determining the correct load limit:
1. Locate the statement “The combined weight of occupants and cargo
should never exceed XXX kg or XXX lbs.” on your vehicle’s placard.
2. Determine the combined weight of the driver and passengers that will
be riding in your vehicle.
3. Subtract the combined weight of the driver and passengers from XXX
kg or XXX lbs.
4. The resulting figure equals the available amount of cargo and luggage
load capacity. For example, if the “XXX” amount equals 1,400 lbs. and
there will be five 150 lb. passengers in your vehicle, the amount of
available cargo and luggage load capacity is 650 lbs. (1400–750 (5 x 150)
= 650 lb.). In metric units (635–340 (5 x 68) = 295 kg.)
5. Determine the combined weight of luggage and cargo being loaded on
the vehicle. That weight may not safely exceed the available cargo and
luggage load capacity calculated in Step 4.
6. If your vehicle will be towing a trailer, load from your trailer will be
transferred to your vehicle. Consult this manual to determine how this
reduces the available cargo and luggage load capacity of your vehicle.
The following gives you a few examples on how to calculate the available
amount of cargo and luggage load capacity:
•Another example for your vehicle with 1,400 lb. (635 kg) of cargo and
luggage capacity. You decide to go golfing. Is there enough load
capacity to carry you, 4 of your friends and all the golf bags? You and
four friends average 220 lb. (99 kg) each and the golf bags weigh
approximately 30 lb. (13.5 kg) each. The calculation would be: 1,400 -
(5 x 220) - (5 x 30) = 1,400 - 1,100 - 150 = 150 lb. Yes, you have
enough load capacity in your vehicle to transport four friends and
your golf bags. In metric units, the calculation would be: 635 kg - (5 x
99 kg) - (5 x 13.5 kg) = 635 - 495 - 67.5 = 72.5 kg.
•A final example for your vehicle with 1,400 lb. (635 kg) of cargo and
luggage capacity. You and one of your friends decide to pick up
cement from the local home improvement store to finish that patio
you have been planning for the past 2 years. Measuring the inside of
the vehicle with the rear seat folded down, you have room for
12-100 lb. (45 kg) bags of cement. Do you have enough load capacity
to transport the cement to your home? If you and your friend each
weigh 220 lb. (99 kg), the calculation would be: 1,400 - (2 x 220) -
(12 x 100) = 1,400 - 440 - 1,200 = - 240 lb. No, you do not have
enough cargo capacity to carry that much weight. In metric units, the
Tires, Wheels and Loading
262
2012 MKT(mkt)
Owners Guide, 1st Printing
USA(fus)
Page 263 of 437
calculation would be: 635 kg - (2 x 99 kg) - (12 x 45 kg) = 635 - 198 -
540 = -103 kg. You will need to reduce the load weight by at least
240 lb. (104 kg). If you remove 3-100 lb. (45 kg) cement bags, then
the load calculation would be:
1,400 - (2 x 220) - (9 x 100) = 1,400 - 440 - 900 = 60 lb. Now you
have the load capacity to transport the cement and your friend home.
In metric units, the calculation would be: 635 kg - (2 x 99 kg) - (9 x
45 kg) = 635 - 198 - 405 = 32 kg.
The above calculations also assume that the loads are positioned in your
vehicle in a manner that does not overload the Front or the Rear Gross
Axle Weight Rating specified for your vehicle on the Safety Compliance
Certification Label found on the edge of the driver’s door.
TRAILER TOWING
Trailer towing puts additional loads on your vehicle’s engine,
transmission, axle, brakes, tires and suspension. For your safety and to
maximize vehicle performance, be sure to use the proper equipment
while towing.
Follow these guidelines to ensure safe towing:
•Do not tow a trailer until your vehicle has been driven at least
1,000 miles (1,600 km).
•Consult your local motor vehicle laws for towing a trailer.
•Refer to the instructions included with towing accessories for the
proper installation and adjustment specifications.
•Thoroughly prepare your vehicle for towing. Refer toPreparing to
towin this chapter.
•Stay within your vehicle’s load limits.
•Use extra caution when driving while trailer towing. Refer toDriving
while you towin this section.
•Service your vehicle more frequently if you tow a trailer. Refer to
Special operating conditionsin your scheduled maintenance.
For load specification terms found on the label, refer toVehicle loading
- with and without a trailerin this chapter. Remember to figure in the
tongue load of your loaded vehicle when figuring the total weight.
WARNING:Do not exceed the GVWR or the GAWR specified on
the certification label.
Tires, Wheels and Loading
263
2012 MKT(mkt)
Owners Guide, 1st Printing
USA(fus)
Page 264 of 437
WARNING:Towing trailers beyond the maximum recommended
gross trailer weight exceeds the limit of the vehicle and could
result in engine damage, transmission damage, structural damage, loss
of vehicle control, vehicle rollover and personal injury.
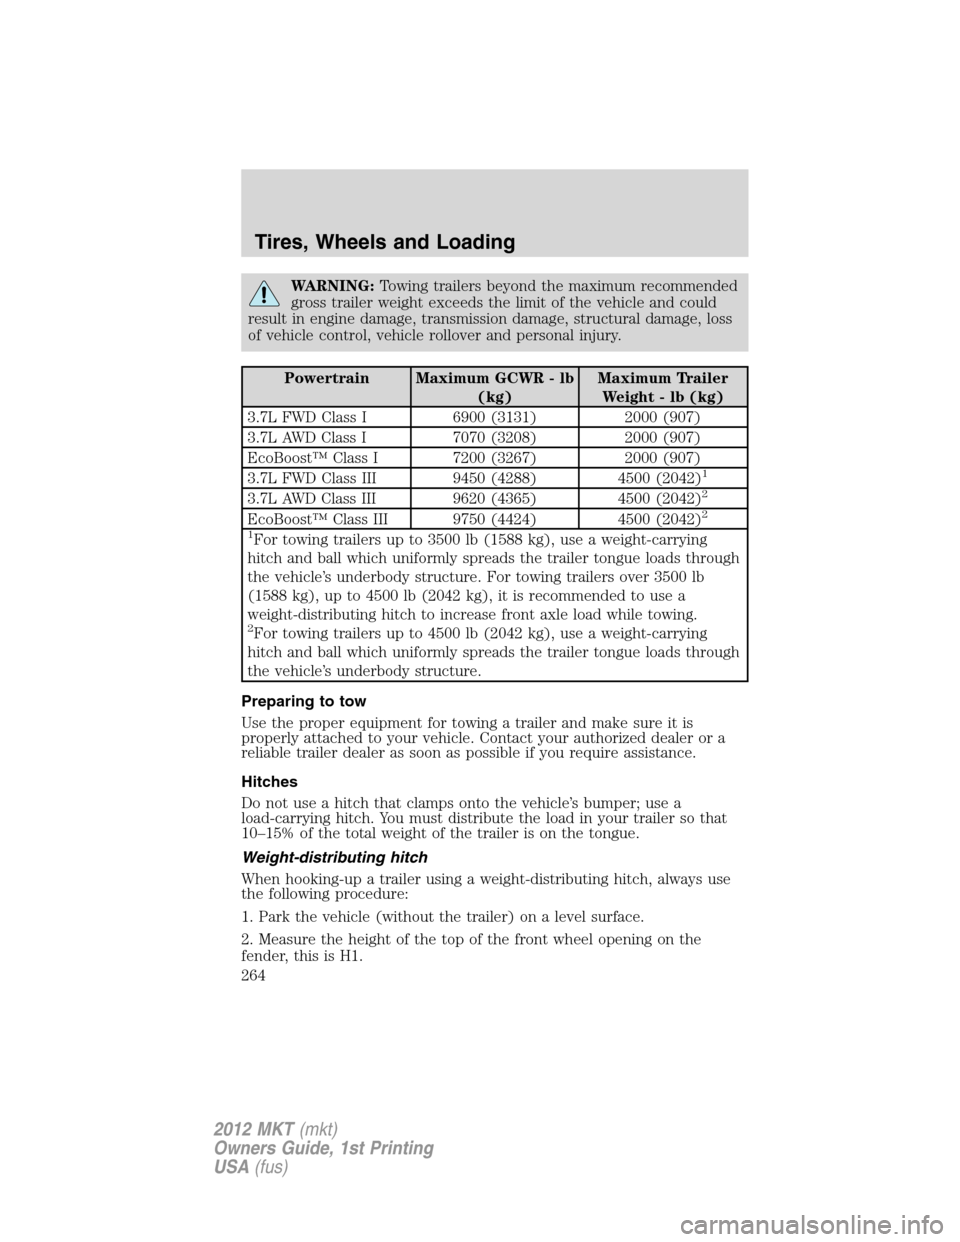
Powertrain Maximum GCWR - lb
(kg)Maximum Trailer
Weight - lb (kg)
3.7L FWD Class I 6900 (3131) 2000 (907)
3.7L AWD Class I 7070 (3208) 2000 (907)
EcoBoost™ Class I 7200 (3267) 2000 (907)
3.7L FWD Class III 9450 (4288) 4500 (2042)
1
3.7L AWD Class III 9620 (4365) 4500 (2042)2
EcoBoost™ Class III 9750 (4424) 4500 (2042)2
1
For towing trailers up to 3500 lb (1588 kg), use a weight-carrying
hitch and ball which uniformly spreads the trailer tongue loads through
the vehicle’s underbody structure. For towing trailers over 3500 lb
(1588 kg), up to 4500 lb (2042 kg), it is recommended to use a
weight-distributing hitch to increase front axle load while towing.
2For towing trailers up to 4500 lb (2042 kg), use a weight-carrying
hitch and ball which uniformly spreads the trailer tongue loads through
the vehicle’s underbody structure.
Preparing to tow
Use the proper equipment for towing a trailer and make sure it is
properly attached to your vehicle. Contact your authorized dealer or a
reliable trailer dealer as soon as possible if you require assistance.
Hitches
Do not use a hitch that clamps onto the vehicle’s bumper; use a
load-carrying hitch. You must distribute the load in your trailer so that
10–15% of the total weight of the trailer is on the tongue.
Weight-distributing hitch
When hooking-up a trailer using a weight-distributing hitch, always use
the following procedure:
1. Park the vehicle (without the trailer) on a level surface.
2. Measure the height of the top of the front wheel opening on the
fender, this is H1.
Tires, Wheels and Loading
264
2012 MKT(mkt)
Owners Guide, 1st Printing
USA(fus)
Page 265 of 437
3. Attach the trailer to the vehicle without the weight distributing bars
connected.
4. Measure the height of the top of the front wheel opening on the
fender a second time, this is H2.
5. Install and adjust the tension in the weight distributing bars so that
the height of the front fender is approximately halfway between H1 and
H2.
6. Check that the trailer is level. If not level, adjust the ball height
accordingly and repeat Steps 3–6.
WARNING:Do not adjust a weight-distributing hitch to any
position where the rear bumper of the vehicle is higher than it
was before attaching the trailer. Doing so will defeat the function of
the weight-distributing hitch, which may cause unpredictable handling,
and could result in serious personal injury.
Safety chains
Always connect the trailer’s safety chains to the frame or hook retainers
of the vehicle hitch. To connect the trailer’s safety chains, cross the
chains under the trailer tongue and allow slack for turning corners.
If you use a rental trailer, follow the instructions that the rental agency
gives to you.
Do not attach safety chains to the bumper.
Trailer brakes
Electric brakes and manual, automatic or surge-type trailer brakes are
safe if installed properly and adjusted to the manufacturer’s
specifications. The trailer brakes must meet local and Federal
regulations.
WARNING:Do not connect a trailer’s hydraulic brake system
directly to your vehicle’s brake system. Your vehicle may not
have enough braking power and your chances of having a collision
greatly increase.
The braking system of the tow vehicle is rated for operation at the
GVWR not GCWR.
Tires, Wheels and Loading
265
2012 MKT(mkt)
Owners Guide, 1st Printing
USA(fus)
Page 266 of 437
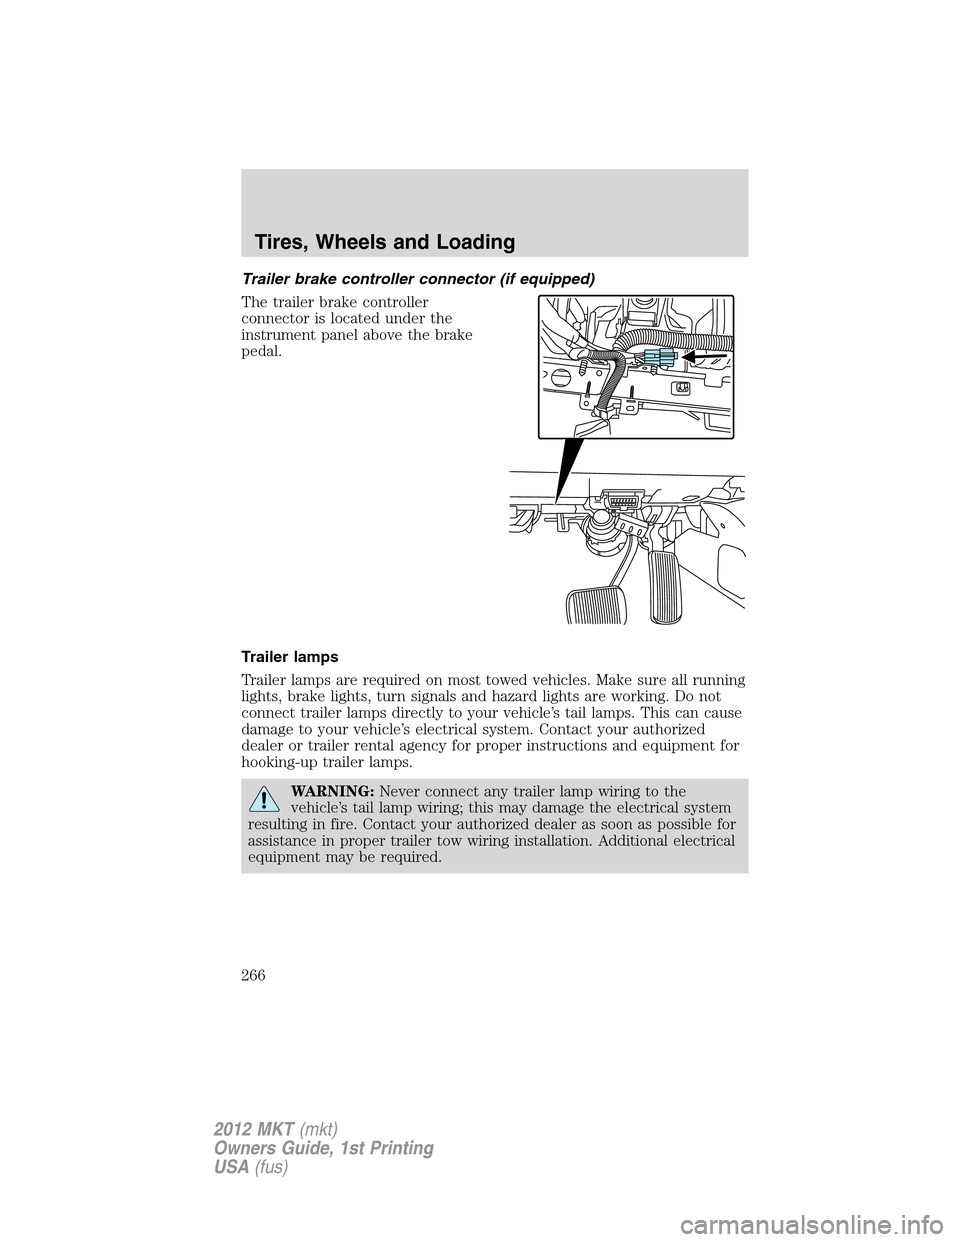
Trailer brake controller connector (if equipped)
The trailer brake controller
connector is located under the
instrument panel above the brake
pedal.
Trailer lamps
Trailer lamps are required on most towed vehicles. Make sure all running
lights, brake lights, turn signals and hazard lights are working. Do not
connect trailer lamps directly to your vehicle’s tail lamps. This can cause
damage to your vehicle’s electrical system. Contact your authorized
dealer or trailer rental agency for proper instructions and equipment for
hooking-up trailer lamps.
WARNING:Never connect any trailer lamp wiring to the
vehicle’s tail lamp wiring; this may damage the electrical system
resulting in fire. Contact your authorized dealer as soon as possible for
assistance in proper trailer tow wiring installation. Additional electrical
equipment may be required.
Tires, Wheels and Loading
266
2012 MKT(mkt)
Owners Guide, 1st Printing
USA(fus)
Page 267 of 437
Driving while you tow
When towing a trailer:
•Turn off the speed control. The speed control may shut off
automatically when you are towing on long, steep grades.
•It is recommended to select the “M” gear position when additional
engine braking is needed. In situations such as prolonged downhill
driving on steep grades (i.e., driving in mountainous areas), additional
engine braking is needed to reduce the load on the vehicle’s regular
brake system to prevent them from overheating. For more information
on transmission operation and gear positions, seeAutomatic
transmission operationin theDrivingchapter.
•Allow more distance for stopping with a trailer attached; anticipate
stops and brake gradually.
Trailer towing tips
•Practice turning, stopping and backing-up before starting on a trip to
get the feel of the vehicle-trailer combination. When turning, make
wider turns so the trailer wheels will clear curbs and other obstacles.
•To aid in engine/transmission cooling and A/C efficiency during hot
weather while stopped in traffic, place the gearshift lever in P (Park).
•After you have traveled 50 miles (80 km), thoroughly check your
hitch, electrical connections and trailer wheel lug nuts.
•If you are driving down a long or steep hill, shift to a lower gear. Do
not apply the brakes continuously, as they may overheat and become
less effective.
•Vehicles with trailers should not be parked on a grade. If you must
park on a grade, place wheel chocks under the trailer’s wheels.
RECREATIONAL TOWING
Follow these guidelines for your specific powertrain combination to tow
your vehicle for personal travel (such as behind a motor home or a
truck).
Note:Put your climate control system in recirculated air mode to
prevent exhaust fumes from entering the vehicle. Refer to theClimate
Controlschapter for more information.
In case of a roadside emergency with a disabled vehicle, please refer to
Wrecker towingin theRoadside Emergencieschapter.
These guidelines are designed to prevent damage to your vehicle after it
is hooked-up to the RV or tow dolly.
Tires, Wheels and Loading
267
2012 MKT(mkt)
Owners Guide, 1st Printing
USA(fus)
Page 268 of 437
Front-wheel drive (FWD) vehiclescan be towed with all four wheels
on the ground or with the front wheels off the ground by using a tow
dolly. If you are using a tow dolly follow the instructions specified by the
equipment provider. If you are towing with all four wheels on the ground,
refer to the towing instructions below.
All-wheel drive (AWD) vehiclescan be towed with all four wheels on
the ground or with all four wheels off the ground using a vehicle
transport trailer.Do not tow your AWD vehicle with the front
wheels off the ground (by using a tow dolly) and the rear wheels
on the ground; this will cause damage to your AWD system.If you
are using a vehicle transport trailer, follow the instruction specified by
the equipment provider. If you are towing with all four wheels on the
ground, refer to the towing instructions below.
If you tow your vehicle with all four wheels on the ground, follow these
instructions:
•Tow only in the forward direction.
•Release the parking brake.
•Place the transmission shift lever in N (Neutral).
•Place the ignition in the accessory position (refer toStartingin the
Drivingchapter).
•Do not exceed 65 mph (105 km/h)
•Start the engine and allow it to run for five minutes at the beginning
of each day and at each fuel stop.
Tires, Wheels and Loading
268
2012 MKT(mkt)
Owners Guide, 1st Printing
USA(fus)
Page 269 of 437
STARTING
Ignition modes
1. Off — This position shuts the engine and all electrical accessories off.
Press and release the START/STOP button without applying the brake
pedal when your vehicle is in accessory or on modes or when the engine
is running and there is no vehicle speed.
Note:In order to switch off the engine while the vehicle is in motion,
press and hold the START/STOP button for at least one second or press
the START/STOP button three times within two seconds. Then, shift to
neutral and use the brakes to bring the vehicle to a safe stop. After the
vehicle has stopped, turn the engine off and shift into park.
2. Accessory — This allows electrical accessories such as the radio to
operate while the engine is not running. Press and release the
START/STOP button without applying the brake pedal. ACCESSORY
POWER ACTIVE and PRESS BRAKE TO START will be displayed in the
message center. Refer toMessage centerin theInstrument Cluster
chapter for more information.
3. On — This will power your vehicle’s electrical system and the warning
lights in the instrument cluster will illuminate, but the engine will remain
off. Press and hold the START/STOP button for at least one second
without applying the brake pedal.
4. Start — Cranks the engine. Press the START/STOP button (for any
length of time) while applying the brake pedal.
Starting your vehicle
This system meets all Canadian interference-causing equipment standard
requirements regulating the impulse electrical field strength of radio
noise.
Don’t press the accelerator before or during starting. Only use the
accelerator when you have difficulty starting the engine. For more
information on starting the vehicle, refer toStarting the enginein this
chapter.
To avoid potential transmission damage at extremely cold temperatures
(below -20°F [-30°C]), it is recommended that the vehicle be warmed up
to normal operating temperature before driving at highway speeds above
50 mph (80 km/h). Normal operating temperature is normally reached
after 10 minutes of moderate driving or idling.
Driving
269
2012 MKT(mkt)
Owners Guide, 1st Printing
USA(fus)
Page 270 of 437
WARNING:Extended idling at high engine speeds can produce
very high temperatures in the engine and exhaust system,
creating the risk of fire or other damage.
WARNING:Do not park, idle, or drive your vehicle in dry grass
or other dry ground cover. The emission system heats up the
engine compartment and exhaust system, which can start a fire.
WARNING:Do not start your vehicle in a closed garage or in
other enclosed areas. Exhaust fumes can be toxic. Always open
the garage door before you start the engine. SeeGuarding against
exhaust fumesin this chapter for more instructions.
WARNING:If you smell exhaust fumes inside your vehicle, have
your dealer inspect your vehicle immediately. Do not drive if you
smell exhaust fumes.
Important safety precautions
When the engine starts, the idle RPM runs higher than normal in order
to warm the engine. If the engine idle speed does not slow down
automatically, have the vehicle checked.
Before starting the vehicle:
1. Make sure all vehicle occupants have buckled their safety belts. For
more information on safety belts and their proper usage, refer to the
Seating and Safety Restraintschapter.
2. Make sure vehicle accessories are off.
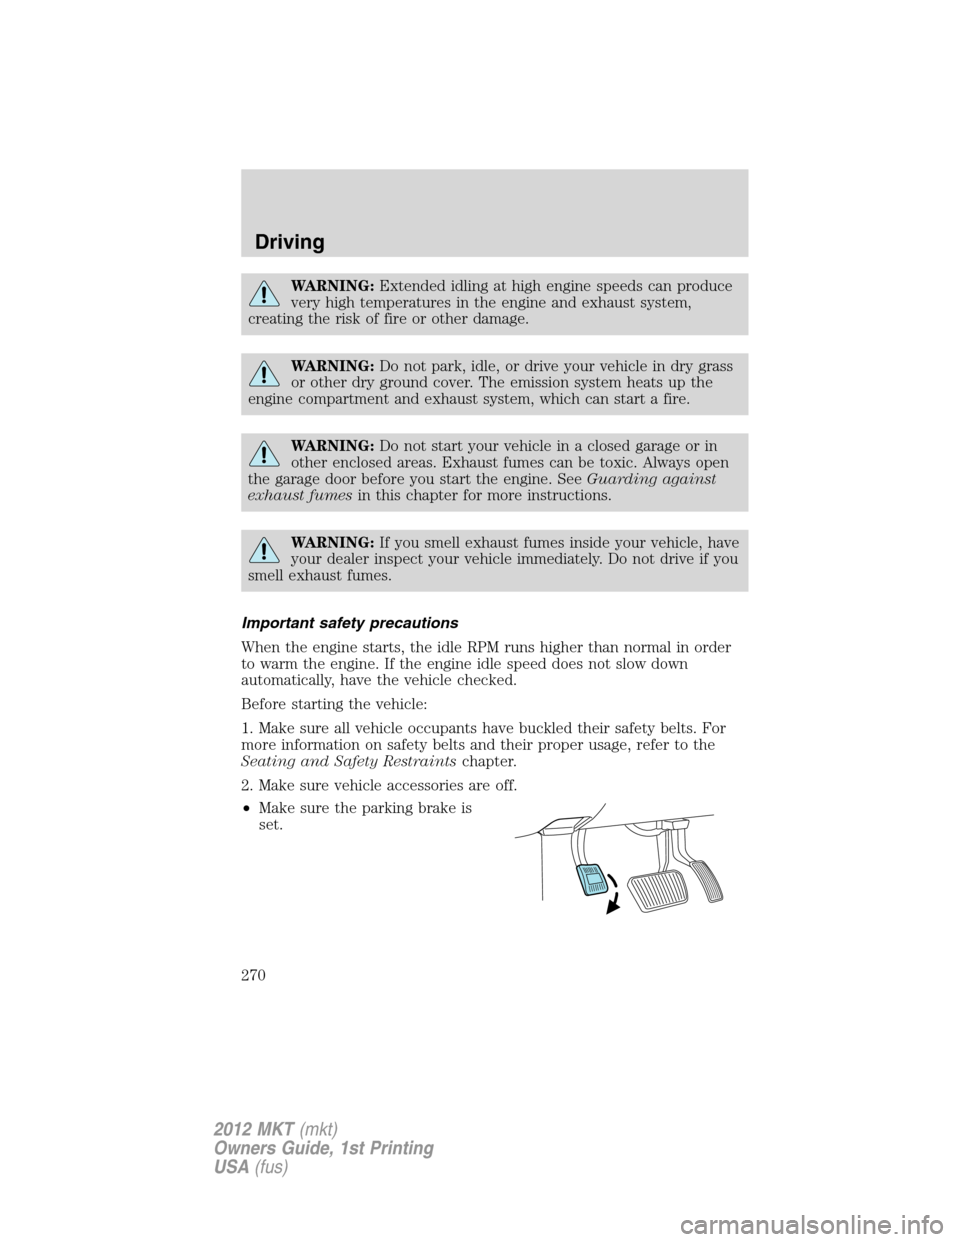
•Make sure the parking brake is
set.
Driving
270
2012 MKT(mkt)
Owners Guide, 1st Printing
USA(fus)