Rotate LINCOLN MKX 2016 Owners Manual
[x] Cancel search | Manufacturer: LINCOLN, Model Year: 2016, Model line: MKX, Model: LINCOLN MKX 2016Pages: 563, PDF Size: 4.96 MB
Page 108 of 563
SUN VISORS
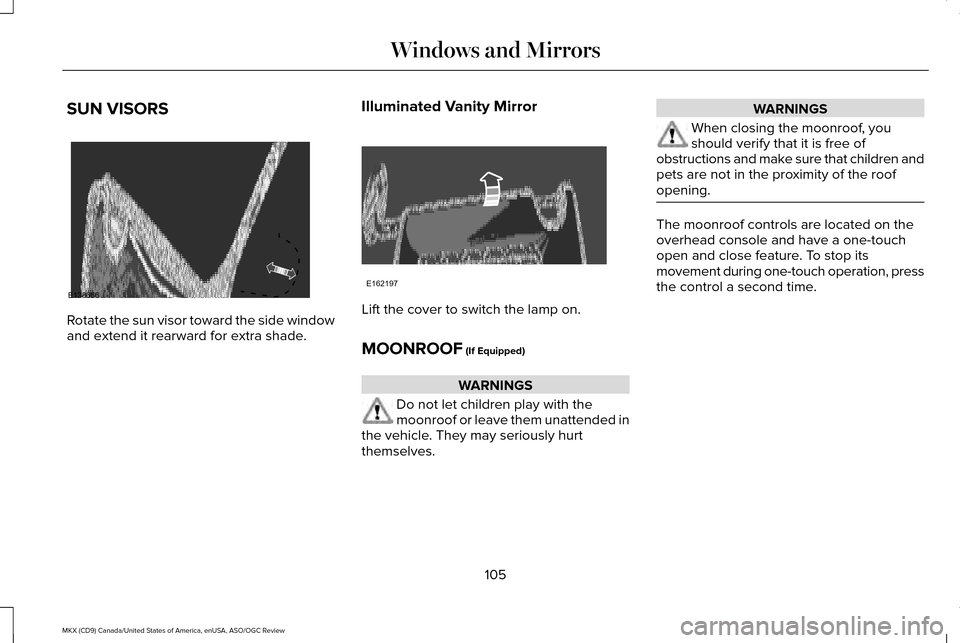
Rotate the sun visor toward the side window
and extend it rearward for extra shade.
Illuminated Vanity Mirror Lift the cover to switch the lamp on.
MOONROOF (If Equipped)
WARNINGS
Do not let children play with the
moonroof or leave them unattended in
the vehicle. They may seriously hurt
themselves. WARNINGS
When closing the moonroof, you
should verify that it is free of
obstructions and make sure that children and
pets are not in the proximity of the roof
opening. The moonroof controls are located on the
overhead console and have a one-touch
open and close feature. To stop its
movement during one-touch operation, press
the control a second time.
105
MKX (CD9) Canada/United States of America, enUSA, ASO/OGC Review Windows and MirrorsE138666 E162197
Page 156 of 563
1. With the ignition on, move the memory
positions to the desired positions.
2. Press and hold the desired preset button
for about five seconds. A tone will sound
after about two seconds. Continue
holding until a second tone is heard.
3. Within three seconds, press the lock button on the remote control you are
linking.
To unlink a remote control, follow the same
procedure – except in step 3, press the
unlock button on the remote control.
Note: If more than one linked remote control
or intelligent access key is in range, the
memory function moves to the settings of
the first key to initiate a memory recall.
Easy Entry and Exit Feature
If you enable the easy entry and exit feature,
it automatically moves the driver seat
position rearward up to two inches (five
centimeters) when you switch the ignition
off.
The driver seat will return to its previous
position when you switch the ignition on. You can enable or disable this feature in the
information display. See Information
Displays (page 114).
REAR SEATS
Adjusting the Rear Seats WARNING
To prevent possible damage to the
seat or safety belts, make sure that the
safety belts are not buckled when folding
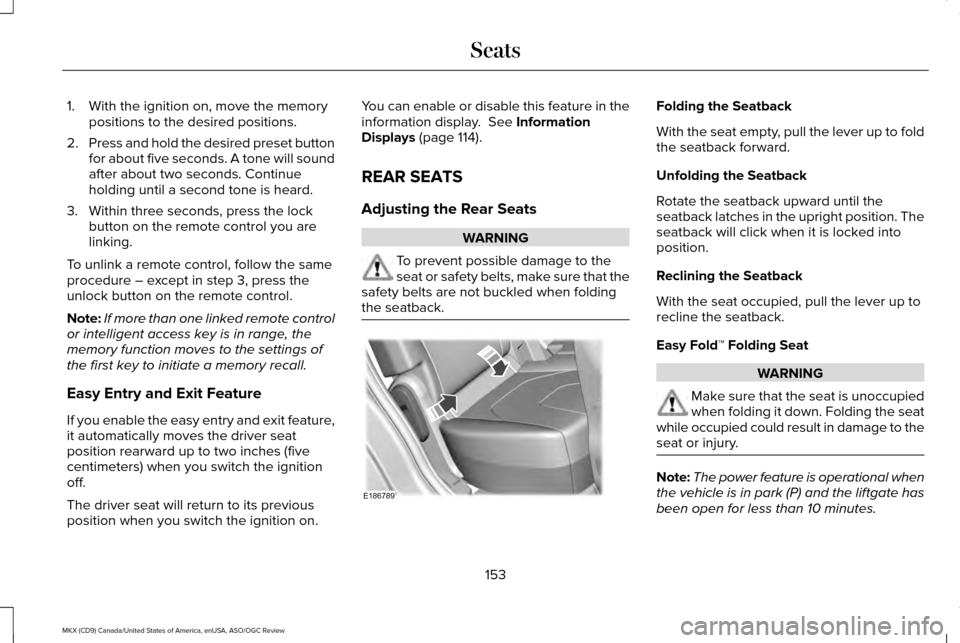
the seatback. Folding the Seatback
With the seat empty, pull the lever up to fold
the seatback forward.
Unfolding the Seatback
Rotate the seatback upward until the
seatback latches in the upright position. The
seatback will click when it is locked into
position.
Reclining the Seatback
With the seat occupied, pull the lever up to
recline the seatback.
Easy Fold™ Folding Seat
WARNING
Make sure that the seat is unoccupied
when folding it down. Folding the seat
while occupied could result in damage to the
seat or injury. Note:
The power feature is operational when
the vehicle is in park (P) and the liftgate has
been open for less than 10 minutes.
153
MKX (CD9) Canada/United States of America, enUSA, ASO/OGC Review SeatsE186789
Page 157 of 563
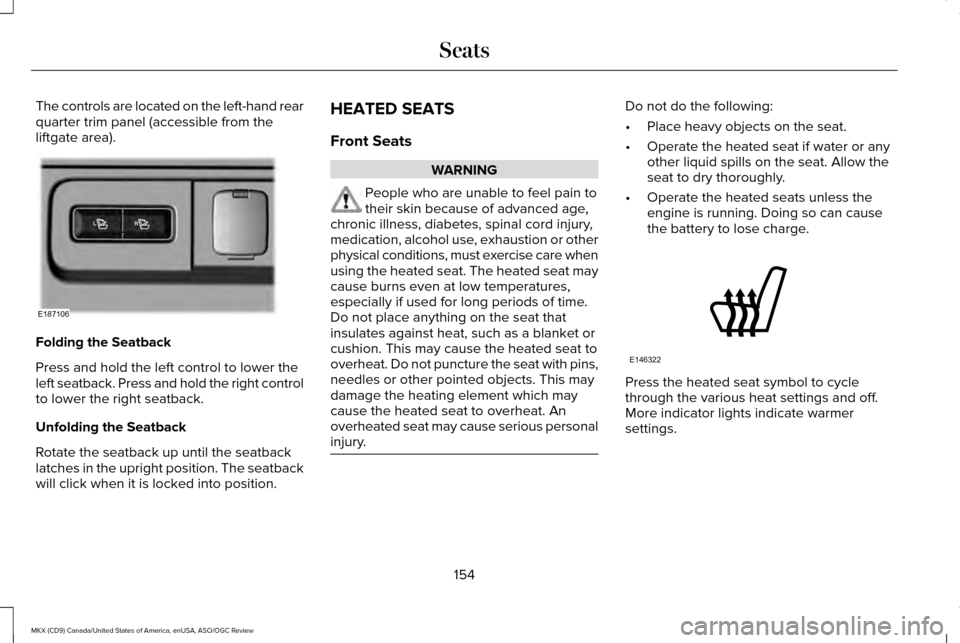
The controls are located on the left-hand rear
quarter trim panel (accessible from the
liftgate area).
Folding the Seatback
Press and hold the left control to lower the
left seatback. Press and hold the right control
to lower the right seatback.
Unfolding the Seatback
Rotate the seatback up until the seatback
latches in the upright position. The seatback
will click when it is locked into position. HEATED SEATS
Front Seats WARNING
People who are unable to feel pain to
their skin because of advanced age,
chronic illness, diabetes, spinal cord injury,
medication, alcohol use, exhaustion or other
physical conditions, must exercise care when
using the heated seat. The heated seat may
cause burns even at low temperatures,
especially if used for long periods of time.
Do not place anything on the seat that
insulates against heat, such as a blanket or
cushion. This may cause the heated seat to
overheat. Do not puncture the seat with pins,
needles or other pointed objects. This may
damage the heating element which may
cause the heated seat to overheat. An
overheated seat may cause serious personal
injury. Do not do the following:
•
Place heavy objects on the seat.
• Operate the heated seat if water or any
other liquid spills on the seat. Allow the
seat to dry thoroughly.
• Operate the heated seats unless the
engine is running. Doing so can cause
the battery to lose charge. Press the heated seat symbol to cycle
through the various heat settings and off.
More indicator lights indicate warmer
settings.
154
MKX (CD9) Canada/United States of America, enUSA, ASO/OGC Review SeatsE187106 E146322
Page 316 of 563
AUTOMATIC TRANSMISSION
FLUID CHECK
WARNING
Do not use supplemental transmission
fluid additives, treatments or cleaning
agents. The use of these materials may affect
transmission operation and result in damage
to internal transmission components. The transmission does not consume fluid.
However, if the transmission slips or shifts
slowly you should check the fluid level. If you
notice a sign of leaking fluid, contact an
authorized dealer.
Checking the Transmission Fluid Level
*
Only check the transmission fluid level when
the engine is at normal operating temprature
179°F (82°C)-199°F (93°C). Normal operating
temprature is reached after driving
approximately
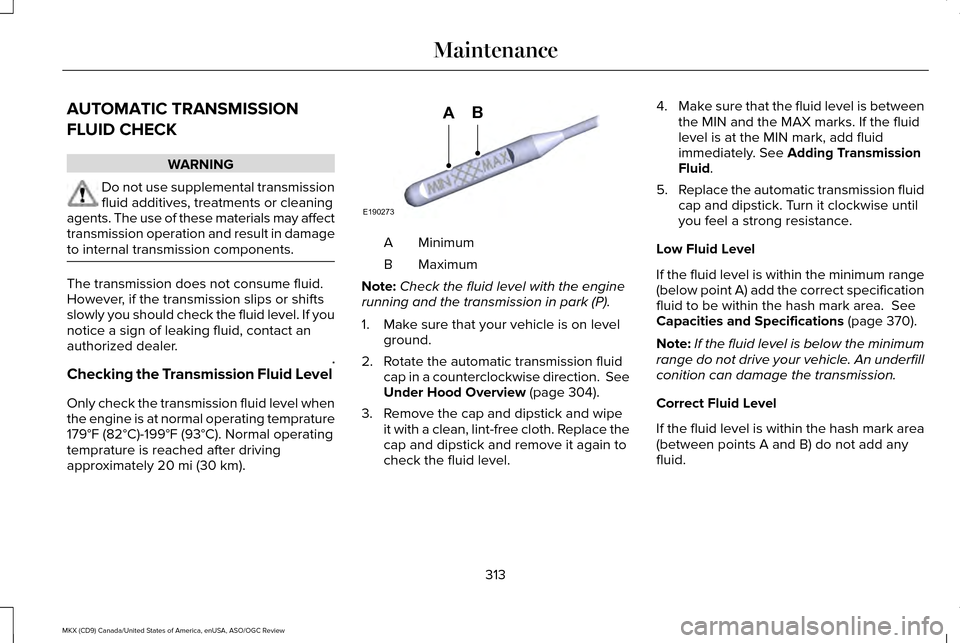
20 mi (30 km). Minimum
A
Maximum
B
Note: Check the fluid level with the engine
running and the transmission in park (P).
1. Make sure that your vehicle is on level ground.
2. Rotate the automatic transmission fluid cap in a counterclockwise direction. See
Under Hood Overview
(page 304).
3. Remove the cap and dipstick and wipe it with a clean, lint-free cloth. Replace the
cap and dipstick and remove it again to
check the fluid level. 4.
Make sure that the fluid level is between
the MIN and the MAX marks. If the fluid
level is at the MIN mark, add fluid
immediately. See
Adding Transmission
Fluid.
5. Replace the automatic transmission fluid
cap and dipstick. Turn it clockwise until
you feel a strong resistance.
Low Fluid Level
If the fluid level is within the minimum range
(below point A) add the correct specification
fluid to be within the hash mark area.
See
Capacities and Specifications (page 370).
Note: If the fluid level is below the minimum
range do not drive your vehicle. An underfill
conition can damage the transmission.
Correct Fluid Level
If the fluid level is within the hash mark area
(between points A and B) do not add any
fluid.
313
MKX (CD9) Canada/United States of America, enUSA, ASO/OGC Review MaintenanceE190273
AB
Page 317 of 563
High Fluid Level
If the fluid level is above the maximum range
(above point A) fluid may need to be
removed. High fluid levels may be caused
by a overheating condition. If you have
operated your vehicle at high speeds, towing
a trailer or in city traffic during hot weather,
allow your vehicle to cool for a minimum of
30 minutes before rechecking the level.
Note:
An overfill conition can damage the
transmission.
Adding Transmission Fluid *
1. Rotate the automatic transmission fluid cap in a counterclockwise direction. *
2. Remove the cap and dipstick and wipe it with a clean, lint-free cloth.
3. Add fluid that meets the Ford specifications. See Capacities and
Specifications (page 376). Pour the fluid
directly into the automatic transmission
fluid cap and dipstick hole.
4. Replace the cap and dipstick and remove
it again to check the fluid level. 5.
Make sure that the fluid level is between
the MIN and the MAX marks.
6. Replace the automatic transmission fluid
cap and dipstick. Turn it clockwise until
you feel a strong resistance.
* Vehicles With 2.7L EcoBoost WARNING
Do not run the engine with the air filter
disconnected.
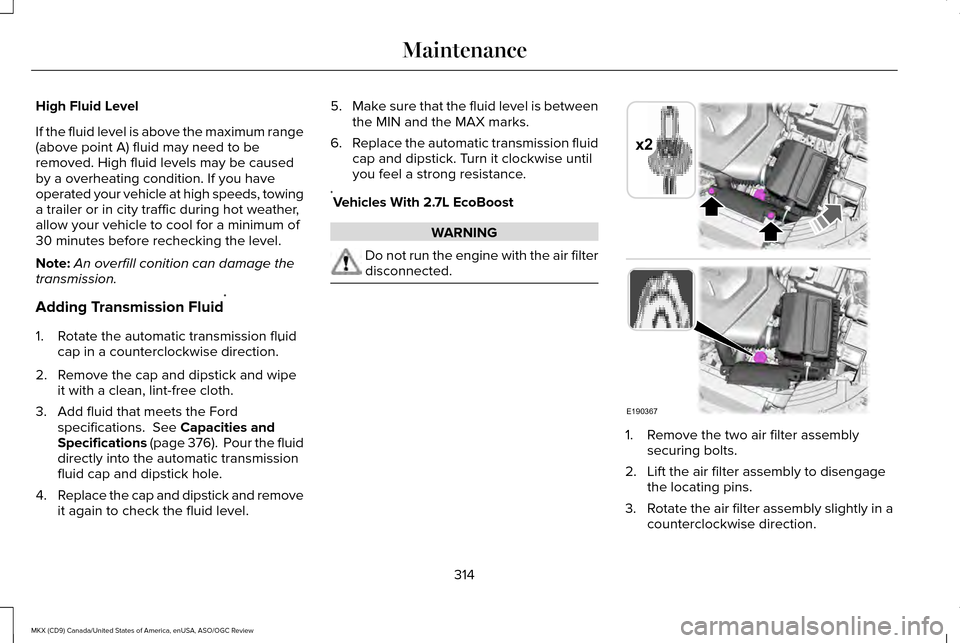
1. Remove the two air filter assembly
securing bolts.
2. Lift the air filter assembly to disengage the locating pins.
3. Rotate the air filter assembly slightly in a
counterclockwise direction.
314
MKX (CD9) Canada/United States of America, enUSA, ASO/OGC Review MaintenanceE190367
x2
Page 345 of 563
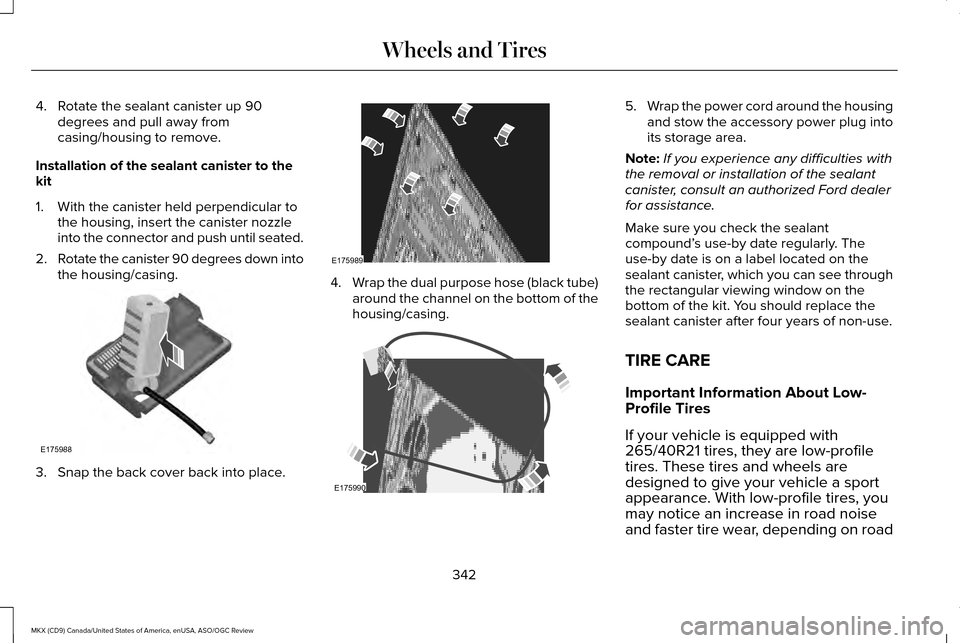
4. Rotate the sealant canister up 90
degrees and pull away from
casing/housing to remove.
Installation of the sealant canister to the
kit
1. With the canister held perpendicular to the housing, insert the canister nozzle
into the connector and push until seated.
2. Rotate the canister 90 degrees down into
the housing/casing. 3. Snap the back cover back into place. 4.
Wrap the dual purpose hose (black tube)
around the channel on the bottom of the
housing/casing. 5.
Wrap the power cord around the housing
and stow the accessory power plug into
its storage area.
Note: If you experience any difficulties with
the removal or installation of the sealant
canister, consult an authorized Ford dealer
for assistance.
Make sure you check the sealant
compound’ s use-by date regularly. The
use-by date is on a label located on the
sealant canister, which you can see through
the rectangular viewing window on the
bottom of the kit. You should replace the
sealant canister after four years of non-use.
TIRE CARE
Important Information About Low-
Profile Tires
If your vehicle is equipped with
265/40R21 tires, they are low-profile
tires. These tires and wheels are
designed to give your vehicle a sport
appearance. With low-profile tires, you
may notice an increase in road noise
and faster tire wear, depending on road
342
MKX (CD9) Canada/United States of America, enUSA, ASO/OGC Review Wheels and TiresE175988 E175989 E175990
Page 360 of 563
Tire and Wheel Alignment
A bad jolt from hitting a curb or pothole
can cause the front end of your vehicle
to become misaligned or cause damage
to your tires. If your vehicle seems to
pull to one side when you’re driving, the
wheels may be out of alignment. Have
an authorized dealer check the wheel
alignment periodically.
Wheel misalignment in the front or the
rear can cause uneven and rapid
treadwear of your tires and should be
corrected by an authorized dealer.
Front-wheel drive vehicles and those
with an independent rear suspension
may require alignment of all four wheels.
The tires should also be balanced
periodically. An unbalanced tire and
wheel assembly may result in irregular
tire wear.
Tire Rotation
Note:
If your tires show uneven wear
ask an authorized dealer to check for
and correct any wheel misalignment,
tire imbalance or mechanical problem
involved before tire rotation.
Note: Your vehicle may be equipped
with a dissimilar spare wheel and tire
assembly. A dissimilar spare wheel and
tire assembly is defined as a spare
wheel and tire assembly that is different
in brand, size or appearance from the
road tires and wheels. If you have a
dissimilar spare wheel and tire assembly
it is intended for temporary use only and
should not be used in a tire rotation.
Note: After having your tires rotated,
inflation pressure must be checked and
adjusted to the vehicle requirements. Rotating your tires at the recommended
interval (as indicated in the scheduled
maintenance information) will help your
tires wear more evenly, providing better
tire performance and longer tire life.
Sometime irregular tire wear can be
corrected by rotating the tires.
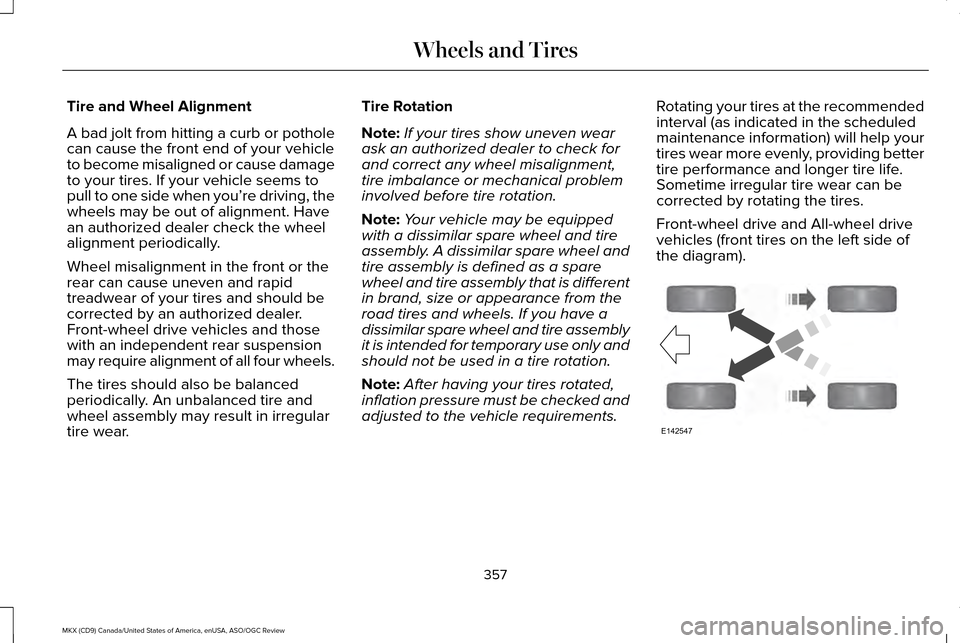
Front-wheel drive and All-wheel drive
vehicles (front tires on the left side of
the diagram).
357
MKX (CD9) Canada/United States of America, enUSA, ASO/OGC Review Wheels and TiresE142547
Page 485 of 563
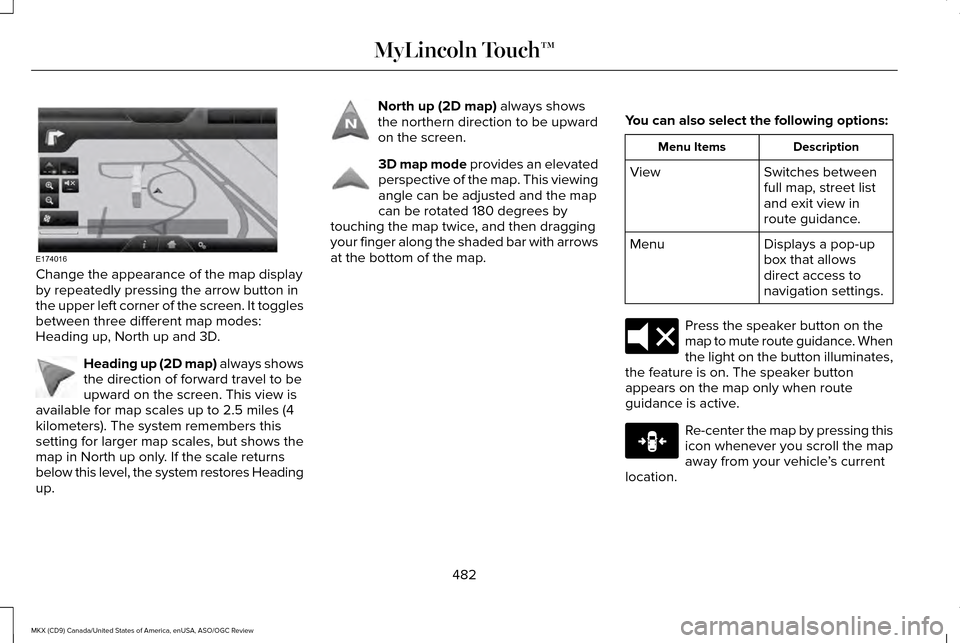
Change the appearance of the map display
by repeatedly pressing the arrow button in
the upper left corner of the screen. It toggles
between three different map modes:
Heading up, North up and 3D.
Heading up (2D map) always shows
the direction of forward travel to be
upward on the screen. This view is
available for map scales up to 2.5 miles (4
kilometers). The system remembers this
setting for larger map scales, but shows the
map in North up only. If the scale returns
below this level, the system restores Heading
up. North up (2D map) always shows
the northern direction to be upward
on the screen. 3D map mode
provides an elevated
perspective of the map. This viewing
angle can be adjusted and the map
can be rotated 180 degrees by
touching the map twice, and then dragging
your finger along the shaded bar with arrows
at the bottom of the map. You can also select the following options: Description
Menu Items
Switches between
full map, street list
and exit view in
route guidance.
View
Displays a pop-up
box that allows
direct access to
navigation settings.
Menu Press the speaker button on the
map to mute route guidance. When
the light on the button illuminates,
the feature is on. The speaker button
appears on the map only when route
guidance is active. Re-center the map by pressing this
icon whenever you scroll the map
away from your vehicle
’s current
location.
482
MKX (CD9) Canada/United States of America, enUSA, ASO/OGC Review MyLincoln Touch™E174016 E142642 E142643 E142644 E174017 E146188
Page 486 of 563
Auto Zoom
Press the green bar to access map mode,
then select the + or - zoom button to bring
up the zoom level and Auto buttons on the
touchscreen. When you press
Auto, Auto
Zoom turns on and Auto displays in the
bottom left corner of the screen in the map
scale. The map zoom level then synchronizes
with vehicle speed. The slower your vehicle
is traveling, the farther the map zooms in;
the faster your vehicle is traveling, the farther
the map zooms out. To switch off the feature,
just press the
+ or - button again.
In 3D mode, rotate the map view by swiping
your finger across the shaded bar with the
arrows.
The ETA box under the zoom buttons
appears when a route is active and displays
the distance and time to your destination. If
the button is pressed, a pop up appears with
the destination listed (and waypoint if
applicable) along with mileage and time to
destination. You may also select to have
either the estimated time to reach your
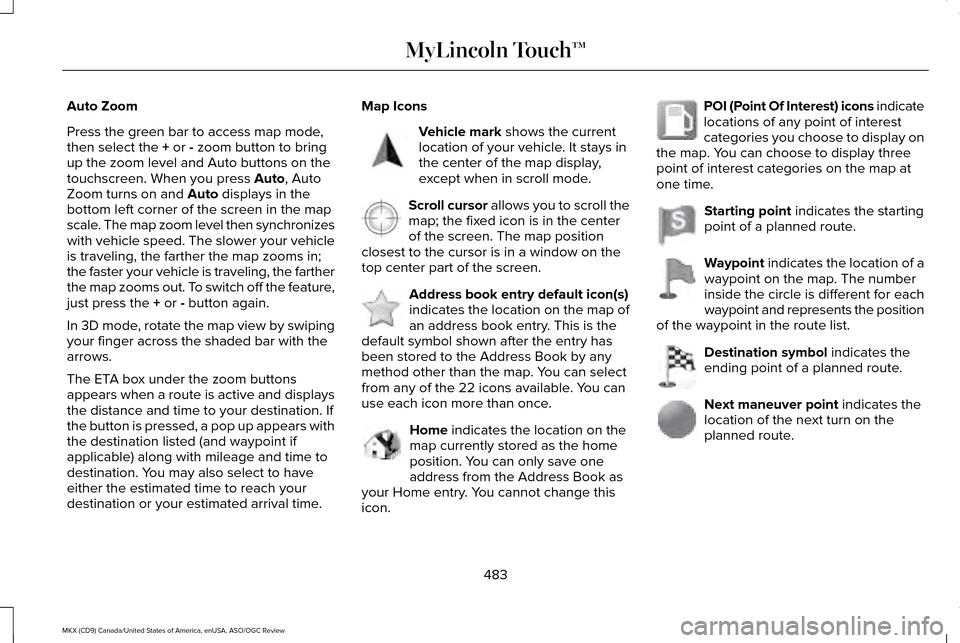
destination or your estimated arrival time. Map Icons Vehicle mark
shows the current
location of your vehicle. It stays in
the center of the map display,
except when in scroll mode. Scroll cursor
allows you to scroll the
map; the fixed icon is in the center
of the screen. The map position
closest to the cursor is in a window on the
top center part of the screen. Address book entry default icon(s)
indicates the location on the map of
an address book entry. This is the
default symbol shown after the entry has
been stored to the Address Book by any
method other than the map. You can select
from any of the 22 icons available. You can
use each icon more than once. Home
indicates the location on the
map currently stored as the home
position. You can only save one
address from the Address Book as
your Home entry. You cannot change this
icon. POI (Point Of Interest) icons indicate
locations of any point of interest
categories you choose to display on
the map. You can choose to display three
point of interest categories on the map at
one time. Starting point
indicates the starting
point of a planned route. Waypoint
indicates the location of a
waypoint on the map. The number
inside the circle is different for each
waypoint and represents the position
of the waypoint in the route list. Destination symbol
indicates the
ending point of a planned route. Next maneuver point
indicates the
location of the next turn on the
planned route.
483
MKX (CD9) Canada/United States of America, enUSA, ASO/OGC Review MyLincoln Touch™E142646 E142647 E142648 E142649 E142650 E142651 E142652 E142653 E142654
Page 508 of 563
Normal Maintenance Intervals
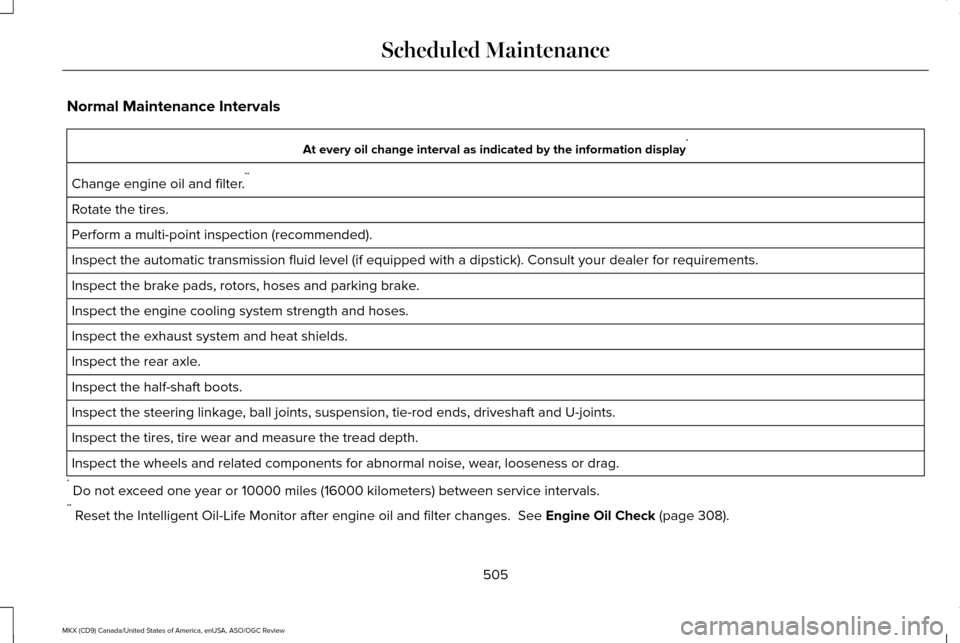
At every oil change interval as indicated by the information display
*
Change engine oil and filter. **
Rotate the tires.
Perform a multi-point inspection (recommended).
Inspect the automatic transmission fluid level (if equipped with a dips\
tick). Consult your dealer for requirements.
Inspect the brake pads, rotors, hoses and parking brake.
Inspect the engine cooling system strength and hoses.
Inspect the exhaust system and heat shields.
Inspect the rear axle.
Inspect the half-shaft boots.
Inspect the steering linkage, ball joints, suspension, tie-rod ends, driveshaft and U-joints.
Inspect the tires, tire wear and measure the tread depth.
Inspect the wheels and related components for abnormal noise, wear, looseness or drag.
* Do not exceed one year or 10000 miles (16000 kilometers) between service interv\
als.
** Reset the Intelligent Oil-Life Monitor after engine oil and filter change\
s. See Engine Oil Check (page 308).
505
MKX (CD9) Canada/United States of America, enUSA, ASO/OGC Review Scheduled Maintenance