display LINCOLN MKX 2018 Owner's Manual
[x] Cancel search | Manufacturer: LINCOLN, Model Year: 2018, Model line: MKX, Model: LINCOLN MKX 2018Pages: 603, PDF Size: 4.94 MB
Page 100 of 603
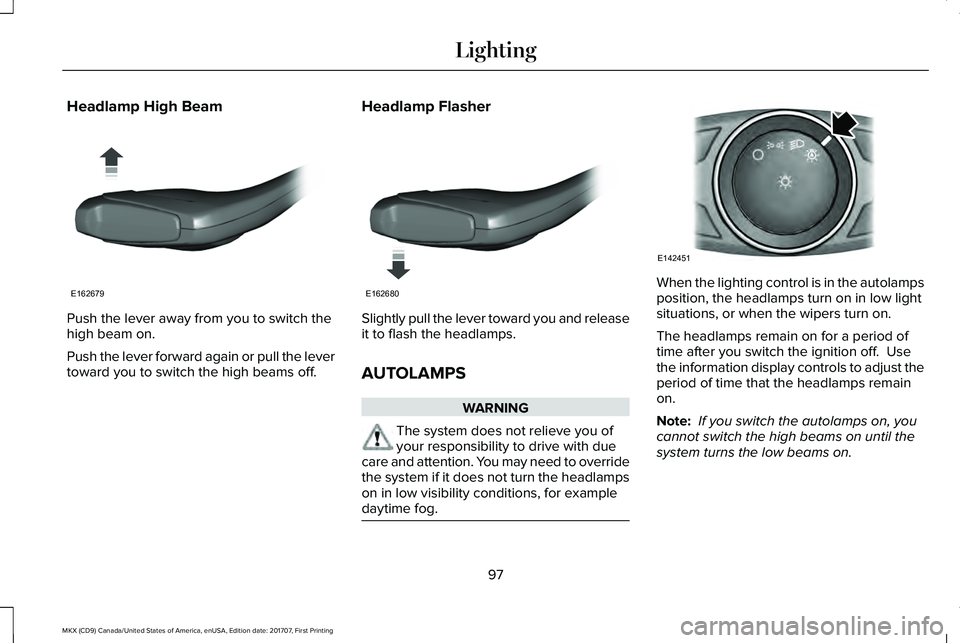
Headlamp High Beam
Push the lever away from you to switch thehigh beam on.
Push the lever forward again or pull the levertoward you to switch the high beams off.
Headlamp Flasher
Slightly pull the lever toward you and releaseit to flash the headlamps.
AUTOLAMPS
WARNING
The system does not relieve you ofyour responsibility to drive with duecare and attention. You may need to overridethe system if it does not turn the headlampson in low visibility conditions, for exampledaytime fog.
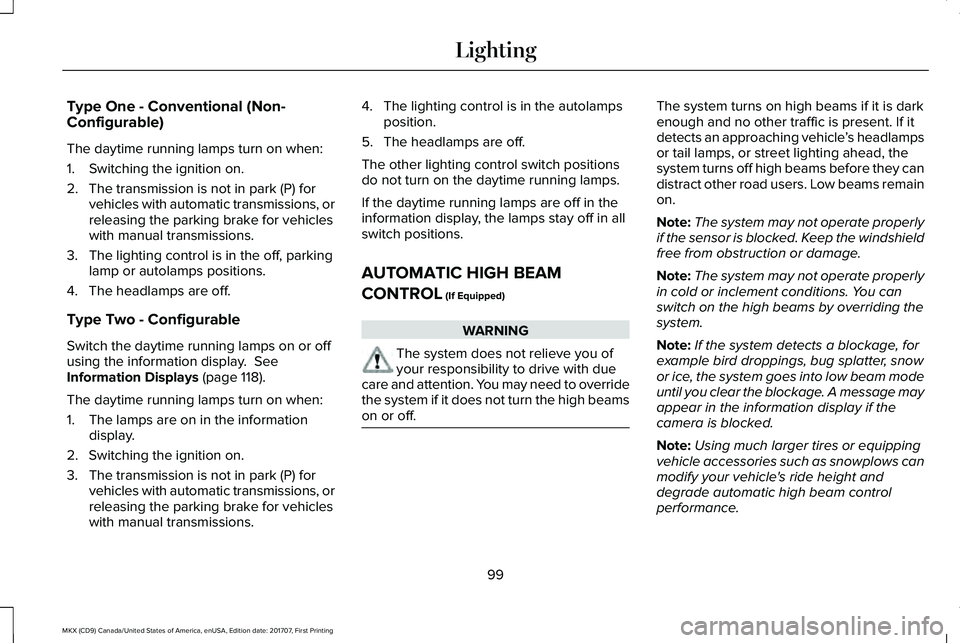
When the lighting control is in the autolampsposition, the headlamps turn on in low lightsituations, or when the wipers turn on.
The headlamps remain on for a period oftime after you switch the ignition off. Usethe information display controls to adjust theperiod of time that the headlamps remainon.
Note: If you switch the autolamps on, youcannot switch the high beams on until thesystem turns the low beams on.
97
MKX (CD9) Canada/United States of America, enUSA, Edition date: 201707, First Printing
LightingE162679 E162680 E142451
Page 102 of 603
Type One - Conventional (Non-Configurable)
The daytime running lamps turn on when:
1. Switching the ignition on.
2. The transmission is not in park (P) forvehicles with automatic transmissions, orreleasing the parking brake for vehicleswith manual transmissions.
3. The lighting control is in the off, parkinglamp or autolamps positions.
4. The headlamps are off.
Type Two - Configurable
Switch the daytime running lamps on or offusing the information display. SeeInformation Displays (page 118).
The daytime running lamps turn on when:
1. The lamps are on in the informationdisplay.
2. Switching the ignition on.
3. The transmission is not in park (P) forvehicles with automatic transmissions, orreleasing the parking brake for vehicleswith manual transmissions.
4. The lighting control is in the autolampsposition.
5. The headlamps are off.
The other lighting control switch positionsdo not turn on the daytime running lamps.
If the daytime running lamps are off in theinformation display, the lamps stay off in allswitch positions.
AUTOMATIC HIGH BEAM
CONTROL (If Equipped)
WARNING
The system does not relieve you ofyour responsibility to drive with duecare and attention. You may need to overridethe system if it does not turn the high beamson or off.
The system turns on high beams if it is darkenough and no other traffic is present. If itdetects an approaching vehicle’s headlampsor tail lamps, or street lighting ahead, thesystem turns off high beams before they candistract other road users. Low beams remainon.
Note:The system may not operate properlyif the sensor is blocked. Keep the windshieldfree from obstruction or damage.
Note:The system may not operate properlyin cold or inclement conditions. You canswitch on the high beams by overriding thesystem.
Note:If the system detects a blockage, forexample bird droppings, bug splatter, snowor ice, the system goes into low beam modeuntil you clear the blockage. A message mayappear in the information display if thecamera is blocked.
Note:Using much larger tires or equippingvehicle accessories such as snowplows canmodify your vehicle's ride height anddegrade automatic high beam controlperformance.
99
MKX (CD9) Canada/United States of America, enUSA, Edition date: 201707, First Printing
Lighting
Page 103 of 603
A camera sensor, centrally mounted behindthe windshield of your vehicle, continuouslymonitors conditions to turn the high beamson and off.
Once the system is active, the high beamsturn on if:
•The ambient light level is low enough.
•There is no traffic in front of your vehicle.
•The vehicle speed is greater thanapproximately 32 mph (51 km/h).
The high beams turn off if:
•The ambient light level is high enoughthat high beams are not required.
•The system detects an approachingvehicle's headlamps or tail lamps.
•The vehicle speed falls belowapproximately 27 mph (44 km/h).
•The system detects severe rain, snow orfog.
•The camera is blocked.
Switching the System On and Off
Switch the system on using the informationdisplay. See Roadside Emergencies (page274).
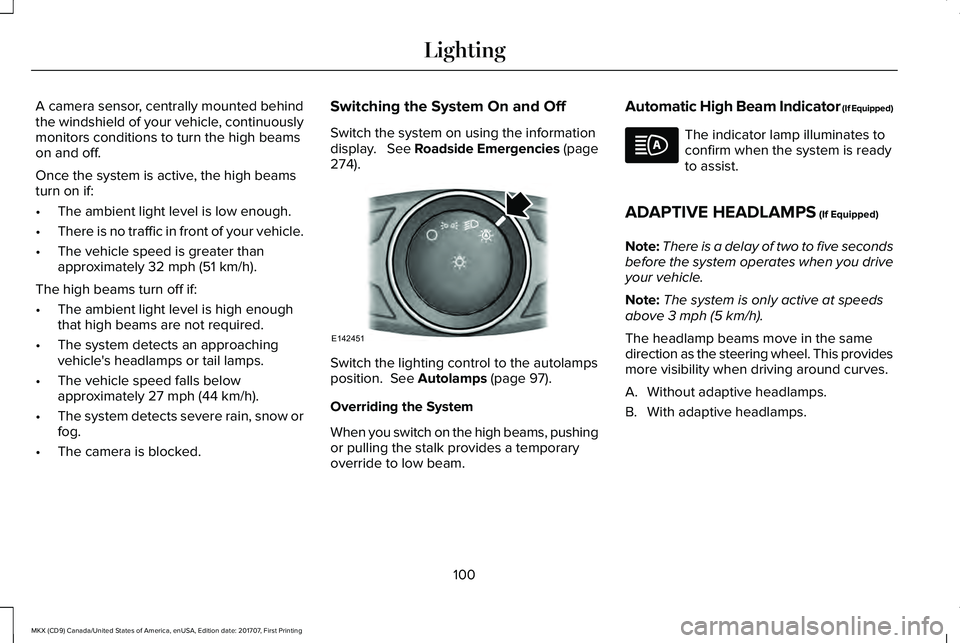
Switch the lighting control to the autolampsposition. See Autolamps (page 97).
Overriding the System
When you switch on the high beams, pushingor pulling the stalk provides a temporaryoverride to low beam.
Automatic High Beam Indicator (If Equipped)
The indicator lamp illuminates toconfirm when the system is readyto assist.
ADAPTIVE HEADLAMPS (If Equipped)
Note:There is a delay of two to five secondsbefore the system operates when you driveyour vehicle.
Note:The system is only active at speedsabove 3 mph (5 km/h).
The headlamp beams move in the samedirection as the steering wheel. This providesmore visibility when driving around curves.
A. Without adaptive headlamps.
B. With adaptive headlamps.
100
MKX (CD9) Canada/United States of America, enUSA, Edition date: 201707, First Printing
LightingE142451
Page 104 of 603
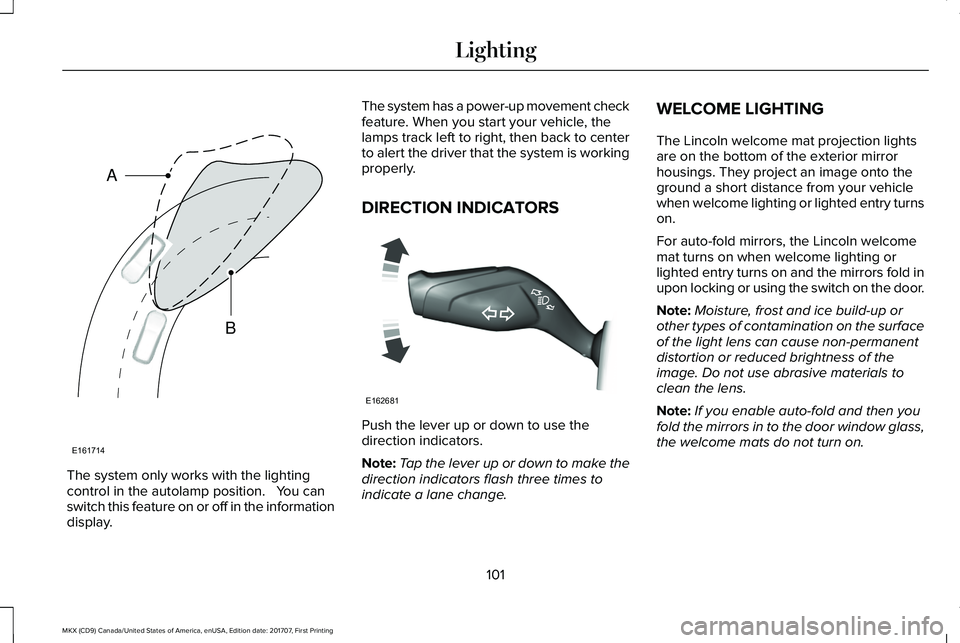
The system only works with the lightingcontrol in the autolamp position. You canswitch this feature on or off in the informationdisplay.
The system has a power-up movement checkfeature. When you start your vehicle, thelamps track left to right, then back to centerto alert the driver that the system is workingproperly.
DIRECTION INDICATORS
Push the lever up or down to use thedirection indicators.
Note:Tap the lever up or down to make thedirection indicators flash three times toindicate a lane change.
WELCOME LIGHTING
The Lincoln welcome mat projection lightsare on the bottom of the exterior mirrorhousings. They project an image onto theground a short distance from your vehiclewhen welcome lighting or lighted entry turnson.
For auto-fold mirrors, the Lincoln welcomemat turns on when welcome lighting orlighted entry turns on and the mirrors fold inupon locking or using the switch on the door.
Note:Moisture, frost and ice build-up orother types of contamination on the surfaceof the light lens can cause non-permanentdistortion or reduced brightness of theimage. Do not use abrasive materials toclean the lens.
Note:If you enable auto-fold and then youfold the mirrors in to the door window glass,the welcome mats do not turn on.
101
MKX (CD9) Canada/United States of America, enUSA, Edition date: 201707, First Printing
LightingE161714
B
A E162681
Page 108 of 603
Pull up the window switch and hold within afew seconds of the window reaching thebounce-back position. The window travelsup with no bounce-back protection. Thewindow stops if you release the switchbefore the window fully closes.
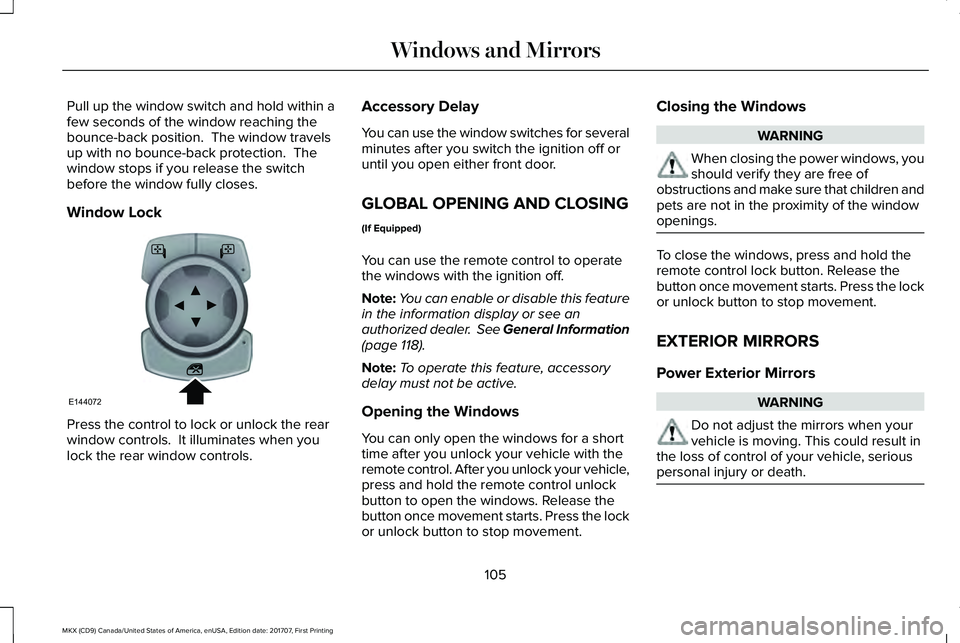
Window Lock
Press the control to lock or unlock the rearwindow controls. It illuminates when youlock the rear window controls.
Accessory Delay
You can use the window switches for severalminutes after you switch the ignition off oruntil you open either front door.
GLOBAL OPENING AND CLOSING
(If Equipped)
You can use the remote control to operatethe windows with the ignition off.
Note:You can enable or disable this featurein the information display or see anauthorized dealer. See General Information(page 118).
Note:To operate this feature, accessorydelay must not be active.
Opening the Windows
You can only open the windows for a shorttime after you unlock your vehicle with theremote control. After you unlock your vehicle,press and hold the remote control unlockbutton to open the windows. Release thebutton once movement starts. Press the lockor unlock button to stop movement.
Closing the Windows
WARNING
When closing the power windows, youshould verify they are free ofobstructions and make sure that children andpets are not in the proximity of the windowopenings.
To close the windows, press and hold theremote control lock button. Release thebutton once movement starts. Press the lockor unlock button to stop movement.
EXTERIOR MIRRORS
Power Exterior Mirrors
WARNING
Do not adjust the mirrors when yourvehicle is moving. This could result inthe loss of control of your vehicle, seriouspersonal injury or death.
105
MKX (CD9) Canada/United States of America, enUSA, Edition date: 201707, First Printing
Windows and MirrorsE144072
Page 109 of 603
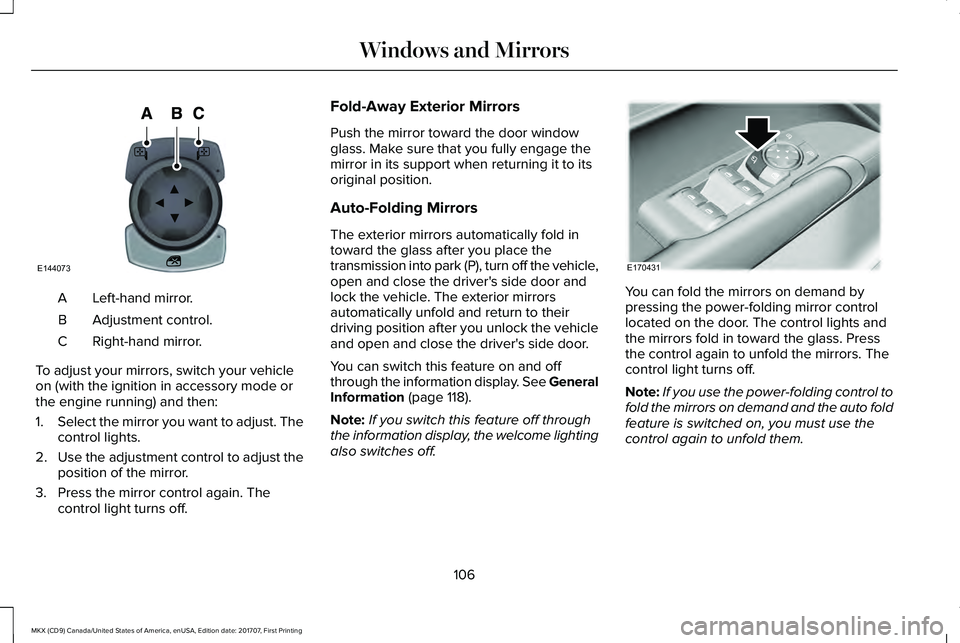
Left-hand mirror.A
Adjustment control.B
Right-hand mirror.C
To adjust your mirrors, switch your vehicleon (with the ignition in accessory mode orthe engine running) and then:
1.Select the mirror you want to adjust. Thecontrol lights.
2.Use the adjustment control to adjust theposition of the mirror.
3. Press the mirror control again. Thecontrol light turns off.
Fold-Away Exterior Mirrors
Push the mirror toward the door windowglass. Make sure that you fully engage themirror in its support when returning it to itsoriginal position.
Auto-Folding Mirrors
The exterior mirrors automatically fold intoward the glass after you place thetransmission into park (P), turn off the vehicle,open and close the driver's side door andlock the vehicle. The exterior mirrorsautomatically unfold and return to theirdriving position after you unlock the vehicleand open and close the driver's side door.
You can switch this feature on and offthrough the information display. See GeneralInformation (page 118).
Note:If you switch this feature off throughthe information display, the welcome lightingalso switches off.
You can fold the mirrors on demand bypressing the power-folding mirror controllocated on the door. The control lights andthe mirrors fold in toward the glass. Pressthe control again to unfold the mirrors. Thecontrol light turns off.
Note:If you use the power-folding control tofold the mirrors on demand and the auto foldfeature is switched on, you must use thecontrol again to unfold them.
106
MKX (CD9) Canada/United States of America, enUSA, Edition date: 201707, First Printing
Windows and MirrorsE144073 E170431
Page 115 of 603
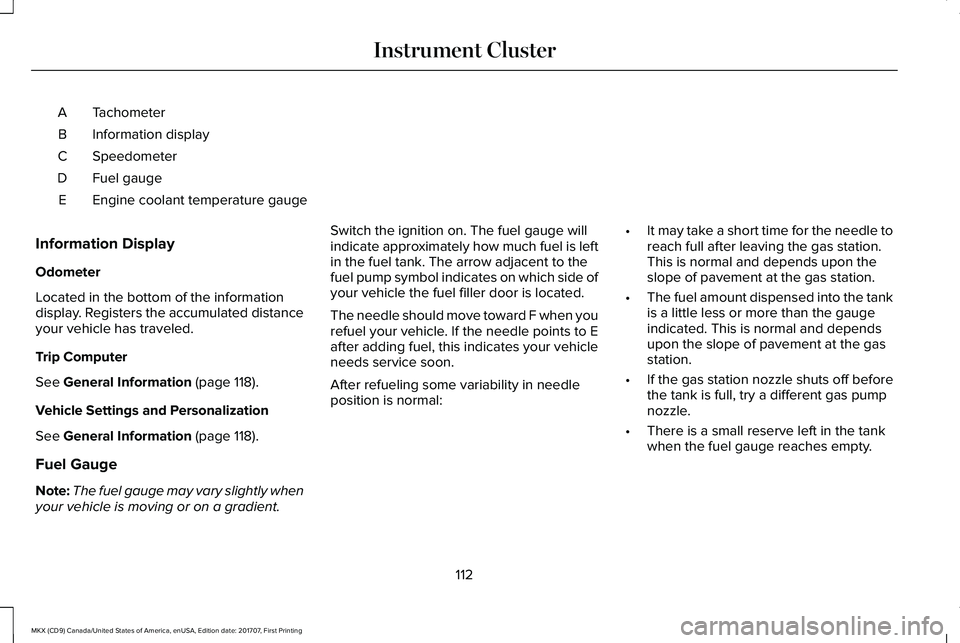
TachometerA
Information displayB
SpeedometerC
Fuel gaugeD
Engine coolant temperature gaugeE
Information Display
Odometer
Located in the bottom of the informationdisplay. Registers the accumulated distanceyour vehicle has traveled.
Trip Computer
See General Information (page 118).
Vehicle Settings and Personalization
See General Information (page 118).
Fuel Gauge
Note:The fuel gauge may vary slightly whenyour vehicle is moving or on a gradient.
Switch the ignition on. The fuel gauge willindicate approximately how much fuel is leftin the fuel tank. The arrow adjacent to thefuel pump symbol indicates on which side ofyour vehicle the fuel filler door is located.
The needle should move toward F when yourefuel your vehicle. If the needle points to Eafter adding fuel, this indicates your vehicleneeds service soon.
After refueling some variability in needleposition is normal:
•It may take a short time for the needle toreach full after leaving the gas station.This is normal and depends upon theslope of pavement at the gas station.
•The fuel amount dispensed into the tankis a little less or more than the gaugeindicated. This is normal and dependsupon the slope of pavement at the gasstation.
•If the gas station nozzle shuts off beforethe tank is full, try a different gas pumpnozzle.
•There is a small reserve left in the tankwhen the fuel gauge reaches empty.
112
MKX (CD9) Canada/United States of America, enUSA, Edition date: 201707, First Printing
Instrument Cluster
Page 116 of 603
Low Fuel Reminder
A low fuel level reminder displays andsounds when the distance to empty reaches50 mi (80 km) to empty for MyKey, and at35 mi (60 km), 25 mi (40 km), 10 mi (20 km)and 0 mi (0 km) for all vehicle keys.
Variations:
Note:The low fuel reminder can appear atdifferent fuel gauge positions depending onfuel economy conditions. This variation isnormal.
Engine Coolant Temperature Gauge
Indicates engine coolant temperature. Atnormal operating temperature, the levelindicator will be in the normal range. If theengine coolant temperature exceeds thenormal range, stop the vehicle as soon assafely possible, switch off the engine and letthe engine cool.
WARNING
Never remove the coolant reservoircap when the engine is running or hot.
WARNING LAMPS AND
INDICATORS
The following warning lamps and indicatorsalert you to a vehicle condition that maybecome serious. Some lamps illuminatewhen you start your vehicle to make surethey work. If any lamps remain on afterstarting your vehicle, refer to the respectivesystem warning lamp for further information.
Note:Some warning indicators appear inthe information display and operate thesame as a warning lamp but do notilluminate when you start your vehicle.
Adaptive Cruise Control Indicator (If
Equipped)
It illuminates when you switch thesystem on.
It illuminates white when thesystem is in standby mode. It illuminatesgreen when you set the adaptive cruisespeed.
See Using Adaptive Cruise Control (page230).
Adaptive Steering (If Equipped)
The adaptive steering systemindicator illuminates if the systemdetects a fault during thecontinuous diagnostic checks.
Adaptive Steering Initialization (yellow,flashing): The adaptive steering system hasdetected a difference between steeringwheel angle and the desired road wheelangle. The steering wheel adjusts itself tocorrect this difference. This adjustment ispart of normal system operation.
Adaptive Steering Off (yellow, solid): Theadaptive steering system is off. It is possiblethat the steering wheel may not be straightwhen the vehicle is driving straight ahead. Ifthis message persists, see an authorizeddealer.
Adaptive Steering Loss (red, solid): Theadaptive steering system integrity cannot beverified. Do not drive the vehicle and contactan authorized dealer immediately. SeeSteering (page 250).
113
MKX (CD9) Canada/United States of America, enUSA, Edition date: 201707, First Printing
Instrument ClusterE144524 E223375
Page 118 of 603
See Using Cruise Control (page 229).
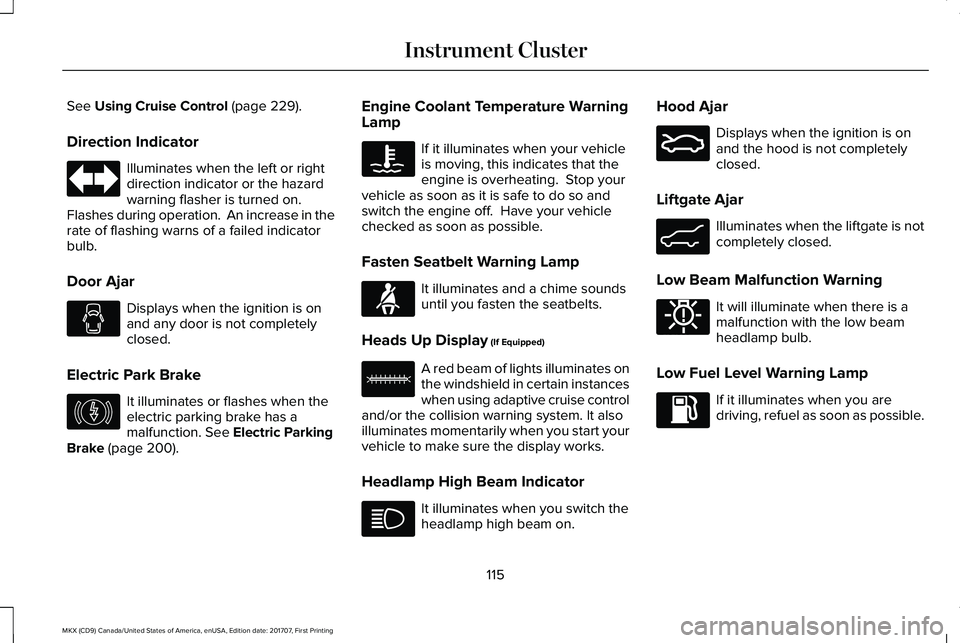
Direction Indicator
Illuminates when the left or rightdirection indicator or the hazardwarning flasher is turned on. Flashes during operation. An increase in therate of flashing warns of a failed indicatorbulb.
Door Ajar
Displays when the ignition is onand any door is not completelyclosed.
Electric Park Brake
It illuminates or flashes when theelectric parking brake has amalfunction. See Electric ParkingBrake (page 200).
Engine Coolant Temperature WarningLamp
If it illuminates when your vehicleis moving, this indicates that theengine is overheating. Stop yourvehicle as soon as it is safe to do so andswitch the engine off. Have your vehiclechecked as soon as possible.
Fasten Seatbelt Warning Lamp
It illuminates and a chime soundsuntil you fasten the seatbelts.
Heads Up Display (If Equipped)
A red beam of lights illuminates onthe windshield in certain instanceswhen using adaptive cruise controland/or the collision warning system. It alsoilluminates momentarily when you start yourvehicle to make sure the display works.
Headlamp High Beam Indicator
It illuminates when you switch theheadlamp high beam on.
Hood Ajar
Displays when the ignition is onand the hood is not completelyclosed.
Liftgate Ajar
Illuminates when the liftgate is notcompletely closed.
Low Beam Malfunction Warning
It will illuminate when there is amalfunction with the low beamheadlamp bulb.
Low Fuel Level Warning Lamp
If it illuminates when you aredriving, refuel as soon as possible.
115
MKX (CD9) Canada/United States of America, enUSA, Edition date: 201707, First Printing
Instrument Cluster E146190 E71880 E156133 E159324 E162453 E181350
Page 121 of 603
GENERAL INFORMATION
WARNING
Driving while distracted can result inloss of vehicle control, crash and injury.We strongly recommend that you useextreme caution when using any device thatmay take your focus off the road. Yourprimary responsibility is the safe operationof your vehicle. We recommend against theuse of any hand-held device while drivingand encourage the use of voice-operatedsystems when possible. Make sure you areaware of all applicable local laws that mayaffect the use of electronic devices whiledriving.
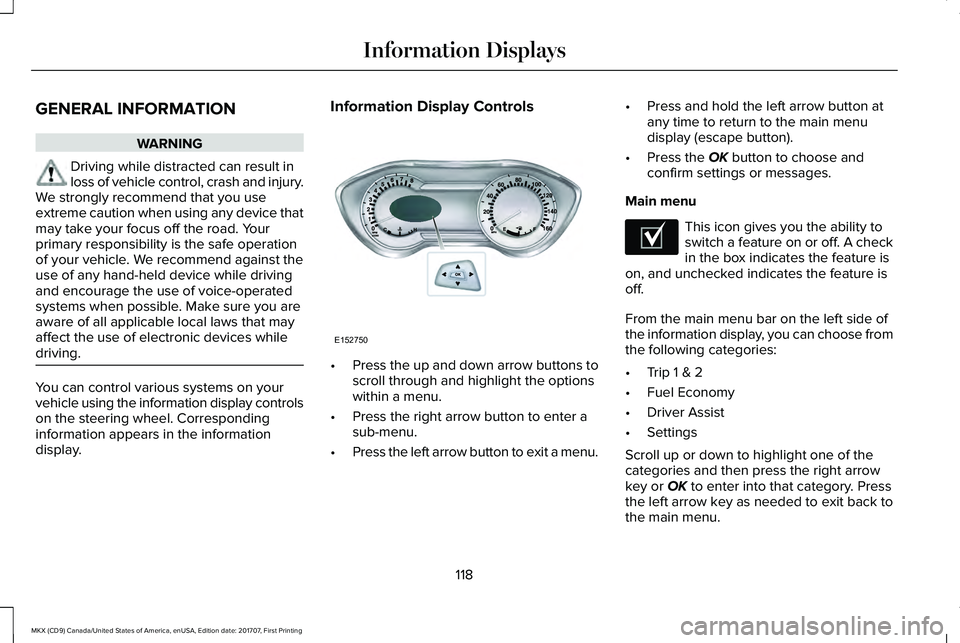
You can control various systems on yourvehicle using the information display controlson the steering wheel. Correspondinginformation appears in the informationdisplay.
Information Display Controls
•Press the up and down arrow buttons toscroll through and highlight the optionswithin a menu.
•Press the right arrow button to enter asub-menu.
•Press the left arrow button to exit a menu.
•Press and hold the left arrow button atany time to return to the main menudisplay (escape button).
•Press the OK button to choose andconfirm settings or messages.
Main menu
This icon gives you the ability toswitch a feature on or off. A checkin the box indicates the feature ison, and unchecked indicates the feature isoff.
From the main menu bar on the left side ofthe information display, you can choose fromthe following categories:
•Trip 1 & 2
•Fuel Economy
•Driver Assist
•Settings
Scroll up or down to highlight one of thecategories and then press the right arrowkey or OK to enter into that category. Pressthe left arrow key as needed to exit back tothe main menu.
118
MKX (CD9) Canada/United States of America, enUSA, Edition date: 201707, First Printing
Information DisplaysE152750 E204495