stop LINCOLN MKZ 2007 Owner's Guide
[x] Cancel search | Manufacturer: LINCOLN, Model Year: 2007, Model line: MKZ, Model: LINCOLN MKZ 2007Pages: 272, PDF Size: 2.24 MB
Page 184 of 272

When driving through water, determine the depth; avoid water higher
than the bottom of the wheel rims (for cars) or the bottom of the hubs
(for trucks) (if possible) and proceed slowly. If the ignition system gets
wet, the vehicle may stall.
Once through water, always try the brakes. Wet brakes do not stop the
vehicle as effectively as dry brakes. Drying can be improved by moving
your vehicle slowly while applying light pressure on the brake pedal.
Be cautious of sudden changes in vehicle speed or direction when you
are driving in mud. Even AWD vehicles can lose traction in slick mud. As
when you are driving over sand, apply the accelerator slowly and avoid
spinning your wheels. If the vehicle does slide, steer in the direction of
the slide until you regain control of the vehicle.
If the engine or transmission is submerged in water, their fluids should
be checked and changed, if necessary.
Driving through deep water may damage the engine or
transmission.
If the front or rear axle is submerged in water, the axle lubricant and
PTU (Power Transfer Unit) lubricant should be checked and changed if
necessary.
After driving through mud, clean off residue stuck to rotating driveshafts
and tires. Excess mud stuck on tires and rotating driveshafts causes an
imbalance that could damage drive components.
“Tread Lightly” is an educational
program designed to increase public
awareness of land-use regulations
and responsibilities in our nations
wilderness areas. Ford Motor
Company joins the U.S. Forest Service and the Bureau of Land
Management in encouraging you to help preserve our national forest and
other public and private lands by “treading lightly.”
Driving on hilly or sloping terrain
Although natural obstacles may make it necessary to travel diagonally up
or down a hill or steep incline, you should always try to drive straight up
or straight down.Avoid driving crosswise or turning on steep
slopes or hills.A danger lies in losing traction, slipping sideways and
possibly rolling over. Whenever driving on a hill, determine beforehand
the route you will use. Do not drive over the crest of a hill without
seeing what conditions are on the other side. Do not drive in reverse
over a hill without the aid of an observer.
REVIEW COPY ——
2007(com), Owners Guide (post-2002-fmt)(own2002),Market:USA(fus)
Driving
184
Page 185 of 272

When climbing a steep slope or hill, start in a lower gear rather than
downshifting to a lower gear from a higher gear once the ascent has
started. This reduces strain on the engine and the possibility of stalling.
If you do stall out, do not try to turnaround because you might roll over.
It is better to back down to a safe location.
Apply just enough power to the wheels to climb the hill. Too much
power will cause the tires to slip, spin or lose traction, resulting in loss of
vehicle control.
Descend a hill in the same gear you
would use to climb up the hill to
avoid excessive brake application
and brake overheating. Do not
descend in neutral; instead,
disengage overdrive or manually
shift to a lower gear. When
descending a steep hill, avoid
sudden hard braking as you could
lose control. The front wheels have
to be turning in order to steer the
vehicle.
Your vehicle has anti-lock brakes, therefore apply the brakes steadily. Do
not “pump” the brakes.
Driving on snow and ice
Note:Excessive tire slippage can cause transaxle damage.
AWD vehicles have advantages over 2WD vehicles in snow and ice but
can skid like any other vehicle.
Should you start to slide while driving on snowy or icy roads, turn the
steering wheel in the direction of the slide until you regain control.
Avoid sudden applications of power and quick changes of direction on
snow and ice. Apply the accelerator slowly and steadily when starting
from a full stop.
Avoid sudden braking as well. Although an AWD vehicle may accelerate
better than a two-wheel drive vehicle in snow and ice, it won’t stop any
faster, because as in other vehicles, braking occurs at all four wheels. Do
not become overconfident as to road conditions.
REVIEW COPY ——
2007(com), Owners Guide (post-2002-fmt)(own2002),Market:USA(fus)
Driving
185
Page 186 of 272
Make sure you allow sufficient distance between you and other vehicles
for stopping. Drive slower than usual and consider using one of the lower
gears. In emergency stopping situations, apply the brake steadily. Since
your vehicle is equipped with a four wheel anti-lock brake system (ABS),
do not “pump” the brakes. Refer to theBrakessection of this chapter
for additional information on the operation of the anti-lock brake system.
Maintenance and Modifications
The suspension and steering systems on your vehicle have been designed
and tested to provide predictable performance whether loaded or empty
and durable load carrying capability. For this reason, Ford Motor
Company strongly recommends that you do not make modifications such
as adding or removing parts (such as lift kits or stabilizer bars) or by
using replacement parts not equivalent to the original factory equipment.
Any modifications to a vehicle that raise the center of gravity can make
it more likely the vehicle will rollover as a result of a loss of control.
Ford Motor Company recommends that caution be used with any vehicle
equipped with a high load or device (such as ladder or luggage racks).
Failure to maintain your vehicle properly may void the warranty, increase
your repair cost, reduce vehicle performance and operational capabilities
and adversely affect driver and passenger safety. Frequent inspection of
vehicle chassis components is recommended if the vehicle is subjected to
heavy off-highway usage.
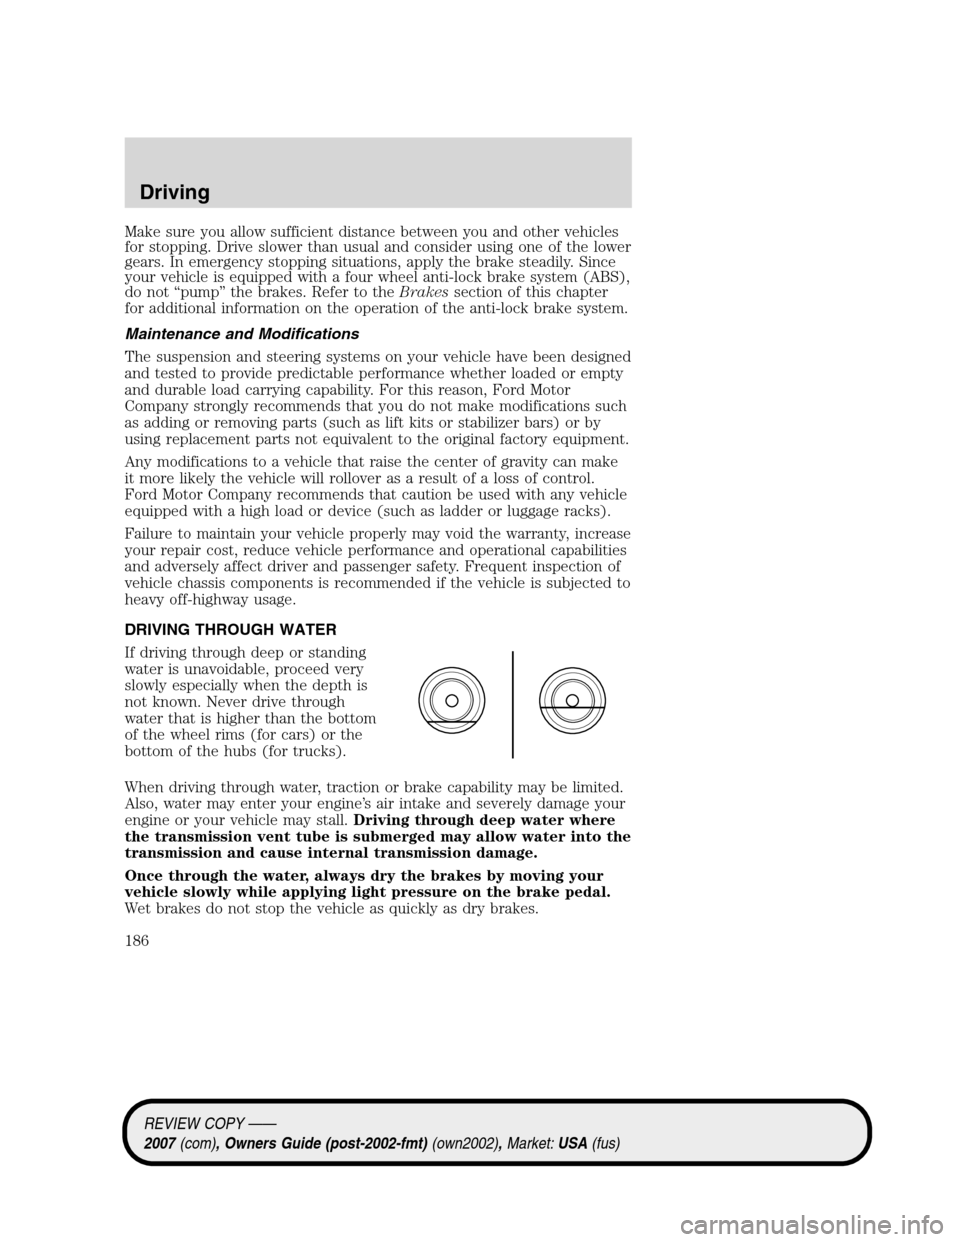
DRIVING THROUGH WATER
If driving through deep or standing
water is unavoidable, proceed very
slowly especially when the depth is
not known. Never drive through
water that is higher than the bottom
of the wheel rims (for cars) or the
bottom of the hubs (for trucks).
When driving through water, traction or brake capability may be limited.
Also, water may enter your engine’s air intake and severely damage your
engine or your vehicle may stall.Driving through deep water where
the transmission vent tube is submerged may allow water into the
transmission and cause internal transmission damage.
Once through the water, always dry the brakes by moving your
vehicle slowly while applying light pressure on the brake pedal.
Wet brakes do not stop the vehicle as quickly as dry brakes.
REVIEW COPY ——
2007(com), Owners Guide (post-2002-fmt)(own2002),Market:USA(fus)
Driving
186
Page 189 of 272
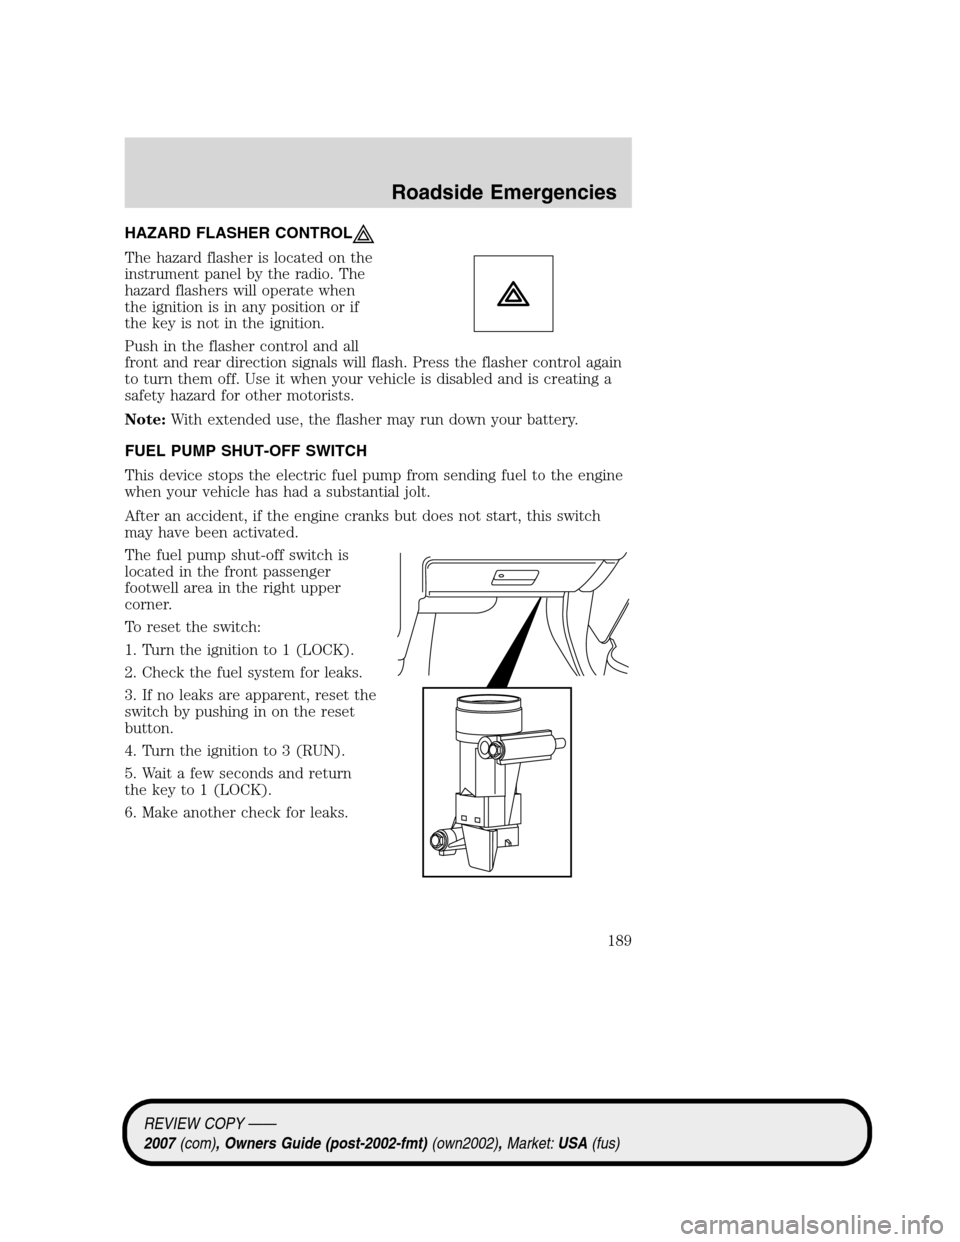
HAZARD FLASHER CONTROL
The hazard flasher is located on the
instrument panel by the radio. The
hazard flashers will operate when
the ignition is in any position or if
the key is not in the ignition.
Push in the flasher control and all
front and rear direction signals will flash. Press the flasher control again
to turn them off. Use it when your vehicle is disabled and is creating a
safety hazard for other motorists.
Note:With extended use, the flasher may run down your battery.
FUEL PUMP SHUT-OFF SWITCH
This device stops the electric fuel pump from sending fuel to the engine
when your vehicle has had a substantial jolt.
After an accident, if the engine cranks but does not start, this switch
may have been activated.
The fuel pump shut-off switch is
located in the front passenger
footwell area in the right upper
corner.
To reset the switch:
1. Turn the ignition to 1 (LOCK).
2. Check the fuel system for leaks.
3. If no leaks are apparent, reset the
switch by pushing in on the reset
button.
4. Turn the ignition to 3 (RUN).
5. Wait a few seconds and return
the key to 1 (LOCK).
6. Make another check for leaks.
REVIEW COPY ——
2007(com), Owners Guide (post-2002-fmt)(own2002),Market:USA(fus)
Roadside Emergencies
189
Page 192 of 272
Fuse/Relay
LocationFuse Amp
RatingPassenger Compartment Fuse Panel
Description
12 7.5A Delay accessories: Radio head units,
Moon roof, Front power windows,
Electrochromatic mirrors
13 7.5A Cluster, Analog clock, Climate control
head units
14 15A Washer pump
15 20A Cigar lighter
16 15A Door lock actuator, Decklid lock solenoid
17 20A Not used (Spare)
18 20A Radio head units, OBDII connector
19 7.5A Not used (Spare)
20 7.5A Power mirrors, Satellite radio module, All
wheel drive
21 7.5A Stop lamps, CHMSL
22 7.5A Audio
23 7.5A Wiper relay coil, Cluster logic
24 7.5A OCS (Passenger’s seat), PAD indicator
25 7.5A RCM
26 7.5A PATS Transceiver, Brake shift interlock
solenoid, Brake pedal switch, Automatic
transmission module
27 7.5A Cluster, Climate control head units
28 10A ABS/Traction Control, Heated seats,
Compass
C/B 30A Circuit
BreakerMoon roof, Delayed accessory (SJB fuse
12, rear power windows)
Power distribution box
The power distribution box is located in the engine compartment. The
power distribution box contains high-current fuses that protect your
vehicle’s main electrical systems from overloads.
Always disconnect the battery before servicing high current
fuses.
REVIEW COPY ——
2007(com), Owners Guide (post-2002-fmt)(own2002),Market:USA(fus)
Roadside Emergencies
192
Page 228 of 272
•3.5L V6 engine
•If required, add engine oil to the engine. Refer toAdding engine oil
in this chapter.
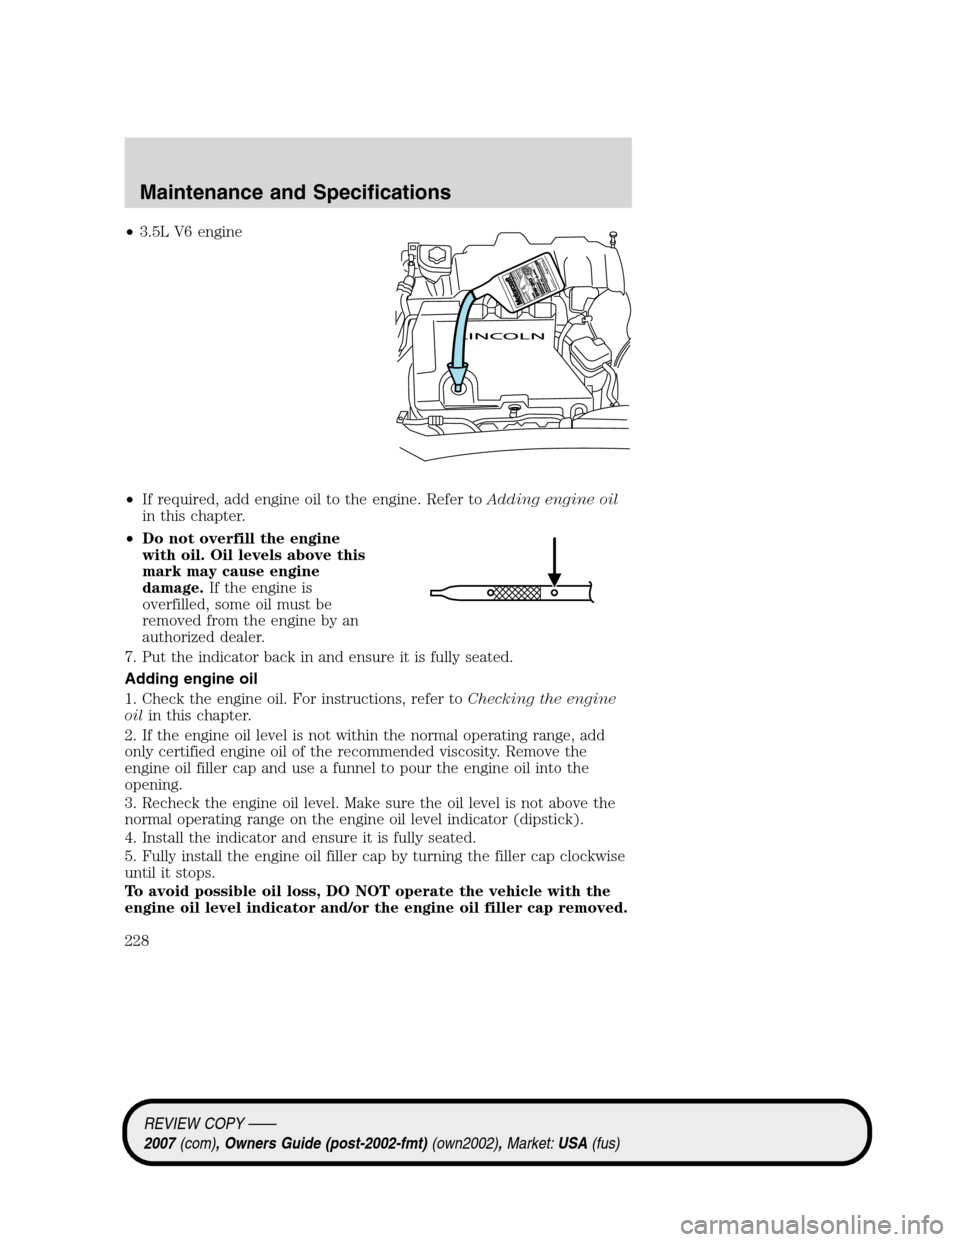
•Do not overfill the engine
with oil. Oil levels above this
mark may cause engine
damage.If the engine is
overfilled, some oil must be
removed from the engine by an
authorized dealer.
7. Put the indicator back in and ensure it is fully seated.
Adding engine oil
1. Check the engine oil. For instructions, refer toChecking the engine
oilin this chapter.
2. If the engine oil level is not within the normal operating range, add
only certified engine oil of the recommended viscosity. Remove the
engine oil filler cap and use a funnel to pour the engine oil into the
opening.
3. Recheck the engine oil level. Make sure the oil level is not above the
normal operating range on the engine oil level indicator (dipstick).
4. Install the indicator and ensure it is fully seated.
5. Fully install the engine oil filler cap by turning the filler cap clockwise
until it stops.
To avoid possible oil loss, DO NOT operate the vehicle with the
engine oil level indicator and/or the engine oil filler cap removed.
REVIEW COPY ——
2007(com), Owners Guide (post-2002-fmt)(own2002),Market:USA(fus)
Maintenance and Specifications
228
Page 231 of 272
Keep batteries out of reach of children. Batteries contain sulfuric
acid. Avoid contact with skin, eyes or clothing. Shield your eyes
when working near the battery to protect against possible splashing of
acid solution. In case of acid contact with skin or eyes, flush
immediately with water for a minimum of 15 minutes and get prompt
medical attention. If acid is swallowed, call a physician immediately.
Battery posts, terminals and related accessories contain lead and
lead compounds.Wash hands after handling.
Because your vehicle’s engine is electronically controlled by a computer,
some control conditions are maintained by power from the battery. When
the battery is disconnected or a new battery is installed, the engine must
relearn its idle and fuel trim strategy for optimum driveability and
performance. To begin this process:
1. With the vehicle at a complete stop, set the parking brake.
2. Put the gearshift in P (Park), turn off all accessories and start the
engine.
3. Run the engine until it reaches normal operating temperature.
4. Allow the engine to idle for at least one minute.
5. Turn the A/C on and allow the engine to idle for at least one minute.
6. Release the parking brake. With your foot on the brake pedal and with
the A/C on, put the vehicle in D (Drive) and allow the engine to idle for
at least one minute.
7. Drive the vehicle to complete the relearning process.
•The vehicle may need to be driven 10 miles (16 km) or more to
relearn the idle and fuel trim strategy.
•If you do not allow the engine to relearn its idle trim, the idle
quality of your vehicle may be adversely affected until the idle
trim is eventually relearned.
If the battery has been disconnected or a new battery has been installed,
the clock and radio settings must be reset once the battery is
reconnected.
REVIEW COPY ——
2007(com), Owners Guide (post-2002-fmt)(own2002),Market:USA(fus)
Maintenance and Specifications
231
Page 234 of 272
Note:Use of Motorcraft Cooling System Stop Leak Pellets or an
equivalent product meeting Ford specification WSS-M99B37-B6, may
darken the color of Motorcraft Premium Gold Engine Coolant from
yellow to golden tan.
•Do not add/mix an orange-colored, extended life coolant such
as Motorcraft Specialty Orange Engine Coolant, meeting Ford
specification WSS-M97B44-D, with the factory-filled coolant.
Mixing Motorcraft Specialty Orange Engine Coolant or any
orange-colored extended life product with your factory filled coolant
can result in degraded corrosion protection.
•A large amount of water without engine coolant may be added, in case
of emergency, to reach a vehicle service location. In this instance, the
cooling system must be drained and refilled with a 50/50 mixture of
engine coolant and distilled water as soon as possible. Water alone
(without engine coolant) can cause engine damage from corrosion,
overheating or freezing.
•Do not use alcohol, methanol, brine or any engine coolants
mixed with alcohol or methanol antifreeze (coolant).Alcohol
and other liquids can cause engine damage from overheating or
freezing.
•Do not add extra inhibitors or additives to the coolant.These
can be harmful and compromise the corrosion protection of the engine
coolant.
To reduce the risk of personal injury, make sure the engine is
cool before unscrewing the coolant pressure relief cap. The
cooling system is under pressure; steam and hot liquid can come out
forcefully when the cap is loosened slightly.
Note: The process stated below should only be used when the
coolant level is low and additional coolant is needed. If the
coolant system has be drained in any way, you must refer to the
Cooling section of the Workshop Manual.
1. Before you begin, turn the engine off and let it cool.
2. When the engine is cool, wrap a thick cloth around the coolant
pressure relief cap on the coolant reservoir (an opaque plastic bottle).
Slowly turn cap counterclockwise (left) until pressure begins to release.
3. Step back while the pressure releases.
4. When you are sure that all the pressure has been released, use the
cloth to turn it counterclockwise and remove the cap.
REVIEW COPY ——
2007(com), Owners Guide (post-2002-fmt)(own2002),Market:USA(fus)
Maintenance and Specifications
234
Page 238 of 272

WHAT YOU SHOULD KNOW ABOUT AUTOMOTIVE FUELS
Important safety precautions
Do not overfill the fuel tank. The pressure in an overfilled tank
may cause leakage and lead to fuel spray and fire.
The fuel system may be under pressure. If the fuel filler cap is
venting vapor or if you hear a hissing sound, wait until it stops
before completely removing the fuel filler cap. Otherwise, fuel may
spray out and injure you or others.
If you do not use the proper fuel filler cap, excessive vacuum in
the fuel tank may damage the fuel system or cause the fuel cap
to disengage in a collision, which may result in possible personal injury.
Automotive fuels can cause serious injury or death if misused or
mishandled.
Gasoline may contain benzene, which is a cancer-causing agent.
Observe the following guidelines when handling automotive fuel:
•Extinguish all smoking materials
and any open flames before
refueling your vehicle.
•Always turn off the vehicle before
refueling.
•Automotive fuels can be harmful
or fatal if swallowed. Fuel such as gasoline is highly toxic and if
swallowed can cause death or permanent injury. If fuel is swallowed,
call a physician immediately, even if no symptoms are immediately
apparent. The toxic effects of fuel may not be visible for hours.
•Avoid inhaling fuel vapors. Inhaling too much fuel vapor of any kind
can lead to eye and respiratory tract irritation. In severe cases,
excessive or prolonged breathing of fuel vapor can cause serious
illness and permanent injury.
REVIEW COPY ——
2007(com), Owners Guide (post-2002-fmt)(own2002),Market:USA(fus)
Maintenance and Specifications
238
Page 240 of 272

•Place approved fuel container on the ground.
•DO NOT fill a fuel container while it is in the vehicle (including the
cargo area).
•Keep the fuel pump nozzle in contact with the fuel container while
filling.
•DO NOT use a device that would hold the fuel pump handle in the fill
position.
Fuel Filler Cap
Your fuel tank filler cap has an indexed design with a 1/4 turn on/off
feature.
When fueling your vehicle:
1. Turn the engine off.
2. Carefully turn the filler cap counterclockwise 1/4 of a turn until it
stops.
3. Pull to remove the cap from the fuel filler pipe.
4. To install the cap, align the tabs on the cap with the notches on the
filler pipe.
5. Turn the filler cap clockwise 1/4 of a turn until it clicks at least once.
If the
indicator comes on and stays on after you start the engine, the
fuel filler cap may not be properly installed. Turn off the engine, remove
the fuel filler cap, align the cap properly and reinstall it.
If you must replace the fuel filler cap, replace it with a fuel filler
cap that is designed for your vehicle. The customer warranty may
be void for any damage to the fuel tank or fuel system if the
correct genuine Ford or Motorcraft fuel filler cap is not used.
The fuel system may be under pressure. If the fuel filler cap is
venting vapor or if you hear a hissing sound, wait until it stops
before completely removing the fuel filler cap. Otherwise, fuel may
spray out and injure you or others.
If you do not use the proper fuel filler cap, excessive vacuum in
the fuel tank may damage the fuel system or cause the fuel cap
to disengage in a collision, which may result in possible personal injury.
REVIEW COPY ——
2007(com), Owners Guide (post-2002-fmt)(own2002),Market:USA(fus)
Maintenance and Specifications
240