light LINCOLN MKZ 2009 User Guide
[x] Cancel search | Manufacturer: LINCOLN, Model Year: 2009, Model line: MKZ, Model: LINCOLN MKZ 2009Pages: 292, PDF Size: 2.02 MB
Page 26 of 292
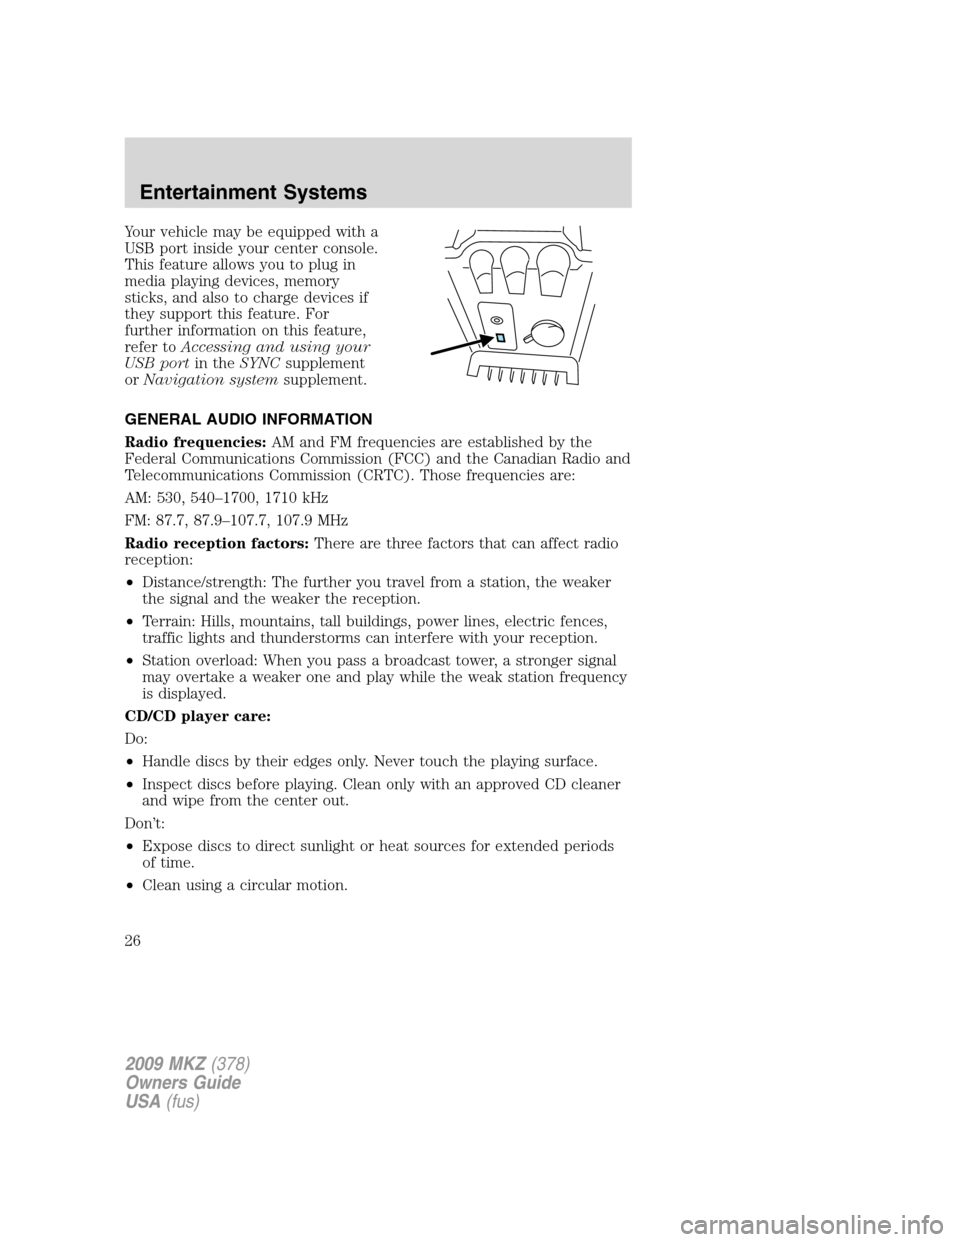
Your vehicle may be equipped with a
USB port inside your center console.
This feature allows you to plug in
media playing devices, memory
sticks, and also to charge devices if
they support this feature. For
further information on this feature,
refer toAccessing and using your
USB portin theSYNCsupplement
orNavigation systemsupplement.
GENERAL AUDIO INFORMATION
Radio frequencies:AM and FM frequencies are established by the
Federal Communications Commission (FCC) and the Canadian Radio and
Telecommunications Commission (CRTC). Those frequencies are:
AM: 530, 540–1700, 1710 kHz
FM: 87.7, 87.9–107.7, 107.9 MHz
Radio reception factors:There are three factors that can affect radio
reception:
•Distance/strength: The further you travel from a station, the weaker
the signal and the weaker the reception.
•Terrain: Hills, mountains, tall buildings, power lines, electric fences,
traffic lights and thunderstorms can interfere with your reception.
•Station overload: When you pass a broadcast tower, a stronger signal
may overtake a weaker one and play while the weak station frequency
is displayed.
CD/CD player care:
Do:
•Handle discs by their edges only. Never touch the playing surface.
•Inspect discs before playing. Clean only with an approved CD cleaner
and wipe from the center out.
Don’t:
•Expose discs to direct sunlight or heat sources for extended periods
of time.
•Clean using a circular motion.
2009 MKZ(378)
Owners Guide
USA(fus)
Entertainment Systems
26
Page 35 of 292
16.AUTO:Press to engage automatic temperature control. Use the
temperature control to select the desired temperature setting. The
system will automatically determine fan speed, airflow location, A/C on
or off, and outside or recirculated air to heat or cool the vehicle, allowing
it to reach the desired temperature. Press and hold AUTO for about two
seconds to toggle between single zone and dual zone temperature
control.
Dual Automatic Temperature Control (DATC) system operating tips
•To reduce fog build up on the windshield during humid weather, place
the air flow selector in the
position.
•To reduce humidity build up inside the vehicle, do not drive with the
system OFF, or with recirculated air
engaged and A/C off.
•Do not put objects under the front seats that will interfere with the
airflow to the back seats.
•Remove any snow, ice or leaves from the air intake area at the base of
the windshield.
•To improve the A/C cool down, drive with the windows slightly open
for 2-3 minutes after start up or until the vehicle has been “aired out.”
During extreme high ambient temperatures when idling stationary for
extended periods of time in gear, it is recommended to run the A/C in
the MAX A/C mode, reduce blower fan speed from the highest setting
and put the vehicle’s transmission into the PARK gear position
(automatic transmission only) to continue to receive cool air from your
A/C system.
•For maximum cooling performance (MAX A/C):
Automatic operation:
•Press AUTO for full automatic operation.
•Do not override A/C or
(recirculated air).
•Set the temperature to 60°F (16°C).
Override operation:
•Select air distribution.
•Select A/C and
(recirculated air). Use(recirculated air) with
A/C to provide colder airflow.
•Set the temperature to 60°F (16°C).
•Set highest fan speed initially, then adjust to maintain comfort.
2009 MKZ(378)
Owners Guide
USA(fus)
Climate Controls
35
Page 37 of 292
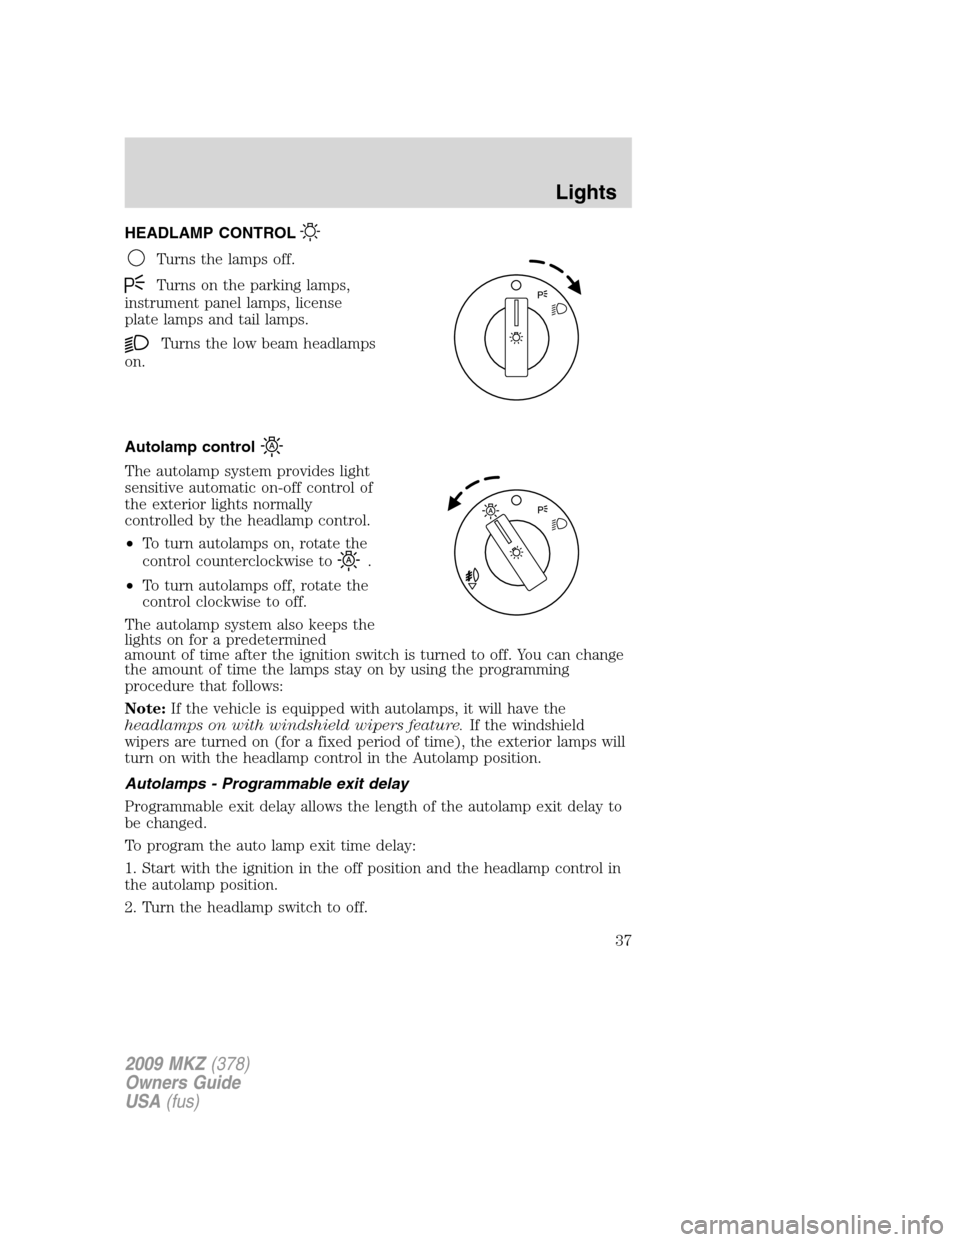
HEADLAMP CONTROL
Turns the lamps off.
Turns on the parking lamps,
instrument panel lamps, license
plate lamps and tail lamps.
Turns the low beam headlamps
on.
Autolamp control
The autolamp system provides light
sensitive automatic on-off control of
the exterior lights normally
controlled by the headlamp control.
•To turn autolamps on, rotate the
control counterclockwise to
.
•To turn autolamps off, rotate the
control clockwise to off.
The autolamp system also keeps the
lights on for a predetermined
amount of time after the ignition switch is turned to off. You can change
the amount of time the lamps stay on by using the programming
procedure that follows:
Note:If the vehicle is equipped with autolamps, it will have the
headlamps on with windshield wipers feature.If the windshield
wipers are turned on (for a fixed period of time), the exterior lamps will
turn on with the headlamp control in the Autolamp position.
Autolamps - Programmable exit delay
Programmable exit delay allows the length of the autolamp exit delay to
be changed.
To program the auto lamp exit time delay:
1. Start with the ignition in the off position and the headlamp control in
the autolamp position.
2. Turn the headlamp switch to off.
2009 MKZ(378)
Owners Guide
USA(fus)
Lights
37
Page 38 of 292
3. Turn the ignition switch to on and then back to off.
4. Turn the headlamp switch to the autolamp position. The headlamps
will turn on.
5. Wait the desired amount of time for the exit delay you want (up to
three minutes), then turn the headlamp switch to off. The headlamps
will turn off.
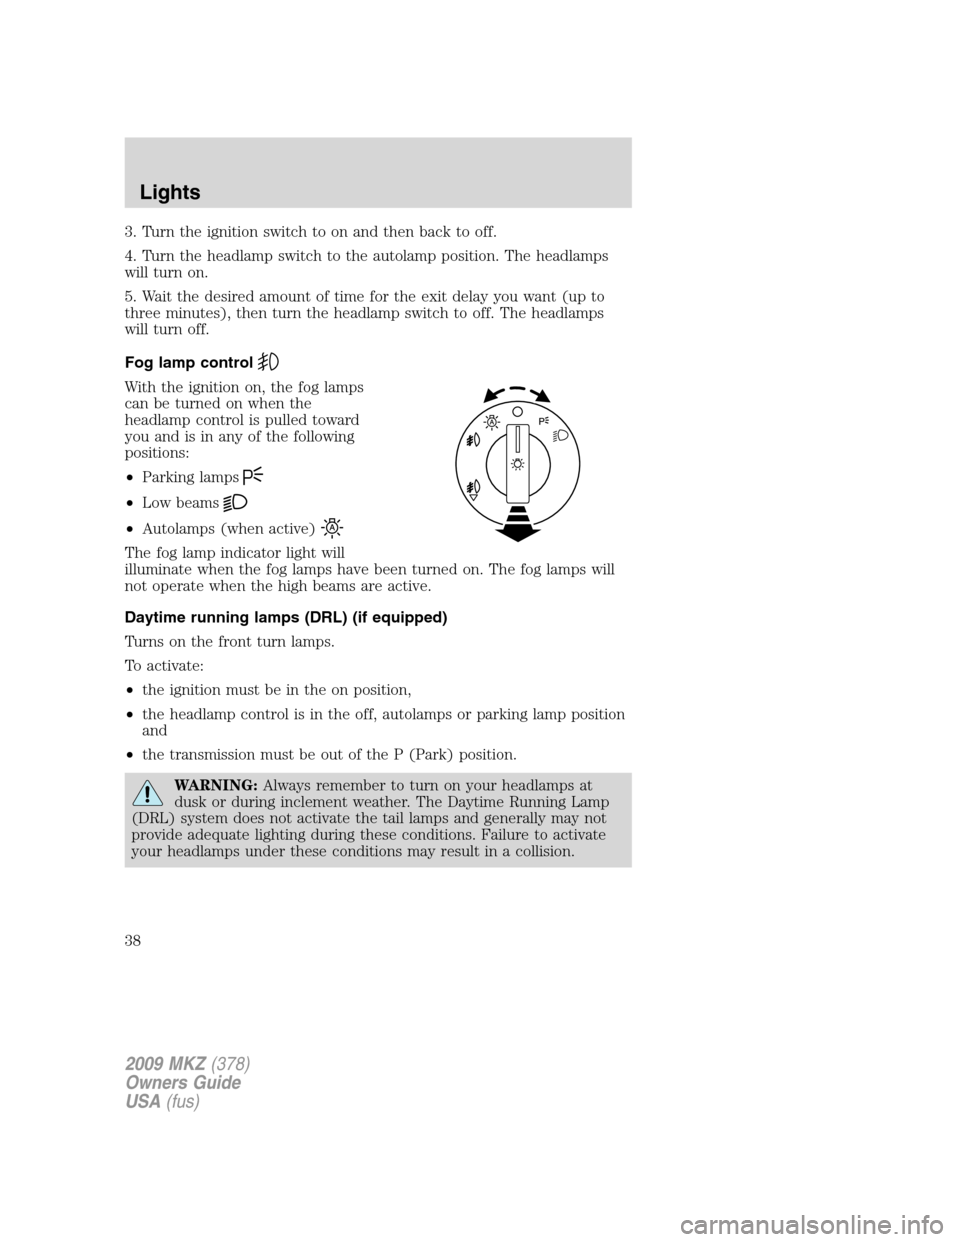
Fog lamp control
With the ignition on, the fog lamps
can be turned on when the
headlamp control is pulled toward
you and is in any of the following
positions:
•Parking lamps
•Low beams
•Autolamps (when active)
The fog lamp indicator light will
illuminate when the fog lamps have been turned on. The fog lamps will
not operate when the high beams are active.
Daytime running lamps (DRL) (if equipped)
Turns on the front turn lamps.
To activate:
•the ignition must be in the on position,
•the headlamp control is in the off, autolamps or parking lamp position
and
•the transmission must be out of the P (Park) position.
WARNING:Always remember to turn on your headlamps at
dusk or during inclement weather. The Daytime Running Lamp
(DRL) system does not activate the tail lamps and generally may not
provide adequate lighting during these conditions. Failure to activate
your headlamps under these conditions may result in a collision.
2009 MKZ(378)
Owners Guide
USA(fus)
Lights
38
Page 39 of 292
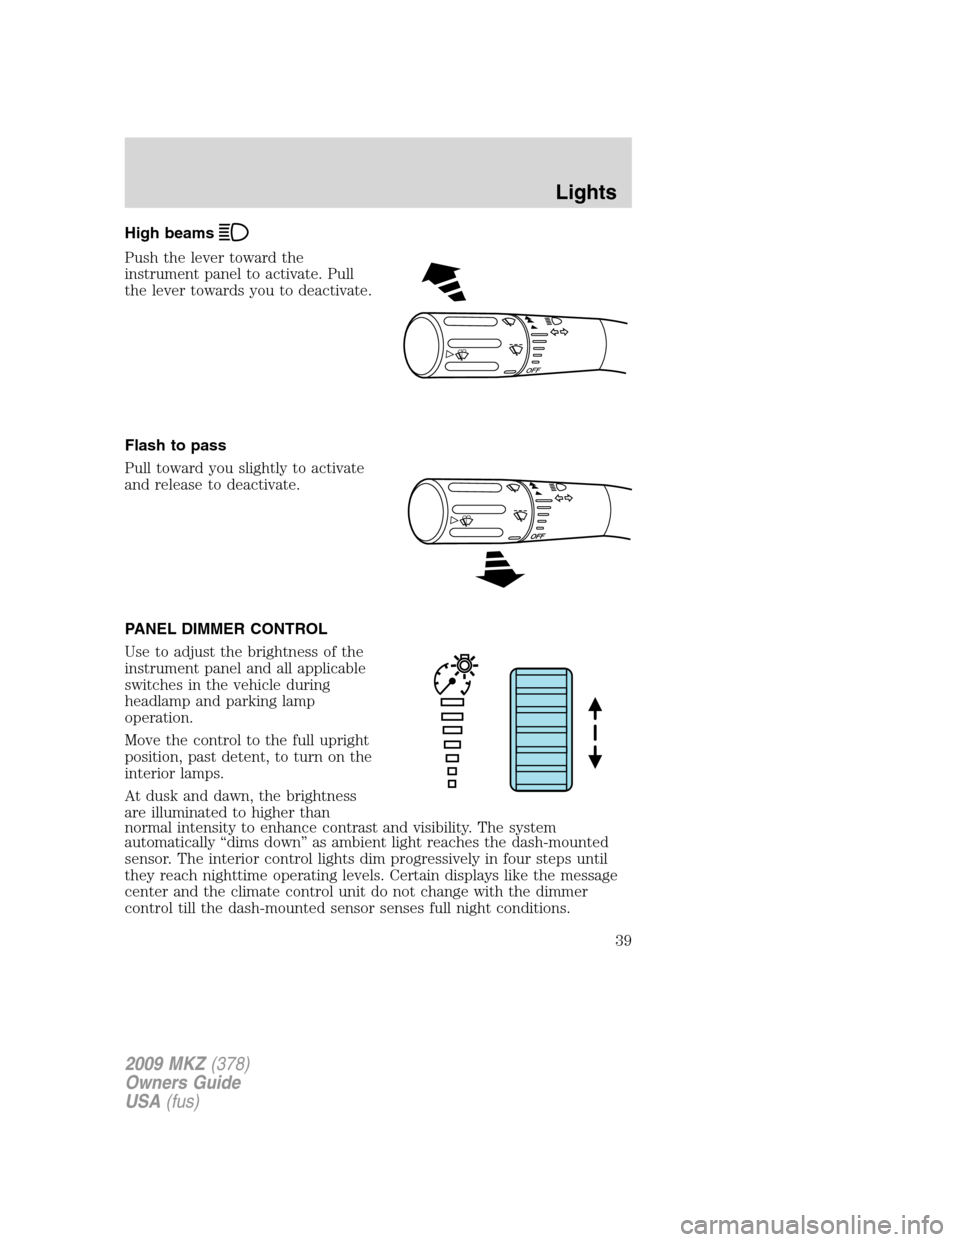
High beams
Push the lever toward the
instrument panel to activate. Pull
the lever towards you to deactivate.
Flash to pass
Pull toward you slightly to activate
and release to deactivate.
PANEL DIMMER CONTROL
Use to adjust the brightness of the
instrument panel and all applicable
switches in the vehicle during
headlamp and parking lamp
operation.
Move the control to the full upright
position, past detent, to turn on the
interior lamps.
At dusk and dawn, the brightness
are illuminated to higher than
normal intensity to enhance contrast and visibility. The system
automatically “dims down” as ambient light reaches the dash-mounted
sensor. The interior control lights dim progressively in four steps until
they reach nighttime operating levels. Certain displays like the message
center and the climate control unit do not change with the dimmer
control till the dash-mounted sensor senses full night conditions.
O
F
F
2009 MKZ(378)
Owners Guide
USA(fus)
Lights
39
Page 40 of 292
Note:If the battery is disconnected, discharged, or a new battery is
installed, the dimmer switch requires re-calibration. Rotate the dimmer
switch from the full dim position to the full Dome/ON position to reset.
This will ensure that your displays are visible under all lighting
conditions.
AIMING THE HEADLAMPS
The headlamps on your vehicle are properly aimed at the assembly plant.
If your vehicle has been in an accident, the alignment of your headlamps
should be checked by your authorized dealer.
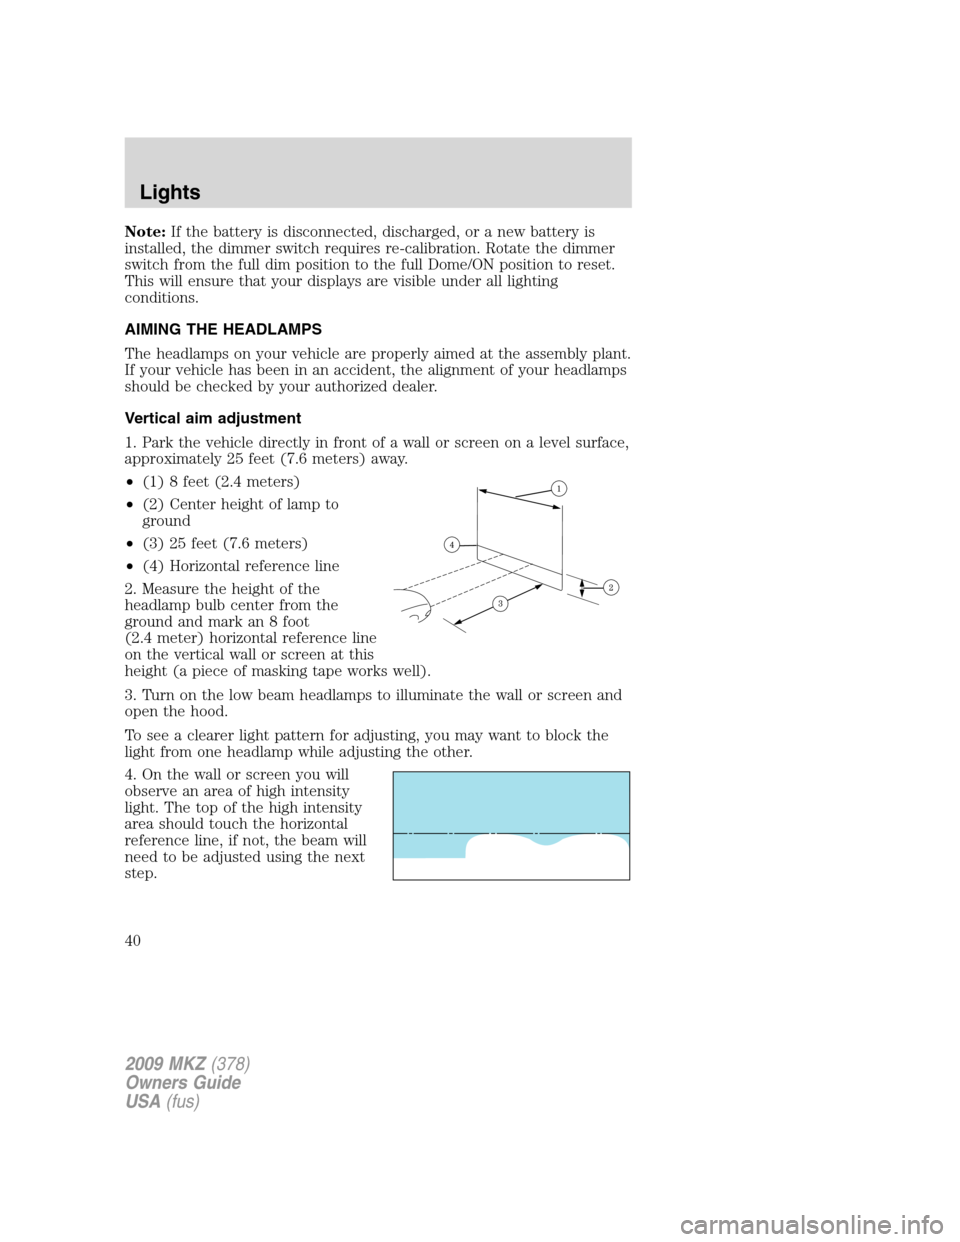
Vertical aim adjustment
1. Park the vehicle directly in front of a wall or screen on a level surface,
approximately 25 feet (7.6 meters) away.
•(1) 8 feet (2.4 meters)
•(2) Center height of lamp to
ground
•(3) 25 feet (7.6 meters)
•(4) Horizontal reference line
2. Measure the height of the
headlamp bulb center from the
ground and mark an 8 foot
(2.4 meter) horizontal reference line
on the vertical wall or screen at this
height (a piece of masking tape works well).
3. Turn on the low beam headlamps to illuminate the wall or screen and
open the hood.
To see a clearer light pattern for adjusting, you may want to block the
light from one headlamp while adjusting the other.
4. On the wall or screen you will
observe an area of high intensity
light. The top of the high intensity
area should touch the horizontal
reference line, if not, the beam will
need to be adjusted using the next
step.
2009 MKZ(378)
Owners Guide
USA(fus)
Lights
40
Page 41 of 292
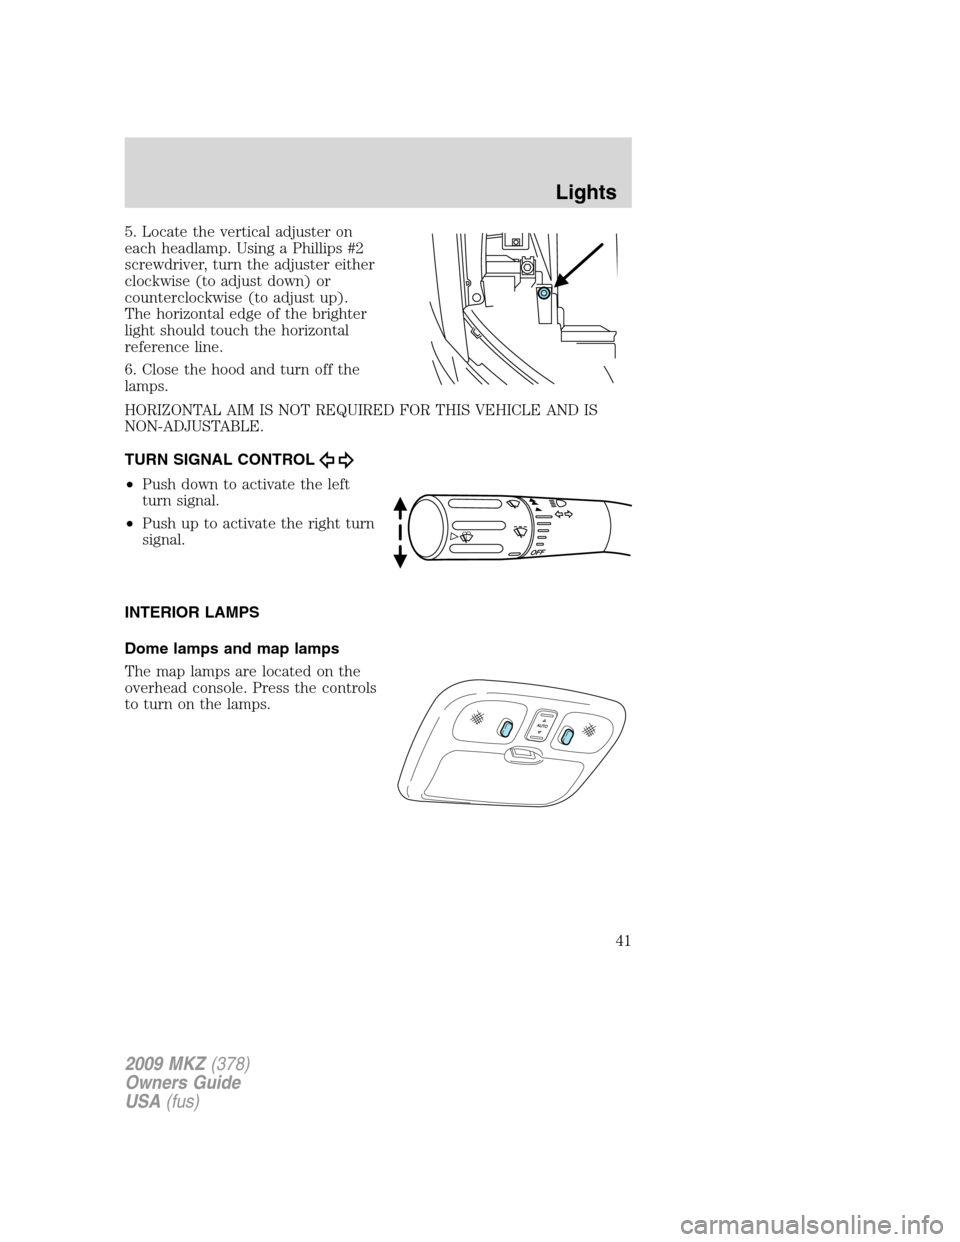
5. Locate the vertical adjuster on
each headlamp. Using a Phillips #2
screwdriver, turn the adjuster either
clockwise (to adjust down) or
counterclockwise (to adjust up).
The horizontal edge of the brighter
light should touch the horizontal
reference line.
6. Close the hood and turn off the
lamps.
HORIZONTAL AIM IS NOT REQUIRED FOR THIS VEHICLE AND IS
NON-ADJUSTABLE.
TURN SIGNAL CONTROL
•Push down to activate the left
turn signal.
•Push up to activate the right turn
signal.
INTERIOR LAMPS
Dome lamps and map lamps
The map lamps are located on the
overhead console. Press the controls
to turn on the lamps.
2009 MKZ(378)
Owners Guide
USA(fus)
Lights
41
Page 42 of 292
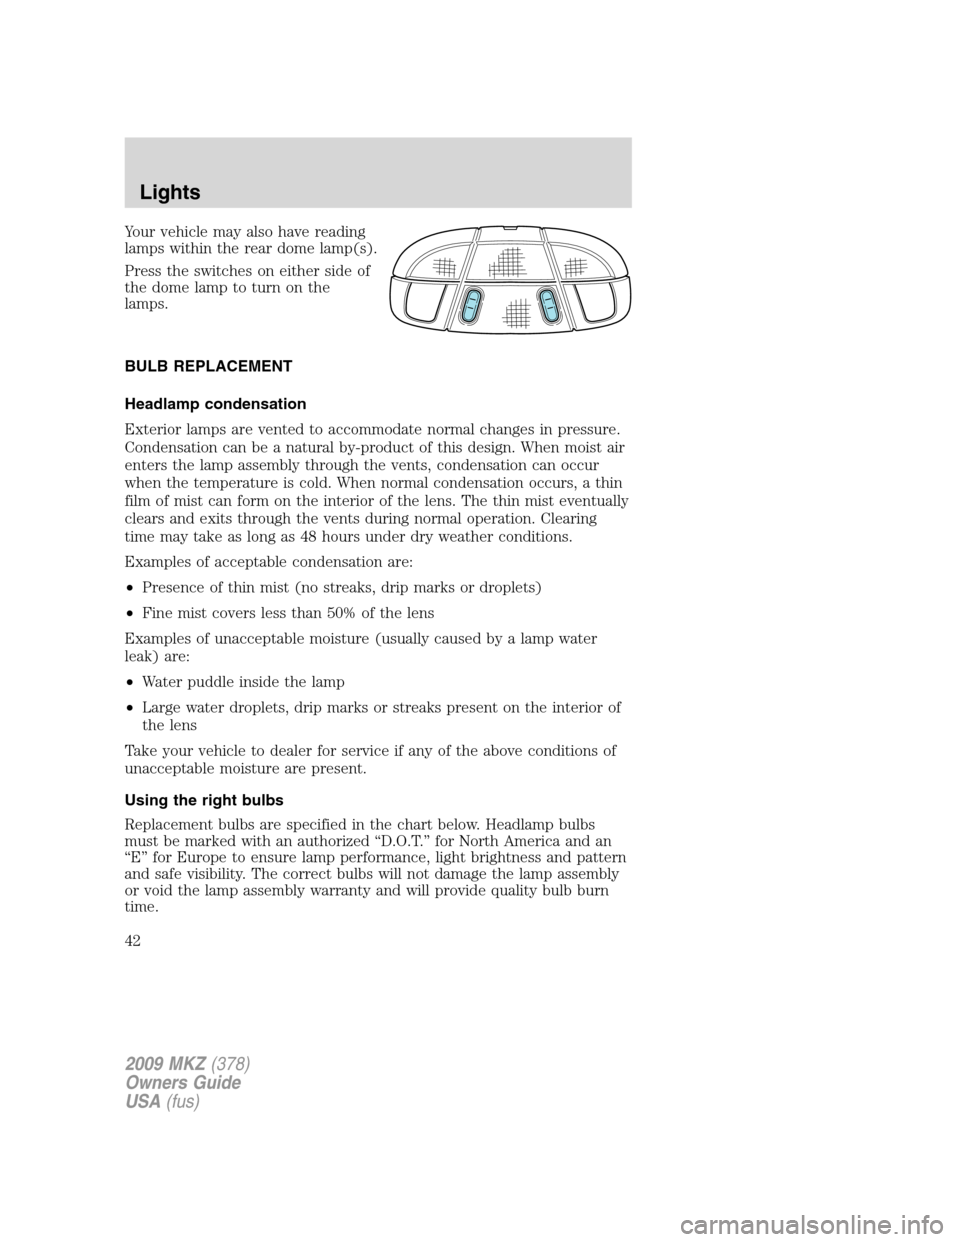
Your vehicle may also have reading
lamps within the rear dome lamp(s).
Press the switches on either side of
the dome lamp to turn on the
lamps.
BULB REPLACEMENT
Headlamp condensation
Exterior lamps are vented to accommodate normal changes in pressure.
Condensation can be a natural by-product of this design. When moist air
enters the lamp assembly through the vents, condensation can occur
when the temperature is cold. When normal condensation occurs, a thin
film of mist can form on the interior of the lens. The thin mist eventually
clears and exits through the vents during normal operation. Clearing
time may take as long as 48 hours under dry weather conditions.
Examples of acceptable condensation are:
•Presence of thin mist (no streaks, drip marks or droplets)
•Fine mist covers less than 50% of the lens
Examples of unacceptable moisture (usually caused by a lamp water
leak) are:
•Water puddle inside the lamp
•Large water droplets, drip marks or streaks present on the interior of
the lens
Take your vehicle to dealer for service if any of the above conditions of
unacceptable moisture are present.
Using the right bulbs
Replacement bulbs are specified in the chart below. Headlamp bulbs
must be marked with an authorized “D.O.T.” for North America and an
“E” for Europe to ensure lamp performance, light brightness and pattern
and safe visibility. The correct bulbs will not damage the lamp assembly
or void the lamp assembly warranty and will provide quality bulb burn
time.
2009 MKZ(378)
Owners Guide
USA(fus)
Lights
42
Page 43 of 292
![LINCOLN MKZ 2009 User Guide Function Number of bulbsTrade
number
Headlamp high beam 2 H7
Headlamp low beam 2H11LL (D1S
[HID]
optional)
Front park/turn signal
lamp23457AK
(amber)
Front redundant park
lamp4 168 NA
* Rear sidemarke LINCOLN MKZ 2009 User Guide Function Number of bulbsTrade
number
Headlamp high beam 2 H7
Headlamp low beam 2H11LL (D1S
[HID]
optional)
Front park/turn signal
lamp23457AK
(amber)
Front redundant park
lamp4 168 NA
* Rear sidemarke](/img/15/6969/w960_6969-42.png)
Function Number of bulbsTrade
number
Headlamp high beam 2 H7
Headlamp low beam 2H11LL (D1S
[HID]
optional)
Front park/turn signal
lamp23457AK
(amber)
Front redundant park
lamp4 168 NA
* Rear sidemarker lamp N/A LED
* Stop/tail lamp N/A LED
Rear turn signal lamp 23157A
(amber)
Redundant tail lamp 8 161
Backup lamp 2 921
License plate lamp 2 C5WL
High-mount brake lamp 1 921
Fog lamp 2 H11
Front map lamp 2 12V6W
Rear dome/reading lamp 6 578
Glove box lamp 1 194
Visor vanity lamp - Slide
on Rail system (SOR)2 37 or 14V1CP
Puddle lamp 2 W5W
Luggage compartment
lamp1 578
All replacement bulbs are clear in color except where noted.
To replace all instrument panel lights - see your authorized dealer.
* To replace these lamps - see your authorized dealer.
2009 MKZ(378)
Owners Guide
USA(fus)
Lights
43
Page 44 of 292
Replacing exterior bulbs
Check the operation of all the bulbs frequently.
Replacing headlamp bulbs
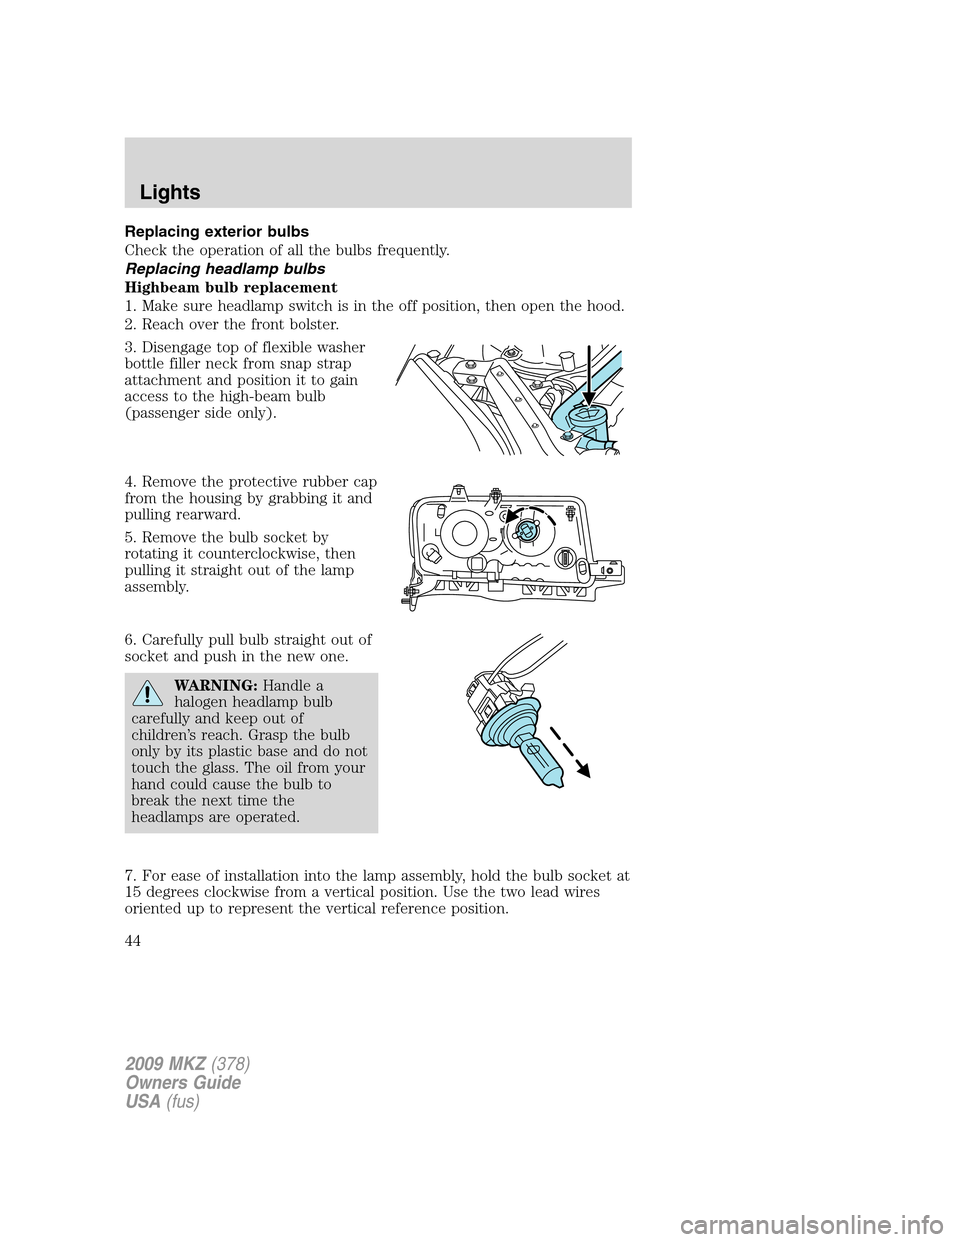
Highbeam bulb replacement
1. Make sure headlamp switch is in the off position, then open the hood.
2. Reach over the front bolster.
3. Disengage top of flexible washer
bottle filler neck from snap strap
attachment and position it to gain
access to the high-beam bulb
(passenger side only).
4. Remove the protective rubber cap
from the housing by grabbing it and
pulling rearward.
5. Remove the bulb socket by
rotating it counterclockwise, then
pulling it straight out of the lamp
assembly.
6. Carefully pull bulb straight out of
socket and push in the new one.
WARNING:Handle a
halogen headlamp bulb
carefully and keep out of
children’s reach. Grasp the bulb
only by its plastic base and do not
touch the glass. The oil from your
hand could cause the bulb to
break the next time the
headlamps are operated.
7. For ease of installation into the lamp assembly, hold the bulb socket at
15 degrees clockwise from a vertical position. Use the two lead wires
oriented up to represent the vertical reference position.
2009 MKZ(378)
Owners Guide
USA(fus)
Lights
44