check engine LINCOLN MKZ 2014 Owner's Manual
[x] Cancel search | Manufacturer: LINCOLN, Model Year: 2014, Model line: MKZ, Model: LINCOLN MKZ 2014Pages: 468, PDF Size: 4.49 MB
Page 270 of 468
GENERAL INFORMATION
Have your vehicle serviced regularly
to help maintain its roadworthiness
and resale value. There is a large
network of Ford authorized dealers
that are there to help you with their
professional servicing expertise. We
believe that their specially trained
technicians are best qualified to
service your vehicle properly and
expertly. They are supported by a wide
range of highly specialized tools
developed specifically for servicing
your vehicle.
To help you service your vehicle, we
provide scheduled maintenance
information which makes tracking
routine service easy. See Scheduled
Maintenance (page 436).
If your vehicle requires professional
service, your authorized dealer can
provide the necessary parts and
service. Check your warranty
information to find out which parts
and services are covered.
Use only recommended fuels,
lubricants, fluids and service parts
conforming to specifications.
Motorcraft® parts are designed and
built to provide the best performance
in your vehicle.
Precautions
• Do not work on a hot engine.
• Make sure that nothing gets caught in moving parts. • Do not work on a vehicle with the
engine running in an enclosed
space, unless you are sure you
have enough ventilation.
• Keep all open flames and other burning material (such as
cigarettes) away from the battery
and all fuel related parts.
Working with the Engine Off
1. Set the parking brake and shift toP (Park).
2. Turn off the engine and remove the key (if equipped).
3. Block the wheels.
Working with the Engine On
WARNING
To reduce the risk of vehicle
damage and/or personal burn
injuries, do not start your engine with
the air cleaner removed and do not
remove it while the engine is running.
1. Set the parking brake and shift to P (Park).
2. Block the wheels
267
Maintenance
Page 274 of 468
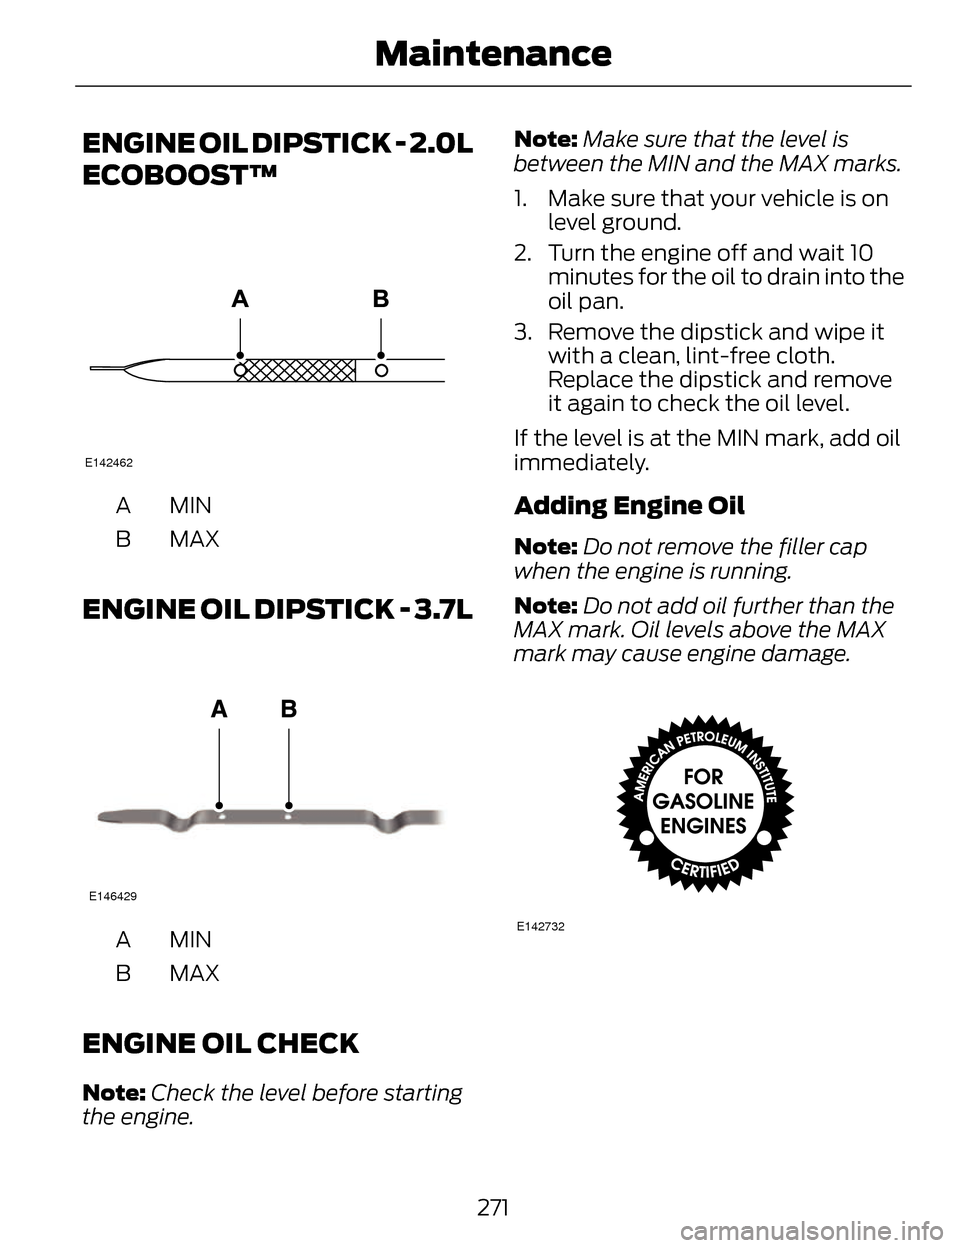
ENGINE OIL DIPSTICK - 2.0L
ECOBOOST™
E142462
MINA
MAXB
ENGINE OIL DIPSTICK - 3.7L
E146429
MINA
MAXB
ENGINE OIL CHECK
Note:Check the level before starting
the engine. Note:
Make sure that the level is
between the MIN and the MAX marks.
1. Make sure that your vehicle is on level ground.
2. Turn the engine off and wait 10 minutes for the oil to drain into the
oil pan.
3. Remove the dipstick and wipe it with a clean, lint-free cloth.
Replace the dipstick and remove
it again to check the oil level.
If the level is at the MIN mark, add oil
immediately.
Adding Engine Oil
Note: Do not remove the filler cap
when the engine is running.
Note: Do not add oil further than the
MAX mark. Oil levels above the MAX
mark may cause engine damage.
E142732
271
Maintenance
Page 275 of 468
Only use oils certified for gasoline
engines by the American Petroleum
Institute (API). An oil with this
trademark symbol conforms to the
current engine and emission system
protection standards and fuel
economy requirements of the
International Lubricants Specification
Advisory Council (ILSAC), comprised
of U.S. and Japanese automobile
manufacturers.
1. Remove the filler cap.
2. Add engine oil that meets the Fordspecifications. See Capacities
and Specifications (page 329).
3. Replace the filler cap. Turn it until you feel a strong resistance.
OIL CHANGE INDICATOR
RESET
To reset the oil monitoring system
after an oil change, See General
Information (page 101).
ENGINE COOLANT CHECK
Checking the Engine Coolant
When the engine is cold, check the
concentration and level of the engine
coolant at the intervals listed in the
scheduled maintenance information.
See Scheduled Maintenance (page
436).
Note: Make sure that the level is
between the MIN and MAX marks on
the coolant reservoir. Note:
Coolant expands when it is hot.
The level may extend beyond the MAX
mark
Note: If the level is at the MIN mark,
below the MIN mark, or empty, add
coolant immediately. See Adding
Engine Coolant in this chapter.
The coolant concentration should be
maintained within 48% to 50%,
which equates to a freeze point
between -30°F degrees (-34ºC) and
-34ºF (-37ºC).
Note: For best results, coolant
concentration should be tested with a
refractometer such as Rotunda tool
300-ROB75240 available from your
authorized dealer. Ford does not
recommend the use of hydrometers or
coolant test strips for measuring
coolant concentrations.
Note: Automotive fluids are not
interchangeable. Do not use engine
coolant or antifreeze or windshield
washer fluid outside of its specified
function and vehicle location.
Adding Engine Coolant
WARNINGS
Do not add engine coolant when
the engine is hot. Steam and
scalding liquids released from a hot
cooling system can burn you badly.
Also, you can be burned if you spill
coolant on hot engine parts.
272
Maintenance
Page 277 of 468
Whenever coolant has been added,
the coolant level in the coolant
reservoir should be checked the next
few times you drive the vehicle. If
necessary, add enough prediluted
engine coolant to bring the coolant
level to the proper level.
Recycled Engine Coolant
Ford Motor Company does not
recommend the use of recycled
engine coolant since a Ford-approved
recycling process is not yet available.
Used engine coolant should be
disposed of in an appropriate manner.
Follow your community’s regulations
and standards for recycling and
disposing of automotive fluids.
Severe Climates
If you drive in extremely cold climates:
• It may be necessary to have a Fordauthorized dealer increase the
coolant concentration above 50%.
• A coolant concentration of 60% will provide improved freeze point
protection. Engine coolant
concentrations above 60% will
decrease the overheat protection
characteristics of the engine
coolant and may cause engine
damage. If you drive in extremely hot climates:
• It may be necessary to have a Ford
authorized dealer decrease the
coolant concentration to 40%.
• A coolant concentration of 40% will provide improved overheat
protection. Engine coolant
concentrations below 40% will
decrease the corrosion/freeze
protection characteristics of the
engine coolant and may cause
engine damage.
Vehicles driven year-round in
non-extreme climates should use
prediluted engine coolant for
optimum cooling system and engine
protection.
What You Should Know About
Fail-Safe Cooling
If the engine coolant supply is
depleted, this feature allows the
vehicle to be driven temporarily before
incremental component damage is
incurred. The “fail-safe” distance
depends on ambient temperatures,
vehicle load and terrain.
How Fail-Safe Cooling Works
If the engine begins to overheat, the
engine coolant temperature gauge
will move to the red (hot) area and:
A high engine temperature
message will appear in the
information display.
The service engine soon
indicator will illuminate.
274
Maintenance
Page 278 of 468
If the engine reaches a preset
over-temperature condition, the
engine will automatically switch to
alternating cylinder operation. Each
disabled cylinder acts as an air pump
and cools the engine.
When this occurs, the vehicle will still
operate. However:
• The engine power will be limited.
• The air conditioning system will bedisabled.
Continued operation will increase the
engine temperature and the engine
will completely shut down, causing
steering and braking effort to increase.
Once the engine temperature cools,
the engine can be re-started. Take
your vehicle to an authorized dealer
as soon as possible to minimize
engine damage.
When Fail-Safe Mode Is Activated
WARNINGS
Fail-safe mode is for use during
emergencies only. Operate the
vehicle in fail-safe mode only as long
as necessary to bring the vehicle to
rest in a safe location and seek
immediate repairs. When in fail-safe
mode, the vehicle will have limited
power, will not be able to maintain
high-speed operation, and may
completely shut down without
warning, potentially losing engine
power, power steering assist, and
power brake assist, which may
increase the possibility of a crash
resulting in serious injury.
WARNINGS
Never remove the coolant
reservoir cap while the engine is
running or hot.
You have limited engine power when
in the fail-safe mode, so drive the
vehicle with caution. The vehicle will
not be able to maintain high-speed
operation and the engine will run
rough. Remember that the engine is
capable of completely shutting down
automatically to prevent engine
damage, therefore:
1. Pull off the road as soon as safely possible and turn off the engine.
2. Arrange for the vehicle to be taken to an authorized dealer.
3. If this is not possible, wait a short period for the engine to cool.
4. Check the coolant level and replenish if low.
5. Re-start the engine and take your vehicle to an authorized dealer.
Note: Driving the vehicle without
repairing the engine problem increases
the chance of engine damage. Take
your vehicle to an authorized dealer as
soon as possible.
275
Maintenance
Page 282 of 468
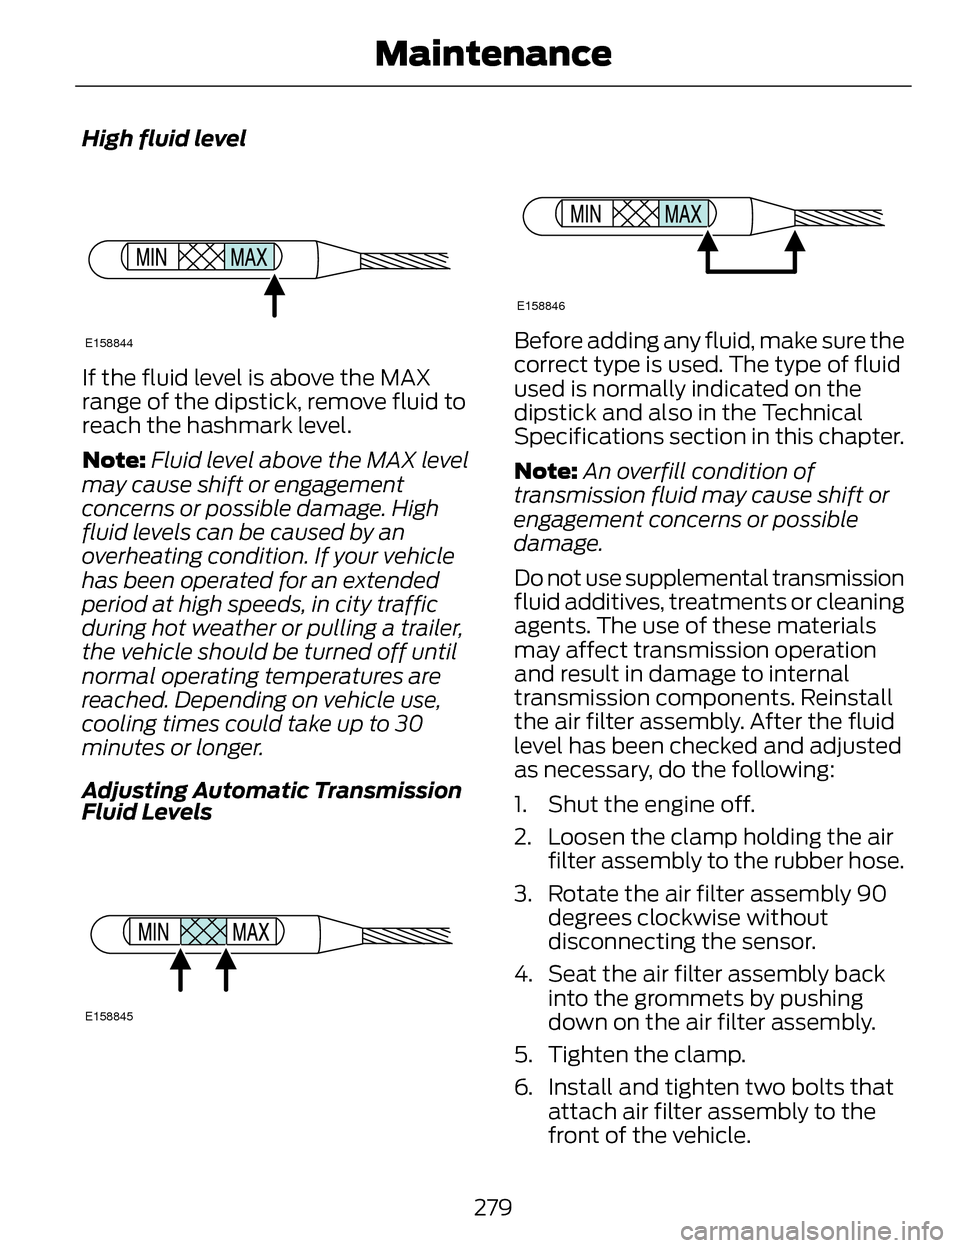
High fluid level
E158844
If the fluid level is above the MAX
range of the dipstick, remove fluid to
reach the hashmark level.
Note:Fluid level above the MAX level
may cause shift or engagement
concerns or possible damage. High
fluid levels can be caused by an
overheating condition. If your vehicle
has been operated for an extended
period at high speeds, in city traffic
during hot weather or pulling a trailer,
the vehicle should be turned off until
normal operating temperatures are
reached. Depending on vehicle use,
cooling times could take up to 30
minutes or longer.
Adjusting Automatic Transmission
Fluid Levels
E158845
E158846
Before adding any fluid, make sure the
correct type is used. The type of fluid
used is normally indicated on the
dipstick and also in the Technical
Specifications section in this chapter.
Note: An overfill condition of
transmission fluid may cause shift or
engagement concerns or possible
damage.
Do not use supplemental transmission
fluid additives, treatments or cleaning
agents. The use of these materials
may affect transmission operation
and result in damage to internal
transmission components. Reinstall
the air filter assembly. After the fluid
level has been checked and adjusted
as necessary, do the following:
1. Shut the engine off.
2. Loosen the clamp holding the air filter assembly to the rubber hose.
3. Rotate the air filter assembly 90 degrees clockwise without
disconnecting the sensor.
4. Seat the air filter assembly back into the grommets by pushing
down on the air filter assembly.
5. Tighten the clamp.
6. Install and tighten two bolts that attach air filter assembly to the
front of the vehicle.
279
Maintenance
Page 286 of 468
Note:It is recommended that the
negative battery cable terminal be
disconnected from the battery if you
plan to store your vehicle for an
extended period of time.
CHECKING THE WIPER
BLADES
E142463
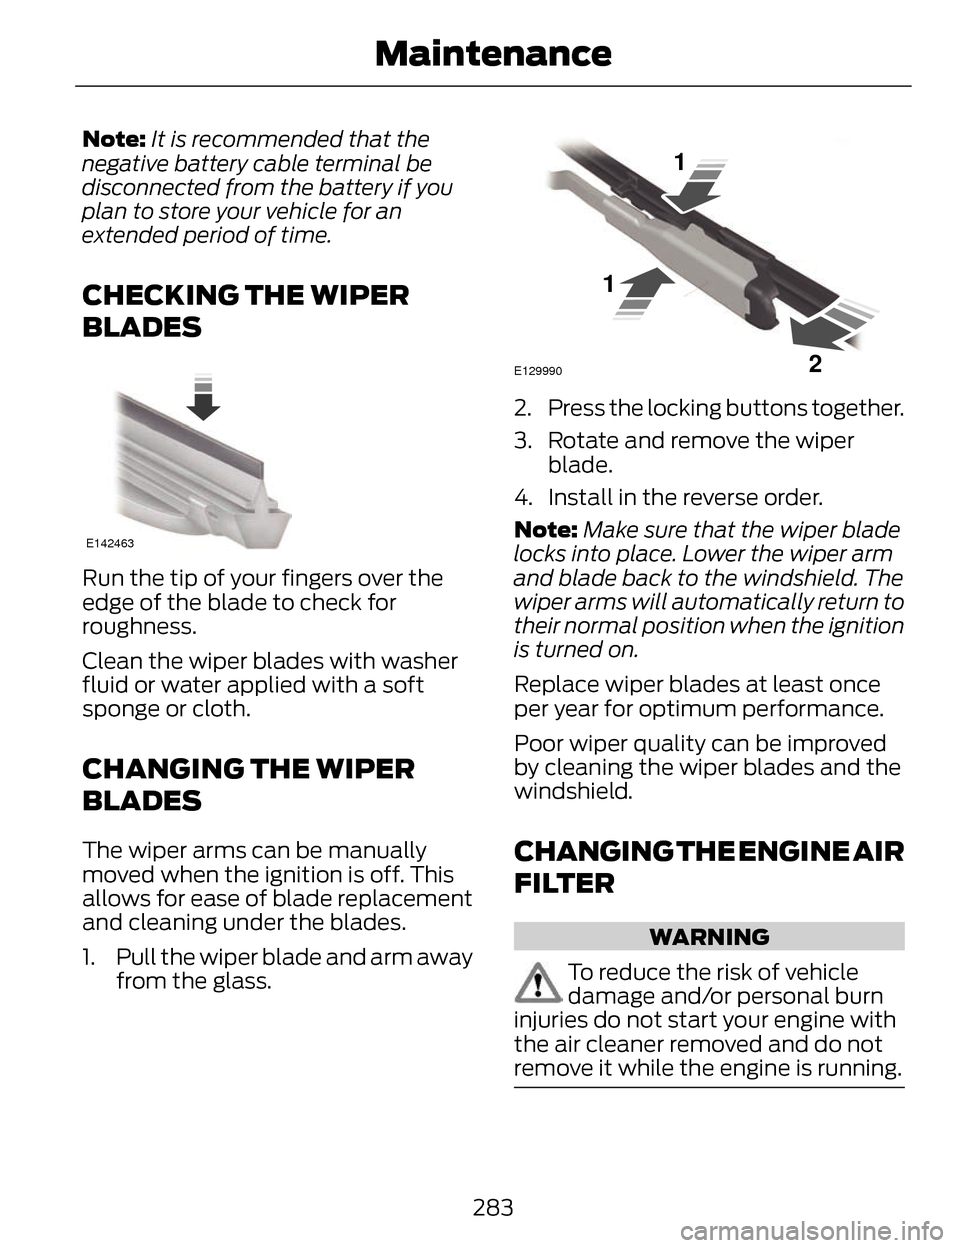
Run the tip of your fingers over the
edge of the blade to check for
roughness.
Clean the wiper blades with washer
fluid or water applied with a soft
sponge or cloth.
CHANGING THE WIPER
BLADES
The wiper arms can be manually
moved when the ignition is off. This
allows for ease of blade replacement
and cleaning under the blades.
1. Pull the wiper blade and arm away from the glass.
E129990
1
1 2
2. Press the locking buttons together.
3. Rotate and remove the wiperblade.
4. Install in the reverse order.
Note: Make sure that the wiper blade
locks into place. Lower the wiper arm
and blade back to the windshield. The
wiper arms will automatically return to
their normal position when the ignition
is turned on.
Replace wiper blades at least once
per year for optimum performance.
Poor wiper quality can be improved
by cleaning the wiper blades and the
windshield.
CHANGING THE ENGINE AIR
FILTER
WARNING
To reduce the risk of vehicle
damage and/or personal burn
injuries do not start your engine with
the air cleaner removed and do not
remove it while the engine is running.
283
Maintenance
Page 302 of 468
• Only use the sealing compoundbefore the use by date. The use by
date is on the lower right hand
corner of the label located on the
sealant canister (bottle). Check
the use by date regularly and
replace the canister after four
years.
• Do not store the kit unsecured inside the passenger compartment
of the vehicle as it may cause injury
during a sudden stop or crash.
Always store the kit in its original
location.
• After sealant use, the tire pressure monitoring system sensor and
valve stem on the wheel must be
replaced by an authorized Ford
dealer.
• When inflating a tire or other objects, use the black air hose only.
Do not use the transparent hose
which is designed for sealant
application only.
• Operating the kit could cause an electrical disturbance in radio, CD,
and DVD player operation.
What to do when a Tire Is
Punctured
A tire puncture within the tire's tread
area can be repaired in two stages
with the kit. • In the first stage, the tire will be
reinflated with a sealing
compound and air. After the tire
has been reinflated, you will need
to drive the vehicle a short
distance (about 4 miles [6
kilometers]) to distribute the
sealant in the tire.
• In the second stage, you will need to check the tire pressure and
adjust, if necessary, to the vehicle's
tire inflation pressure.
First Stage: Reinflating the Tire
with Sealing Compound and Air
WARNINGS
Do not stand directly over the kit
while inflating the tire. If you
notice any unusual bulges or
deformations in the tire's sidewall
during inflation, stop and call roadside
assistance.
If the tire doesn't inflate to the
recommended tire pressure
within 15 minutes, stop and call
roadside assistance.
Preparation: Park the vehicle in a safe,
level and secure area, away from
moving traffic. Turn the hazard lights
on. Apply the parking brake and turn
the engine off. Inspect the flat tire for
visible damage.
Sealant compound contains latex. To
avoid any allergic reactions, use the
non-latex gloves located in the
accessory box on the underside of the
kit housing.
299
Wheels and Tires
Page 334 of 468
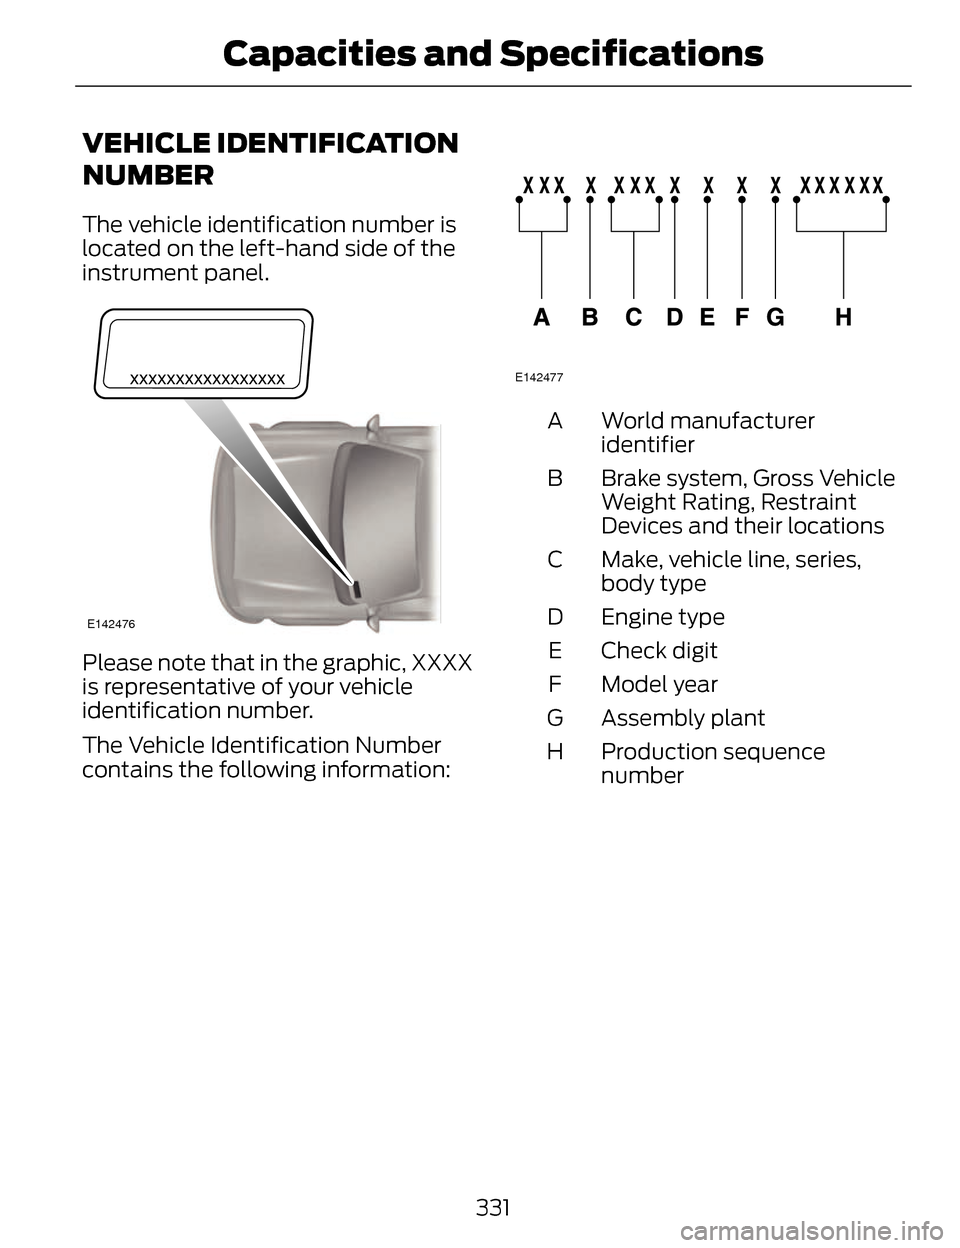
VEHICLE IDENTIFICATION
NUMBER
The vehicle identification number is
located on the left-hand side of the
instrument panel.
E142476
Please note that in the graphic, XXXX
is representative of your vehicle
identification number.
The Vehicle Identification Number
contains the following information:
E142477
World manufacturer
identifier
A
Brake system, Gross Vehicle
Weight Rating, Restraint
Devices and their locations
B
Make, vehicle line, series,
body type
C
Engine type
D
Check digit
E
Model year
F
Assembly plant
G
Production sequence
number
H
331
Capacities and Specifications
Page 339 of 468
Ford part number /Ford specification
Ford part name or
equivalent
Capacity
Item
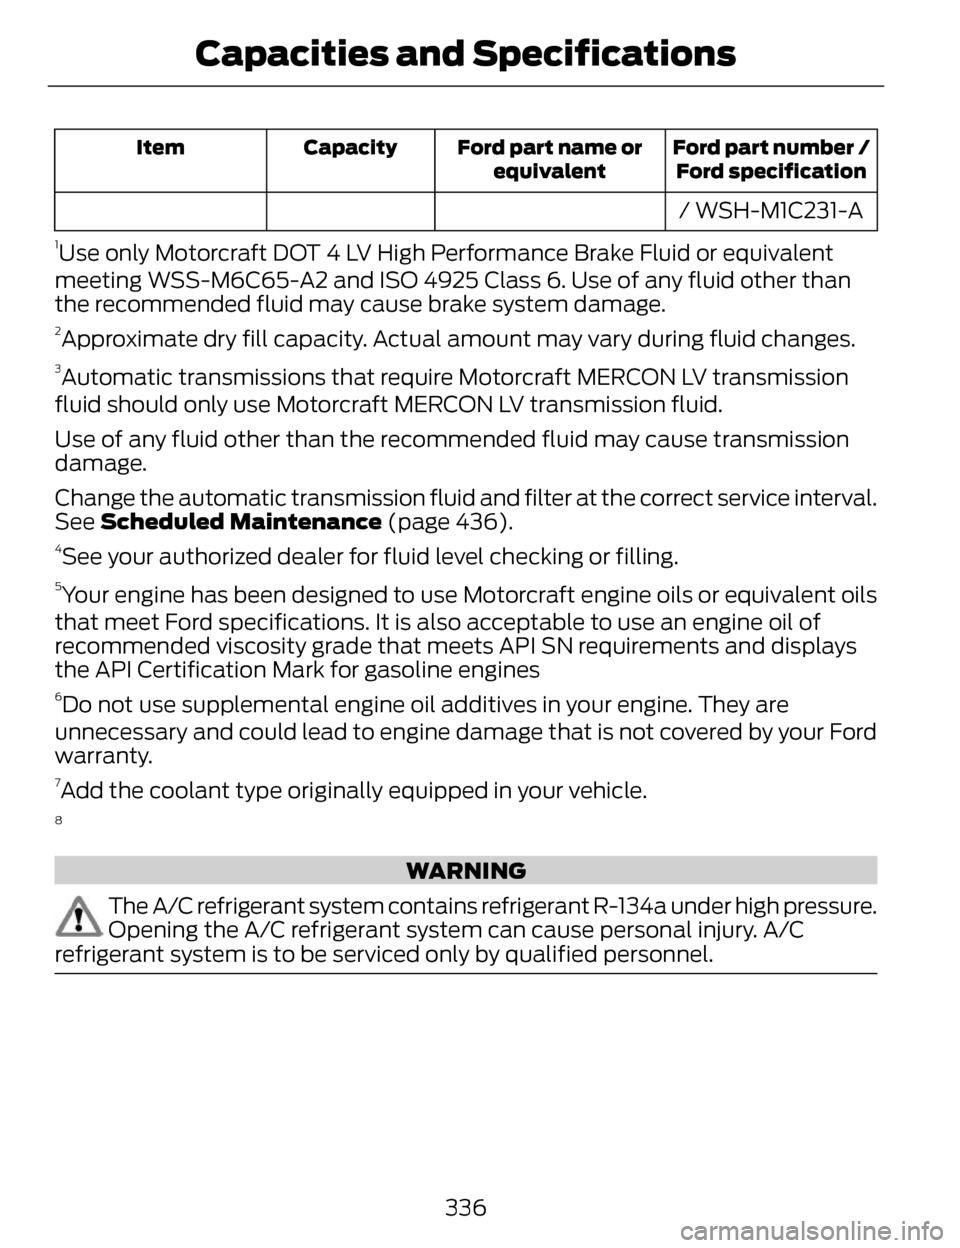
/ WSH-M1C231-A
1Use only Motorcraft DOT 4 LV High Performance Brake Fluid or equivalent
meeting WSS-M6C65-A2 and ISO 4925 Class 6. Use of any fluid other than
the recommended fluid may cause brake system damage.
2Approximate dry fill capacity. Actual amount may vary during fluid changes.
3Automatic transmissions that require Motorcraft MERCON LV transmission
fluid should only use Motorcraft MERCON LV transmission fluid.
Use of any fluid other than the recommended fluid may cause transmission
damage.
Change the automatic transmission fluid and filter at the correct service interval.
See Scheduled Maintenance (page 436).
4See your authorized dealer for fluid level checking or filling.
5Your engine has been designed to use Motorcraft engine oils or equivalent oils
that meet Ford specifications. It is also acceptable to use an engine oil of
recommended viscosity grade that meets API SN requirements and displays
the API Certification Mark for gasoline engines
6Do not use supplemental engine oil additives in your engine. They are
unnecessary and could lead to engine damage that is not covered by your Ford
warranty.
7Add the coolant type originally equipped in your vehicle.
8
WARNING
The A/C refrigerant system contains refrigerant R-134a under high pressure.
Opening the A/C refrigerant system can cause personal injury. A/C
refrigerant system is to be serviced only by qualified personnel.
336
Capacities and Specifications