PRESSURE LINCOLN MKZ 2014 Owners Manual
[x] Cancel search | Manufacturer: LINCOLN, Model Year: 2014, Model line: MKZ, Model: LINCOLN MKZ 2014Pages: 468, PDF Size: 4.49 MB
Page 8 of 468

Cleaning the Exterior........................288
Repairing Minor Paint Damage......289
Waxing...................................................289
Cleaning the Engine..........................290
Cleaning the Windows and WiperBlades................................................290
Cleaning the Interior...........................291
Cleaning the Instrument Panel and Instrument Cluster Lens..............292
Cleaning Leather Seats....................292
Cleaning the Alloy Wheels..............293
Vehicle Storage...................................294
Wheels and Tires
Temporary Mobility Kit.....................297
Tire Pressure Monitoring System...............................................303
Tire Care.................................................307
Using Snow Chains............................323
Changing a Road Wheel..................323
Technical Specifications.................328
Capacities and Specific- ations
Engine Specifications.......................329
Motorcraft Parts.................................329
Vehicle Identification Number........331
Vehicle Certification Label..............332
Transmission CodeDesignation.......................................332
Technical Specifications.................334
Accessories
Accessories...........................................337
Ford Extended Service Plan (ESP)
Ford Extended Service Plan(ESP)..................................................339
MyLincoln Touch™
General Information..........................342
Settings..................................................352
Entertainment.....................................364
Phone.....................................................385
Information...........................................392
Climate..................................................404
Naviga tion.............................................407
Appendices
End User License Agreement.........418
Scheduled Maintenance
General Maintenance
Information......................................436
Normal Scheduled Maintenance...................................440
Special Operating Conditions Scheduled Maintenance.............443
Scheduled Maintenance Record................................................445
5
Table of Contents
Page 12 of 468
E91392
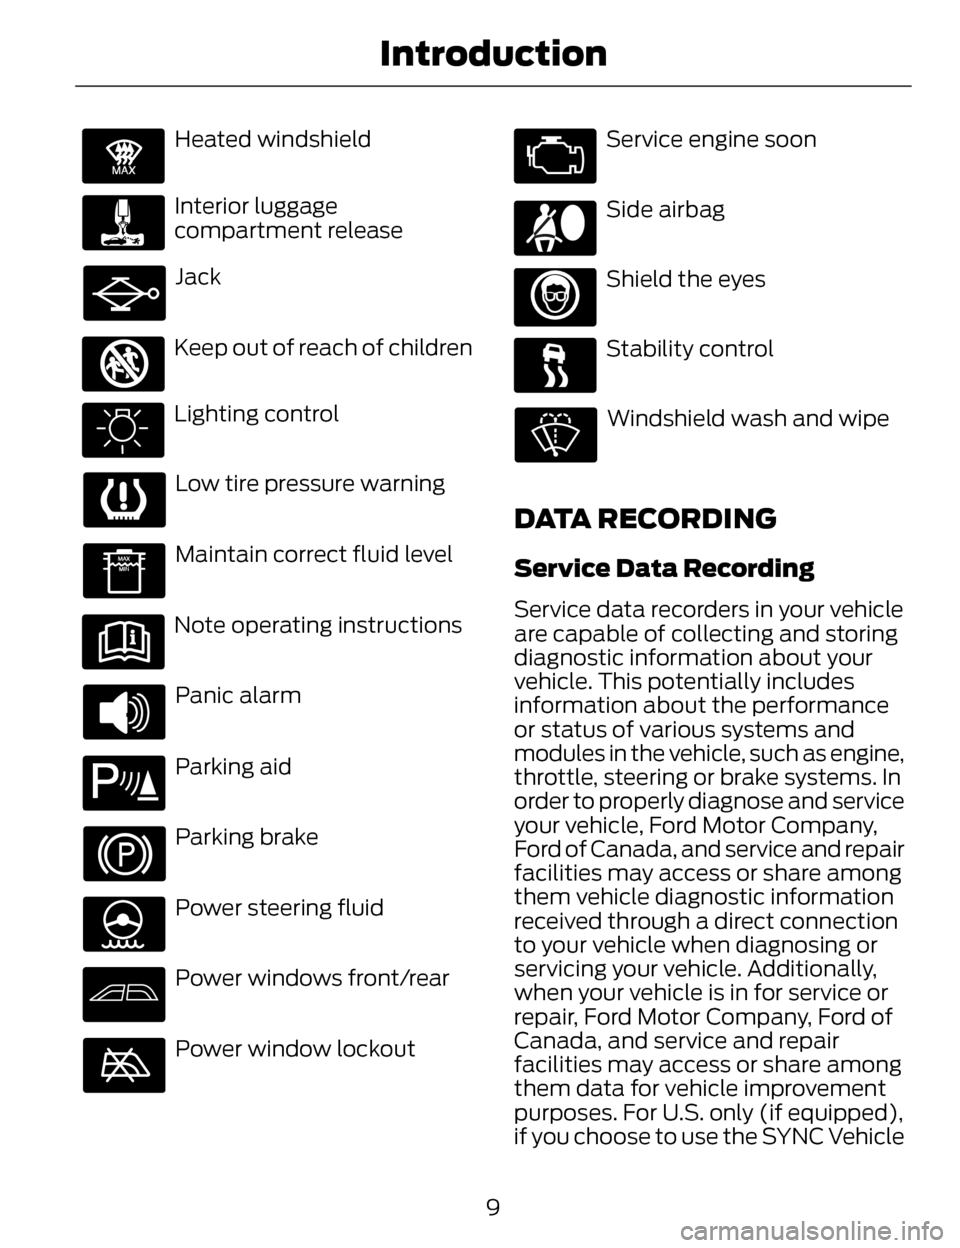
Heated windshield
Interior luggage
compartment release
Jack
E161353
Keep out of reach of children
Lighting control
Low tire pressure warning
Maintain correct fluid level
Note operating instructions
Panic alarm
E139213
Parking aid
Parking brake
Power steering fluid
Power windows front/rear
Power window lockout
Service engine soon
Side airbag
Shield the eyes
Stability control
Windshield wash and wipe
DATA RECORDING
Service Data Recording
Service data recorders in your vehicle
are capable of collecting and storing
diagnostic information about your
vehicle. This potentially includes
information about the performance
or status of various systems and
modules in the vehicle, such as engine,
throttle, steering or brake systems. In
order to properly diagnose and service
your vehicle, Ford Motor Company,
Ford of Canada, and service and repair
facilities may access or share among
them vehicle diagnostic information
received through a direct connection
to your vehicle when diagnosing or
servicing your vehicle. Additionally,
when your vehicle is in for service or
repair, Ford Motor Company, Ford of
Canada, and service and repair
facilities may access or share among
them data for vehicle improvement
purposes. For U.S. only (if equipped),
if you choose to use the SYNC Vehicle
9
Introduction
Page 38 of 468
3. Allow the belt to retract. As thebelt retracts, you will hear a
clicking sound. This indicates the
safety belt is now in the automatic
locking mode.
How to Disengage the Automatic
Locking Mode
Unbuckle the combination lap and
shoulder belt and allow it to retract
completely to disengage the
automatic locking mode and activate
the vehicle sensitive (emergency)
locking mode.
Rear Inflatable Safety Belt (If
Equipped)
WARNING
Do not attempt to service, repair,
or modify the rear inflatable
safety belt.
The rear inflatable safety belts are
fitted in the shoulder portion of the
safety belts of the second-row
outboard seating positions.
Note: The rear inflatable safety belts
are compatible with most infant and
child safety car seats and belt
positioning booster seats when
properly installed. This is because they
are designed to fill with a cooled gas
at a lower pressure and at a slower rate
than traditional airbags. After inflation,
the shoulder portion of the safety belt
remains cool to the touch. The rear inflatable safety belt consists
of the following:
• An inflatable bag located in the
shoulder safety belt webbing.
• Lap safety belt webbing with automatic locking mode.
• The same warning light, electronic control and diagnostic unit as used
for the front safety belts.
• Impact sensors located in various parts of the vehicle.
How does the rear inflatable safety
belt system work?
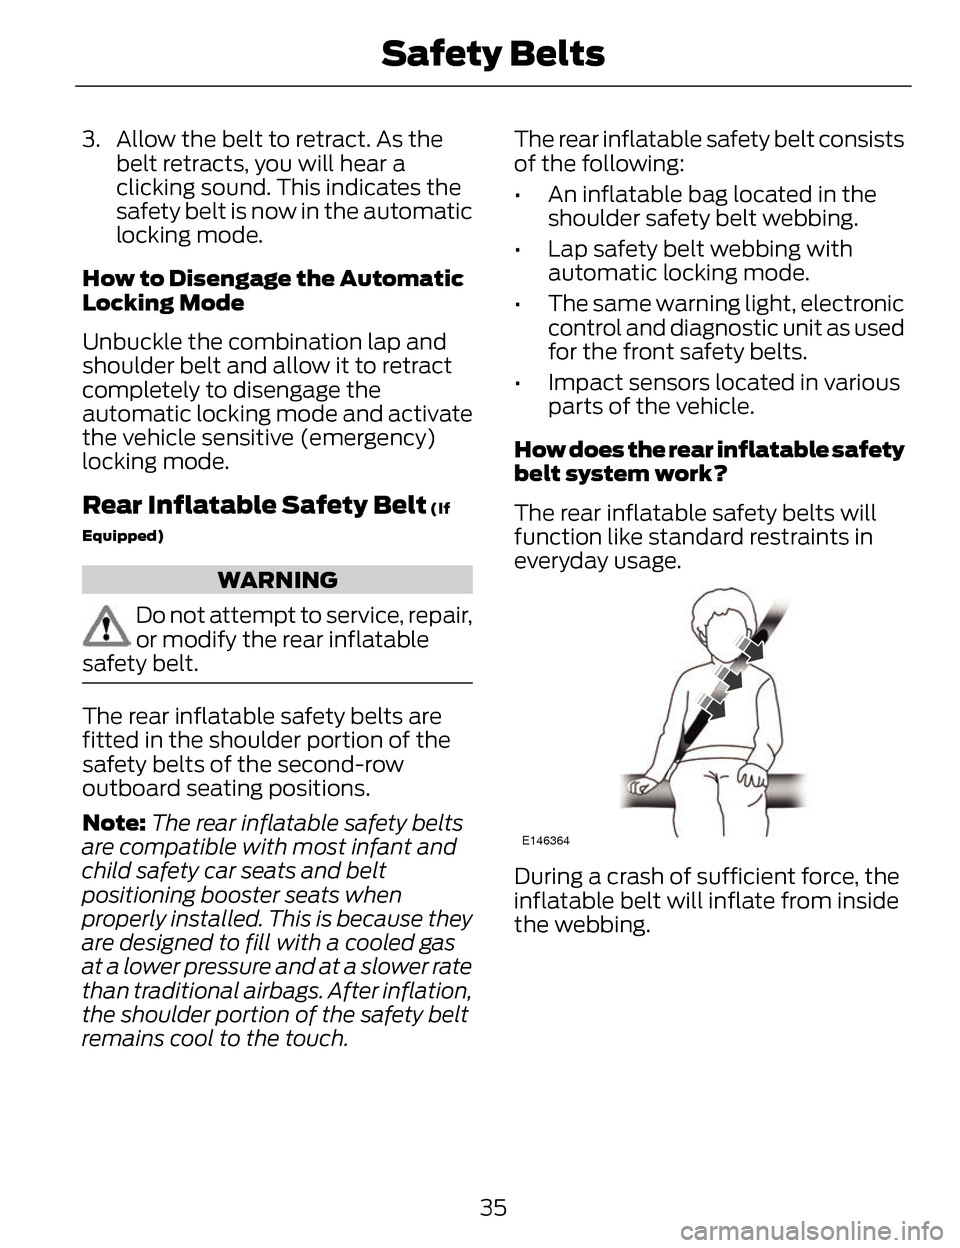
The rear inflatable safety belts will
function like standard restraints in
everyday usage.
E146364
During a crash of sufficient force, the
inflatable belt will inflate from inside
the webbing.
35
Safety Belts
Page 39 of 468

E146365
The fully inflated belt's increased
diameter more effectively holds the
occupant in the appropriate seating
position, and spreads crash forces
over more area of the body than
regular safety belts. This helps reduce
pressure on the chest and helps
control head and neck motion for
passengers.
WARNING
If the rear inflatable safety belt
has deployed, it will not function
again. The rear inflatable safety belt
system must be replaced by an
authorized dealer.
The rear inflatable safety belts are
designed to inflate in frontal or
near-frontal crashes and some side
impact crashes. The fact that the rear
inflatable safety belt did not inflate in
a crash does not mean that
something is wrong with the system.
Rather, it means the forces were not
of the type sufficient to cause
activation.
Safety Belt Extension
Assembly
WARNINGS
Do not use extensions to change
the fit of the shoulder belt across
the torso.
Do not use extensions with an
inflatable safety belt.
If the safety belt is too short when
fully extended, a safety belt extension
assembly can be obtained from an
authorized dealer.
Use only extensions manufactured by
the same supplier as the safety belt.
Manufacturer identification is located
at the end of the webbing on the label.
A safety belt extension is not available
for the inflatable safety belt. Also, use
the safety belt extension only if the
safety belt is too short for you when
fully extended.
SAFETY BELT HEIGHT
ADJUSTMENT
WARNING
Position the safety belt height
adjusters so that the belt rests
across the middle of your shoulder.
Failure to adjust the safety belt
properly could reduce the
effectiveness of the safety belt and
increase the risk of injury in a crash.
Adjust the height of the shoulder belt
so the belt rests across the middle of
your shoulder.
36
Safety Belts
Page 101 of 468
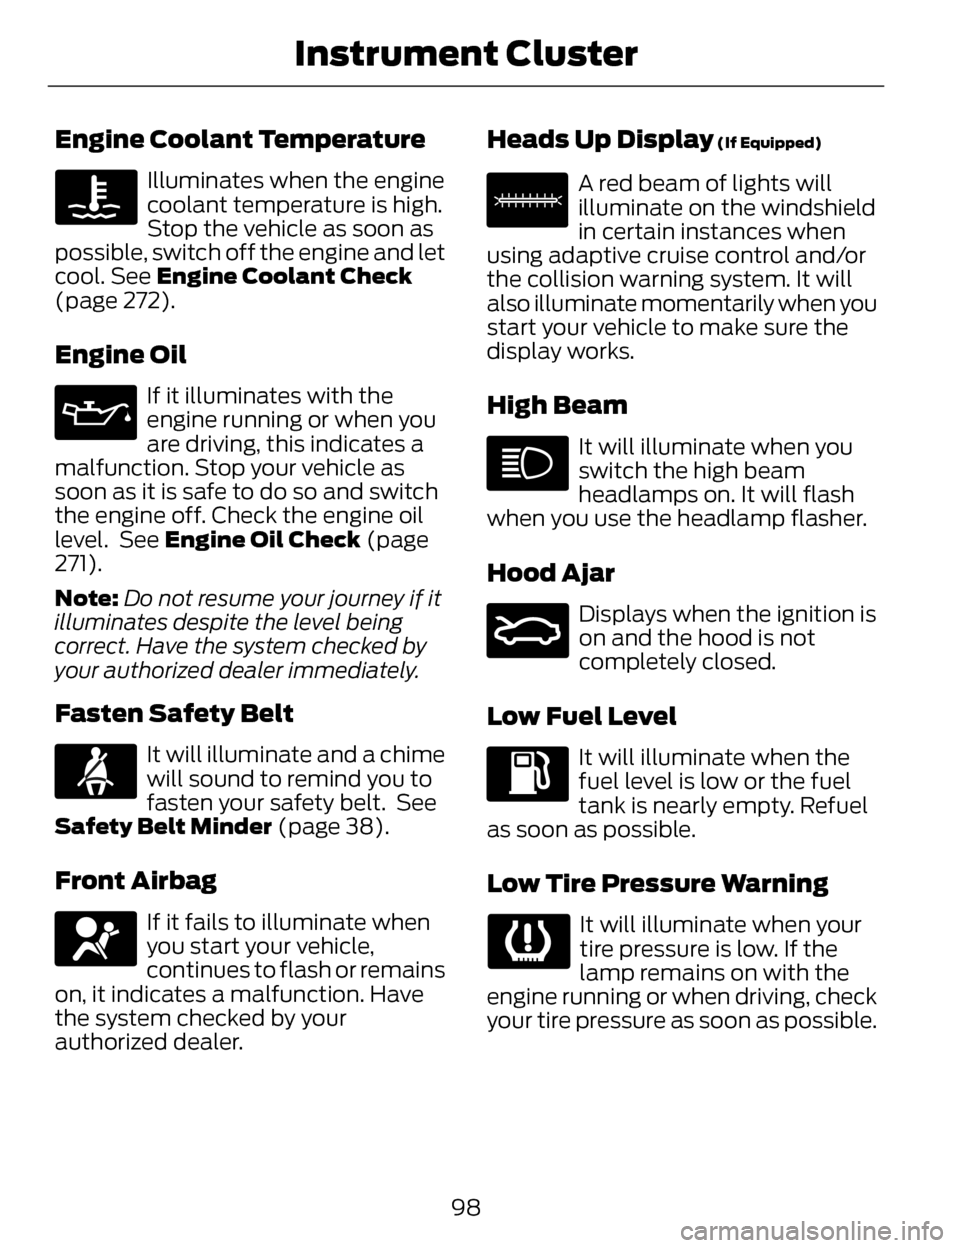
Engine Coolant Temperature
Illuminates when the engine
coolant temperature is high.
Stop the vehicle as soon as
possible, switch off the engine and let
cool. See Engine Coolant Check
(page 272).
Engine Oil
If it illuminates with the
engine running or when you
are driving, this indicates a
malfunction. Stop your vehicle as
soon as it is safe to do so and switch
the engine off. Check the engine oil
level. See Engine Oil Check (page
271).
Note: Do not resume your journey if it
illuminates despite the level being
correct. Have the system checked by
your authorized dealer immediately.
Fasten Safety Belt
It will illuminate and a chime
will sound to remind you to
fasten your safety belt. See
Safety Belt Minder (page 38).
Front Airbag
If it fails to illuminate when
you start your vehicle,
continues to flash or remains
on, it indicates a malfunction. Have
the system checked by your
authorized dealer.
Heads Up Display (If Equipped)
E156133
A red beam of lights will
illuminate on the windshield
in certain instances when
using adaptive cruise control and/or
the collision warning system. It will
also illuminate momentarily when you
start your vehicle to make sure the
display works.
High Beam
It will illuminate when you
switch the high beam
headlamps on. It will flash
when you use the headlamp flasher.
Hood Ajar
E159324
Displays when the ignition is
on and the hood is not
completely closed.
Low Fuel Level
It will illuminate when the
fuel level is low or the fuel
tank is nearly empty. Refuel
as soon as possible.
Low Tire Pressure Warning
It will illuminate when your
tire pressure is low. If the
lamp remains on with the
engine running or when driving, check
your tire pressure as soon as possible.
98
Instrument Cluster
Page 123 of 468
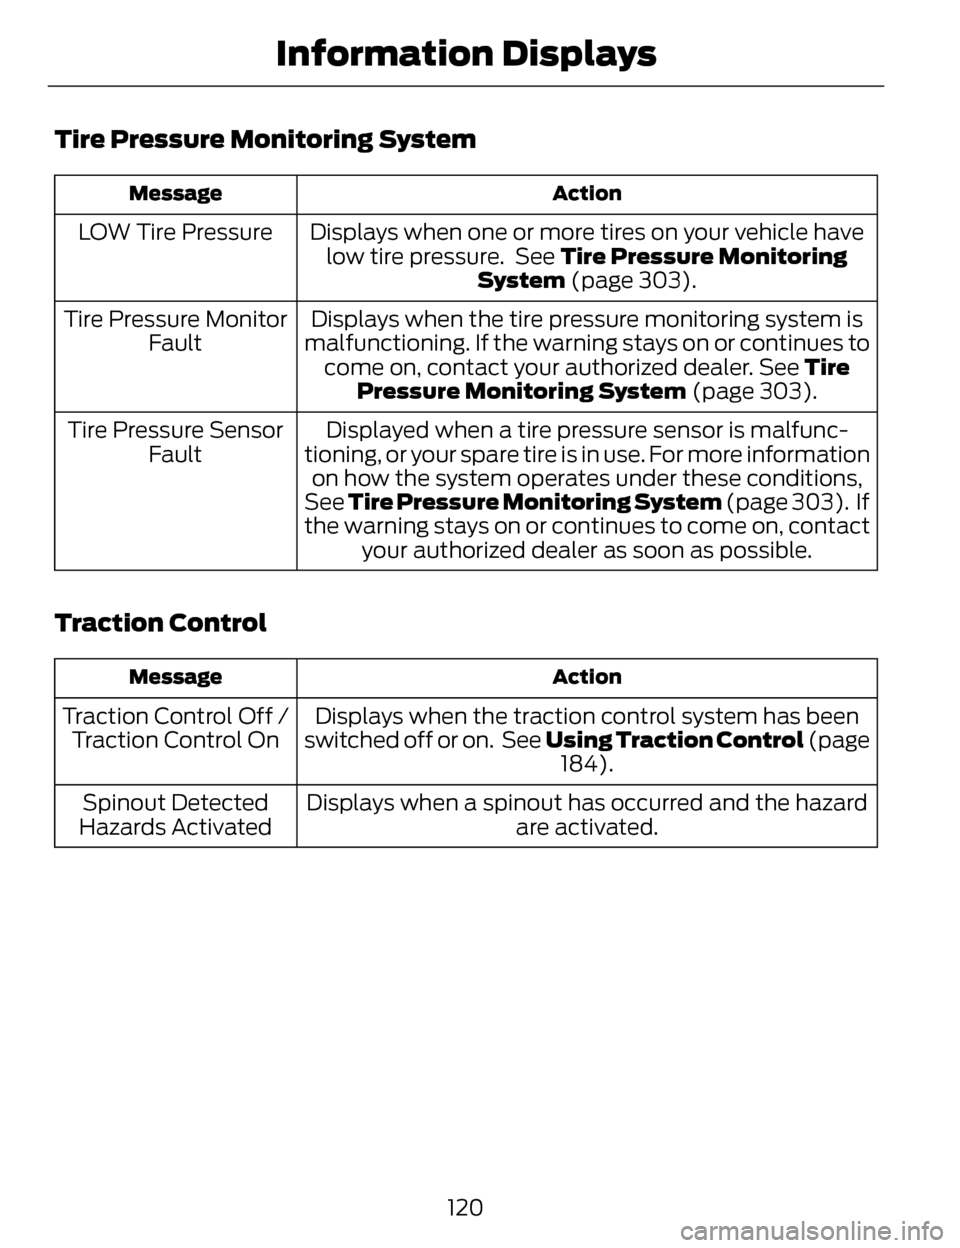
Tire Pressure Monitoring System
Action
Message
Displays when one or more tires on your vehicle have
low tire pressure. See Tire Pressure Monitoring System (page 303).
LOW Tire Pressure
Displays when the tire pressure monitoring system is
malfunctioning. If the warning stays on or continues to come on, contact your authorized dealer. See Tire
Pressure Monitoring System (page 303).
Tire Pressure Monitor
Fault
Displayed when a tire pressure sensor is malfunc-
tioning, or your spare tire is in use. For more information on how the system operates under these conditions,
See Tire Pressure Monitoring System (page 303). If
the warning stays on or continues to come on, contact your authorized dealer as soon as possible.
Tire Pressure Sensor
Fault
Traction Control
Action
Message
Displays when the traction control system has been
switched off or on. See Using Traction Control (page
184).
Traction Control Off /
Traction Control On
Displays when a spinout has occurred and the hazardare activated.
Spinout Detected
Hazards Activated
120
Information Displays
Page 160 of 468
SAFETY PRECAUTIONS
WARNINGS
Do not overfill the fuel tank. The
pressure in an overfilled tank
may cause leakage and lead to fuel
spray and fire.
The fuel system may be under
pressure. If you hear a hissing
sound near the fuel filler door (Easy
Fuel capless fuel system), do not
refuel until the sound stops.
Otherwise, fuel may spray out, which
could cause serious personal injury.
Automotive fuels can cause
serious injury or death if misused
or mishandled.
The flow of fuel through a fuel
pump nozzle can produce static
electricity, which can cause a fire if
fuel is pumped into an ungrounded
fuel container.
Fuel ethanol and gasoline may
contain benzene, which is a
cancer-causing agent.
When refueling always shut the
engine off and never allow
sparks or open flames near the filler
neck. Never smoke or use a cell phone
while refueling. Fuel vapor is
extremely hazardous under certain
conditions. Avoid inhaling excess
fumes.
Observe the following guidelines
when handling automotive fuel: • Extinguish all smoking materials
and any open flames before
refueling your vehicle.
• Always turn off the vehicle before refueling.
• Automotive fuels can be harmful or fatal if swallowed. Fuel such as
gasoline is highly toxic and if
swallowed can cause death or
permanent injury. If fuel is
swallowed, call a physician
immediately, even if no symptoms
are immediately apparent. The
toxic effects of fuel may not be
visible for hours.
• Avoid inhaling fuel vapors. Inhaling too much fuel vapor of any kind
can lead to eye and respiratory
tract irritation. In severe cases,
excessive or prolonged breathing
of fuel vapor can cause serious
illness and permanent injury.
• Avoid getting fuel liquid in your eyes. If fuel is splashed in the eyes,
remove contact lenses (if worn),
flush with water for 15 minutes and
seek medical attention. Failure to
seek proper medical attention
could lead to permanent injury.
157
Fuel and Refueling
Page 164 of 468
WARNINGS
Read and follow all the
instructions on the pump island.
Switch off your engine when you
are refueling.
Do not smoke if you are near fuel
or refueling your vehicle.
Keep sparks, flames and
smoking materials away from
fuel.
Stay outside your vehicle and do
not leave the fuel pump
unattended when refueling your
vehicle. This is against the law in some
places.
Keep children away from the fuel
pump; never let children pump
fuel.
Do not use personal electronic
devices while refueling.
Use the following guidelines to avoid
electrostatic charge build-up when
filling an ungrounded fuel container:
• Place approved fuel container on the ground.
• Do not fill a fuel container while it is in your vehicle (including the
cargo area).
• Keep the fuel pump nozzle in contact with the fuel container
while filling.
• Do not use a device that would hold the fuel pump handle in the
fill position.
Easy Fuel™ Capless Fuel
System
WARNING
The fuel system may be under
pressure. If you hear a hissing
sound near the fuel filler door, do not
refuel until the sound stops.
Otherwise, fuel may spray out, which
could cause serious personal injury.
When fueling your vehicle:
1. Put the vehicle in position P and
switch the ignition off.
E166527
2. Press the center-rear edge of the fuel filler door and release to open.
E156032
161
Fuel and Refueling
Page 178 of 468
WARNINGS
If the parking brake is fully
released, but the brake warning
lamp remains illuminated, the brakes
may not be working properly. See your
authorized dealer.
Do not spin the wheels at over
35 mph (56 km/h). The tires may
fail and injure a passenger or
bystander.
Note: Do not rock the vehicle if the
engine is not at normal operating
temperature or damage to the
transmission may occur.
Note: Do not rock the vehicle for more
than a few minutes or damage to the
transmission and tires may occur or the
engine may overheat.
If your vehicle gets stuck in mud or
snow it may be rocked out by shifting
between forward and reverse gears,
stopping between shifts, in a steady
pattern. Press lightly on the
accelerator in each gear.
If your vehicle is equipped with
AdvanceTrac® with Roll Stability
Control™, it may be beneficial to
disengage the AdvanceTrac® with
Roll Stability Control™ system while
attempting to rock the vehicle.
Emergency Maneuvers
• In an unavoidable emergency situation where a sudden sharp
turn must be made, remember to
avoid "over-driving" your vehicle
(i.e., turn the steering wheel only
as rapidly and as far as required to
avoid the emergency). Excessive steering will result in less vehicle
control, not more. Additionally,
smooth variations of the
accelerator and/or brake pedal
pressure should be utilized if
changes in vehicle speed are called
for. Avoid abrupt steering,
acceleration or braking which
could result in an increased risk of
loss of vehicle control, vehicle
rollover and/or personal injury. Use
all available road surface to return
the vehicle to a safe direction of
travel.
• In the event of an emergency stop, avoid skidding the tires and do not
attempt any sharp steering wheel
movements.
• If the vehicle goes from one type of surface to another (i.e., from
concrete to gravel) there will be a
change in the way the vehicle
responds to a maneuver (steering,
acceleration or braking). Again,
avoid these abrupt inputs.
Sand
When driving over sand, try to keep all
four wheels on the most solid area of
the trail. Avoid reducing the tire
pressures but shift to a lower gear and
drive steadily through the terrain.
Apply the accelerator slowly and
avoid spinning the wheels.
Do not drive your AWD vehicle in deep
sand. This will cause the AWD system
to overheat. After the system has
cooled down, normal AWD function
will return.
175
All-Wheel Drive (If Equipped)
Page 179 of 468
Under severe operating conditions,
the A/C may cycle on and off to
protect overheating of the engine.
Avoid excessive speed because
vehicle momentum can work against
you and cause the vehicle to become
stuck to the point that assistance may
be required from another vehicle.
Remember, you may be able to back
out the way you came if you proceed
with caution.
Mud and Water
If you must drive through high water,
drive slowly. Traction or brake
capability may be limited.
When driving through water,
determine the depth; avoid water
higher than the bottom of the wheel
rims (for cars) or the bottom of the
hubs (for trucks) (if possible) and
proceed slowly. If the ignition system
gets wet, the vehicle may stall.
E142667
Once through water, always try the
brakes. Wet brakes do not stop the
vehicle as effectively as dry brakes.
Drying can be improved by moving
your vehicle slowly while applying
light pressure on the brake pedal.Be cautious of sudden changes in
vehicle speed or direction when you
are driving in mud. Even AWD vehicles
can lose traction in slick mud. As when
you are driving over sand, apply the
accelerator slowly and avoid spinning
your wheels. If the vehicle does slide,
steer in the direction of the slide until
you regain control of the vehicle.
After driving through mud, clean off
residue stuck to rotating driveshafts
and tires. Excess mud stuck on tires
and rotating driveshafts causes an
imbalance that could damage drive
components.
Note:
Driving through deep water may
damage the transmission.
If the front or rear axle is submerged
in water, the axle lubricant and AWD
PTU (Power Transfer Unit) lubricant
should be checked and changed if
necessary.
E143950
“Tread Lightly” is an educational
program designed to increase public
awareness of land-use regulations
and responsibilities in our nations
wilderness areas. Ford Motor
Company joins the U.S. Forest Service
and the Bureau of Land Management
in encouraging you to help preserve
our national forest and other public
and private lands by “treading lightly.”
176
All-Wheel Drive (If Equipped)