clock LINCOLN MKZ 2016 User Guide
[x] Cancel search | Manufacturer: LINCOLN, Model Year: 2016, Model line: MKZ, Model: LINCOLN MKZ 2016Pages: 544, PDF Size: 5.77 MB
Page 321 of 544
1. Remove the valve cap from the tire valve.
2. Unhook the black hose from the side ofthe compressor and fasten firmly on the
valve stem by turning clockwise.
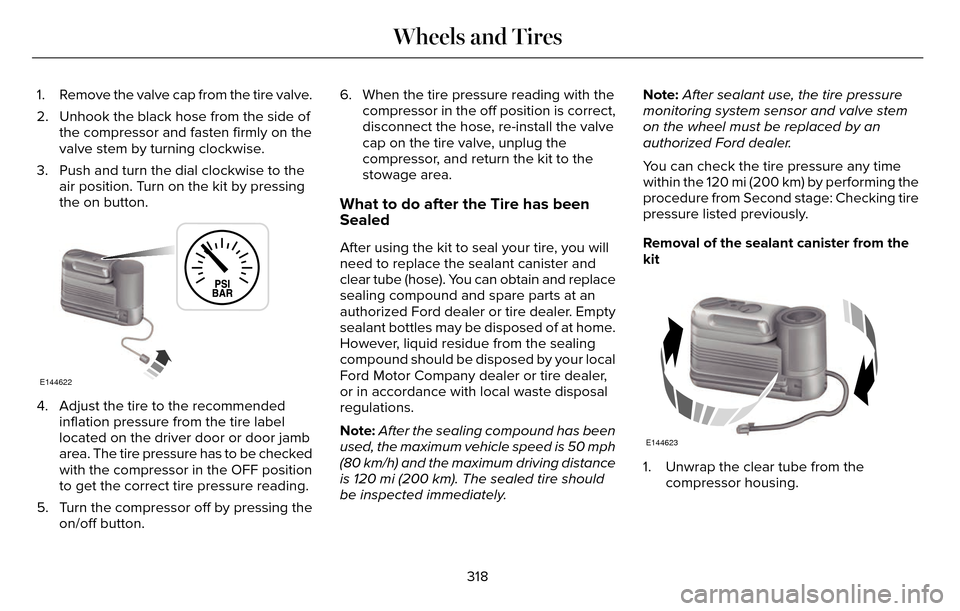
3. Push and turn the dial clockwise to the air position. Turn on the kit by pressing
the on button.
E144622
4. Adjust the tire to the recommendedinflation pressure from the tire label
located on the driver door or door jamb
area. The tire pressure has to be checked
with the compressor in the OFF position
to get the correct tire pressure reading.
5. Turn the compressor off by pressing the on/off button. 6. When the tire pressure reading with the
compressor in the off position is correct,
disconnect the hose, re-install the valve
cap on the tire valve, unplug the
compressor, and return the kit to the
stowage area.
What to do after the Tire has been
Sealed
After using the kit to seal your tire, you will
need to replace the sealant canister and
clear tube (hose). You can obtain and replace
sealing compound and spare parts at an
authorized Ford dealer or tire dealer. Empty
sealant bottles may be disposed of at home.
However, liquid residue from the sealing
compound should be disposed by your local
Ford Motor Company dealer or tire dealer,
or in accordance with local waste disposal
regulations.
Note: After the sealing compound has been
used, the maximum vehicle speed is 50 mph
(80 km/h) and the maximum driving distance
is 120 mi (200 km). The sealed tire should
be inspected immediately. Note:
After sealant use, the tire pressure
monitoring system sensor and valve stem
on the wheel must be replaced by an
authorized Ford dealer.
You can check the tire pressure any time
within the 120 mi (200 km) by performing the
procedure from Second stage: Checking tire
pressure listed previously.
Removal of the sealant canister from the
kit
E144623
1. Unwrap the clear tube from the compressor housing.
318
Wheels and Tires
Page 325 of 544
• Only use the sealing compound beforethe use-by date. The use-by date is on a
label on the sealant canister and can be
seen through the rectangular viewing
window on the bottom of the compressor.
Check the use-by date regularly and
replace the canister after four years of
non-use.
• Do not store the kit unsecured inside the passenger compartment of the vehicle
as it may cause injury during a sudden
stop or crash. Always store the kit in its
original location.
• After sealant use, the tire pressure monitoring system sensor and valve stem
on the wheel must be replaced by an
authorized Ford dealer.
• Operating the kit could cause an electrical disturbance in radio, CD, and
DVD player operation.
E175978
* When inflation only is required for
a tire or other objects, the selector
must be in the Air position.
What to do when a Tire Is Punctured
A tire puncture within the tire's tread area
can be repaired in two stages with the kit.
• In the first stage, the tire will be reinflatedwith a sealing compound and air. After
the tire has been inflated, you will need
to drive the vehicle a short distance
(about 4 miles [6 kilometers]) to distribute
the sealant in the tire.
• In the second stage, you will need to check the tire pressure and adjust, if
necessary, to the vehicle's specified tire
inflation pressure.
First Stage: Reinflating the Tire with
Sealing Compound and Air
WARNINGS
Do not stand directly over the kit while
inflating the tire. If you notice any
unusual bulges or deformations in the tire's
sidewall during inflation, stop and call
roadside assistance.
If the tire does not inflate to the
recommended tire pressure within 15
minutes, stop and call roadside assistance.
WARNINGS
Do not run the engine during kit
operation unless the vehicle is
outdoors or in a well-ventilated area.
Preparation: Park the vehicle in a safe, level
and secure area, away from moving traffic.
Turn the hazard lights on. Apply the parking
brake and turn the engine off. Inspect the
flat tire for visible damage.
Sealant compound contains latex. Use
appropriate precautions to avoid any allergic
reactions.
Do not remove any foreign object that has
pierced the tire. If a puncture is located in
the tire sidewall, stop and call roadside
assistance.
1. Remove the valve cap from the tire valve.
2. Unwrap the dual purpose hose (black tube) from the back of the compressor
housing.
3. Fasten the hose to the tire valve by turning the connector clockwise. Tighten
the connection securely.
322
Wheels and Tires
Page 326 of 544
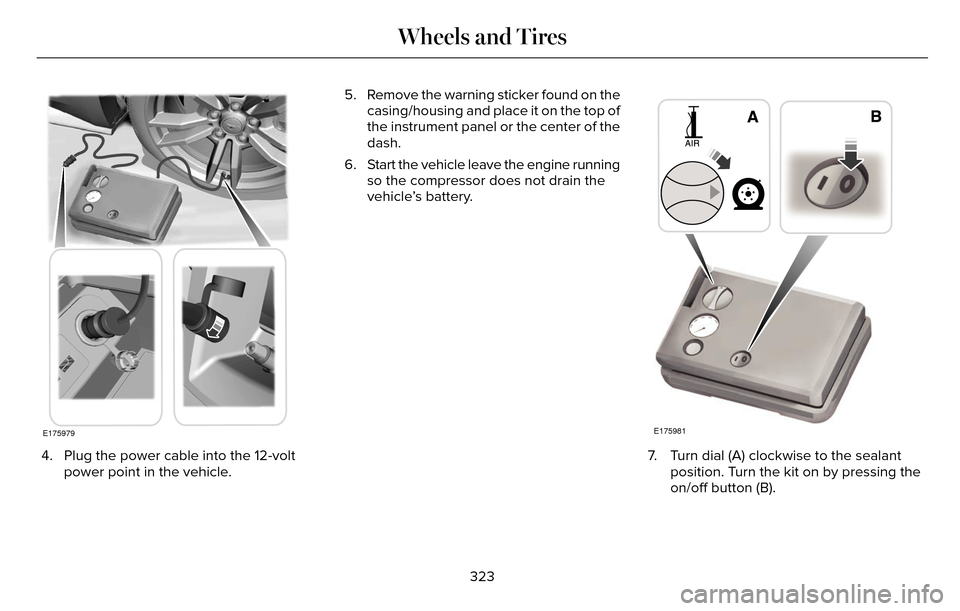
E175979
4. Plug the power cable into the 12-voltpower point in the vehicle. 5. Remove the warning sticker found on the
casing/housing and place it on the top of
the instrument panel or the center of the
dash.
6. Start the vehicle leave the engine running so the compressor does not drain the
vehicle’s battery.
E175981
7. Turn dial (A) clockwise to the sealantposition. Turn the kit on by pressing the
on/off button (B).
323
Wheels and Tires
Page 328 of 544
Second Stage: Checking Tire Pressure
WARNINGS
If you are proceeding from the First
Stage: Re-inflating the Tire with Sealing
Compound and Air section and have injected
sealant in the tire and the pressure is below
20 psi (1.4 bar), continue to the next step.
The power plug may get hot after use
and should be handled carefully while
unplugging.
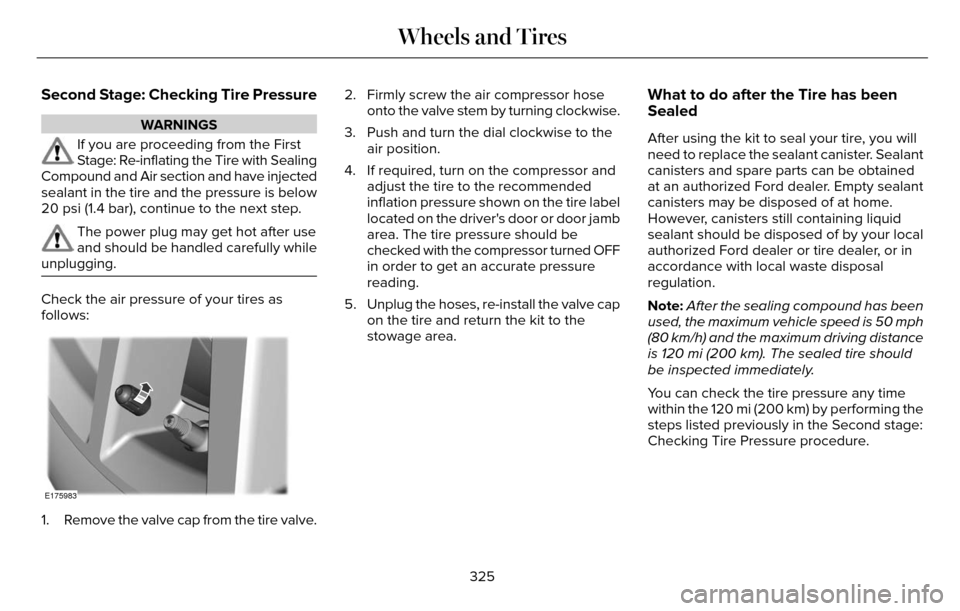
Check the air pressure of your tires as
follows:
E175983
1. Remove the valve cap from the tire valve. 2. Firmly screw the air compressor hose
onto the valve stem by turning clockwise.
3. Push and turn the dial clockwise to the air position.
4. If required, turn on the compressor and adjust the tire to the recommended
inflation pressure shown on the tire label
located on the driver's door or door jamb
area. The tire pressure should be
checked with the compressor turned OFF
in order to get an accurate pressure
reading.
5. Unplug the hoses, re-install the valve cap on the tire and return the kit to the
stowage area.
What to do after the Tire has been
Sealed
After using the kit to seal your tire, you will
need to replace the sealant canister. Sealant
canisters and spare parts can be obtained
at an authorized Ford dealer. Empty sealant
canisters may be disposed of at home.
However, canisters still containing liquid
sealant should be disposed of by your local
authorized Ford dealer or tire dealer, or in
accordance with local waste disposal
regulation.
Note: After the sealing compound has been
used, the maximum vehicle speed is 50 mph
(80 km/h) and the maximum driving distance
is 120 mi (200 km). The sealed tire should
be inspected immediately.
You can check the tire pressure any time
within the 120 mi (200 km) by performing the
steps listed previously in the Second stage:
Checking Tire Pressure procedure.
325
Wheels and Tires
Page 352 of 544
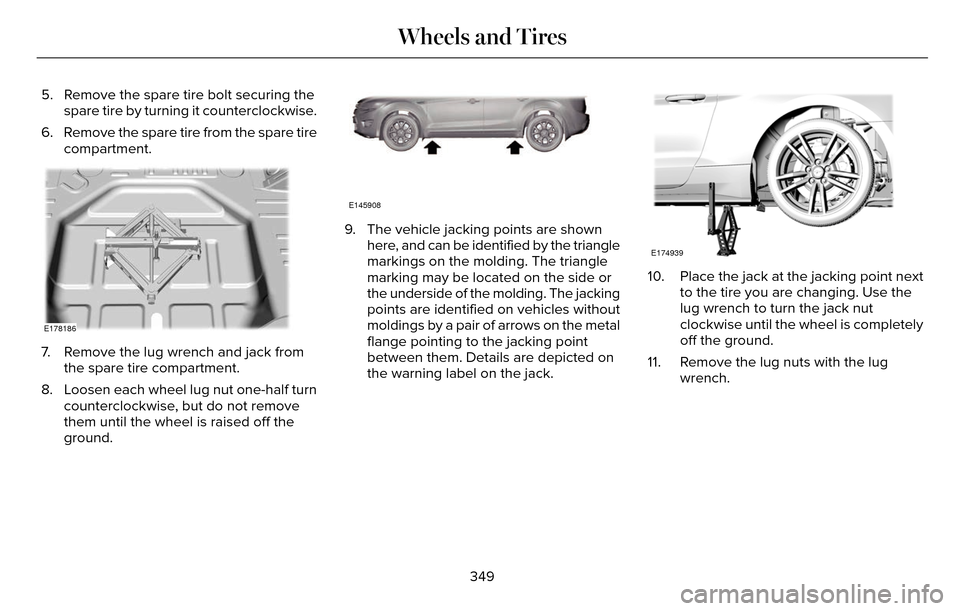
5. Remove the spare tire bolt securing thespare tire by turning it counterclockwise.
6. Remove the spare tire from the spare tire compartment.
E178186
7. Remove the lug wrench and jack fromthe spare tire compartment.
8. Loosen each wheel lug nut one-half turn counterclockwise, but do not remove
them until the wheel is raised off the
ground.
E145908
9. The vehicle jacking points are shownhere, and can be identified by the triangle
markings on the molding. The triangle
marking may be located on the side or
the underside of the molding. The jacking
points are identified on vehicles without
moldings by a pair of arrows on the metal
flange pointing to the jacking point
between them. Details are depicted on
the warning label on the jack.
E174939
10. Place the jack at the jacking point next to the tire you are changing. Use the
lug wrench to turn the jack nut
clockwise until the wheel is completely
off the ground.
11. Remove the lug nuts with the lug wrench.
349
Wheels and Tires
Page 353 of 544
12. Replace the flat tire with the spare tire,making sure the valve stem is facing
outward. Reinstall the lug nuts until the
wheel is snug against the hub. Do not
fully tighten the lug nuts until the wheel
has been lowered. If you are using the
temporary tire, the lug nut washers will
not appear to be flush with the rim. This
is normal only when using the
temporary spare tire.
13. Lower the wheel by turning the jack handle counterclockwise.
1
2
3
4
5
E75442
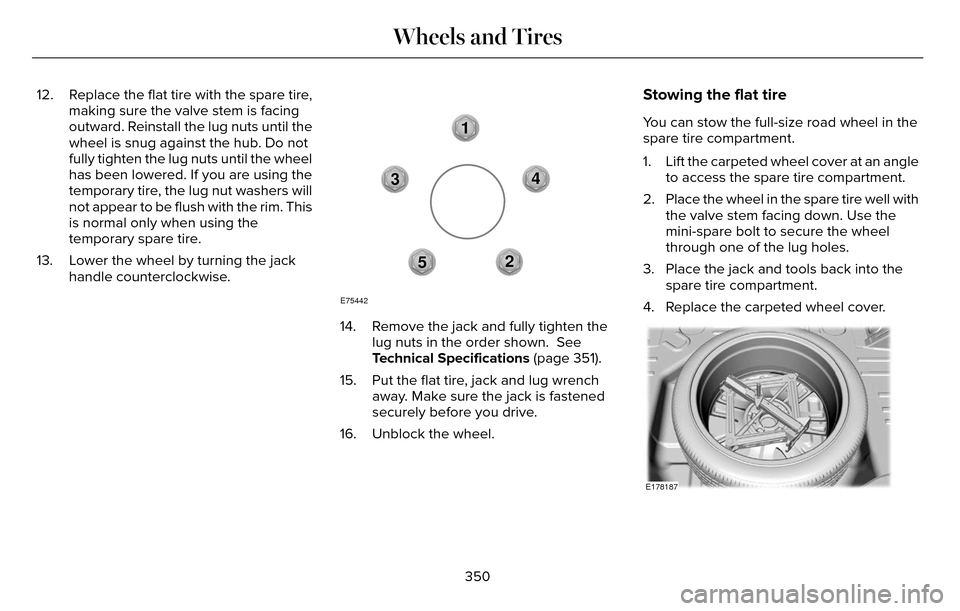
14. Remove the jack and fully tighten the lug nuts in the order shown. See
Technical Specifications (page 351).
15. Put the flat tire, jack and lug wrench away. Make sure the jack is fastened
securely before you drive.
16. Unblock the wheel.
Stowing the flat tire
You can stow the full-size road wheel in the
spare tire compartment.
1. Lift the carpeted wheel cover at an angle to access the spare tire compartment.
2. Place the wheel in the spare tire well with the valve stem facing down. Use the
mini-spare bolt to secure the wheel
through one of the lug holes.
3. Place the jack and tools back into the spare tire compartment.
4. Replace the carpeted wheel cover.
E178187
350
Wheels and Tires
Page 378 of 544
Note:You can access the entertainment
features for 30 minutes after you switch the
ignition off, and no doors are opened.
PHONE
Press to select any of the following:
Menu Item
Phone
Quick Dial
Phonebook
History
Messaging
Settings NAVIGATION
Press to select any of the following:
Menu Item
My Home
Favorites
Previous Destinations
Point of Interest
Emergency
Street Address
Intersection
City Center
Map
Edit Route
Cancel Route
CLIMATE
Press the corresponding icons to control the
following options: • Driver Settings
• Recirculated Air
• Auto
• Dual
• Passenger Settings
• A/C
• Defrost
SETTINGS
E142607
Press to select any of the following:
Menu Item
Clock
Display
Sound
Vehicle
Settings
Help
375
MyLincoln Touch™
Page 387 of 544
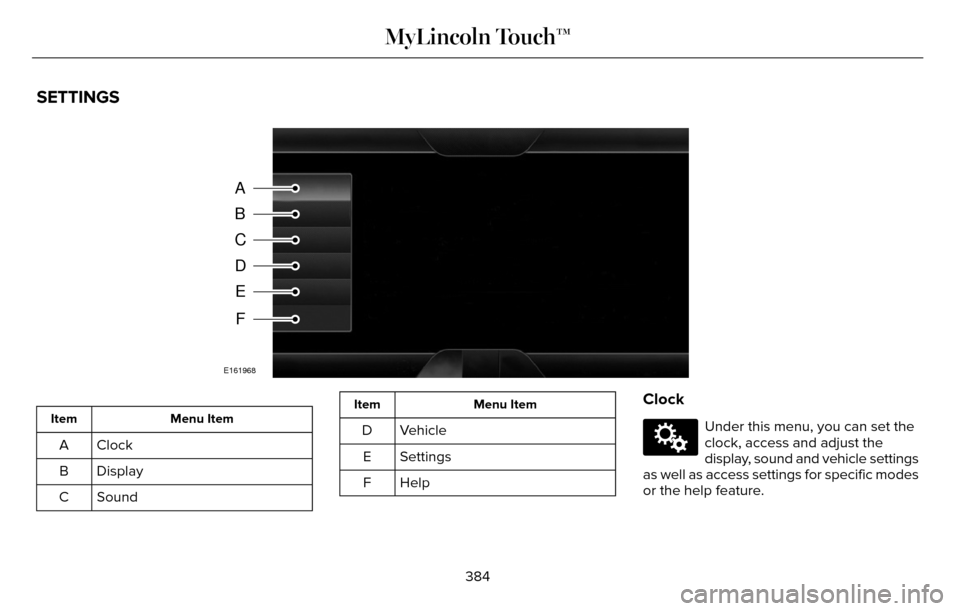
SETTINGS
A
B
C
D
E
F
E161968
Menu Item
Item
Clock
A
Display
B
Sound
C
Menu Item
Item
Vehicle
D
Settings
E
HelpF
Clock
E142607
Under this menu, you can set the
clock, access and adjust the
display, sound and vehicle settings
as well as access settings for specific modes
or the help feature.
384
MyLincoln Touch™
Page 388 of 544
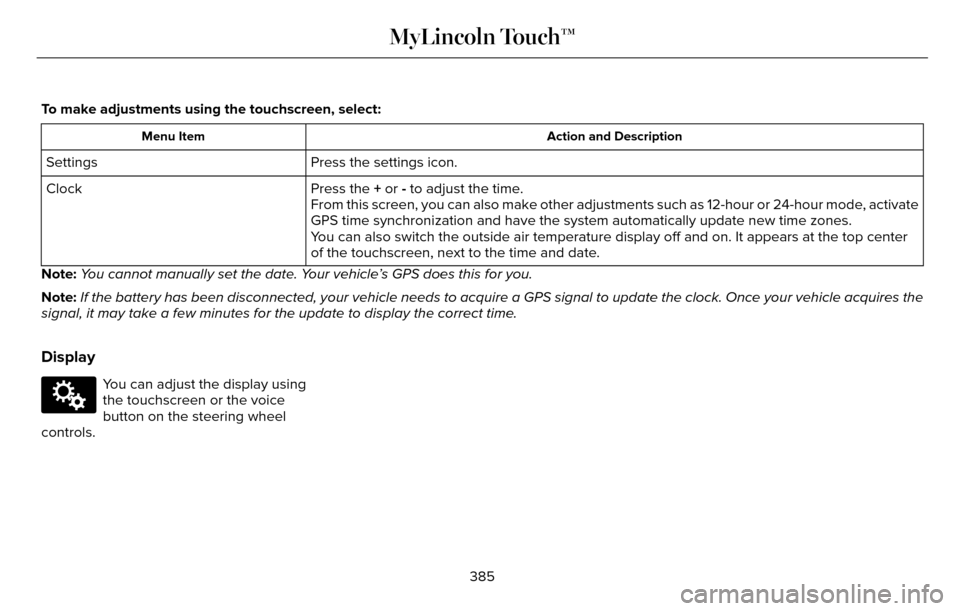
To make adjustments using the touchscreen, select:
Action and Description
Menu Item
Press the settings icon.
Settings
Press the + or - to adjust the time.
Clock
From this screen, you can also make other adjustments such as 12-hour or\
24-hour mode, activate
GPS time synchronization and have the system automatically update new ti\
me zones.
You can also switch the outside air temperature display off and on. It ap\
pears at the top center
of the touchscreen, next to the time and date.
Note: You cannot manually set the date. Your vehicle’s GPS does this for you.
Note: If the battery has been disconnected, your vehicle needs to acquire a GP\
S signal to update the clock. Once your vehicle acquires the
signal, it may take a few minutes for the update to display the correct \
time.
Display
E142607
You can adjust the display using
the touchscreen or the voice
button on the steering wheel
controls.
385
MyLincoln Touch™
Page 456 of 544
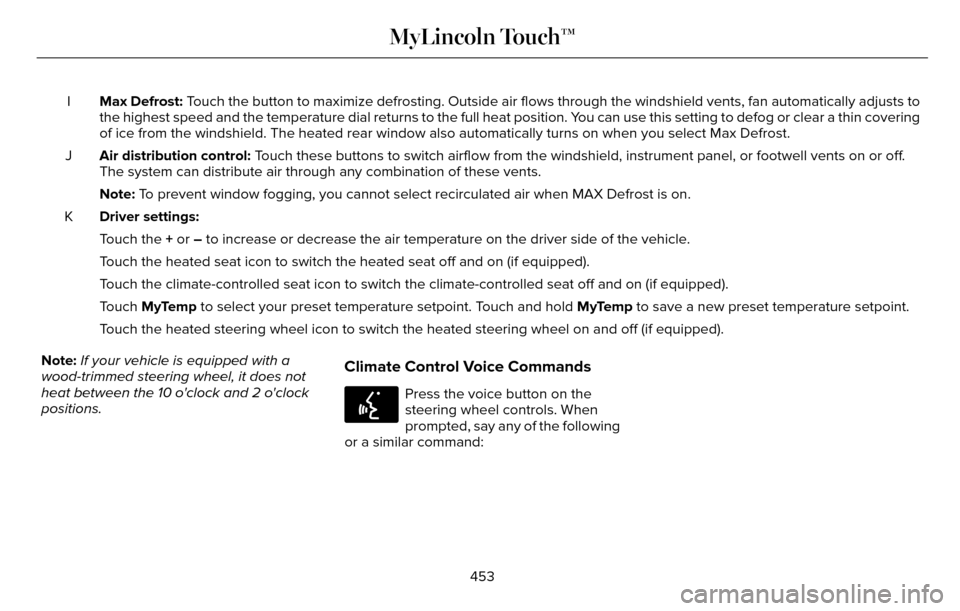
Max Defrost: Touch the button to maximize defrosting. Outside air flows through the wi\
ndshield vents, fan automatically adjusts to
the highest speed and the temperature dial returns to the full heat posi\
tion. You can use this setting to defog or clear a thin covering
of ice from the windshield. The heated rear window also automatically tu\
rns on when you select Max Defrost.
I
Air distribution control: Touch these buttons to switch airflow from the windshield, instrument pan\
el, or footwell vents on or off.
The system can distribute air through any combination of these vents.
J
Note: To prevent window fogging, you cannot select recirculated air when MAX De\
frost is on.
Driver settings:
K
Touch the + or – to increase or decrease the air temperature on the driver side of the v\
ehicle.
Touch the heated seat icon to switch the heated seat off and on (if equi\
pped).
Touch the climate-controlled seat icon to switch the climate-controlled s\
eat off and on (if equipped).
Touch MyTemp to select your preset temperature setpoint. Touch and hold MyTemp to save a new preset temperature setpoint.
Touch the heated steering wheel icon to switch the heated steering wheel \
on and off (if equipped).
Note: If your vehicle is equipped with a
wood-trimmed steering wheel, it does not
heat between the 10 o'clock and 2 o'clock
positions.
Climate Control Voice Commands
E142599
Press the voice button on the
steering wheel controls. When
prompted, say any of the following
or a similar command:
453
MyLincoln Touch™