all LINCOLN MKZ 2017 Manual PDF
[x] Cancel search | Manufacturer: LINCOLN, Model Year: 2017, Model line: MKZ, Model: LINCOLN MKZ 2017Pages: 564, PDF Size: 5.54 MB
Page 93 of 564
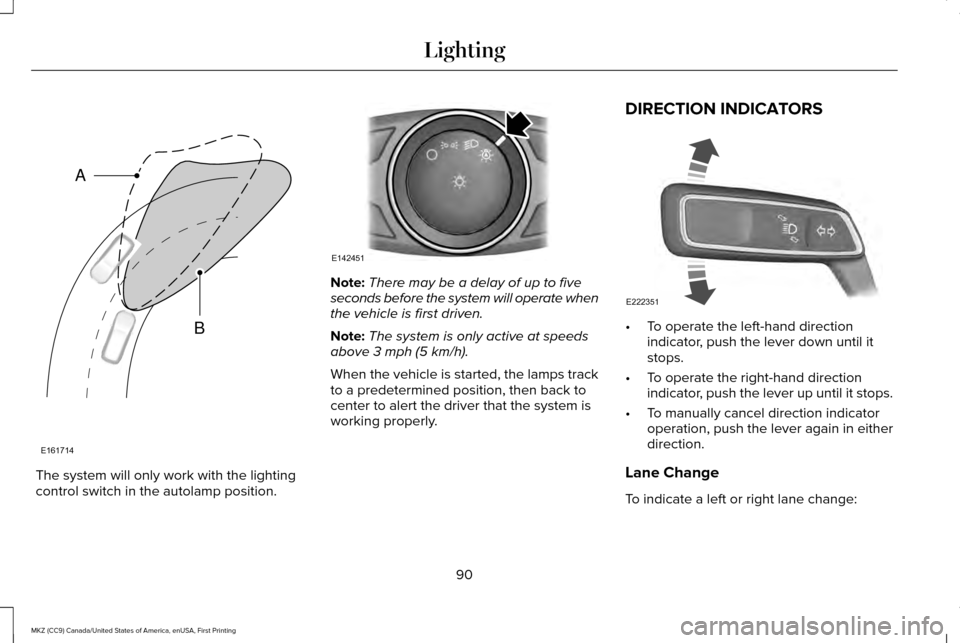
The system will only work with the lighting
control switch in the autolamp position. Note:
There may be a delay of up to five
seconds before the system will operate when
the vehicle is first driven.
Note: The system is only active at speeds
above 3 mph (5 km/h).
When the vehicle is started, the lamps track
to a predetermined position, then back to
center to alert the driver that the system is
working properly. DIRECTION INDICATORS
•
To operate the left-hand direction
indicator, push the lever down until it
stops.
• To operate the right-hand direction
indicator, push the lever up until it stops.
• To manually cancel direction indicator
operation, push the lever again in either
direction.
Lane Change
To indicate a left or right lane change:
90
MKZ (CC9) Canada/United States of America, enUSA, First Printing LightingE161714
B
A E142451 E222351
Page 94 of 564
•
Push the lever up or down to the first
stop position and release. The direction
indicator will flash three times and stop.
• Push the lever up or down to the first
stop position and hold. The direction
indicator will flash for as long as you hold
the lever in this position.
WELCOME LIGHTING
The Lincoln welcome mat projection lights
are on the bottom of the exterior mirror
housings. They will project an image onto
the ground a short distance from your vehicle
when welcome lighting or lighted entry turns
on.
Note: Moisture, frost and ice build-up or
other types of contamination on the surface
of the light lens can cause non-permanent
distortion or reduced brightness of the
image. Do not use abrasive materials to
clean the lens.
INTERIOR LAMPS
The lamps switch on when: •
You open any door.
• You press a remote control button.
• You press the all lamps on switch on the
front interior lamp.
Front Interior Lamp
Note: The front interior lamp switches are
on the overhead console. The exact location
of each switch on the overhead console
depends upon which roof, sunroof, and
window shade features are on your vehicle.
Note: Press the door function switch to
switch off when you open any door. The
indicator lamp illuminates amber when the
door function is off. When the door function
is off and you open a door, the courtesy and
door lamps stay off. Press the door function
switch again to switch back on. The indicator
lamp illuminates white when the door
function is on. When the door function is on
and you open a door, the courtesy and door
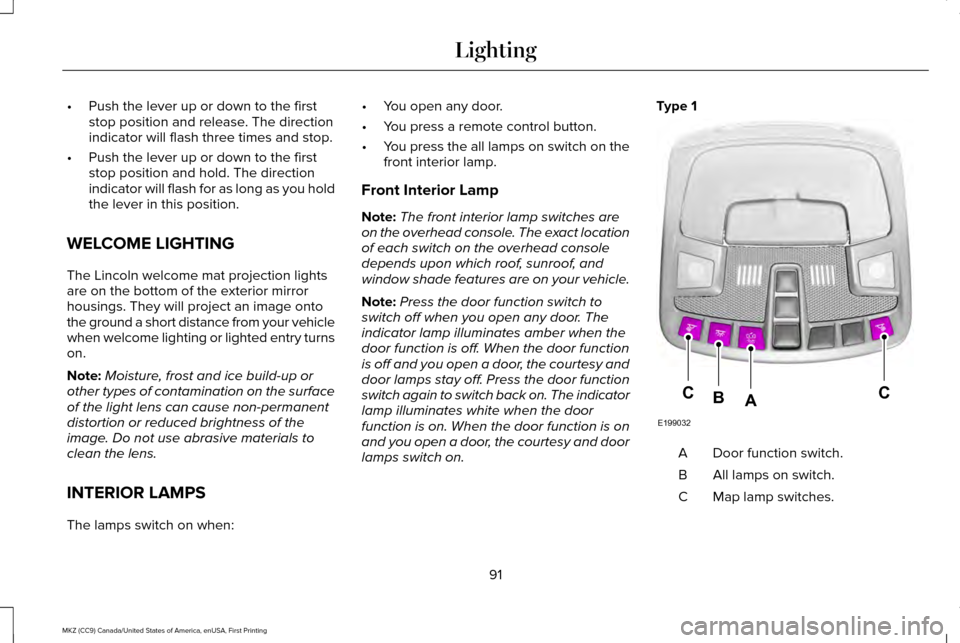
lamps switch on. Type 1
Door function switch.
A
All lamps on switch.
B
Map lamp switches.
C
91
MKZ (CC9) Canada/United States of America, enUSA, First Printing LightingE199032
CCAB
Page 95 of 564
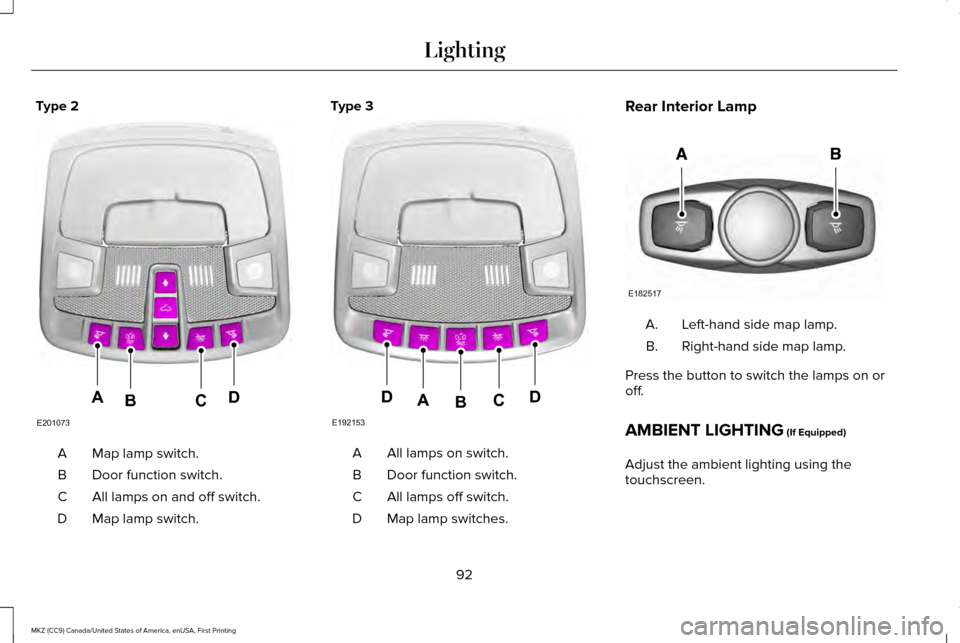
Type 2
Map lamp switch.
A
Door function switch.
B
All lamps on and off switch.
C
Map lamp switch.
D Type 3
All lamps on switch.
A
Door function switch.
B
All lamps off switch.
C
Map lamp switches.
D Rear Interior Lamp
Left-hand side map lamp.
A.
Right-hand side map lamp.
B.
Press the button to switch the lamps on or
off.
AMBIENT LIGHTING (If Equipped)
Adjust the ambient lighting using the
touchscreen.
92
MKZ (CC9) Canada/United States of America, enUSA, First Printing LightingE201073
ADCB E192153
DDCAB E182517
Page 96 of 564
POWER WINDOWS
WARNINGS
Do not leave children unattended in
your vehicle and do not let them play
with the power windows. They may seriously
injure themselves. When closing the power windows, you
should verify they are free of
obstructions and make sure that children and
pets are not in the proximity of the window
openings. Note:
You may hear a pulsing noise when
just one of the windows is open. Lower the
opposite window slightly to reduce this
noise.
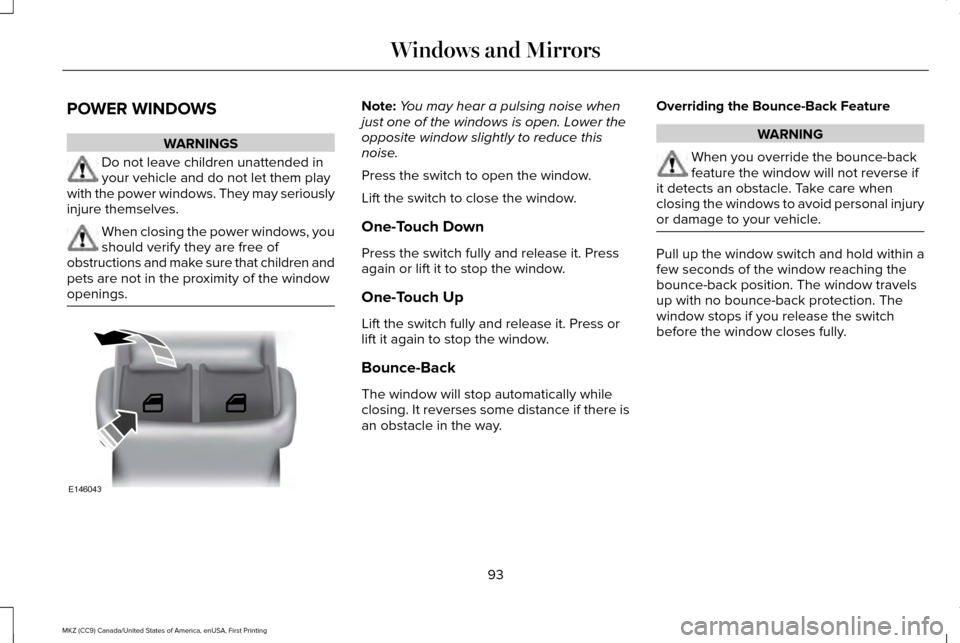
Press the switch to open the window.
Lift the switch to close the window.
One-Touch Down
Press the switch fully and release it. Press
again or lift it to stop the window.
One-Touch Up
Lift the switch fully and release it. Press or
lift it again to stop the window.
Bounce-Back
The window will stop automatically while
closing. It reverses some distance if there is
an obstacle in the way. Overriding the Bounce-Back Feature WARNING
When you override the bounce-back
feature the window will not reverse if
it detects an obstacle. Take care when
closing the windows to avoid personal injury
or damage to your vehicle. Pull up the window switch and hold within a
few seconds of the window reaching the
bounce-back position. The window travels
up with no bounce-back protection. The
window stops if you release the switch
before the window closes fully.
93
MKZ (CC9) Canada/United States of America, enUSA, First Printing Windows and MirrorsE146043
Page 98 of 564
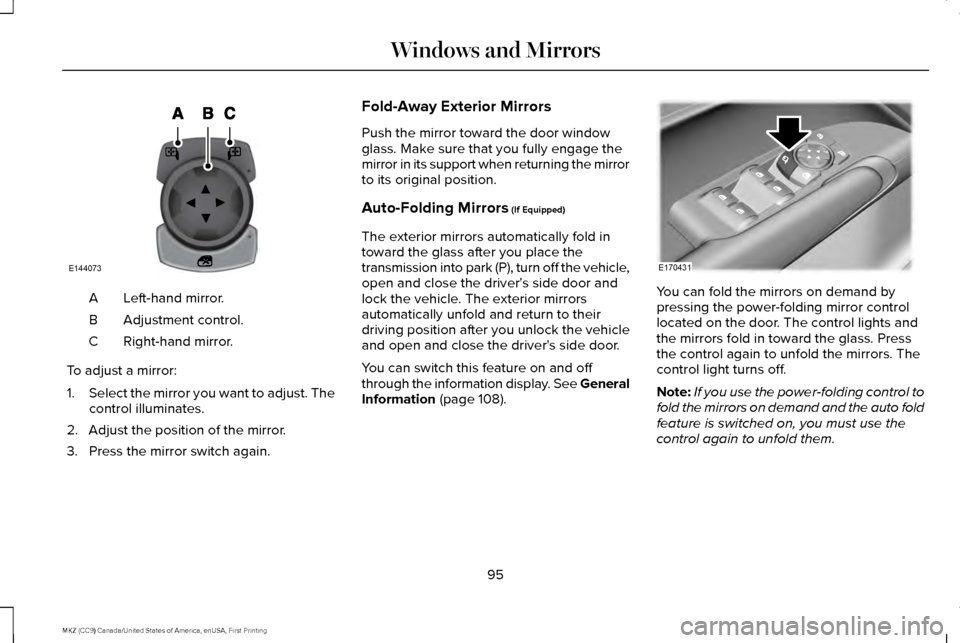
Left-hand mirror.
A
Adjustment control.
B
Right-hand mirror.
C
To adjust a mirror:
1. Select the mirror you want to adjust. The
control illuminates.
2. Adjust the position of the mirror.
3. Press the mirror switch again. Fold-Away Exterior Mirrors
Push the mirror toward the door window
glass. Make sure that you fully engage the
mirror in its support when returning the mirror
to its original position.
Auto-Folding Mirrors (If Equipped)
The exterior mirrors automatically fold in
toward the glass after you place the
transmission into park (P), turn off the vehicle,
open and close the driver's side door and
lock the vehicle. The exterior mirrors
automatically unfold and return to their
driving position after you unlock the vehicle
and open and close the driver's side door.
You can switch this feature on and off
through the information display. See General
Information
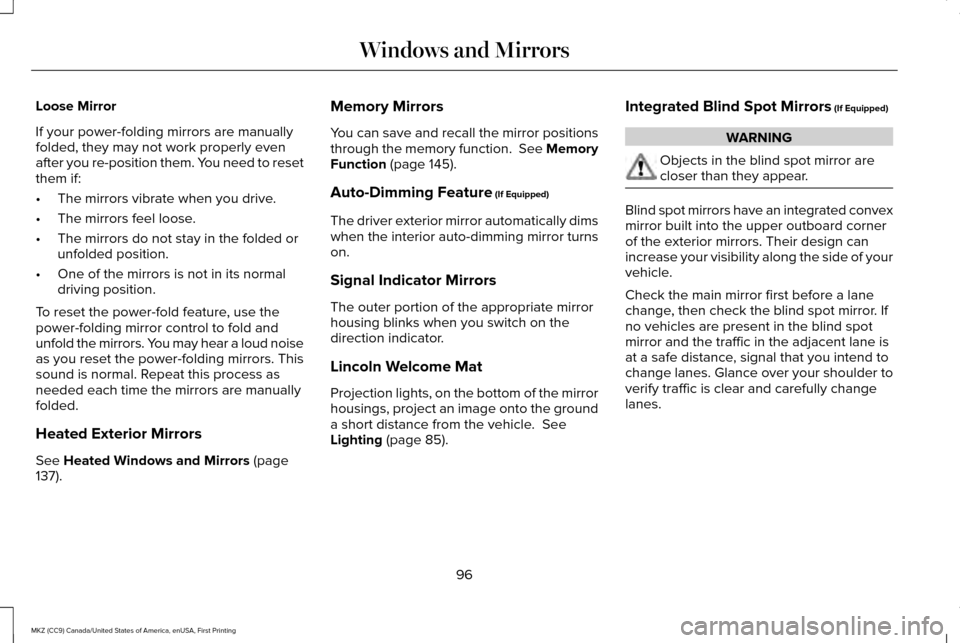
(page 108). You can fold the mirrors on demand by
pressing the power-folding mirror control
located on the door. The control lights and
the mirrors fold in toward the glass. Press
the control again to unfold the mirrors. The
control light turns off.
Note:
If you use the power-folding control to
fold the mirrors on demand and the auto fold
feature is switched on, you must use the
control again to unfold them.
95
MKZ (CC9) Canada/United States of America, enUSA, First Printing Windows and MirrorsE144073 E170431
Page 99 of 564
Loose Mirror
If your power-folding mirrors are manually
folded, they may not work properly even
after you re-position them. You need to reset
them if:
•
The mirrors vibrate when you drive.
• The mirrors feel loose.
• The mirrors do not stay in the folded or
unfolded position.
• One of the mirrors is not in its normal
driving position.
To reset the power-fold feature, use the
power-folding mirror control to fold and
unfold the mirrors. You may hear a loud noise
as you reset the power-folding mirrors. This
sound is normal. Repeat this process as
needed each time the mirrors are manually
folded.
Heated Exterior Mirrors
See Heated Windows and Mirrors (page
137). Memory Mirrors
You can save and recall the mirror positions
through the memory function. See Memory
Function
(page 145).
Auto-Dimming Feature
(If Equipped)
The driver exterior mirror automatically dims
when the interior auto-dimming mirror turns
on.
Signal Indicator Mirrors
The outer portion of the appropriate mirror
housing blinks when you switch on the
direction indicator.
Lincoln Welcome Mat
Projection lights, on the bottom of the mirror
housings, project an image onto the ground
a short distance from the vehicle.
See
Lighting (page 85). Integrated Blind Spot Mirrors
(If Equipped) WARNING
Objects in the blind spot mirror are
closer than they appear.
Blind spot mirrors have an integrated convex
mirror built into the upper outboard corner
of the exterior mirrors. Their design can
increase your visibility along the side of your
vehicle.
Check the main mirror first before a lane
change, then check the blind spot mirror. If
no vehicles are present in the blind spot
mirror and the traffic in the adjacent lane is
at a safe distance, signal that you intend to
change lanes. Glance over your shoulder to
verify traffic is clear and carefully change
lanes.
96
MKZ (CC9) Canada/United States of America, enUSA, First Printing Windows and Mirrors
Page 100 of 564
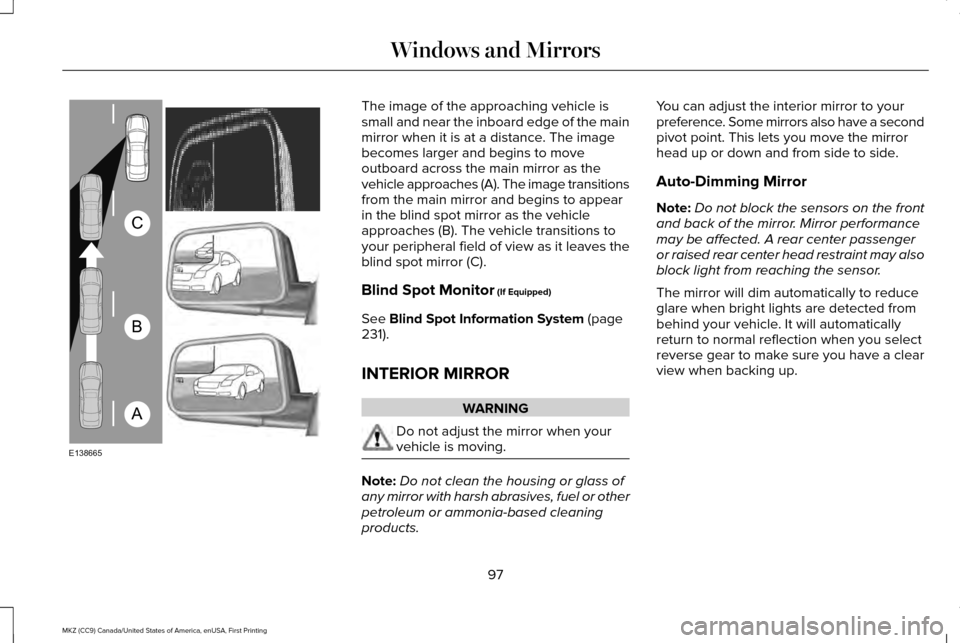
The image of the approaching vehicle is
small and near the inboard edge of the main
mirror when it is at a distance. The image
becomes larger and begins to move
outboard across the main mirror as the
vehicle approaches (A). The image transitions
from the main mirror and begins to appear
in the blind spot mirror as the vehicle
approaches (B). The vehicle transitions to
your peripheral field of view as it leaves the
blind spot mirror (C).
Blind Spot Monitor (If Equipped)
See
Blind Spot Information System (page
231).
INTERIOR MIRROR WARNING
Do not adjust the mirror when your
vehicle is moving.
Note:
Do not clean the housing or glass of
any mirror with harsh abrasives, fuel or other
petroleum or ammonia-based cleaning
products. You can adjust the interior mirror to your
preference. Some mirrors also have a second
pivot point. This lets you move the mirror
head up or down and from side to side.
Auto-Dimming Mirror
Note:
Do not block the sensors on the front
and back of the mirror. Mirror performance
may be affected. A rear center passenger
or raised rear center head restraint may also
block light from reaching the sensor.
The mirror will dim automatically to reduce
glare when bright lights are detected from
behind your vehicle. It will automatically
return to normal reflection when you select
reverse gear to make sure you have a clear
view when backing up.
97
MKZ (CC9) Canada/United States of America, enUSA, First Printing Windows and MirrorsA
B
C
E138665
Page 101 of 564
SUN VISORS
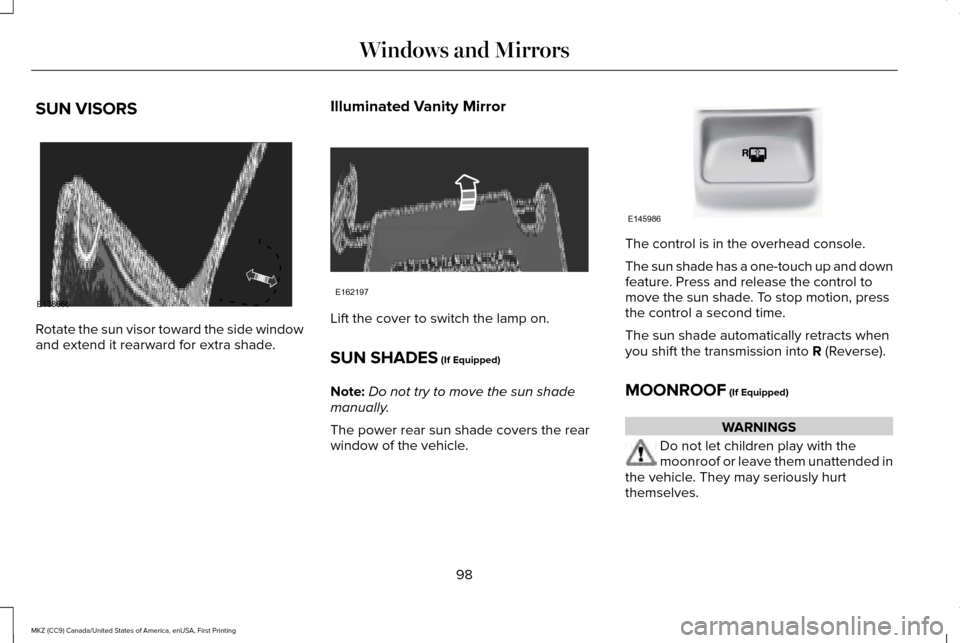
Rotate the sun visor toward the side window
and extend it rearward for extra shade.
Illuminated Vanity Mirror Lift the cover to switch the lamp on.
SUN SHADES (If Equipped)
Note: Do not try to move the sun shade
manually.
The power rear sun shade covers the rear
window of the vehicle. The control is in the overhead console.
The sun shade has a one-touch up and down
feature. Press and release the control to
move the sun shade. To stop motion, press
the control a second time.
The sun shade automatically retracts when
you shift the transmission into R (Reverse).
MOONROOF
(If Equipped) WARNINGS
Do not let children play with the
moonroof or leave them unattended in
the vehicle. They may seriously hurt
themselves.
98
MKZ (CC9) Canada/United States of America, enUSA, First Printing Windows and MirrorsE138666 E162197 E145986
Page 102 of 564
WARNINGS
When closing the moonroof, you
should verify that it is free of
obstructions and make sure that children and
pets are not in the proximity of the roof
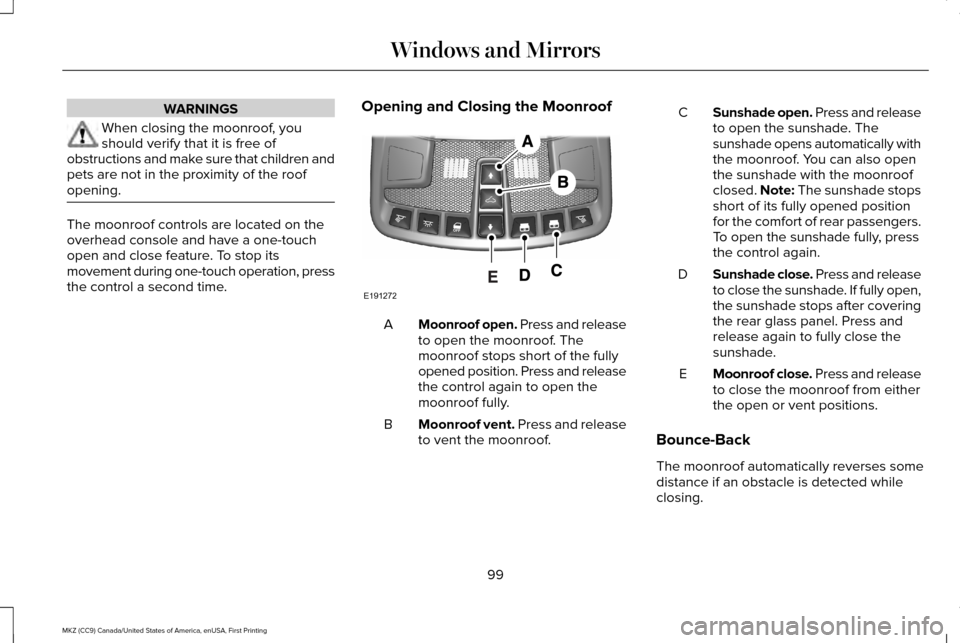
opening. The moonroof controls are located on the
overhead console and have a one-touch
open and close feature. To stop its
movement during one-touch operation, press
the control a second time.
Opening and Closing the Moonroof Moonroof open. Press and release
to open the moonroof. The
moonroof stops short of the fully
opened position. Press and release
the control again to open the
moonroof fully.
A
Moonroof vent. Press and release
to vent the moonroof.
B Sunshade open. Press and release
to open the sunshade. The
sunshade opens automatically with
the moonroof. You can also open
the sunshade with the moonroof
closed. Note: The sunshade stops
short of its fully opened position
for the comfort of rear passengers.
To open the sunshade fully, press
the control again.
C
Sunshade close. Press and release
to close the sunshade. If fully open,
the sunshade stops after covering
the rear glass panel. Press and
release again to fully close the
sunshade.
D
Moonroof close. Press and release
to close the moonroof from either
the open or vent positions.
E
Bounce-Back
The moonroof automatically reverses some
distance if an obstacle is detected while
closing.
99
MKZ (CC9) Canada/United States of America, enUSA, First Printing Windows and MirrorsE191272
Page 105 of 564
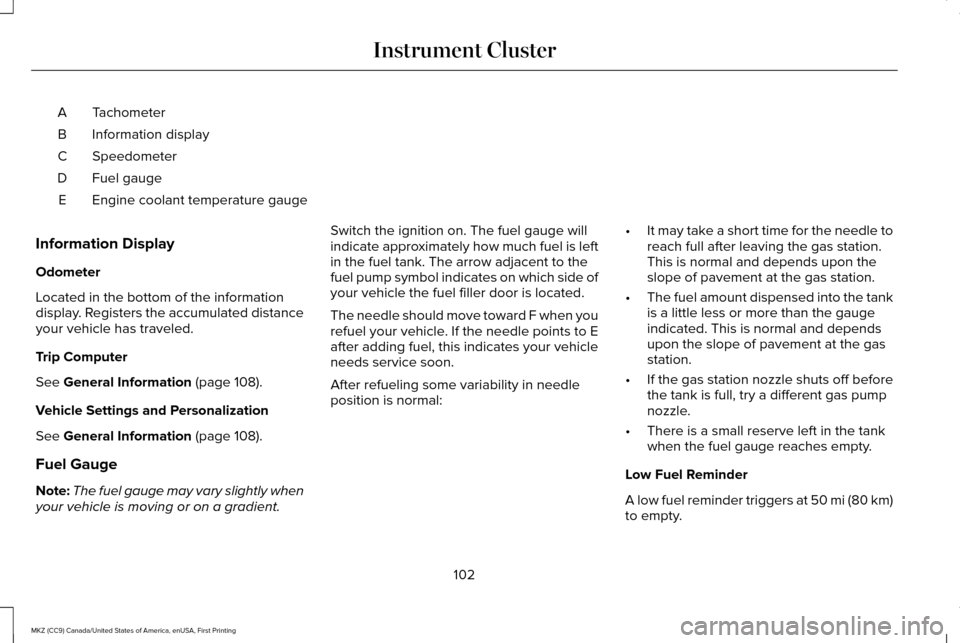
Tachometer
A
Information display
B
Speedometer
C
Fuel gauge
D
Engine coolant temperature gauge
E
Information Display
Odometer
Located in the bottom of the information
display. Registers the accumulated distance
your vehicle has traveled.
Trip Computer
See General Information (page 108).
Vehicle Settings and Personalization
See
General Information (page 108).
Fuel Gauge
Note: The fuel gauge may vary slightly when
your vehicle is moving or on a gradient. Switch the ignition on. The fuel gauge will
indicate approximately how much fuel is left
in the fuel tank. The arrow adjacent to the
fuel pump symbol indicates on which side of
your vehicle the fuel filler door is located.
The needle should move toward F when you
refuel your vehicle. If the needle points to E
after adding fuel, this indicates your vehicle
needs service soon.
After refueling some variability in needle
position is normal:
•
It may take a short time for the needle to
reach full after leaving the gas station.
This is normal and depends upon the
slope of pavement at the gas station.
• The fuel amount dispensed into the tank
is a little less or more than the gauge
indicated. This is normal and depends
upon the slope of pavement at the gas
station.
• If the gas station nozzle shuts off before
the tank is full, try a different gas pump
nozzle.
• There is a small reserve left in the tank
when the fuel gauge reaches empty.
Low Fuel Reminder
A low fuel reminder triggers at 50 mi (80 km)
to empty.
102
MKZ (CC9) Canada/United States of America, enUSA, First Printing Instrument Cluster