clock LINCOLN MKZ 2018 User Guide
[x] Cancel search | Manufacturer: LINCOLN, Model Year: 2018, Model line: MKZ, Model: LINCOLN MKZ 2018Pages: 595, PDF Size: 5.06 MB
Page 314 of 595
Note:Automotive fluids are notinterchangeable. Do not use coolant orwindshield washer fluid outside of itsspecified function and vehicle location.
Note: Do not use stop leak pellets, coolingsystem sealants, or non-specified additivesas they can cause damage to the enginecooling or heating systems. Resultingcomponent damage may not be covered bythe vehicle Warranty.
Adding Coolant
WARNINGS
Do not add engine coolant when theengine is hot. Failure to follow thisinstruction could result in personal injury.
Never remove the coolant reservoircap when the engine is running or hot.
It is very important to use prediluted coolantmeeting the correct specification in order toavoid plugging the small passageways in theengine cooling system. See Capacities andSpecifications (page 380). Incorrectprediluted coolant use can cause damagenot covered by the vehicle Warranty.
If the coolant level is at or below theminimum mark, add prediluted coolantimmediately.
To top up the coolant level do the following:
1. Unscrew the cap slowly. Any pressureescapes as you unscrew the cap.
2. Add prediluted coolant meeting thecorrect specification. See Capacities andSpecifications (page 373).
3.Add enough prediluted coolant to reachthe correct level.
4. Replace the coolant reservoir cap, turnit clockwise until you feel a strongresistance.
5. Check the coolant level in the coolantreservoir the next few times you driveyour vehicle.
Note:During normal vehicle operation, thecoolant may change color from orange topink or light red. As long as the coolant isclear and uncontaminated, this color changedoes not indicate the coolant has degradednor does it require the coolant to be drained,the system to be flushed, or the coolant tobe replaced.
Do not mix different colors or types ofprediluted coolant in your vehicle. Mixing ofprediluted coolant or using an incorrectprediluted coolant may harm the engine orcooling system components and may not becovered by the vehicle Warranty.
In case of emergency, you can add a largeamount of water without engine coolant inorder to reach a vehicle service location. Inthis instance, qualified personnel:
1. Must drain the cooling system.
2. Chemically clean the cooling system.
3. Refill with prediluted coolant as soon aspossible.
Water alone, without prediluted coolant, cancause engine damage from corrosion,overheating or freezing.
Do not use the following as a coolantsubstitute:
•Alcohol.
•Methanol.
•Brine.
•Any coolant mixed with alcohol ormethanol antifreeze.
311
MKZ (CC9) Canada/United States of America, enUSA, Edition date: 201706, First Printing
Maintenance
Page 319 of 595
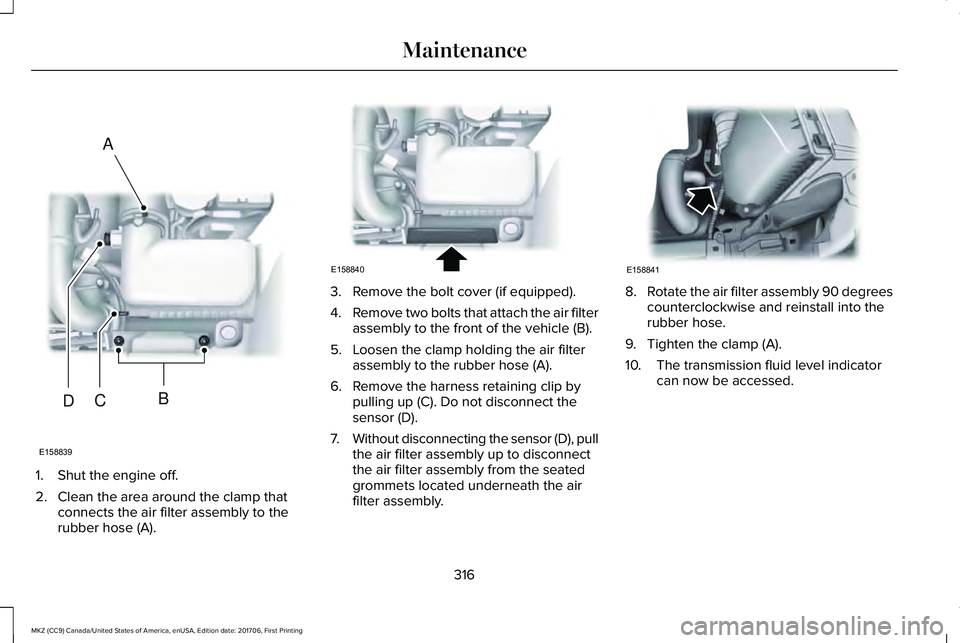
1. Shut the engine off.
2. Clean the area around the clamp thatconnects the air filter assembly to therubber hose (A).
3. Remove the bolt cover (if equipped).
4.Remove two bolts that attach the air filterassembly to the front of the vehicle (B).
5. Loosen the clamp holding the air filterassembly to the rubber hose (A).
6. Remove the harness retaining clip bypulling up (C). Do not disconnect thesensor (D).
7.Without disconnecting the sensor (D), pullthe air filter assembly up to disconnectthe air filter assembly from the seatedgrommets located underneath the airfilter assembly.
8.Rotate the air filter assembly 90 degreescounterclockwise and reinstall into therubber hose.
9. Tighten the clamp (A).
10. The transmission fluid level indicatorcan now be accessed.
316
MKZ (CC9) Canada/United States of America, enUSA, Edition date: 201706, First Printing
MaintenanceE158839
A
BCD E158840 E158841
Page 321 of 595
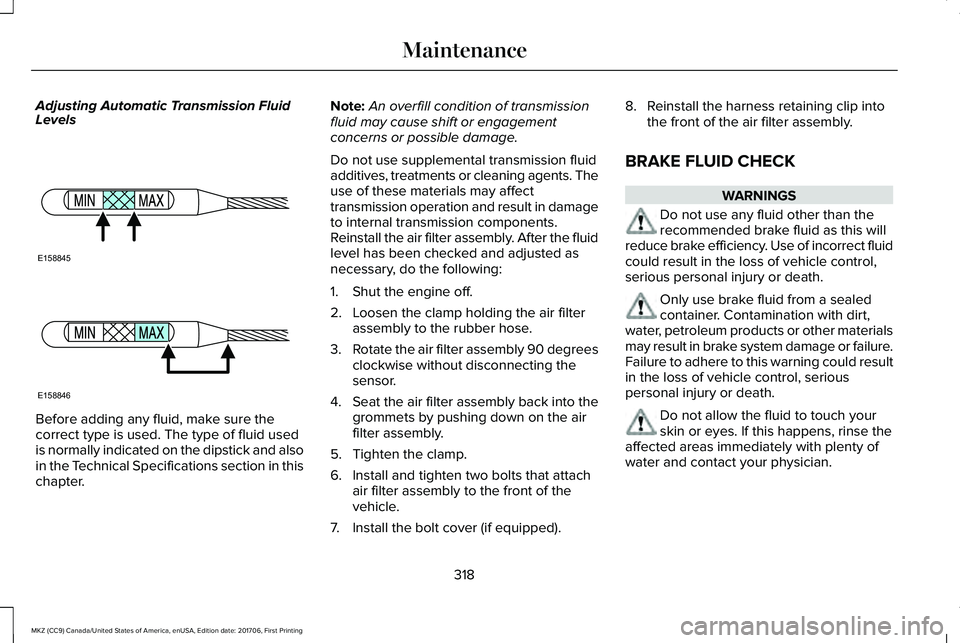
Adjusting Automatic Transmission FluidLevels
Before adding any fluid, make sure thecorrect type is used. The type of fluid usedis normally indicated on the dipstick and alsoin the Technical Specifications section in thischapter.
Note:An overfill condition of transmissionfluid may cause shift or engagementconcerns or possible damage.
Do not use supplemental transmission fluidadditives, treatments or cleaning agents. Theuse of these materials may affecttransmission operation and result in damageto internal transmission components.Reinstall the air filter assembly. After the fluidlevel has been checked and adjusted asnecessary, do the following:
1. Shut the engine off.
2. Loosen the clamp holding the air filterassembly to the rubber hose.
3.Rotate the air filter assembly 90 degreesclockwise without disconnecting thesensor.
4.Seat the air filter assembly back into thegrommets by pushing down on the airfilter assembly.
5. Tighten the clamp.
6. Install and tighten two bolts that attachair filter assembly to the front of thevehicle.
7. Install the bolt cover (if equipped).
8. Reinstall the harness retaining clip intothe front of the air filter assembly.
BRAKE FLUID CHECK
WARNINGS
Do not use any fluid other than therecommended brake fluid as this willreduce brake efficiency. Use of incorrect fluidcould result in the loss of vehicle control,serious personal injury or death.
Only use brake fluid from a sealedcontainer. Contamination with dirt,water, petroleum products or other materialsmay result in brake system damage or failure.Failure to adhere to this warning could resultin the loss of vehicle control, seriouspersonal injury or death.
Do not allow the fluid to touch yourskin or eyes. If this happens, rinse theaffected areas immediately with plenty ofwater and contact your physician.
318
MKZ (CC9) Canada/United States of America, enUSA, Edition date: 201706, First Printing
MaintenanceE158845 E158846
Page 323 of 595
WARNINGS
Keep batteries out of reach of children.Batteries contain sulfuric acid. Avoidcontact with skin, eyes or clothing. Shieldyour eyes when working near the battery toprotect against possible splashing of acidsolution. In case of acid contact with skin oreyes, flush immediately with water for aminimum of 15 minutes and get promptmedical attention. If acid is swallowed, call aphysician immediately.
Battery posts, terminals and relatedaccessories contain lead and leadcompounds. Wash hands after handling.
For vehicles with Auto-Start-Stop thebattery requirement is different. Youmust replace the battery with one of exactlythe same specification.
Your vehicle is fitted with a Motorcraftmaintenance-free battery which normallydoes not require additional water.
When a battery replacement is required, youmust use a recommended replacementbattery that matches the electricalrequirements of the vehicle.
Note:If your vehicle has a battery cover,after cleaning or replacing the battery, makesure you reinstall it.
Note:See an authorized dealer for batteryaccess, testing, or replacement.
To make sure the battery managementsystem works correctly, do not connect anelectrical device ground connection directlyto the battery negative post. This can causeinaccurate measurements of the batterycondition and potential incorrect systemoperation.
Note:If you add electrical accessories orcomponents to the vehicle, it may adverselyaffect battery performance and durability.This may also affect the performance ofother electrical systems in the vehicle.
If you see any corrosion on the battery orterminals, remove the cables from theterminals and clean with a wire brush. Youcan neutralize the acid with a solution ofbaking soda and water.
Because your vehicle’s engine iselectronically-controlled by a computer,some engine control settings are maintainedby power from the battery. Some enginecomputer settings, like the idle trim and fueltrim strategy, optimize the driveability andperformance of the engine. The clock andradio station presets are also maintained inmemory by power from the low-voltagebattery. These settings are erased when atechnician disconnects and connects thelow-voltage battery.
To restore the settings, do the following:
Note:Until you switch the ignition to the onposition, you will receive a message in yourinformation display stating that your vehicleis not in park.
1. Apply the parking brake.
2. Shift into park (P) or neutral (N).
3. Switch off all accessories.
4. Press the brake pedal and start yourvehicle.
320
MKZ (CC9) Canada/United States of America, enUSA, Edition date: 201706, First Printing
Maintenance
Page 324 of 595
5. Run the engine until it reaches normaloperating temperature. While the engineis warming up, complete the following:Reset the clock. See Audio Unit (page395). Reset the power windowsbounce-back feature. See PowerWindows (page 96). Reset the radiostation presets. See Audio Unit (page395).
6. Allow the engine to idle for at least oneminute.
7.Drive the vehicle at least 10 mi (16 km) tocompletely relearn the idle trim and fueltrim strategy.
Note:If you do not allow the engine torelearn the idle and fuel trim strategy, theidle quality of your vehicle may be adverselyaffected until the engine computereventually relearns the idle trim and fuel trimstrategy.
Note:Certain features may not operate ifthe battery monitor system is not reset witha scan tool following a jump start or batteryreplacement. Normal electrical accessoryoperation should resume after your vehicleis left undisturbed for 8 hours.
Make sure that you dispose of old batteriesin an environmentally friendly way. Seekadvice from your local authority aboutrecycling old batteries.
If storing your vehicle for more than 30 dayswithout recharging the battery, werecommend that you disconnect the batterycables to maintain battery charge for quickstarting.
CHECKING THE WIPER BLADES
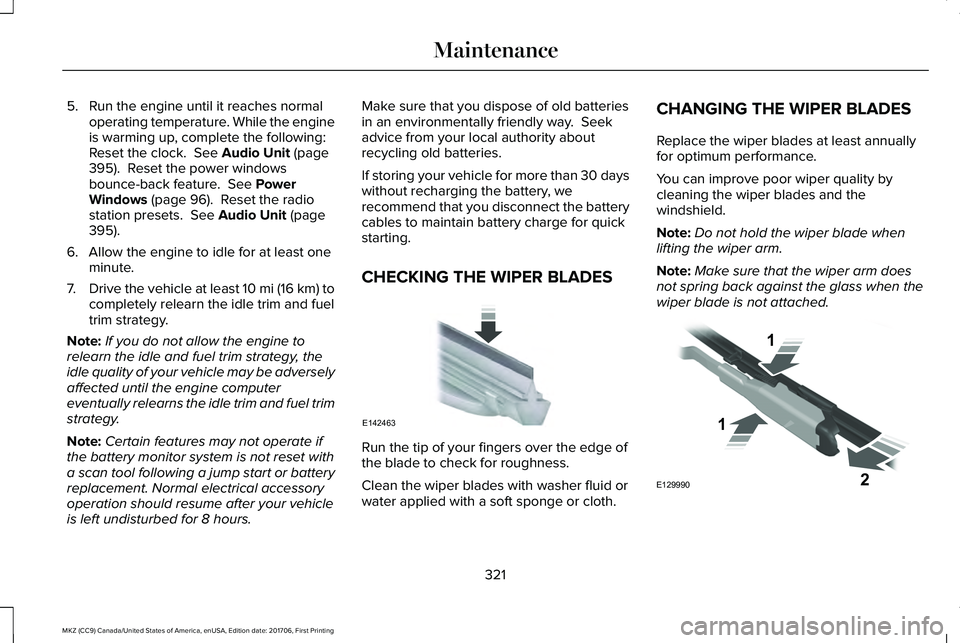
Run the tip of your fingers over the edge ofthe blade to check for roughness.
Clean the wiper blades with washer fluid orwater applied with a soft sponge or cloth.
CHANGING THE WIPER BLADES
Replace the wiper blades at least annuallyfor optimum performance.
You can improve poor wiper quality bycleaning the wiper blades and thewindshield.
Note:Do not hold the wiper blade whenlifting the wiper arm.
Note:Make sure that the wiper arm doesnot spring back against the glass when thewiper blade is not attached.
321
MKZ (CC9) Canada/United States of America, enUSA, Edition date: 201706, First Printing
MaintenanceE142463 E129990
1
1 2
Page 326 of 595
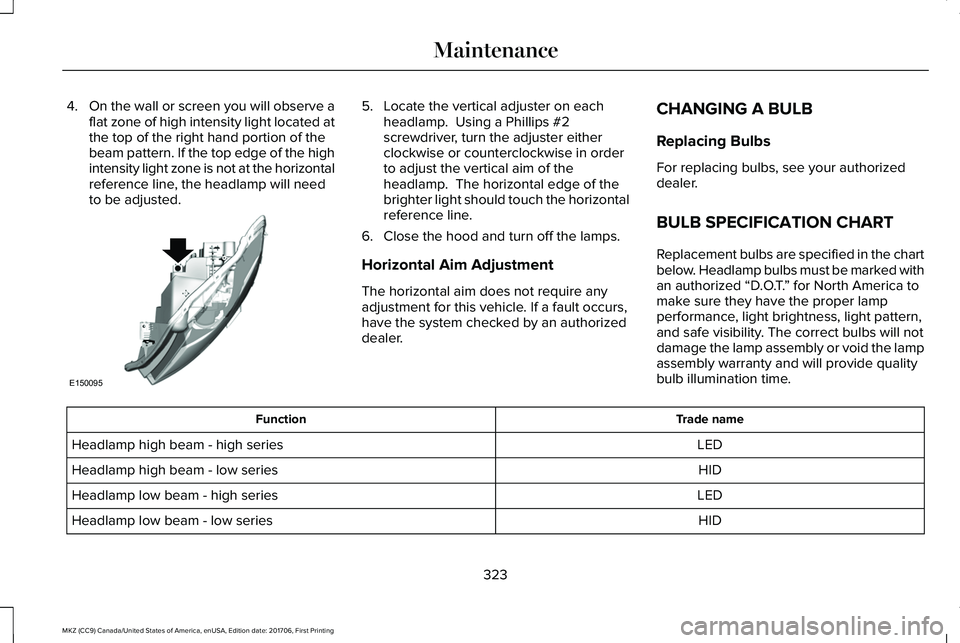
4.On the wall or screen you will observe aflat zone of high intensity light located atthe top of the right hand portion of thebeam pattern. If the top edge of the highintensity light zone is not at the horizontalreference line, the headlamp will needto be adjusted.
5. Locate the vertical adjuster on eachheadlamp. Using a Phillips #2screwdriver, turn the adjuster eitherclockwise or counterclockwise in orderto adjust the vertical aim of theheadlamp. The horizontal edge of thebrighter light should touch the horizontalreference line.
6. Close the hood and turn off the lamps.
Horizontal Aim Adjustment
The horizontal aim does not require anyadjustment for this vehicle. If a fault occurs,have the system checked by an authorizeddealer.
CHANGING A BULB
Replacing Bulbs
For replacing bulbs, see your authorizeddealer.
BULB SPECIFICATION CHART
Replacement bulbs are specified in the chartbelow. Headlamp bulbs must be marked withan authorized “D.O.T.” for North America tomake sure they have the proper lampperformance, light brightness, light pattern,and safe visibility. The correct bulbs will notdamage the lamp assembly or void the lampassembly warranty and will provide qualitybulb illumination time.
Trade nameFunction
LEDHeadlamp high beam - high series
HIDHeadlamp high beam - low series
LEDHeadlamp low beam - high series
HIDHeadlamp low beam - low series
323
MKZ (CC9) Canada/United States of America, enUSA, Edition date: 201706, First Printing
MaintenanceE150095
Page 341 of 595
What to do when a Tire Is Punctured
A tire puncture within the tire's tread areacan be repaired in two stages with the kit:
•In the first stage, the tire will be reinflatedwith a sealing compound and air. Afterthe tire has been inflated, you will needto drive the vehicle about 3.7 mi (6 km)to distribute the sealant in the tire.
•In the second stage, you will need tocheck the tire pressure and adjust, ifnecessary, to the vehicle's specified tireinflation pressure.
First Stage: Reinflating the Tire withSealing Compound and Air
WARNING
Do not stand directly beside the tirewhile the compressor is operating. Thiscould cause personal injury if the tire bursts.
Note:If the tire does not inflate to therecommended tire pressure within 15minutes, stop and call roadside assistance.
WARNINGS
Watch the sidewall of the tire wheninflating. If any cracks, bumps or similardamage appears, switch the compressor offand let the air out by means of the pressurerelief valve. Do not continue driving with thistire. This could cause loss of vehicle control.
Do not run the engine when operatingthe air compressor unless the vehicleis outdoors or in a well-ventilated area.
Preparation: Park the vehicle in a safe, leveland secure area, away from moving traffic.
Turn the hazard lights on. Apply the parkingbrake and turn the engine off. Inspect theflat tire for visible damage.
Sealant compound contains latex. Useappropriate precautions to avoid any allergicreactions.
Do not remove any foreign object that haspierced the tire. If a puncture is located inthe tire sidewall, stop and call roadsideassistance.
1.Remove the valve cap from the tire valve.
2. Unwrap the dual purpose hose (blacktube) from the back of the compressorhousing.
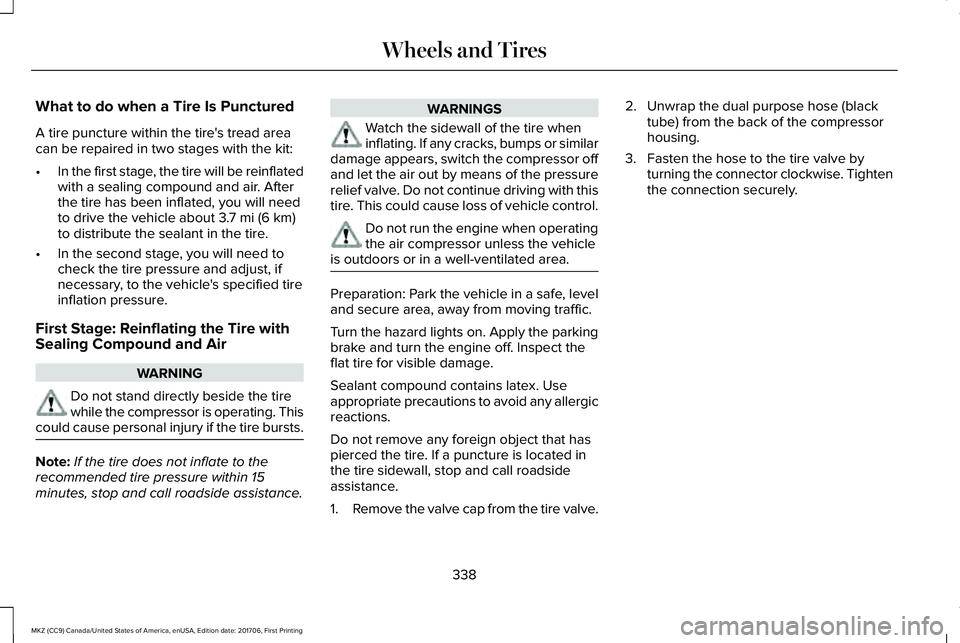
3. Fasten the hose to the tire valve byturning the connector clockwise. Tightenthe connection securely.
338
MKZ (CC9) Canada/United States of America, enUSA, Edition date: 201706, First Printing
Wheels and Tires
Page 342 of 595
4. Plug the power cable into the 12-voltpower point in the vehicle.
5.Remove the warning sticker found on thecasing/housing and place it on the top ofthe instrument panel or the center of thedash.
6.Start the vehicle leave the engine runningso the compressor does not drain thevehicle’s battery.
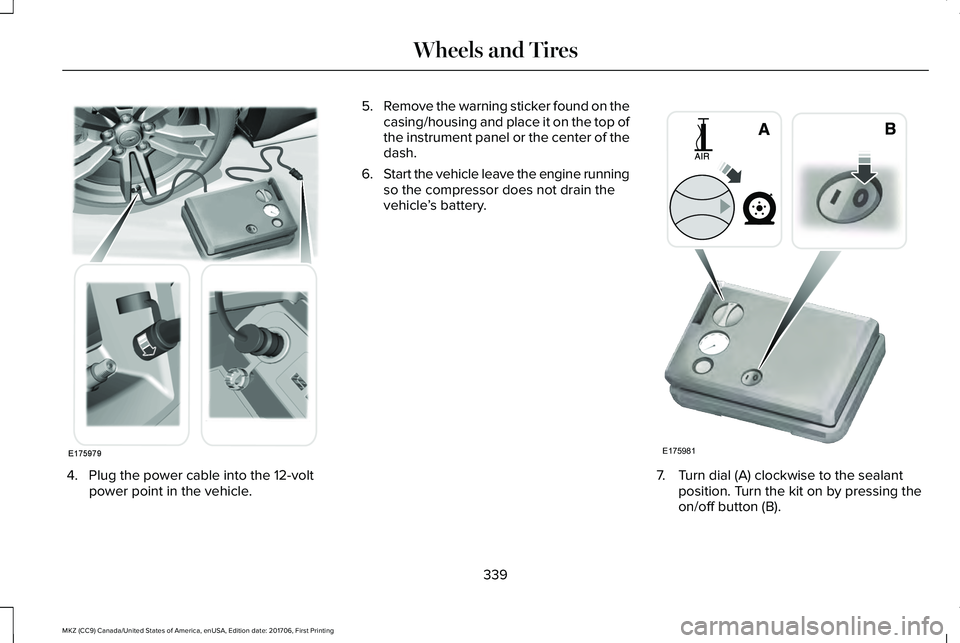
7. Turn dial (A) clockwise to the sealantposition. Turn the kit on by pressing theon/off button (B).
339
MKZ (CC9) Canada/United States of America, enUSA, Edition date: 201706, First Printing
Wheels and TiresE175979 E175981
Page 344 of 595
Note:If you experience any unusualvibration, ride disturbance or noise whiledriving, do not proceed to the second stageof this operation.
Second Stage: Checking Tire Pressure
If you have injected sealant in the tire andthe pressure is below 20 psi (1.4 bar),continue to the next step.
Note:If the tire does not inflate to therecommended tire pressure within 15minutes, stop and call roadside assistance.
WARNING
The air compressor power plug maybe hot after use. Allow it to cool beforehandling. Failure to do so could result inpersonal injury.
Check the air pressure of your tires asfollows:
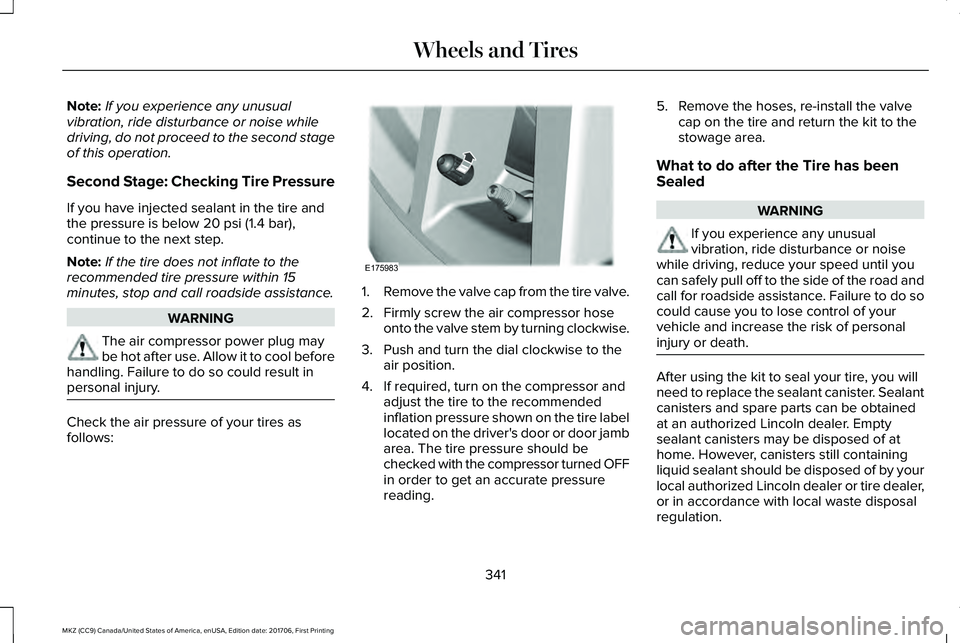
1.Remove the valve cap from the tire valve.
2. Firmly screw the air compressor hoseonto the valve stem by turning clockwise.
3. Push and turn the dial clockwise to theair position.
4. If required, turn on the compressor andadjust the tire to the recommendedinflation pressure shown on the tire labellocated on the driver's door or door jambarea. The tire pressure should bechecked with the compressor turned OFFin order to get an accurate pressurereading.
5. Remove the hoses, re-install the valvecap on the tire and return the kit to thestowage area.
What to do after the Tire has beenSealed
WARNING
If you experience any unusualvibration, ride disturbance or noisewhile driving, reduce your speed until youcan safely pull off to the side of the road andcall for roadside assistance. Failure to do socould cause you to lose control of yourvehicle and increase the risk of personalinjury or death.
After using the kit to seal your tire, you willneed to replace the sealant canister. Sealantcanisters and spare parts can be obtainedat an authorized Lincoln dealer. Emptysealant canisters may be disposed of athome. However, canisters still containingliquid sealant should be disposed of by yourlocal authorized Lincoln dealer or tire dealer,or in accordance with local waste disposalregulation.
341
MKZ (CC9) Canada/United States of America, enUSA, Edition date: 201706, First Printing
Wheels and TiresE175983
Page 369 of 595
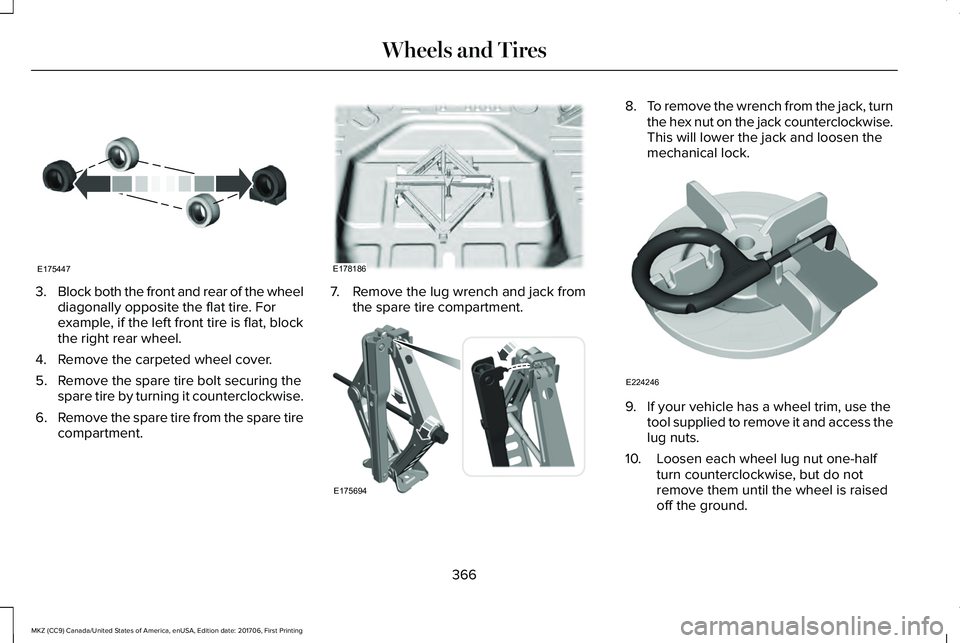
3.Block both the front and rear of the wheeldiagonally opposite the flat tire. Forexample, if the left front tire is flat, blockthe right rear wheel.
4. Remove the carpeted wheel cover.
5. Remove the spare tire bolt securing thespare tire by turning it counterclockwise.
6.Remove the spare tire from the spare tirecompartment.
7. Remove the lug wrench and jack fromthe spare tire compartment.
8.To remove the wrench from the jack, turnthe hex nut on the jack counterclockwise.This will lower the jack and loosen themechanical lock.
9. If your vehicle has a wheel trim, use thetool supplied to remove it and access thelug nuts.
10. Loosen each wheel lug nut one-halfturn counterclockwise, but do notremove them until the wheel is raisedoff the ground.
366
MKZ (CC9) Canada/United States of America, enUSA, Edition date: 201706, First Printing
Wheels and TiresE175447 E178186 E175694 E224246