sensor LINCOLN MKZ 2018 Workshop Manual
[x] Cancel search | Manufacturer: LINCOLN, Model Year: 2018, Model line: MKZ, Model: LINCOLN MKZ 2018Pages: 595, PDF Size: 5.06 MB
Page 299 of 595
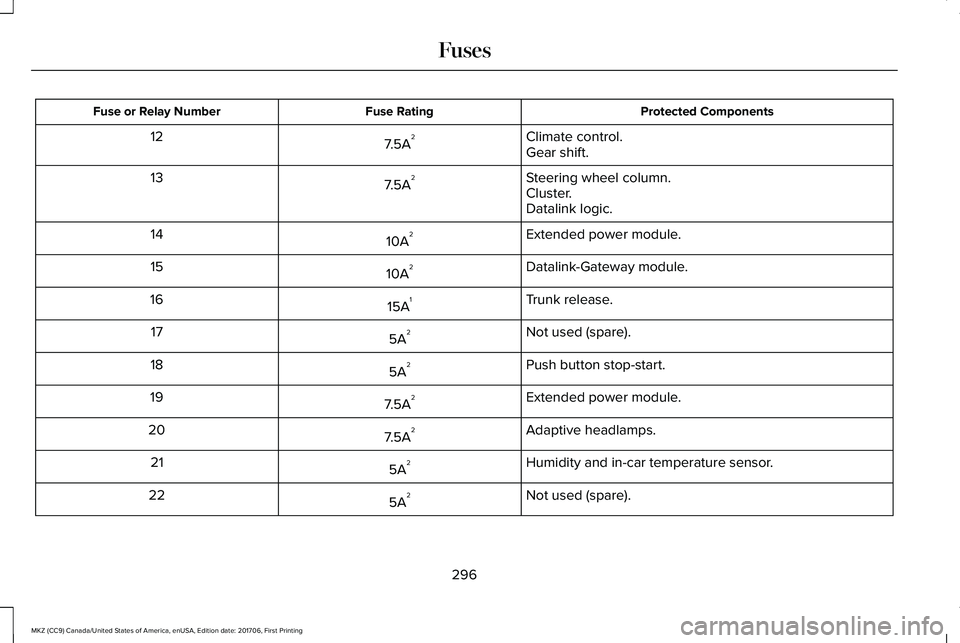
Protected ComponentsFuse RatingFuse or Relay Number
Climate control.7.5A212Gear shift.
Steering wheel column.7.5A213Cluster.Datalink logic.
Extended power module.10A214
Datalink-Gateway module.10A215
Trunk release.15A116
Not used (spare).5A217
Push button stop-start.5A218
Extended power module.7.5A219
Adaptive headlamps.7.5A220
Humidity and in-car temperature sensor.5A221
Not used (spare).5A222
296
MKZ (CC9) Canada/United States of America, enUSA, Edition date: 201706, First Printing
Fuses
Page 319 of 595
1. Shut the engine off.
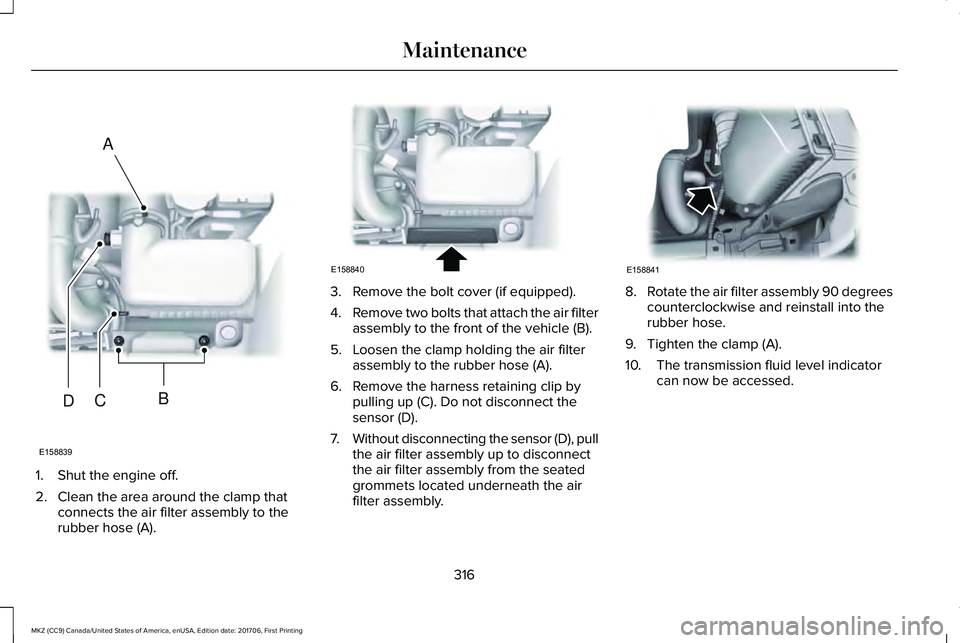
2. Clean the area around the clamp thatconnects the air filter assembly to therubber hose (A).
3. Remove the bolt cover (if equipped).
4.Remove two bolts that attach the air filterassembly to the front of the vehicle (B).
5. Loosen the clamp holding the air filterassembly to the rubber hose (A).
6. Remove the harness retaining clip bypulling up (C). Do not disconnect thesensor (D).
7.Without disconnecting the sensor (D), pullthe air filter assembly up to disconnectthe air filter assembly from the seatedgrommets located underneath the airfilter assembly.
8.Rotate the air filter assembly 90 degreescounterclockwise and reinstall into therubber hose.
9. Tighten the clamp (A).
10. The transmission fluid level indicatorcan now be accessed.
316
MKZ (CC9) Canada/United States of America, enUSA, Edition date: 201706, First Printing
MaintenanceE158839
A
BCD E158840 E158841
Page 321 of 595
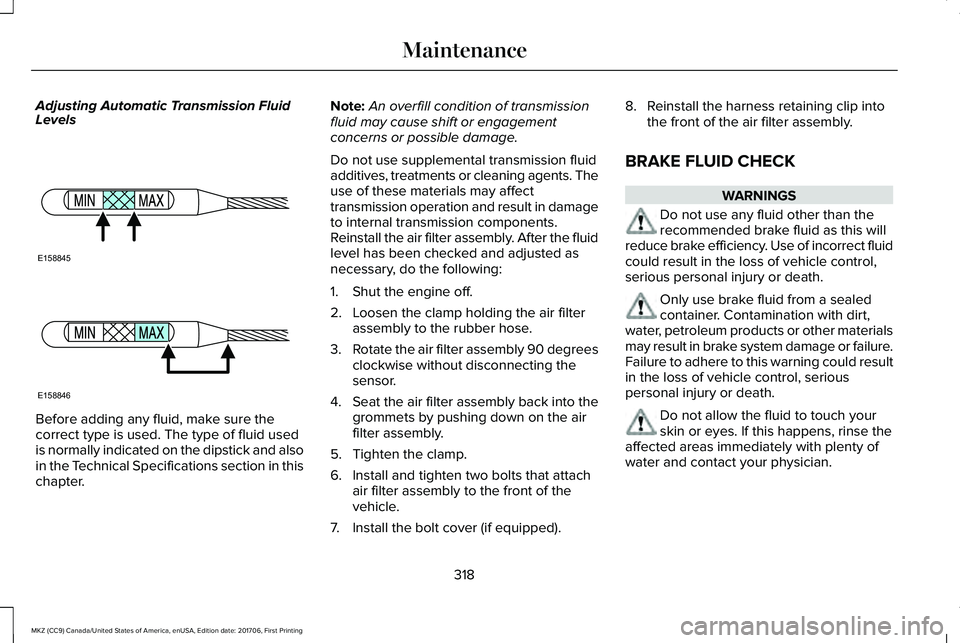
Adjusting Automatic Transmission FluidLevels
Before adding any fluid, make sure thecorrect type is used. The type of fluid usedis normally indicated on the dipstick and alsoin the Technical Specifications section in thischapter.
Note:An overfill condition of transmissionfluid may cause shift or engagementconcerns or possible damage.
Do not use supplemental transmission fluidadditives, treatments or cleaning agents. Theuse of these materials may affecttransmission operation and result in damageto internal transmission components.Reinstall the air filter assembly. After the fluidlevel has been checked and adjusted asnecessary, do the following:
1. Shut the engine off.
2. Loosen the clamp holding the air filterassembly to the rubber hose.
3.Rotate the air filter assembly 90 degreesclockwise without disconnecting thesensor.
4.Seat the air filter assembly back into thegrommets by pushing down on the airfilter assembly.
5. Tighten the clamp.
6. Install and tighten two bolts that attachair filter assembly to the front of thevehicle.
7. Install the bolt cover (if equipped).
8. Reinstall the harness retaining clip intothe front of the air filter assembly.
BRAKE FLUID CHECK
WARNINGS
Do not use any fluid other than therecommended brake fluid as this willreduce brake efficiency. Use of incorrect fluidcould result in the loss of vehicle control,serious personal injury or death.
Only use brake fluid from a sealedcontainer. Contamination with dirt,water, petroleum products or other materialsmay result in brake system damage or failure.Failure to adhere to this warning could resultin the loss of vehicle control, seriouspersonal injury or death.
Do not allow the fluid to touch yourskin or eyes. If this happens, rinse theaffected areas immediately with plenty ofwater and contact your physician.
318
MKZ (CC9) Canada/United States of America, enUSA, Edition date: 201706, First Printing
MaintenanceE158845 E158846
Page 340 of 595
Loss of air pressure may adversely affect tireperformance. For this reason:
Note:Do not drive the vehicle above 50 mph(80 km/h).
Note:Do not drive further than 120 mi(200 km). Drive only to the closest authorizedLincoln dealer or tire repair shop to haveyour tire inspected.
•Drive carefully and avoid abrupt steeringmaneuvers.
•Periodically monitor tire inflation pressurein the affected tire; if the tire is losingpressure, have the vehicle towed.
•Read the information in the Tips for Useof the Kit section to make sure safeoperation of the kit and your vehicle.
Tips for Use of the Kit
To ensure safe operation of the kit:
•Read all instructions and cautions fully.
•Before operating the kit, make sure yourvehicle is safely off the road and awayfrom moving traffic. Turn on the hazardlights.
•Always set the parking brake to ensurethe vehicle doesn't move unexpectedly.
•Do not remove any foreign objects, suchas nails or screws, from the tire.
•When using the kit, leave the enginerunning (only if the vehicle is outdoors orin a well-ventilated area) so thecompressor does not drain the vehicle'sbattery.
•Do not allow the compressor to operatecontinuously for more than 15 minutes.This will help prevent the compressorfrom overheating.
•Never leave the kit unattended duringoperation.
•Sealant compound contains latex. Thosewith latex sensitivities should useappropriate precautions to avoid anallergic reaction.
•Keep the kit away from children.
•Only use the kit when the ambienttemperature is between -22°F (-30°C) and158°F (70°C).
•Only use the sealing compound beforethe use-by date. The use-by date is on alabel on the sealant canister and can beseen through the rectangular viewingwindow on the bottom of the compressor.Check the use-by date regularly andreplace the canister after four years ofnon-use.
•Do not store the kit unsecured inside thepassenger compartment of the vehicleas it may cause injury during a suddenstop or crash. Always store the kit in itsoriginal location.
•After sealant use, the tire pressuremonitoring system sensor and valve stemon the wheel must be replaced by anauthorized Lincoln dealer.
•Operating the kit could cause anelectrical disturbance in radio, CD, andDVD player operation.
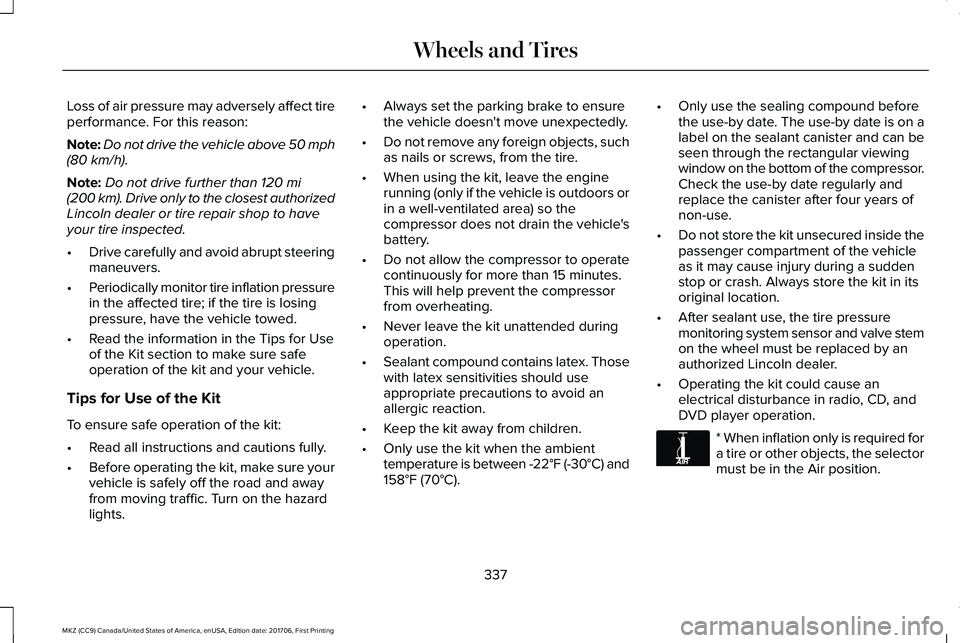
* When inflation only is required fora tire or other objects, the selectormust be in the Air position.
337
MKZ (CC9) Canada/United States of America, enUSA, Edition date: 201706, First Printing
Wheels and TiresE175978
Page 358 of 595
WARNINGS
When inflating the tire for mountingpressures up to 20 psi (1.38 bar)greater than the maximum pressure onthe tire sidewall, the followingprecautions must be taken to protectthe person mounting the tire:
1.Make sure that you have the correcttire and wheel size.
2.Lubricate the tire bead and wheelbead seat area again.
3. Stand at a minimum of 12 ft (3.66 m)away from the wheel and tireassembly.
4. Use both eye and ear protection.
WARNINGS
For a mounting pressure more than20 psi (1.38 bar) greater than themaximum pressure, a Ford dealer orother tire service professional should dothe mounting.
WARNINGS
Always inflate steel carcass tireswith a remote air fill with the personinflating standing at a minimum of 12 ft(3.66 m) away from the wheel and tireassembly.
Important: Remember to replace thewheel valve stems when the road tiresare replaced on your vehicle
It is recommended that the two fronttires or two rear tires generally bereplaced as a pair.
The tire pressure sensors mounted inthe wheels (originally installed on yourvehicle) are not designed to be used inaftermarket wheels.
The use of wheels or tires notrecommended by Ford Motor Companymay affect the operation of your tirepressure monitoring system.
If the tire pressure monitoring systemindicator is flashing, your system ismalfunctioning. Your replacement tiremight be incompatible with your tirepressure monitoring system, or somecomponent of the system may bedamaged.
Safety Practices
WARNINGS
If your vehicle is stuck in snow,mud or sand, do not rapidly spinthe tires; spinning the tires can tear thetire and cause an explosion. A tire canexplode in as little as three to fiveseconds.
Do not spin the wheels at over34 mph (55 km/h). The tires mayfail and injure a passenger or bystander.
Driving habits have a great deal to dowith your tire mileage and safety.
•Observe posted speed limits
•Avoid fast starts, stops and turns
355
MKZ (CC9) Canada/United States of America, enUSA, Edition date: 201706, First Printing
Wheels and Tires
Page 362 of 595
TIRE PRESSURE MONITORING
SYSTEM
WARNING
The tire pressure monitoring system isnot a substitute for manually checkingtire pressures. You should periodically checktire pressures using a pressure gauge.Failure to correctly maintain tire pressurescould increase the risk of tire failure, loss ofcontrol, vehicle rollover and personal injury.
Note: You should only use tire sealants inroadside emergencies as they may causedamage to the tire pressure monitoringsystem sensor.
Note: If the tire pressure monitoring systemsensor becomes damaged, it may notfunction.
Each tire, including the spare (ifprovided), should be checkedmonthly when cold and inflated tothe inflation pressure recommended by thevehicle manufacturer on the vehicle placardor tire inflation pressure label. (If your vehiclehas tires of a different size than the sizeindicated on the vehicle placard or tireinflation pressure label, you shoulddetermine the proper tire inflation pressurefor those tires).
As an added safety feature, your vehicle hasbeen equipped with a Tire PressureMonitoring System (TPMS) that illuminates alow tire pressure telltale when one or moreof your tires is significantly under-inflated.Accordingly, when the low tire pressuretelltale illuminates, you should stop andcheck your tires as soon as possible, andinflate them to the proper pressure. Drivingon a significantly under-inflated tire causesthe tire to overheat and can lead to tirefailure. Under-inflation also reduces fuelefficiency and tire tread life, and may affectthe vehicle’s handling and stopping ability.
Please note that the TPMS is not a substitutefor proper tire maintenance, and it is thedriver’s responsibility to maintain correct tirepressure, even if under-inflation has notreached the level to trigger illumination ofthe TPMS low tire pressure telltale.
Your vehicle has also been equipped with aTPMS malfunction indicator to indicate whenthe system is not operating properly. TheTPMS malfunction indicator is combined withthe low tire pressure telltale. When thesystem detects a malfunction, the telltale willflash for approximately one minute and thenremain continuously illuminated. Thissequence will continue upon subsequentvehicle start-ups as long as the malfunctionexists.
When the malfunction indicator is illuminated,the system may not be able to detect orsignal low tire pressure as intended. TPMSmalfunctions may occur for a variety ofreasons, including the installation ofreplacement or alternate tires or wheels onthe vehicle that prevent the TPMS from
359
MKZ (CC9) Canada/United States of America, enUSA, Edition date: 201706, First Printing
Wheels and Tires
Page 363 of 595
functioning properly. Always check the TPMSmalfunction telltale after replacing one ormore tires or wheels on your vehicle toensure that the replacement or alternate tiresand wheels allow the TPMS to continue tofunction properly.
This device complies with Part 15 of the FCCRules and with License exempt RSSStandards of Industry Canada. Operation issubject to the following two conditions:
1. This device may not cause harmfulinterference, and
2.This device must accept any interferencereceived, including interference that maycause undesired operation.
Note:Changes or modifications notexpressively approved by the partyresponsible for compliance could void theuser's authority to operate the equipment.The term "IC:" before the radio certificationnumber only signifies that Industry Canadatechnical specifications were met.
Changing Tires With a Tire PressureMonitoring System
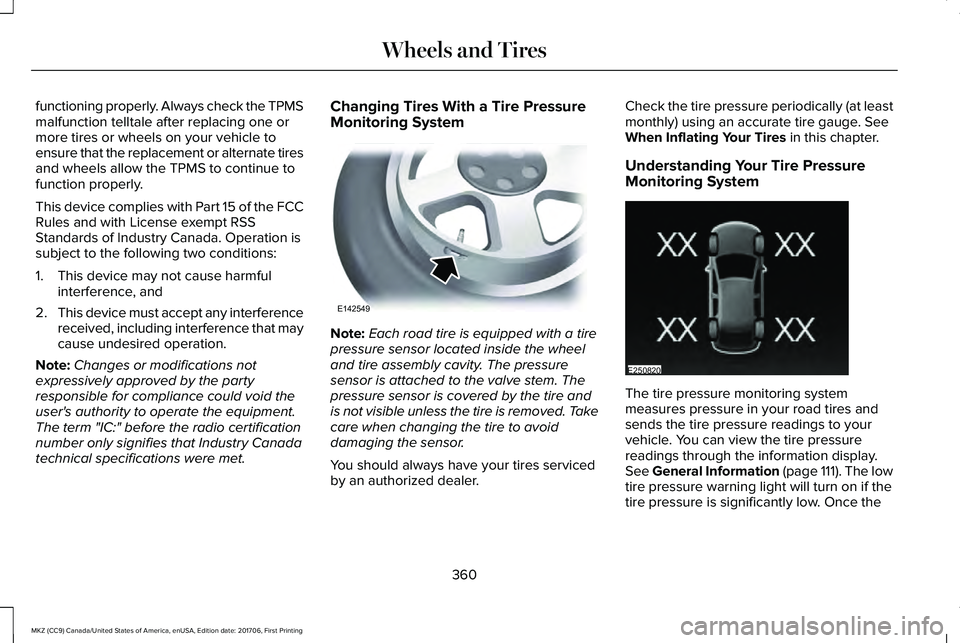
Note:Each road tire is equipped with a tirepressure sensor located inside the wheeland tire assembly cavity. The pressuresensor is attached to the valve stem. Thepressure sensor is covered by the tire andis not visible unless the tire is removed. Takecare when changing the tire to avoiddamaging the sensor.
You should always have your tires servicedby an authorized dealer.
Check the tire pressure periodically (at leastmonthly) using an accurate tire gauge. SeeWhen Inflating Your Tires in this chapter.
Understanding Your Tire PressureMonitoring System
The tire pressure monitoring systemmeasures pressure in your road tires andsends the tire pressure readings to yourvehicle. You can view the tire pressurereadings through the information display.See General Information (page 111). The lowtire pressure warning light will turn on if thetire pressure is significantly low. Once the
360
MKZ (CC9) Canada/United States of America, enUSA, Edition date: 201706, First Printing
Wheels and TiresE142549 E250820
Page 366 of 595
When Inflating Your Tires
WARNING
Do not use the tire pressure displayedin the information display as a tirepressure gauge. Failure to follow thisinstruction could result in personal injury ordeath.
When putting air into your tires (such as at agas station or in your garage), the tirepressure monitoring system may not respondimmediately to the air added to your tires.
It may take up to two minutes of driving over20 mph (32 km/h) for the light to turn off afteryou have filled your tires to therecommended inflation pressure.
How Temperature Affects Your TirePressure
The tire pressure monitoring system monitorstire pressure in each pneumatic tire. Whiledriving in a normal manner, a typicalpassenger tire inflation pressure mayincrease about 2–4 psi (14–28 kPa) from acold start situation. If the vehicle is stationary
overnight with the outside temperaturesignificantly lower than the daytimetemperature, the tire pressure may decreaseabout 3 psi (21 kPa) for a drop of 30°F (17°C)in ambient temperature. This lower pressurevalue may be detected by the tire pressuremonitoring system as being significantlylower than the recommended inflationpressure and activate the system warninglight for low tire pressure. If the low tirepressure warning light is on, visually checkeach tire to verify that no tire is flat. If one ormore tires are flat, repair as necessary.Check the air pressure in the road tires. Ifany tire is under-inflated, carefully drive thevehicle to the nearest location where air canbe added to the tires. Inflate all the tires tothe recommended inflation pressure.
CHANGING A ROAD WHEEL (If
Equipped)
WARNINGS
Do not use tire sealants as they maydamage the tire pressure monitoringsystem.
WARNINGS
If the tire pressure monitor sensorbecomes damaged it may not function.
Note:The tire pressure monitoring systemindicator light will illuminate when the sparetire is in use. To restore the full function ofthe monitoring system, all road wheelsequipped with tire pressure monitoringsensors must be mounted on the vehicle.
If you get a flat tire while driving, do not applythe brake heavily. Instead, graduallydecrease your speed. Hold the steeringwheel firmly and slowly move to a safe placeon the side of the road.
Have a flat serviced by an authorized dealerin order to prevent damage to the tirepressure monitoring system sensors. SeeTire Pressure Monitoring System (page 359).Replace the spare tire with a road tire assoon as possible. During repairing orreplacing of the flat tire, have an authorizeddealer inspect the tire pressure monitoringsystem sensor for damage.
363
MKZ (CC9) Canada/United States of America, enUSA, Edition date: 201706, First Printing
Wheels and Tires
Page 580 of 595
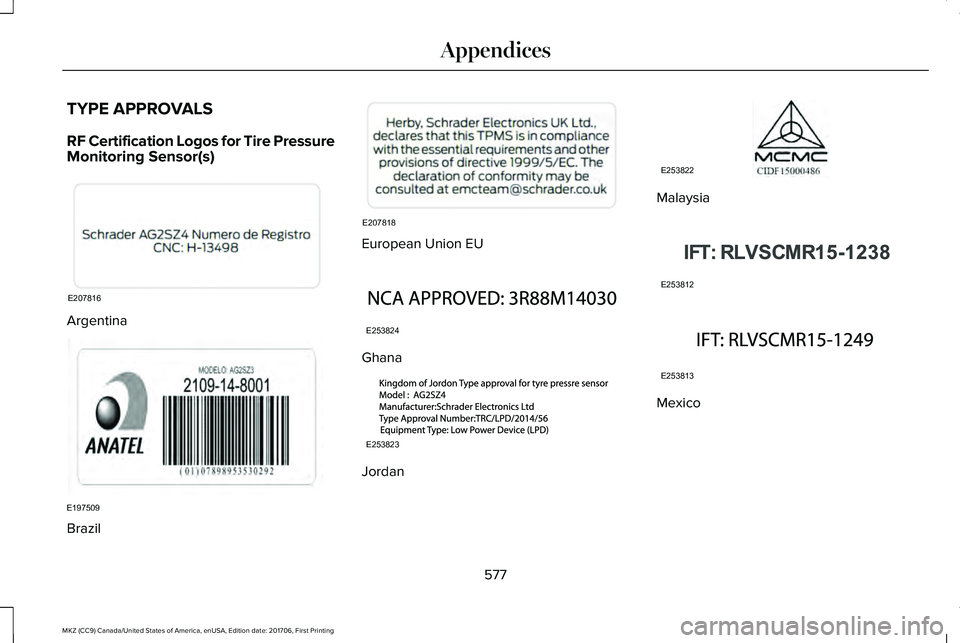
TYPE APPROVALS
RF Certification Logos for Tire PressureMonitoring Sensor(s)
Argentina
Brazil
European Union EU
Ghana
Jordan
Malaysia
Mexico
577
MKZ (CC9) Canada/United States of America, enUSA, Edition date: 201706, First Printing
AppendicesE207816 E197509 E207818 E253824 E253823 E253822 E253812 E253813
Page 586 of 595
Cleaning Products........................................326Materials...............................................................326
Cleaning the Engine....................................328Cleaning the Exterior...................................327Cleaning the Headlamps..................................327Exterior Chrome Parts.......................................327Exterior Plastic Parts..........................................328Stripes or Graphics............................................328Underbody...........................................................328Under Hood.........................................................328
Cleaning the Instrument Panel andInstrument Cluster Lens............................331Cleaning the Interior....................................329Cleaning Alcantara Microfiber ClothFabric................................................................330
Cleaning the Wheels...................................333Cleaning the Windows and WiperBlades...........................................................329Clearing All MyKeys.......................................65Climate............................................................440Climate Control..............................................137Climate Controlled Seats............................152Cooled Seats........................................................153
Coolant CheckSee: Engine Coolant Check.............................310
Crash Sensors and Airbag Indicator..........55
Creating a MyKey...........................................63Programming/Changing ConfigurableSettings...............................................................64
Cross Traffic Alert.........................................240Blocked Sensors.................................................243Switching the System Off and On..................243System Errors......................................................243System Lights, Messages and AudibleAlerts.................................................................243System Limitations.............................................243Using the Cross Traffic Alert System............240
Cruise Control..................................................83Principle of Operation.......................................222Type One................................................................83Type Two.................................................................84
Cruise controlSee: Using Cruise Control...............................222
Customer Assistance...................................274
D
Data Recording..................................................9Event Data Recording...........................................10Service Data Recording.........................................9
Daytime Running Lamps...............................90Type One - Conventional(Non-Configurable)...........................................91Type Two - Configurable......................................91
Direction Indicators........................................93Lane Change..........................................................93
Doors and Locks.............................................68Drive Control.................................................249LINCOLN DRIVE CONTROL............................249
Driver Alert......................................................231PRINCIPLE OF OPERATION.............................231USING DRIVER ALERT.......................................231
Driver and Passenger Airbags....................48Children and Airbags...........................................49Proper Driver and Front Passenger SeatingAdjustment.........................................................49
Driver and Passenger Knee Airbags.........53Driving Aids.....................................................231Driving Hints..................................................263Driving Through Water...............................263DRLSee: Daytime Running Lamps...........................90
E
Economical Driving......................................263Electric Parking Brake..................................196Applying the electric parking brake...............196Applying the electric parking brake when thevehicle is moving............................................197Battery With No Charge....................................198Releasing the electric parking brake.............197
583
MKZ (CC9) Canada/United States of America, enUSA, Edition date: 201706, First Printing
Index