warning LINCOLN MKZ 2020 Service Manual
[x] Cancel search | Manufacturer: LINCOLN, Model Year: 2020, Model line: MKZ, Model: LINCOLN MKZ 2020Pages: 561, PDF Size: 5.7 MB
Page 66 of 561
Note:
Not every feature applies to every
vehicle in every market. When they are
available for your vehicle, then they appear
in your information display, providing choices
to switch them on or off, or to select a more
specific setting.
• Various vehicle speed limits so the
MyKey driver cannot exceed certain
speeds. The information display shows
warnings followed by an audible tone
when the MyKey driver reaches the set
speed. You cannot override the set
speed by fully depressing the accelerator
pedal. WARNING: Do not set MyKey
maximum speed limit to a limit that will
prevent the driver from maintaining a safe
speed considering posted speed limits and
prevailing road conditions. The driver is
always responsible to drive in accordance
with local laws and prevailing conditions.
Failure to do so could result in accident or
injury. •
Various vehicle speed reminders so
MyKey drivers know when their vehicle
speed approaches the limits. Warnings
appear in your information display and a
tone sounds when the MyKey drivers
exceed the set vehicle speed.
• The audio system's maximum volume
limits to 45% so MyKey drivers can
concentrate on the road. A message
appears in the information display when
MyKey drivers attempt to exceed the
limited volume. MyKey also disables the
automatic volume control.
Note: If your
vehicle includes an AM/FM radio or a
very basic audio system, then the radio
may not limit.
• Always on setting. This setting forces
certain features to remain on and active
for MyKey drivers. For example, E911 or
emergency assistance and the do not
disturb features stay on even if a MyKey
driver uses the feature's control to switch
it off. When selected, you will not be able
to turn off Advance Trac or traction
control (if your vehicle has this feature). CREATING A MYKEY
Use the information display to create a
MyKey:
1. Insert the key you want to program into
the ignition. If your vehicle is equipped
with a push-button start, place the remote
control into the backup slot. See Starting
a Gasoline Engine
(page 162).
2. Switch the ignition on.
3. Access the main menu in the information
display and then scroll through the
menus to change the settings of your
MyKey. From the MyKey menu select the
option Create MyKey.
See Information
Displays (page 109).
4. When prompted, hold the OK button until
you see a message informing you to label
this key as a MyKey. The programmed
restrictions apply when you key off, open
and close the driver door and restart your
vehicle with the programmed key or
transmitter.
MyKey is successfully created. Make sure
you label it so you can distinguish it from the
admin keys.
63
MKZ (CC9) Canada/United States of America, enUSA, Edition date: 201905, Second-Printing MyKey™
Page 74 of 561
Battery Saver
If you leave the courtesy lamps, interior
lamps or headlamps on, the battery saver
shuts them off 10 minutes after you switch
the ignition off.
Accessory Mode Battery Saver for
Intelligent Access Keys
If you leave the ignition switched on, it shuts
off when it detects a certain amount of
battery drain, or after 45 minutes.
Luggage Compartment
From Inside Your Vehicle
Press the button on the instrument
panel to open the luggage
compartment.
With the Remote Control Press twice within three seconds
to open the luggage compartment. From Outside Your Vehicle
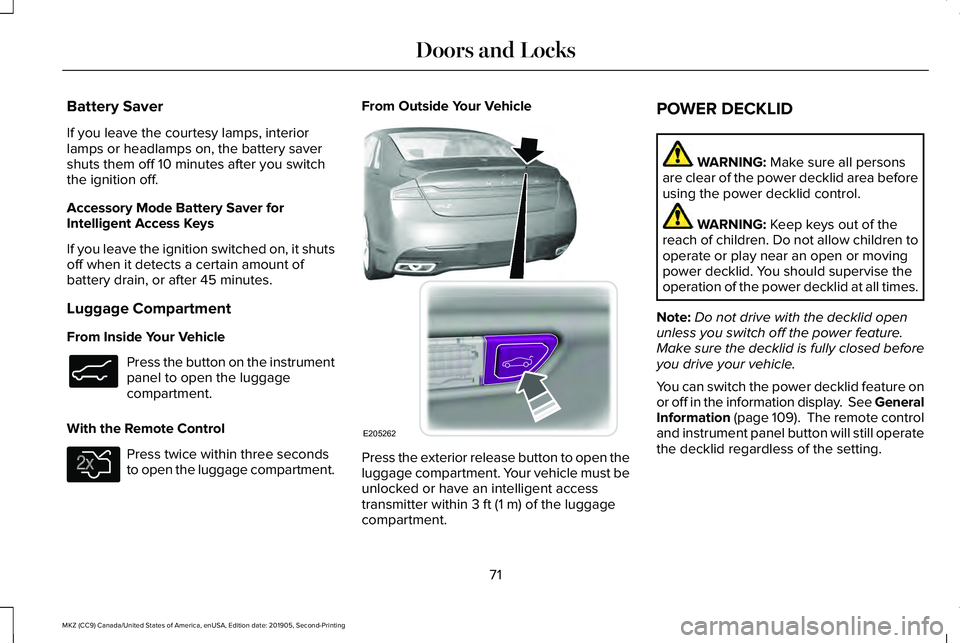
Press the exterior release button to open the
luggage compartment. Your vehicle must be
unlocked or have an intelligent access
transmitter within 3 ft (1 m) of the luggage
compartment. POWER DECKLID WARNING:
Make sure all persons
are clear of the power decklid area before
using the power decklid control. WARNING:
Keep keys out of the
reach of children. Do not allow children to
operate or play near an open or moving
power decklid. You should supervise the
operation of the power decklid at all times.
Note: Do not drive with the decklid open
unless you switch off the power feature.
Make sure the decklid is fully closed before
you drive your vehicle.
You can switch the power decklid feature on
or off in the information display. See
General
Information (page 109). The remote control
and instrument panel button will still operate
the decklid regardless of the setting.
71
MKZ (CC9) Canada/United States of America, enUSA, Edition date: 201905, Second-Printing Doors and LocksE138633 E138630 E205262
Page 76 of 561
Note:
Before driving your vehicle, check the
instrument cluster for a trunk ajar or door
ajar message or warning indicator. Failure
to do this could result in unintentionally
leaving the decklid open while driving.
The decklid will stop and three chimes will
sound if it detects an obstacle while opening.
Remove the obstacle to operate the decklid.
Resetting the Power Decklid
The decklid may not operate correctly and
you may need to reset it if:
• The vehicle battery charge is low.
• You disconnect the battery.
• You manually close the decklid and leave
it unlatched.
To reset the power decklid:
1. Disconnect the battery for 20 seconds then reconnect the battery.
2. Manually close the decklid making sure it is fully closed.
3. Power open the decklid using the remote
control or instrument panel button. KEYLESS ENTRY
SECURICODE™ KEYLESS ENTRY
KEYPAD
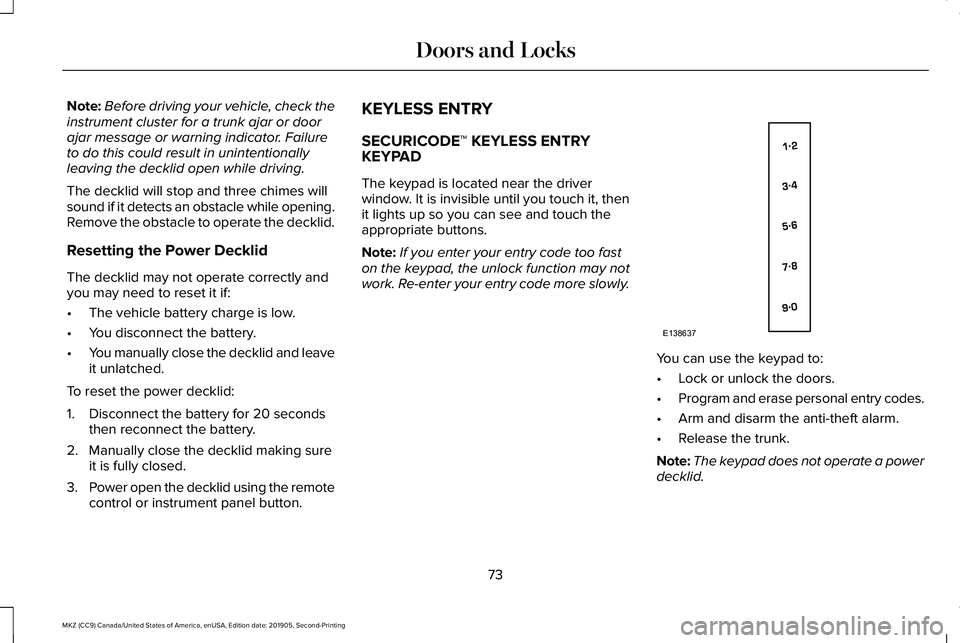
The keypad is located near the driver
window. It is invisible until you touch it, then
it lights up so you can see and touch the
appropriate buttons.
Note:
If you enter your entry code too fast
on the keypad, the unlock function may not
work. Re-enter your entry code more slowly. You can use the keypad to:
•
Lock or unlock the doors.
• Program and erase personal entry codes.
• Arm and disarm the anti-theft alarm.
• Release the trunk.
Note: The keypad does not operate a power
decklid.
73
MKZ (CC9) Canada/United States of America, enUSA, Edition date: 201905, Second-Printing Doors and LocksE138637
Page 78 of 561
To Unlock All Doors
Enter the factory-set code or your personal
code, then press 3·4 within five seconds.
To Lock All Doors
Press and hold 7·8 and 9·0 at the same time
with the driver door closed. You do not need
to enter the keypad code first.
To Release the Trunk
Enter the factory-set code or your personal
code, then press
5·6 within five seconds.
Note: The keypad does not operate a power
decklid.
Displaying the Factory Set Code
Note: You need to have two programmed
intelligent access keys for this procedure.
To display the factory-set code in the
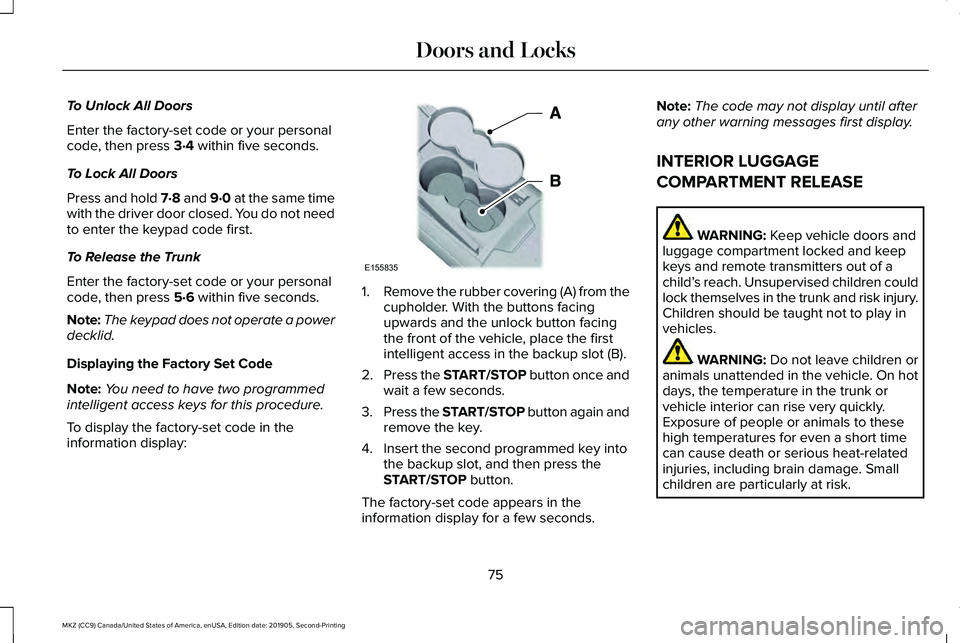
information display: 1.
Remove the rubber covering (A) from the
cupholder. With the buttons facing
upwards and the unlock button facing
the front of the vehicle, place the first
intelligent access in the backup slot (B).
2. Press the START/STOP button once and
wait a few seconds.
3. Press the START/STOP button again and
remove the key.
4. Insert the second programmed key into the backup slot, and then press the
START/STOP
button.
The factory-set code appears in the
information display for a few seconds. Note:
The code may not display until after
any other warning messages first display.
INTERIOR LUGGAGE
COMPARTMENT RELEASE WARNING:
Keep vehicle doors and
luggage compartment locked and keep
keys and remote transmitters out of a
child’ s reach. Unsupervised children could
lock themselves in the trunk and risk injury.
Children should be taught not to play in
vehicles. WARNING:
Do not leave children or
animals unattended in the vehicle. On hot
days, the temperature in the trunk or
vehicle interior can rise very quickly.
Exposure of people or animals to these
high temperatures for even a short time
can cause death or serious heat-related
injuries, including brain damage. Small
children are particularly at risk.
75
MKZ (CC9) Canada/United States of America, enUSA, Edition date: 201905, Second-Printing Doors and LocksE155835
Page 83 of 561
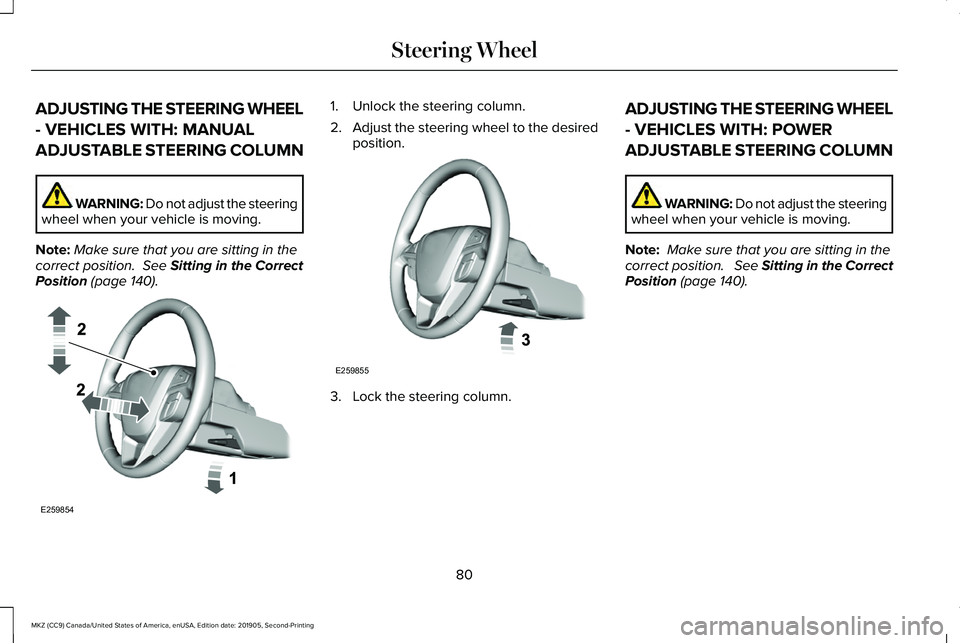
ADJUSTING THE STEERING WHEEL
- VEHICLES WITH: MANUAL
ADJUSTABLE STEERING COLUMN
WARNING: Do not adjust the steering
wheel when your vehicle is moving.
Note: Make sure that you are sitting in the
correct position. See Sitting in the Correct
Position (page 140). 1. Unlock the steering column.
2.
Adjust the steering wheel to the desired
position. 3. Lock the steering column.ADJUSTING THE STEERING WHEEL
- VEHICLES WITH: POWER
ADJUSTABLE STEERING COLUMN WARNING: Do not adjust the steering
wheel when your vehicle is moving.
Note: Make sure that you are sitting in the
correct position. See Sitting in the Correct
Position (page 140).
80
MKZ (CC9) Canada/United States of America, enUSA, Edition date: 201905, Second-Printing Steering WheelE259854 E259855
Page 91 of 561
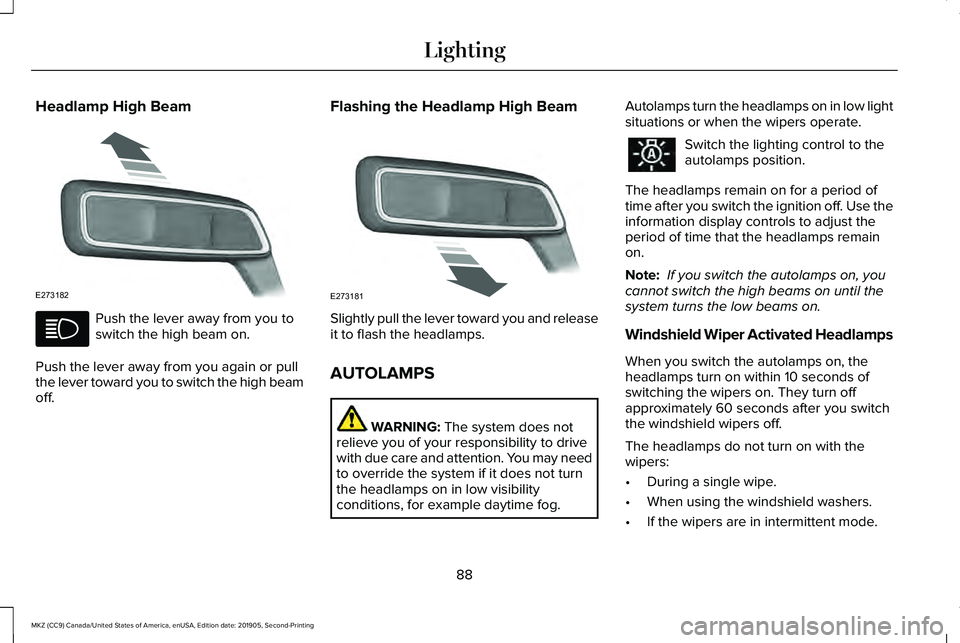
Headlamp High Beam
Push the lever away from you to
switch the high beam on.
Push the lever away from you again or pull
the lever toward you to switch the high beam
off. Flashing the Headlamp High Beam
Slightly pull the lever toward you and release
it to flash the headlamps.
AUTOLAMPS
WARNING: The system does not
relieve you of your responsibility to drive
with due care and attention. You may need
to override the system if it does not turn
the headlamps on in low visibility
conditions, for example daytime fog. Autolamps turn the headlamps on in low light
situations or when the wipers operate. Switch the lighting control to the
autolamps position.
The headlamps remain on for a period of
time after you switch the ignition off. Use the
information display controls to adjust the
period of time that the headlamps remain
on.
Note: If you switch the autolamps on, you
cannot switch the high beams on until the
system turns the low beams on.
Windshield Wiper Activated Headlamps
When you switch the autolamps on, the
headlamps turn on within 10 seconds of
switching the wipers on. They turn off
approximately 60 seconds after you switch
the windshield wipers off.
The headlamps do not turn on with the
wipers:
• During a single wipe.
• When using the windshield washers.
• If the wipers are in intermittent mode.
88
MKZ (CC9) Canada/United States of America, enUSA, Edition date: 201905, Second-Printing LightingE273182 E273181
Page 92 of 561
Note:
If you switch the autolamps and the
autowipers on, the headlamps turn on when
the windshield wipers continuously operate.
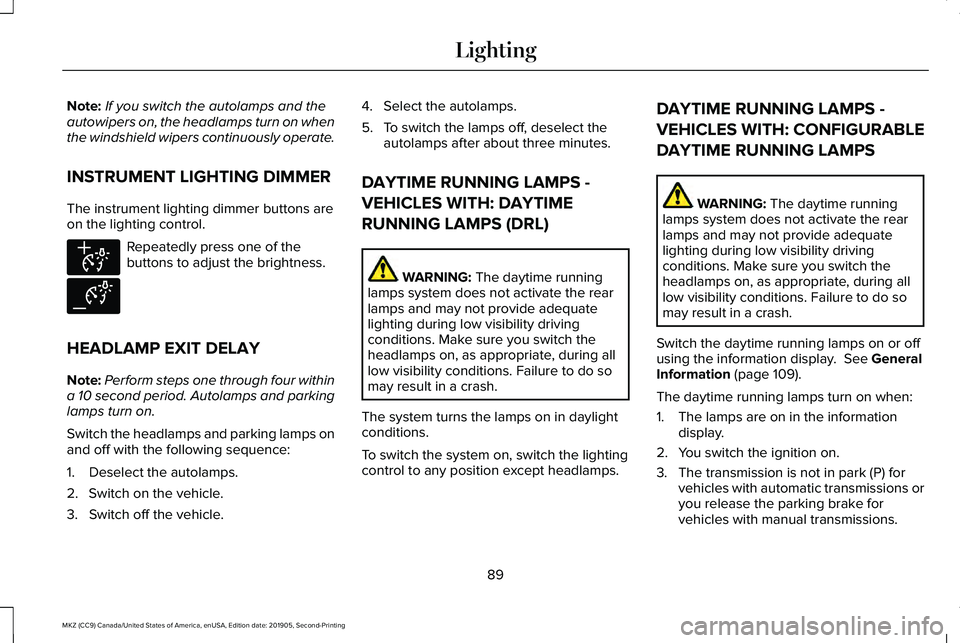
INSTRUMENT LIGHTING DIMMER
The instrument lighting dimmer buttons are
on the lighting control. Repeatedly press one of the
buttons to adjust the brightness.
HEADLAMP EXIT DELAY
Note: Perform steps one through four within
a 10 second period. Autolamps and parking
lamps turn on.
Switch the headlamps and parking lamps on
and off with the following sequence:
1. Deselect the autolamps.
2. Switch on the vehicle.
3. Switch off the vehicle. 4. Select the autolamps.
5. To switch the lamps off, deselect the
autolamps after about three minutes.
DAYTIME RUNNING LAMPS -
VEHICLES WITH: DAYTIME
RUNNING LAMPS (DRL) WARNING: The daytime running
lamps system does not activate the rear
lamps and may not provide adequate
lighting during low visibility driving
conditions. Make sure you switch the
headlamps on, as appropriate, during all
low visibility conditions. Failure to do so
may result in a crash.
The system turns the lamps on in daylight
conditions.
To switch the system on, switch the lighting
control to any position except headlamps. DAYTIME RUNNING LAMPS -
VEHICLES WITH: CONFIGURABLE
DAYTIME RUNNING LAMPS WARNING:
The daytime running
lamps system does not activate the rear
lamps and may not provide adequate
lighting during low visibility driving
conditions. Make sure you switch the
headlamps on, as appropriate, during all
low visibility conditions. Failure to do so
may result in a crash.
Switch the daytime running lamps on or off
using the information display.
See General
Information (page 109).
The daytime running lamps turn on when:
1. The lamps are on in the information display.
2. You switch the ignition on.
3. The transmission is not in park (P) for vehicles with automatic transmissions or
you release the parking brake for
vehicles with manual transmissions.
89
MKZ (CC9) Canada/United States of America, enUSA, Edition date: 201905, Second-Printing LightingE291299 E291298
Page 97 of 561
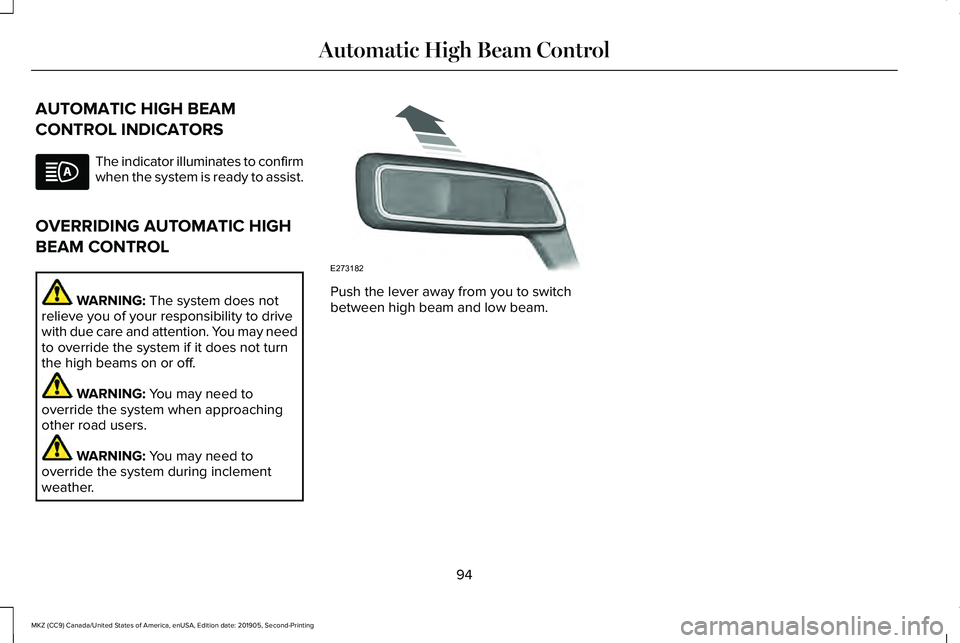
AUTOMATIC HIGH BEAM
CONTROL INDICATORS
The indicator illuminates to confirm
when the system is ready to assist.
OVERRIDING AUTOMATIC HIGH
BEAM CONTROL WARNING: The system does not
relieve you of your responsibility to drive
with due care and attention. You may need
to override the system if it does not turn
the high beams on or off. WARNING:
You may need to
override the system when approaching
other road users. WARNING:
You may need to
override the system during inclement
weather. Push the lever away from you to switch
between high beam and low beam.
94
MKZ (CC9) Canada/United States of America, enUSA, Edition date: 201905, Second-Printing Automatic High Beam Control E273182
Page 98 of 561
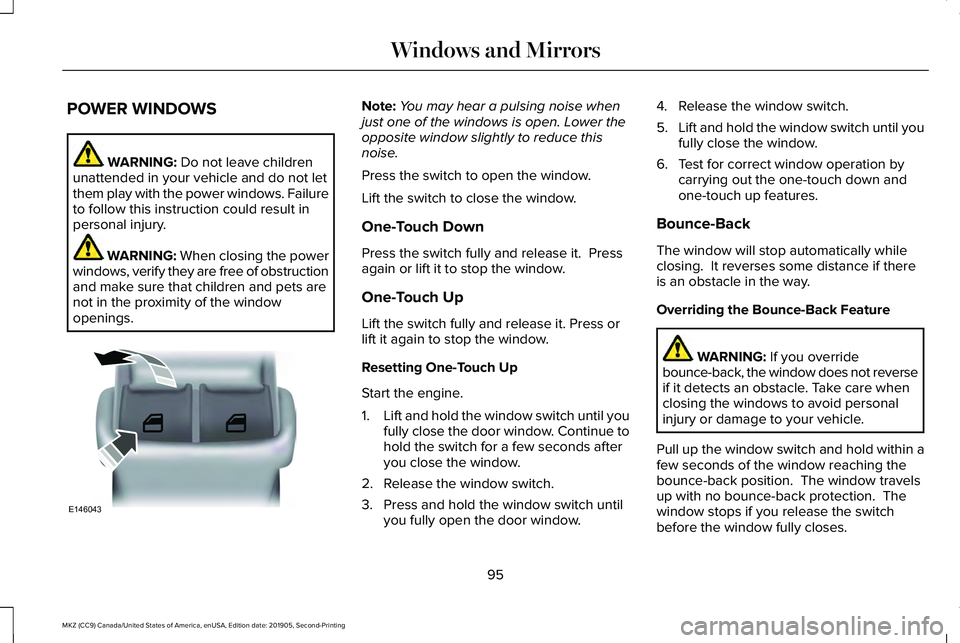
POWER WINDOWS
WARNING: Do not leave children
unattended in your vehicle and do not let
them play with the power windows. Failure
to follow this instruction could result in
personal injury. WARNING:
When closing the power
windows, verify they are free of obstruction
and make sure that children and pets are
not in the proximity of the window
openings. Note:
You may hear a pulsing noise when
just one of the windows is open. Lower the
opposite window slightly to reduce this
noise.
Press the switch to open the window.
Lift the switch to close the window.
One-Touch Down
Press the switch fully and release it. Press
again or lift it to stop the window.
One-Touch Up
Lift the switch fully and release it. Press or
lift it again to stop the window.
Resetting One-Touch Up
Start the engine.
1. Lift and hold the window switch until you
fully close the door window. Continue to
hold the switch for a few seconds after
you close the window.
2. Release the window switch.
3. Press and hold the window switch until you fully open the door window. 4. Release the window switch.
5.
Lift and hold the window switch until you
fully close the window.
6. Test for correct window operation by carrying out the one-touch down and
one-touch up features.
Bounce-Back
The window will stop automatically while
closing. It reverses some distance if there
is an obstacle in the way.
Overriding the Bounce-Back Feature WARNING:
If you override
bounce-back, the window does not reverse
if it detects an obstacle. Take care when
closing the windows to avoid personal
injury or damage to your vehicle.
Pull up the window switch and hold within a
few seconds of the window reaching the
bounce-back position. The window travels
up with no bounce-back protection. The
window stops if you release the switch
before the window fully closes.
95
MKZ (CC9) Canada/United States of America, enUSA, Edition date: 201905, Second-Printing Windows and MirrorsE146043
Page 99 of 561
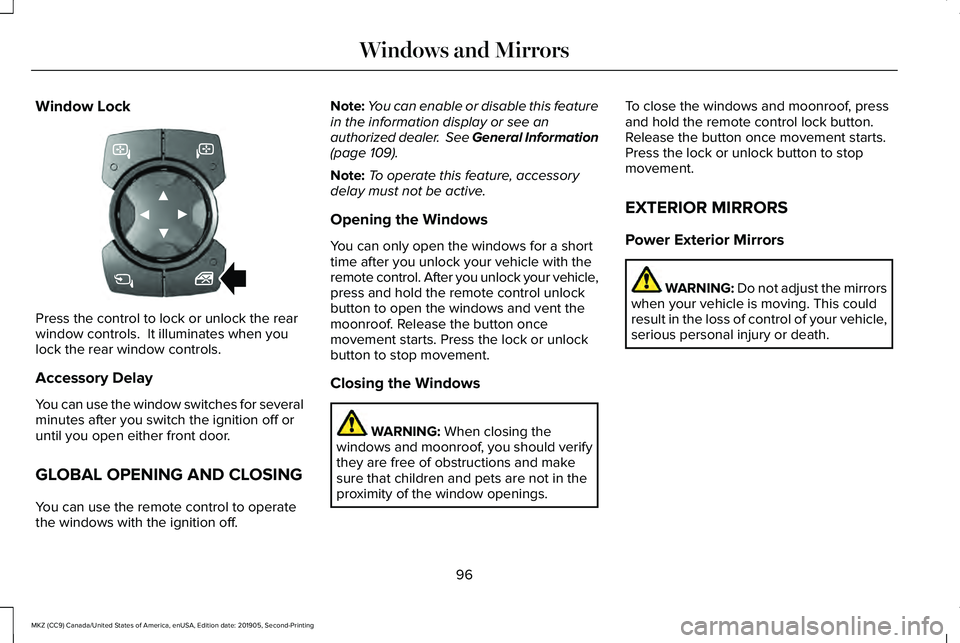
Window Lock
Press the control to lock or unlock the rear
window controls. It illuminates when you
lock the rear window controls.
Accessory Delay
You can use the window switches for several
minutes after you switch the ignition off or
until you open either front door.
GLOBAL OPENING AND CLOSING
You can use the remote control to operate
the windows with the ignition off. Note:
You can enable or disable this feature
in the information display or see an
authorized dealer. See General Information
(page 109).
Note: To operate this feature, accessory
delay must not be active.
Opening the Windows
You can only open the windows for a short
time after you unlock your vehicle with the
remote control. After you unlock your vehicle,
press and hold the remote control unlock
button to open the windows and vent the
moonroof. Release the button once
movement starts. Press the lock or unlock
button to stop movement.
Closing the Windows WARNING:
When closing the
windows and moonroof, you should verify
they are free of obstructions and make
sure that children and pets are not in the
proximity of the window openings. To close the windows and moonroof, press
and hold the remote control lock button.
Release the button once movement starts.
Press the lock or unlock button to stop
movement.
EXTERIOR MIRRORS
Power Exterior Mirrors
WARNING: Do not adjust the mirrors
when your vehicle is moving. This could
result in the loss of control of your vehicle,
serious personal injury or death.
96
MKZ (CC9) Canada/United States of America, enUSA, Edition date: 201905, Second-Printing Windows and MirrorsE318100