check transmission fluid LINCOLN MKZ 2020 Owners Manual
[x] Cancel search | Manufacturer: LINCOLN, Model Year: 2020, Model line: MKZ, Model: LINCOLN MKZ 2020Pages: 561, PDF Size: 5.7 MB
Page 8 of 561
Getting Assistance Outside the U.S. and
Canada ......................................................276
Ordering Additional Owner's Literature ......................................................................
278
Reporting Safety Defects (U.S. Only) ......
279
Reporting Safety Defects (Canada Only) ......................................................................
279
Fuses
Fuse Specification Chart ............................
281
Changing a Fuse .........................................
298
Maintenance
General Information ....................................
301
Opening and Closing the Hood ...............
301
Under Hood Overview - 2.0L ...................
303
Under Hood Overview - 3.0L ...................
305
Engine Oil Dipstick - 2.0L .........................
306
Engine Oil Dipstick - 3.0L ..........................
306
Engine Oil Check ........................................
306
Oil Change Indicator Reset ......................
308
Engine Coolant Check ...............................
308
Automatic Transmission Fluid Check ......
313
Brake Fluid Check ........................................
317Washer Fluid Check
....................................
318
Fuel Filter ........................................................
318
Changing the 12V Battery ..........................
318
Checking the Wiper Blades .....................
320
Changing the Wiper Blades .....................
320
Adjusting the Headlamps ..........................
321
Changing a Bulb ..........................................
322
Changing the Engine Air Filter ................
322
Vehicle Care
General Information ....................................
324
Cleaning Products .......................................
324
Cleaning the Exterior .................................
325
Waxing ...........................................................
326
Cleaning the Engine ...................................
327
Cleaning the Windows and Wiper Blades ......................................................................
327
Cleaning the Interior ...................................
328
Cleaning the Instrument Panel and Instrument Cluster Lens ........................
330
Cleaning Leather Seats ..............................
331
Repairing Minor Paint Damage .................
331
Cleaning the Wheels ...................................
331Vehicle Storage
...........................................
332
Body Styling Kits ..........................................
334
Wheels and Tires
Tire Care ........................................................
335
Using Summer Tires ...................................
349
Using Snow Chains .....................................
349
Tire Pressure Monitoring System ...........
350
Changing a Road Wheel ...........................
355
Technical Specifications ............................
363
Capacities and Specifications
Engine Specifications - 2.0L .....................
365
Engine Specifications - 3.0L .....................
366
Motorcraft Parts - 2.0L ................................
367
Motorcraft Parts - 3.0L ...............................
369
Vehicle Identification Number .................
370
Vehicle Certification Label ........................
370
Transmission Code Designation ...............
371
Capacities and Specifications - 2.0L ......
372
Capacities and Specifications - 3.0L ......
382
Bulb Specification Chart ............................
392
5
MKZ (CC9) Canada/United States of America, enUSA, Edition date: 201905, Second-Printing Table of Contents
Page 304 of 561
GENERAL INFORMATION
Have your vehicle serviced regularly to help
maintain its roadworthiness and resale value.
There is a large network of authorized
dealers that are there to help you with their
professional servicing expertise. We believe
that their specially trained technicians are
best qualified to service your vehicle properly
and expertly. They are supported by a wide
range of highly specialized tools developed
specifically for servicing your vehicle.
If your vehicle requires professional service,
an authorized dealer can provide the
necessary parts and service. Check your
warranty information to find out which parts
and services are covered.
Use only recommended fuels, lubricants,
fluids and service parts conforming to
specifications. Motorcraft® parts are
designed and built to provide the best
performance in your vehicle.
Precautions
•
Do not work on a hot engine.
• Make sure that nothing gets caught in
moving parts.
• Do not work on a vehicle with the engine
running in an enclosed space, unless you
are sure you have enough ventilation.
• Keep all open flames and other burning
material (such as cigarettes) away from
the battery and all fuel related parts.
Working with the Engine Off
1. Set the parking brake and shift the transmission to park (P).
2. Switch off the engine.
3. Block the wheels.
Working with the Engine On WARNING: To reduce the risk of
vehicle damage and personal burn injuries,
do not start your engine with the air
cleaner removed and do not remove it
while the engine is running. 1. Set the parking brake and shift the
transmission to park (P).
2. Block the wheels.
OPENING AND CLOSING THE
HOOD
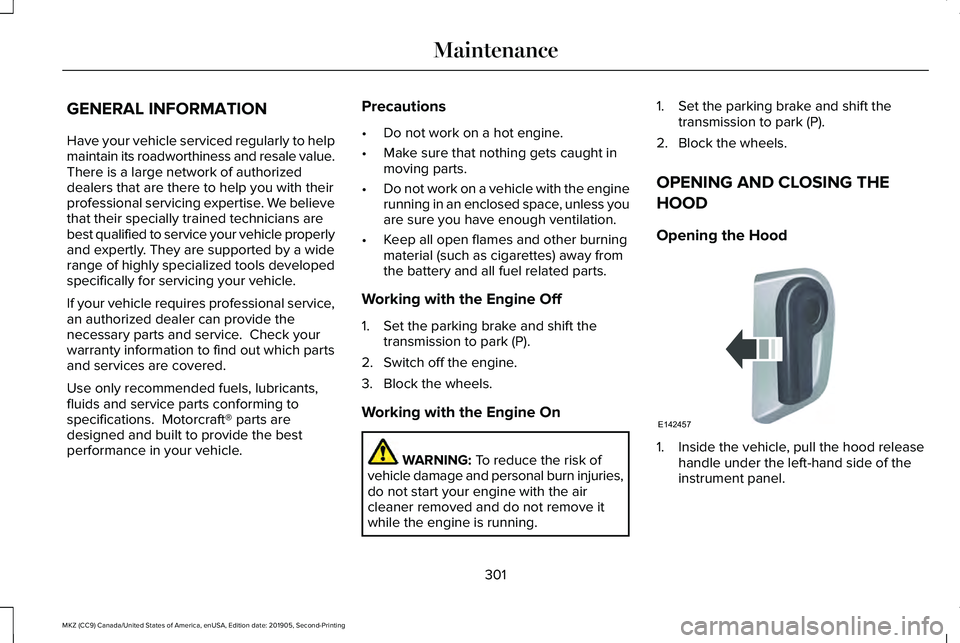
Opening the Hood 1. Inside the vehicle, pull the hood release
handle under the left-hand side of the
instrument panel.
301
MKZ (CC9) Canada/United States of America, enUSA, Edition date: 201905, Second-Printing MaintenanceE142457
Page 309 of 561
Air filter assembly. See Changing the Engine Air Filter (page 322).
E
Automatic transmission fluid dipstick.
See Automatic Transmission Fluid Check (page 313).
F
Engine oil dipstick.
See Engine Oil Dipstick (page 306).
G
Engine oil filler cap.
See Engine Oil Check (page 306).
H
Windshield washer fluid reservoir.
See Washer Fluid Check (page 318).
I
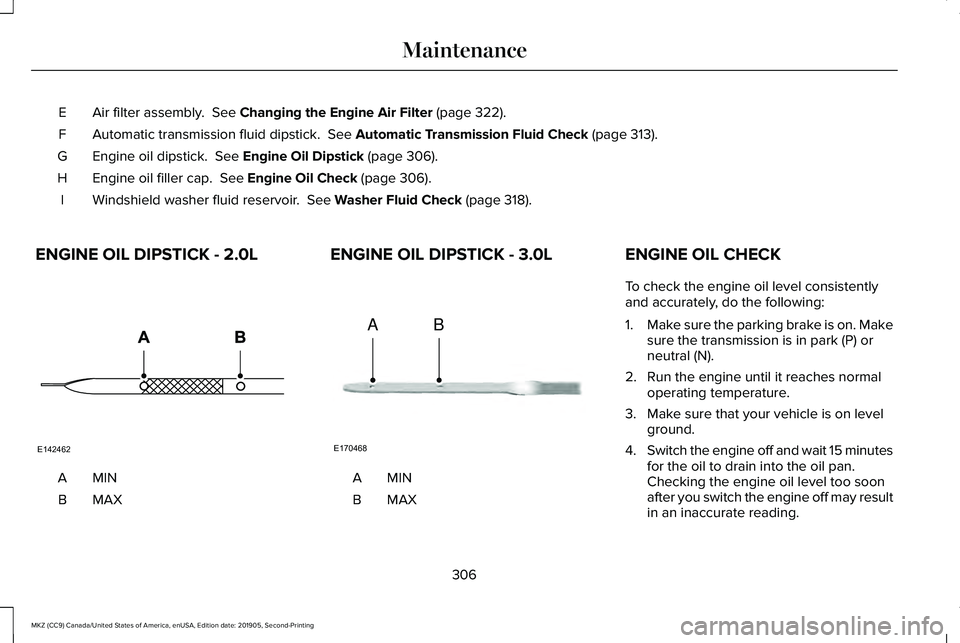
ENGINE OIL DIPSTICK - 2.0L MINA
MAXB ENGINE OIL DIPSTICK - 3.0L
MINA
MAXBENGINE OIL CHECK
To check the engine oil level consistently
and accurately, do the following:
1.
Make sure the parking brake is on. Make
sure the transmission is in park (P) or
neutral (N).
2. Run the engine until it reaches normal operating temperature.
3. Make sure that your vehicle is on level ground.
4. Switch the engine off and wait 15 minutes
for the oil to drain into the oil pan.
Checking the engine oil level too soon
after you switch the engine off may result
in an inaccurate reading.
306
MKZ (CC9) Canada/United States of America, enUSA, Edition date: 201905, Second-Printing MaintenanceE142462 E170468
AB
Page 316 of 561
You may notice a reduction in vehicle speed
caused by reduced engine power in order
to manage the engine coolant temperature.
Your vehicle may enter this mode if certain
high-temperature and high-load conditions
take place. The amount of speed reduction
depends on vehicle loading, grade and
ambient temperature. If this occurs, there is
no need to pull off the road. You can
continue to drive your vehicle.
The air conditioning may automatically turn
on and off during severe operating
conditions to protect the engine from
overheating. When the coolant temperature
decreases to the normal operating
temperature, the air conditioning turns on.
If the coolant temperature gauge moves fully
into the red zone, or if the coolant
temperature warning or service engine soon
messages appear in your information display,
do the following:
1. Pull off the road as soon as safely
possible and shift the transmission into
park (P). 2. Leave the engine running until the
coolant temperature gauge needle
returns to the normal position. If the
temperature does not drop after several
minutes, follow the remaining steps.
3. Switch the engine off and wait for it to cool. Check the coolant level.
4. If the coolant level is at or below the minimum mark, add prediluted coolant
immediately.
5. If the coolant level is normal, restart the engine and continue.
AUTOMATIC TRANSMISSION
FLUID CHECK
6F35 Transmission
(If Equipped)
Note: Transmission fluid should be checked
by an authorized dealer. If required, fluid
should be added by an authorized dealer.
The automatic transmission does not have
a transmission fluid dipstick. Refer to your scheduled maintenance
information for scheduled intervals for fluid
checks and changes. Your transmission does
not consume fluid. However, the fluid level
should be checked if the transmission is not
properly working. For example, if the
transmission slips or shifts slowly or if you
notice some sign of fluid leakage.
See
Scheduled Maintenance (page 475).
Do not use supplemental transmission fluid
additives, treatments or cleaning agents. The
use of these materials may affect
transmission operation and result in damage
to internal transmission components.
6F55 Transmission
(If Equipped) WARNING:
The dipstick and
surrounding components are hot. Use
gloves when moving components and
checking the transmission fluid level.
Failure to follow this warning could result
in serious personal injury.
313
MKZ (CC9) Canada/United States of America, enUSA, Edition date: 201905, Second-Printing Maintenance
Page 317 of 561
Note:
Automatic transmission fluid expands
when warmed. To obtain an accurate fluid
check, drive the vehicle approximately 20 mi
(30 km) until it is warmed up. If your vehicle
has been operated for an extended period
at high speeds, in city traffic during hot
weather or pulling a trailer, the vehicle
should be switched off until normal operating
temperatures are reached to allow the fluid
to cool before checking. Depending on
vehicle use, cooling times could take up to
30 minutes or longer.
Refer to your scheduled maintenance
information for scheduled intervals for fluid
checks and changes. Your transmission does
not consume fluid. However, the fluid level
should be checked if the transmission is not
working properly. For example, if the
transmission slips or shifts slowly or if you
notice some sign of fluid leakage.
1. Drive the vehicle
20 mi (30 km) or until it
reaches normal operating temperature
2. Park the vehicle on a level surface and engage the parking brake. 3.
With the parking brake engaged and your
foot on the brake pedal, start the engine
and move the gearshift lever through all
of the gear ranges. Allow a minimum of
10 seconds for each gear to engage.
4. Put the gearshift lever in park (P) and leave the engine running.
Note: You will need to move the air filter
assembly to access the transmission
dipstick.
5. Remove the dipstick, wiping it clean with
a clean, dry lint free rag. If necessary,
refer to Under hood overview in this
chapter for the location of the dipstick.
6. Install the dipstick making sure it is fully seated in the filler tube by turning it to
the locked position.
7. Remove the dipstick and inspect the fluid
level. The fluid should be in the
designated areas for normal operating
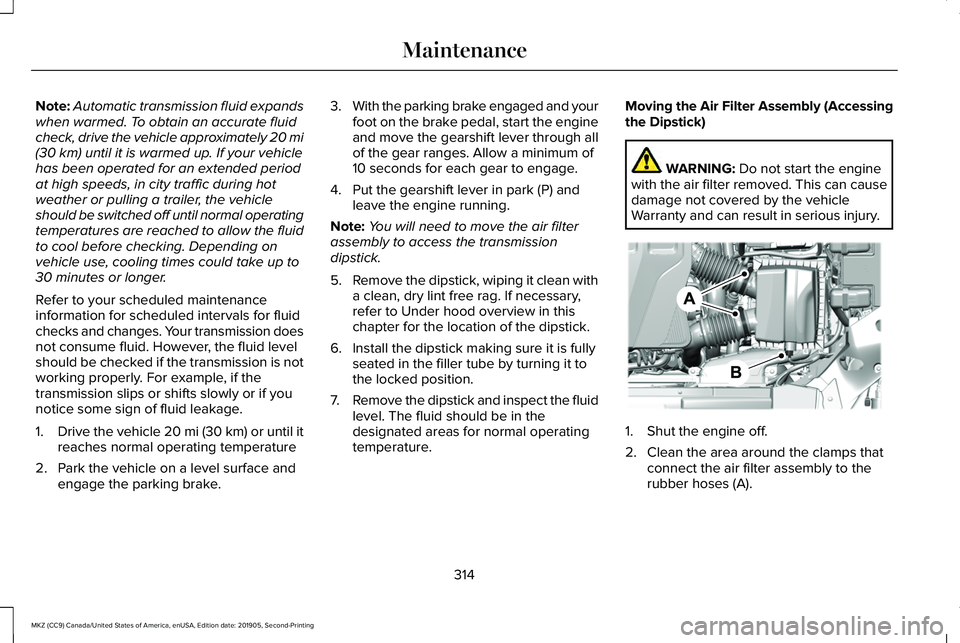
temperature. Moving the Air Filter Assembly (Accessing
the Dipstick) WARNING:
Do not start the engine
with the air filter removed. This can cause
damage not covered by the vehicle
Warranty and can result in serious injury. 1. Shut the engine off.
2. Clean the area around the clamps that
connect the air filter assembly to the
rubber hoses (A).
314
MKZ (CC9) Canada/United States of America, enUSA, Edition date: 201905, Second-Printing MaintenanceE296775
Page 318 of 561
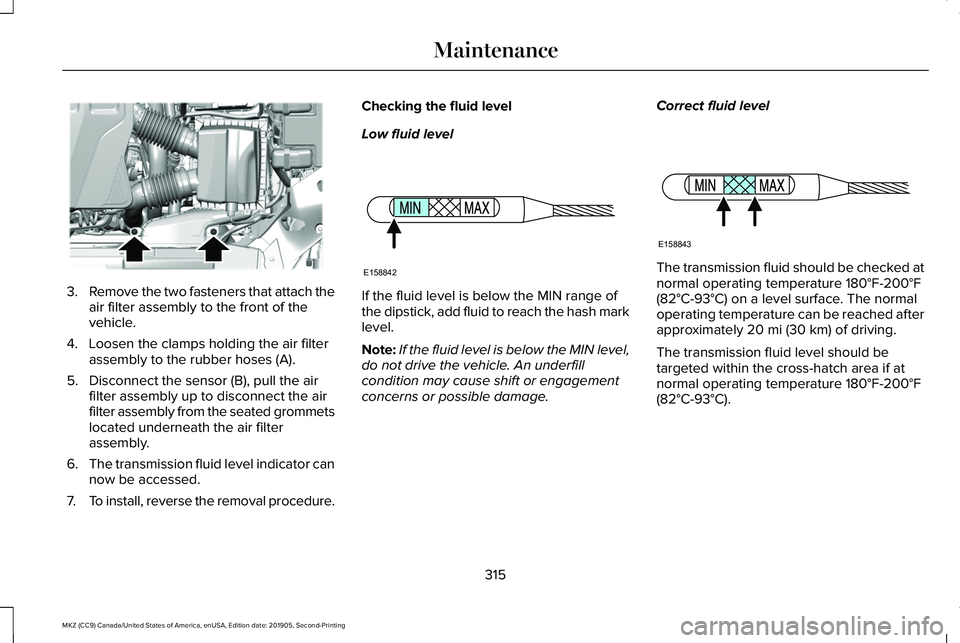
3.
Remove the two fasteners that attach the
air filter assembly to the front of the
vehicle.
4. Loosen the clamps holding the air filter assembly to the rubber hoses (A).
5. Disconnect the sensor (B), pull the air filter assembly up to disconnect the air
filter assembly from the seated grommets
located underneath the air filter
assembly.
6. The transmission fluid level indicator can
now be accessed.
7. To install, reverse the removal procedure. Checking the fluid level
Low fluid level
If the fluid level is below the MIN range of
the dipstick, add fluid to reach the hash mark
level.
Note:
If the fluid level is below the MIN level,
do not drive the vehicle. An underfill
condition may cause shift or engagement
concerns or possible damage. Correct fluid level The transmission fluid should be checked at
normal operating temperature 180°F-200°F
(82°C-93°C) on a level surface. The normal
operating temperature can be reached after
approximately 20 mi (30 km) of driving.
The transmission fluid level should be
targeted within the cross-hatch area if at
normal operating temperature 180°F-200°F
(82°C-93°C).
315
MKZ (CC9) Canada/United States of America, enUSA, Edition date: 201905, Second-Printing MaintenanceE296774 E158842 E158843
Page 319 of 561
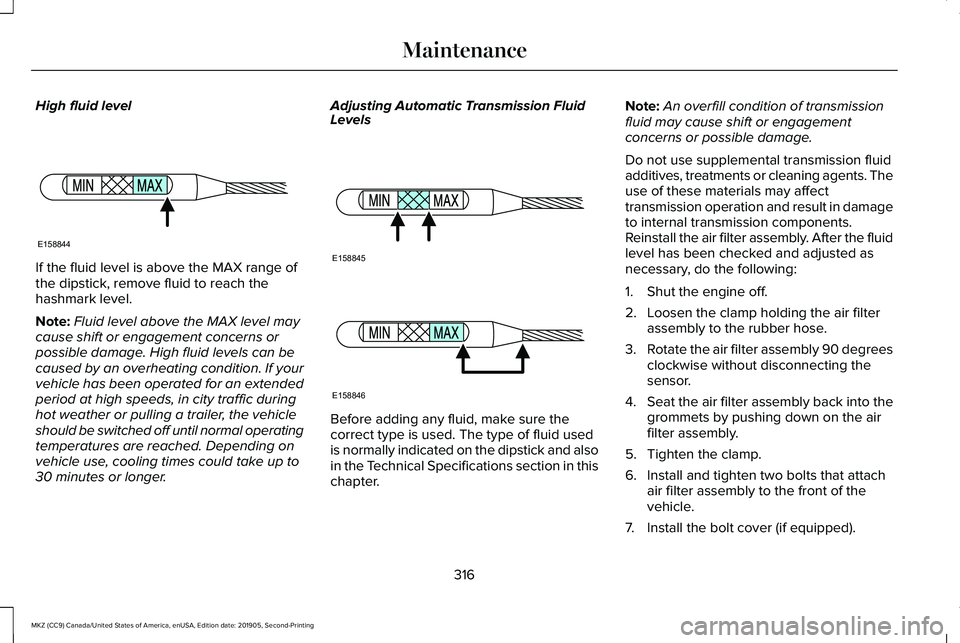
High fluid level
If the fluid level is above the MAX range of
the dipstick, remove fluid to reach the
hashmark level.
Note:
Fluid level above the MAX level may
cause shift or engagement concerns or
possible damage. High fluid levels can be
caused by an overheating condition. If your
vehicle has been operated for an extended
period at high speeds, in city traffic during
hot weather or pulling a trailer, the vehicle
should be switched off until normal operating
temperatures are reached. Depending on
vehicle use, cooling times could take up to
30 minutes or longer. Adjusting Automatic Transmission Fluid
Levels
Before adding any fluid, make sure the
correct type is used. The type of fluid used
is normally indicated on the dipstick and also
in the Technical Specifications section in this
chapter.Note:
An overfill condition of transmission
fluid may cause shift or engagement
concerns or possible damage.
Do not use supplemental transmission fluid
additives, treatments or cleaning agents. The
use of these materials may affect
transmission operation and result in damage
to internal transmission components.
Reinstall the air filter assembly. After the fluid
level has been checked and adjusted as
necessary, do the following:
1. Shut the engine off.
2. Loosen the clamp holding the air filter assembly to the rubber hose.
3. Rotate the air filter assembly 90 degrees
clockwise without disconnecting the
sensor.
4. Seat the air filter assembly back into the
grommets by pushing down on the air
filter assembly.
5. Tighten the clamp.
6. Install and tighten two bolts that attach air filter assembly to the front of the
vehicle.
7. Install the bolt cover (if equipped).
316
MKZ (CC9) Canada/United States of America, enUSA, Edition date: 201905, Second-Printing MaintenanceE158844 E158845 E158846
Page 482 of 561
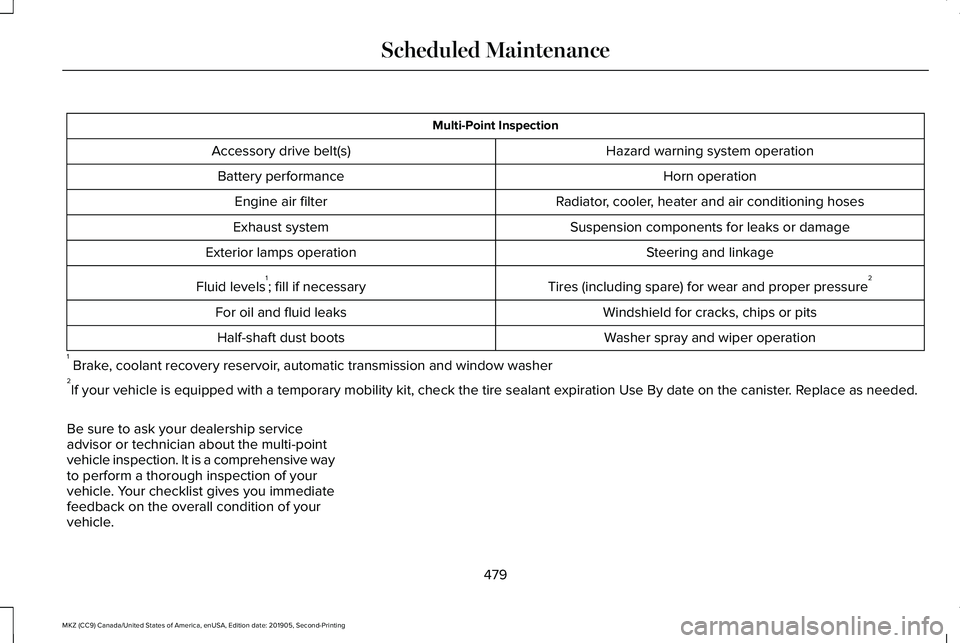
Multi-Point Inspection
Hazard warning system operation
Accessory drive belt(s)
Horn operation
Battery performance
Radiator, cooler, heater and air conditioning hoses
Engine air filter
Suspension components for leaks or damage
Exhaust system
Steering and linkage
Exterior lamps operation
Tires (including spare) for wear and proper pressure2
Fluid levels 1
; fill if necessary
Windshield for cracks, chips or pits
For oil and fluid leaks
Washer spray and wiper operation
Half-shaft dust boots
1 Brake, coolant recovery reservoir, automatic transmission and window washer
2 If your vehicle is equipped with a temporary mobility kit, check the tir\
e sealant expiration Use By date on the canister. Replace as needed.
Be sure to ask your dealership service
advisor or technician about the multi-point
vehicle inspection. It is a comprehensive way
to perform a thorough inspection of your
vehicle. Your checklist gives you immediate
feedback on the overall condition of your
vehicle.
479
MKZ (CC9) Canada/United States of America, enUSA, Edition date: 201905, Second-Printing Scheduled Maintenance
Page 490 of 561
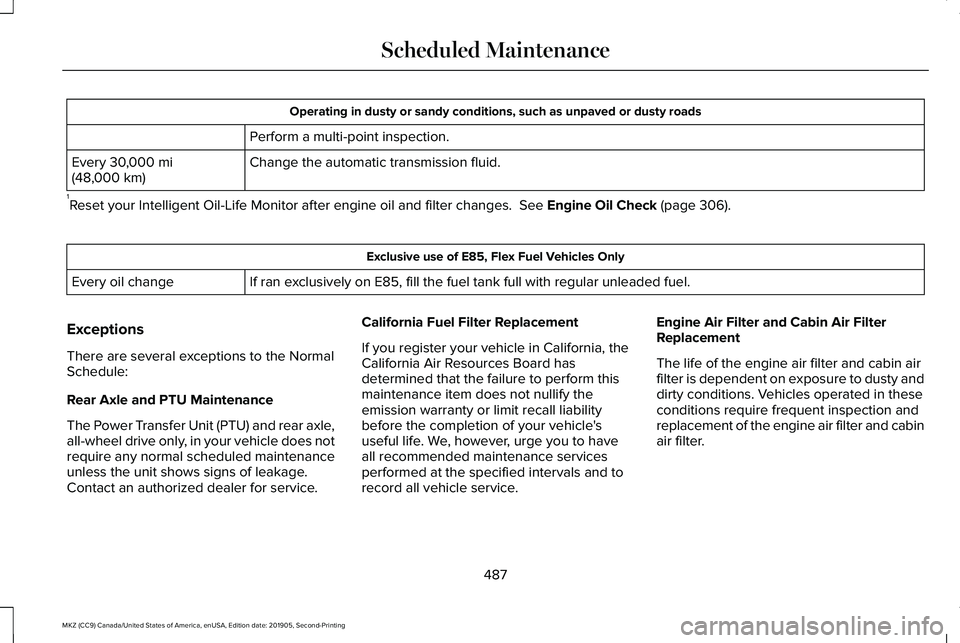
Operating in dusty or sandy conditions, such as unpaved or dusty roads
Perform a multi-point inspection.
Change the automatic transmission fluid.
Every 30,000 mi
(48,000 km)
1 Reset your Intelligent Oil-Life Monitor after engine oil and filter chang\
es.
See Engine Oil Check (page 306). Exclusive use of E85, Flex Fuel Vehicles Only
If ran exclusively on E85, fill the fuel tank full with regular unleaded fuel.
Every oil change
Exceptions
There are several exceptions to the Normal
Schedule:
Rear Axle and PTU Maintenance
The Power Transfer Unit (PTU) and rear axle,
all-wheel drive only, in your vehicle does not
require any normal scheduled maintenance
unless the unit shows signs of leakage.
Contact an authorized dealer for service. California Fuel Filter Replacement
If you register your vehicle in California, the
California Air Resources Board has
determined that the failure to perform this
maintenance item does not nullify the
emission warranty or limit recall liability
before the completion of your vehicle's
useful life. We, however, urge you to have
all recommended maintenance services
performed at the specified intervals and to
record all vehicle service.Engine Air Filter and Cabin Air Filter
Replacement
The life of the engine air filter and cabin air
filter is dependent on exposure to dusty and
dirty conditions. Vehicles operated in these
conditions require frequent inspection and
replacement of the engine air filter and cabin
air filter.
487
MKZ (CC9) Canada/United States of America, enUSA, Edition date: 201905, Second-Printing Scheduled Maintenance
Page 549 of 561
Autolamps.........................................................88
Windshield Wiper Activated Headlamps........88
Automatic Climate Control..........................135 Directing Air to the Footwell Air Vents..........135
Directing Air to the Instrument Panel Air
Vents..................................................................135
Setting the Blower Motor Speed.....................135
Setting the Temperature....................................135
Switching Auto Mode On and Off...................135
Switching Defrost On and Off..........................136
Switching Dual Zone Mode On and Off.........137
Switching Maximum Air Conditioning On and Off........................................................................\
137
Switching Maximum Defrost On and Off.......137
Switching Recirculated Air On and Off..........137
Switching the Air Conditioning On and Off.......................................................................136
Switching the Climate Control On and Off.......................................................................136
Automatic High Beam Control....................93
Automatic High Beam Control Indicators........................................................94
Automatic Transmission
...............................178
Automatic Transmission Adaptive
Learning............................................................183
Brake-Shift Interlock Override..........................181
If Your Vehicle Gets Stuck In Mud or Snow..................................................................183 Push Button Shift Transmission.......................178
SelectShift Automatic
™ Transmission.............180
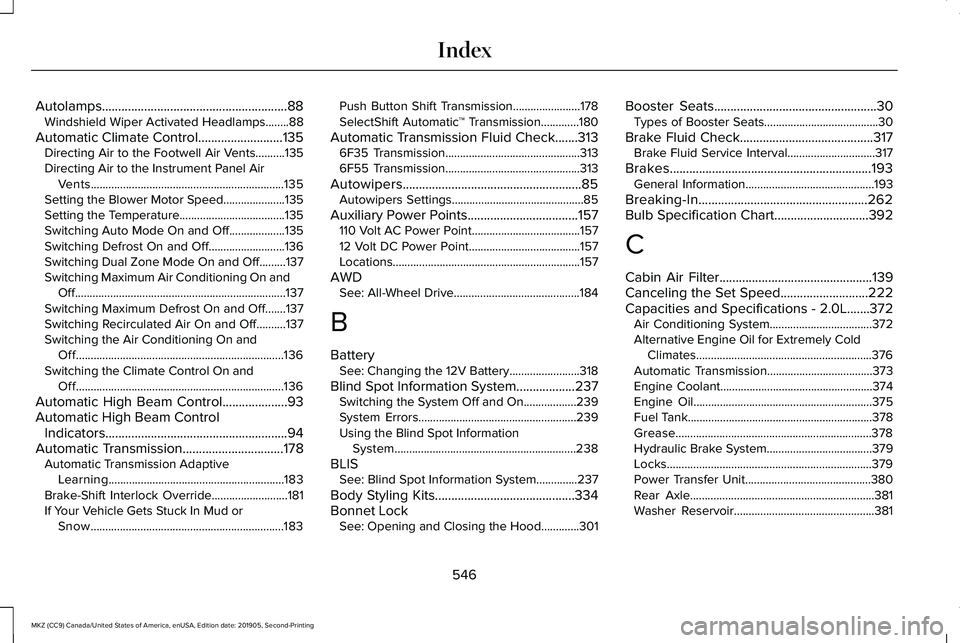
Automatic Transmission Fluid Check.......313 6F35 Transmission..............................................313
6F55 Transmission..............................................313
Autowipers.......................................................85 Autowipers Settings.............................................85
Auxiliary Power Points..................................157 110 Volt AC Power Point.....................................157
12 Volt DC Power Point......................................157
Locations................................................................157
AWD See: All-Wheel Drive...........................................184
B
Battery See: Changing the 12V Battery........................318
Blind Spot Information System..................237 Switching the System Off and On..................239
System Errors......................................................239
Using the Blind Spot Information
System..............................................................238
BLIS See: Blind Spot Information System..............
237
Body Styling Kits
...........................................334
Bonnet Lock See: Opening and Closing the Hood.............301 Booster Seats
..................................................30
Types of Booster Seats.......................................30
Brake Fluid Check.........................................317 Brake Fluid Service Interval..............................317
Brakes..............................................................193 General Information............................................193
Breaking-In....................................................262
Bulb Specification Chart
.............................392
C
Cabin Air Filter
...............................................139
Canceling the Set Speed...........................222
Capacities and Specifications - 2.0L.......372 Air Conditioning System...................................372
Alternative Engine Oil for Extremely Cold
Climates............................................................376
Automatic Transmission....................................373
Engine Coolant....................................................374
Engine Oil.............................................................375
Fuel Tank...............................................................378
Grease...................................................................378
Hydraulic Brake System....................................379
Locks......................................................................379
Power Transfer Unit...........................................380
Rear Axle...............................................................381
Washer Reservoir................................................381
546
MKZ (CC9) Canada/United States of America, enUSA, Edition date: 201905, Second-Printing Index