warning LINCOLN NAUTILUS 2022 Service Manual
[x] Cancel search | Manufacturer: LINCOLN, Model Year: 2022, Model line: NAUTILUS, Model: LINCOLN NAUTILUS 2022Pages: 586, PDF Size: 13.97 MB
Page 106 of 586
LIFTGATE PRECAUTIONS
WARNING: It is extremely dangerousto ride in a cargo area, inside or outside ofa vehicle. In a crash, people riding in theseareas are more likely to be seriouslyinjured or killed. Do not allow people toride in any area of your vehicle that is notequipped with seats and seatbelts. Makesure everyone in your vehicle is in a seatand properly using a seatbelt. Failure tofollow this warning could result in seriouspersonal injury or death.
WARNING: Make sure that you fullyclose the liftgate to prevent exhaust fumesfrom entering your vehicle. If you areunable to fully close the liftgate, open theair vents or the windows to allow fresh airto enter your vehicle. Failure to follow thisinstruction could result in personal injuryor death.
WARNING: Keep keys out of reachof children. Do not allow children tooperate or play near an open or movingpower liftgate. You should supervise theoperation of the power liftgate at all times.
OPENING THE LIFTGATE
OPENING THE LIFTGATE FROM INSIDEYOUR VEHICLE
With the transmission in park (P),press the button on the instrumentpanel.
Note:Be careful when opening or closingthe liftgate in a garage or other enclosedarea to avoid damaging the liftgate.
Note: Do not hang anything, for example abike rack, from the glass or liftgate. Thiscould damage the liftgate and itscomponents.
Note: Do not leave the liftgate open whiledriving. This could damage the liftgate andits components.
OPENING THE LIFTGATE FROMOUTSIDE YOUR VEHICLE
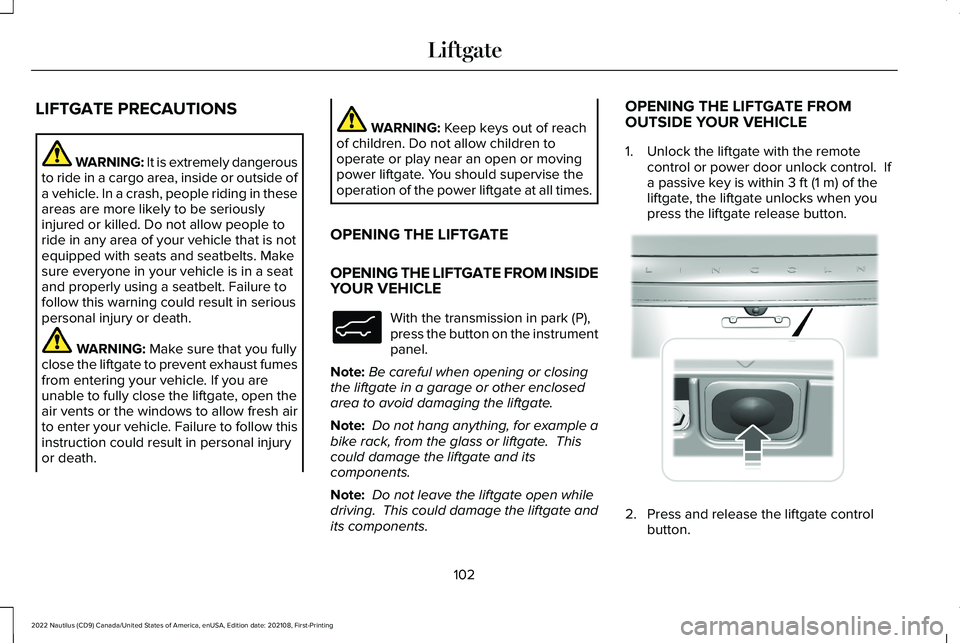
1.Unlock the liftgate with the remotecontrol or power door unlock control. Ifa passive key is within 3 ft (1 m) of theliftgate, the liftgate unlocks when youpress the liftgate release button.
2.Press and release the liftgate controlbutton.
102
2022 Nautilus (CD9) Canada/United States of America, enUSA, Edition date: 202108, First-PrintingLiftgateE138633 E291416
Page 109 of 586
4.The power liftgate now opens at theprogrammed height. To change theprogrammed height, repeat the steps.
Note:You can fully open the liftgate bymanually pushing it upward to the maximumopen position if it opens in a lower position.
Note:The system recalls the newprogrammed height until you reprogram it,even if you disconnect the battery.
CLOSING THE LIFTGATE
CLOSING THE LIFTGATE FROM INSIDEYOUR VEHICLE
WARNING: Make sure all personsare clear of the power liftgate area beforeusing the power liftgate control.
With the transmission in park (P),press the button on the instrumentpanel.
Note: Make sure that you close the liftgatebefore operating or moving your vehicle,especially in an enclosure, like a garage ora parking structure. This could damage theliftgate and its components.
Note: Make sure the area behind yourvehicle is free from obstruction and thatthere is enough room for you to operate theliftgate. Objects too close to your vehicle,for example a wall, garage door or anothervehicle may come into contact with themoving liftgate. This could damage theliftgate and its components.
Note:Make sure that you fully close theliftgate to prevent cargo from falling out.
CLOSING THE LIFTGATE FROMOUTSIDE YOUR VEHICLE
WARNING: Make sure all personsare clear of the power liftgate area beforeusing the power liftgate control.
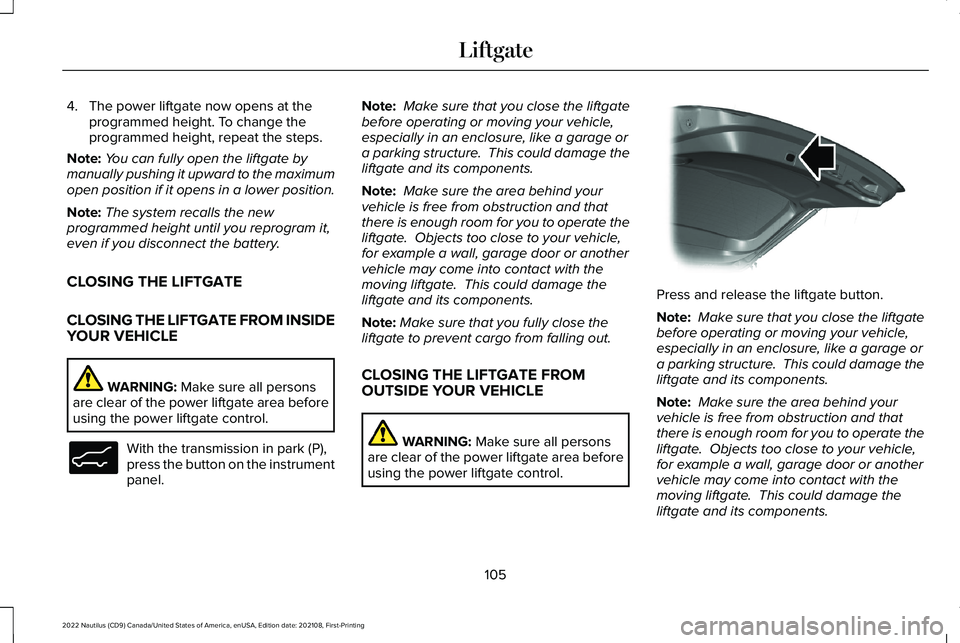
Press and release the liftgate button.
Note: Make sure that you close the liftgatebefore operating or moving your vehicle,especially in an enclosure, like a garage ora parking structure. This could damage theliftgate and its components.
Note: Make sure the area behind yourvehicle is free from obstruction and thatthere is enough room for you to operate theliftgate. Objects too close to your vehicle,for example a wall, garage door or anothervehicle may come into contact with themoving liftgate. This could damage theliftgate and its components.
105
2022 Nautilus (CD9) Canada/United States of America, enUSA, Edition date: 202108, First-PrintingLiftgateE138633 E138636
Page 110 of 586
Note:Make sure that you fully close theliftgate to prevent cargo from falling out.
CLOSING THE LIFTGATE USING THEREMOTE CONTROL
WARNING: Make sure all personsare clear of the power liftgate area beforeusing the power liftgate control.
Press the button twice within threeseconds.
Note: Make sure that you close the liftgatebefore operating or moving your vehicle,especially in an enclosure, like a garage ora parking structure. This could damage theliftgate and its components.
Note: Make sure the area behind yourvehicle is free from obstruction and thatthere is enough room for you to operate theliftgate. Objects too close to your vehicle,for example a wall, garage door or anothervehicle may come into contact with themoving liftgate. This could damage theliftgate and its components.
Note:Make sure that you fully close theliftgate to prevent cargo from falling out.
CLOSING THE HANDS-FREE LIFTGATE
(If Equipped)
Make sure you have the remote controlwithin 3 ft (1 m) of the liftgate.
1.Stand behind your vehicle, and face theliftgate.
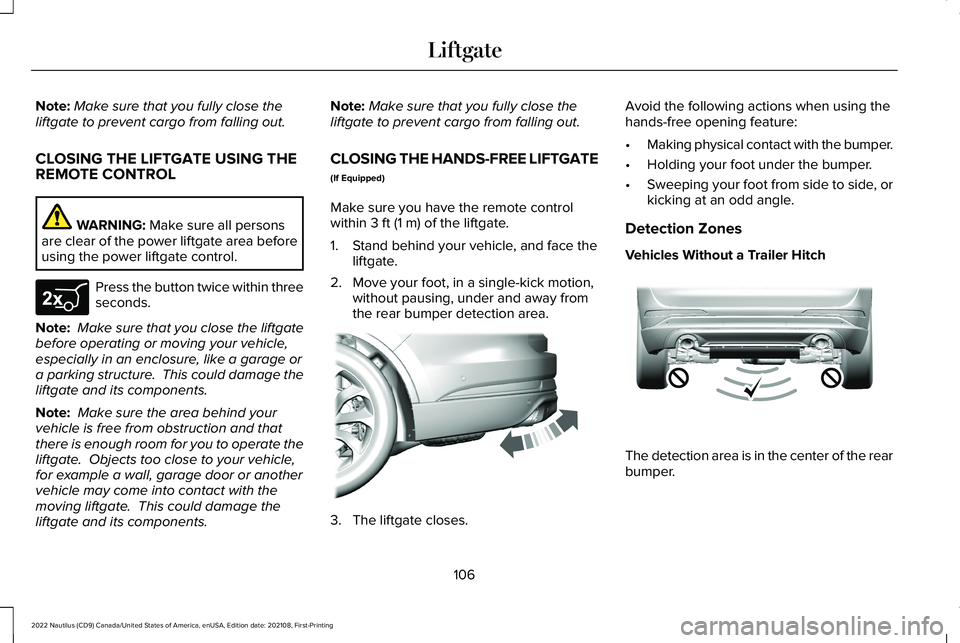
2.Move your foot, in a single-kick motion,without pausing, under and away fromthe rear bumper detection area.
3.The liftgate closes.
Avoid the following actions when using thehands-free opening feature:
•Making physical contact with the bumper.
•Holding your foot under the bumper.
•Sweeping your foot from side to side, orkicking at an odd angle.
Detection Zones
Vehicles Without a Trailer Hitch
The detection area is in the center of the rearbumper.
106
2022 Nautilus (CD9) Canada/United States of America, enUSA, Edition date: 202108, First-PrintingLiftgateE267940 E300799 E310717
Page 111 of 586
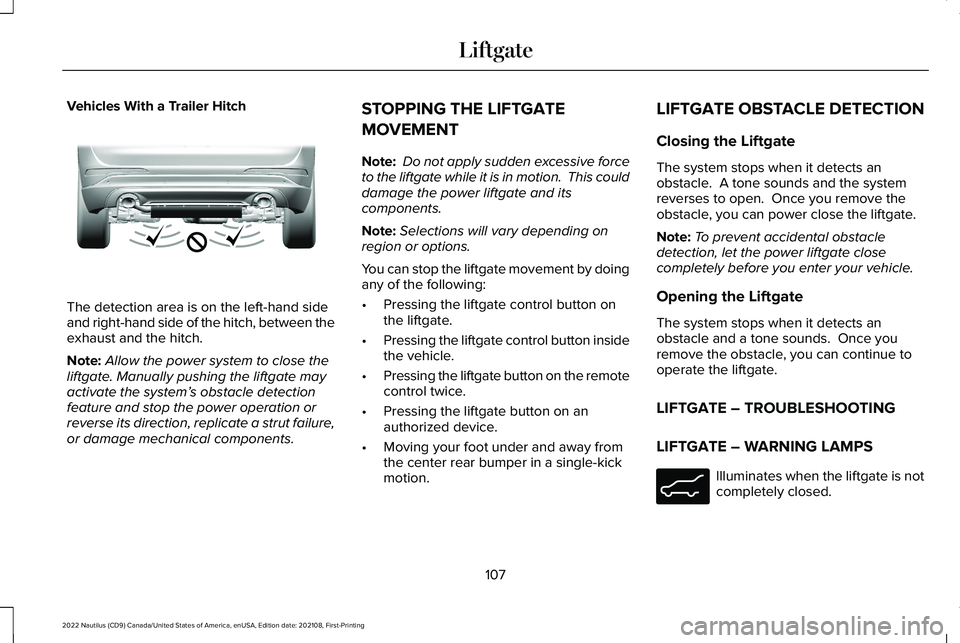
Vehicles With a Trailer Hitch
The detection area is on the left-hand sideand right-hand side of the hitch, between theexhaust and the hitch.
Note:Allow the power system to close theliftgate. Manually pushing the liftgate mayactivate the system’s obstacle detectionfeature and stop the power operation orreverse its direction, replicate a strut failure,or damage mechanical components.
STOPPING THE LIFTGATE
MOVEMENT
Note: Do not apply sudden excessive forceto the liftgate while it is in motion. This coulddamage the power liftgate and itscomponents.
Note:Selections will vary depending onregion or options.
You can stop the liftgate movement by doingany of the following:
•Pressing the liftgate control button onthe liftgate.
•Pressing the liftgate control button insidethe vehicle.
•Pressing the liftgate button on the remotecontrol twice.
•Pressing the liftgate button on anauthorized device.
•Moving your foot under and away fromthe center rear bumper in a single-kickmotion.
LIFTGATE OBSTACLE DETECTION
Closing the Liftgate
The system stops when it detects anobstacle. A tone sounds and the systemreverses to open. Once you remove theobstacle, you can power close the liftgate.
Note:To prevent accidental obstacledetection, let the power liftgate closecompletely before you enter your vehicle.
Opening the Liftgate
The system stops when it detects anobstacle and a tone sounds. Once youremove the obstacle, you can continue tooperate the liftgate.
LIFTGATE – TROUBLESHOOTING
LIFTGATE – WARNING LAMPS
Illuminates when the liftgate is notcompletely closed.
107
2022 Nautilus (CD9) Canada/United States of America, enUSA, Edition date: 202108, First-PrintingLiftgateE310718 E162453
Page 118 of 586
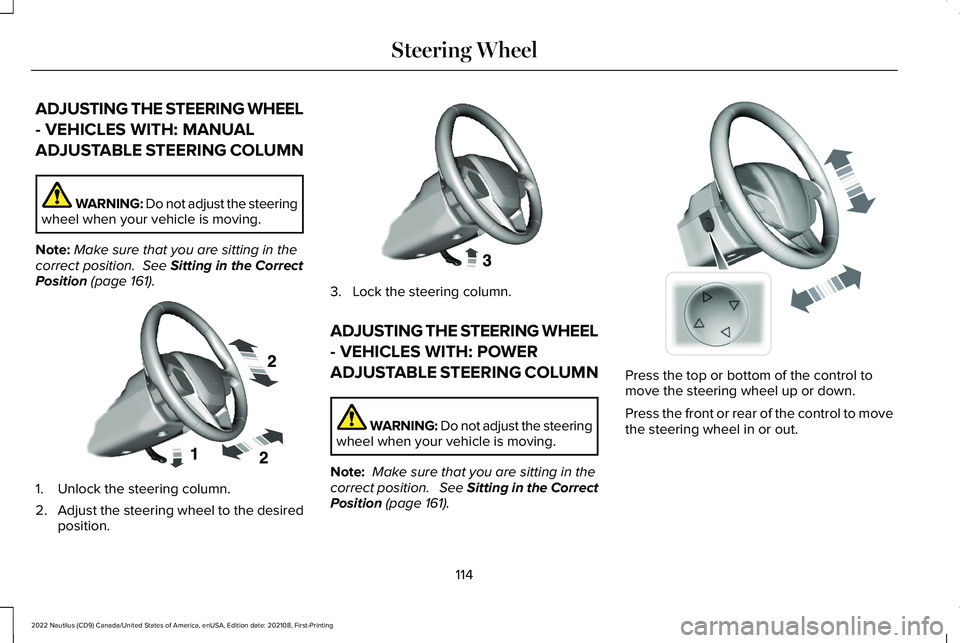
ADJUSTING THE STEERING WHEEL
- VEHICLES WITH: MANUAL
ADJUSTABLE STEERING COLUMN
WARNING: Do not adjust the steeringwheel when your vehicle is moving.
Note:Make sure that you are sitting in thecorrect position. See Sitting in the CorrectPosition (page 161).
1.Unlock the steering column.
2.Adjust the steering wheel to the desiredposition.
3.Lock the steering column.
ADJUSTING THE STEERING WHEEL
- VEHICLES WITH: POWER
ADJUSTABLE STEERING COLUMN
WARNING: Do not adjust the steeringwheel when your vehicle is moving.
Note: Make sure that you are sitting in thecorrect position. See Sitting in the CorrectPosition (page 161).
Press the top or bottom of the control tomove the steering wheel up or down.
Press the front or rear of the control to movethe steering wheel in or out.
114
2022 Nautilus (CD9) Canada/United States of America, enUSA, Edition date: 202108, First-PrintingSteering WheelE191039 E191047 E261582
Page 123 of 586

Note:Make sure that the wiper arm doesnot spring back against the glass when thewiper blade is not attached.
3.To install, reverse the removal procedure.
Note:Make sure that the wiper blade locksinto place.
WASHERS
WASHER PRECAUTIONS
WARNING: If you operate yourvehicle in temperatures below 41°F (5°C),use washer fluid with antifreeze protection.Failure to use washer fluid with antifreezeprotection in cold weather could result inimpaired windshield vision and increasethe risk of injury or accident.
Do not operate the washers when thewasher reservoir is empty. This could causethe washer pump to overheat.
Keep the outside of the windshield clean. The rain sensor is very sensitive and thewipers may operate if dirt, mist or insects hitthe windshield.
USING THE WINDSHIELD WASHER
Pull the lever toward you tooperate the windshield washer.
Note:A courtesy wipe occurs a short timeafter the wipers stop to clear any remainingwasher fluid when switched on. SeeSwitching the Courtesy Wipe On and Off(page 119).
SWITCHING THE COURTESY WIPE ONAND OFF
1.Using the instrument cluster controls onthe steering wheel, select Settings.
2.Select Vehicle.
3.Select Wipers.
4.Switch Courtesy Wipe on or off.
USING THE REAR WINDOW WASHER
Push the lever away from you to operate therear window washer.
119
2022 Nautilus (CD9) Canada/United States of America, enUSA, Edition date: 202108, First-PrintingWipers and WashersE269412 E270967 E269727
Page 124 of 586
Note:A courtesy wipe occurs a short timeafter the wipers stop to clear any remainingwasher fluid when switched on. SeeSwitching the Courtesy Wipe On and Off(page 119).
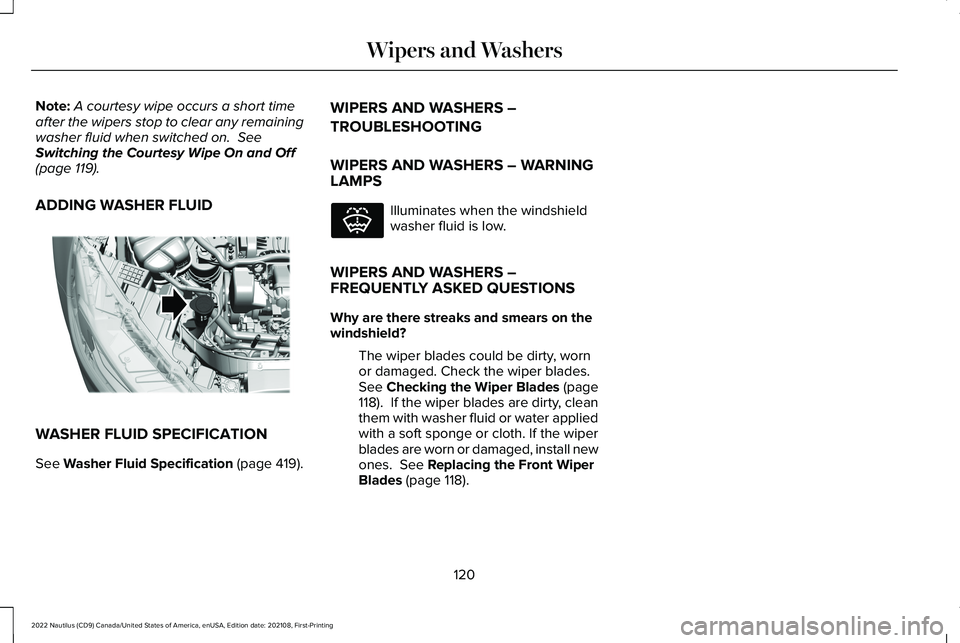
ADDING WASHER FLUID
WASHER FLUID SPECIFICATION
See Washer Fluid Specification (page 419).
WIPERS AND WASHERS –
TROUBLESHOOTING
WIPERS AND WASHERS – WARNINGLAMPS
Illuminates when the windshieldwasher fluid is low.
WIPERS AND WASHERS –FREQUENTLY ASKED QUESTIONS
Why are there streaks and smears on thewindshield?
The wiper blades could be dirty, wornor damaged. Check the wiper blades.See Checking the Wiper Blades (page118). If the wiper blades are dirty, cleanthem with washer fluid or water appliedwith a soft sponge or cloth. If the wiperblades are worn or damaged, install newones. See Replacing the Front WiperBlades (page 118).
120
2022 Nautilus (CD9) Canada/United States of America, enUSA, Edition date: 202108, First-PrintingWipers and WashersE330184 E132353
Page 126 of 586
HEADLAMPS – TROUBLESHOOTING
HEADLAMPS – FREQUENTLY ASKEDQUESTIONS
Why is there condensation in theheadlamps?
Headlamps have vents to accommodatenormal changes in air pressure.Condensation can be a naturalby-product of this design. When moistair enters the lamp assembly throughthe vents, there is a possibility thatcondensation can occur when thetemperature is cold. When normalcondensation occurs, a fine mist canform on the interior of the lens. The finemist eventually clears and exits throughthe vents during normal operation.
How much condensation is acceptable?
The presence of a fine mist, for exampleno streaks, drip marks or large droplets.A fine mist covers less than 50% of thelens.
How long may it take for the acceptablecondensation to be cleared?
Clearing time may take as long as 48hours under dry weather conditions.
How much condensation is unacceptable?
A water puddle inside the lamp. Streaks,drip marks or large droplets present onthe interior of the lens.
What should I do if unacceptablecondensation is present?
Have your vehicle checked as soon aspossible.
Why do my headlamps turn off when I havethem switched on when I switch my vehicleoff?
The battery saver turns the headlampsoff after a short period of time after youswitch your vehicle off.
AUTOLAMPS
WHAT ARE AUTOLAMPS
WARNING: The system does notrelieve you of your responsibility to drivewith due care and attention. You may needto override the system if it does not turnthe headlamps on in low visibilityconditions, for example daytime fog.
Autolamps turn the headlamps on in low lightsituations or when the windshield wipersoperate.
AUTOLAMP SETTINGS
1.Using the instrument cluster controls onthe steering wheel, select Settings.
2.Select Vehicle.
3.Select Lighting.
4.Select Autolamp Delay.
5.Select a setting and press the OK button.
122
2022 Nautilus (CD9) Canada/United States of America, enUSA, Edition date: 202108, First-PrintingExterior Lighting
Page 127 of 586
EXTERIOR LAMPS
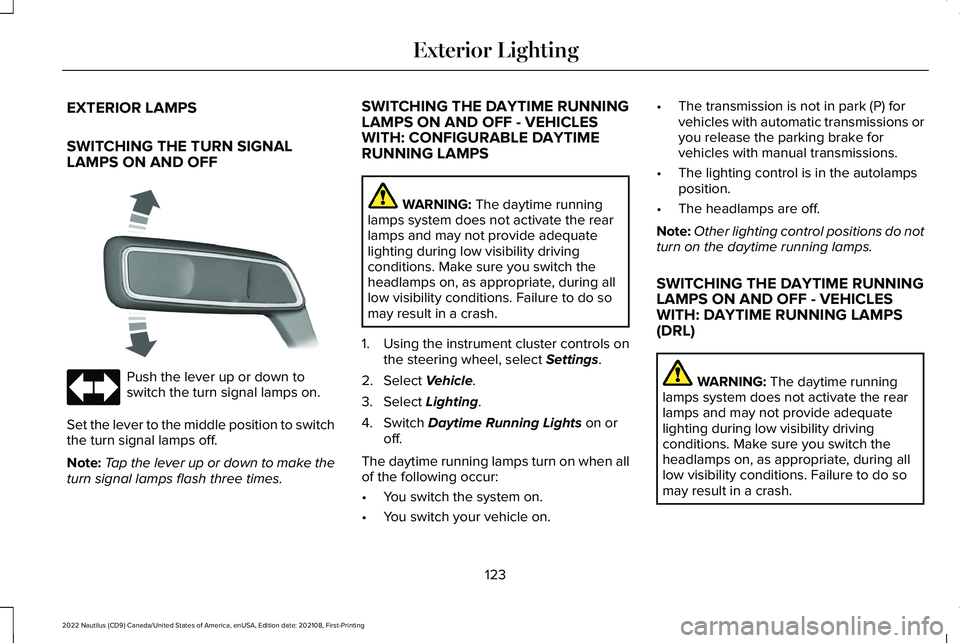
SWITCHING THE TURN SIGNALLAMPS ON AND OFF
Push the lever up or down toswitch the turn signal lamps on.
Set the lever to the middle position to switchthe turn signal lamps off.
Note:Tap the lever up or down to make theturn signal lamps flash three times.
SWITCHING THE DAYTIME RUNNINGLAMPS ON AND OFF - VEHICLESWITH: CONFIGURABLE DAYTIMERUNNING LAMPS
WARNING: The daytime runninglamps system does not activate the rearlamps and may not provide adequatelighting during low visibility drivingconditions. Make sure you switch theheadlamps on, as appropriate, during alllow visibility conditions. Failure to do somay result in a crash.
1.Using the instrument cluster controls onthe steering wheel, select Settings.
2.Select Vehicle.
3.Select Lighting.
4.Switch Daytime Running Lights on oroff.
The daytime running lamps turn on when allof the following occur:
•You switch the system on.
•You switch your vehicle on.
•The transmission is not in park (P) forvehicles with automatic transmissions oryou release the parking brake forvehicles with manual transmissions.
•The lighting control is in the autolampsposition.
•The headlamps are off.
Note:Other lighting control positions do notturn on the daytime running lamps.
SWITCHING THE DAYTIME RUNNINGLAMPS ON AND OFF - VEHICLESWITH: DAYTIME RUNNING LAMPS(DRL)
WARNING: The daytime runninglamps system does not activate the rearlamps and may not provide adequatelighting during low visibility drivingconditions. Make sure you switch theheadlamps on, as appropriate, during alllow visibility conditions. Failure to do somay result in a crash.
123
2022 Nautilus (CD9) Canada/United States of America, enUSA, Edition date: 202108, First-PrintingExterior Lighting E273180
Page 128 of 586
Daytime running lamps are always on unlessyou switch on the headlamps or your vehicleis in park (P).
SWITCHING THE FRONT FOG LAMPSON AND OFF (If Equipped)
The front fog lamp button is on the lightingcontrol.
Press the button to switch the frontfog lamps on or off.
Note:Only switch the front fog lamps onduring reduced visibility.
Note:The brightness of the daytime runninglamps may decrease when the front foglamps are switched on.
Note:When the lighting control is in theautolamps position, you cannot switch thefog lamps on unless the headlamps are on.
SWITCHING WELCOME LIGHTING ONAND OFF
Welcome lighting slowly turns on the exteriorlamps when you approach your vehicle withan authenticated device or unlock the doors.
1.Using the instrument cluster controls onthe steering wheel, select Settings.
2.Select Vehicle.
3.Select Lighting.
4.Switch Welcome Lighting on or off.
EXTERIOR LAMP INDICATORS
Front Fog Lamp
It illuminates when you switch thefront fog lamps on.
Turn Signal Lamp
It flashes when you switch the turnsignal lamps on.
Note:An increase in the rate of flashingwarns of a failed turn signal lamp.
EXTERIOR LAMP AUDIBLE WARNING
Exterior Lamps On
Sounds when you open the driver door andthe exterior lamps are on.
AUTOMATIC HIGH BEAM CONTROL
HOW DOES AUTOMATIC HIGH BEAMCONTROL WORK
Automatic high beam control turns the highbeams on if it is dark enough and no othertraffic is present. If it detects an approachingvehicle’s headlamps or tail lamps, or streetlighting ahead, the system turns the highbeams off.
A camera sensor, centrally mounted behindthe windshield of your vehicle, continuouslymonitors conditions to turn the high beamson and off.
124
2022 Nautilus (CD9) Canada/United States of America, enUSA, Edition date: 202108, First-PrintingExterior Lighting