warning light LINCOLN NAUTILUS 2023 Owners Manual
[x] Cancel search | Manufacturer: LINCOLN, Model Year: 2023, Model line: NAUTILUS, Model: LINCOLN NAUTILUS 2023Pages: 606, PDF Size: 13.57 MB
Page 21 of 606
ABOUT THIS PUBLICATION
WARNING: Driving while distractedcan result in loss of vehicle control, crashand injury. We strongly recommend thatyou use extreme caution when using anydevice that may take your focus off theroad. Your primary responsibility is the safeoperation of your vehicle. We recommendagainst the use of any hand-held devicewhile driving and encourage the use ofvoice-operated systems when possible.Make sure you are aware of all applicablelocal laws that may affect the use ofelectronic devices while driving.
WARNING: You risk death, fire, orserious injury to yourself and others if youdo not follow the instruction highlightedby the warning symbol.
Thank you for choosing Lincoln. Werecommend that you take some time to getto know your vehicle in order to benefit fromgreater safety and pleasure from driving it. Use this digital manual, that we have alsomade available for your continued usethrough the Lincoln Way app and your localLincoln website to familiarize yourself withthe basics.
Note:To download the Lincoln Way app,visit your device's app store.
Note:To find the local Ford website, visithttps://corporate.ford.com/operations/locations/global-links.html.
Note: Use and operate your vehicle in linewith all applicable laws and regulations.
Note:Pass on all printed owner’s informationwhen selling this vehicle.
Our digital resources include acomprehensive digital owner’s manual thatis dynamically created according to thefeatures on your vehicle by using the vehicleidentification number. See Locating theVehicle Identification Number (page 426).The digital owner’s manual includes visual
and full text search functions so that you canquickly locate the information you arelooking for. It also includes links to a numberof how-to videos created to help youunderstand some of the advancedtechnologies on your vehicle.
Features and Options
This publication describes product featuresand options available throughout the rangeof available models, sometimes even beforethey are generally available. It may describeoptions that are not available on the vehicleyou have bought.
Illustrations
Some of the illustrations in this manual couldshow features as used in different models,some can appear different to you on yourvehicle.
Location of Components
This manual may qualify the location of acomponent as left-hand side or right-handside. The side is determined when facingforward in the seat.
17
2023 Nautilus (CD9) Canada/United States of America, enUSA, Edition date: 202207, DOMIntroduction
Page 24 of 606
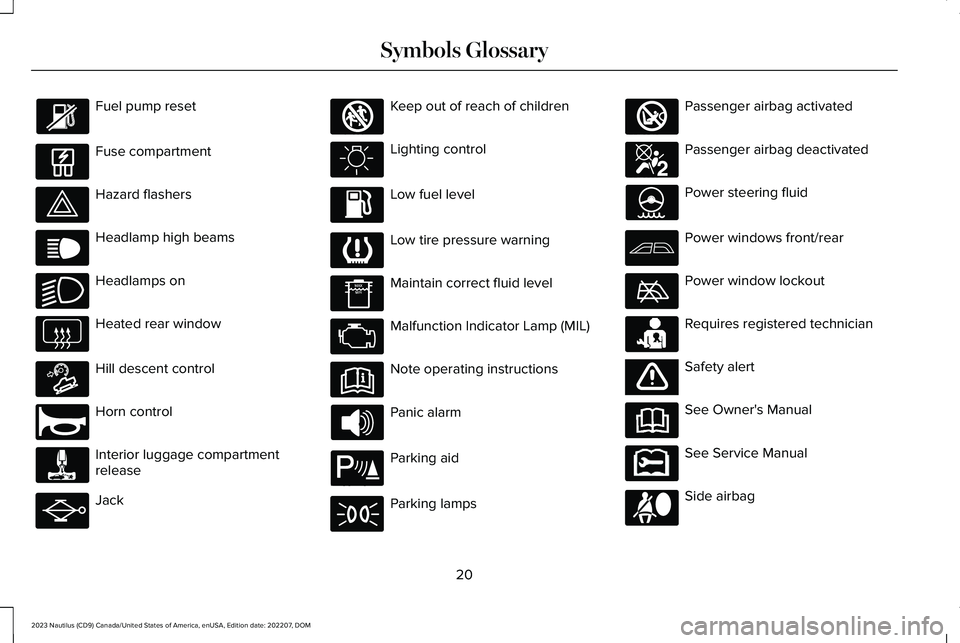
Fuel pump reset
Fuse compartment
Hazard flashers
Headlamp high beams
Headlamps on
Heated rear window
Hill descent control
Horn control
Interior luggage compartmentrelease
Jack
Keep out of reach of children
Lighting control
Low fuel level
Low tire pressure warning
Maintain correct fluid level
Malfunction Indicator Lamp (MIL)
Note operating instructions
Panic alarm
Parking aid
Parking lamps
Passenger airbag activated
Passenger airbag deactivated
Power steering fluid
Power windows front/rear
Power window lockout
Requires registered technician
Safety alert
See Owner's Manual
See Service Manual
Side airbag
20
2023 Nautilus (CD9) Canada/United States of America, enUSA, Edition date: 202207, DOMSymbols Glossary E139214 E75790 E67019 E270968 E163171 E270945 E139231 E161353 E139232 E139229 E67028 E72343 E139213 E71341 E270849 E270850 E139216 E139225 E231159 E65963 E72021 E231158
Page 50 of 606
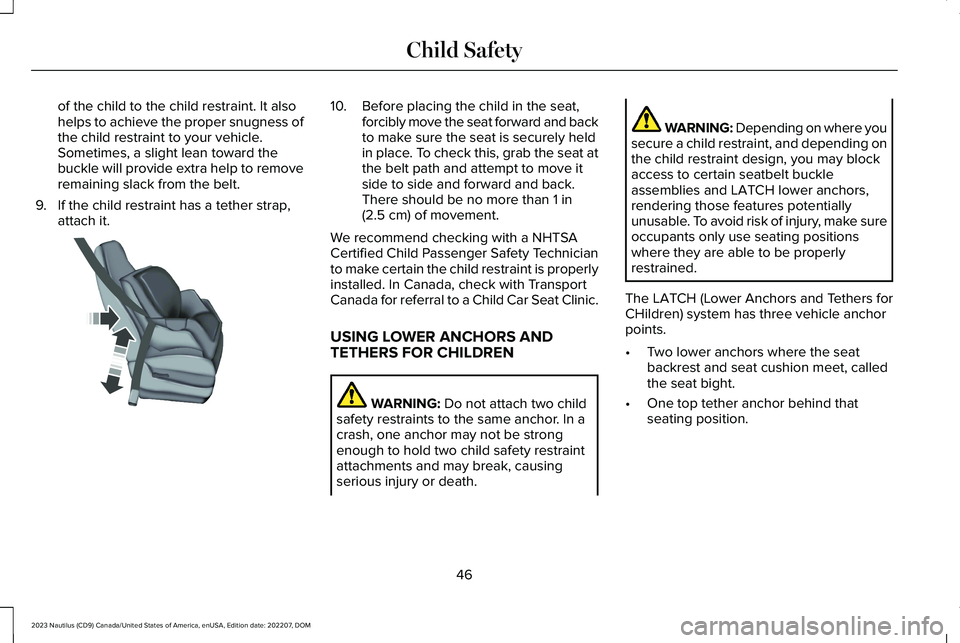
of the child to the child restraint. It alsohelps to achieve the proper snugness ofthe child restraint to your vehicle.Sometimes, a slight lean toward thebuckle will provide extra help to removeremaining slack from the belt.
9.If the child restraint has a tether strap,attach it.
10.Before placing the child in the seat,forcibly move the seat forward and backto make sure the seat is securely heldin place. To check this, grab the seat atthe belt path and attempt to move itside to side and forward and back.There should be no more than 1 in(2.5 cm) of movement.
We recommend checking with a NHTSACertified Child Passenger Safety Technicianto make certain the child restraint is properlyinstalled. In Canada, check with TransportCanada for referral to a Child Car Seat Clinic.
USING LOWER ANCHORS ANDTETHERS FOR CHILDREN
WARNING: Do not attach two childsafety restraints to the same anchor. In acrash, one anchor may not be strongenough to hold two child safety restraintattachments and may break, causingserious injury or death.
WARNING: Depending on where yousecure a child restraint, and depending onthe child restraint design, you may blockaccess to certain seatbelt buckleassemblies and LATCH lower anchors,rendering those features potentiallyunusable. To avoid risk of injury, make sureoccupants only use seating positionswhere they are able to be properlyrestrained.
The LATCH (Lower Anchors and Tethers forCHildren) system has three vehicle anchorpoints.
•Two lower anchors where the seatbackrest and seat cushion meet, calledthe seat bight.
•One top tether anchor behind thatseating position.
46
2023 Nautilus (CD9) Canada/United States of America, enUSA, Edition date: 202207, DOMChild SafetyE142534
Page 58 of 606
The seatbelt system consists of:
•Lap and shoulder seatbelts.
•Shoulder seatbelt with automatic lockingmode, except driver seatbelt.
•Height adjuster at the front outermostseating positions.
•Seatbelt pretensioners at the frontoutermost and second row outermostseating positions.
•Belt tension sensor at the front outermostpassenger seating position.
•Seatbelt warning light and chime.
•Crash sensors and monitoring systemwith readiness indicator.
The seatbelt pretensioners are designed totighten the seatbelts when activated. Infrontal and near-frontal crashes, the seatbeltpretensioners may be activated alone or, ifthe crash is of sufficient severity, togetherwith the front airbags. The pretensioners mayalso activate when a Safety Canopy airbagdeploys.
FASTENING AND UNFASTENING
THE SEATBELTS
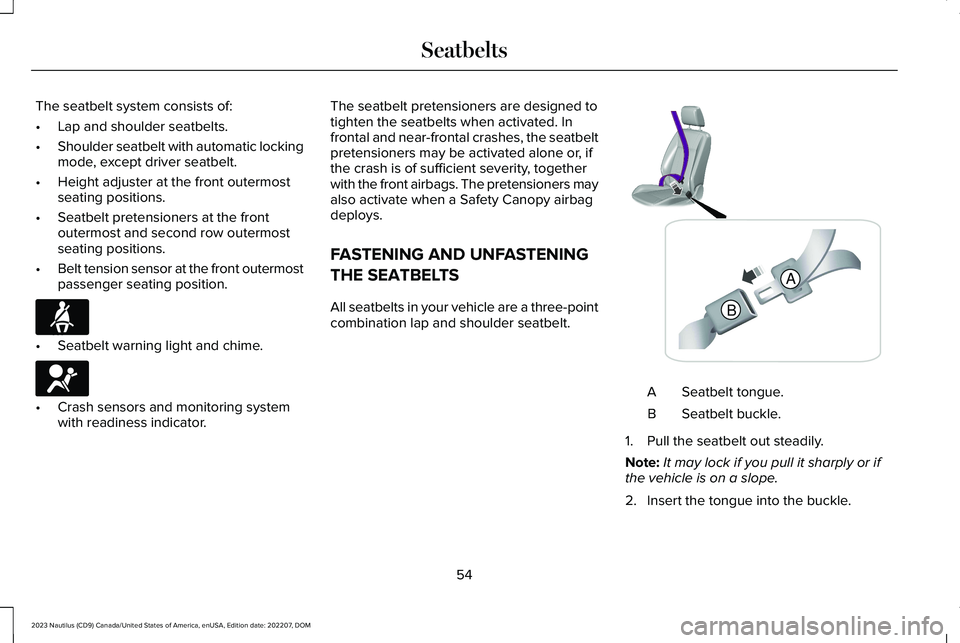
All seatbelts in your vehicle are a three-pointcombination lap and shoulder seatbelt.
Seatbelt tongue.A
Seatbelt buckle.B
1.Pull the seatbelt out steadily.
Note:It may lock if you pull it sharply or ifthe vehicle is on a slope.
2.Insert the tongue into the buckle.
54
2023 Nautilus (CD9) Canada/United States of America, enUSA, Edition date: 202207, DOMSeatbeltsE71880 E67017 BA E338014
Page 65 of 606
Make sure that:
•The parking brake is set.
•The transmission is in park (P).
•The ignition is off.
•The driver and front passenger seatbeltsare unfastened.
1.Switch the ignition on. Do not start theengine.
2.After Step 1, wait an additional fiveseconds before proceeding with Step 3.Once you start Step 3, you mustcomplete the procedure within 30seconds.
3.For the seating position you are switchingoff, buckle then unbuckle the seatbeltfour times at a moderate speed, endingin the unbuckled state. After Step 3, theseatbelt warning light switches on.
4.When the seatbelt warning light is on,buckle then unbuckle the seatbelt. AfterStep 4, the seatbelt warning light flashesfor confirmation.
This switches the feature off for that seatingposition if it is currently on.
This switches the feature on for that seatingposition if it is currently off.
CHECKING THE SEATBELTS
Check the seatbelts and child restraintsperiodically to make sure they work properlyand are not damaged. Make sure there areno nicks, tears or cuts. Replace if necessary.
Check the following seatbelt assemblies aftera crash.
•Retractors.
•Buckles.
•Front seatbelt buckle assemblies.
•Shoulder belt height adjusters.
•Shoulder belt guide on seat backrest.
•Child restraint LATCH and tether anchors.
•Attaching hardware.
Read the child restraint manufacturer'sinstructions for additional inspection andmaintenance information specific to the childrestraint.
We recommend that all seatbelt assembliesin use in vehicles involved in a crash bereplaced. However, if the crash was minorand an authorized dealer finds that the beltsdo not show damage and continue tooperate properly, they do not need to bereplaced. Seatbelt assemblies not in useduring a crash should also be checked andreplaced if either damage or improperoperation is noted.
Properly care for seatbelts. See CleaningSeatbelts (page 370).
SEATBELT EXTENSIONS
WARNING: Persons who fit into thevehicle's seatbelt should not use anextension. Unnecessary use could resultin serious personal injury in the event of acrash.
61
2023 Nautilus (CD9) Canada/United States of America, enUSA, Edition date: 202207, DOMSeatbelts
Page 67 of 606
WHAT IS THE PERSONAL SAFETY
SYSTEM
An advanced safety system that protectsoccupants in frontal crashes.
HOW DOES THE PERSONAL
SAFETY SYSTEM WORK
This system provides an improved level offrontal crash protection to front seatoccupants and is designed to reduce the riskof airbag-related injuries. The systemanalyzes occupant conditions and crashseverity before activating the appropriatesafety devices. During a crash, the restraintscontrol module may deploy the seatbeltpretensioners, and one or both stages of thedual-stage airbags based on crash severityand occupant conditions.
PERSONAL SAFETY SYSTEM
COMPONENTS
•Driver and passenger dual-stage airbagsupplemental restraints.
•Front seat outermost seatbelts withpretensioners, energy managementretractors and seatbelt usage sensors.
•Driver seat position sensor.
•Passenger seat position sensor.
•Front passenger sensing system.
•Passenger airbag off and on indicators.
•Front crash severity sensors.
•Restraints control module with impactand safing sensors.
•Restraint system warning light and tone.
•The electrical wiring for the airbags, crashsensors, seatbelt pretensioners, frontseatbelt usage sensors, front passengersensing system and indicator lights.
63
2023 Nautilus (CD9) Canada/United States of America, enUSA, Edition date: 202207, DOMPersonal Safety System™
Page 72 of 606
PROPERLY ADJUSTING THE
DRIVER AND FRONT PASSENGER
SEATS
WARNING: National Highway TrafficSafety Administration (NHTSA)recommends a minimum distance of atleast 10 in (25 cm) between an occupant'schest and the driver airbag module.
To properly position yourself away from theairbag:
•Move your seat to the rear as far as youcan while still reaching the pedalscomfortably.
•Recline the seat slightly one or twodegrees from the upright position.
After all occupants have adjusted their seatsand put on seatbelts, it is very important thatthey continue to sit properly. Properly seatedoccupants sit upright, lean against the seatbackrest, and center themselves on the seatcushion, with their feet comfortably extendedon the floor. Sitting improperly can increase
the chance of injury in a crash event. Forexample, if an occupant slouches, lies down,turns sideways, sits forward, leans forwardor sideways, or puts one or both feet up, thechance of injury during a crash greatlyincreases.
CHILDREN AND AIRBAGS
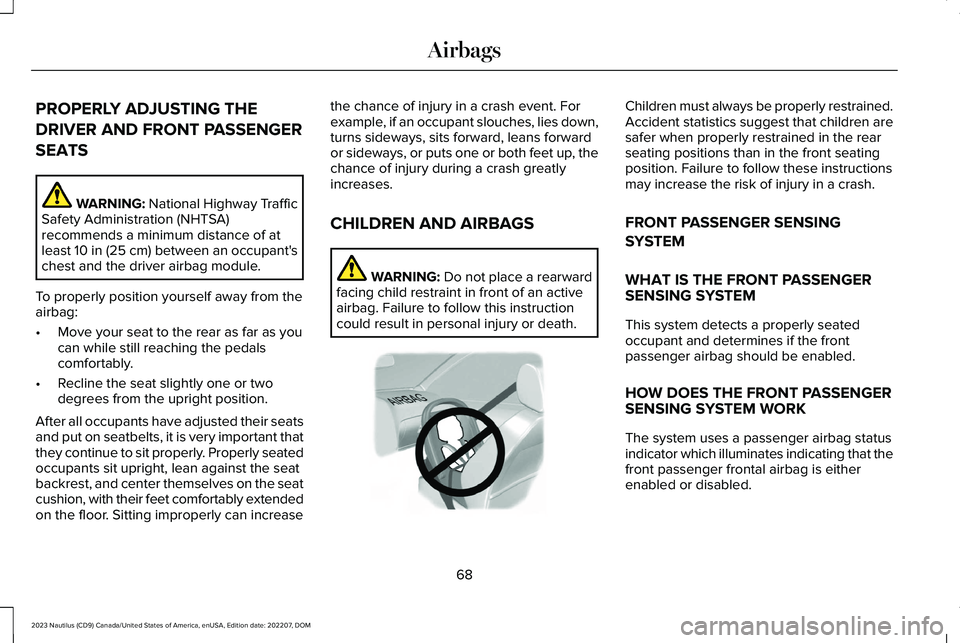
WARNING: Do not place a rearwardfacing child restraint in front of an activeairbag. Failure to follow this instructioncould result in personal injury or death.
Children must always be properly restrained.Accident statistics suggest that children aresafer when properly restrained in the rearseating positions than in the front seatingposition. Failure to follow these instructionsmay increase the risk of injury in a crash.
FRONT PASSENGER SENSING
SYSTEM
WHAT IS THE FRONT PASSENGERSENSING SYSTEM
This system detects a properly seatedoccupant and determines if the frontpassenger airbag should be enabled.
HOW DOES THE FRONT PASSENGERSENSING SYSTEM WORK
The system uses a passenger airbag statusindicator which illuminates indicating that thefront passenger frontal airbag is eitherenabled or disabled.
68
2023 Nautilus (CD9) Canada/United States of America, enUSA, Edition date: 202207, DOMAirbagsE142846
Page 76 of 606
CRASH SENSORS AND AIRBAG
INDICATOR
WARNING: Modifying or addingequipment to the front of your vehiclecould affect the performance of the airbagsystem, increasing the risk of injury. Thisincludes the hood, bumper system, frame,front body structure, tow hooks, hood pins,push bar and snowplows.
Your vehicle has a collection of crash andoccupant sensors. These sensors provideinformation to the restraints control modulewhich activates the following:
•Front and rear seatbelt pretensioners.
•Driver airbag.
•Passenger airbag.
•Knee airbag(s).
•Seat mounted side airbags.
•Safety Canopy.
Based on the type of crash, the restraintscontrol module deploys the appropriatesafety devices.
The restraints control module also monitorsthe readiness of the above safety devicesplus the crash and occupant sensors. Thereadiness of the safety system is indicatedby a warning indicator light in the instrumentcluster or by a backup tone if the warninglight is not working. Routine maintenance ofthe airbag is not required.
A difficulty with the system is indicated byone or more of the following:
The readiness light will notilluminate immediately after youswitch the ignition on.
•The readiness light either flashes or stayson.
•You hear a series of five tones. The tonepattern repeats periodically until theproblem, the light or both are repaired.
If any of these things happen, evenintermittently, have the supplementalrestraint system serviced immediately.Unless serviced, the system may not functionproperly in the event of a crash.
The fact that the seatbelt pretensioners orfront airbags did not activate for both frontseat occupants in a crash does not meanthat something is wrong with the system.Rather, it means the restraints control moduledetermined the accident conditions (crashseverity, seatbelt usage) were notappropriate to activate these safety devices.
•The front airbags activate only in frontaland near-frontal crashes. Front airbagsmay activate in rollovers, side impacts orrear impacts if the crash causes sufficientfrontal deceleration.
•The seatbelt pretensioners activate infrontal, near-frontal and side crashes, andin rollovers.
•The knee airbag(s) deploy based oncrash severity and occupant conditions.
72
2023 Nautilus (CD9) Canada/United States of America, enUSA, Edition date: 202207, DOMAirbagsE67017
Page 125 of 606
HEADLAMPS – TROUBLESHOOTING
HEADLAMPS – FREQUENTLY ASKEDQUESTIONS
Why is there condensation in the
headlamps?
•Headlamps have vents to accommodatenormal changes in air pressure.Condensation can be a naturalby-product of this design. When moist airenters the lamp assembly through thevents, there is a possibility thatcondensation can occur when thetemperature is cold. When normalcondensation occurs, a fine mist can formon the interior of the lens. The fine misteventually clears and exits through thevents during normal operation.
How much condensation is acceptable?
•The presence of a fine mist, for exampleno streaks, drip marks or large droplets.A fine mist covers less than 50% of thelens.
How long may it take for theacceptable condensation to becleared?
•Clearing time may take as long as 48hours under dry weather conditions.
How much condensation isunacceptable?
•A water puddle inside the lamp. Streaks,drip marks or large droplets present onthe interior of the lens.
What should I do if unacceptablecondensation is present?
•Have your vehicle checked as soon aspossible.
Why do my headlamps turn off when Ihave them switched on when I switchmy vehicle off?
•The battery saver turns the headlampsoff after a short period of time after youswitch your vehicle off.
AUTOLAMPS
WHAT ARE AUTOLAMPS
WARNING: The system does notrelieve you of your responsibility to drivewith due care and attention. You may needto override the system if it does not turnthe headlamps on in low visibilityconditions, for example daytime fog.
Autolamps turn the headlamps on in low lightsituations or when the windshield wipersoperate.
AUTOLAMP SETTINGS
1.Using the instrument cluster controls onthe steering wheel, select Settings.
2.Select Vehicle.
3.Select Lighting.
4.Select Autolamp Delay.
5.Select a setting and press the OK button.
121
2023 Nautilus (CD9) Canada/United States of America, enUSA, Edition date: 202207, DOMExterior Lighting
Page 126 of 606

EXTERIOR LAMPS
USING THE TURN SIGNAL LAMPS
Push the lever up or down toswitch the turn signal lamps on.
Set the lever to the middle position to switchthe turn signal lamps off.
Note:Tap the lever up or down to make theturn signal lamps flash three times.
Turn Signal Lamp Indicator
It flashes when you switch the turnsignal lamps on.
Note:An increase in the rate of flashingwarns of a failed turn signal lamp.
SWITCHING THE DAYTIME RUNNINGLAMPS ON AND OFF - VEHICLESWITH: CONFIGURABLE DAYTIMERUNNING LAMPS
WARNING: The daytime runninglamps system does not activate the rearlamps and may not provide adequatelighting during low visibility drivingconditions. Make sure you switch theheadlamps on, as appropriate, during alllow visibility conditions. Failure to do somay result in a crash.
1.Using the instrument cluster controls onthe steering wheel, select Settings.
2.Select Vehicle.
3.Select Lighting.
4.Switch Daytime Running Lights on oroff.
The daytime running lamps turn on when allof the following occur:
•You switch the system on.
•You switch your vehicle on.
•The transmission is not in park (P) forvehicles with automatic transmissions oryou release the parking brake forvehicles with manual transmissions.
•The lighting control is in the autolampsposition.
•The headlamps are off.
Note:Other lighting control positions do notturn on the daytime running lamps.
122
2023 Nautilus (CD9) Canada/United States of America, enUSA, Edition date: 202207, DOMExterior Lighting E273180 E67018 E67018