clock LINCOLN NAVIGATOR 2007 User Guide
[x] Cancel search | Manufacturer: LINCOLN, Model Year: 2007, Model line: NAVIGATOR, Model: LINCOLN NAVIGATOR 2007Pages: 312, PDF Size: 2.74 MB
Page 188 of 312
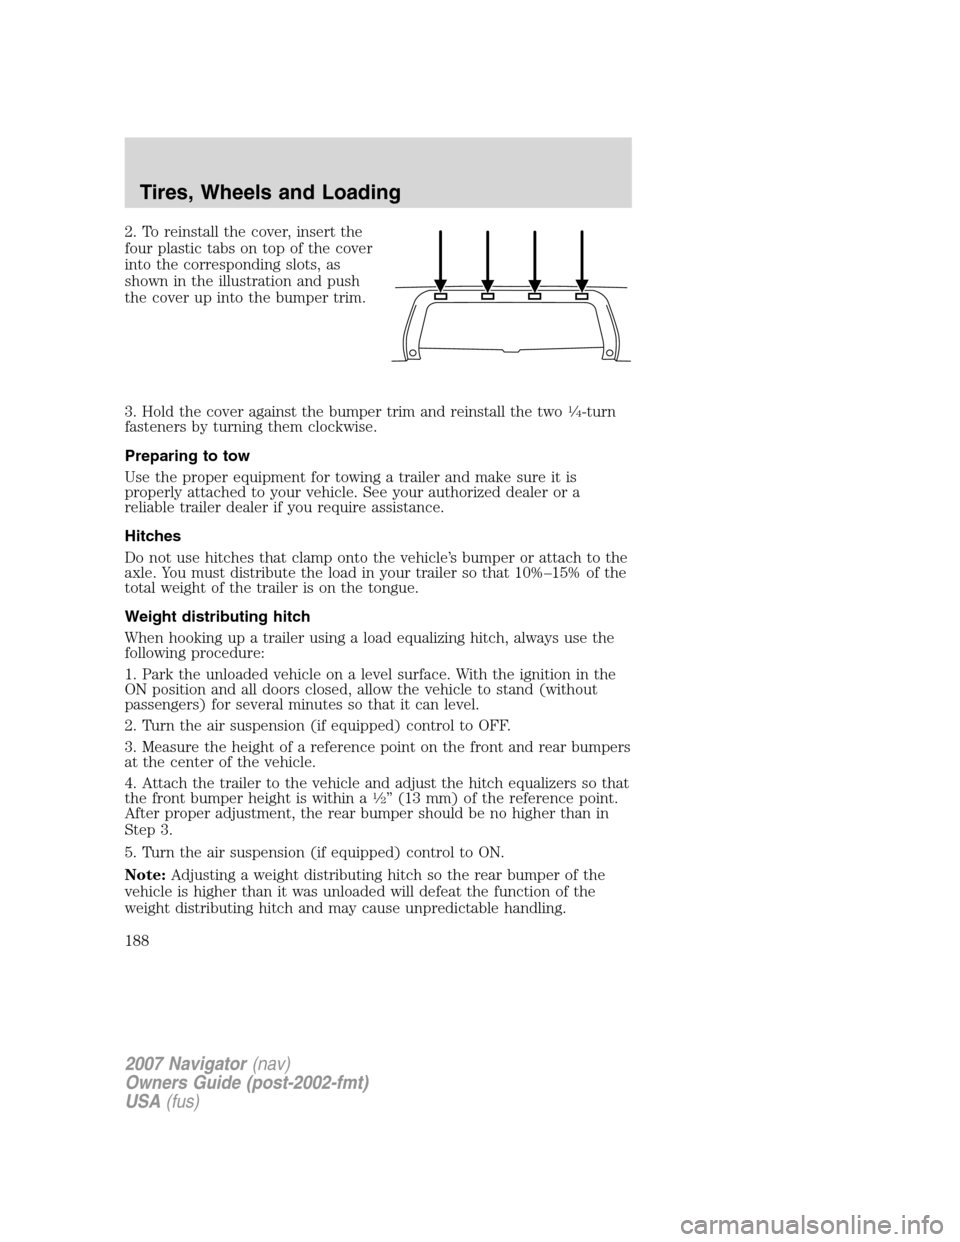
2. To reinstall the cover, insert the
four plastic tabs on top of the cover
into the corresponding slots, as
shown in the illustration and push
the cover up into the bumper trim.
3. Hold the cover against the bumper trim and reinstall the two
1�4-turn
fasteners by turning them clockwise.
Preparing to tow
Use the proper equipment for towing a trailer and make sure it is
properly attached to your vehicle. See your authorized dealer or a
reliable trailer dealer if you require assistance.
Hitches
Do not use hitches that clamp onto the vehicle’s bumper or attach to the
axle. You must distribute the load in your trailer so that 10%–15% of the
total weight of the trailer is on the tongue.
Weight distributing hitch
When hooking up a trailer using a load equalizing hitch, always use the
following procedure:
1. Park the unloaded vehicle on a level surface. With the ignition in the
ON position and all doors closed, allow the vehicle to stand (without
passengers) for several minutes so that it can level.
2. Turn the air suspension (if equipped) control to OFF.
3. Measure the height of a reference point on the front and rear bumpers
at the center of the vehicle.
4. Attach the trailer to the vehicle and adjust the hitch equalizers so that
the front bumper height is within a
1�2” (13 mm) of the reference point.
After proper adjustment, the rear bumper should be no higher than in
Step 3.
5. Turn the air suspension (if equipped) control to ON.
Note:Adjusting a weight distributing hitch so the rear bumper of the
vehicle is higher than it was unloaded will defeat the function of the
weight distributing hitch and may cause unpredictable handling.
2007 Navigator(nav)
Owners Guide (post-2002-fmt)
USA(fus)
Tires, Wheels and Loading
188
Page 226 of 312
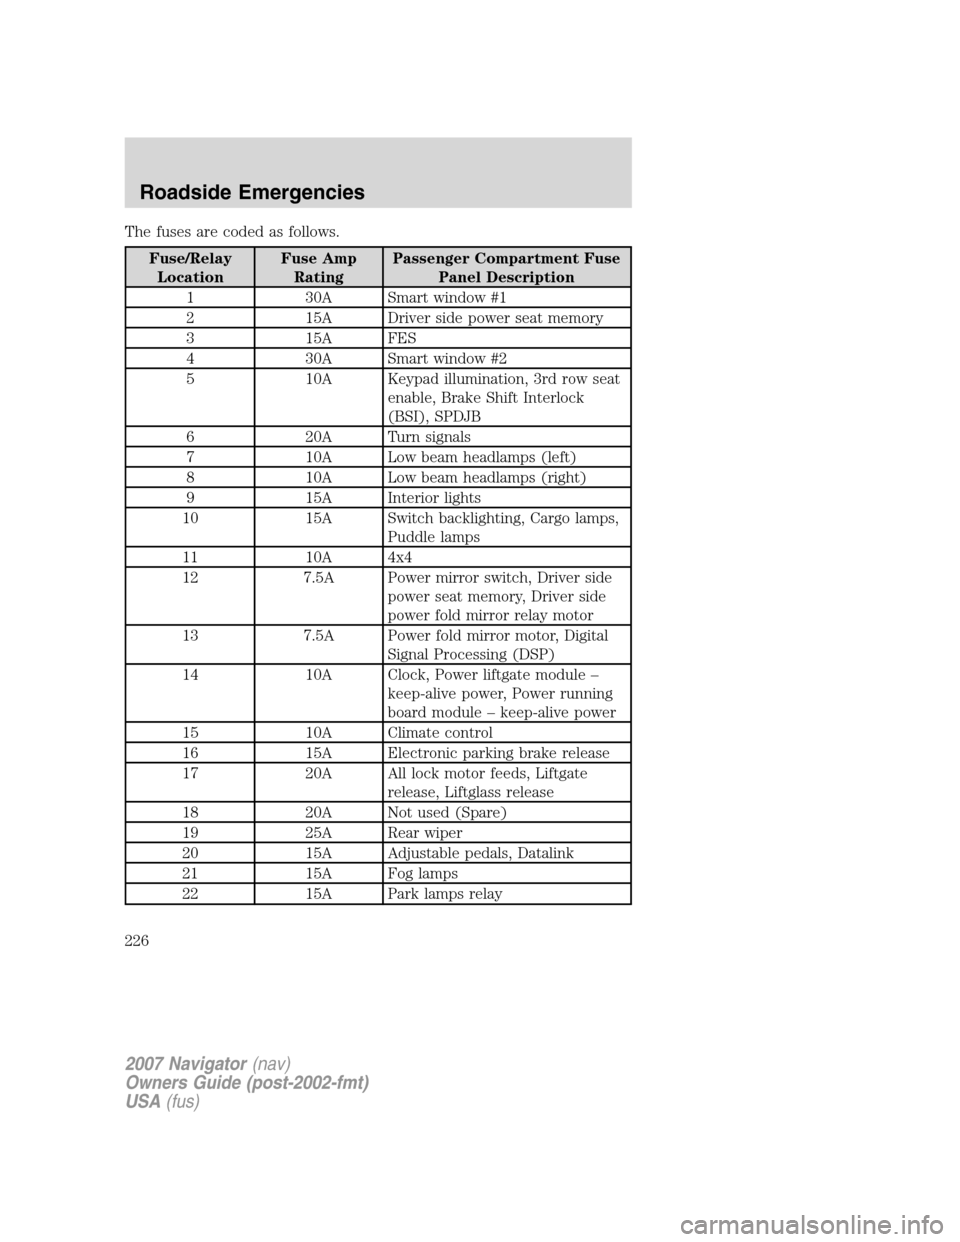
The fuses are coded as follows.
Fuse/Relay
LocationFuse Amp
RatingPassenger Compartment Fuse
Panel Description
1 30A Smart window #1
2 15A Driver side power seat memory
3 15A FES
4 30A Smart window #2
5 10A Keypad illumination, 3rd row seat
enable, Brake Shift Interlock
(BSI), SPDJB
6 20A Turn signals
7 10A Low beam headlamps (left)
8 10A Low beam headlamps (right)
9 15A Interior lights
10 15A Switch backlighting, Cargo lamps,
Puddle lamps
11 10A 4x4
12 7.5A Power mirror switch, Driver side
power seat memory, Driver side
power fold mirror relay motor
13 7.5A Power fold mirror motor, Digital
Signal Processing (DSP)
14 10A Clock, Power liftgate module –
keep-alive power, Power running
board module – keep-alive power
15 10A Climate control
16 15A Electronic parking brake release
17 20A All lock motor feeds, Liftgate
release, Liftglass release
18 20A Not used (Spare)
19 25A Rear wiper
20 15A Adjustable pedals, Datalink
21 15A Fog lamps
22 15A Park lamps relay
2007 Navigator(nav)
Owners Guide (post-2002-fmt)
USA(fus)
Roadside Emergencies
226
Page 235 of 312
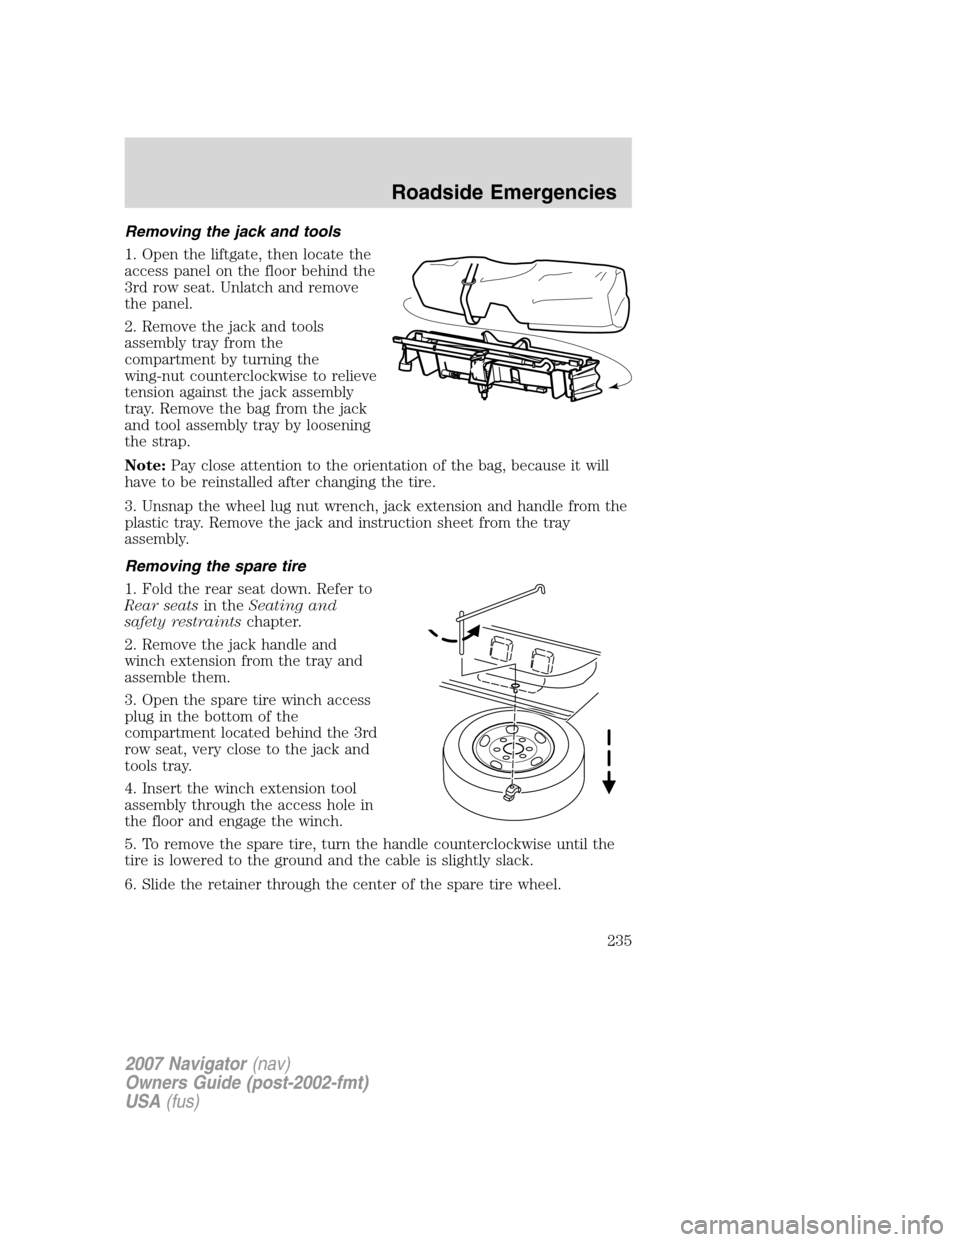
Removing the jack and tools
1. Open the liftgate, then locate the
access panel on the floor behind the
3rd row seat. Unlatch and remove
the panel.
2. Remove the jack and tools
assembly tray from the
compartment by turning the
wing-nut counterclockwise to relieve
tension against the jack assembly
tray. Remove the bag from the jack
and tool assembly tray by loosening
the strap.
Note:Pay close attention to the orientation of the bag, because it will
have to be reinstalled after changing the tire.
3. Unsnap the wheel lug nut wrench, jack extension and handle from the
plastic tray. Remove the jack and instruction sheet from the tray
assembly.
Removing the spare tire
1. Fold the rear seat down. Refer to
Rear seatsin theSeating and
safety restraintschapter.
2. Remove the jack handle and
winch extension from the tray and
assemble them.
3. Open the spare tire winch access
plug in the bottom of the
compartment located behind the 3rd
row seat, very close to the jack and
tools tray.
4. Insert the winch extension tool
assembly through the access hole in
the floor and engage the winch.
5. To remove the spare tire, turn the handle counterclockwise until the
tire is lowered to the ground and the cable is slightly slack.
6. Slide the retainer through the center of the spare tire wheel.
2007 Navigator(nav)
Owners Guide (post-2002-fmt)
USA(fus)
Roadside Emergencies
235
Page 237 of 312
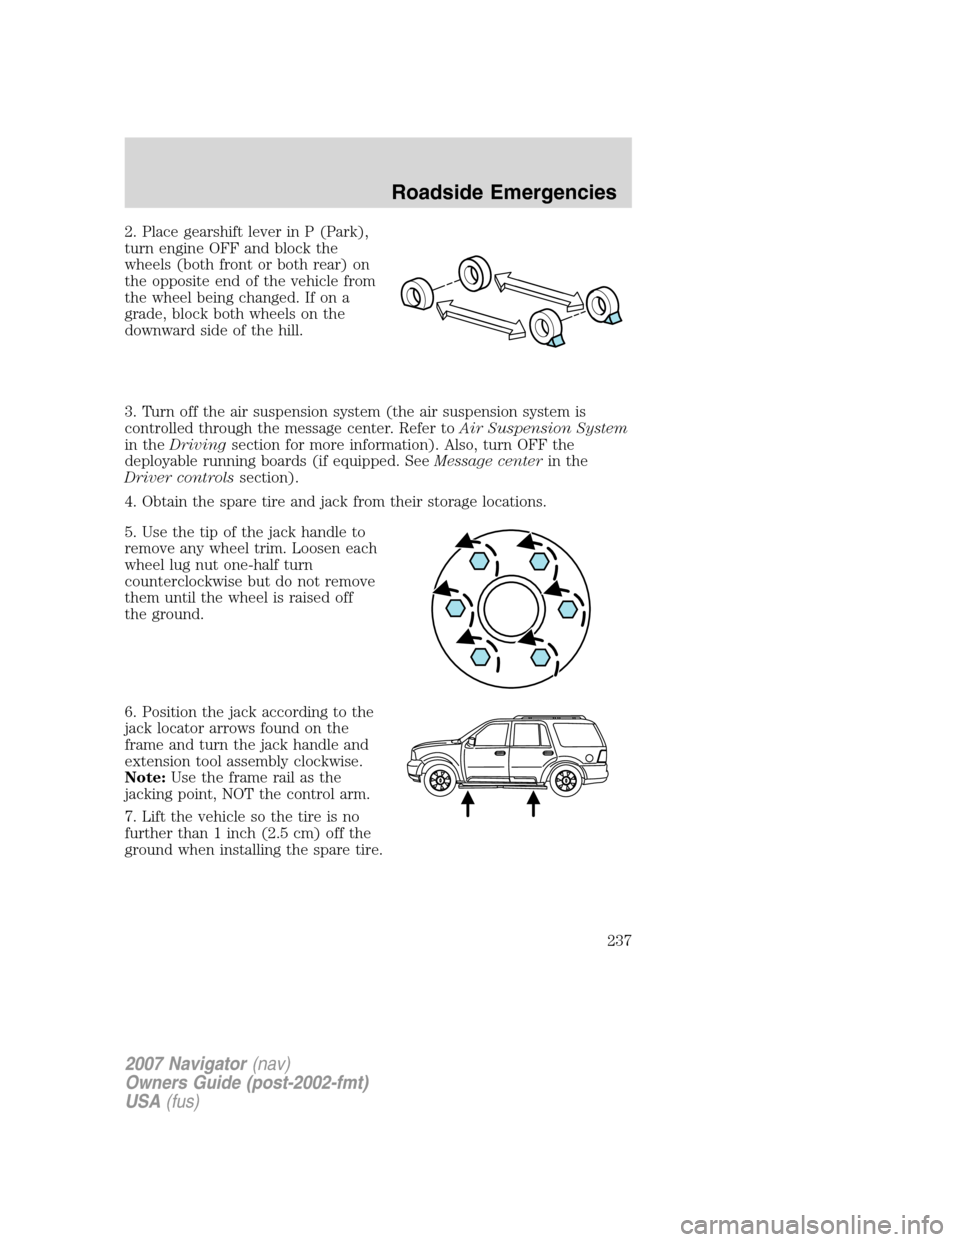
2. Place gearshift lever in P (Park),
turn engine OFF and block the
wheels (both front or both rear) on
the opposite end of the vehicle from
the wheel being changed. If on a
grade, block both wheels on the
downward side of the hill.
3. Turn off the air suspension system (the air suspension system is
controlled through the message center. Refer toAir Suspension System
in theDrivingsection for more information). Also, turn OFF the
deployable running boards (if equipped. SeeMessage centerin the
Driver controlssection).
4. Obtain the spare tire and jack from their storage locations.
5. Use the tip of the jack handle to
remove any wheel trim. Loosen each
wheel lug nut one-half turn
counterclockwise but do not remove
them until the wheel is raised off
the ground.
6. Position the jack according to the
jack locator arrows found on the
frame and turn the jack handle and
extension tool assembly clockwise.
Note:Use the frame rail as the
jacking point, NOT the control arm.
7. Lift the vehicle so the tire is no
further than 1 inch (2.5 cm) off the
ground when installing the spare tire.
2007 Navigator(nav)
Owners Guide (post-2002-fmt)
USA(fus)
Roadside Emergencies
237
Page 239 of 312
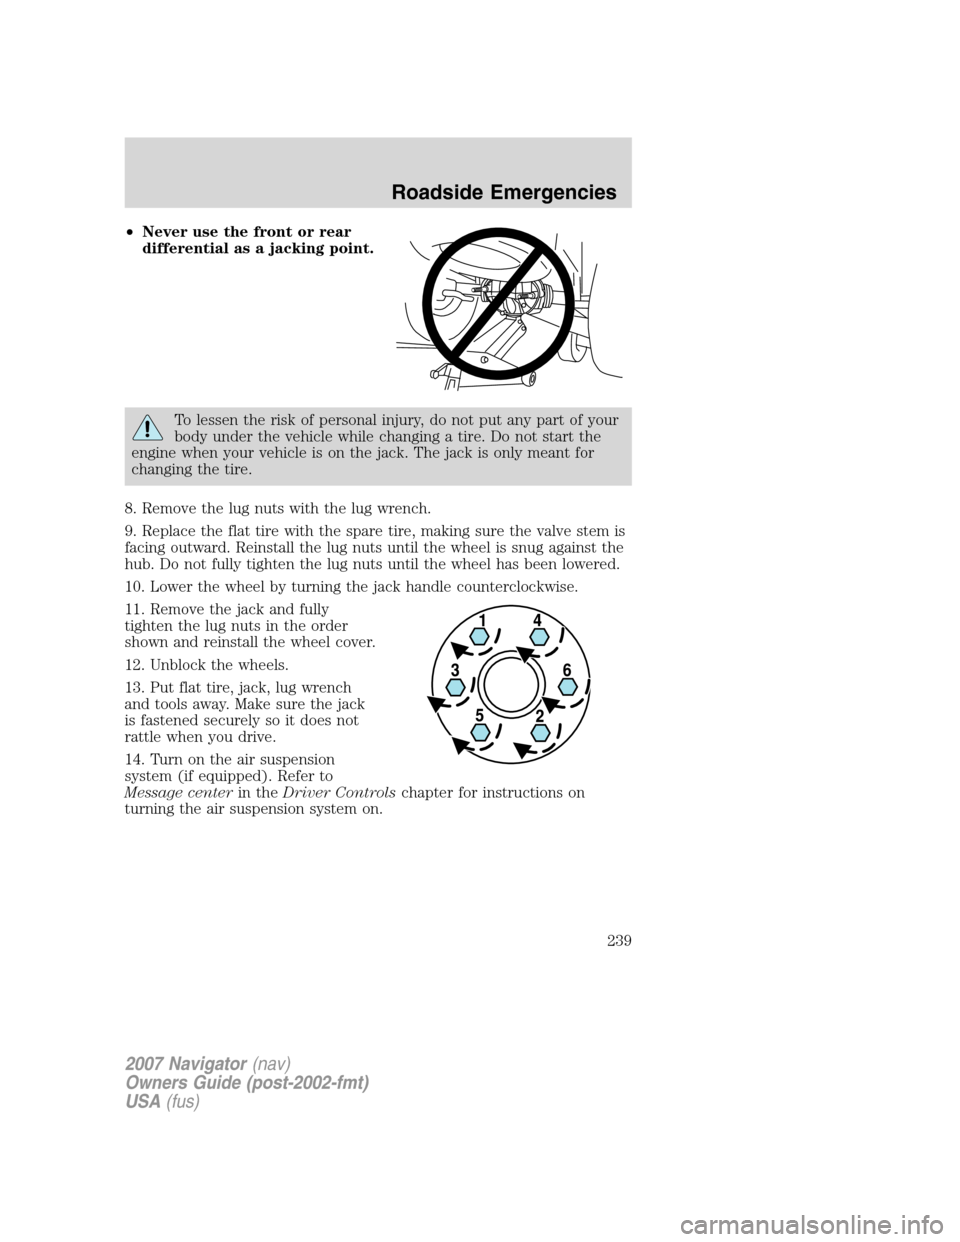
•Never use the front or rear
differential as a jacking point.
To lessen the risk of personal injury, do not put any part of your
body under the vehicle while changing a tire. Do not start the
engine when your vehicle is on the jack. The jack is only meant for
changing the tire.
8. Remove the lug nuts with the lug wrench.
9. Replace the flat tire with the spare tire, making sure the valve stem is
facing outward. Reinstall the lug nuts until the wheel is snug against the
hub. Do not fully tighten the lug nuts until the wheel has been lowered.
10. Lower the wheel by turning the jack handle counterclockwise.
11. Remove the jack and fully
tighten the lug nuts in the order
shown and reinstall the wheel cover.
12. Unblock the wheels.
13. Put flat tire, jack, lug wrench
and tools away. Make sure the jack
is fastened securely so it does not
rattle when you drive.
14. Turn on the air suspension
system (if equipped). Refer to
Message centerin theDriver Controlschapter for instructions on
turning the air suspension system on.
2007 Navigator(nav)
Owners Guide (post-2002-fmt)
USA(fus)
Roadside Emergencies
239
Page 240 of 312
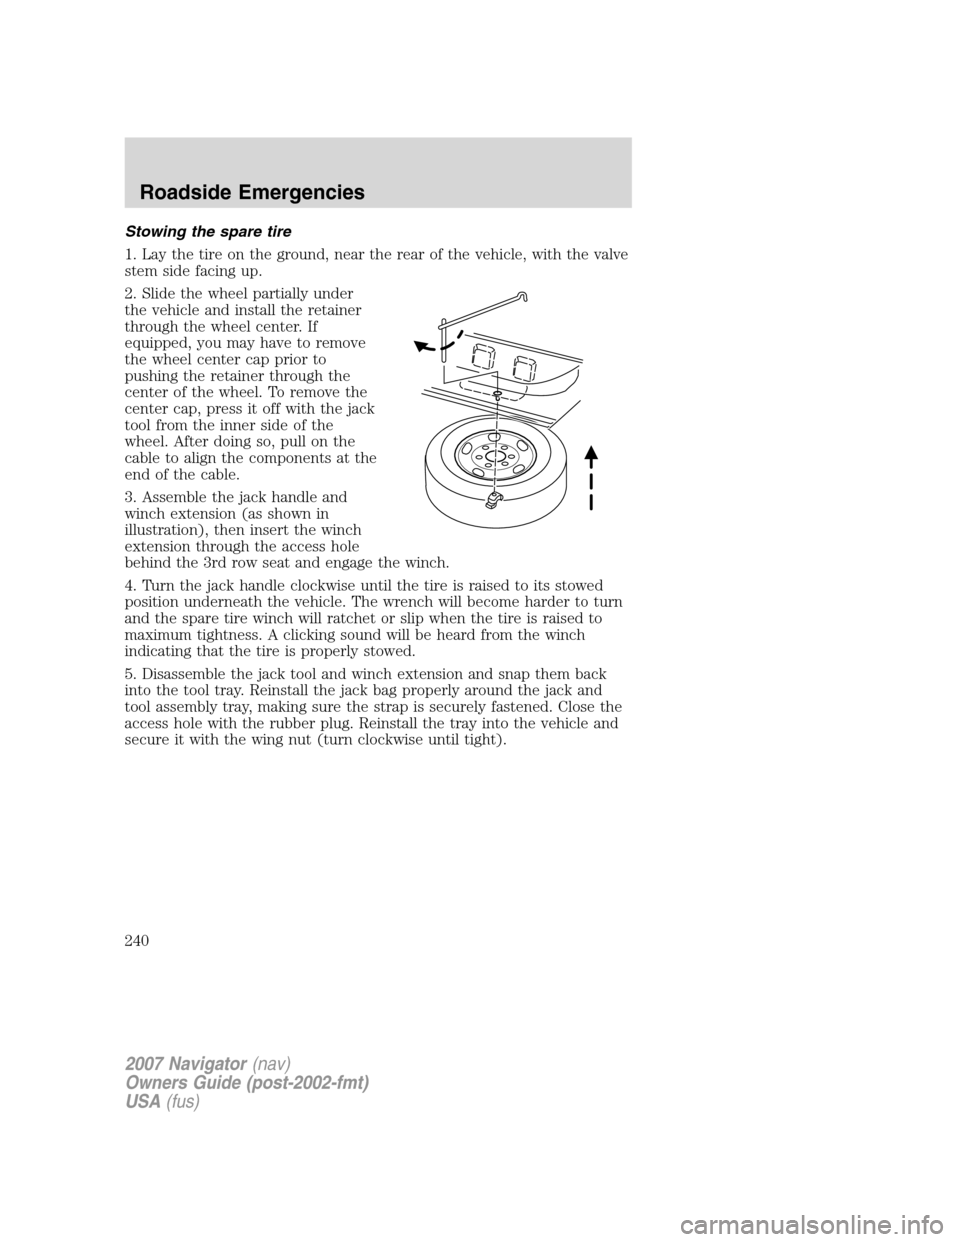
Stowing the spare tire
1. Lay the tire on the ground, near the rear of the vehicle, with the valve
stem side facing up.
2. Slide the wheel partially under
the vehicle and install the retainer
through the wheel center. If
equipped, you may have to remove
the wheel center cap prior to
pushing the retainer through the
center of the wheel. To remove the
center cap, press it off with the jack
tool from the inner side of the
wheel. After doing so, pull on the
cable to align the components at the
end of the cable.
3. Assemble the jack handle and
winch extension (as shown in
illustration), then insert the winch
extension through the access hole
behind the 3rd row seat and engage the winch.
4. Turn the jack handle clockwise until the tire is raised to its stowed
position underneath the vehicle. The wrench will become harder to turn
and the spare tire winch will ratchet or slip when the tire is raised to
maximum tightness. A clicking sound will be heard from the winch
indicating that the tire is properly stowed.
5. Disassemble the jack tool and winch extension and snap them back
into the tool tray. Reinstall the jack bag properly around the jack and
tool assembly tray, making sure the strap is securely fastened. Close the
access hole with the rubber plug. Reinstall the tray into the vehicle and
secure it with the wing nut (turn clockwise until tight).
2007 Navigator(nav)
Owners Guide (post-2002-fmt)
USA(fus)
Roadside Emergencies
240
Page 271 of 312
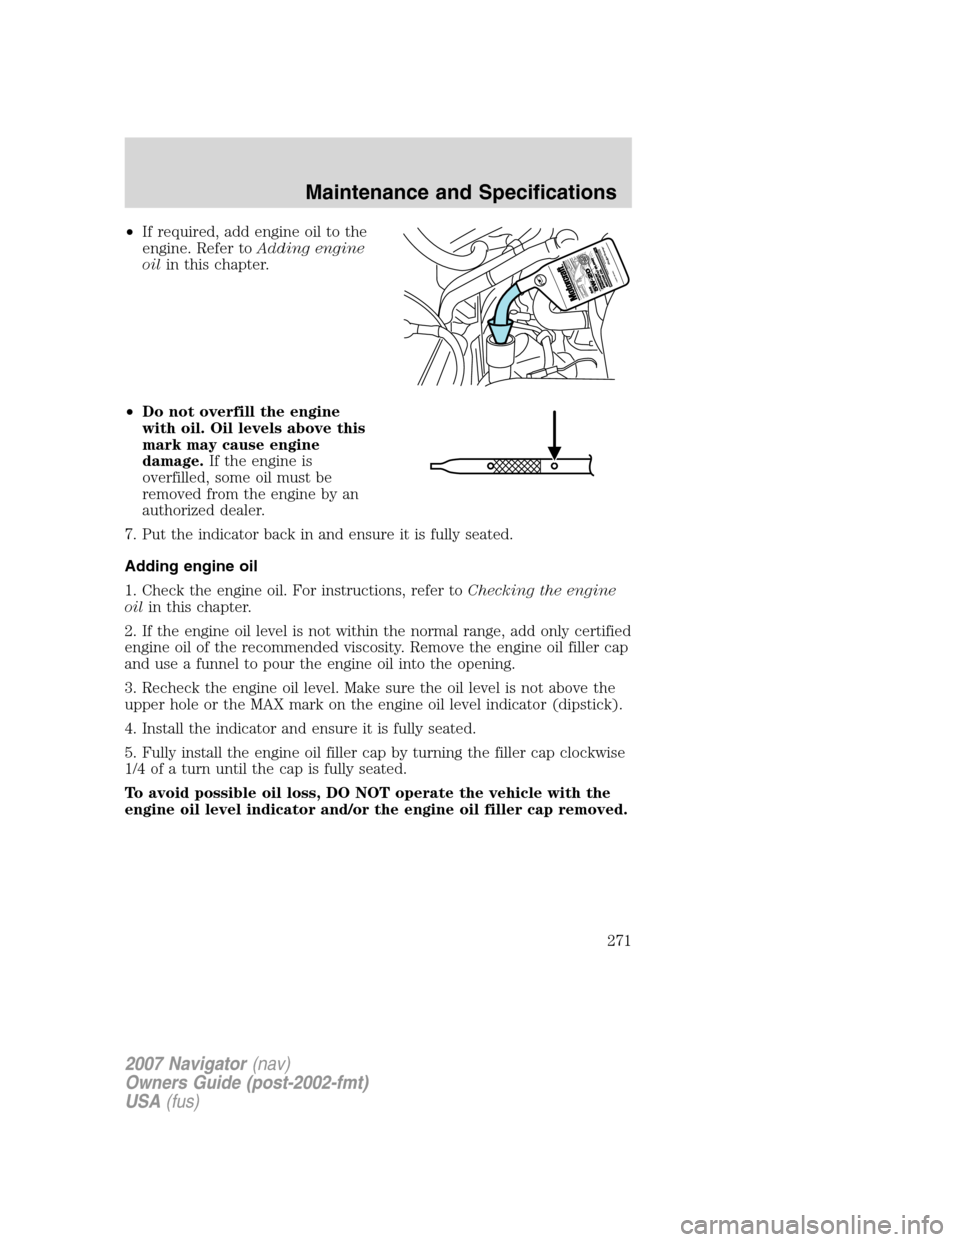
•If required, add engine oil to the
engine. Refer toAdding engine
oilin this chapter.
•Do not overfill the engine
with oil. Oil levels above this
mark may cause engine
damage.If the engine is
overfilled, some oil must be
removed from the engine by an
authorized dealer.
7. Put the indicator back in and ensure it is fully seated.
Adding engine oil
1. Check the engine oil. For instructions, refer toChecking the engine
oilin this chapter.
2. If the engine oil level is not within the normal range, add only certified
engine oil of the recommended viscosity. Remove the engine oil filler cap
and use a funnel to pour the engine oil into the opening.
3. Recheck the engine oil level. Make sure the oil level is not above the
upper hole or the MAX mark on the engine oil level indicator (dipstick).
4. Install the indicator and ensure it is fully seated.
5. Fully install the engine oil filler cap by turning the filler cap clockwise
1/4 of a turn until the cap is fully seated.
To avoid possible oil loss, DO NOT operate the vehicle with the
engine oil level indicator and/or the engine oil filler cap removed.
2007 Navigator(nav)
Owners Guide (post-2002-fmt)
USA(fus)
Maintenance and Specifications
271
Page 274 of 312
Keep batteries out of reach of children. Batteries contain sulfuric
acid. Avoid contact with skin, eyes or clothing. Shield your eyes
when working near the battery to protect against possible splashing of
acid solution. In case of acid contact with skin or eyes, flush
immediately with water for a minimum of 15 minutes and get prompt
medical attention. If acid is swallowed, call a physician immediately.
Battery posts, terminals and related accessories contain lead and
lead compounds.Wash hands after handling.
For information on transmission operation after the battery has been
disconnected, refer toShift strategyin theDrivingchapter.
Because your vehicle’s engine is electronically controlled by a computer,
some control conditions are maintained by power from the battery. When
the battery is disconnected or a new battery is installed, the engine must
relearn its idle and fuel trim strategy for optimum driveability and
performance. To begin this process:
1. With the vehicle at a complete stop, set the parking brake.
2. Put the gearshift in P (Park), turn off all accessories and start the
engine.
3. Run the engine until it reaches normal operating temperature.
4. Allow the engine to idle for at least one minute.
5. Turn the A/C on and allow the engine to idle for at least one minute.
6. Release the parking brake. With your foot on the brake pedal and with
the A/C on, put the vehicle in D (Drive) and allow the engine to idle for
at least one minute.
7. Drive the vehicle to complete the relearning process.
•The vehicle may need to be driven 10 miles (16 km) or more to
relearn the idle and fuel trim strategy.
•If you do not allow the engine to relearn its idle trim, the idle
quality of your vehicle may be adversely affected until the idle
trim is eventually relearned.
If the battery has been disconnected or a new battery has been installed,
the clock and radio settings must be reset once the battery is
reconnected.
2007 Navigator(nav)
Owners Guide (post-2002-fmt)
USA(fus)
Maintenance and Specifications
274
Page 277 of 312
Note:Use of Motorcraft Cooling System Stop Leak Pellets or an
equivalent product meeting Ford specification WSS-M99B37-B6, may
darken the color of Motorcraft Premium Gold Engine Coolant from
yellow to golden tan.
•Do not add/mix an orange-colored, extended life coolant such
as Motorcraft Specialty Orange Engine Coolant, meeting Ford
specification WSS-M97B44-D, with the factory-filled coolant.
Mixing Motorcraft Specialty Orange Engine Coolant or any
orange-colored extended life product with your factory filled coolant
can result in degraded corrosion protection.
•A large amount of water without engine coolant may be added, in case
of emergency, to reach a vehicle service location. In this instance, the
cooling system must be drained and refilled with a 50/50 mixture of
engine coolant and distilled water as soon as possible. Water alone
(without engine coolant) can cause engine damage from corrosion,
overheating or freezing.
•Do not use alcohol, methanol, brine or any engine coolants
mixed with alcohol or methanol antifreeze (coolant).Alcohol
and other liquids can cause engine damage from overheating or
freezing.
•Do not add extra inhibitors or additives to the coolant.These
can be harmful and compromise the corrosion protection of the engine
coolant.
For vehicles with overflow coolant systems with a non-pressurized cap
on the coolant recovery system, add coolant to the coolant recovery
reservoir when the engine is cool. Add the proper mixture of coolant and
water to the “FULL COLD” level. For all other vehicles which have a
coolant degas system with a pressurized cap, or if it is necessary to
remove the coolant pressure relief cap on the radiator of a vehicle with
an overflow system, follow these steps to add engine coolant.
To reduce the risk of personal injury, make sure the engine is
cool before unscrewing the coolant pressure relief cap. The
cooling system is under pressure; steam and hot liquid can come out
forcefully when the cap is loosened slightly.
1. Before you begin, turn the engine off and let it cool.
2. When the engine is cool, wrap a thick cloth around the coolant
pressure relief cap on the coolant reservoir (a translucent plastic bottle).
Slowly turn cap counterclockwise (left) until pressure begins to release.
2007 Navigator(nav)
Owners Guide (post-2002-fmt)
USA(fus)
Maintenance and Specifications
277
Page 278 of 312
3. Step back while the pressure releases.
4. When you are sure that all the pressure has been released, use the
cloth to turn it counterclockwise and remove the cap.
5. Fill the coolant reservoir slowly with the proper coolant mixture (see
above), to within the “COLD FILL RANGE” or the “FULL COLD” level on
the reservoir. If you removed the radiator cap in an overflow system, fill
the radiator until the coolant is visible and radiator is almost full.
6. Replace the cap. Turn until tightly installed. (Cap must be tightly
installed to prevent coolant loss.)
After any coolant has been added, check the coolant concentration (refer
toChecking engine coolant). If the concentration is not 50/50
(protection to –34° F/–36° C), drain some coolant and adjust the
concentration. It may take several drains and additions to obtain a 50/50
coolant concentration.
Whenever coolant has been added, the coolant level in the coolant
reservoir should be checked the next few times you drive the vehicle. If
necessary, add enough 50/50 concentration of engine coolant and
distilled water to bring the liquid level to the proper level.
If you have to add more than 1.0 quart (1.0 liter) of engine coolant per
month, have your authorized dealer check the engine cooling system.
Your cooling system may have a leak. Operating an engine with a low
level of coolant can result in engine overheating and possible engine
damage.
Recycled engine coolant
Ford Motor Company does NOT recommend the use of recycled engine
coolant in vehicles originally equipped with Motorcraft Premium Gold
Engine Coolant since a Ford-approved recycling process is not yet
available.
Used engine coolant should be disposed of in an appropriate
manner. Follow your community’s regulations and standards for recycling
and disposing of automotive fluids.
Coolant refill capacity
To find out how much fluid your vehicle’s cooling system can hold, refer
toMaintenance product specifications and capacitiesin this chapter.
Fill your engine coolant reservoir as outlined inAdding engine coolant
in this section.
2007 Navigator(nav)
Owners Guide (post-2002-fmt)
USA(fus)
Maintenance and Specifications
278