engine LINCOLN NAVIGATOR 2010 User Guide
[x] Cancel search | Manufacturer: LINCOLN, Model Year: 2010, Model line: NAVIGATOR, Model: LINCOLN NAVIGATOR 2010Pages: 385, PDF Size: 2.96 MB
Page 17 of 385
High beams:Illuminates when the
high beam headlamps are turned on.
Key-in-ignition warning chime:Sounds when the key is left in the
ignition in the off or accessory position and the driver’s door is opened.
Headlamps on warning chime:Sounds when the headlamps or parking
lamps are on, the ignition is off (the key is not in the ignition) and the
driver’s door is opened.
Parking brake on warning chime:Sounds when the parking brake is
set, the engine is running and the vehicle is driven more than 3 mph
(5 km/h).
Turn signal chime:Sounds when the turn signal lever has been
activated to signal a turn and not turned off after the vehicle is driven
more than 1.5 miles (2.4 km).
Message center activation chime:Sounds when some warning
messages appear in the message center display for the first time.
Reverse warning chime (if equipped):Sounds when the vehicle is in
R (Reverse). Refer to theDrivingchapter for more information.
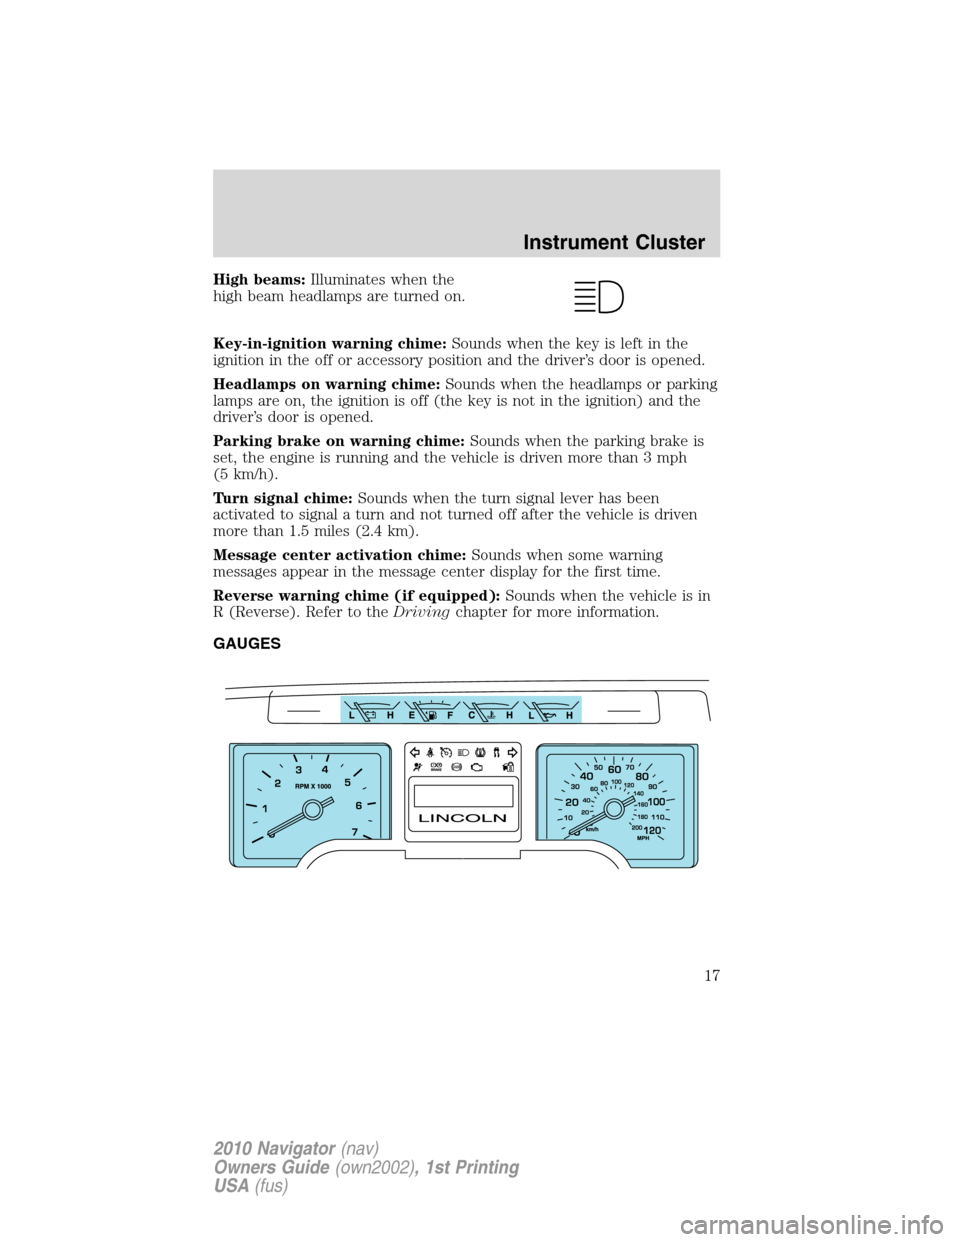
GAUGES
Instrument Cluster
17
2010 Navigator(nav)
Owners Guide(own2002), 1st Printing
USA(fus)
Page 18 of 385
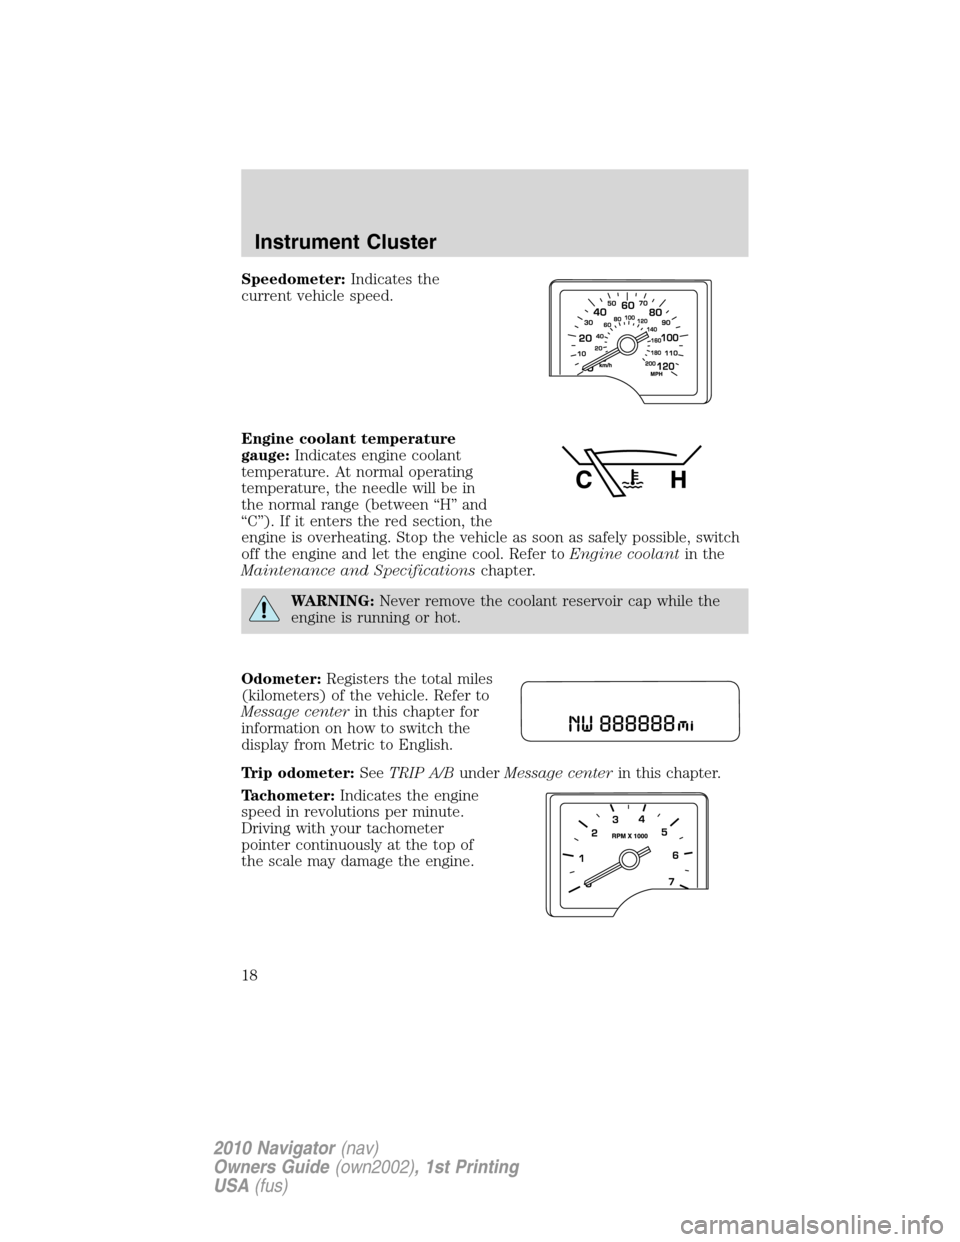
Speedometer:Indicates the
current vehicle speed.
Engine coolant temperature
gauge:Indicates engine coolant
temperature. At normal operating
temperature, the needle will be in
the normal range (between “H” and
“C”). If it enters the red section, the
engine is overheating. Stop the vehicle as soon as safely possible, switch
off the engine and let the engine cool. Refer toEngine coolantin the
Maintenance and Specificationschapter.
WARNING:Never remove the coolant reservoir cap while the
engine is running or hot.
Odometer:Registers the total miles
(kilometers) of the vehicle. Refer to
Message centerin this chapter for
information on how to switch the
display from Metric to English.
Trip odometer:SeeTRIP A/BunderMessage centerin this chapter.
Tachometer:Indicates the engine
speed in revolutions per minute.
Driving with your tachometer
pointer continuously at the top of
the scale may damage the engine.
Instrument Cluster
18
2010 Navigator(nav)
Owners Guide(own2002), 1st Printing
USA(fus)
Page 19 of 385
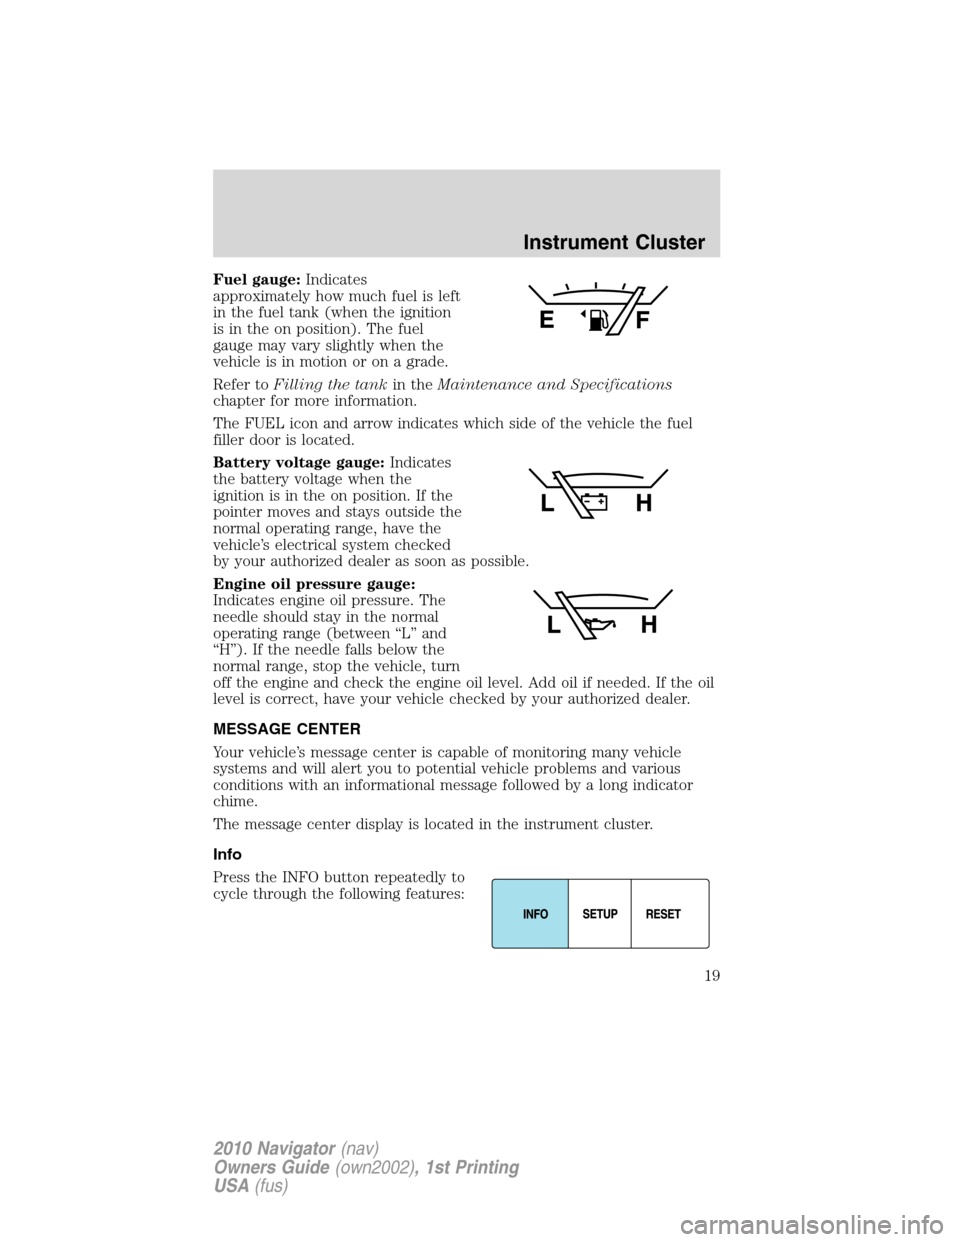
Fuel gauge:Indicates
approximately how much fuel is left
in the fuel tank (when the ignition
is in the on position). The fuel
gauge may vary slightly when the
vehicle is in motion or on a grade.
Refer toFilling the tankin theMaintenance and Specifications
chapter for more information.
The FUEL icon and arrow indicates which side of the vehicle the fuel
filler door is located.
Battery voltage gauge:Indicates
the battery voltage when the
ignition is in the on position. If the
pointer moves and stays outside the
normal operating range, have the
vehicle’s electrical system checked
by your authorized dealer as soon as possible.
Engine oil pressure gauge:
Indicates engine oil pressure. The
needle should stay in the normal
operating range (between “L” and
“H”). If the needle falls below the
normal range, stop the vehicle, turn
off the engine and check the engine oil level. Add oil if needed. If the oil
level is correct, have your vehicle checked by your authorized dealer.
MESSAGE CENTER
Your vehicle’s message center is capable of monitoring many vehicle
systems and will alert you to potential vehicle problems and various
conditions with an informational message followed by a long indicator
chime.
The message center display is located in the instrument cluster.
Info
Press the INFO button repeatedly to
cycle through the following features:
Instrument Cluster
19
2010 Navigator(nav)
Owners Guide(own2002), 1st Printing
USA(fus)
Page 22 of 385
Note:Some systems show a message only if a condition is present.
1. OIL LIFE
2. CHARGING SYSTEM
3. WASHER FLUID LEVEL
4. DOOR STATUS
5. LIFTGATE/GLASS
6. BRAKE SYSTEM
7. TIRE PRESSURE
8. AIR SUSPENSION SYSTEM
9. FUEL LEVEL
10. MYKEY MILES (if programmed)
11. MYKEY(S) PROGRAMMED
12. ADMIN KEYS PROGRAMMED
OIL LIFE
This displays the remaining oil life.
An oil change is required whenever indicated by the message center and
according to the recommended maintenance schedule. USE ONLY
RECOMMENDED ENGINE OILS.
To reset the oil monitoring system to 100% after each oil change
(approximately 7,500 miles [12,000 km] or 12 months) perform the
following:
1. Press and release the SETUP button to display “OIL LIFE XXX%
HOLD RESET = NEW”.
2. Press and hold the RESET button for two seconds and release to reset
the oil life to 100%.
Note:To change oil life 100% miles value from 7,500 miles (12,000 km)
or 12 months to another value, proceed to Step 3.
3. Once “OIL LIFE SET TO XXX%” is displayed, release and press the
RESET button to change the Oil Life Start Value. Each release and press
will reduce the value by 10%.
Note:Oil life start value of 100% equals 7,500 miles (12,000 km) or
12 months. For example, setting oil life start value to 60% sets the oil
life start value to 4,500 miles (7,200 km) and 219 days.
Instrument Cluster
22
2010 Navigator(nav)
Owners Guide(own2002), 1st Printing
USA(fus)
Page 25 of 385
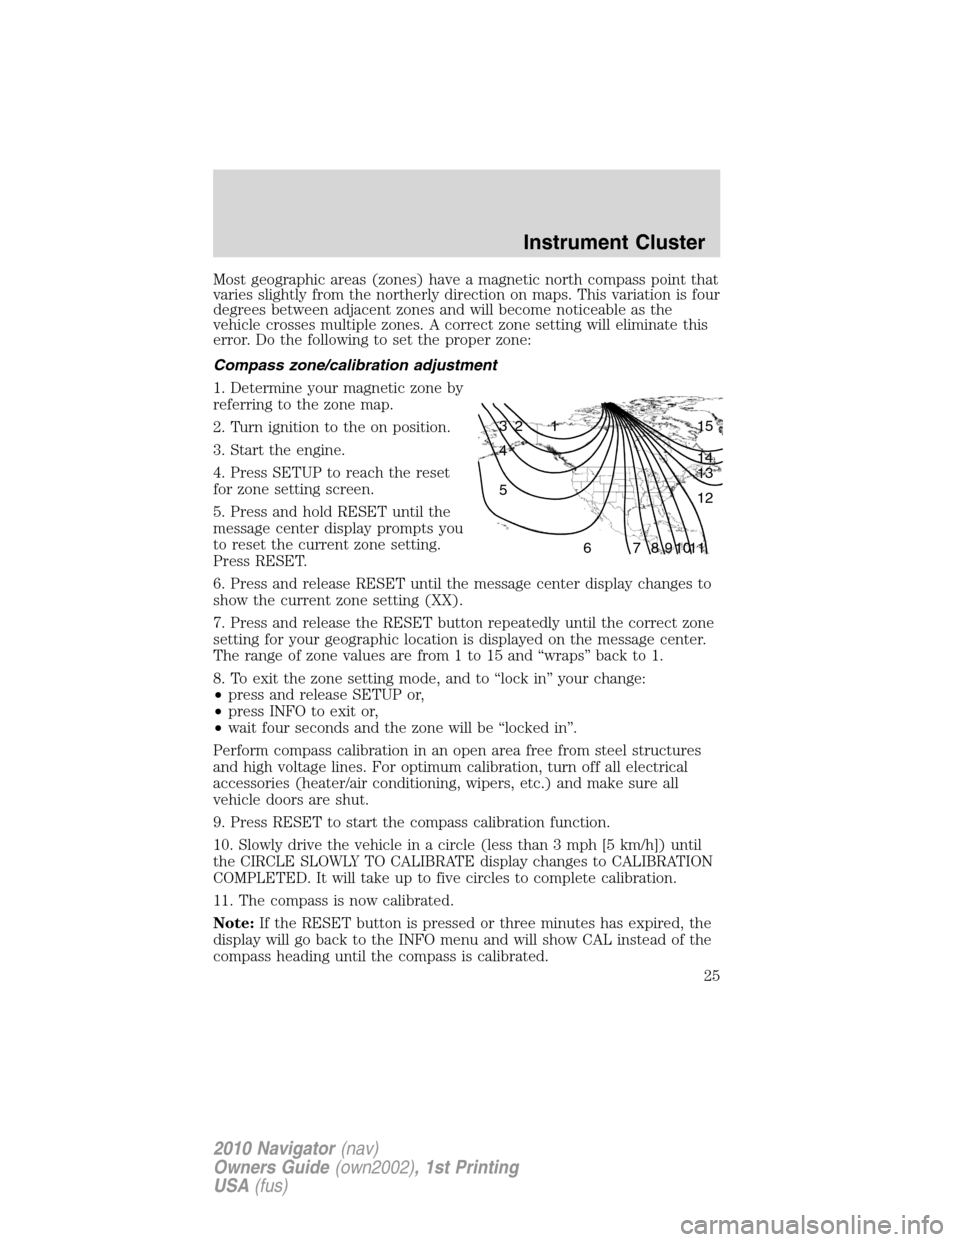
Most geographic areas (zones) have a magnetic north compass point that
varies slightly from the northerly direction on maps. This variation is four
degrees between adjacent zones and will become noticeable as the
vehicle crosses multiple zones. A correct zone setting will eliminate this
error. Do the following to set the proper zone:
Compass zone/calibration adjustment
1. Determine your magnetic zone by
referring to the zone map.
2. Turn ignition to the on position.
3. Start the engine.
4. Press SETUP to reach the reset
for zone setting screen.
5. Press and hold RESET until the
message center display prompts you
to reset the current zone setting.
Press RESET.
6. Press and release RESET until the message center display changes to
show the current zone setting (XX).
7. Press and release the RESET button repeatedly until the correct zone
setting for your geographic location is displayed on the message center.
The range of zone values are from 1 to 15 and “wraps” back to 1.
8. To exit the zone setting mode, and to “lock in” your change:
•press and release SETUP or,
•press INFO to exit or,
•wait four seconds and the zone will be “locked in”.
Perform compass calibration in an open area free from steel structures
and high voltage lines. For optimum calibration, turn off all electrical
accessories (heater/air conditioning, wipers, etc.) and make sure all
vehicle doors are shut.
9. Press RESET to start the compass calibration function.
10. Slowly drive the vehicle in a circle (less than 3 mph [5 km/h]) until
the CIRCLE SLOWLY TO CALIBRATE display changes to CALIBRATION
COMPLETED. It will take up to five circles to complete calibration.
11. The compass is now calibrated.
Note:If the RESET button is pressed or three minutes has expired, the
display will go back to the INFO menu and will show CAL instead of the
compass heading until the compass is calibrated.
1 2 3
4
5
6 7 8 9 101112 13 14 15
Instrument Cluster
25
2010 Navigator(nav)
Owners Guide(own2002), 1st Printing
USA(fus)
Page 27 of 385
CHECK CHARGING SYSTEM— Displayed when the electrical system
is not maintaining proper voltage when the engine is running. If you are
operating electrical accessories when the engine is idling at a low speed,
turn off as many of the electrical loads as soon as possible. If the
warning stays on or comes on when the engine is operating at normal
speeds, contact your authorized dealer as soon as possible.
CHECK FUEL FILL INLET— Displayed when the fuel fill inlet may
not be properly closed. Refer toEasy Fuel™ “no cap” fuel systemin
theMaintenance and Specificationschapter.
TIRE PRESSURE SENSOR FAULT— Displayed when a tire pressure
sensor is malfunctioning, or your spare tire is in use. For more
information on how the system operates under these conditions, refer to
Understanding Your Tire Pressure Monitoring System (TPMS)in the
Tires, Wheels and Loadingchapter. If the warning stays on or
continues to come on, contact your authorized dealer as soon as
possible.
LOW TIRE PRESSURE— Displayed when one or more tires on your
vehicle have low tire pressure. Refer toInflating your tiresin theTires,
Wheels and Loadingchapter.
TIRE PRESSURE MONITOR FAULT— Displayed when the Tire
Pressure Monitoring System is malfunctioning. If the warning stays on or
continues to come on, contact your authorized dealer as soon as
possible.
AIR SUSPENSION OFF (if equipped)— Displayed when the air
suspension is off. For more information, refer toAir suspension system
in theDrivingchapter.
BRAKE FLUID LEVEL LOW— Indicates the brake fluid level is low
and the brake system should be inspected immediately. Refer toBrake
fluidin theMaintenance and Specificationschapter.
WASHER FLUID LEVEL LOW— Indicates the washer fluid reservoir
is less than one quarter full. Check the washer fluid level. Refer to
Windshield washer fluidin theMaintenance and Specifications
chapter.
OIL LIFE CHANGE SOON— Displayed when the engine oil life
remaining is 10% or less. When oil life left is between 10% and 0%, the
XX% OIL LIFE CHANGE SOON message will be displayed.
OIL CHANGE REQUIRED— Displayed when the oil life left reaches
0%, the OIL CHANGE REQUIRED message will be displayed.
Instrument Cluster
27
2010 Navigator(nav)
Owners Guide(own2002), 1st Printing
USA(fus)
Page 28 of 385
CHECK AIR SUSPENSION (if equipped)— Displayed when the air
suspension system is not operating properly. If this message is displayed
while driving, pull off the road as soon as safely possible. For more
information, refer toAir suspension systemin theDrivingchapter.
CHECK BRAKE SYSTEM— Displayed when the braking system is not
operating properly. If the warning stays on or continues to come on,
contact your authorized dealer as soon as possible.
XXX MILES TO E FUEL LEVEL LOW— Displayed as an early
reminder of a low fuel condition.
PARK BRAKE ENGAGED— Displayed when the parking brake is set,
the engine is running and the vehicle is driven more than 3 mph
(5 km/h). If the warning stays on after the parking brake is released,
contact your authorized dealer as soon as possible.
TRAILER SWAY REDUCE SPEED (if equipped)— Displayed when
the trailer sway control has detected trailer sway. For more information,
refer to theDrivingchapter for more information.
4X4 SHIFT IN PROGRESS—4X4 SHIFT IN PROGRESS—
Displayed when the 4X4 system is making a shift. For more information,
refer toControl trac four-wheel drive (4X4) operationin theDriving
chapter.
FOR 4X4 LOW SLOW TO 3 MPH (if equipped)— Displayed when
4X4 LOW is selected while the vehicle is moving. For more information,
refer toControl trac four-wheel drive (4X4) operationin theDriving
chapter.
FOR 4X4 LOW SHIFT TO N (if equipped)— Displayed when 4X4
LOW is selected and the vehicle is stopped. For more information, refer
toControl trac four-wheel drive (4X4) operationin theDriving
chapter.
TO EXIT 4X4 LOW SLOW TO 3 MPH (if equipped)— Displayed
when 2WD is selected while the vehicle is operating in 4X4 LOW. For
more information, refer toControl trac four-wheel drive (4X4)
operationin theDrivingchapter.
TO EXIT 4X4 LOW SHIFT TO N (if equipped)— Displayed when
2WD is selected while the vehicle has been stopped in 4X4 LOW. For
more information, refer toControl trac four-wheel drive (4X4)
operationin theDrivingchapter.
MY KEY ACTIVE DRIVE SAFELY— Displayed at startup when
MyKey™ is in use. Refer toMyKey™in theLocks and Securitychapter
for more information.
Instrument Cluster
28
2010 Navigator(nav)
Owners Guide(own2002), 1st Printing
USA(fus)
Page 75 of 385
rights owners. Use of this copyright protection technology must be
authorized by Macrovision Corporation, and is intended for home and
other limited viewing uses only unless otherwise authorized by
Macrovision Corporation. Reverse engineering or disassembly is
prohibited.
MP3:Supply of this product only conveys a license for private,
non-commercial use and does not convey a license nor imply any right to
use this product in any commercial (i.e. revenue generating) real time
broadcasting (terrestrial, satellite, cable and /or any other media)
broadcasting/streaming via internet, intranets and/or other networks or in
other electronic content distribution systems, such as pay-audio or
audio-on-demand applications. An independent license for such use is
required. For details, please visit http:// www.mp3licensing.com.
Safety information
WARNING:Driving while distracted can result in loss of vehicle
control, accident and injury. Ford strongly recommends that
drivers use extreme caution when using any device that may take their
focus off the road. The driver’s primary responsibility is the safe
operation of their vehicle. Only use cell phones and other devices not
essential to the driving task when it is safe to do so.
Read all of the safety and operating instructions before operating the
system and retain for future reference.
Do not attempt to service, repair or modify the Family Entertainment
System (FES). See your dealer.
Do not insert foreign objects into the DVD compartment.
WARNING:Do not leave children unattended in the vehicle and
do not let children operate the system while unsupervised. If
wired headphones or auxiliary systems are used, children may become
entangled in the cords and seriously injure themselves.
WARNING:The front glass on the liquid crystal display (LCD)
flip-down screen may break when hit with a hard surface. If the
glass breaks, do not touch the liquid crystalline material. In case of
contact with skin, wash immediately with soap and water.
Entertainment Systems
75
2010 Navigator(nav)
Owners Guide(own2002), 1st Printing
USA(fus)
Page 85 of 385
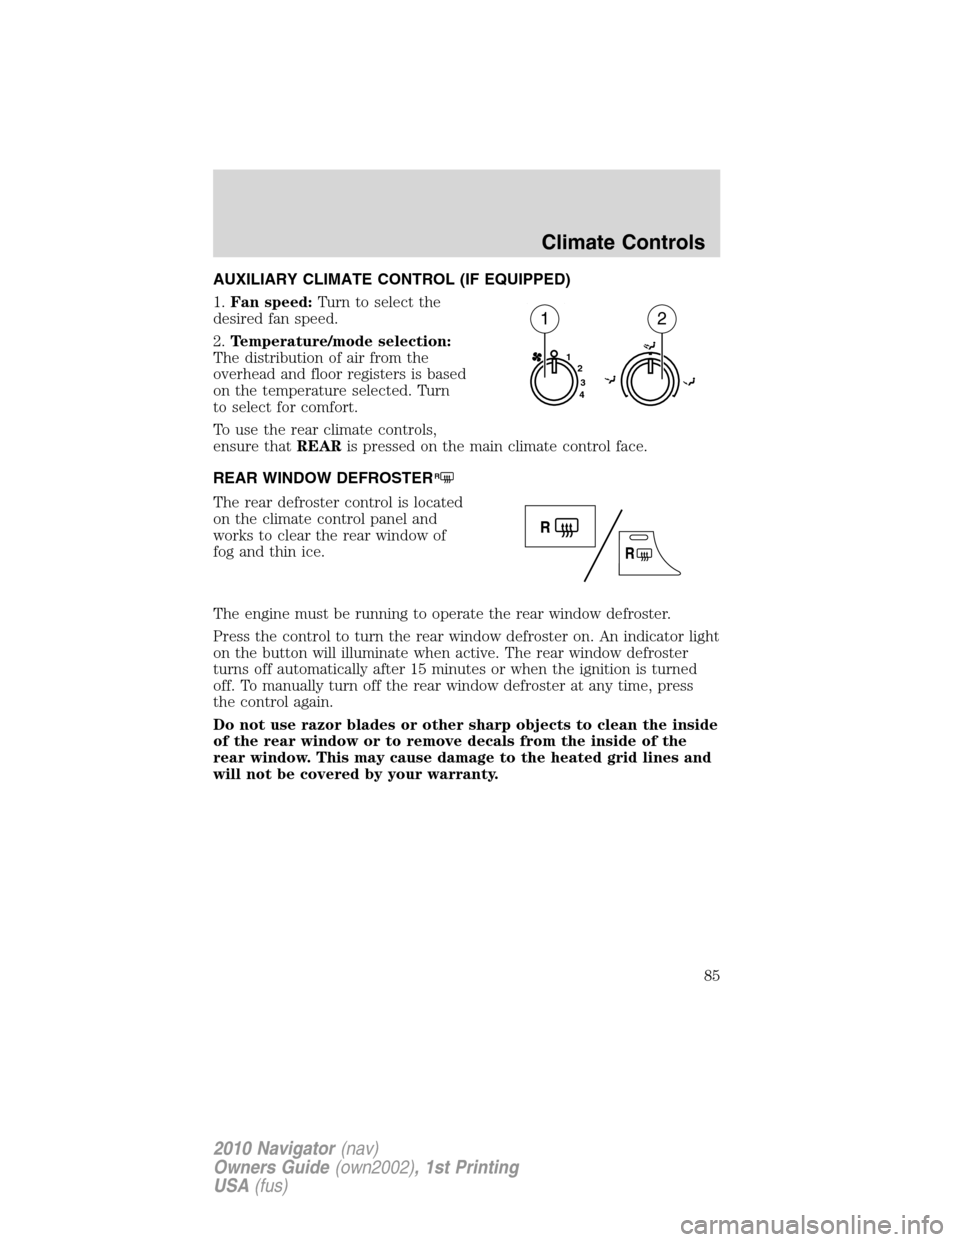
AUXILIARY CLIMATE CONTROL (IF EQUIPPED)
1.Fan speed:Turn to select the
desired fan speed.
2.Temperature/mode selection:
The distribution of air from the
overhead and floor registers is based
on the temperature selected. Turn
to select for comfort.
To use the rear climate controls,
ensure thatREARis pressed on the main climate control face.
REAR WINDOW DEFROSTER
R
The rear defroster control is located
on the climate control panel and
works to clear the rear window of
fog and thin ice.
The engine must be running to operate the rear window defroster.
Press the control to turn the rear window defroster on. An indicator light
on the button will illuminate when active. The rear window defroster
turns off automatically after 15 minutes or when the ignition is turned
off. To manually turn off the rear window defroster at any time, press
the control again.
Do not use razor blades or other sharp objects to clean the inside
of the rear window or to remove decals from the inside of the
rear window. This may cause damage to the heated grid lines and
will not be covered by your warranty.
1
2
3
4
12
Climate Controls
85
2010 Navigator(nav)
Owners Guide(own2002), 1st Printing
USA(fus)
Page 103 of 385
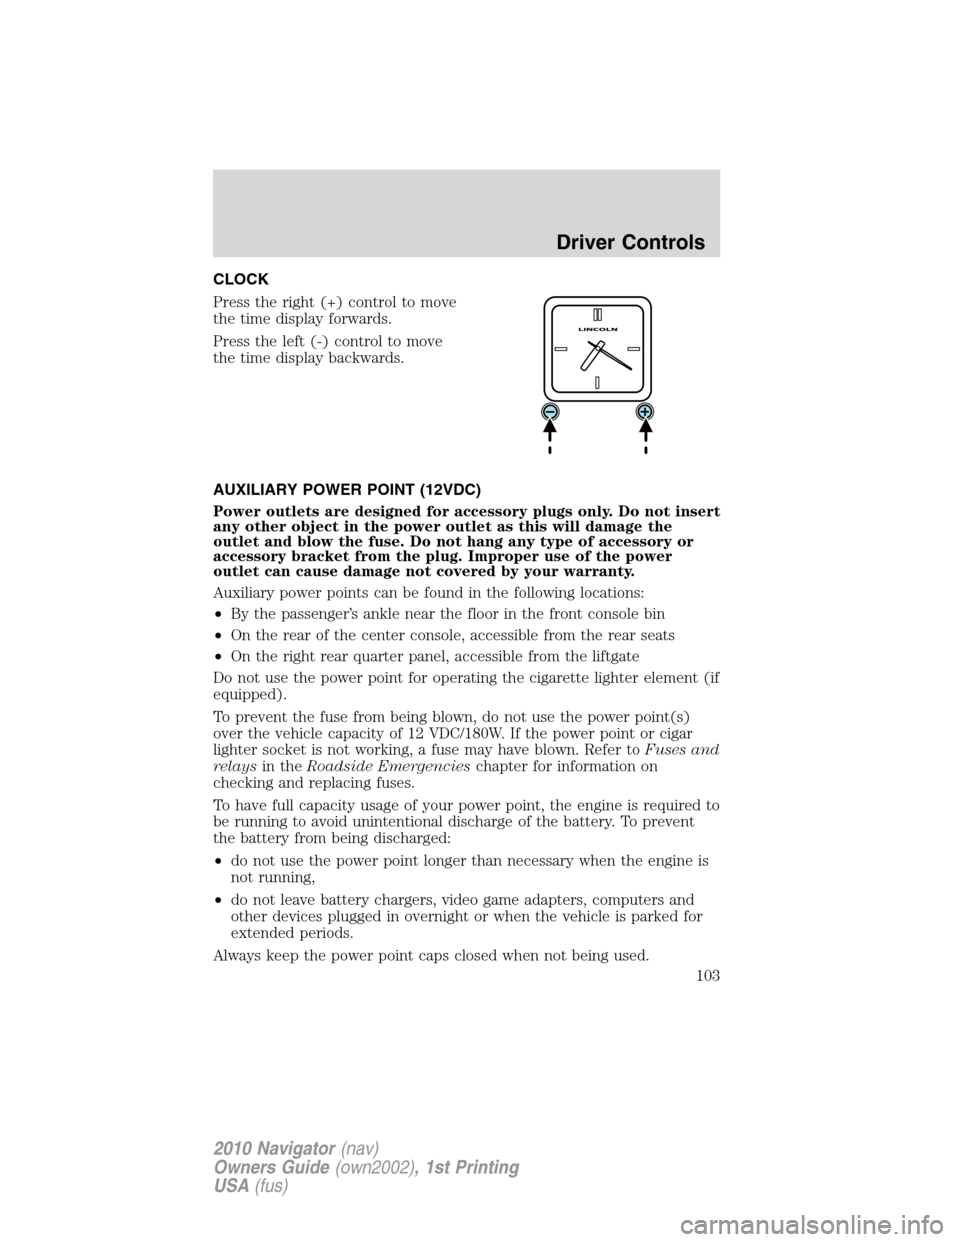
CLOCK
Press the right (+) control to move
the time display forwards.
Press the left (-) control to move
the time display backwards.
AUXILIARY POWER POINT (12VDC)
Power outlets are designed for accessory plugs only. Do not insert
any other object in the power outlet as this will damage the
outlet and blow the fuse. Do not hang any type of accessory or
accessory bracket from the plug. Improper use of the power
outlet can cause damage not covered by your warranty.
Auxiliary power points can be found in the following locations:
•By the passenger’s ankle near the floor in the front console bin
•On the rear of the center console, accessible from the rear seats
•On the right rear quarter panel, accessible from the liftgate
Do not use the power point for operating the cigarette lighter element (if
equipped).
To prevent the fuse from being blown, do not use the power point(s)
over the vehicle capacity of 12 VDC/180W. If the power point or cigar
lighter socket is not working, a fuse may have blown. Refer toFuses and
relaysin theRoadside Emergencieschapter for information on
checking and replacing fuses.
To have full capacity usage of your power point, the engine is required to
be running to avoid unintentional discharge of the battery. To prevent
the battery from being discharged:
•do not use the power point longer than necessary when the engine is
not running,
•do not leave battery chargers, video game adapters, computers and
other devices plugged in overnight or when the vehicle is parked for
extended periods.
Always keep the power point caps closed when not being used.
Driver Controls
103
2010 Navigator(nav)
Owners Guide(own2002), 1st Printing
USA(fus)